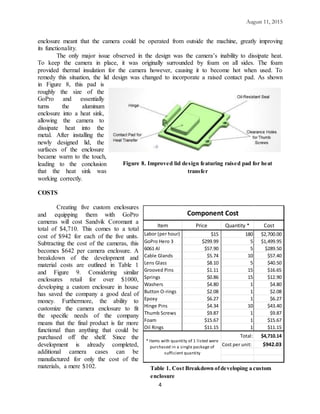
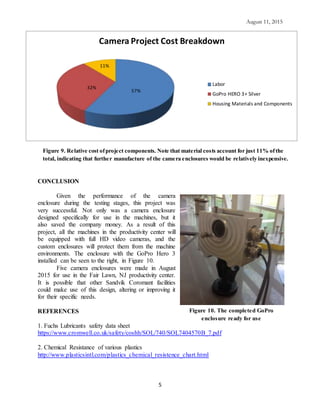
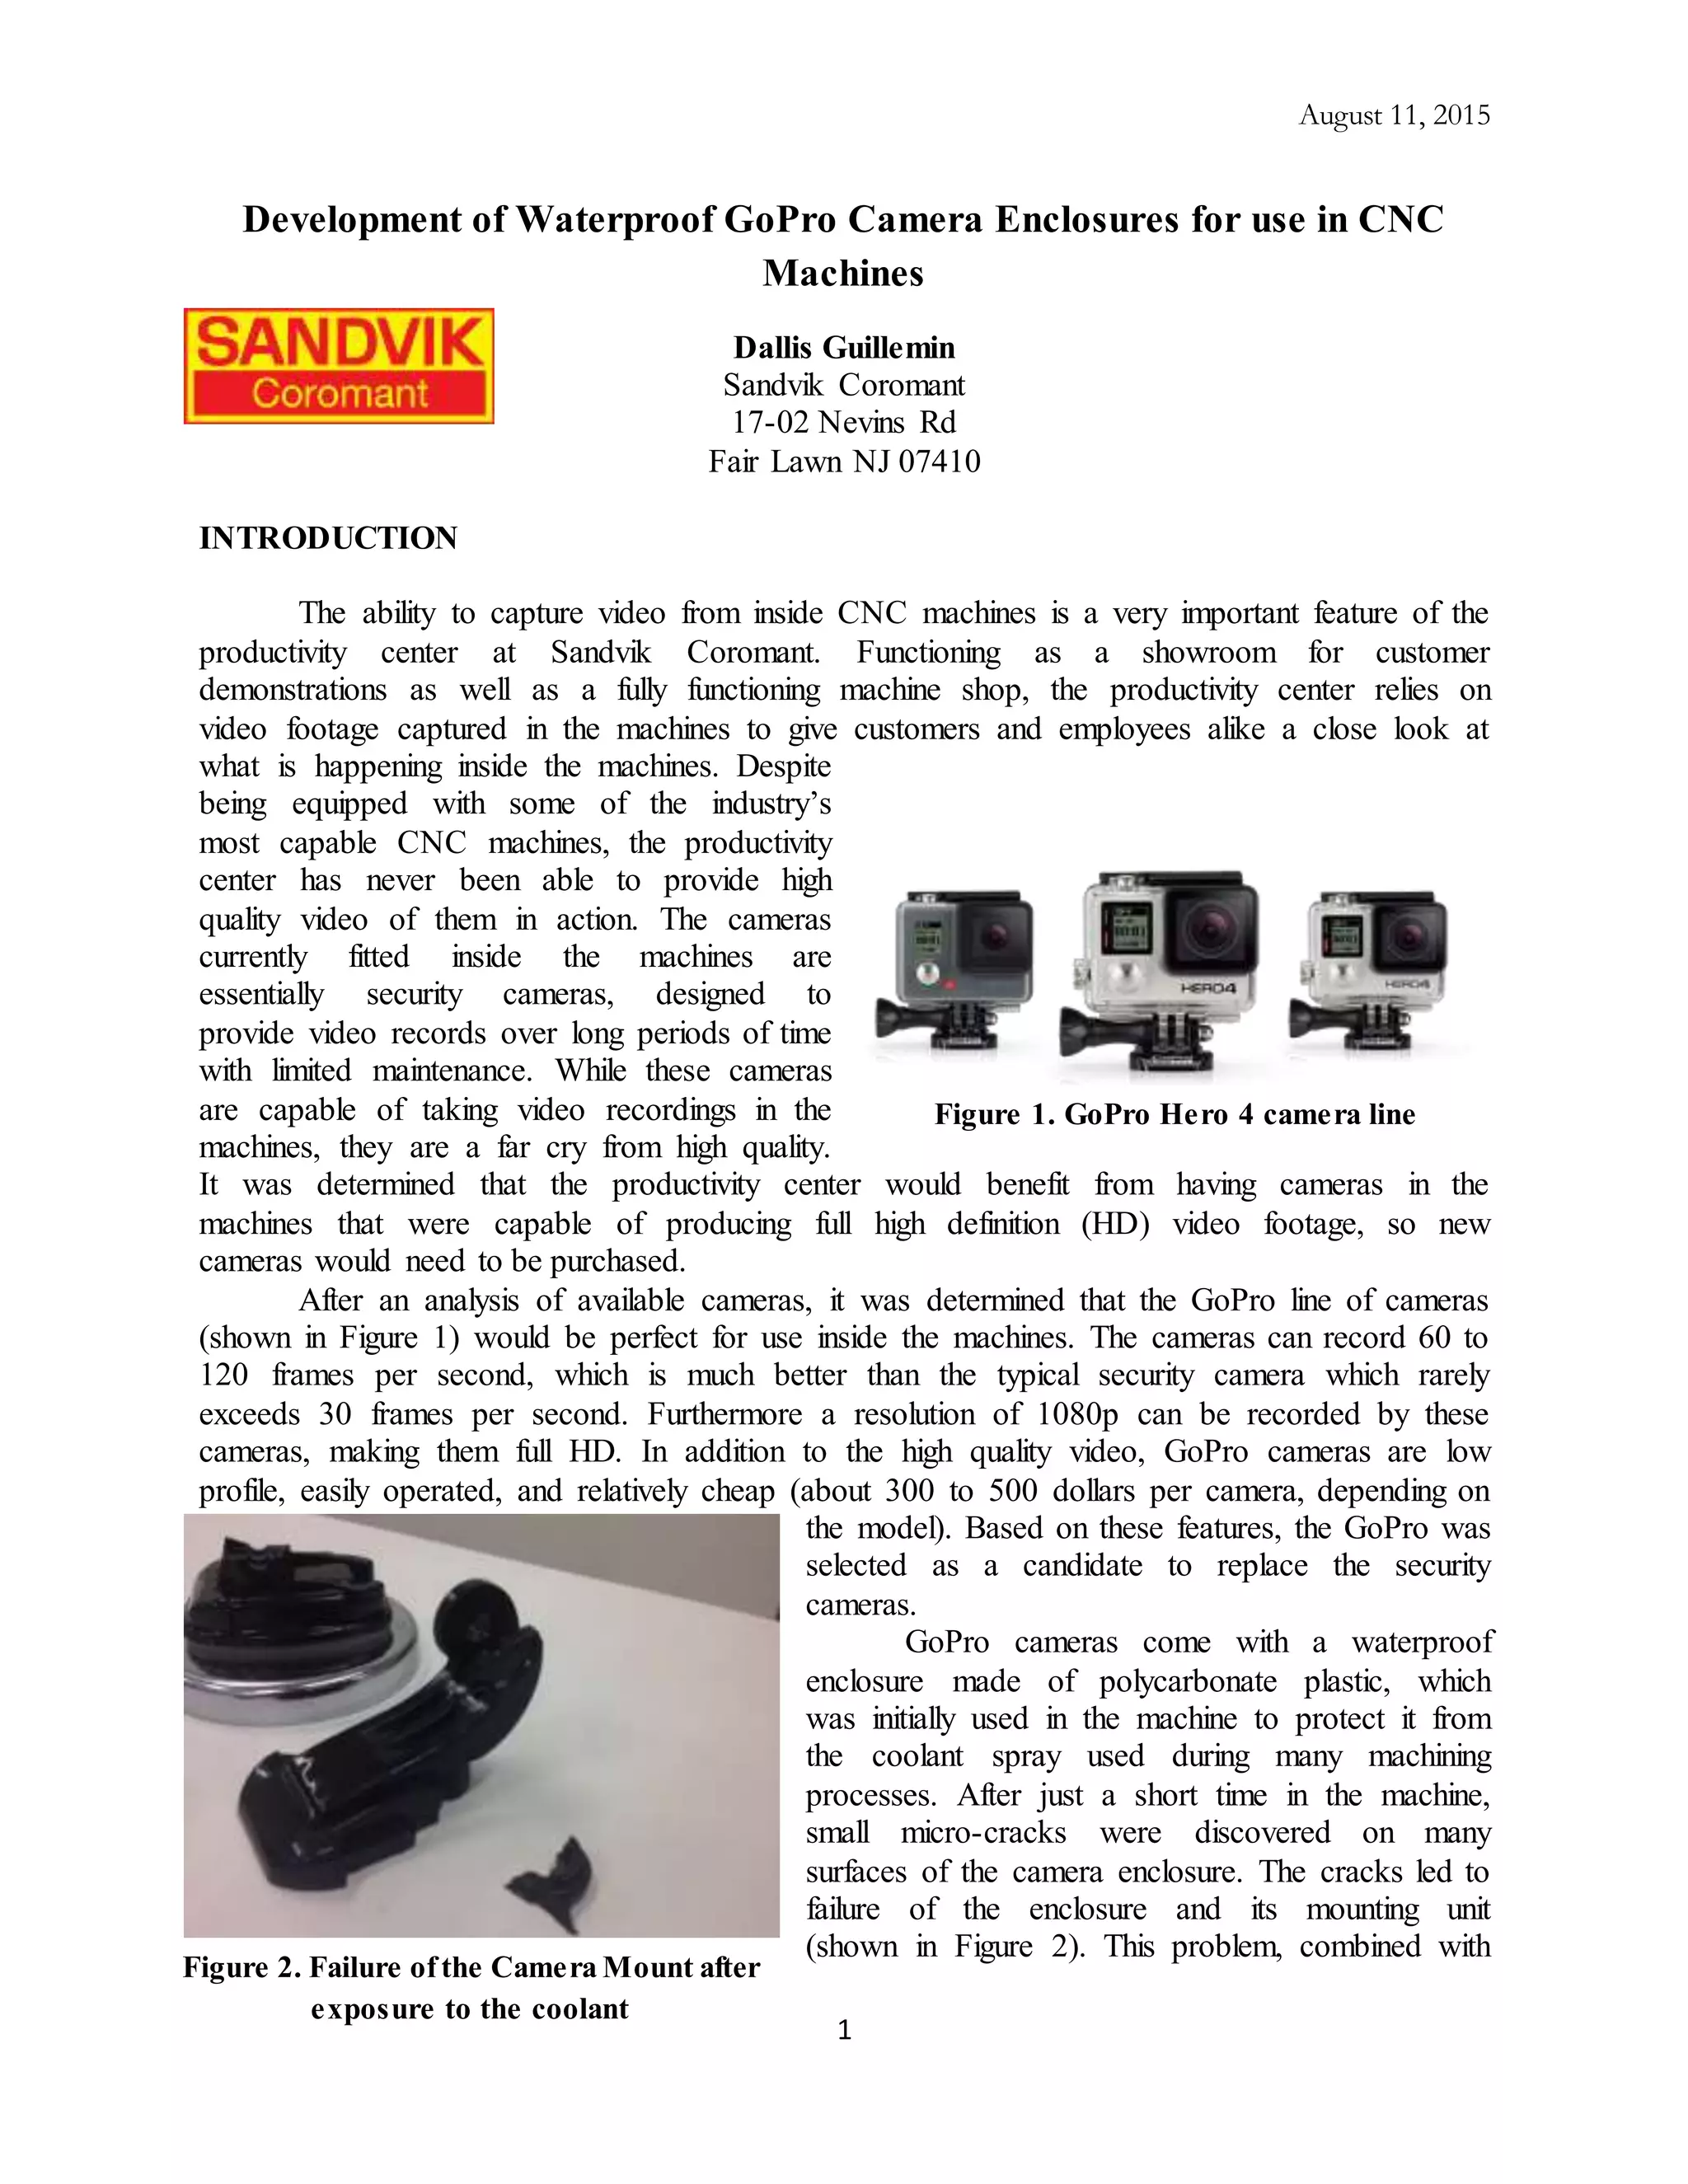
The productivity center at Sandvik Coromant wanted to capture high quality video inside their CNC machines to demonstrate machine operations to customers. Their existing security cameras provided low quality video. GoPro cameras were selected to replace them but the stock polycarbonate enclosures failed when exposed to coolant. An engineer designed and 3D printed a prototype for an aluminum enclosure with a tempered glass viewport and waterproof buttons and cord grips. Testing showed the enclosure resisted coolant infiltration and allowed wireless remote control of the GoPro. Manufacturing 5 enclosures and equipping them with GoPros cost $4,710, saving money compared to purchasing commercial enclosures.

![August 11, 2015
2
a lack of access to a live feed HDMI video cord, made the stock polycarbonate enclosure
unacceptable for use inside the machines. An enclosure would need to be acquired that was not
only waterproof, but coolant-proof as well. This enclosure would also need to support live feed
wires from the camera, which would be a necessity for classes and demonstrations involving the
machines. After no such enclosure could be found, it was determined one would be designed in
house.
DEVELOPMENT
The enclosure which was designed to meet these design criteria needed to be made of
something other than polycarbonate plastic. After acquiring the chemical data sheet for the
machine’s coolant (Fuchs Ecocool S761 B) [1] a series of plastics and other materials were
considered. Plastics are light and cheap, and could be easily machined at the productivity center
to create the final product. Unfortunately, research showed that most plastics would be
completely or partially dissolved by the coolant’s chemicals (Detailed in Figure 3). As a result,
aluminum was chosen as the material with which the enclosure would be constructed. Aluminum
is relatively light and cheap, and
could be machined easily in the
productivity center. Due to the poor
performance of many plastics,
tempered glass was chosen to cover
the viewport of the enclosure.
As the enclosure begun to
take shape, the issue of wire access
to the camera was given attention.
The wires would need to enter the
enclosure to connect to the camera,
and be waterproof once installed. Watertight cord grips were chosen to complete this task. The
cord grips were large enough when open to allow the wires to pass through the housing wall, but
could then be tightened to seal around a smaller diameter. A schematic of a typical water-tight
cord grip can be seen in Figure 4.
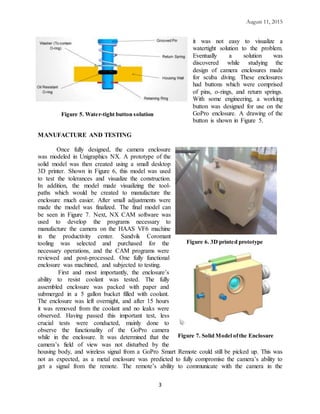
To attach the lid to the
housing, a hinge was considered due
to its convenience. The lid and
housing would be one unit, preventing
the possibility of the lid and housing
becoming separated. Once closed, the
lid would be secured to the housing
tightly through the use of thumb
screws. Between the hinge and
screws, adequate sealing pressure
could be achieved on the oil ring
between the lid and housing.
The most difficult aspect of
the design involved the incorporation of watertight buttons which would allow the camera to be
used fully when sealed inside the enclosure. Because the buttons would need to be moving parts,
Figure 3. Polycarbonate’s performance when exposed to
Naphtha and Ethyl Acetate,two of the primary solvents in
the coolant. D indicates very poor performance. [2]
Figure 4. Components of a typical Cord Grip, exploded
for reference](https://image.slidesharecdn.com/5acd4efc-eb43-40b3-8dc4-329711a15b5c-150811154331-lva1-app6892/85/Housing_Report-2-320.jpg)