SlideShare a Scribd company logo
1 of 15
Download to read offline
How to Get Started with
Dynamics 365 Portal
Sometimes, integrating portals can be difficult. We saw a lot
of feedback and questions from customers about the
process, so we created a step by step guide on How to
Install the Default Portal Add-On for Dynamics 365. But in
case you’ve decided to opt for a third party portal like our
Dynamics 365 WordPress Portal, then this blog is for you.
We are going to discuss how to install and enable Dynamics
365 WordPress portal in your CRM.
A quick overview of the Dynamics 365 WordPress portal:
sales@crmjetty.com
It is a third party portal solution for your business. It helps
you provide quality service to your customers round the
clock. It makes your team’s work effortless.
Let’s see steps to install it.
Installation:
To install the ‘Dynamics CRM Customer Portal’ plugin, the
following steps have to be followed:
Step 1: Once you have purchased the plugin, you will get a
zip file named DynamicsCRM-Customer-Portal-v3.0.zip.
Step 2: Log in to your CRM Account and click on Settings →
Solutions
Step 2(a): If you are using a unified interface, click on the
Settings icon which is on the right side of the Title bar. Then
click on Advanced Settings.
sales@crmjetty.com
Now go to Settings → Solution.
Step 3: Click on ‘Import’ to upload and install the Solution.
sales@crmjetty.com
Step 4: Click on the Browse button and choose the Package
Zip File for Dynamics CRM Customer Portal from the Import
Solution window.
Step 5: Click on Next for further processing.
Step 6: Check the box to enable any SDK message
processing steps included in the solution and click on the
Import button to import the Solution.
sales@crmjetty.com
Step 7: Click on ‘Close’ after the successful completion
message is displayed.
Step 8: Once you import the solution, it will be displayed in
the solutions grid view.
sales@crmjetty.com
WordPress Manual Plugin Installation:
Step 1: To start with the installation, Log in as Administrator
into WordPress. Hover on ‘Plugins’ and click on ‘Add New’ to
install the package.
Step 2: To upload the plugin, click on the ‘Upload Plugin’
button.
sales@crmjetty.com
Step 3: Now, click on the ‘Browse’ button and Browse the zip
file. After uploading the package, click on the ‘Install Now’
button to install the package.
Step 4: Navigate to Installed plugins. Here, you can see
“Customer Portal” plugin was successfully installed. But it’s
still inactive.
sales@crmjetty.com
Step 5: Click on ‘Activate’ to activate the plugin.
Dynamics CRM Configuration
Step 1: Get the activation key from the Order Confirmation
Mail. OR Login to your CRMJetty account then go to
downloadable options and copy the activation key for the
Dynamics CRM Customer Portal plug-in.
Note: Applicable only if purchased from CRMJetty.
Step 2: Activate your plug-in.
Step 3: Once you import the solution, it will be displayed in
the solutions grid view.
sales@crmjetty.com
Step 4: Double click on ‘DynamicsCRM Customer Portal for
WordPress’ solution to configure the plugin with your
license key.
Step 5: This will open up a new window. Click on
‘Configuration’ from the options provided on the left panel.
Step 6: You can activate your one-month free trial.
Step 4: To get a one-month free trial license key, fill out the
details, and click on the ‘Activate’ button.
sales@crmjetty.com
Your portal is ready to use.
Now, talking about Customer portal login:
After configuring the Dynamics CRM and WordPress portal
for WordPress Portal plug-in, customers can sign-up or
login to the WordPress portal and access Dynamics CRM
modules based on the access you’ve provided.
Dynamics Portal Login, Sign Up & Forgot Password:
Dynamics 365 portal login page
Step 1: Directly login to the portal using your portal
credentials.
Step 2: If two-step authentication is enabled, then portal
users will receive an OTP in email. Enter valid OTP and it
will allow portal users to access the interface.
sales@crmjetty.com
Note: OTP is valid for 30 minutes. If not used in that
timeframe then request a new OTP.
Sign Up:
Step 1: New customers can sign-up on the WordPress portal
by clicking on ‘Sign Up Now!’ link on the login page. This link
will redirect customers to sign up page.
A new user can directly sign-up from the portal. The
credentials will be verified to check whether any customer
has been registered with the same username and email
address. If any such user does not exist in the system, then a
user will be created in the Dynamics CRM Contacts module.
Step 2: Once signed-up from the portal, Users can directly
login to the portal and can also access their WordPress
account without having to log in again.
sales@crmjetty.com
Note: Already existing customers on both sides (WordPress
and Dynamics CRM) won’t get access to the Customer Portal
automatically on installation.
Forgot Password:
Step 1: Portal users can retrieve their login password using
the ‘Forgot Password’ option. Click on the ‘Forgot Password’
option and enter your username and email address. Click on
the ‘Submit’ button and you will receive a reset password
link on your email.
sales@crmjetty.com
Now, talking about the core features of the Dynamics
365 WordPress portal:
1. Custom Module Support:
Not only custom modules, but our Dynamics CRM customer
portal also supports all the default modules as well so that
you can share the right information with your customers.
2. Case Deflection:
This feature helps portal users to get probable solutions
before generating a case. When a portal user can’t find
solutions related to any queries or issues, they will be able
to navigate to add a case option. Using the search bar they
sales@crmjetty.com
can simply search for their issue and if it is not found they
can easily add their case.
3. Role-based Accessibility:
You can create accessibility-based user groups and add
contacts to assign specific roles. A Portal User can have
access only to the modules that are assigned to them in that
specific group. Admin can create multiple groups and add
contacts to them.
About Us
CRMJetty is a hub of innovative customer relationship
solutions. Our tools ensure that you can render enhanced
interactions at each stage of your customer lifecycle. So, if
you are searching for the right portal solution for your
company, then you can choose from our wide range of
solutions for Salesforce, Dynamics, and more. We have
served in this industry for over a decade and have built
many portals like customer portal, self-service portal,
non-profit portal, etc. Get in touch with us and we’ll help
you kick start your journey towards communicating better.
Source:
https:/
/www.crmjetty.com/blog/how-to-get-started-with
-dynamics-365-portal/
sales@crmjetty.com
sales@crmjetty.com

More Related Content

More from CRMJetty

More from CRMJetty (10)

B2 c portal development the ultimate guide (challenges, features, and advanta...
B2 c portal development the ultimate guide (challenges, features, and advanta...B2 c portal development the ultimate guide (challenges, features, and advanta...
B2 c portal development the ultimate guide (challenges, features, and advanta...
 
All you need to know about channel management process
All you need to know about channel management processAll you need to know about channel management process
All you need to know about channel management process
 
Everything about vendor management system
Everything about vendor management systemEverything about vendor management system
Everything about vendor management system
 
Educational Portal Whitepaper
Educational Portal WhitepaperEducational Portal Whitepaper
Educational Portal Whitepaper
 
Partner Portal Whitepaper
Partner Portal WhitepaperPartner Portal Whitepaper
Partner Portal Whitepaper
 
Affiliate Portal Whitepaper
Affiliate Portal WhitepaperAffiliate Portal Whitepaper
Affiliate Portal Whitepaper
 
Vendor/Supplier Portal Whitepaper - CRMJetty
Vendor/Supplier Portal Whitepaper - CRMJettyVendor/Supplier Portal Whitepaper - CRMJetty
Vendor/Supplier Portal Whitepaper - CRMJetty
 
Help and Support Portal Whitepaper - CRMJetty
Help and Support Portal Whitepaper - CRMJettyHelp and Support Portal Whitepaper - CRMJetty
Help and Support Portal Whitepaper - CRMJetty
 
Customer Portal Whitepaper - CRMJetty
Customer Portal Whitepaper - CRMJettyCustomer Portal Whitepaper - CRMJetty
Customer Portal Whitepaper - CRMJetty
 
CRM Portals Through the Customer Perspective
CRM Portals Through the Customer PerspectiveCRM Portals Through the Customer Perspective
CRM Portals Through the Customer Perspective
 

How to Get Started with Dynamics 365 Portal.pdf

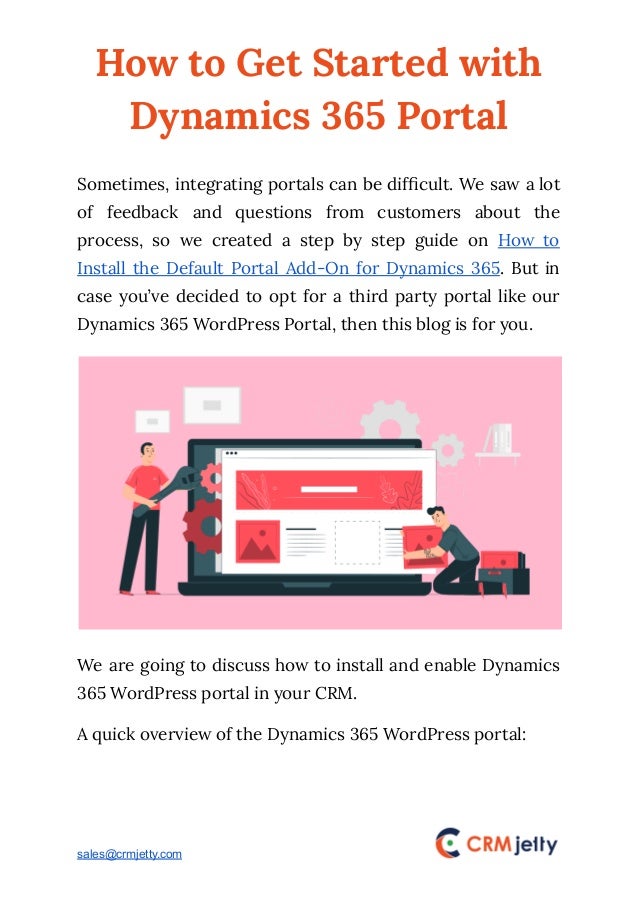
  • 1. How to Get Started with Dynamics 365 Portal Sometimes, integrating portals can be difficult. We saw a lot of feedback and questions from customers about the process, so we created a step by step guide on How to Install the Default Portal Add-On for Dynamics 365. But in case you’ve decided to opt for a third party portal like our Dynamics 365 WordPress Portal, then this blog is for you. We are going to discuss how to install and enable Dynamics 365 WordPress portal in your CRM. A quick overview of the Dynamics 365 WordPress portal: sales@crmjetty.com
  • 2. It is a third party portal solution for your business. It helps you provide quality service to your customers round the clock. It makes your team’s work effortless. Let’s see steps to install it. Installation: To install the ‘Dynamics CRM Customer Portal’ plugin, the following steps have to be followed: Step 1: Once you have purchased the plugin, you will get a zip file named DynamicsCRM-Customer-Portal-v3.0.zip. Step 2: Log in to your CRM Account and click on Settings → Solutions Step 2(a): If you are using a unified interface, click on the Settings icon which is on the right side of the Title bar. Then click on Advanced Settings. sales@crmjetty.com
  • 3. Now go to Settings → Solution. Step 3: Click on ‘Import’ to upload and install the Solution. sales@crmjetty.com
  • 4. Step 4: Click on the Browse button and choose the Package Zip File for Dynamics CRM Customer Portal from the Import Solution window. Step 5: Click on Next for further processing. Step 6: Check the box to enable any SDK message processing steps included in the solution and click on the Import button to import the Solution. sales@crmjetty.com
  • 5. Step 7: Click on ‘Close’ after the successful completion message is displayed. Step 8: Once you import the solution, it will be displayed in the solutions grid view. sales@crmjetty.com
  • 6. WordPress Manual Plugin Installation: Step 1: To start with the installation, Log in as Administrator into WordPress. Hover on ‘Plugins’ and click on ‘Add New’ to install the package. Step 2: To upload the plugin, click on the ‘Upload Plugin’ button. sales@crmjetty.com
  • 7. Step 3: Now, click on the ‘Browse’ button and Browse the zip file. After uploading the package, click on the ‘Install Now’ button to install the package. Step 4: Navigate to Installed plugins. Here, you can see “Customer Portal” plugin was successfully installed. But it’s still inactive. sales@crmjetty.com
  • 8. Step 5: Click on ‘Activate’ to activate the plugin. Dynamics CRM Configuration Step 1: Get the activation key from the Order Confirmation Mail. OR Login to your CRMJetty account then go to downloadable options and copy the activation key for the Dynamics CRM Customer Portal plug-in. Note: Applicable only if purchased from CRMJetty. Step 2: Activate your plug-in. Step 3: Once you import the solution, it will be displayed in the solutions grid view. sales@crmjetty.com
  • 9. Step 4: Double click on ‘DynamicsCRM Customer Portal for WordPress’ solution to configure the plugin with your license key. Step 5: This will open up a new window. Click on ‘Configuration’ from the options provided on the left panel. Step 6: You can activate your one-month free trial. Step 4: To get a one-month free trial license key, fill out the details, and click on the ‘Activate’ button. sales@crmjetty.com
  • 10. Your portal is ready to use. Now, talking about Customer portal login: After configuring the Dynamics CRM and WordPress portal for WordPress Portal plug-in, customers can sign-up or login to the WordPress portal and access Dynamics CRM modules based on the access you’ve provided. Dynamics Portal Login, Sign Up & Forgot Password: Dynamics 365 portal login page Step 1: Directly login to the portal using your portal credentials. Step 2: If two-step authentication is enabled, then portal users will receive an OTP in email. Enter valid OTP and it will allow portal users to access the interface. sales@crmjetty.com
  • 11. Note: OTP is valid for 30 minutes. If not used in that timeframe then request a new OTP. Sign Up: Step 1: New customers can sign-up on the WordPress portal by clicking on ‘Sign Up Now!’ link on the login page. This link will redirect customers to sign up page. A new user can directly sign-up from the portal. The credentials will be verified to check whether any customer has been registered with the same username and email address. If any such user does not exist in the system, then a user will be created in the Dynamics CRM Contacts module. Step 2: Once signed-up from the portal, Users can directly login to the portal and can also access their WordPress account without having to log in again. sales@crmjetty.com
  • 12. Note: Already existing customers on both sides (WordPress and Dynamics CRM) won’t get access to the Customer Portal automatically on installation. Forgot Password: Step 1: Portal users can retrieve their login password using the ‘Forgot Password’ option. Click on the ‘Forgot Password’ option and enter your username and email address. Click on the ‘Submit’ button and you will receive a reset password link on your email. sales@crmjetty.com
  • 13. Now, talking about the core features of the Dynamics 365 WordPress portal: 1. Custom Module Support: Not only custom modules, but our Dynamics CRM customer portal also supports all the default modules as well so that you can share the right information with your customers. 2. Case Deflection: This feature helps portal users to get probable solutions before generating a case. When a portal user can’t find solutions related to any queries or issues, they will be able to navigate to add a case option. Using the search bar they sales@crmjetty.com
  • 14. can simply search for their issue and if it is not found they can easily add their case. 3. Role-based Accessibility: You can create accessibility-based user groups and add contacts to assign specific roles. A Portal User can have access only to the modules that are assigned to them in that specific group. Admin can create multiple groups and add contacts to them. About Us CRMJetty is a hub of innovative customer relationship solutions. Our tools ensure that you can render enhanced interactions at each stage of your customer lifecycle. So, if you are searching for the right portal solution for your company, then you can choose from our wide range of solutions for Salesforce, Dynamics, and more. We have served in this industry for over a decade and have built many portals like customer portal, self-service portal, non-profit portal, etc. Get in touch with us and we’ll help you kick start your journey towards communicating better. Source: https:/ /www.crmjetty.com/blog/how-to-get-started-with -dynamics-365-portal/ sales@crmjetty.com