SlideShare a Scribd company logo
1 of 43
Download to read offline
Service Workbook
EPIC D.I. Engine Management System
i
EPIC
ELECTRONIC PROGRAMMED INJECTION CONTROL
Service Workbook
This Service Workbook covers the EPIC engine fitted to LDV vehicles. It is primarily designed to assist skilled
technicians in the efficient repair and maintenance of this system, but can also be used as a reference workbook for
training purposes.
This Service Workbook should always be consulted prior to servicing or repair work.
SPECIFICATION
LDV (the Company) reserves the right to change the procedures, material, specification, dimensions or design of the
vehicles shown, described or referred to herein at any time and without prior notice in accordance with the Company’s
policy of constant product improvement.
Every reasonable effort is made to ensure that the Company’s publications are accurate, but nothing shown,
described or referred to herein should be regarded as an infallible guide to the procedures, materials, specifications,
dimensions, design or availability of any particular vehicle, nor does this publication constitute an offer for the sale
of any particular vehicle. No liability can be accepted by the Company or any Distributor or Dealer for any
malfunction, damage, loss, injury, or death caused by the use of incorrect or misinterpreted information, omissions
or errors that may have arisen during the preparation of this workbook.
Purchasers are advised that the specification details set out in this publication apply to a range of vehicles and not
to any particular vehicle. For the specification of any particular vehicle, purchasers should consult their LDV
Distributor or Dealer. Please note that LDV Distributors and Dealers are not agents of the Company, and have no
right or authority whatsoever to bind the Company in any way, or to assume on its behalf any obligation expressed
or implied.
COPYRIGHT
 LDV 2001
All rights reserved. No part of this publication may be reproduced, stored in a retrieval system or transmitted, in any
form, whether electronic, or mechanical, or by photocopying, recording or other means without prior permission in
writing of LDV.
Published by LDV. Further copies may be obtained through your normal literature ordering procedure.
LDV Limited
Training & Publications
Bromford House
Drews Lane
Birmingham
B8 2QG June 2001 DW03963004
EPIC DI Engine Management System – Diagnostics
i
iii
Notes
In some circumstances it may be possible for an
electrical connector pin to become displaced axially, thus
creating a poor connection or an open–circuit. That
action is referred to in this Manual as “Backing off”.
The expression “ground” refers to any metallic part of the
engine or vehicle structures which is electrically
connected to the battery negative terminal.
Certain signals which may be displayed on the Laser
2000 screen are known as “internal variables”. For
clarification, their names are shown in upper–case letters
in this Manual e.g.: “EGR VALVE POSN” which
represents the “feedback” from the EGR valve position
sensor.
BOB – Break–Out–Box
CVT – Current–to–Vacuum Transducer
EVR – Electrical Vacuum Regulator
DCU – Diesel Control Unit
EGR – Exhaust Gas Recirculation
EMS – Engine Management System
ESOS – Electric Shut Off Solenoid
HPDS – High Pedal Demand Switch
LPDS – Low Pedal Demand Switch
NOx – Nitrous Oxide
PATS – Passive Anti–theft System
PDS – Pedal Demand Sensor
PWM – Pulse Width Modulation
SCP – Standard Communications Protocol
TP – Transfer Pressure
‘‘Key on” – The action of turning the ‘Ignition’ key
‘‘Key off” to the on/off positions
Precrank – ‘Ignition’ key on, engine stationary prior
to starting
Stalled – Engine has stopped for reasons other
than being switched off
OV – Chassis Ground
+Bat – Battery Voltage
“Wiggle Test” – A test used to find intermittent wiring
faults. It involves agitation of the wiring
harness, particularly close to
connections.
Abbreviations
ii Contents
Introduction1
Diagnostics Procedure2
Non–coded Faults3
Coded Faults4
Technical Information5
EPIC DI Engine Management System – Diagnostics
i Contents
i
iv
Introduction
1.1 The EPIC Dl system 1. . . . . . . . . . . . . . . . . . . . . . . . . . . . . . . . . . . . . . . . . . . . . . . . . . . . . . . . . . . . .
1.2 Safety precautions .... 2. . . . . . . . . . . . . . . . . . . . . . . . . . . . . . . . . . . . . . . . . . . . . . . . . . . . . . . . . . . .
Diagnostics Procedure
2.1 Tools and training 3. . . . . . . . . . . . . . . . . . . . . . . . . . . . . . . . . . . . . . . . . . . . . . . . . . . . . . . . . . . . . . . .
2.2 System 3. . . . . . . . . . . . . . . . . . . . . . . . . . . . . . . . . . . . . . . . . . . . . . . . . . . . . . . . . . . . . . . . . . . . . . . .
2.2.1 Coded faults. 3. . . . . . . . . . . . . . . . . . . . . . . . . . . . . . . . . . . . . . . . . . . . . . . . . . . . . . . . . . .
2.2.2 Non–coded faults 3. . . . . . . . . . . . . . . . . . . . . . . . . . . . . . . . . . . . . . . . . . . . . . . . . . . . . . . .
2.3 Prcoedure 5. . . . . . . . . . . . . . . . . . . . . . . . . . . . . . . . . . . . . . . . . . . . . . . . . . . . . . . . . . . . . . . . . . . . . .
2.3.1 Initial inspection .. 5. . . . . . . . . . . . . . . . . . . . . . . . . . . . . . . . . . . . . . . . . . . . . . . . . . . . . . .
2.3.2 Flowchart 5. . . . . . . . . . . . . . . . . . . . . . . . . . . . . . . . . . . . . . . . . . . . . . . . . . . . . . . . . . . . . .
2.3.3 Laser 2000 and examination of fault codes 5. . . . . . . . . . . . . . . . . . . . . . . . . . . . . . . . .
2.3.4 Location of the DCU . 5. . . . . . . . . . . . . . . . . . . . . . . . . . . . . . . . . . . . . . . . . . . . . . . . . . . .
2.3.5 Electrical testing 5. . . . . . . . . . . . . . . . . . . . . . . . . . . . . . . . . . . . . . . . . . . . . . . . . . . . . . . . .
2.3.6 Actuator tests 5. . . . . . . . . . . . . . . . . . . . . . . . . . . . . . . . . . . . . . . . . . . . . . . . . . . . . . . . . . .
2.4 Repair 6. . . . . . . . . . . . . . . . . . . . . . . . . . . . . . . . . . . . . . . . . . . . . . . . . . . . . . . . . . . . . . . . . . . . . . . . .
2.5 Idle trim setting ... 6. . . . . . . . . . . . . . . . . . . . . . . . . . . . . . . . . . . . . . . . . . . . . . . . . . . . . . . . . . . . . . . .
2.6 Backleak trim setting ... 6. . . . . . . . . . . . . . . . . . . . . . . . . . . . . . . . . . . . . . . . . . . . . . . . . . . . . . . . . . .
Non–coded Faults
3.1 EMS warning lamp fails to switch on 7. . . . . . . . . . . . . . . . . . . . . . . . . . . . . . . . . . . . . . . . . . . . . . . .
3.2 Engine stops whilst driving or idling, and will not restart whilst cranking 7. . . . . . . . . . . . . . . . . .
3.3 Engine will not start, or is difficult to start after normal engine stop 7. . . . . . . . . . . . . . . . . . . . . . .
3.4 Unstable hot idle, low power, slow acceleration, stalling or poor pull away 8. . . . . . . . . . . . . . . .
3.5 Reduced power (excessive smoke) . 8. . . . . . . . . . . . . . . . . . . . . . . . . . . . . . . . . . . . . . . . . . . . . . .
3.6 Smoke at low engine speed (full–load) 8. . . . . . . . . . . . . . . . . . . . . . . . . . . . . . . . . . . . . . . . . . . . . .
3.7 Reduced power (with no smoke) 8. . . . . . . . . . . . . . . . . . . . . . . . . . . . . . . . . . . . . . . . . . . . . . . . . . .
3.8 Engine does not stop instantly on ‘key off’ 8. . . . . . . . . . . . . . . . . . . . . . . . . . . . . . . . . . . . . . . . . .
Coded Faults
4.1 Pump rotor control 9. . . . . . . . . . . . . . . . . . . . . . . . . . . . . . . . . . . . . . . . . . . . . . . . . . . . . . . . . . . . . . .
4.2 Electric shut–off solenoid (ESOS) 12. . . . . . . . . . . . . . . . . . . . . . . . . . . . . . . . . . . . . . . . . . . . . . . . . .
4.3 Pump cam control and pump temperature sensor 14. . . . . . . . . . . . . . . . . . . . . . . . . . . . . . . . . . . .
4.4 Calibration resistor 17. . . . . . . . . . . . . . . . . . . . . . . . . . . . . . . . . . . . . . . . . . . . . . . . . . . . . . . . . . . . . . .
4.5 Pump speed sensor (drive shaft position) 18. . . . . . . . . . . . . . . . . . . . . . . . . . . . . . . . . . . . . . . . . . .
4.6 Pedal sensor control 19. . . . . . . . . . . . . . . . . . . . . . . . . . . . . . . . . . . . . . . . . . . . . . . . . . . . . . . . . . . . .
4.7 Engine speed sensor (crankshaft position) 21. . . . . . . . . . . . . . . . . . . . . . . . . . . . . . . . . . . . . . . . . .
4.8 Engine coolant temperature sensor 22. . . . . . . . . . . . . . . . . . . . . . . . . . . . . . . . . . . . . . . . . . . . . . . .
4.9 Air charge temperature sensor 23. . . . . . . . . . . . . . . . . . . . . . . . . . . . . . . . . . . . . . . . . . . . . . . . . . . . .
4.10 Exhaust gas recirculation (EGR) 24. . . . . . . . . . . . . . . . . . . . . . . . . . . . . . . . . . . . . . . . . . . . . . . . . . .
4.11 Boost pressure sensor 26. . . . . . . . . . . . . . . . . . . . . . . . . . . . . . . . . . . . . . . . . . . . . . . . . . . . . . . . . . .
4.12 Power hold relay, key–switch and battery circuit 27. . . . . . . . . . . . . . . . . . . . . . . . . . . . . . . . . . . . . .
4.13 Engine–to–pump synchronisation (pump bolt–up limits) 29. . . . . . . . . . . . . . . . . . . . . . . . . . . . . . .
4.14 DCU 30. . . . . . . . . . . . . . . . . . . . . . . . . . . . . . . . . . . . . . . . . . . . . . . . . . . . . . . . . . . . . . . . . . . . . . . . . . .
4.15 Passive anti–theft system (PATS) 31. . . . . . . . . . . . . . . . . . . . . . . . . . . . . . . . . . . . . . . . . . . . . . . . . .
Technical Information
5.1 Dynamic data 32. . . . . . . . . . . . . . . . . . . . . . . . . . . . . . . . . . . . . . . . . . . . . . . . . . . . . . . . . . . . . . . . . . .
5.2 Vehicle wiring diagram (MY95) 33. . . . . . . . . . . . . . . . . . . . . . . . . . . . . . . . . . . . . . . . . . . . . . . . . . . .
5.3 Component location 34. . . . . . . . . . . . . . . . . . . . . . . . . . . . . . . . . . . . . . . . . . . . . . . . . . . . . . . . . . . . . .
5.4 DCU multiplug pin identification 36. . . . . . . . . . . . . . . . . . . . . . . . . . . . . . . . . . . . . . . . . . . . . . . . . . . . .
5.5 Resistance values 37. . . . . . . . . . . . . . . . . . . . . . . . . . . . . . . . . . . . . . . . . . . . . . . . . . . . . . . . . . . . . . .
5.6 Pulse–width modulation 38. . . . . . . . . . . . . . . . . . . . . . . . . . . . . . . . . . . . . . . . . . . . . . . . . . . . . . . . . .
1
2
3
4
5
1EPIC DI Engine Management System – Diagnostics Introduction
1
1.1 THE EPIC Dl SYSTEM
The Lucas EPIC Diesel Fuel injection system provides
electronic control of both the amount of fuel injected and
the timing of injection in order to optimise exhaust
emissions and fuel economy. The system comprises a
rotary fuel injection pump (with electrical actuators and
sensors), a Diesel Control Unit (DCU), various engine
and vehicle sensors, a power hold relay, battery, key
switch, and harness.
NOTE When a DCU is fitted to a vehicle/engine
combination, it must be configured to suit that
specific application. A DCU may not be
transferred between vehicles fitted with Passive
Anti–Theft (PATS).
The LDV 4EA 2.5TC engine is fitted, rated at 100 PS.
The Laser 2000 communicates with the DCU using the
Standard Communications Protocol (SCP). The Laser
2000 requires hardware and software modules,
diagnostic lead, and Break Out Box (BOB) to connect to
the 55–pin DCU.
Vehicle Configuration
Screen
Refer to Section 2.6 Refer to Section 2.5
Start Up Menu
Title Screen
Diagnostic Menu Display Stored Data Backleak Trim Mode Idle Trim Mode
Display/
Clear
Faults
Clear Fault Codes
Read Fault Codes
Print Fault Codes
Store Fault Codes
Dynamic
Display
Dynamic
Recording
EXIT SETUP PAGE TRIG LIVE 1. Select Displayed Parameters
2. Select Position of Trigger
3. Select Trigger Type
4. Wiggle Tests
Actuator
Tests
Gearbox Shift Solenoid
Gearbox Kickdown Solenoid
'Check Engine' Lamp
Air-Conditioning Clutch
Power Hold Relay
Pump Cam Actuator
Gearbox Shift Solenoid
Gearbox Kickdown Solenoid
EGR Current-to-Vacuum
Air-Conditioning Clutch
Engine Shut-Off Solenoid
Pedal Demand
Key on,
engine
running
Key on,
engine
stationary
Diagnostic Charts
DCU-Identification
Fig. 1 Laser 2000 Menu Structure
A045-002
Transfer Stored Data
EPIC DI Engine Management System – DiagnosticsIntroduction1
2
1.2 SAFETY PRECAUTIONS
1 For “on the road” tests using a LASER 2000, the
vehicle must be driven by an assistant.
NOTE UNDER NO CIRCUMSTANCES MAY
THE LASER 2000 BE LEFT CONNECTED
TO THE VEHICLE SYSTEM FOR ANY
TESTING BY THE OWNER/DRIVER. IT
SHOULD ONLY BE USED BY AN
EXPERIENCED TECHNICIAN.
2 Observe normal Health and Safety precautions
when working with fuel systems, e.g. no smoking,
no naked lights, and beware of the very high
pressures generated within the injection system.
3 Ensure that the gear selector is in neutral and
the parking brake is on when working on a
stationary vehicle with the engine running.
4 If working in a confined area use exhaust fume
extraction, or ensure adequate ventilation, whilst the
engine is running.
5 Beware of moving engine parts when the engine
is running.
6 Cleanliness should be observed at all times.
7 Ensure that any spilt fuel is thoroughly cleaned–up.
8 Incorrect electrical connections may damage
sensitive electronic devices fitted to the vehicle.
9 Do not work on a vehicle whilst the battery is
being charged from an external power source.
10 Ensure that all cables are clear of hot or moving
parts. For on–the–road tests ensure that all cables
and test equipment are secure and will not impede
driving.
11 DO NOT disconnect the battery whilst the engine
is running.
12 DO NOT “fast charge” the battery without
disconnecting it from the vehicle’s electrical system.
13 Switch off the vehicle key switch before making
or breaking electrical connections.
NOTE REFER TO THE PRECAUTIONS
AND PRELIMINARY TESTS LISTED IN
THE LASER 2000 OPERATING
INSTRUCTIONS (Pub. No. XXB875).
2EPIC DI Engine Management System – Diagnostics Diagnostics Procedure
3
2.1 TOOLS AND TRAINING
To enable fault–finding the following tools are required:
Laser 2000 Equipment
Laser 2000 kit YWB700. . . . . . . . . . . . .
Diagnostic Cable YWB776. . . . . . . . . . .
Software Module YDS120 (language). . . . . . . . . . .
Hardware Module YWB722. . . . . . . . . .
BOB Equipment
BOB YWB741. . . . . . . . . . . . . . . . . . . . . .
Adaptor Box YDA200. . . . . . . . . . . . . .
Pump–to–BOB Cable YDA287. . . . . .
Static Timing Device YWB317. . . . . .
Pressure & vacuum test kit LDV141. .
NOTE If a Laser 1500 is available, the BOB (YWB741)
is not required but Adaptor Box YDA200 and
Cable YDA287 are.
During testing of the electrical and electronic equipment
a digital multimeter is essential, preferably with the facility
for measuring duty cycles (such as Lucas YWB208).
NOTE If the YWB208 multimeter is not available, any
good quality digital multimeter may be used.
However, if the instrument is not of the ‘auto–ranging’
type, ensure that its sensitivity is set to suit the range
of the parameter being measured. (In addition, the
meter must have a ‘duty–cycle’ measuring facility).
Users of this publication must have previously attended
a LDV–approved training course and be fully conversant
with the use of the Laser 2000 diagnostic equipment.
2.2 SYSTEM
The DCU controls all the major functions of the EPIC
fuel injection system. It also detects when the system is not
functioning correctly. When that happens, a ‘faultcode’
related to the fault is logged within the DCU and the Engine
Management System (EMS) lamp on the dash board (see
fig. 3) is illuminated. The logged code(s) may be retrieved
using the Laser 2000. A fault which is recognised by the
DCU is known as a ‘coded fault’; any other faults are known
as ‘non–coded faults’ and are not displayed by the Laser
2000.
Fig. 3 EMS lamp Symbol A045-007
2.2.1 Coded Faults
Coded Faults occur when:
An input is outside pre–programmed limits. That could be
due to faulty connectors, wiring or sensor.
An input is within pre–programmed limits but is not changing
as is expected by the DCU. A possible fault could be that of
an actuator that is seized or worn.
Fault Codes are split into two types:
Current Faults The fault persists and continues
during fault diagnosis. That could be
due to a complete disconnection of a
wire or connector.
Intermittent Faults The fault will be logged by the DCU
but may not be apparent during
subsequent diagnosis. That type of
fault could be due to a loose or
partially–damaged wire.
2.2.2 Non–Coded Faults
Not all faults which occur on the vehicle will be logged by
the DCU. Those faults can be diagnosed with the aid of
the Diagnostics Flowchart (see fig. 4) and section 3 of this
Manual.
HARDWARE
MODULE
(YWB722)
DIAGNOSTIC
CABLE
(YWB776) TO VEHICLE
DIAGNOSTIC
CONNECTOR
SOFTWARE
MODULE
(YDS 120)
LASER 2000
Fig. 2a Connection of the LASER
A045-005
1500
BREAK-OUT BOX
(YWB741)
or
LASER 1500
(YWB703)
YDA287
TO PUMP
YDA200
TO VEHICLE
120 WAY BOB
Fig. 2b Connection of the BOB A045-006
EPIC DI Engine Management System – DiagnosticsDiagnostics Procedure2
4
Intermittent fault codes
Yes
No
No Fault Logged
Current
fault
codes
Yes
No
No
Yes
Vehicle satisfactory
Use Snap-Shot mode
on Laser 2000
Drive vehicle or
agitate harness
Read Fault
Logged
Use original Fault Codes
for guidance
Go to relevant section
of Manual
Fault
Diagnosed
Read
fault
codes
Fault
rectified
Refer to
Coded Faults
section of
Manual
Refer to
Non-Coded
Faults section
of Manual
Repair Repair
Vehicle Fault
Read safety instructions in Section 1.3
Initial Inspection
Connect Laser 2000
Read Fault Codes
Record Codes
Clear Codes on Laser 2000
B
B
A
A
Fig. 4 Diagnostics Flowchart
A045-008
2EPIC DI Engine Management System – Diagnostics Diagnostics Procedure
5
2.3 PROCEDURE
2.3.1 Initial inspection
Before connecting the Laser 2000 carry out an initial
inspection of the vehicle to ensure that there is fuel in the
tank, that there are no blocked airways, and no fuel leaks
or loose pipes.
2.3.2 Flowchart
The Diagnostic Flowchart (see fig. 4) indicates the
procedure which should be followed when diagnosing
problems.
2.3.3 Laser 2000 and examination of Fault Codes
The Laser 2000 may display more than one fault code. If
that is the case, investigate the codes in the sequence
that the Laser 2000 displays them.
Remember that if a sensor is disconnected whilst the
ignition is on, a fault code will be logged by the DCU. Fault
codes could be induced by the driver tampering with
engine components and disconnecting sensors. Clear
these codes using the Laser 2000, then re–test the
vehicle to ensure that only genuine fault codes are
displayed.
For future reference, record all fault codes.
If coded faults are displayed, go directly to the section of
this Manual relevant to that code using the index on the
inside rear cover.
If the vehicle is not running correctly, and codes are
not displayed by the Laser 2000, refer to the Non–Coded
Fault section of this Manual.
‘SNAP SHOT MODE’ is of particular use when
diagnosing intermittent faults. The Laser 2000 records
data internally until a fault is identified. All the data is then
stored in memory and can be examined later. When
examining stored data after SNAP SHOT look for:
• Out–of–limits values.
• Sudden changes to the data.
Current faults cause all the dynamic data to lock at
their default values when the engine is running.
However the dynamic data is still valid during
cranking. This is of use for fault–finding on engines
which will not start.
2.3.4 Location of the DCU
See section 5.3 & 5.4 for the location of the DCU.
2.3.5 Electrical Testing
Only basic testing is required to determine if the
electrical circuits are functional. The tests below describe
the procedures:
(If the result of the test is the same as that described,
there is a fault.)
a) Open–circuit.
Check the resistance between the pins specified in the
diagnostic procedure. Infinite resistance indicates an
open–circuit.
A resistance reading higher than specified, but less than
infinity, indicates either corroded or loose connections, or
a partial break in the wire strands.
b) Short–circuit.
Check the resistance between the pins specified in the
diagnostic procedure. Measured resistances below
infinity can indicate a partial short–circuit.
A resistance reading lower than specified indicates a
short circuit.
c) Short–to–ground.
Check the resistance between the pin(s) specified in
the diagnostic procedure and BOB connection 54.
A low resistance indicates a short–to–ground.
d) Short to +BAT.
Turn the ignition switch to position ll. Check the voltage
between the pin(s) specified in the diagnostic procedure
and BOB connection 54 (OV). If the meter reads battery
voltage a short to +BAT exists.
Whilst carrying out these tests, agitate the harness close
to the connections. If the results are unstable there is an
intermittent break in the circuit.
2.3.6 Actuator Tests
Using the ‘ACTUATOR TESTS’ option, accessed from
the Diagnostics Menu, individual actuators can be tested
and their operation confirmed. The following items can be
tested:
ENGINE RUNNING
Gearbox shift solenoid
Gearbox kickdown solenoid
EGR CVT
Air–conditioning clutch
ESOS
PDS
ENGINE STATIONARY (‘KEYSWITCH’ ON)
Gearbox shift solenoid
Gearbox kickdown solenoid
EMS lamp
Air–conditioning clutch
Power–hold relay
Advance actuator
EPIC DI Engine Management System – DiagnosticsDiagnostics Procedure2
6
2.4 REPAIR
After diagnosis it may be possible to repair a fault in
the workshop. Procedures for all the possible workshop
repairs are documented in the relevant Lucas Workshop
Manual.
2.5 IDLE TRIM SETTING
Using the ‘IDLE TRIM MODE’ option, the idle speed can
be adjusted within a range of ±50 rpm from the nominal
idle speed to eliminate or reduce vehicle body vibrations.
Check the following items before carrying out the idle
setting procedure:
• There must be no CURRENT or
lNTERMlTTENT faults.
• The engine must be running.
• The engine coolant temperature must be
above 70 °C.
• The accelerator pedal must be fully
released.
• If air–conditioning is fitted it must be switched
off.
• The vehicle must be in neutral with the clutch
engaged, or in ‘PARK’ if automatic.
1 Connect the LASER 2000 to the diagnostic plug in
the vehicle fuse box (see Section 5.4).
Start the engine and allow it to idle.
2 Switch on the Laser 2000, select ‘IDLE TRIM
MODE’ from the MAIN MENU.
3 Control the idle speed using the accelerator pedal
(fully raised = minimum idle speed, fully depressed
= maximum idle speed).
4 When the idle speed is correct, set it using key F5.
The revised idle speed will then be stored in the
DCU.
2.6 BACKLEAK TRIM SETTING
Using the ‘BACKLEAK TRIM’ option, fine–tuning of the
idling delivery can be achieved to eliminate or reduce
body vibrations and improve other pump characteristics.
Before carrying out this procedure
• There must be no CURRENT or
INTERMITTENT faults.
• The engine must be running.
• The engine must be at normal operating
temperature (i.e. coolant temperature must be
above 77°C, or the pump temperature must be
above 30°C).
• The accelerator pedal must be fully released.
• If air–conditioning is fitted it must be switched off.
• The vehicle must be in neutral with the clutch
engaged, or in ‘PARK’ if automatic.
1 Connect the LASER 2000 to the diagnostic plug in
the vehicle EPIC fuse box (see Section 5.3 & 5.4).
Start the engine and allow it to idle.
2 Switch on the Laser 2000, select ‘BACKLEAK TRIM
MODE’ from the MAIN MENU.
3 The DCU will be set to the backleak trim mode; this
will take approximately 10 seconds to execute.
On completion, LASER 2000 will display the status,
i.e. ‘BACKLEAK TRIM SUCCESSFUL’ or
‘UNSUCCESSFUL’ and return to the MAIN MENU.
3EPIC DI Engine Management System – Diagnostics Non–coded Faults
7
3.1 EMS WARNING LAMP FAILS TO SWITCH
ON
Ensure that the EMS warning lamp is illuminated for a
short period after key–on. If the bulb fails to illuminate
then:
• Check for failed bulb
• Check that the EMS lamp is not obscured
• Check EMS lamp electrical connections.
• Check on BOB connector pins 44 and 47 for continuity
of the lamp circuit, and pins 45 and 20, with key switch
on, for battery voltage (+BAT).
3.2 ENGINE STOPS WHILST DRIVING OR
IDLING, AND WILL NOT RESTART
WHILST CRANKING
• Check for fuel in tank, and type i.e. not petrol.
• Check that the ducting to the air filter and
turbocharger is clear.
• Ensure that there is no water in the fuel. If so:
– Drain the fuel filter (and the tank if necessary),
– Check that the water sensor is operating.
• Check for fuel leaks or loose fuel pipe connections.
• Check for restriction in the fuel tank vent causing the
tank to implode, i.e. remove the filler cap.
• Fit a pressure/vacuum gauge in the fuel feed line to
the pump, and crank the engine. The pressure should
read positive. If it does not, check the following:
• Restriction in the fuel feed or return.
• The age of the fuel filter. Replace it if any doubt.
• Failed mechanical fuel pump.
• The key power circuit (refer to SCP fault code 1191).
• The power–hold relay circuit (refer to SCP fault code
1606) .
• The battery supply to the DCU (refer to SCP fault code
9671).
• Operation of the fuel injection pump by slackening
the injector pipe at any injector and note the fuel
discharge at the connector whilst cranking.
3.3 ENGINE WILL NOT START, OR IS DIFFICULT
TO START AFTER NORMAL ENGINE STOP
• Check cranking speed and battery condition.
• Check operation of the fuel injection pump.
• Slacken the injector pipe at any injector and note
fuel discharge at connector whilst cranking.
• If fitted, check the ‘Flamestart’ system (see fig. 5).
• Disconnect the fuel supply from the Flamestart
heater element. Activate the system and check fuel flow
to the element.
• Check the voltage supply to the element.
• Remove the element, reconnect the fuel supply
and ensure that the voltage supply to the element
is disconnected. Activate the system and if fuel does
not flow from the element, rectify or replace the element.
• Remove the element, connect the voltage supply
and earth, and ensure fuel supply is disconnected.
Activate the system and renew the element if it does not
glow.
• Check pump–to–engine timing.
• Follow procedures as for section 3.2.
EPIC DI Engine Management System – DiagnosticsNon–coded Faults3
8
3.4 UNSTABLE HOT IDLE, LOW
POWER, SLOW ACCELERATION,
STALLING OR POOR PULL AWAY
• Check that the air ducting to the air filter
and turbocharger is clear.
• Read FUEL DEMAND on LASER 2000 whilst idling
hot and carry out BACKLEAK TRIM.
• Check that correct grade of fuel is being used. If
‘Winter grade’ or ‘City class’ fuel is being used, carry
out BACKLEAK TRIM.
• If CYL3 IDL FUEL, CYL1 OFFSET, CYL2 OFFSET,
CYL4 OFFSET readings on the LASER 2000 show
one value significantly different to the others, check the
injectors and engine condition i.e. valve clearances
etc.
• For a high mileage vehicle that has had no fuel
injection pump or pump actuator changes, read and
note the LASER 2000 DYNAMIC DISPLAY Values; If
the ROTOR DELAY A value is greater than 35, change
the pump horizontal actuator pair. If the ROTOR
DELAY B value is greater than 50, change the pump
vertical actuator pair.
• Check cylinder compressions.
3.5 REDUCED POWER (EXCESSIVE SMOKE)
• Check that the air ducting to the air filter
and turbocharger is clear.
• Check that the throttle valve is operating.
• Check for restrictions in the exhaust system.
• Check that the boost sensor hose is attached, and
for leaks from, and restrictions in, it.
• Check that the EGR valve is closing by removing the
pipe to the valve, and noting if the valve makes a ‘click’
when it closes.
• If no faults are found, replace the boost sensor.
3.6 SMOKE AT LOW ENGINE SPEED (FULL
LOAD)
• Carry out BACKLEAK TRIM (see Section 2.6).
• Check throttle operation.
• Replace the boost sensor.
3.7 REDUCED POWER (WITH NO SMOKE)
• Check that the ducting to the air filter and turbocharger
is clear.
• Fit a pressure/vacuum gauge in the fuel feed line to
the pump, and crank the engine. The pressure should
read positive. If it does not, check the following:
– Restriction in the fuel feed or return.
– Age of the fuel filter. Replace if any doubt.
– The mechanical pump.
– For fuel leaks.
• Check that the EGR valve is closing by removing the
pipe to the valve, and noting if the valve makes a ‘click’
when it closes.
• Check that the air–conditioning is not
permanently operating.
• Check the fuel injection pump.
3.8 ENGINE DOES NOT STOP INSTANTLY ON
‘KEY–OFF’
• DCU pin 38 shorted to +BAT (DCU pin 47). This will
cause the fuel injection pump ESOS to over–heat and
burn out.
• The spring–loaded plunger of the ESOS will not
close– possibly due to debris contamination.
If the engine does not stop within 10 seconds then
fault code 1170 will be logged by the DCU.
4EPIC DI Engine Management System – Diagnostics Coded Faults
9
4.1 PUMP ROTOR CONTROL
Applicable codes : 1171, 1172, 1173, 1198
Description of Operation:
The ‘Rotor A’ and ‘Rotor B’ actuators control the
axial displacement of the pump rotor, and hence the
quantity of fuel injected. Opening Rotor A (feed) actuator
decreases fuel, and opening Rotor B (drain) actuator
increases fuel. The rotor sensor monitors the axial
position of the rotor. Either rotor A or rotor B actuator is
driven with a pulse from the DCU, whose duration is
related to the difference between the required
rotor position, (ROTOR DEMAND), and the measured
rotor position, (ROTOR FEEDBACK) . Calculation of the
required rotor position is based upon some or all of the
following input signals:
Throttle pedal demand
Internal fuel ‘mapping’
Boost pressure
Engine air inlet temperature
Engine speed
EGR valve position
The temperature compensation resistor is built into the
rotor position sensor. Its thermal characteristic is in
opposition to that of the sensor, thus eliminating ’drift’ of
the rotor position signal due to temperature changes.
Functions and Components Involved:
Transfer pressure
Rotor A (feed) actuator
Rotor B (drain) actuator
Rotor/drive shaft assembly
Rotor position sensor (including the temperature
compensation resistor)
Backleak
DCU
Harness
1171 ROTOR POSITION
This fault code will be displayed if the DCU identifies
either:
i) that the sensor resistance is outside limits e.g.
open–circuit, short–circuited to ground or to +BAT.
ii) an accidental connection to ground or +BAT.
iii) that the temperature compensation resistor is outside
limits e.g. open–circuit or short–circuit.
iv) that there is no feedback to the DCU.
The vehicle will show symptoms of greatly reduced power
and impaired driveability.
Perform the following:
1 Ensure that the key–switch is off. Remove the
connector from the DCU and check pins for
damage, incorrect engagement etc.
If there are no faults, go to 3, otherwise, go to 2.
2 If damage is apparent, repair it and retest the
vehicle.
9
12
6
41
42
47
48
14
13
17
10
7
11
6
2 1
3
4
1 Rotor position sensor
2 Temperature compensation resistor
3 Rotor feed actuator
4 Rotor drain actuator
DCU
Connector
Pins
Pump
Connector
Pins
A045-009
3 Fit the BOB. Test and record values for:
a) open–circuit
b) short–circuit
c) short–to–ground
d) short to +BAT
on BOB pins 9 & 6, and 9 & 12 (see table 1 in Section
5.6 for Rotor Position Sensor and Rotor
Compensation Resistor values).
If there are no faults, go to 4, otherwise, go to 5.
4 Remove the BOB and reconnect the harness to the
DCU . Clear any fault codes and retest the vehicle. If the
fault(s) still occurs change the DCU.
5 Remove the connector from the pump and check the
pins for damage, incorrect engagement etc.
If there are no faults, go to 7, otherwise, go to 6.
6 If damage is apparent, repair it, and retest the vehicle.
7 Fit the BOB, with the adaptor cable, to the pump
connector. Test and record resistance values for:
a) open–circuit
b) short–circuit
on BOB pins 14 & 17, 14 and 13. (See table 1 in
Section 5.5 for Rotor Position Sensor and Rotor
Compensation Resistor values).
If there are no faults, go to 9, otherwise, go to 8.
8 There is a fault with the rotor sensor assembly.
Repair the pump and retest the vehicle.
9 There is a fault with the vehicle harness. Repair it,
and retest the vehicle.
EPIC DI Engine Management System – DiagnosticsCoded Faults4
10
1172 PUMP ROTOR CONTROL OVERFUELLING
1198 PUMP ROTOR CONTROL UNDERFUELLING
The vehicle symptoms are:
i) For code 1172 the engine will stop
ii) For code 1198 unstable idling and stalling.
For intermittent faults go to test 1.
For current faults go to test 2.
1 Start the engine and allow it to idle, connect the
LASER 2000 and read the DYNAMIC DISPLAY
values, ROTOR DEMAND, and ROTOR
FEEDBACK. Note the difference between the two
values. Use the SNAP SHOT facility to assist in this
test.
If the DEMAND and FEEDBACK difference is 5 or
less, go to test 2. If greater than 5, got to test 6.
2 Fit a pressure/vacuum gauge in the fuel feed line to
the pump and run the engine. In neutral gear and at
full throttle, the pressure should read positive,
approx. 0.2 bar when warm and less when cold.
If there are no faults, go to 4, otherwise, go to 3.
3 If the pressure reading is below zero (i.e. a vacuum),
check the fuel supply circuit from tank to pump e.g.
filter and lift pump, and for imploded fuel tank or
pipes etc., and rectify. Retest the vehicle.
4 Remove the 24 mm A/F blanking plug, situated
beside the inlet and outlet connectors, and fit
adaptor, 6408–64 with an O–ring. Fit, preferably, a
0 to 14.0 bar pressure gauge. At idle, the transfer
pressure should read between 4.8 to 6.9 bar.
If there are no faults, go to 6, otherwise, go to 5.
5 If the pressure is low either the transfer pressure
(TP) regulator is stuck open (see Workshop Manual
XNB100 for repair) or the transfer pump is worn or
broken (remove the pump assembly and replace it).
If the TP is high, the TP regulator is stuck closed
(see Workshop Manual XNB100 for repair).
Remove the TP adaptor, refit the TP plug (ensure
that the O–ring is fitted) and tighten it to 23 Nm (204
Ib in). Retest the vehicle.
6 Ensure that the key–switch is off. Remove the
connector from the DCU and check pins for damage,
incorrect engagement etc.
If there are no faults, go to 7, otherwise, go to 8.
7 If damage is apparent, repair it and retest the
vehicle.
8 Fit the BOB. Test and record values for:
a) Open–circuit
b) Short–circuit
c) Short–to–ground
d) Short to + BAT
Fit on BOB pins 41 & 47, and 42 & 47 (see table 1 in
Section 5.5 for Rotor A and Rotor B actuator resistance
values).
If there are no faults, go to 9, otherwise, go to 10.
9 Remove the BOB and reconnect the harness to the
DCU. Clear any fault codes and retest the vehicle. If
the 2 fault still occurs, go to 12.
10 Remove the connector from the pump and check pins
for damage, incorrect engagement etc. If there are no
faults, go to 12, otherwise, go to 11.
11 If damage is apparent, repair it and retest the vehicle.
12 Fit the BOB with the adaptor cable to the pump
connector. Test and record values for:
a) open–circuit
b) short–circuit
on BOB pins 10 & 6, and 7 & 11 (see table 1 in
Section 5.5 for Rotor A and Rotor B actuator resistance
values).
If test 12 is correct and test 8 is incorrect go to 14; if
both tests 12 and 8 are correct go to 15, if test 12 is
incorrect go to 13.
13 Fault with an actuator. Identify which actuator from
its resistance value (see Section 5.6). Repair the pump
and retest the vehicle. If the fault is still present go to 1.
14 Fault with the vehicle harness. Repair and retest
the vehicle. If the fault is still present go to 1.
15 Remove the BOB and refit the DCU. Use the
LASER 2000 to read the DYNAMIC DISPLAY values;
ROTOR DELAY A (feed) and ROTOR DELAY B (drain)
and note the values. ROTOR DELAY A should be less
than 35 and ROTOR DELAY B less than 50.
If there are no faults, go to 17, otherwise, go to 16.
16 If either of the DELAYS is above limits, the
relevant actuator is at fault. Repair the pump and retest
the vehicle. If the fault is still present go to 1.
17 Clear any fault codes present. Retest the vehicle and
if the fault is still present, change the DCU.
4EPIC DI Engine Management System – Diagnostics Coded Faults
11
1173 PUMP ROTOR CALIBRATION
This fault code will be displayed if:
i) In the ‘pre–crank’ state (‘key–on’), the DCU
indicates when the rotor sensor is above or below
limits.
NOTE At rest, the rotor sensor core is on its end
stop (maximum fuel).
ii) In the ‘engine running’ state, the DCU indicates, in
the zero fuel condition, that the rotor sensor is
outside an allowed range.
NOTE When the pedal is fully released, the rotor
is driven to the zero fuel end–stop.
The cause may be due to the following:
• A fault in the harness or the rotor sensor
connector
• Roller shoes tight in the drive shaft
• Misalignment of the drive shaft and rotor
The vehicle will show symptoms of greatly reduced power
and impaired driveability.
For intermittent faults go to test 1.
For current faults go to test 6.
Fit the BOB and connect the Laser 2000.
1 Stop the engine. When it is stationary, key–on and
note the ROTOR FEEDBACK value.
If the FEEDBACK value is within 212 to 240 go to
test 2.
If it is outside those limits go to 3.
2 Whilst agitating the harness at the pump and the
DCU, note any ROTOR FEEDBACK variation.
If the ROTOR FEEDBACK differs by more than +/– 2
go to test 5. If inside limits, go to test 6.
3 Ensure that the key switch is off. Rotate the engine
clockwise manually through 90_, using a spanner or
wrench on the front pulley bolt, and note the ROTOR
FEEDBACK value.
If the FEEDBACK value has changed by more than
5 from that noted in test 1, go to 4. If no change, go
to test 6.
4 Fault with the pump rotor. Repair the pump and
retest the vehicle.
5 Start, stop and ‘key–on’ a couple of times and note
the ROTOR FEEDBACK at ‘key–on’.
If the ROTOR FEEDBACK varies by more than +/– 5
go to 4. If the FEEDBACK does not vary, go to
test 6.
6 Drive the vehicle in third gear, down–hill. With
the vehicle driving the engine (foot off the pedal), note
the ROTOR FEEDBACK in this condition.
If the value is less than 5 go to 8. If the value is
greater than 4, go to 7.
7 Fault with the pump rotor. Repair the pump and retest.
8 Ensure that the key–switch is off. Remove the
connector from the DCU and check pins for damage,
incorrect engagement etc. If there are no faults, go to
10, otherwise, go to 9.
9 If damage is apparent, repair it and retest the vehicle.
10 Fit the BOB. Test and record values for:
a) Open–circuit
b) Short–circuit
c) Short–to–ground
d) Short to + BAT
on BOB pins 9 & 6 (see table 1 in Section 5.5 for
Rotor Sensor resistance values).
If there are no faults, go to 11, otherwise, go to 12.
11 Remove the BOB and reconnect the harness to
the DCU. Clear any fault codes and retest the vehicle.
If the fault still occurs change the DCU.
12 Remove the connector from the pump and check pins
for damage, incorrect engagement etc. If there are no
faults, go to 14, otherwise go to 13.
13 If damage is apparent, repair it and retest the vehicle.
14 Fit the BOB with the adaptor cable to the pump. Test
and record values for:
a) open–circuit
b) short–circuit
on BOB pins 14 and 17 (see table 1 in Section 5.5
for Rotor Sensor resistance values).
If test 14 is correct go to test 16, if incorrect go to 15.
If both tests 10 and 14 are correct go to 17.
15 Fault with rotor sensor assembly. Repair the pump
and retest the vehicle.
16 Fault with the vehicle harness. Repair it and retest
the vehicle.
17 Mechanical fault with the pump. Repair the pump
and retest the vehicle.
EPIC DI Engine Management System – DiagnosticsCoded Faults4
12
4.2 ELECTRIC SHUT–OFF SOLENOID (ESOS)
Connector Applicable code: 1170
Description of Operation:
The ESOS plunger is held closed by a spring. Lifting of
the plunger requires energisation of the ESOS coil. The
supply to the ESOS is ‘pulse–width modulated’ (PWM).
See Section 5.7 for an explanation of ‘PWM’. The ratio of
‘on’ to ‘off’ periods is varied by the DCU to provide the
current level required for the three modes in which the
ESOS operates.
The modes are:
a) Engine stationary, key–switch on. The DCU supplies
a small current to check the integrity of the ESOS
circuit.
b) When, during cranking, the DCU is satisfied that
the rotor is in the position required for starting it will
supply maximum current for rapid opening of the
ESOS.
c) When the ESOS is fully open, less current is required
to maintain that position. The DCU will reduce the
current accordingly.
Low resultant current
(testing & precrank)
Max. resultant current
(lifting)
Medium resultant current
(holding)
A045-010
To minimise black smoke on start–up above 0_C, the
ESOS is not operated until the pump rotor is in the correct
position for starting. Below 0_C, the ESOS is operated
instantly on start–up.
Functions and Components involved:
Transfer pressure
Backleak value
ESOS
DCU
Harness
Failure may be due to one or more of the following:
Restricted fuel supply to the pump
Restricted backleak return to the filter
Air venting through the system after a filter change.
TP regulator fault
TP cassette fault
ESOS fault
Harness/connector fault
1170 ESOS DRIVE CURRENT
The vehicle symptoms are that the engine will not start, it
stops, or it will not restart. If the engine does restart, only
limited power 12 will be available
Perform the following:
1 If the engine stops and will not restart, go to 8.
If the engine stops and can be restarted, but runs
either erratically with stalling or with reduced power,
go to 2.
38
47
48
3
2
DCU
Connector
Pins
Pump
Connector
Pins
ESOS
A045-011
2 Connect the LASER 2000, start and idle the engine.
Set the LASER 2000 to DIAGNOSTICS
MENU/ACTUATOR TESTS/KEY ON ENGINE
RUNNING/ENGINE SHUT OFF SOLENOID. Operate
the ESOS by pressing STOP (F2). Restart the engine
and allow it to idle. If in test 2 the engine does not stop,
go to 3. If in test 2 the engine stops instantly but will not
restart or starts sluggishly, go to test 4.
3 Fault with the ESOS. Repair it and retest the vehicle.
4 Fit a pressure/vacuum gauge in the fuel feed line to
the pump and run the engine. In neutral gear and
full throttle, pressure should read positive, approx.
0.2 bar when warm and less when cold.
If test 4 is correct go to 6, if incorrect go to 5.
5 If the pressure reading is below zero (vacuum),
check the fuel supply circuit from tank to pump e.g filter,
lift pump, collapsed fuel tank, pipes etc. and rectify.
Retest.
6 Remove the 24 mm A/F blanking plug, situated beside
the inlet and outlet connectors, and fit adaptor 6408–64,
with an O–ring. Fit, preferably, a 0 to 14.0 bar pressure
gauge. At idle, the transfer pressure should read
between 4.8 to 6.9 bar.
If test 6 is correct go to 8, if incorrect go to 7.
7 If the pressure is low then either the transfer
pressure (TP) regulator is stuck open (see Workshop
Manual XNB100 for repair) or the transfer pump is worn
or broken (remove the pump and repair). If the TP is
high, the TP regulator is stuck closed (see Workshop
Manual XNB100 for repair). Remove the TP adaptor,
refit the TP plug (ensure that the O–ring is fitted) and
tighten it to 23 Nm (204 Ib in). Retest the vehicle.
8 Ensure that the key–switch is off. Remove the
connector from the DCU and check pins for damage,
backing–off etc. If test 8 shows no fault go to 10, if
incorrect go to 9.
9 If damage is apparent, repair it and retest the vehicle.
4EPIC DI Engine Management System – Diagnostics Coded Faults
13
10 Fit the BOB. Test and record resistance values for:
a) Open–circuit
b) Short–circuit
c) Short–to–ground d) Short to +BAT
on BOB pins 38 & 47 (see table 1 Section 5.5 for
ESOS resistance value). If test 10 is correct go to 11,
if incorrect go to 12.
11 Remove the BOB, reconnect the harness to the DCU
and retest the vehicle. If the fault is still present
change the DCU.
12 Remove the connector from the pump and check
pins for damage, backing–off etc. If test 12 shows no
fault go to test 14, if incorrect go to test 13.
13 If damage is apparent, repair it and retest the
vehicle.
14 Fit the BOB with adaptor cable to pump connector.
Test and record resistance values for:
a) Open–circuit
b) Short–circuit
on BOB pins 3 & 2 (see table 1 in Section 5.5 for
ESOS resistance value). If test 14 is correct go to 16,
if incorrect go to 15.
15 Fault with the ESOS. Repair the pump and retest
the vehicle. If the fault still present go to 1.
16 Fault with the vehicle harness. Repair it and retest
the vehicle. If the fault is still present go to 1.
EPIC DI Engine Management System – DiagnosticsCoded Faults4
14
4.3 PUMP CAM CONTROL AND
PUMP TEMPERATURE SENSOR
Applicable codes : 1174, 1175, 1176, 0185, 1185, 1186
Description of Operation:
The advance piston is engaged with the cam advance
screw and rotates the cam ring. Injection timing is
determined by the position of the cam ring, which is
controlled by the DCU–driven cam actuator (CAM
DEMAND). The position of the cam is determined from
the cam sensor feedback (CAM FEEDBACK).
The current flowing through the actuator coil determines
how far the plunger opens. The current is derived from a
PWM supply (see Section 5.6 for explanation of PWM).
The DCU controls the cam position in such a way as to
reduce any difference between CAM DEMAND and CAM
FEEDBACK.
To resist ‘cam reaction’ during the pumping cycle, the cam
ring is locked hydraulically by the lock–off ball assemblies.
A small orifice is positioned in parallel with the lock–off
assembly to allow the advance piston to retard, when
required, during the non– pumping part of the cycle.
The pump temperature sensor is built into the cam
position sensor and functions independently of it.
Functions and Components involved:
Transfer pressure
Pump cam control actuator
Pump cam position sensor
Pump cam position sensor core
Pump temperature sensor
Cam advance screw
Cam position sensor core drive pin.
Advance piston (includes control orifice)
Advance piston spring Lock–off assemblies and
orifice plug
Backleak
DCU
Harness
1174 PUMP CAM POSITION
This fault code will be displayed if the DCU identifies
either:
i) That the sensor resistance is outside limits e.g.
open–circuit, short–circuit to ground or +BAT.
ii) That there is no feedback to the DCU.
The vehicle will show symptoms of reduced power and
impaired driveability.
Perform the following:
1 Ensure that the key–switch is off. Remove the
connector from the DCU and check pins for damage,
backing–off etc. If there are no faults, go to 3,
otherwise, go to 2.
2 If damage is apparent, repair it and retest vehicle.
18
19
6
43
47
48
19
15
18
12
16
2 1
3
1 Cam sensor
2 Pump temperature sensor
3 Cam advance actuator
DCU
Connector
Pins
Pump
Connector
Pins
A045-012
3 Fit the BOB. Test and record resistance values for:
a) Short–circuit
b) Open–circuit
c) Short–to–ground
d) Short to +BAT
on pins 6 & 18 (see table 1 in Section 5.5 for Cam
Sensor resistance value). If there are no faults, go to 4,
otherwise, go to 5.
4 Remove the BOB and reconnect the harness to
the DCU. Clear any fault codes and retest the vehicle.
If the fault still occurs change the DCU.
5 Fit the BOB to the pump using the adaptor cable.
Test and record resistance values for: a) Open–circuit
b) Short–circuit on BOB pins 18 & 19 (see table 1 in
Section 5.5 for Cam sensor resistance value). If no fault
is apparent go to 7, if faulty then go to 6.
6 Fault with the cam sensor assembly. Repair the
pump and retest the vehicle.
7 Fault with the vehicle harness. Repair it and retest the
vehicle.
4EPIC DI Engine Management System – Diagnostics Coded Faults
15
1175 PUMP CAM CONTROL
This code will also be displayed if the cam ring ‘drifts’ from
its CAM DEMAND position.
Failure may be due to one or more of the following:
Restricted fuel supply to the pump
Restricted backleak return to the filter
Harness/connector fault
TP regulator fault
Transfer pump assembly fault
Actuator seat worn
Air venting through the fuel system after filter
change.
Lock–off assemblies worn, damaged, missing,
or incorrectly assembled.
Perform the following:
1 Fit a pressure/vacuum gauge in the fuel feed line to
the pump and run the engine. In neutral gear and at
full throttle, pressure should read positive (approx.
0.2 bar when warm and less when cold).
If there are no faults, go to 3, otherwise, go to 2.
2 If the pressure reading is below zero (i.e. a
vacuum), check the fuel supply circuit from the tank
to the pump e.g filter and lift pump, and for imploded
fuel tank or pipes etc., and rectify. Retest.
3 Remove the 24 mm A/F blanking plug, situated
beside the inlet and outlet connectors, and fit adaptor
6408–64, complete with an O–ring. Fit, preferably, a
0 to 14.0 bar pressure gauge. At idle, the transfer
pressure should read between 4.8 to 6.9 bar.
If there are no faults, go to 5, otherwise, go to 4.
4 If the pressure is low either the TP regulator is
stuck open (see SIN D047 for repair) or the transfer
pump is worn or broken (replace the pump). If the TP
is high, the TP regulator is stuck closed (see SIN
D047 for repair). Remove the TP adaptor, refit the TP
plug (ensure that the O–ring is fitted) and tighten it to
23 Nm (204 Ib in).
Retest the vehicle.
5 Ensure that the key–switch is turned off. Connect
the LASER 2000, turn the key–switch on, and set
the LASER 2000 to ACTUATOR TESTS/ PUMP
CAM ACTUATOR. Disconnect the harness from the
pump. Using the DOWN (F2) key, set PUMP CAM
PWM DRIVE to zero. Using the UP (F4) key set
PUMP CAM PWM DRIVE to 1000. Using a
multimeter set to milliamps (mA), measure and
record the current on the harness connector pins 12
and 16.
If the value is between 70 and 80 mA, go to 6. If the
value is outside these limits, go to 7.
6 Fault with the pump. Rectify it and retest.
7 Ensure that the key–switch is off. Remove the
connector from the DCU and check both DCU and pump
connector pins for damage, backing–off etc. If there are
no faults, go to 9, otherwise, go to 8.
8 If damage is apparent, repair it and retest the vehicle.
9 Fit the BOB. Test and record resistance values for:
a) Open–circuit
b) Short–to–ground
c) Short to +BAT
between BOB pin 43 and harness connector pin 12,
and BOB pin 47 and harness connector pin 16.
If there are no faults, go to 10, otherwise, go to 11.
10 DCU fault. Replace it and retest the vehicle.
11 Harness fault. Repair it and retest the vehicle.
NOTE If a LASER 2000 is not available, carry
out continuity checks on:
i) DCU connector pins 43 and 47, via the
BOB,
ii) Pump connector pins 12 and 16 (see table
1 in Section 5.6 for the Cam actuator
resistance value)
1176 PUMP CAM CALIBRATION
This fault code will be displayed if, in the ‘pre–crank’ state
(key–switch on), the DCU identifies that the cam calibration is
above or below limits. Note that, at rest, the advance piston is
on its end stop.
The vehicle symptoms are reduced power and impaired
driveability.
Perform the following:
1 When the key–switch is turned on, CAM
FEEDBACK should be between 8 and 16.
If CAM FEEDBACK value is outside limits, go to test 2.
If CAM FEEDBACK value is inside limits, go to 4.
2 Start the engine, stop it and turn the key–switch on
twice, noting the CAM FEEDBACK values.
If the value changes to that in test 1, go to 3.
If the value does not change, go to 4.
3 Pump sensor, core, or cam ring fault.
4 Ensure that the key–switch is off. Remove the
connector from the DCU and check the pins for damage,
backing– off etc. If there are no faults, go to 6, otherwise,
go to 5.
5 If damage is apparent, repair it and retest the vehicle.
EPIC DI Engine Management System – DiagnosticsCoded Faults4
16
6 Fit the BOB. Test and record resistance values for:
a) Open–circuit
b) Short–circuit
c) Short–to–ground
d) Short to +BAT
on BOB pins 6 & 18 (see table 1 in Section 5.5 for
Cam sensor resistance values). If there are no faults,
go to 8, otherwise, go to 7.
7 Remove the BOB and reconnect the harness to
the DCU. Clear any fault codes and retest the
vehicle. If the fault still occurs change the DCU.
8 Remove the connector from the pump and check
pins for damage, backing–off etc. If there are no
faults, go to 10, otherwise, go to 9.
9 If damage is apparent, repair it and retest the vehicle.
10 Fit the BOB to the pump using the adaptor cable.
Test and record resistance values for:
a) Open–circuit
b) Short–circuit
between BOB pins 18 and 19 (see table 1 in
Section 5.5 for Cam sensor resistance value). If
there are no faults, go to 12, otherwise, go to 11.
11 Fault with the cam sensor assembly. Repair the
pump and retest the vehicle.
12 Fault with the vehicle harness. Repair it and retest
the vehicle.
0185 PUMP TEMPERATURE
1185 PUMP TEMPERATURE HIGH
1186 PUMP TEMPERATURE LOW
These fault codes will be displayed if the DCU identifies
that the sensor is outside resistance limits.
The sensor is a negative temperature coefficient
thermistor (its resistance is inversely proportional to
temperature) i.e. Iow resistance = high temperature, high
resistance = low temperature. An open–circuit failure
(infinite resistance) will display a low temperature value
and a short–circuit failure (low resistance) will display a
high temperature value.
The vehicle will show symptoms of slightly reduced
power.
Perform the following:
1 Ensure that the key–switch is off. Remove the
connector from the DCU and check the pins for
damage, backing– off etc.
If there are no faults, go to 3, otherwise, go to 2.
2 If damage is apparent, repair and retest vehicle.
3 Fit the BOB. Test and record resistance values for:
a) Open–circuit
b) Short–circuit
c) Short–to–ground
d) Short to +BAT
on pins BOB 6 & 19 (see table 1 in Section 5.5 for
pump temperature sensor resistance values). If there
are no faults, go to 4, otherwise, go to 5.
4 Remove the BOB and reconnect the harness to
the DCU. Clear any fault codes and retest the vehicle. If
the fault still occurs change the DCU.
5 Remove the connector from the pump and check
the pins for damage, backing–off etc. If there are no
faults, go to 7, otherwise, go to 6.
6 If damage is apparent, repair it and retest the vehicle.
7 Fit the BOB to the pump using the adaptor cable.
Test and record resistance values for:
a) Open–circuit
b) Short–circuit
on BOB pins 15 & 18 (see table 1 in Section 5.5 for
pump temperature sensor resistance values).
If test 7 shows no fault go to 9, if it is incorrect go to 8.
8 Fault with the cam sensor assembly. Repair the
pump and retest the vehicle.
9 Fault with the vehicle harness. Repair it and retest
the vehicle.
4EPIC DI Engine Management System – Diagnostics Coded Faults
17
4.4 CALIBRATION RESISTOR
Applicable codes : 11 90
Description of Operation:
The calibration resistor is located in the pump connector.
A range of resistances is used for production fuel setting.
The vehicle symptom is a slight loss of power.
Components involved:
Calibration resistor pump connector
(within the harness)
DCU
1190 CALIBRATION RESISTOR
This fault code will be displayed if either:
i) The measured value lies outside the tolerance band
ii) Apparent nominal resistor value differs from
that measured on ‘key–on’.
Perform the following:
Record the value of the calibration resistor which is fitted,
by referringtotheLASER2000/DlAGNOSTlCSMODE/DYN
AMlC DISPLAY / CALIBRATION. (Refer to table 2 in
Section 5.5 for Calibration Resistor values.)
1 Ensure that the key–switch is off. Remove the
connector from the DCU and check the pins for
damage, backing–off etc.
If there are no faults, go to 3, otherwise, go to 2.
2 If damage is apparent, repair it and retest the
vehicle.
3 Fit the BOB. Test and record resistance values for:
a) Open–circuit
b) Short–circuit
c) Short–to–ground
d) Short to +BAT
on BOB pins 16 & 50. (See table 2 in Section 5.5
for Calibration Resistor values.) If there are no faults,
go to 4, otherwise, go to 5.
4 Remove the BOB and reconnect the harness to
the DCU. Clear any fault codes and retest the
vehicle. If the fault still occurs change the DCU.
5 Remove the connector from the pumpa nd check
pins for damage, backing–off etc. If there are no
faults, go to 7, otherwise, go to 6.
6 If damage is apparent, repair it and retest the
vehicle.
16
50
8
9
DCU
Connector
Pins
Pump
Connector
PINS
Vehicle harness
CALIBRATION
RESISTOR
A045-013
7 Fit the BOB to the pump using the adaptor cable.
Test and record resistance values for:
a) Open–circuit
b) Short–circuit
Between BOB pins 9 & 8 (using data from item 3
above, see table 2 in Section 5.6 for value). If there are
no faults, go to 9, otherwise, go to 8.
8 Fault with the connector assembly. Repair the pump
and retest the vehicle.
9 Fault with the vehicle harness. Repair it and retest
the vehicle.
EPIC DI Engine Management System – DiagnosticsCoded Faults4
18
4.5 PUMP SPEED SENSOR
(DRIVE SHAFT POSITION)
Applicable codes : 1644, 1189
Description of Operation:
The pump speed sensor is a ‘Hall Effect’ device, note that
the ‘period’ is the time between identical points on
successive cycles. There are four pulses per pump
revolution.
The vehicle symptom is loss of power (reduced fuel).
Components involved:
Pump speed (drive shaft position) sensor
Harness and connectors
DCU
Test Equipment:
Use the static timing device YWB317 and
the specified BOB.
1644 PUMP SPEED SENSOR
1189 PUMP SPEED LOST
These faults will be displayed if either:
i) The period is not within the allowed limit, or
ii) No pump speed signal is present.
The sensor detects the passage of ‘flags’ on the pump
timing ring and supplies to the DCU a signal which is
interpreted to provide the following:
i) Pump speed.
ii) Drive shaft angular position (basic timing).
Perform the following:
1 Ensure that the key–switch is off. Remove the
connector from the DCU and check the pins for
damage, backing– off etc.
If there are no faults, go to 3, otherwise, go to 2.
2 If damage is apparent, repair it and retest the
vehicle.
3 Fit the BOB. Plug the timing device into the BOB in
the following order:
Red wire to pin 47
Black wire to pin 50
White wire to pin 7.
Crank the engine and note if the red and green LEDs
on the timing device flash alternately and evenly.
NOTE Every fourth pair of flashes will be slightly
shorter than the others.
If test 3 is correct go to 4, if it is incorrect i.e. uneven
or no flashes, go to 5.
DCU
Connector
Pins
Pump
Connector
Pins
Vehicle
harnessRed
White
Black
PUMP
SPEED
SENSOR
STATIC
TIMING
DEVICE
YWB317
47
50
7
1
4
5
A045-024
4 Remove the BOB and reconnect the harness to
the DCU. Clear any fault codes and retest the vehicle.
If the fault still occurs change the DCU.
5 Remove the connector from the pump and check
the pins for damage, backing–off etc.
If there are no faults, go to 7, otherwise, qo to 6.
6 If damage is apparent, repair it and retest the vehicle.
7 Fit the BOB to the pump connector with the
adaptor cable. Plug the timing device into the BOB in
the following order:
Red wire to pin 1
Black wire to pin 4
White wire to pin 5.
Crank the engine and note if the red and green LED’s
on the timing device flash alternately and evenly.
NOTE Every fourth pair of flashes will be slightly
shorter than the others.
If test 7 is correct go to 9, if it is incorrect go to 8.
8 Fault with the pump speed sensor. Repair the pump
and retest the vehicle.
9 Fault with the vehicle harness. Repair it and retest
the vehicle.
4EPIC DI Engine Management System – Diagnostics Coded Faults
19
4.6 PEDAL SENSOR CONTROL
Applicable codes : 1180, 1181, 1182, 1183, 1184,
1252, 1253, 1254, 1255, 1256,
1257, 1258
Description of Operation:
The assembly comprises:
A ‘reverse’ twin–pack potentiometer (PDS1 &
PDS2)
A ‘low pedal–demand’ (idling position) switch
(LPDS)
A ‘high pedal–demand’ (kick–down position) switch
(HPDS)
NOTE A ‘reverse twin–pack potentiometer’ comprises
a pair of potentiometers mounted on the same
shaft and arranged so that when one of the pair
presents a high voltage at its output, the other
presents a low voltage.
The two switches are for validating the pedal sensor
values. With no throttle response i.e. engine stationary or
at idle, LPDS is open and HPDS is closed. At
part–throttle, both switches are closed. At full throttle,
LPDS is closed and HPDS is open.
HPDS is also used to initiate automatic gearbox
kick–down.
The potentiometer assembly is part of the LDV pedal
assembly and is non–repairable. It must be replaced if
faulty.
Components involved:
Pedal assembly
Harness and plugs
DCU
1180 PEDAL DEMAND SENSOR FAILED
1181 PEDAL – PDS1 HIGH
1182 PEDAL – PDS1 LOW
1183 PEDAL – PDS2 HIGH
1184 PEDAL – PDS2 LOW
PEDAL – CORRELATION BETWEEN PDS1 &
LPDS HIGH
1252
PEDAL – CORRELATION BETWEEN PDS1 &
LPDS LOW
1253
PEDAL – CORRELATION BETWEEN PDS2 &
LPDS HIGH
1254
PEDAL – CORRELATION BETWEEN PDS2 &
LPDS LOW
1255
PEDAL – CORRELATION BETWEEN PDS1 &
HPDS
1256
PEDAL – CORRELATION BETWEEN PDS2 &
HPDS
1257
PEDAL – CORRELATION BETWEEN PDS1 &
PDS2
1258
EPIC DI Engine Management System – DiagnosticsCoded Faults4
20
Perform the following:
1 Ensure that the key–switch is off. Remove the
connector from the DCU and check the pins for
damage, backing–off etc.
If there are no faults, go to 3, otherwise, go to 2.
2 If damage is apparent, repair it and retest the
vehicle.
3 Fit the BOB to the harness. With the pedal released
and later fully depressed record resistance values
for:
a) Short–to–ground
b) Short to +BAT
on BOB pins 8, 10, 29, 30, 33, 50 and 51.
If there are no faults, go to 6, otherwise, go to 4.
4 Remove the connector from the sensor and
repeat test 3.
If the fault is still apparent go to 5, otherwise, go to 6.
5 Harness faulty. Repair and retest the vehicle.
6 Check for correct operation of the HPDS and
LPDS switches.
Reconnect the harness to the sensor and measure
the resistance across the BOB terminals listed in the
table below, recording the results.
Pedal Position BOB– Result (ideal)
Released 8
30
50
50
open–circuit
short–circuit
Depressed
fully
8
30
50
50
1.0 k to 5.5 k Ohms
short–circuit
If the test results differ from those listed go to 9,
otherwise, go to 7.
7 Check for correct operation of the pedal sensor
tracks. Measure the resistance across the BOB pins
listed in the table below and record values.
Pedal Position Grop BOB pins
Released 1a
1b
33
51
10
29
2a
2b
10
29
51
33
Depressed 3a
3b
33
51
10
29
4a
4b
10
29
51
33
If the following pairs of results: 1 a and 4a, 1 b and 4b,
2a and 3a, 2b and 3b differ by more than 400 Ω go to
9. Otherwise go to 8.
8 Reconnect the harness to the DCU. Connect the
LASER 2000 and turn the key–switch on (do not start
the engine). Set the LASER 2000 to read DYNAMIC
DISPLAY items:
PEDAL POSN 1 and
PEDAL POSN 2, and record values for:
i) Pedal position 1: (a) foot–off, and (b) fully
depressed
ii) Pedal position 2: (a) foot–off, and (b) fully
depressed Also, note if the values ‘jump’, whilst
moving the pedal position slowly.
If the values 1 ) (a) and 2) (a) are outside 7% to 11
%, and 1 ) (b) and 2) (b) are outside 87% to 93%, or
the values change erratically (jump), go to 9. If
otherwise, go to 10.
9 Fault with the pedal sensor assembly. Replace
the assembly and retest the vehicle.
10 Clear all the fault codes and re–test the vehicle. If the
fault still occurs go to 1.
4EPIC DI Engine Management System – Diagnostics Coded Faults
21
4.7 ENGINE SPEED SENSOR
(CRANKSHAFT POSITION)
Applicable codes: 0335, 0336 Description of Operation:
The engine speed sensor is an inductive device. The
sensor detects the passage of holes drilled in the engine
flywheel and supplies to the DCU a signal which is
interpreted to provide:
i) Engine speed
ii) Engine crankshaft angular position
The vehicle symptom is loss of power (reduced fuel).
Components involved:
Engine speed sensor
Harness and connectors
DCU
These faults will be displayed if:
i) The interval between sequences of pulses is
corrupted
ii) The interval between pulses is too small
iii) No engine speed signal is present
0335 ENGINE SPEED SENSOR
0336 ENGINE SPEED LOST
Perform the following:
1 Check to see if a shim is fitted between the sensor
body and the bell housing.
If a shim is fitted go to 3, if not go to 2.
2 Clean the mounting faces, fit a new shim, refit the
sensor to the engine, retest the vehicle.
3 Ensure that the key–switch is off. Remove the
connector from the DCU and check the pins for
damage, backing–off etc.
If there are no faults, go to 5, otherwise, go to 4.
4 If damage is apparent, repair it and retest the
vehicle.
5 Fit the BOB. Test and record resistance values for:
a) Open–circuit
b) Short–circuit
c) Short–to–ground
d) Short to +BAT
on BOB pins 14 & 53 (see table 1 in Section 5.5 for
the Engine Speed sensor resistance value). Also,
test for open–circuit between BOB pins 3 & 14 and 3
& 53.
If no fault is apparent go to 6, if the screening tests
are incorrect go to 7, if other tests incorrect go to 8.
6 Remove the BOB and reconnect the harness to
the DCU. Retest the vehicle.
7 Fault with the harness screening. Repair it and
retest.
14
DCU
Connector
Pins
Sensor
Connector
Pins
Vehicle harness
ENGINE SPEED/
CRANKSHAFT
POSITION SENSOR
Screen
53
3
A045-019
8 Remove the connector from the sensor and check
the pins for damage, backing–off etc.
If no fault is apparent go to 10, if it is incorrect go to 9.
9 If damage is apparent, repair it and retest the vehicle.
10 Test and record resistance values for:
a) Open–circuit
b) Short–circuit
on the sensor pins (see table 1 in Section 5.5 for
engine speed sensor resistance value).
If there are no faults, go to 12, otherwise, go to 11.
11 Fault with the sensor. Replace it and retest the vehicle. If
the fault is still present go to 1.
12 Fault with the vehicle harness. Repair it and retest
the vehicle. If fault is still present go to 1.
EPIC DI Engine Management System – DiagnosticsCoded Faults4
22
4.8 ENGINE COOLANT
TEMPERATURE SENSOR
Applicable codes: 0116, 0117, 0118
Description of Operation:
The sensor is a negative temperature coefficient
thermistor (its resistance is inversely proportional to
temperature) i.e. Low temperature = high resistance, high
temperature = low resistance. The DCU will vary the
amount of fuel injected and injection timing, dependent
upon engine temperature.
This fault code will be displayed if the DCU identifies that
the sensor is outside resistance limits.
The vehicle symptom is slightly reduced power.
Components involved:
Engine coolant temperature sensor
Harness and plugs
DCU
0116 COOLANT TEMPERATURE
0117 COOLANT TEMPERATURE LOW
0118 COOLANT TEMPERATURE HIGH
Perform the following:
1 Ensure that the key–switch is off. Remove the
connector from the DCU and check the pins for
damage, backing–off etc.
If there are no faults, go to 3, otherwise, go to 2.
2 If damage is apparent, repair it and retest the
vehicle. Fit the BOB. Test and record resistance
values for:
3 Test and record resistance values for:
a) Open–circuit
b) Short–circuit
c) Short–to–ground
d) Short to +BAT
on BOB pins 17 & 50 (see table 3 in Section 5.5 for
the Engine coolant temperature sensor resistance
values).
If there are no faults, go to 4, otherwise, go to 5.
4 Remove the BOB and reconnect the harness to
the DCU. Clear any fault codes and retest the
vehicle. If the fault still occurs change the DCU.
5 Remove the connector from the sensor and check
the pins for damage, backing–off etc.
If there are no faults, go to 7, otherwise, go to 6.
6 If damage is apparent, repair it and retest the vehicle.
17
1
2
50
DCU
Connector
Pins
Sensor
Connector
Pins
Vehicle
harness
ENGINE COOLANT
TEMPERATURE
SENSOR
A045-018
7 Test and record resistance values for:
a) open–circuit
b) short–circuit
on sensor pins 1 & 2 (see table 1 in Section 5.5 for
the Engine coolant temperature sensor resistance
values).
8 Fault with the sensor. Replace it and retest the vehicle.
9 Fault with the vehicle harness. Repair it and retest
the vehicle.
4EPIC DI Engine Management System – Diagnostics Coded Faults
23
4.9 AIR CHARGE TEMPERATURE SENSOR
Applicable codes: 0110, 0112, 0113
Description of Operation:
The sensor is a negative temperature coefficient
thermistor. (Its resistance inversely proportional to
temperature) i.e. Iow temperature = high resistance, high
temperature = low resistance. The DCU will vary the
amount of fuel injected and injection timing, dependent
upon air charge temperature.
This fault code will be displayed if the DCU identifies that
the sensor is outside resistance limits.
The vehicle symptom is slight loss of power (reduced
fuel).
Components involved:
Air charge temperature sensor
Harness and connectors
DCU
0110 AIR TEMPERATURE
0112 AIR TEMPERATURE LOW
0113 AIR TEMPERATURE HIGH
Perform the following:
1 Ensure that the key–switch is off. Remove the
connector from the DCU and check the pins for
damage, backing–off etc.
If there are no faults, go to 3, otherwise, go to 2.
2 if damage is apparent, repair it and retest the vehicle.
3 Fit the BOB. Test and record resistance values for:
a) open–circuit
b) short–circuit
c) short–to–ground
d) short to +BAT
on BOB pins 15 & 50 (see table 4 in Section 5.5
for the air charge temperature sensor resistance
values).
If there are no faults, go to 4, otherwise, go to 5.
4 Remove the BOB and reconnect the harness to
the DCU. Clear any fault codes and retest the
vehicle. If the fault still occurs change the DCU.
5 Remove the connector from the sensor and check
the pins for damage, backing–off etc.
If there are no faults, go to 7, otherwise, go to 6.
6 If damage is apparent, repair it and retest the
vehicle.
50
1
2
15
DCU
Connector
Pins
Sensor
Connector
Pins
Vehicle harness
AIR CHARGE
TEMPERATURE
SENSOR
A045-017
7 Test and record resistance values for:
a) Open–circuit
b) Short–circuit
on sensor pins 1 & 2. Air charge temperature
sensor resistance values can be found in section 5.5.
If there are no faults, go to 9, otherwise, go to 8.
8 Fault with the sensor. Replace it and retest the vehicle.
9 Fault with the vehicle harness. Repair it and retest
the vehicle.
EPIC DI Engine Management System – DiagnosticsCoded Faults4
24
4.10 EXHAUST GAS RECIRCULATION (EGR)
Applicable codes : 1402, 0401, 0402, 0400, 1193,
0122,0123,1122,1123,1224,1125
Description of Operation:
The LDV EGR system is designed to reduce nitrous oxide
(NOx) emissions in the exhaust gases by limiting
the amount of oxygen available for combustion at
part–load. Reduction of oxygen is achieved by the
admission of a controlled amount of exhaust gas into the
engine inlet manifold, thus limiting combustion
temperature, which is a controlling factor in the formation
of NOx.
The system has a Current–to–Vacuum Transducer
(CVT), controlled by a PWM current (EGR DEMAND) from
the DCU, and which applies a variable vacuum to an EGR
valve (connected to the exhaust manifold), and a throttle
valve which is in the engine air intake system after the
turbocharger compressor. The CVT is connected to the
vehicle braking system vacuum Supply.
A position sensor built–in to the EGR valve provides a
signal to the DCU (EGR VLVE POSN).
Model year 1997 vehicles have a system which uses an
EVR instead of the CVT. These components are not
interchangeable.
See section 5.6 for an explanation of ‘PWM’.
Components involved:
CVT
Vacuum supply to CVT
EGR valve
EGR valve position sensor
Pipes
DCU
Harness and connectors
1402 EGR VALVE POSITION SENSOR
0401 EGR SENSOR LOW
0402 EGR SENSOR HIGH
These fault codes will be displayed if the DCU identifies
that either:
i) The sensor value is above ‘high limit’ or below ‘low
limit’.
ii) EGR valve position does not show movement in
th required direction.
Perform the following:
1 Check the vacuum supply (engine at idle) to the CVT
or EVR by removing the pipe to the EGR valve, and
noting if the valve makes a click when it closes.
Check that all pipes are clear and not damaged.
If there are no faults, go to 3, otherwise, go to 2.
2 If damage is apparent, repair it and retest.
35
2
52
40
47
1
3
2
1-
2+
DCU
connector
pins
Sensor
connector
pins
48
Vehicle harness
EGR VALVE POSITION SENSOR
EGR CURRENT-TO-VACUUM
TRANSDUCER (CVT)
A045-015
4EPIC DI Engine Management System – Diagnostics Coded Faults
25
3 Ensure that the key–switch is off. Remove the
connector from the DCU and check the pins for
damage, backing– off etc.
If no fault is apparent go to 5, if there is a fault go to
4.
4 If damage is apparent, repair it and retest the
vehicle.
5 Fit the BOB and disconnect the boost pressure
sensor. Test and record resistance values for:
a) Open–circuit
b) Short–circuit
c) Short–to–ground
d) Short to +BAT
on BOB pins 35 & 52, and 2 & 52 (see table 1 in
Section 5.5 for External supply EGR position, and
EGR position sensor resistance values).
If no fault is apparent go to 6, if there is a fault go to
7.
6 Remove the BOB and reconnect the harness to
the DCU. Clear any fault codes and retest the
vehicle. If the fault still occurs change the DCU.
7 Remove the connector from the EGR valve
position sensor and check the pins for damage,
backing–off etc. If there are no faults, go to 9,
otherwise, go to 8.
8 If damage is apparent, repair it and retest the vehicle.
9 Test and record resistance values for:
a) Open–circuit
b) Short–circuit
on pins 1 & 2, and 3 & 2 (see table 1 in Section 5.5
for External Supply, EGR position and EGR Position
Sensor resistance values).
If there are no faults, go to 11, otherwise, go to 10.
10 Fault with the EGR position sensor. Repair it and
retest the vehicle.
11 Fault with the vehicle harness. Repair it and retest
the vehicle.
0400 EGR CONTROL
1193 EGR DRIVE OVERCURRENT
0122 THROTTLE VALVE LOW
0123 THROTTLE VALVE HIGH
1122 THROTTLE CALIBRATION LOW
1123 THROTTLE CALIBRATION HIGH
1224 THROTTLE CALIBRATION
1125 THROTTLE POSITION FAULT
Fault code 0400 will be displayed because:
i) The EGR VLVE POSN exceeds demand (EGR
DEMAND) and has not reduced since the last reading
ii) EGR DEMAND exceeds EGR VLVE POSN and has
not reduced since the last reading.
Fault code 1193 will be displayed because the DCU–
supplied drive current exceeds a maximum limit.
Perform the following:
1 Clean the CVT or EVR filter located on the CVT or
EVR, beneath the large removable disc. Ensure that the
key–switch is off. Connect the LASER 2000, turn the
key–switch on, start the engine and run at idle. Set
the LASER 2000 to ACTUATOR TESTS/ EGR
CURRENT TO VACUUM. Using the DOWN (F2) key, set
EGR CVT DEMAND to zero. Using the UP (F4) key,
gradually increase the value, noting whether the throttle
valve (situated on the air inlet manifold) is moving.
If the throttle valve does not move, go to 2. Otherwise
go to 3.
2 Ensure that the vacuum pipes are clear, and retest.
Re–run 1 and, if the throttle valve still does not
move, replace the CVT or EVR. Retest.
3 The vacuum supply is correct. At idle, remove the
pipe from the EGR poppet valve, noting whether the
valve closes with an audible ‘click’.
If the valve does not operate correctly, go to 4.
Otherwise go to 5.
4 Replace the EGR valve and retest.
5 Ensure that the key–switch is off. Remove the
connector from the DCU and check the pins for damage,
backing–off etc.
If there is a fault go to 6. If no fault is apparent, go to 7.
6 If damage is apparent, repair it and retest the vehicle.
7 Fit the BOB, and test and record resistance values for:
a) Open–circuit
b) Short–circuit
c) Short–to–ground
d) Short to +BAT
on BOB pins 40 and 47 (see table 1 in Section 5.5
for CVT or EVR resistance values). Also pins 49 and 47
for Model Year 97 vehicles.
It there is a fault, go to 8. If no fault is apparent, go to 9.
8 Remove the BOB and reconnect the harness to
the DCU. Clear any fault codes and retest the vehicle. If
the fault still occurs change the DCU. Retest.
9 Remove the connector from the CVT or EVR and
check the pins for damage, backing–off, etc. If there is a
fault, go to 10, otherwise go to 11.
10 If damage is apparent, repair it and retest the vehicle.
11 Test and record resistance values on CVT or EVR
pins 1 and 2 (see the table 1 in Section 5.5 for CVT or
EVR resistance values).
If there are no faults, go to 12, otherwise go to 13.
12 Fault with the vehicle harness. Repair it and retest
the vehicle.
13 Fault with the CVT or EVR. Repair it and retest
the vehicle.
EPIC DI Engine Management System – DiagnosticsCoded Faults4
26
4.11 BOOST PRESSURE SENSOR
Applicable codes : 0105, 1108, 1109, 1300, 1301, 1302
Description of Operation:
The boost pressure sensor is provided with a 4.75V
reference voltage from the DCU. Its output voltage is
proportional to boost pressure. The DCU adjusts the
amount of fuel injected and the injection timing according
to boost pressure.
Components involved:
Boost sensor
Turbocharger
DCU
Harness and connectors
0105 BOOST SENSOR
1108 BOOST SENSOR HIGH
1109 BOOST SENSOR LOW
These fault codes will be displayed if, whilst in ‘precrank’
or ‘idle’, the DCU identifies that the sensor output signal
is:
i) Above the ‘high–limit’ threshold, or
ii) Below the ‘low–limit’ threshold
A failed turbocharger or blockage in the air inlet could
restrict air flow and thus drop the air pressure below the
‘low–limit’ threshold. If the turbocharger wastegate fails to
open, the boost pressure would exceed the ‘high–limit’
threshold.
1300 BOOST CALIBRATION
1301 BOOST CALIBRATION > HIGH LIMIT
1302 BOOST CALIBRATION < LOW LIMIT
These fault codes will be displayed if, whilst in ‘precrank’
or ‘idle’, the DCU identifies that the sensor output signal
is:
i) Above the ‘high–limit’ threshold, or
ii) Below the ‘low–limit’ threshold
The threshold range is less than for Boost Sensor fault
codes.
Perform the following:
1 For BOOST CALIBRATION FAULTS go to test 3.
For BOOST PRESSURE LOW, check the air inlet
for blockage; i.e. at the air fiIter or turbocharger
compressor.
Also check that the turbocharger is rotating.
For BOOST PRESSURE HIGH, check that
the turbocharger waste gate is operating.
If there are no faults, go to 3, otherwise, go to 2.
35
11
52
A
B
C
DCU
Connector
Pins
Sensor
Connector
Pins
Vehicle harness
Boost Pressure
Sensor
A045-014
2 If blockage or damage is apparent, repair it and
retest the vehicle.
3 Ensure that the key–switch is off. Remove the
connector from the DCU and check the pins for damage,
backing–off etc. If there are no faults, go to 5, otherwise,
go to 4.
4 If damage is apparent, repair it and retest the vehicle.
5 Fit the BOB and disconnect the EGR position sensor.
Test and record resistance values for:
a) Open–circuit
b) Short–circuit
c) Short–to–ground
d) Short to +BAT
on BOB pins 35 & 52, and 11 & 52 (see table 1 in
Section 5.5 for External supply (boost sensor) and Boost
pressure sensor resistance values).
If there are no faults, go to 6, otherwise, go to 7.
6 Remove the BOB and reconnect the harness to the
DCU and the EGR position sensor. Clear any fault codes
and retest the vehicle. If the fault still occurs change
the DCU.
7 Remove the connector from the boost sensor and
check the pins for damage, backing–off etc.
If there are no faults, go to 9, otherwise, go to 8.
8 If damage is apparent, repair it, reconnect the
harness and retest the vehicle.
9 Test and record resistance values for:
a) Open–circuit
b) Short–circuit
on pins C & A, and B & A (see Section 5.4 for
pin identification and table 1 in Section 5.5 for
External supply, and boost pressure sensor resistance
values). If no fault is shown then go to 11, if there is a
fault go to 10.
10 Fault with the boost sensor. Replace it, reconnect
the harness and retest the vehicle.
11 Fault with the vehicle harness. Repair it, reconnect
the harness and retest the vehicle.
4EPIC DI Engine Management System – Diagnostics Coded Faults
27
4.12 POWER HOLD RELAY, KEY–SWITCH, AND
BATTERY CIRCUIT
Applicable codes : 1191, 1196, 1197, 9671, 9317,
9318, 1606
Description of Operation:
When the key–switch is turned to position ii (‘key–on’),
+BAT is applied to DCU pin 20. The DCU then takes DCU
pin 45 to ‘ground’ potential, which energises the power
hold relay. +BAT is then applied to the main DCU power
pins 47 and 48.
During ‘key–off’ the ESOS is immediately de–energised
by the DCU. The power hold relay is not de–energised
until the engine has stopped. This means that DCU can
take alternative action if the ESOS (De–energised) fails to
stop the engine. (e.g. the DCU will ensure that the pump
rotor is driven to the ‘zero fuel’ position.)
The DCU monitors its power supply and will record fault
codes if +BAT falls outside set limits.
Components involved:
Key switch
Power hold relay
Fuses
Battery and cables
Harness and connectors
DCU
1191 KEY LINE VOLTAGE
1196 KEY–OFF VOLTAGE HIGH
1197 KEY–OFF VOLTAGE LOW
These fault codes will be displayed if the sensed voltage on
the key–switch line (DCU pin 20) is below 8 Volts or above 16
Volts.
NOTE The battery voltage may drop whilst the engine
is running if it is being used as a slave battery to
start another vehicle, thus creating fault codes.
Action
Check the two fuses. Replace if faulty, and retest.
Perform the following:
1 Check that battery and earth–to–vehicle–body
terminals/connectors are clean and tight. With the
multimeter set to measure Volts DC, measure voltage
across the battery terminals.
If below 10 Volts, go to test 2. If above 10 Volts, go to test
3.
2 Carry out battery Volt–drop test using a heavy
discharge tester directly on the battery terminals
(‘key–off’). If it fails this test, recharge or renew the
battery. Retest the vehicle.
3 Start the engine, using a slave battery if necessary,
and allow it to idle. Ensure that the charge warning light
goes out by increasing engine speed. Return the engine
to idle speed and measure the voltage across the
vehicle battery terminals.
If the voltage exceeds 14 Volts, or the charge
warning light does not go out, go to 4. If the battery
voltage is below 14 Volts, go to 5.
45
47
DCU
Connector
Pins
Switch
Connector
Pins
Vehicle harness
20
48
54
55
+ -
15
0
1
2
350
30
5.0 A
5A
KEY-SWITCH
(Position 2)
To starter solenoid
VEHICLE
BATTERY
POWER
HOLD
RELAY
Link these
two pins in
order to pull-
in the relay
A045-020
EPIC DI Engine Management System – DiagnosticsCoded Faults4
28
4 There is a fauIt with the charging circuit e.g. the
alternator regulator has failed. Rectify it and retest
vehicle.
5 Disconnect the plug from the DCU and check pins
for damage, backing off etc.
If there are no faults, go to 6, otherwise, go to 7.
6 Rectify the fault and retest the vehicle.
7 Fit the BOB with the adaptor cable and turn on the
key–switch. Test and record values for open–circuit
between pin 20 and the battery positive terminal.
If the resistance is greater than 3 Ohms, go to 8. If
the resistance is less than 3 Ohms go to 9.
8 Fault with the key switch; rectify or replace it and
retest.
9 Test and record values for open–circuit between pin
54 and battery negative terminal, and between pin
55 and the battery negative terminal.
If, in test 9, the resistance is greater than 3 Ohms, go
to 10. If the resistance is less than 3 Ohms go to 11.
10 Fault with the harness. Rectify it and retest.
11 Remove the BOB, reconnect the DCU and retest the
vehicle. If the fault persists change the DCU.
9671 BATTERY VOLTAGE
9317 BATTERY VOLTAGE HIGH
9318 BATTERY VOLTAGE LOW
These fault codes will be displayed if the sensed voltage
on the power line (DCU pins 47 and 48) is below 8 Volts
or above 16 Volts.
For low voltage, the symptoms will be a noticeable drop
in cranking speed when hot, and no crank when cold.
NOTE The battery voltage may drop if it is being used as
a slave battery to start another vehicle, thus
creating fault codes.
Perform the following:
1 With the engine at rest, check the condition of the
following cables and connectors between the battery
terminals and the vehicle electrical system:
D Battery positive to the starter motor
D Battery negative to the engine and the vehicle
body/chassis
With the multimeter set to measure Volts DC,
measure the voltage across the battery terminals.
If it is below 10 Volts, go to test 2. If it is above 10
Volts, go to test 3.
2 Carry out a battery ‘Volt drop test’ using a heavy
discharge tester directly on the battery terminals
(‘key–off’). If it fails this test, recharge or renew the
battery. Retest the vehicle.
3 Start the engine, using a ‘slave’ battery if necessary,
and allow it to idle. Ensure that the charge warning light
goes out by increasing engine speed. Return the engine
to idle speed and measure the voltage across the
vehicle battery terminals.
If the voltage exceeds 14 Volts or the charging
warning light does not go out, go to test 4. If the battery
voltage is below 14 Volts go to 5.
4 There is a fault with the charging circuit e.g.
alternator regulator failed. Rectify it and retest the
vehicle.
5 Disconnect the plug from the DCU and check pins
for damage, backing off etc.
If there are no faults, go to 6, otherwise, go to 7. Rectify
the fault and retest the vehicle.
7 Fit the BOB with the adaptor cable. Link BOB pins
54 and 45 (this action energises the power hold relay).
Test and record values for open–circuit between BOB
pin 47 and the battery positive terminal.
If the value is greater than 3 Ohms, go to test 8. If
the value is less than 3 Ohms, go to test 9.
8 Fault with the power hold relay. Rectify or replace it
and retest.
9 Test and record resistance values for:
a) Open–circuit
b) Short to +BAT
between BOB pin 54 and the battery negative
terminal, and BOB pin 55 and the battery negative
terminal.
If the resistance is greater than 3 Ohms, go to 10.
If resistance is less than 3 Ohms go to 11.
10 Fault with the harness. Rectify and retest.
11 Remove the BOB, reconnect the DCU and retest
the vehicle. If the fault persists change DCU.
1606 ECU POWER HOLD RELAY
This fault will be recorded if the DCU is unable to switch off
the power hold relay after key–off’.
Perform the following:
1 Fit the BOB to the harness. Test and record
resistance values for an open–circuit between BOB pin
45 and the battery positive terminal. Power hold relay
drive resistance values should be between 80 Ω and
100 Ω.
If the value is incorrect, go to 2. If the value is correct,
go to test 3.
2 Fault with the power hold relay. Rectify it and retest.
3 Test and record resistance values for:
a) open–circuit
b) short to +BAT
between BOB pin 54 and the battery negative
terminal, and BOB pin 55 and the battery negative
terminal.
If, in test 3, the resistance is greater than 3 Ohms, go
to 4. If the resistance is less than 3 Ohms go to 5.
4 Fault with the harness. Rectify it and retest.
5 Remove the BOB, reconnect the DCU and retest
the vehicle. If the fault persists change the DCU.
4EPIC DI Engine Management System – Diagnostics Coded Faults
29
4.13 ENGINE–TO PUMP SYNCHRONISATION
(PUMP BOLT–UP LIMITS)
Applicable codes : 1177, 1178
1178 PUMP BOLT–UP LIMITS
This fault indicates that the bolt–up angle has exceeded a
high or low threshold. The bolt–up angle is the difference
between the positions of the pump and engine position
sensors.
This fault is usually rectified by retiming the pump to the
engine.
1177 ENGINE–PUMP SYNCHRONISATION
This fault indicates that there is a ‘speed event’ error, i.e.
an error in synchronisation between the pump ‘timing ring’
and the flywheel drillings.
It is also displayed if the narrower of the four pump speed
ring vanes is not detected once per revolution.
Perform the following:
The possible faults could be:
i) The pump has been incorrectly fitted to the engine.
Re– time the pump.
ii) The pump timing wheel is loose or broken away.
The pump must be repaired.
iii) The drive shaft position sensor is loose. The pump
must be retimed using the method described in
Page 18, Section 4.
NOTE A ‘speed event’ is the point at which a pump
or engine speed signal is passed to the DCU.
EPIC DI Engine Management System – DiagnosticsCoded Faults4
30
4.14 DCU
Applicable codes : 1187, 1192, 1195, 0605, 1194, 1605,
1608
1187 DCU VARIANT SELECTION
This will indicate that the DCU was not configured when
fitted.
Check the configuration using the LASER 2000
procedure.
1192 EXTERNAL VOLTAGE (VEXT)
1195 SCP–HBCC FAILED TO INITIALISE
0605 DCU PROCESSOR ROM/RAM
1194 DCU A TO D CONVERTER
1605 DCU EEPROM
1608 DCU WATCHDOGS (SEE NOTE BELOW)
If any of these codes are logged, change the DCU.
NOTE The DCU ‘watchdog’ is a section of the
circuitry which maintains surveillance over all
DCU operational activity and which has the
authority to close down the system (stop the
engine) in the event of a major malfunction.
To achieve a lower gear (kickdown) for faster acceleration or
for driving uphill, the throttle pedal is fully depressed and the
High Pedal Demand Switch (HPDS) instructs the DCU to
operate the kickdown relay and the hold relay. The high
current required by the kickdown solenoid is supplied by the
kickdown relay. The lower current required to hold the
solenoid in the kickdown position is supplied by the hold
relay. The hold solenoid remains on until the throttle pedal is
released or the vehicle achieves 100 kph.
NOTE Under no circumstances should the pull–in relay
and solenoid be supplied from a power source
other than the DCU.
ATX Solenoid
Failure of this circuit will result in poor/sluggish gear changes
or higher vehicle speeds will have to be achieved before
gear changes take place.
Kickdown pull–in circuit
Failure of this circuit will result in no kickdown.
Kickdown hold circuit
Failure of this circuit will result in no hold. Transmission
will change and then release.
Incorrect DCU configuration
If the DCU is incorrectly configured, that is, if the vehicle
has manual transmission but the DCU is programmed for
automatic transmission, fault codes will be logged. Check the
configuration using the LASER 2000.
Acceleration test
The DCU drives the electrical system which actuates
the gearbox shift control and kickdown. The diagnostic facility
only detects failures up to the gearbox control solenoid and
the kickdown pull–in and hold relays. The outputs of these
devices are not monitored.
Correct operation of the system will be confirmed by
carrying out a full–throttle acceleration test without kickdown
requested (approximately 95% throttle travel), and with
kickdown requested (100% throttle travel). The transmission
will shift between gears at the speeds defined by the table
below.
Full throttle acceleration
1st to 2nd 2500 rpm. With kickdown operating at 3800 rpm.
2nd to 3rd 3300 rpm. With kickdown operating at 3950 rpm.
Direct drive engagement 4th gear 2900 rpm.
3rd to 4th 2900 rpm. With operating at 3900 rpm.
Any failure related to the transmission should be referred to
a dealer.
4EPIC DI Engine Management System – Diagnostics Coded Faults
31
4.15 PASSIVE ANTI THEFT SYSTEM (PATS)
Applicable codes: 9342
Description of Operation:
This is a vehicle immobilisation system. The introduction
of Passive Anti–Theft means that vehicles are now fitted
with a PATS module which communicates with the DCU
upon vehicle ‘key–on’. The module interrogates the DCU
and if the code stored in the DCU does not match that of
the ignition key used then the vehicle is put into a
‘fail–safe’ mode and will not start. An immobiliser
diagnostic light can be found above the windscreen in the
centre of the passenger compartment – in ‘fail–safe’ mode
this will flash a LDV fault code (otherwise known as ‘blink’
code).
Functions and Components Involved:
DCU PATS Module
PATS NULL CODE
9342 PATS NULL CODE
When the ‘ignition’ is first switched on, a transponder on
the key transmits a key code to the PATS module. This
keycode is compared with both that held in the PATS
module and that stored in the DCU . The above fault code
appears when the code in the DCU and PATS module
does not ‘match’.
The fundamental question as to why the DCU and
PATS module do not ‘match’ should be asked. Verify the
vehicle history. Check the Vehicle Identification Number (VIN)
against the engine number on the chassis; ensure that there
is no evidence of theft.
Check the ‘blink’ code flashed on the immobiliser
diagnostic light. A two–digit number will be flashed:–
The first digit will be flashed followed by a one–second
pause and then the second digit. After a three–second pause
the code will be repeated.
Code 3.1 – Indicates a wrong code received from the
DCU. Please contact a Lucas National
Distributor for assistance.
Code 3.2 – Indicates a wiring fault in the PATS circuitry
or faulty PATS module. No attempt should be
made to investigate this; the vehicle must be
referred to a LDV dealer.
Starting Procedure
Fault Codes
9342 PATS nullcode
Vehicle system
KEY/IGN. Switch
Passive Anti-Theft System
Key on
PATS module checks key response
If OK
PATS module requests DCU
response
DCU checks message from PATS
module
If OK
DCU enter run mode
DCU responds to PATS module
If OK
PATS module enables engine crank
A045-026
EPIC DI Engine Management System – DiagnosticsTechnical Information5
32
5.1 DYNAMIC DATA
Screen Message Units Description
ENGINE SPEED
VEHICLE SPEED
COOLANT
AIR TEMP
PUMP TEMP
BOOST
PEDAL FUEL
MAX A/F DENS.
MAX FUEL
FUEL DEMAND
CYL 3 IDL FUEL
CYL 1 OFFSET
CYL 2 OFFSET
CYL 4 OFFSET
IDLE REF
IDLE REFT
ROTOR DEMAND
ROTOR F/B
ROTOR DELAY –
ROTOR DELAY +
CALIBRATION
CAM DEMAND
CAM FEEDBACK
CAM INTEGRAL
BOLT – UP TRIM
PEDAL POSN. 1
PEDAL POSN. 2
PEDAL
EGR DEMAND
EGR VLVE POSN
RAW EGR POSN
BATTERY
KEYVOLTS
STATUS
RECOVERY MODES
ENGINE STOPS
REDUCED FUEL
O/LOOP ROTOR
OPEN LOOP CAM
RPM
kph
_C
_C
_C
mbar
mm3
mm3
mm3
mm3
mm3
mm3
mm3
mm3
RPM
RPM
units
units
units
units
units
units
units
units
Degrees
%
%
%
units
units
units
Volts
Volts
Status
ON/OFF
ON/OFF
ON/OFF
ON/OFF
Input signal to the DCU from the engine speed sensor.
Input signal to the DCU from the vehicle speed sensor.
Input signal to the DCU from the engine coolant temperature sensor.
Input signal to the DCU from the air charge temperature sensor.
Input signal to the DCU from the pump temperature sensor.
Input signal to the DCU from the boost pressure sensor.
Input signal to the DCU from the pedal position sensor.
Maximum air/fuel ratio. Maximum fuel is limited by air density.
This is the maximum fuel permitted.
Above idle, the value displayed will be the lowest of PEDAL FUEL, MAX A/F DENS or
MAX FUEL.
Idling fuel on cylinder 3.
This offset value plus the CYL3 IDL FUEL gives the idle fuel on cylinder 1.
This offset value plus the CYL3 IDL FUEL gives the idle fuel on cylinder 2.
This offset value plus the CYL3 IDL FUEL gives the idle fuel on cylinder 4.
Target idle RPM (as set when in the IDLE TRIM mode).
Idle RPM for all temperatures.
This is the desired rotor axial position.
This is the measured rotor axial position. (If all the conditions are correct, ROTOR DEMAND and
ROTOR FEEDBACK follow each other closely).
These values determine the pulse width required to allow the actuators to achieve the
rotor demand.
Refer to table 2 in Section 5.6 to obtain the calibration resistance value.
This is the desired cam position.
This is the measured cam position. (CAM FEEDBACK should follow CAM DEMAND closely).
This value will be between 45 and 55.
This is an indication of pump–to–engine timing. A change will result in a fault code being logged.
Pedal position potentiometer track 1. The value indivcates the position of the wiper on the track.
Pedal position potentiometer track 2. The value indivcates the position of the wiper on the track.
Relate this value to PEDAL FUEL.
This is the desired EGR valve position.
Result of processing by the DCU of the RAW position.
Actual EGR valve position.
Battery voltage as measured on DCU pins nos. 47 and 48 (+BAT).
Battery voltage as measured on DCU pin 20 (switch line).
Engine staus; PRE CRANK, RUNNING or STALLED.
Engine stopped due to a major fault.
Reduced fuel mode to a fault.
Open–loop rotor control due to a fault.
Open–loop cam control due to a fault.
5EPIC DI Engine Management System – Diagnostics Technical Information
33
5.2 VEHICLE WIRING DIAGRAM (MY97)
Fig. 7 – EPIC – System Wiring Diagram
EPIC DI Engine Management System – DiagnosticsTechnical Information5
34
5EPIC DI Engine Management System – Diagnostics Technical Information
35
5.3 COMPONENT LOCATION
WP
WPWP
WB
WG
BR
BW
BU
BG
NR
WU
WU
WU
WR
WU
WU
WR
WB
WG
BR
BW
BU
BG
NR
WG
NG
WG
WR
WU
YR
NRNR
NU
NR
PY
PY
W
Y
S
N
WB
17
19
9
12
38
41
42
43
6
7
2
18
1
14
53
11
40
8
35
52
50
48
47
10
33
29
51
30
NU
NY
WU
W
Y
S
N
WB
U
S
U
BY
BY
WP
S
B
B
B
B
BU
KW
PY
BY
21555415223442045
BY
BU
RY
RO
BK
GU
BO
O
RO
O
B
NW
YR
YU
NW
ECU
PUPU
WP
WG
NG
WG
WR
NU
NY
WP
WR
WG
NU
W
W
MainHarness
Connection
BU
W
W
PY
PU
GU
NW
WP
PU
PW
PO
PB
P
NU
NR
NU
NY
YU
NG
WU
NW
WP
WR
PU
NG
WG
YG YG
WG
NG NG
RY
Eng.Managment
WarningLight
Battery
Positive
Terminal
Batt
Neg.
Term.
FrontRH
BodyEarth
Sheildsfor
Eng.Speed&
Injetor
PumpSensors
B=Black
G=Green
K=Pink
N=Brown
P=Purple
R=Red
U=Blue
W=White
Y=Yellow
wirecodes
A045-027
2
3
4
5
6
8
9
10
7
5
5
5
1
1
2
3
4
5
6
7
8
9
10
illustrationkey
Fuseboxanddiagnosticsocket
Acceleratorpedalpositionsensor
Enginespeedcrankpositionsensor
Boostpressuresensor
Currentvacuumtransducer
Airchargetemperaturesensor
Enginecoolanttemperaturesensor
EGRvalvepositionsensor
Fuelpump
Dieselcontrolunit
Whenimmobiliser
fitted
EPIC DI Engine Management System – DiagnosticsTechnical Information5
36
5.4 CONNECTOR PIN IDENTIFICATION
DCU
1 3
2
20
38 55 37
191
17
8
4
1 3
AIR CHARGE TEMPERATURE SENSOR
ENGINE SPEED SENSOR
CURRENT-TO-VACUUM TRANSDUCER
ON-BOARD DIAGNOSTICS CONNECTOR
21
(+)
2
1 2
1 2
1
(+)
(A)
(B)
(C)
1 2 3 4 5 6 7 8
9 10 11 12 13 14 15 16
Fig. 8
A045-022
FUEL PUMP
PEDAL DEMAND SENSOR
BOOST PRESSURE SENSOR
EGR VALVE POSITION SENSOR
ENGINE COOLANT TEMPERATURE SENSOR
1
5
4
8
5EPIC DI Engine Management System – Diagnostics Technical Information
37
5.5 RESISTANCE VALUES
Table 1
CIRCUIT
DESCRIPTION
BREAK–OUT BOX
Pin + Pin –
PUMP PIN
Pin +
RESISTANCE (Ω)
Min + Max –DESCRIPTION Pin + Pin – Pin +
Pin –
Min + Max –
Rotor A (feed) Actuator 41 47 6 10 25 35
Rotor B (drain) Actuator 42 47 11 7 25 35
Cam Actuator 43 47 16 12 25 35
ESOS 47 38 2 3 1 3
Rotor Position Sensor 20 °C 9 6 14 17 48 60
Pump Temperature Sensor 19 6 15 9 690 3.5k
Cam Position Sensor 18 6 18 19 45 55
Engine Speed Sensor 14 53 1 2 300 1.2k
Engine Coolant Temperature 17 50 See table 3
Air Charge Temperature 15 50 See table 4 (MY97) >
EGR Position Sensor
(disconnect Throttle Sensor
and Boost Pressure Sensor)
2
35
52
52
300
1.5k
1k
2k
EMS Lamp 44 47 12 55
EVR Valve Actuator (MY97) 47 40 28 38
EVR Throttle Actuator (MY97) 47 49 28 38
EVR CVT (MY95) 47 40 4 10
Boost Pressure Sensor
(disconnect Throttle Sensor
and EGR Position Sensor)
52
52
35
11
500
10k
3k
300k
LPDS (Idle) 8 50 2 8 Open–circuit (o/c)
HPDS (Idle) 30 50 4 8 0 3
Pedal Demand Sensor 1
(Full throttle)
10 51 1 7 3k 7k
Pedal Demand Sensor 2
(Idle)
29 51 5 7 3k 7k
PATS Module 4 GND 4k 7k
Power GND Batt–ve GND 0 3
Power Supply 47, 48 Batt +ve Open–circuit (o/c) o/c
Abbreviations
LPDS – Low Pedal Demand Switch HPDS – High Pedal Demand Signal
CVT – Current–to–vacuum Transducer
Epic service manual
Epic service manual

More Related Content

What's hot

Em Manual de taller de Nissan almera modelo m16 Parte mecánica del motor
Em Manual de taller de Nissan almera modelo m16 Parte mecánica del motorEm Manual de taller de Nissan almera modelo m16 Parte mecánica del motor
Em Manual de taller de Nissan almera modelo m16 Parte mecánica del motorJordan Felipe Cabrera Nuñez
 
Bt 50 en repair manual
Bt 50 en repair manualBt 50 en repair manual
Bt 50 en repair manualpacho916
 
Manual linde h25 d, h30d, h35d 393[1]
Manual linde h25 d, h30d, h35d 393[1]Manual linde h25 d, h30d, h35d 393[1]
Manual linde h25 d, h30d, h35d 393[1]susooutsider
 
PERKINS 1300 SERIES WF DIESEL ENGINE Service Repair Manual
PERKINS 1300 SERIES WF DIESEL ENGINE Service Repair ManualPERKINS 1300 SERIES WF DIESEL ENGINE Service Repair Manual
PERKINS 1300 SERIES WF DIESEL ENGINE Service Repair Manualhjnskmdje
 
manual de servicio del sistema common rail, mitsubishi l200
manual de servicio del sistema common rail,  mitsubishi l200manual de servicio del sistema common rail,  mitsubishi l200
manual de servicio del sistema common rail, mitsubishi l200Jordan Felipe Cabrera Nuñez
 
Perkins 400 series 402 d 403d 404d industrial engine (model gp) service repai...
Perkins 400 series 402 d 403d 404d industrial engine (model gp) service repai...Perkins 400 series 402 d 403d 404d industrial engine (model gp) service repai...
Perkins 400 series 402 d 403d 404d industrial engine (model gp) service repai...jknhdjskm
 
Mercedes Benz- eletricidade-veicular-completo-04-11-04
Mercedes Benz- eletricidade-veicular-completo-04-11-04Mercedes Benz- eletricidade-veicular-completo-04-11-04
Mercedes Benz- eletricidade-veicular-completo-04-11-04Jose Roberto
 
17071 02 b13 r d13c chn 125761-132856
17071 02 b13 r d13c chn 125761-13285617071 02 b13 r d13c chn 125761-132856
17071 02 b13 r d13c chn 125761-132856marco
 
364 Audi Q7 Sistema Electrico.pdf
364 Audi Q7 Sistema Electrico.pdf364 Audi Q7 Sistema Electrico.pdf
364 Audi Q7 Sistema Electrico.pdfjcarrey
 
Jeep liberty 2002 2005 fuel system
Jeep liberty 2002 2005 fuel systemJeep liberty 2002 2005 fuel system
Jeep liberty 2002 2005 fuel systemJeff Sparks
 
Codigos de falhas kaptor .com
Codigos de falhas kaptor .comCodigos de falhas kaptor .com
Codigos de falhas kaptor .comJose Soares
 
Jcb isuzu 6 hk1 engine service repair manual
Jcb isuzu 6 hk1 engine service repair manualJcb isuzu 6 hk1 engine service repair manual
Jcb isuzu 6 hk1 engine service repair manualdujjsjekkekmme
 
PERKINS 2300 SERIES 2306A-E14 6 CYLINDER TURBOCHARGED DIESEL ENGINE Service R...
PERKINS 2300 SERIES 2306A-E14 6 CYLINDER TURBOCHARGED DIESEL ENGINE Service R...PERKINS 2300 SERIES 2306A-E14 6 CYLINDER TURBOCHARGED DIESEL ENGINE Service R...
PERKINS 2300 SERIES 2306A-E14 6 CYLINDER TURBOCHARGED DIESEL ENGINE Service R...fujdfjskekem
 
Allison 5000, 6000, 8000, 9000 Troubleshooting Manual PDF.pdf
Allison  5000, 6000, 8000, 9000 Troubleshooting Manual PDF.pdfAllison  5000, 6000, 8000, 9000 Troubleshooting Manual PDF.pdf
Allison 5000, 6000, 8000, 9000 Troubleshooting Manual PDF.pdfRolandasPetkus
 
Case ih jx95 tractor service repair manual
Case ih jx95 tractor service repair manualCase ih jx95 tractor service repair manual
Case ih jx95 tractor service repair manualfjsjjefskekmem
 

What's hot (20)

Manual de Operacion y Mantenimiento Motores C4.4 ACERT (ingles)
Manual de Operacion y Mantenimiento Motores C4.4 ACERT (ingles)Manual de Operacion y Mantenimiento Motores C4.4 ACERT (ingles)
Manual de Operacion y Mantenimiento Motores C4.4 ACERT (ingles)
 
Em Manual de taller de Nissan almera modelo m16 Parte mecánica del motor
Em Manual de taller de Nissan almera modelo m16 Parte mecánica del motorEm Manual de taller de Nissan almera modelo m16 Parte mecánica del motor
Em Manual de taller de Nissan almera modelo m16 Parte mecánica del motor
 
Bt 50 en repair manual
Bt 50 en repair manualBt 50 en repair manual
Bt 50 en repair manual
 
Manual linde h25 d, h30d, h35d 393[1]
Manual linde h25 d, h30d, h35d 393[1]Manual linde h25 d, h30d, h35d 393[1]
Manual linde h25 d, h30d, h35d 393[1]
 
DeWalt Tools Catalog
DeWalt Tools CatalogDeWalt Tools Catalog
DeWalt Tools Catalog
 
PERKINS 1300 SERIES WF DIESEL ENGINE Service Repair Manual
PERKINS 1300 SERIES WF DIESEL ENGINE Service Repair ManualPERKINS 1300 SERIES WF DIESEL ENGINE Service Repair Manual
PERKINS 1300 SERIES WF DIESEL ENGINE Service Repair Manual
 
manual de servicio del sistema common rail, mitsubishi l200
manual de servicio del sistema common rail,  mitsubishi l200manual de servicio del sistema common rail,  mitsubishi l200
manual de servicio del sistema common rail, mitsubishi l200
 
Perkins 400 series 402 d 403d 404d industrial engine (model gp) service repai...
Perkins 400 series 402 d 403d 404d industrial engine (model gp) service repai...Perkins 400 series 402 d 403d 404d industrial engine (model gp) service repai...
Perkins 400 series 402 d 403d 404d industrial engine (model gp) service repai...
 
Mercedes Benz- eletricidade-veicular-completo-04-11-04
Mercedes Benz- eletricidade-veicular-completo-04-11-04Mercedes Benz- eletricidade-veicular-completo-04-11-04
Mercedes Benz- eletricidade-veicular-completo-04-11-04
 
17071 02 b13 r d13c chn 125761-132856
17071 02 b13 r d13c chn 125761-13285617071 02 b13 r d13c chn 125761-132856
17071 02 b13 r d13c chn 125761-132856
 
364 Audi Q7 Sistema Electrico.pdf
364 Audi Q7 Sistema Electrico.pdf364 Audi Q7 Sistema Electrico.pdf
364 Audi Q7 Sistema Electrico.pdf
 
Ssp353es
Ssp353esSsp353es
Ssp353es
 
Jeep liberty 2002 2005 fuel system
Jeep liberty 2002 2005 fuel systemJeep liberty 2002 2005 fuel system
Jeep liberty 2002 2005 fuel system
 
Codigos de falhas kaptor .com
Codigos de falhas kaptor .comCodigos de falhas kaptor .com
Codigos de falhas kaptor .com
 
Jcb isuzu 6 hk1 engine service repair manual
Jcb isuzu 6 hk1 engine service repair manualJcb isuzu 6 hk1 engine service repair manual
Jcb isuzu 6 hk1 engine service repair manual
 
PERKINS 2300 SERIES 2306A-E14 6 CYLINDER TURBOCHARGED DIESEL ENGINE Service R...
PERKINS 2300 SERIES 2306A-E14 6 CYLINDER TURBOCHARGED DIESEL ENGINE Service R...PERKINS 2300 SERIES 2306A-E14 6 CYLINDER TURBOCHARGED DIESEL ENGINE Service R...
PERKINS 2300 SERIES 2306A-E14 6 CYLINDER TURBOCHARGED DIESEL ENGINE Service R...
 
Allison 5000, 6000, 8000, 9000 Troubleshooting Manual PDF.pdf
Allison  5000, 6000, 8000, 9000 Troubleshooting Manual PDF.pdfAllison  5000, 6000, 8000, 9000 Troubleshooting Manual PDF.pdf
Allison 5000, 6000, 8000, 9000 Troubleshooting Manual PDF.pdf
 
Case ih jx95 tractor service repair manual
Case ih jx95 tractor service repair manualCase ih jx95 tractor service repair manual
Case ih jx95 tractor service repair manual
 
PRIUS 1 DTC
PRIUS 1 DTCPRIUS 1 DTC
PRIUS 1 DTC
 
Perkins 2506 15
Perkins 2506 15Perkins 2506 15
Perkins 2506 15
 

Viewers also liked

2010.06 defender my07 workshop manual complete
2010.06 defender my07 workshop manual complete2010.06 defender my07 workshop manual complete
2010.06 defender my07 workshop manual completeFajar Isnanto
 
Land rover defender_110_en_gb
Land rover defender_110_en_gbLand rover defender_110_en_gb
Land rover defender_110_en_gbFajar Isnanto
 
Land rover defender_110_en_gb
Land rover defender_110_en_gbLand rover defender_110_en_gb
Land rover defender_110_en_gbFajar Isnanto
 
Manual despiece motor fiat diesel
Manual despiece motor fiat dieselManual despiece motor fiat diesel
Manual despiece motor fiat dieselMario Salas
 
manual de reparacion land rover td5
manual de reparacion land rover td5manual de reparacion land rover td5
manual de reparacion land rover td5selillo
 

Viewers also liked (6)

2010.06 defender my07 workshop manual complete
2010.06 defender my07 workshop manual complete2010.06 defender my07 workshop manual complete
2010.06 defender my07 workshop manual complete
 
Land rover defender_110_en_gb
Land rover defender_110_en_gbLand rover defender_110_en_gb
Land rover defender_110_en_gb
 
Land rover defender_110_en_gb
Land rover defender_110_en_gbLand rover defender_110_en_gb
Land rover defender_110_en_gb
 
2.2 l engine
2.2 l engine2.2 l engine
2.2 l engine
 
Manual despiece motor fiat diesel
Manual despiece motor fiat dieselManual despiece motor fiat diesel
Manual despiece motor fiat diesel
 
manual de reparacion land rover td5
manual de reparacion land rover td5manual de reparacion land rover td5
manual de reparacion land rover td5
 

Similar to Epic service manual

AUDI 00052506920 motronic fuel-injection_and_ignition_system_(5-cylinder)
AUDI 00052506920 motronic fuel-injection_and_ignition_system_(5-cylinder)AUDI 00052506920 motronic fuel-injection_and_ignition_system_(5-cylinder)
AUDI 00052506920 motronic fuel-injection_and_ignition_system_(5-cylinder)Gherghescu Gabriel
 
Audi 100 electrical system dupa 1991
Audi 100 electrical system dupa 1991Audi 100 electrical system dupa 1991
Audi 100 electrical system dupa 1991Gherghescu Gabriel
 
7.5kw generator service manual for kohler genset used in yachts and on telecom
7.5kw generator service manual for kohler genset used in yachts and on telecom7.5kw generator service manual for kohler genset used in yachts and on telecom
7.5kw generator service manual for kohler genset used in yachts and on telecomDennisBurke7
 
Lenze 8400-motec-manual
Lenze 8400-motec-manualLenze 8400-motec-manual
Lenze 8400-motec-manualIgorTerekhov2
 
A1800 Technical Manual_rev.02.pdf
A1800 Technical Manual_rev.02.pdfA1800 Technical Manual_rev.02.pdf
A1800 Technical Manual_rev.02.pdfMoHsinKh2
 
Denso hp-3 servis manual
Denso hp-3 servis manualDenso hp-3 servis manual
Denso hp-3 servis manualViktor
 
Philips Respironics V60 - Service manual.pdf
Philips Respironics V60 - Service manual.pdfPhilips Respironics V60 - Service manual.pdf
Philips Respironics V60 - Service manual.pdfFatiEspindola
 
Cummins onan dqcb generator set with power command 3201 controller service re...
Cummins onan dqcb generator set with power command 3201 controller service re...Cummins onan dqcb generator set with power command 3201 controller service re...
Cummins onan dqcb generator set with power command 3201 controller service re...fjkskemuiijdmme
 
Cummins onan dqca generator set with power command 3201 controller service re...
Cummins onan dqca generator set with power command 3201 controller service re...Cummins onan dqca generator set with power command 3201 controller service re...
Cummins onan dqca generator set with power command 3201 controller service re...fusjejfjskerekem
 
Cummins onan dfeh generator set with power command 3201 controller service re...
Cummins onan dfeh generator set with power command 3201 controller service re...Cummins onan dfeh generator set with power command 3201 controller service re...
Cummins onan dfeh generator set with power command 3201 controller service re...jfksemdmmeazx
 
Cummins onan dqcc generator set with power command 3201 controller service re...
Cummins onan dqcc generator set with power command 3201 controller service re...Cummins onan dqcc generator set with power command 3201 controller service re...
Cummins onan dqcc generator set with power command 3201 controller service re...fusjejfjskerekem
 
Cummins onan dfej generator set with power command 3201 controller service re...
Cummins onan dfej generator set with power command 3201 controller service re...Cummins onan dfej generator set with power command 3201 controller service re...
Cummins onan dfej generator set with power command 3201 controller service re...jfksemdmmeazx
 
Cummins onan dfej generator set with power command 3201 controller service re...
Cummins onan dfej generator set with power command 3201 controller service re...Cummins onan dfej generator set with power command 3201 controller service re...
Cummins onan dfej generator set with power command 3201 controller service re...fujsjejfskekkm
 
Cummins onan dfeg generator set with power command 3201 controller service re...
Cummins onan dfeg generator set with power command 3201 controller service re...Cummins onan dfeg generator set with power command 3201 controller service re...
Cummins onan dfeg generator set with power command 3201 controller service re...jfksemdmmeazx
 
Cummins onan dqca generator set with power command 3201 controller service re...
Cummins onan dqca generator set with power command 3201 controller service re...Cummins onan dqca generator set with power command 3201 controller service re...
Cummins onan dqca generator set with power command 3201 controller service re...fjkskemuiijdmme
 
Cummins onan dfek generator set with power command 3201 controller service re...
Cummins onan dfek generator set with power command 3201 controller service re...Cummins onan dfek generator set with power command 3201 controller service re...
Cummins onan dfek generator set with power command 3201 controller service re...jfksemdmmeazx
 
Cummins onan dqcb generator set with power command 3201 controller service re...
Cummins onan dqcb generator set with power command 3201 controller service re...Cummins onan dqcb generator set with power command 3201 controller service re...
Cummins onan dqcb generator set with power command 3201 controller service re...fusjejfjskerekem
 
Cummins onan dqcc generator set with power command 3201 controller service re...
Cummins onan dqcc generator set with power command 3201 controller service re...Cummins onan dqcc generator set with power command 3201 controller service re...
Cummins onan dqcc generator set with power command 3201 controller service re...fjkskemuiijdmme
 

Similar to Epic service manual (20)

Bucher lift control guide
Bucher lift control guideBucher lift control guide
Bucher lift control guide
 
AUDI 00052506920 motronic fuel-injection_and_ignition_system_(5-cylinder)
AUDI 00052506920 motronic fuel-injection_and_ignition_system_(5-cylinder)AUDI 00052506920 motronic fuel-injection_and_ignition_system_(5-cylinder)
AUDI 00052506920 motronic fuel-injection_and_ignition_system_(5-cylinder)
 
1608m um001 -en-p
1608m um001 -en-p1608m um001 -en-p
1608m um001 -en-p
 
Audi 100 electrical system dupa 1991
Audi 100 electrical system dupa 1991Audi 100 electrical system dupa 1991
Audi 100 electrical system dupa 1991
 
7.5kw generator service manual for kohler genset used in yachts and on telecom
7.5kw generator service manual for kohler genset used in yachts and on telecom7.5kw generator service manual for kohler genset used in yachts and on telecom
7.5kw generator service manual for kohler genset used in yachts and on telecom
 
Lenze 8400-motec-manual
Lenze 8400-motec-manualLenze 8400-motec-manual
Lenze 8400-motec-manual
 
A1800 Technical Manual_rev.02.pdf
A1800 Technical Manual_rev.02.pdfA1800 Technical Manual_rev.02.pdf
A1800 Technical Manual_rev.02.pdf
 
Denso hp-3 servis manual
Denso hp-3 servis manualDenso hp-3 servis manual
Denso hp-3 servis manual
 
Philips Respironics V60 - Service manual.pdf
Philips Respironics V60 - Service manual.pdfPhilips Respironics V60 - Service manual.pdf
Philips Respironics V60 - Service manual.pdf
 
Cummins onan dqcb generator set with power command 3201 controller service re...
Cummins onan dqcb generator set with power command 3201 controller service re...Cummins onan dqcb generator set with power command 3201 controller service re...
Cummins onan dqcb generator set with power command 3201 controller service re...
 
Cummins onan dqca generator set with power command 3201 controller service re...
Cummins onan dqca generator set with power command 3201 controller service re...Cummins onan dqca generator set with power command 3201 controller service re...
Cummins onan dqca generator set with power command 3201 controller service re...
 
Cummins onan dfeh generator set with power command 3201 controller service re...
Cummins onan dfeh generator set with power command 3201 controller service re...Cummins onan dfeh generator set with power command 3201 controller service re...
Cummins onan dfeh generator set with power command 3201 controller service re...
 
Cummins onan dqcc generator set with power command 3201 controller service re...
Cummins onan dqcc generator set with power command 3201 controller service re...Cummins onan dqcc generator set with power command 3201 controller service re...
Cummins onan dqcc generator set with power command 3201 controller service re...
 
Cummins onan dfej generator set with power command 3201 controller service re...
Cummins onan dfej generator set with power command 3201 controller service re...Cummins onan dfej generator set with power command 3201 controller service re...
Cummins onan dfej generator set with power command 3201 controller service re...
 
Cummins onan dfej generator set with power command 3201 controller service re...
Cummins onan dfej generator set with power command 3201 controller service re...Cummins onan dfej generator set with power command 3201 controller service re...
Cummins onan dfej generator set with power command 3201 controller service re...
 
Cummins onan dfeg generator set with power command 3201 controller service re...
Cummins onan dfeg generator set with power command 3201 controller service re...Cummins onan dfeg generator set with power command 3201 controller service re...
Cummins onan dfeg generator set with power command 3201 controller service re...
 
Cummins onan dqca generator set with power command 3201 controller service re...
Cummins onan dqca generator set with power command 3201 controller service re...Cummins onan dqca generator set with power command 3201 controller service re...
Cummins onan dqca generator set with power command 3201 controller service re...
 
Cummins onan dfek generator set with power command 3201 controller service re...
Cummins onan dfek generator set with power command 3201 controller service re...Cummins onan dfek generator set with power command 3201 controller service re...
Cummins onan dfek generator set with power command 3201 controller service re...
 
Cummins onan dqcb generator set with power command 3201 controller service re...
Cummins onan dqcb generator set with power command 3201 controller service re...Cummins onan dqcb generator set with power command 3201 controller service re...
Cummins onan dqcb generator set with power command 3201 controller service re...
 
Cummins onan dqcc generator set with power command 3201 controller service re...
Cummins onan dqcc generator set with power command 3201 controller service re...Cummins onan dqcc generator set with power command 3201 controller service re...
Cummins onan dqcc generator set with power command 3201 controller service re...
 

More from Andras69

Ttc ford transit catalogue
Ttc ford transit catalogueTtc ford transit catalogue
Ttc ford transit catalogueAndras69
 
Ttc electrical & air coils
Ttc electrical & air coilsTtc electrical & air coils
Ttc electrical & air coilsAndras69
 
Ttc braking catalogue
Ttc braking catalogueTtc braking catalogue
Ttc braking catalogueAndras69
 
Ttc air brake catalogue
Ttc air brake catalogueTtc air brake catalogue
Ttc air brake catalogueAndras69
 
Edition 18 complete low res
Edition 18 complete low resEdition 18 complete low res
Edition 18 complete low resAndras69
 

More from Andras69 (7)

Ttc ford transit catalogue
Ttc ford transit catalogueTtc ford transit catalogue
Ttc ford transit catalogue
 
Ttc electrical & air coils
Ttc electrical & air coilsTtc electrical & air coils
Ttc electrical & air coils
 
Ttc braking catalogue
Ttc braking catalogueTtc braking catalogue
Ttc braking catalogue
 
Ttc air brake catalogue
Ttc air brake catalogueTtc air brake catalogue
Ttc air brake catalogue
 
Edition 18 complete low res
Edition 18 complete low resEdition 18 complete low res
Edition 18 complete low res
 
Tech
TechTech
Tech
 
Ford vg
Ford vgFord vg
Ford vg
 

Epic service manual

  • 1. Service Workbook EPIC D.I. Engine Management System
  • 2. i EPIC ELECTRONIC PROGRAMMED INJECTION CONTROL Service Workbook This Service Workbook covers the EPIC engine fitted to LDV vehicles. It is primarily designed to assist skilled technicians in the efficient repair and maintenance of this system, but can also be used as a reference workbook for training purposes. This Service Workbook should always be consulted prior to servicing or repair work. SPECIFICATION LDV (the Company) reserves the right to change the procedures, material, specification, dimensions or design of the vehicles shown, described or referred to herein at any time and without prior notice in accordance with the Company’s policy of constant product improvement. Every reasonable effort is made to ensure that the Company’s publications are accurate, but nothing shown, described or referred to herein should be regarded as an infallible guide to the procedures, materials, specifications, dimensions, design or availability of any particular vehicle, nor does this publication constitute an offer for the sale of any particular vehicle. No liability can be accepted by the Company or any Distributor or Dealer for any malfunction, damage, loss, injury, or death caused by the use of incorrect or misinterpreted information, omissions or errors that may have arisen during the preparation of this workbook. Purchasers are advised that the specification details set out in this publication apply to a range of vehicles and not to any particular vehicle. For the specification of any particular vehicle, purchasers should consult their LDV Distributor or Dealer. Please note that LDV Distributors and Dealers are not agents of the Company, and have no right or authority whatsoever to bind the Company in any way, or to assume on its behalf any obligation expressed or implied. COPYRIGHT  LDV 2001 All rights reserved. No part of this publication may be reproduced, stored in a retrieval system or transmitted, in any form, whether electronic, or mechanical, or by photocopying, recording or other means without prior permission in writing of LDV. Published by LDV. Further copies may be obtained through your normal literature ordering procedure. LDV Limited Training & Publications Bromford House Drews Lane Birmingham B8 2QG June 2001 DW03963004
  • 3. EPIC DI Engine Management System – Diagnostics i iii Notes In some circumstances it may be possible for an electrical connector pin to become displaced axially, thus creating a poor connection or an open–circuit. That action is referred to in this Manual as “Backing off”. The expression “ground” refers to any metallic part of the engine or vehicle structures which is electrically connected to the battery negative terminal. Certain signals which may be displayed on the Laser 2000 screen are known as “internal variables”. For clarification, their names are shown in upper–case letters in this Manual e.g.: “EGR VALVE POSN” which represents the “feedback” from the EGR valve position sensor. BOB – Break–Out–Box CVT – Current–to–Vacuum Transducer EVR – Electrical Vacuum Regulator DCU – Diesel Control Unit EGR – Exhaust Gas Recirculation EMS – Engine Management System ESOS – Electric Shut Off Solenoid HPDS – High Pedal Demand Switch LPDS – Low Pedal Demand Switch NOx – Nitrous Oxide PATS – Passive Anti–theft System PDS – Pedal Demand Sensor PWM – Pulse Width Modulation SCP – Standard Communications Protocol TP – Transfer Pressure ‘‘Key on” – The action of turning the ‘Ignition’ key ‘‘Key off” to the on/off positions Precrank – ‘Ignition’ key on, engine stationary prior to starting Stalled – Engine has stopped for reasons other than being switched off OV – Chassis Ground +Bat – Battery Voltage “Wiggle Test” – A test used to find intermittent wiring faults. It involves agitation of the wiring harness, particularly close to connections. Abbreviations ii Contents Introduction1 Diagnostics Procedure2 Non–coded Faults3 Coded Faults4 Technical Information5
  • 4. EPIC DI Engine Management System – Diagnostics i Contents i iv Introduction 1.1 The EPIC Dl system 1. . . . . . . . . . . . . . . . . . . . . . . . . . . . . . . . . . . . . . . . . . . . . . . . . . . . . . . . . . . . . 1.2 Safety precautions .... 2. . . . . . . . . . . . . . . . . . . . . . . . . . . . . . . . . . . . . . . . . . . . . . . . . . . . . . . . . . . . Diagnostics Procedure 2.1 Tools and training 3. . . . . . . . . . . . . . . . . . . . . . . . . . . . . . . . . . . . . . . . . . . . . . . . . . . . . . . . . . . . . . . . 2.2 System 3. . . . . . . . . . . . . . . . . . . . . . . . . . . . . . . . . . . . . . . . . . . . . . . . . . . . . . . . . . . . . . . . . . . . . . . . 2.2.1 Coded faults. 3. . . . . . . . . . . . . . . . . . . . . . . . . . . . . . . . . . . . . . . . . . . . . . . . . . . . . . . . . . . 2.2.2 Non–coded faults 3. . . . . . . . . . . . . . . . . . . . . . . . . . . . . . . . . . . . . . . . . . . . . . . . . . . . . . . . 2.3 Prcoedure 5. . . . . . . . . . . . . . . . . . . . . . . . . . . . . . . . . . . . . . . . . . . . . . . . . . . . . . . . . . . . . . . . . . . . . . 2.3.1 Initial inspection .. 5. . . . . . . . . . . . . . . . . . . . . . . . . . . . . . . . . . . . . . . . . . . . . . . . . . . . . . . 2.3.2 Flowchart 5. . . . . . . . . . . . . . . . . . . . . . . . . . . . . . . . . . . . . . . . . . . . . . . . . . . . . . . . . . . . . . 2.3.3 Laser 2000 and examination of fault codes 5. . . . . . . . . . . . . . . . . . . . . . . . . . . . . . . . . 2.3.4 Location of the DCU . 5. . . . . . . . . . . . . . . . . . . . . . . . . . . . . . . . . . . . . . . . . . . . . . . . . . . . 2.3.5 Electrical testing 5. . . . . . . . . . . . . . . . . . . . . . . . . . . . . . . . . . . . . . . . . . . . . . . . . . . . . . . . . 2.3.6 Actuator tests 5. . . . . . . . . . . . . . . . . . . . . . . . . . . . . . . . . . . . . . . . . . . . . . . . . . . . . . . . . . . 2.4 Repair 6. . . . . . . . . . . . . . . . . . . . . . . . . . . . . . . . . . . . . . . . . . . . . . . . . . . . . . . . . . . . . . . . . . . . . . . . . 2.5 Idle trim setting ... 6. . . . . . . . . . . . . . . . . . . . . . . . . . . . . . . . . . . . . . . . . . . . . . . . . . . . . . . . . . . . . . . . 2.6 Backleak trim setting ... 6. . . . . . . . . . . . . . . . . . . . . . . . . . . . . . . . . . . . . . . . . . . . . . . . . . . . . . . . . . . Non–coded Faults 3.1 EMS warning lamp fails to switch on 7. . . . . . . . . . . . . . . . . . . . . . . . . . . . . . . . . . . . . . . . . . . . . . . . 3.2 Engine stops whilst driving or idling, and will not restart whilst cranking 7. . . . . . . . . . . . . . . . . . 3.3 Engine will not start, or is difficult to start after normal engine stop 7. . . . . . . . . . . . . . . . . . . . . . . 3.4 Unstable hot idle, low power, slow acceleration, stalling or poor pull away 8. . . . . . . . . . . . . . . . 3.5 Reduced power (excessive smoke) . 8. . . . . . . . . . . . . . . . . . . . . . . . . . . . . . . . . . . . . . . . . . . . . . . 3.6 Smoke at low engine speed (full–load) 8. . . . . . . . . . . . . . . . . . . . . . . . . . . . . . . . . . . . . . . . . . . . . . 3.7 Reduced power (with no smoke) 8. . . . . . . . . . . . . . . . . . . . . . . . . . . . . . . . . . . . . . . . . . . . . . . . . . . 3.8 Engine does not stop instantly on ‘key off’ 8. . . . . . . . . . . . . . . . . . . . . . . . . . . . . . . . . . . . . . . . . . Coded Faults 4.1 Pump rotor control 9. . . . . . . . . . . . . . . . . . . . . . . . . . . . . . . . . . . . . . . . . . . . . . . . . . . . . . . . . . . . . . . 4.2 Electric shut–off solenoid (ESOS) 12. . . . . . . . . . . . . . . . . . . . . . . . . . . . . . . . . . . . . . . . . . . . . . . . . . 4.3 Pump cam control and pump temperature sensor 14. . . . . . . . . . . . . . . . . . . . . . . . . . . . . . . . . . . . 4.4 Calibration resistor 17. . . . . . . . . . . . . . . . . . . . . . . . . . . . . . . . . . . . . . . . . . . . . . . . . . . . . . . . . . . . . . . 4.5 Pump speed sensor (drive shaft position) 18. . . . . . . . . . . . . . . . . . . . . . . . . . . . . . . . . . . . . . . . . . . 4.6 Pedal sensor control 19. . . . . . . . . . . . . . . . . . . . . . . . . . . . . . . . . . . . . . . . . . . . . . . . . . . . . . . . . . . . . 4.7 Engine speed sensor (crankshaft position) 21. . . . . . . . . . . . . . . . . . . . . . . . . . . . . . . . . . . . . . . . . . 4.8 Engine coolant temperature sensor 22. . . . . . . . . . . . . . . . . . . . . . . . . . . . . . . . . . . . . . . . . . . . . . . . 4.9 Air charge temperature sensor 23. . . . . . . . . . . . . . . . . . . . . . . . . . . . . . . . . . . . . . . . . . . . . . . . . . . . . 4.10 Exhaust gas recirculation (EGR) 24. . . . . . . . . . . . . . . . . . . . . . . . . . . . . . . . . . . . . . . . . . . . . . . . . . . 4.11 Boost pressure sensor 26. . . . . . . . . . . . . . . . . . . . . . . . . . . . . . . . . . . . . . . . . . . . . . . . . . . . . . . . . . . 4.12 Power hold relay, key–switch and battery circuit 27. . . . . . . . . . . . . . . . . . . . . . . . . . . . . . . . . . . . . . 4.13 Engine–to–pump synchronisation (pump bolt–up limits) 29. . . . . . . . . . . . . . . . . . . . . . . . . . . . . . . 4.14 DCU 30. . . . . . . . . . . . . . . . . . . . . . . . . . . . . . . . . . . . . . . . . . . . . . . . . . . . . . . . . . . . . . . . . . . . . . . . . . . 4.15 Passive anti–theft system (PATS) 31. . . . . . . . . . . . . . . . . . . . . . . . . . . . . . . . . . . . . . . . . . . . . . . . . . Technical Information 5.1 Dynamic data 32. . . . . . . . . . . . . . . . . . . . . . . . . . . . . . . . . . . . . . . . . . . . . . . . . . . . . . . . . . . . . . . . . . . 5.2 Vehicle wiring diagram (MY95) 33. . . . . . . . . . . . . . . . . . . . . . . . . . . . . . . . . . . . . . . . . . . . . . . . . . . . 5.3 Component location 34. . . . . . . . . . . . . . . . . . . . . . . . . . . . . . . . . . . . . . . . . . . . . . . . . . . . . . . . . . . . . . 5.4 DCU multiplug pin identification 36. . . . . . . . . . . . . . . . . . . . . . . . . . . . . . . . . . . . . . . . . . . . . . . . . . . . . 5.5 Resistance values 37. . . . . . . . . . . . . . . . . . . . . . . . . . . . . . . . . . . . . . . . . . . . . . . . . . . . . . . . . . . . . . . 5.6 Pulse–width modulation 38. . . . . . . . . . . . . . . . . . . . . . . . . . . . . . . . . . . . . . . . . . . . . . . . . . . . . . . . . . 1 2 3 4 5
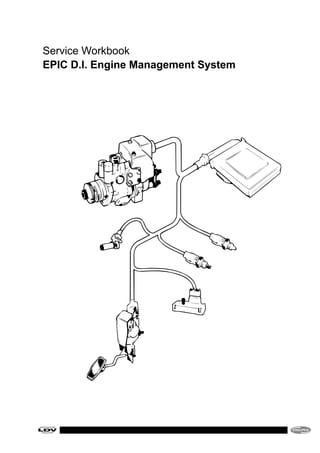
  • 5. 1EPIC DI Engine Management System – Diagnostics Introduction 1 1.1 THE EPIC Dl SYSTEM The Lucas EPIC Diesel Fuel injection system provides electronic control of both the amount of fuel injected and the timing of injection in order to optimise exhaust emissions and fuel economy. The system comprises a rotary fuel injection pump (with electrical actuators and sensors), a Diesel Control Unit (DCU), various engine and vehicle sensors, a power hold relay, battery, key switch, and harness. NOTE When a DCU is fitted to a vehicle/engine combination, it must be configured to suit that specific application. A DCU may not be transferred between vehicles fitted with Passive Anti–Theft (PATS). The LDV 4EA 2.5TC engine is fitted, rated at 100 PS. The Laser 2000 communicates with the DCU using the Standard Communications Protocol (SCP). The Laser 2000 requires hardware and software modules, diagnostic lead, and Break Out Box (BOB) to connect to the 55–pin DCU. Vehicle Configuration Screen Refer to Section 2.6 Refer to Section 2.5 Start Up Menu Title Screen Diagnostic Menu Display Stored Data Backleak Trim Mode Idle Trim Mode Display/ Clear Faults Clear Fault Codes Read Fault Codes Print Fault Codes Store Fault Codes Dynamic Display Dynamic Recording EXIT SETUP PAGE TRIG LIVE 1. Select Displayed Parameters 2. Select Position of Trigger 3. Select Trigger Type 4. Wiggle Tests Actuator Tests Gearbox Shift Solenoid Gearbox Kickdown Solenoid 'Check Engine' Lamp Air-Conditioning Clutch Power Hold Relay Pump Cam Actuator Gearbox Shift Solenoid Gearbox Kickdown Solenoid EGR Current-to-Vacuum Air-Conditioning Clutch Engine Shut-Off Solenoid Pedal Demand Key on, engine running Key on, engine stationary Diagnostic Charts DCU-Identification Fig. 1 Laser 2000 Menu Structure A045-002 Transfer Stored Data
  • 6. EPIC DI Engine Management System – DiagnosticsIntroduction1 2 1.2 SAFETY PRECAUTIONS 1 For “on the road” tests using a LASER 2000, the vehicle must be driven by an assistant. NOTE UNDER NO CIRCUMSTANCES MAY THE LASER 2000 BE LEFT CONNECTED TO THE VEHICLE SYSTEM FOR ANY TESTING BY THE OWNER/DRIVER. IT SHOULD ONLY BE USED BY AN EXPERIENCED TECHNICIAN. 2 Observe normal Health and Safety precautions when working with fuel systems, e.g. no smoking, no naked lights, and beware of the very high pressures generated within the injection system. 3 Ensure that the gear selector is in neutral and the parking brake is on when working on a stationary vehicle with the engine running. 4 If working in a confined area use exhaust fume extraction, or ensure adequate ventilation, whilst the engine is running. 5 Beware of moving engine parts when the engine is running. 6 Cleanliness should be observed at all times. 7 Ensure that any spilt fuel is thoroughly cleaned–up. 8 Incorrect electrical connections may damage sensitive electronic devices fitted to the vehicle. 9 Do not work on a vehicle whilst the battery is being charged from an external power source. 10 Ensure that all cables are clear of hot or moving parts. For on–the–road tests ensure that all cables and test equipment are secure and will not impede driving. 11 DO NOT disconnect the battery whilst the engine is running. 12 DO NOT “fast charge” the battery without disconnecting it from the vehicle’s electrical system. 13 Switch off the vehicle key switch before making or breaking electrical connections. NOTE REFER TO THE PRECAUTIONS AND PRELIMINARY TESTS LISTED IN THE LASER 2000 OPERATING INSTRUCTIONS (Pub. No. XXB875).
  • 7. 2EPIC DI Engine Management System – Diagnostics Diagnostics Procedure 3 2.1 TOOLS AND TRAINING To enable fault–finding the following tools are required: Laser 2000 Equipment Laser 2000 kit YWB700. . . . . . . . . . . . . Diagnostic Cable YWB776. . . . . . . . . . . Software Module YDS120 (language). . . . . . . . . . . Hardware Module YWB722. . . . . . . . . . BOB Equipment BOB YWB741. . . . . . . . . . . . . . . . . . . . . . Adaptor Box YDA200. . . . . . . . . . . . . . Pump–to–BOB Cable YDA287. . . . . . Static Timing Device YWB317. . . . . . Pressure & vacuum test kit LDV141. . NOTE If a Laser 1500 is available, the BOB (YWB741) is not required but Adaptor Box YDA200 and Cable YDA287 are. During testing of the electrical and electronic equipment a digital multimeter is essential, preferably with the facility for measuring duty cycles (such as Lucas YWB208). NOTE If the YWB208 multimeter is not available, any good quality digital multimeter may be used. However, if the instrument is not of the ‘auto–ranging’ type, ensure that its sensitivity is set to suit the range of the parameter being measured. (In addition, the meter must have a ‘duty–cycle’ measuring facility). Users of this publication must have previously attended a LDV–approved training course and be fully conversant with the use of the Laser 2000 diagnostic equipment. 2.2 SYSTEM The DCU controls all the major functions of the EPIC fuel injection system. It also detects when the system is not functioning correctly. When that happens, a ‘faultcode’ related to the fault is logged within the DCU and the Engine Management System (EMS) lamp on the dash board (see fig. 3) is illuminated. The logged code(s) may be retrieved using the Laser 2000. A fault which is recognised by the DCU is known as a ‘coded fault’; any other faults are known as ‘non–coded faults’ and are not displayed by the Laser 2000. Fig. 3 EMS lamp Symbol A045-007 2.2.1 Coded Faults Coded Faults occur when: An input is outside pre–programmed limits. That could be due to faulty connectors, wiring or sensor. An input is within pre–programmed limits but is not changing as is expected by the DCU. A possible fault could be that of an actuator that is seized or worn. Fault Codes are split into two types: Current Faults The fault persists and continues during fault diagnosis. That could be due to a complete disconnection of a wire or connector. Intermittent Faults The fault will be logged by the DCU but may not be apparent during subsequent diagnosis. That type of fault could be due to a loose or partially–damaged wire. 2.2.2 Non–Coded Faults Not all faults which occur on the vehicle will be logged by the DCU. Those faults can be diagnosed with the aid of the Diagnostics Flowchart (see fig. 4) and section 3 of this Manual. HARDWARE MODULE (YWB722) DIAGNOSTIC CABLE (YWB776) TO VEHICLE DIAGNOSTIC CONNECTOR SOFTWARE MODULE (YDS 120) LASER 2000 Fig. 2a Connection of the LASER A045-005 1500 BREAK-OUT BOX (YWB741) or LASER 1500 (YWB703) YDA287 TO PUMP YDA200 TO VEHICLE 120 WAY BOB Fig. 2b Connection of the BOB A045-006
  • 8. EPIC DI Engine Management System – DiagnosticsDiagnostics Procedure2 4 Intermittent fault codes Yes No No Fault Logged Current fault codes Yes No No Yes Vehicle satisfactory Use Snap-Shot mode on Laser 2000 Drive vehicle or agitate harness Read Fault Logged Use original Fault Codes for guidance Go to relevant section of Manual Fault Diagnosed Read fault codes Fault rectified Refer to Coded Faults section of Manual Refer to Non-Coded Faults section of Manual Repair Repair Vehicle Fault Read safety instructions in Section 1.3 Initial Inspection Connect Laser 2000 Read Fault Codes Record Codes Clear Codes on Laser 2000 B B A A Fig. 4 Diagnostics Flowchart A045-008
  • 9. 2EPIC DI Engine Management System – Diagnostics Diagnostics Procedure 5 2.3 PROCEDURE 2.3.1 Initial inspection Before connecting the Laser 2000 carry out an initial inspection of the vehicle to ensure that there is fuel in the tank, that there are no blocked airways, and no fuel leaks or loose pipes. 2.3.2 Flowchart The Diagnostic Flowchart (see fig. 4) indicates the procedure which should be followed when diagnosing problems. 2.3.3 Laser 2000 and examination of Fault Codes The Laser 2000 may display more than one fault code. If that is the case, investigate the codes in the sequence that the Laser 2000 displays them. Remember that if a sensor is disconnected whilst the ignition is on, a fault code will be logged by the DCU. Fault codes could be induced by the driver tampering with engine components and disconnecting sensors. Clear these codes using the Laser 2000, then re–test the vehicle to ensure that only genuine fault codes are displayed. For future reference, record all fault codes. If coded faults are displayed, go directly to the section of this Manual relevant to that code using the index on the inside rear cover. If the vehicle is not running correctly, and codes are not displayed by the Laser 2000, refer to the Non–Coded Fault section of this Manual. ‘SNAP SHOT MODE’ is of particular use when diagnosing intermittent faults. The Laser 2000 records data internally until a fault is identified. All the data is then stored in memory and can be examined later. When examining stored data after SNAP SHOT look for: • Out–of–limits values. • Sudden changes to the data. Current faults cause all the dynamic data to lock at their default values when the engine is running. However the dynamic data is still valid during cranking. This is of use for fault–finding on engines which will not start. 2.3.4 Location of the DCU See section 5.3 & 5.4 for the location of the DCU. 2.3.5 Electrical Testing Only basic testing is required to determine if the electrical circuits are functional. The tests below describe the procedures: (If the result of the test is the same as that described, there is a fault.) a) Open–circuit. Check the resistance between the pins specified in the diagnostic procedure. Infinite resistance indicates an open–circuit. A resistance reading higher than specified, but less than infinity, indicates either corroded or loose connections, or a partial break in the wire strands. b) Short–circuit. Check the resistance between the pins specified in the diagnostic procedure. Measured resistances below infinity can indicate a partial short–circuit. A resistance reading lower than specified indicates a short circuit. c) Short–to–ground. Check the resistance between the pin(s) specified in the diagnostic procedure and BOB connection 54. A low resistance indicates a short–to–ground. d) Short to +BAT. Turn the ignition switch to position ll. Check the voltage between the pin(s) specified in the diagnostic procedure and BOB connection 54 (OV). If the meter reads battery voltage a short to +BAT exists. Whilst carrying out these tests, agitate the harness close to the connections. If the results are unstable there is an intermittent break in the circuit. 2.3.6 Actuator Tests Using the ‘ACTUATOR TESTS’ option, accessed from the Diagnostics Menu, individual actuators can be tested and their operation confirmed. The following items can be tested: ENGINE RUNNING Gearbox shift solenoid Gearbox kickdown solenoid EGR CVT Air–conditioning clutch ESOS PDS ENGINE STATIONARY (‘KEYSWITCH’ ON) Gearbox shift solenoid Gearbox kickdown solenoid EMS lamp Air–conditioning clutch Power–hold relay Advance actuator
  • 10. EPIC DI Engine Management System – DiagnosticsDiagnostics Procedure2 6 2.4 REPAIR After diagnosis it may be possible to repair a fault in the workshop. Procedures for all the possible workshop repairs are documented in the relevant Lucas Workshop Manual. 2.5 IDLE TRIM SETTING Using the ‘IDLE TRIM MODE’ option, the idle speed can be adjusted within a range of ±50 rpm from the nominal idle speed to eliminate or reduce vehicle body vibrations. Check the following items before carrying out the idle setting procedure: • There must be no CURRENT or lNTERMlTTENT faults. • The engine must be running. • The engine coolant temperature must be above 70 °C. • The accelerator pedal must be fully released. • If air–conditioning is fitted it must be switched off. • The vehicle must be in neutral with the clutch engaged, or in ‘PARK’ if automatic. 1 Connect the LASER 2000 to the diagnostic plug in the vehicle fuse box (see Section 5.4). Start the engine and allow it to idle. 2 Switch on the Laser 2000, select ‘IDLE TRIM MODE’ from the MAIN MENU. 3 Control the idle speed using the accelerator pedal (fully raised = minimum idle speed, fully depressed = maximum idle speed). 4 When the idle speed is correct, set it using key F5. The revised idle speed will then be stored in the DCU. 2.6 BACKLEAK TRIM SETTING Using the ‘BACKLEAK TRIM’ option, fine–tuning of the idling delivery can be achieved to eliminate or reduce body vibrations and improve other pump characteristics. Before carrying out this procedure • There must be no CURRENT or INTERMITTENT faults. • The engine must be running. • The engine must be at normal operating temperature (i.e. coolant temperature must be above 77°C, or the pump temperature must be above 30°C). • The accelerator pedal must be fully released. • If air–conditioning is fitted it must be switched off. • The vehicle must be in neutral with the clutch engaged, or in ‘PARK’ if automatic. 1 Connect the LASER 2000 to the diagnostic plug in the vehicle EPIC fuse box (see Section 5.3 & 5.4). Start the engine and allow it to idle. 2 Switch on the Laser 2000, select ‘BACKLEAK TRIM MODE’ from the MAIN MENU. 3 The DCU will be set to the backleak trim mode; this will take approximately 10 seconds to execute. On completion, LASER 2000 will display the status, i.e. ‘BACKLEAK TRIM SUCCESSFUL’ or ‘UNSUCCESSFUL’ and return to the MAIN MENU.
  • 11. 3EPIC DI Engine Management System – Diagnostics Non–coded Faults 7 3.1 EMS WARNING LAMP FAILS TO SWITCH ON Ensure that the EMS warning lamp is illuminated for a short period after key–on. If the bulb fails to illuminate then: • Check for failed bulb • Check that the EMS lamp is not obscured • Check EMS lamp electrical connections. • Check on BOB connector pins 44 and 47 for continuity of the lamp circuit, and pins 45 and 20, with key switch on, for battery voltage (+BAT). 3.2 ENGINE STOPS WHILST DRIVING OR IDLING, AND WILL NOT RESTART WHILST CRANKING • Check for fuel in tank, and type i.e. not petrol. • Check that the ducting to the air filter and turbocharger is clear. • Ensure that there is no water in the fuel. If so: – Drain the fuel filter (and the tank if necessary), – Check that the water sensor is operating. • Check for fuel leaks or loose fuel pipe connections. • Check for restriction in the fuel tank vent causing the tank to implode, i.e. remove the filler cap. • Fit a pressure/vacuum gauge in the fuel feed line to the pump, and crank the engine. The pressure should read positive. If it does not, check the following: • Restriction in the fuel feed or return. • The age of the fuel filter. Replace it if any doubt. • Failed mechanical fuel pump. • The key power circuit (refer to SCP fault code 1191). • The power–hold relay circuit (refer to SCP fault code 1606) . • The battery supply to the DCU (refer to SCP fault code 9671). • Operation of the fuel injection pump by slackening the injector pipe at any injector and note the fuel discharge at the connector whilst cranking. 3.3 ENGINE WILL NOT START, OR IS DIFFICULT TO START AFTER NORMAL ENGINE STOP • Check cranking speed and battery condition. • Check operation of the fuel injection pump. • Slacken the injector pipe at any injector and note fuel discharge at connector whilst cranking. • If fitted, check the ‘Flamestart’ system (see fig. 5). • Disconnect the fuel supply from the Flamestart heater element. Activate the system and check fuel flow to the element. • Check the voltage supply to the element. • Remove the element, reconnect the fuel supply and ensure that the voltage supply to the element is disconnected. Activate the system and if fuel does not flow from the element, rectify or replace the element. • Remove the element, connect the voltage supply and earth, and ensure fuel supply is disconnected. Activate the system and renew the element if it does not glow. • Check pump–to–engine timing. • Follow procedures as for section 3.2.
  • 12. EPIC DI Engine Management System – DiagnosticsNon–coded Faults3 8 3.4 UNSTABLE HOT IDLE, LOW POWER, SLOW ACCELERATION, STALLING OR POOR PULL AWAY • Check that the air ducting to the air filter and turbocharger is clear. • Read FUEL DEMAND on LASER 2000 whilst idling hot and carry out BACKLEAK TRIM. • Check that correct grade of fuel is being used. If ‘Winter grade’ or ‘City class’ fuel is being used, carry out BACKLEAK TRIM. • If CYL3 IDL FUEL, CYL1 OFFSET, CYL2 OFFSET, CYL4 OFFSET readings on the LASER 2000 show one value significantly different to the others, check the injectors and engine condition i.e. valve clearances etc. • For a high mileage vehicle that has had no fuel injection pump or pump actuator changes, read and note the LASER 2000 DYNAMIC DISPLAY Values; If the ROTOR DELAY A value is greater than 35, change the pump horizontal actuator pair. If the ROTOR DELAY B value is greater than 50, change the pump vertical actuator pair. • Check cylinder compressions. 3.5 REDUCED POWER (EXCESSIVE SMOKE) • Check that the air ducting to the air filter and turbocharger is clear. • Check that the throttle valve is operating. • Check for restrictions in the exhaust system. • Check that the boost sensor hose is attached, and for leaks from, and restrictions in, it. • Check that the EGR valve is closing by removing the pipe to the valve, and noting if the valve makes a ‘click’ when it closes. • If no faults are found, replace the boost sensor. 3.6 SMOKE AT LOW ENGINE SPEED (FULL LOAD) • Carry out BACKLEAK TRIM (see Section 2.6). • Check throttle operation. • Replace the boost sensor. 3.7 REDUCED POWER (WITH NO SMOKE) • Check that the ducting to the air filter and turbocharger is clear. • Fit a pressure/vacuum gauge in the fuel feed line to the pump, and crank the engine. The pressure should read positive. If it does not, check the following: – Restriction in the fuel feed or return. – Age of the fuel filter. Replace if any doubt. – The mechanical pump. – For fuel leaks. • Check that the EGR valve is closing by removing the pipe to the valve, and noting if the valve makes a ‘click’ when it closes. • Check that the air–conditioning is not permanently operating. • Check the fuel injection pump. 3.8 ENGINE DOES NOT STOP INSTANTLY ON ‘KEY–OFF’ • DCU pin 38 shorted to +BAT (DCU pin 47). This will cause the fuel injection pump ESOS to over–heat and burn out. • The spring–loaded plunger of the ESOS will not close– possibly due to debris contamination. If the engine does not stop within 10 seconds then fault code 1170 will be logged by the DCU.
  • 13. 4EPIC DI Engine Management System – Diagnostics Coded Faults 9 4.1 PUMP ROTOR CONTROL Applicable codes : 1171, 1172, 1173, 1198 Description of Operation: The ‘Rotor A’ and ‘Rotor B’ actuators control the axial displacement of the pump rotor, and hence the quantity of fuel injected. Opening Rotor A (feed) actuator decreases fuel, and opening Rotor B (drain) actuator increases fuel. The rotor sensor monitors the axial position of the rotor. Either rotor A or rotor B actuator is driven with a pulse from the DCU, whose duration is related to the difference between the required rotor position, (ROTOR DEMAND), and the measured rotor position, (ROTOR FEEDBACK) . Calculation of the required rotor position is based upon some or all of the following input signals: Throttle pedal demand Internal fuel ‘mapping’ Boost pressure Engine air inlet temperature Engine speed EGR valve position The temperature compensation resistor is built into the rotor position sensor. Its thermal characteristic is in opposition to that of the sensor, thus eliminating ’drift’ of the rotor position signal due to temperature changes. Functions and Components Involved: Transfer pressure Rotor A (feed) actuator Rotor B (drain) actuator Rotor/drive shaft assembly Rotor position sensor (including the temperature compensation resistor) Backleak DCU Harness 1171 ROTOR POSITION This fault code will be displayed if the DCU identifies either: i) that the sensor resistance is outside limits e.g. open–circuit, short–circuited to ground or to +BAT. ii) an accidental connection to ground or +BAT. iii) that the temperature compensation resistor is outside limits e.g. open–circuit or short–circuit. iv) that there is no feedback to the DCU. The vehicle will show symptoms of greatly reduced power and impaired driveability. Perform the following: 1 Ensure that the key–switch is off. Remove the connector from the DCU and check pins for damage, incorrect engagement etc. If there are no faults, go to 3, otherwise, go to 2. 2 If damage is apparent, repair it and retest the vehicle. 9 12 6 41 42 47 48 14 13 17 10 7 11 6 2 1 3 4 1 Rotor position sensor 2 Temperature compensation resistor 3 Rotor feed actuator 4 Rotor drain actuator DCU Connector Pins Pump Connector Pins A045-009 3 Fit the BOB. Test and record values for: a) open–circuit b) short–circuit c) short–to–ground d) short to +BAT on BOB pins 9 & 6, and 9 & 12 (see table 1 in Section 5.6 for Rotor Position Sensor and Rotor Compensation Resistor values). If there are no faults, go to 4, otherwise, go to 5. 4 Remove the BOB and reconnect the harness to the DCU . Clear any fault codes and retest the vehicle. If the fault(s) still occurs change the DCU. 5 Remove the connector from the pump and check the pins for damage, incorrect engagement etc. If there are no faults, go to 7, otherwise, go to 6. 6 If damage is apparent, repair it, and retest the vehicle. 7 Fit the BOB, with the adaptor cable, to the pump connector. Test and record resistance values for: a) open–circuit b) short–circuit on BOB pins 14 & 17, 14 and 13. (See table 1 in Section 5.5 for Rotor Position Sensor and Rotor Compensation Resistor values). If there are no faults, go to 9, otherwise, go to 8. 8 There is a fault with the rotor sensor assembly. Repair the pump and retest the vehicle. 9 There is a fault with the vehicle harness. Repair it, and retest the vehicle.
  • 14. EPIC DI Engine Management System – DiagnosticsCoded Faults4 10 1172 PUMP ROTOR CONTROL OVERFUELLING 1198 PUMP ROTOR CONTROL UNDERFUELLING The vehicle symptoms are: i) For code 1172 the engine will stop ii) For code 1198 unstable idling and stalling. For intermittent faults go to test 1. For current faults go to test 2. 1 Start the engine and allow it to idle, connect the LASER 2000 and read the DYNAMIC DISPLAY values, ROTOR DEMAND, and ROTOR FEEDBACK. Note the difference between the two values. Use the SNAP SHOT facility to assist in this test. If the DEMAND and FEEDBACK difference is 5 or less, go to test 2. If greater than 5, got to test 6. 2 Fit a pressure/vacuum gauge in the fuel feed line to the pump and run the engine. In neutral gear and at full throttle, the pressure should read positive, approx. 0.2 bar when warm and less when cold. If there are no faults, go to 4, otherwise, go to 3. 3 If the pressure reading is below zero (i.e. a vacuum), check the fuel supply circuit from tank to pump e.g. filter and lift pump, and for imploded fuel tank or pipes etc., and rectify. Retest the vehicle. 4 Remove the 24 mm A/F blanking plug, situated beside the inlet and outlet connectors, and fit adaptor, 6408–64 with an O–ring. Fit, preferably, a 0 to 14.0 bar pressure gauge. At idle, the transfer pressure should read between 4.8 to 6.9 bar. If there are no faults, go to 6, otherwise, go to 5. 5 If the pressure is low either the transfer pressure (TP) regulator is stuck open (see Workshop Manual XNB100 for repair) or the transfer pump is worn or broken (remove the pump assembly and replace it). If the TP is high, the TP regulator is stuck closed (see Workshop Manual XNB100 for repair). Remove the TP adaptor, refit the TP plug (ensure that the O–ring is fitted) and tighten it to 23 Nm (204 Ib in). Retest the vehicle. 6 Ensure that the key–switch is off. Remove the connector from the DCU and check pins for damage, incorrect engagement etc. If there are no faults, go to 7, otherwise, go to 8. 7 If damage is apparent, repair it and retest the vehicle. 8 Fit the BOB. Test and record values for: a) Open–circuit b) Short–circuit c) Short–to–ground d) Short to + BAT Fit on BOB pins 41 & 47, and 42 & 47 (see table 1 in Section 5.5 for Rotor A and Rotor B actuator resistance values). If there are no faults, go to 9, otherwise, go to 10. 9 Remove the BOB and reconnect the harness to the DCU. Clear any fault codes and retest the vehicle. If the 2 fault still occurs, go to 12. 10 Remove the connector from the pump and check pins for damage, incorrect engagement etc. If there are no faults, go to 12, otherwise, go to 11. 11 If damage is apparent, repair it and retest the vehicle. 12 Fit the BOB with the adaptor cable to the pump connector. Test and record values for: a) open–circuit b) short–circuit on BOB pins 10 & 6, and 7 & 11 (see table 1 in Section 5.5 for Rotor A and Rotor B actuator resistance values). If test 12 is correct and test 8 is incorrect go to 14; if both tests 12 and 8 are correct go to 15, if test 12 is incorrect go to 13. 13 Fault with an actuator. Identify which actuator from its resistance value (see Section 5.6). Repair the pump and retest the vehicle. If the fault is still present go to 1. 14 Fault with the vehicle harness. Repair and retest the vehicle. If the fault is still present go to 1. 15 Remove the BOB and refit the DCU. Use the LASER 2000 to read the DYNAMIC DISPLAY values; ROTOR DELAY A (feed) and ROTOR DELAY B (drain) and note the values. ROTOR DELAY A should be less than 35 and ROTOR DELAY B less than 50. If there are no faults, go to 17, otherwise, go to 16. 16 If either of the DELAYS is above limits, the relevant actuator is at fault. Repair the pump and retest the vehicle. If the fault is still present go to 1. 17 Clear any fault codes present. Retest the vehicle and if the fault is still present, change the DCU.
  • 15. 4EPIC DI Engine Management System – Diagnostics Coded Faults 11 1173 PUMP ROTOR CALIBRATION This fault code will be displayed if: i) In the ‘pre–crank’ state (‘key–on’), the DCU indicates when the rotor sensor is above or below limits. NOTE At rest, the rotor sensor core is on its end stop (maximum fuel). ii) In the ‘engine running’ state, the DCU indicates, in the zero fuel condition, that the rotor sensor is outside an allowed range. NOTE When the pedal is fully released, the rotor is driven to the zero fuel end–stop. The cause may be due to the following: • A fault in the harness or the rotor sensor connector • Roller shoes tight in the drive shaft • Misalignment of the drive shaft and rotor The vehicle will show symptoms of greatly reduced power and impaired driveability. For intermittent faults go to test 1. For current faults go to test 6. Fit the BOB and connect the Laser 2000. 1 Stop the engine. When it is stationary, key–on and note the ROTOR FEEDBACK value. If the FEEDBACK value is within 212 to 240 go to test 2. If it is outside those limits go to 3. 2 Whilst agitating the harness at the pump and the DCU, note any ROTOR FEEDBACK variation. If the ROTOR FEEDBACK differs by more than +/– 2 go to test 5. If inside limits, go to test 6. 3 Ensure that the key switch is off. Rotate the engine clockwise manually through 90_, using a spanner or wrench on the front pulley bolt, and note the ROTOR FEEDBACK value. If the FEEDBACK value has changed by more than 5 from that noted in test 1, go to 4. If no change, go to test 6. 4 Fault with the pump rotor. Repair the pump and retest the vehicle. 5 Start, stop and ‘key–on’ a couple of times and note the ROTOR FEEDBACK at ‘key–on’. If the ROTOR FEEDBACK varies by more than +/– 5 go to 4. If the FEEDBACK does not vary, go to test 6. 6 Drive the vehicle in third gear, down–hill. With the vehicle driving the engine (foot off the pedal), note the ROTOR FEEDBACK in this condition. If the value is less than 5 go to 8. If the value is greater than 4, go to 7. 7 Fault with the pump rotor. Repair the pump and retest. 8 Ensure that the key–switch is off. Remove the connector from the DCU and check pins for damage, incorrect engagement etc. If there are no faults, go to 10, otherwise, go to 9. 9 If damage is apparent, repair it and retest the vehicle. 10 Fit the BOB. Test and record values for: a) Open–circuit b) Short–circuit c) Short–to–ground d) Short to + BAT on BOB pins 9 & 6 (see table 1 in Section 5.5 for Rotor Sensor resistance values). If there are no faults, go to 11, otherwise, go to 12. 11 Remove the BOB and reconnect the harness to the DCU. Clear any fault codes and retest the vehicle. If the fault still occurs change the DCU. 12 Remove the connector from the pump and check pins for damage, incorrect engagement etc. If there are no faults, go to 14, otherwise go to 13. 13 If damage is apparent, repair it and retest the vehicle. 14 Fit the BOB with the adaptor cable to the pump. Test and record values for: a) open–circuit b) short–circuit on BOB pins 14 and 17 (see table 1 in Section 5.5 for Rotor Sensor resistance values). If test 14 is correct go to test 16, if incorrect go to 15. If both tests 10 and 14 are correct go to 17. 15 Fault with rotor sensor assembly. Repair the pump and retest the vehicle. 16 Fault with the vehicle harness. Repair it and retest the vehicle. 17 Mechanical fault with the pump. Repair the pump and retest the vehicle.
  • 16. EPIC DI Engine Management System – DiagnosticsCoded Faults4 12 4.2 ELECTRIC SHUT–OFF SOLENOID (ESOS) Connector Applicable code: 1170 Description of Operation: The ESOS plunger is held closed by a spring. Lifting of the plunger requires energisation of the ESOS coil. The supply to the ESOS is ‘pulse–width modulated’ (PWM). See Section 5.7 for an explanation of ‘PWM’. The ratio of ‘on’ to ‘off’ periods is varied by the DCU to provide the current level required for the three modes in which the ESOS operates. The modes are: a) Engine stationary, key–switch on. The DCU supplies a small current to check the integrity of the ESOS circuit. b) When, during cranking, the DCU is satisfied that the rotor is in the position required for starting it will supply maximum current for rapid opening of the ESOS. c) When the ESOS is fully open, less current is required to maintain that position. The DCU will reduce the current accordingly. Low resultant current (testing & precrank) Max. resultant current (lifting) Medium resultant current (holding) A045-010 To minimise black smoke on start–up above 0_C, the ESOS is not operated until the pump rotor is in the correct position for starting. Below 0_C, the ESOS is operated instantly on start–up. Functions and Components involved: Transfer pressure Backleak value ESOS DCU Harness Failure may be due to one or more of the following: Restricted fuel supply to the pump Restricted backleak return to the filter Air venting through the system after a filter change. TP regulator fault TP cassette fault ESOS fault Harness/connector fault 1170 ESOS DRIVE CURRENT The vehicle symptoms are that the engine will not start, it stops, or it will not restart. If the engine does restart, only limited power 12 will be available Perform the following: 1 If the engine stops and will not restart, go to 8. If the engine stops and can be restarted, but runs either erratically with stalling or with reduced power, go to 2. 38 47 48 3 2 DCU Connector Pins Pump Connector Pins ESOS A045-011 2 Connect the LASER 2000, start and idle the engine. Set the LASER 2000 to DIAGNOSTICS MENU/ACTUATOR TESTS/KEY ON ENGINE RUNNING/ENGINE SHUT OFF SOLENOID. Operate the ESOS by pressing STOP (F2). Restart the engine and allow it to idle. If in test 2 the engine does not stop, go to 3. If in test 2 the engine stops instantly but will not restart or starts sluggishly, go to test 4. 3 Fault with the ESOS. Repair it and retest the vehicle. 4 Fit a pressure/vacuum gauge in the fuel feed line to the pump and run the engine. In neutral gear and full throttle, pressure should read positive, approx. 0.2 bar when warm and less when cold. If test 4 is correct go to 6, if incorrect go to 5. 5 If the pressure reading is below zero (vacuum), check the fuel supply circuit from tank to pump e.g filter, lift pump, collapsed fuel tank, pipes etc. and rectify. Retest. 6 Remove the 24 mm A/F blanking plug, situated beside the inlet and outlet connectors, and fit adaptor 6408–64, with an O–ring. Fit, preferably, a 0 to 14.0 bar pressure gauge. At idle, the transfer pressure should read between 4.8 to 6.9 bar. If test 6 is correct go to 8, if incorrect go to 7. 7 If the pressure is low then either the transfer pressure (TP) regulator is stuck open (see Workshop Manual XNB100 for repair) or the transfer pump is worn or broken (remove the pump and repair). If the TP is high, the TP regulator is stuck closed (see Workshop Manual XNB100 for repair). Remove the TP adaptor, refit the TP plug (ensure that the O–ring is fitted) and tighten it to 23 Nm (204 Ib in). Retest the vehicle. 8 Ensure that the key–switch is off. Remove the connector from the DCU and check pins for damage, backing–off etc. If test 8 shows no fault go to 10, if incorrect go to 9. 9 If damage is apparent, repair it and retest the vehicle.
  • 17. 4EPIC DI Engine Management System – Diagnostics Coded Faults 13 10 Fit the BOB. Test and record resistance values for: a) Open–circuit b) Short–circuit c) Short–to–ground d) Short to +BAT on BOB pins 38 & 47 (see table 1 Section 5.5 for ESOS resistance value). If test 10 is correct go to 11, if incorrect go to 12. 11 Remove the BOB, reconnect the harness to the DCU and retest the vehicle. If the fault is still present change the DCU. 12 Remove the connector from the pump and check pins for damage, backing–off etc. If test 12 shows no fault go to test 14, if incorrect go to test 13. 13 If damage is apparent, repair it and retest the vehicle. 14 Fit the BOB with adaptor cable to pump connector. Test and record resistance values for: a) Open–circuit b) Short–circuit on BOB pins 3 & 2 (see table 1 in Section 5.5 for ESOS resistance value). If test 14 is correct go to 16, if incorrect go to 15. 15 Fault with the ESOS. Repair the pump and retest the vehicle. If the fault still present go to 1. 16 Fault with the vehicle harness. Repair it and retest the vehicle. If the fault is still present go to 1.
  • 18. EPIC DI Engine Management System – DiagnosticsCoded Faults4 14 4.3 PUMP CAM CONTROL AND PUMP TEMPERATURE SENSOR Applicable codes : 1174, 1175, 1176, 0185, 1185, 1186 Description of Operation: The advance piston is engaged with the cam advance screw and rotates the cam ring. Injection timing is determined by the position of the cam ring, which is controlled by the DCU–driven cam actuator (CAM DEMAND). The position of the cam is determined from the cam sensor feedback (CAM FEEDBACK). The current flowing through the actuator coil determines how far the plunger opens. The current is derived from a PWM supply (see Section 5.6 for explanation of PWM). The DCU controls the cam position in such a way as to reduce any difference between CAM DEMAND and CAM FEEDBACK. To resist ‘cam reaction’ during the pumping cycle, the cam ring is locked hydraulically by the lock–off ball assemblies. A small orifice is positioned in parallel with the lock–off assembly to allow the advance piston to retard, when required, during the non– pumping part of the cycle. The pump temperature sensor is built into the cam position sensor and functions independently of it. Functions and Components involved: Transfer pressure Pump cam control actuator Pump cam position sensor Pump cam position sensor core Pump temperature sensor Cam advance screw Cam position sensor core drive pin. Advance piston (includes control orifice) Advance piston spring Lock–off assemblies and orifice plug Backleak DCU Harness 1174 PUMP CAM POSITION This fault code will be displayed if the DCU identifies either: i) That the sensor resistance is outside limits e.g. open–circuit, short–circuit to ground or +BAT. ii) That there is no feedback to the DCU. The vehicle will show symptoms of reduced power and impaired driveability. Perform the following: 1 Ensure that the key–switch is off. Remove the connector from the DCU and check pins for damage, backing–off etc. If there are no faults, go to 3, otherwise, go to 2. 2 If damage is apparent, repair it and retest vehicle. 18 19 6 43 47 48 19 15 18 12 16 2 1 3 1 Cam sensor 2 Pump temperature sensor 3 Cam advance actuator DCU Connector Pins Pump Connector Pins A045-012 3 Fit the BOB. Test and record resistance values for: a) Short–circuit b) Open–circuit c) Short–to–ground d) Short to +BAT on pins 6 & 18 (see table 1 in Section 5.5 for Cam Sensor resistance value). If there are no faults, go to 4, otherwise, go to 5. 4 Remove the BOB and reconnect the harness to the DCU. Clear any fault codes and retest the vehicle. If the fault still occurs change the DCU. 5 Fit the BOB to the pump using the adaptor cable. Test and record resistance values for: a) Open–circuit b) Short–circuit on BOB pins 18 & 19 (see table 1 in Section 5.5 for Cam sensor resistance value). If no fault is apparent go to 7, if faulty then go to 6. 6 Fault with the cam sensor assembly. Repair the pump and retest the vehicle. 7 Fault with the vehicle harness. Repair it and retest the vehicle.
  • 19. 4EPIC DI Engine Management System – Diagnostics Coded Faults 15 1175 PUMP CAM CONTROL This code will also be displayed if the cam ring ‘drifts’ from its CAM DEMAND position. Failure may be due to one or more of the following: Restricted fuel supply to the pump Restricted backleak return to the filter Harness/connector fault TP regulator fault Transfer pump assembly fault Actuator seat worn Air venting through the fuel system after filter change. Lock–off assemblies worn, damaged, missing, or incorrectly assembled. Perform the following: 1 Fit a pressure/vacuum gauge in the fuel feed line to the pump and run the engine. In neutral gear and at full throttle, pressure should read positive (approx. 0.2 bar when warm and less when cold). If there are no faults, go to 3, otherwise, go to 2. 2 If the pressure reading is below zero (i.e. a vacuum), check the fuel supply circuit from the tank to the pump e.g filter and lift pump, and for imploded fuel tank or pipes etc., and rectify. Retest. 3 Remove the 24 mm A/F blanking plug, situated beside the inlet and outlet connectors, and fit adaptor 6408–64, complete with an O–ring. Fit, preferably, a 0 to 14.0 bar pressure gauge. At idle, the transfer pressure should read between 4.8 to 6.9 bar. If there are no faults, go to 5, otherwise, go to 4. 4 If the pressure is low either the TP regulator is stuck open (see SIN D047 for repair) or the transfer pump is worn or broken (replace the pump). If the TP is high, the TP regulator is stuck closed (see SIN D047 for repair). Remove the TP adaptor, refit the TP plug (ensure that the O–ring is fitted) and tighten it to 23 Nm (204 Ib in). Retest the vehicle. 5 Ensure that the key–switch is turned off. Connect the LASER 2000, turn the key–switch on, and set the LASER 2000 to ACTUATOR TESTS/ PUMP CAM ACTUATOR. Disconnect the harness from the pump. Using the DOWN (F2) key, set PUMP CAM PWM DRIVE to zero. Using the UP (F4) key set PUMP CAM PWM DRIVE to 1000. Using a multimeter set to milliamps (mA), measure and record the current on the harness connector pins 12 and 16. If the value is between 70 and 80 mA, go to 6. If the value is outside these limits, go to 7. 6 Fault with the pump. Rectify it and retest. 7 Ensure that the key–switch is off. Remove the connector from the DCU and check both DCU and pump connector pins for damage, backing–off etc. If there are no faults, go to 9, otherwise, go to 8. 8 If damage is apparent, repair it and retest the vehicle. 9 Fit the BOB. Test and record resistance values for: a) Open–circuit b) Short–to–ground c) Short to +BAT between BOB pin 43 and harness connector pin 12, and BOB pin 47 and harness connector pin 16. If there are no faults, go to 10, otherwise, go to 11. 10 DCU fault. Replace it and retest the vehicle. 11 Harness fault. Repair it and retest the vehicle. NOTE If a LASER 2000 is not available, carry out continuity checks on: i) DCU connector pins 43 and 47, via the BOB, ii) Pump connector pins 12 and 16 (see table 1 in Section 5.6 for the Cam actuator resistance value) 1176 PUMP CAM CALIBRATION This fault code will be displayed if, in the ‘pre–crank’ state (key–switch on), the DCU identifies that the cam calibration is above or below limits. Note that, at rest, the advance piston is on its end stop. The vehicle symptoms are reduced power and impaired driveability. Perform the following: 1 When the key–switch is turned on, CAM FEEDBACK should be between 8 and 16. If CAM FEEDBACK value is outside limits, go to test 2. If CAM FEEDBACK value is inside limits, go to 4. 2 Start the engine, stop it and turn the key–switch on twice, noting the CAM FEEDBACK values. If the value changes to that in test 1, go to 3. If the value does not change, go to 4. 3 Pump sensor, core, or cam ring fault. 4 Ensure that the key–switch is off. Remove the connector from the DCU and check the pins for damage, backing– off etc. If there are no faults, go to 6, otherwise, go to 5. 5 If damage is apparent, repair it and retest the vehicle.
  • 20. EPIC DI Engine Management System – DiagnosticsCoded Faults4 16 6 Fit the BOB. Test and record resistance values for: a) Open–circuit b) Short–circuit c) Short–to–ground d) Short to +BAT on BOB pins 6 & 18 (see table 1 in Section 5.5 for Cam sensor resistance values). If there are no faults, go to 8, otherwise, go to 7. 7 Remove the BOB and reconnect the harness to the DCU. Clear any fault codes and retest the vehicle. If the fault still occurs change the DCU. 8 Remove the connector from the pump and check pins for damage, backing–off etc. If there are no faults, go to 10, otherwise, go to 9. 9 If damage is apparent, repair it and retest the vehicle. 10 Fit the BOB to the pump using the adaptor cable. Test and record resistance values for: a) Open–circuit b) Short–circuit between BOB pins 18 and 19 (see table 1 in Section 5.5 for Cam sensor resistance value). If there are no faults, go to 12, otherwise, go to 11. 11 Fault with the cam sensor assembly. Repair the pump and retest the vehicle. 12 Fault with the vehicle harness. Repair it and retest the vehicle. 0185 PUMP TEMPERATURE 1185 PUMP TEMPERATURE HIGH 1186 PUMP TEMPERATURE LOW These fault codes will be displayed if the DCU identifies that the sensor is outside resistance limits. The sensor is a negative temperature coefficient thermistor (its resistance is inversely proportional to temperature) i.e. Iow resistance = high temperature, high resistance = low temperature. An open–circuit failure (infinite resistance) will display a low temperature value and a short–circuit failure (low resistance) will display a high temperature value. The vehicle will show symptoms of slightly reduced power. Perform the following: 1 Ensure that the key–switch is off. Remove the connector from the DCU and check the pins for damage, backing– off etc. If there are no faults, go to 3, otherwise, go to 2. 2 If damage is apparent, repair and retest vehicle. 3 Fit the BOB. Test and record resistance values for: a) Open–circuit b) Short–circuit c) Short–to–ground d) Short to +BAT on pins BOB 6 & 19 (see table 1 in Section 5.5 for pump temperature sensor resistance values). If there are no faults, go to 4, otherwise, go to 5. 4 Remove the BOB and reconnect the harness to the DCU. Clear any fault codes and retest the vehicle. If the fault still occurs change the DCU. 5 Remove the connector from the pump and check the pins for damage, backing–off etc. If there are no faults, go to 7, otherwise, go to 6. 6 If damage is apparent, repair it and retest the vehicle. 7 Fit the BOB to the pump using the adaptor cable. Test and record resistance values for: a) Open–circuit b) Short–circuit on BOB pins 15 & 18 (see table 1 in Section 5.5 for pump temperature sensor resistance values). If test 7 shows no fault go to 9, if it is incorrect go to 8. 8 Fault with the cam sensor assembly. Repair the pump and retest the vehicle. 9 Fault with the vehicle harness. Repair it and retest the vehicle.
  • 21. 4EPIC DI Engine Management System – Diagnostics Coded Faults 17 4.4 CALIBRATION RESISTOR Applicable codes : 11 90 Description of Operation: The calibration resistor is located in the pump connector. A range of resistances is used for production fuel setting. The vehicle symptom is a slight loss of power. Components involved: Calibration resistor pump connector (within the harness) DCU 1190 CALIBRATION RESISTOR This fault code will be displayed if either: i) The measured value lies outside the tolerance band ii) Apparent nominal resistor value differs from that measured on ‘key–on’. Perform the following: Record the value of the calibration resistor which is fitted, by referringtotheLASER2000/DlAGNOSTlCSMODE/DYN AMlC DISPLAY / CALIBRATION. (Refer to table 2 in Section 5.5 for Calibration Resistor values.) 1 Ensure that the key–switch is off. Remove the connector from the DCU and check the pins for damage, backing–off etc. If there are no faults, go to 3, otherwise, go to 2. 2 If damage is apparent, repair it and retest the vehicle. 3 Fit the BOB. Test and record resistance values for: a) Open–circuit b) Short–circuit c) Short–to–ground d) Short to +BAT on BOB pins 16 & 50. (See table 2 in Section 5.5 for Calibration Resistor values.) If there are no faults, go to 4, otherwise, go to 5. 4 Remove the BOB and reconnect the harness to the DCU. Clear any fault codes and retest the vehicle. If the fault still occurs change the DCU. 5 Remove the connector from the pumpa nd check pins for damage, backing–off etc. If there are no faults, go to 7, otherwise, go to 6. 6 If damage is apparent, repair it and retest the vehicle. 16 50 8 9 DCU Connector Pins Pump Connector PINS Vehicle harness CALIBRATION RESISTOR A045-013 7 Fit the BOB to the pump using the adaptor cable. Test and record resistance values for: a) Open–circuit b) Short–circuit Between BOB pins 9 & 8 (using data from item 3 above, see table 2 in Section 5.6 for value). If there are no faults, go to 9, otherwise, go to 8. 8 Fault with the connector assembly. Repair the pump and retest the vehicle. 9 Fault with the vehicle harness. Repair it and retest the vehicle.
  • 22. EPIC DI Engine Management System – DiagnosticsCoded Faults4 18 4.5 PUMP SPEED SENSOR (DRIVE SHAFT POSITION) Applicable codes : 1644, 1189 Description of Operation: The pump speed sensor is a ‘Hall Effect’ device, note that the ‘period’ is the time between identical points on successive cycles. There are four pulses per pump revolution. The vehicle symptom is loss of power (reduced fuel). Components involved: Pump speed (drive shaft position) sensor Harness and connectors DCU Test Equipment: Use the static timing device YWB317 and the specified BOB. 1644 PUMP SPEED SENSOR 1189 PUMP SPEED LOST These faults will be displayed if either: i) The period is not within the allowed limit, or ii) No pump speed signal is present. The sensor detects the passage of ‘flags’ on the pump timing ring and supplies to the DCU a signal which is interpreted to provide the following: i) Pump speed. ii) Drive shaft angular position (basic timing). Perform the following: 1 Ensure that the key–switch is off. Remove the connector from the DCU and check the pins for damage, backing– off etc. If there are no faults, go to 3, otherwise, go to 2. 2 If damage is apparent, repair it and retest the vehicle. 3 Fit the BOB. Plug the timing device into the BOB in the following order: Red wire to pin 47 Black wire to pin 50 White wire to pin 7. Crank the engine and note if the red and green LEDs on the timing device flash alternately and evenly. NOTE Every fourth pair of flashes will be slightly shorter than the others. If test 3 is correct go to 4, if it is incorrect i.e. uneven or no flashes, go to 5. DCU Connector Pins Pump Connector Pins Vehicle harnessRed White Black PUMP SPEED SENSOR STATIC TIMING DEVICE YWB317 47 50 7 1 4 5 A045-024 4 Remove the BOB and reconnect the harness to the DCU. Clear any fault codes and retest the vehicle. If the fault still occurs change the DCU. 5 Remove the connector from the pump and check the pins for damage, backing–off etc. If there are no faults, go to 7, otherwise, qo to 6. 6 If damage is apparent, repair it and retest the vehicle. 7 Fit the BOB to the pump connector with the adaptor cable. Plug the timing device into the BOB in the following order: Red wire to pin 1 Black wire to pin 4 White wire to pin 5. Crank the engine and note if the red and green LED’s on the timing device flash alternately and evenly. NOTE Every fourth pair of flashes will be slightly shorter than the others. If test 7 is correct go to 9, if it is incorrect go to 8. 8 Fault with the pump speed sensor. Repair the pump and retest the vehicle. 9 Fault with the vehicle harness. Repair it and retest the vehicle.
  • 23. 4EPIC DI Engine Management System – Diagnostics Coded Faults 19 4.6 PEDAL SENSOR CONTROL Applicable codes : 1180, 1181, 1182, 1183, 1184, 1252, 1253, 1254, 1255, 1256, 1257, 1258 Description of Operation: The assembly comprises: A ‘reverse’ twin–pack potentiometer (PDS1 & PDS2) A ‘low pedal–demand’ (idling position) switch (LPDS) A ‘high pedal–demand’ (kick–down position) switch (HPDS) NOTE A ‘reverse twin–pack potentiometer’ comprises a pair of potentiometers mounted on the same shaft and arranged so that when one of the pair presents a high voltage at its output, the other presents a low voltage. The two switches are for validating the pedal sensor values. With no throttle response i.e. engine stationary or at idle, LPDS is open and HPDS is closed. At part–throttle, both switches are closed. At full throttle, LPDS is closed and HPDS is open. HPDS is also used to initiate automatic gearbox kick–down. The potentiometer assembly is part of the LDV pedal assembly and is non–repairable. It must be replaced if faulty. Components involved: Pedal assembly Harness and plugs DCU 1180 PEDAL DEMAND SENSOR FAILED 1181 PEDAL – PDS1 HIGH 1182 PEDAL – PDS1 LOW 1183 PEDAL – PDS2 HIGH 1184 PEDAL – PDS2 LOW PEDAL – CORRELATION BETWEEN PDS1 & LPDS HIGH 1252 PEDAL – CORRELATION BETWEEN PDS1 & LPDS LOW 1253 PEDAL – CORRELATION BETWEEN PDS2 & LPDS HIGH 1254 PEDAL – CORRELATION BETWEEN PDS2 & LPDS LOW 1255 PEDAL – CORRELATION BETWEEN PDS1 & HPDS 1256 PEDAL – CORRELATION BETWEEN PDS2 & HPDS 1257 PEDAL – CORRELATION BETWEEN PDS1 & PDS2 1258
  • 24. EPIC DI Engine Management System – DiagnosticsCoded Faults4 20 Perform the following: 1 Ensure that the key–switch is off. Remove the connector from the DCU and check the pins for damage, backing–off etc. If there are no faults, go to 3, otherwise, go to 2. 2 If damage is apparent, repair it and retest the vehicle. 3 Fit the BOB to the harness. With the pedal released and later fully depressed record resistance values for: a) Short–to–ground b) Short to +BAT on BOB pins 8, 10, 29, 30, 33, 50 and 51. If there are no faults, go to 6, otherwise, go to 4. 4 Remove the connector from the sensor and repeat test 3. If the fault is still apparent go to 5, otherwise, go to 6. 5 Harness faulty. Repair and retest the vehicle. 6 Check for correct operation of the HPDS and LPDS switches. Reconnect the harness to the sensor and measure the resistance across the BOB terminals listed in the table below, recording the results. Pedal Position BOB– Result (ideal) Released 8 30 50 50 open–circuit short–circuit Depressed fully 8 30 50 50 1.0 k to 5.5 k Ohms short–circuit If the test results differ from those listed go to 9, otherwise, go to 7. 7 Check for correct operation of the pedal sensor tracks. Measure the resistance across the BOB pins listed in the table below and record values. Pedal Position Grop BOB pins Released 1a 1b 33 51 10 29 2a 2b 10 29 51 33 Depressed 3a 3b 33 51 10 29 4a 4b 10 29 51 33 If the following pairs of results: 1 a and 4a, 1 b and 4b, 2a and 3a, 2b and 3b differ by more than 400 Ω go to 9. Otherwise go to 8. 8 Reconnect the harness to the DCU. Connect the LASER 2000 and turn the key–switch on (do not start the engine). Set the LASER 2000 to read DYNAMIC DISPLAY items: PEDAL POSN 1 and PEDAL POSN 2, and record values for: i) Pedal position 1: (a) foot–off, and (b) fully depressed ii) Pedal position 2: (a) foot–off, and (b) fully depressed Also, note if the values ‘jump’, whilst moving the pedal position slowly. If the values 1 ) (a) and 2) (a) are outside 7% to 11 %, and 1 ) (b) and 2) (b) are outside 87% to 93%, or the values change erratically (jump), go to 9. If otherwise, go to 10. 9 Fault with the pedal sensor assembly. Replace the assembly and retest the vehicle. 10 Clear all the fault codes and re–test the vehicle. If the fault still occurs go to 1.
  • 25. 4EPIC DI Engine Management System – Diagnostics Coded Faults 21 4.7 ENGINE SPEED SENSOR (CRANKSHAFT POSITION) Applicable codes: 0335, 0336 Description of Operation: The engine speed sensor is an inductive device. The sensor detects the passage of holes drilled in the engine flywheel and supplies to the DCU a signal which is interpreted to provide: i) Engine speed ii) Engine crankshaft angular position The vehicle symptom is loss of power (reduced fuel). Components involved: Engine speed sensor Harness and connectors DCU These faults will be displayed if: i) The interval between sequences of pulses is corrupted ii) The interval between pulses is too small iii) No engine speed signal is present 0335 ENGINE SPEED SENSOR 0336 ENGINE SPEED LOST Perform the following: 1 Check to see if a shim is fitted between the sensor body and the bell housing. If a shim is fitted go to 3, if not go to 2. 2 Clean the mounting faces, fit a new shim, refit the sensor to the engine, retest the vehicle. 3 Ensure that the key–switch is off. Remove the connector from the DCU and check the pins for damage, backing–off etc. If there are no faults, go to 5, otherwise, go to 4. 4 If damage is apparent, repair it and retest the vehicle. 5 Fit the BOB. Test and record resistance values for: a) Open–circuit b) Short–circuit c) Short–to–ground d) Short to +BAT on BOB pins 14 & 53 (see table 1 in Section 5.5 for the Engine Speed sensor resistance value). Also, test for open–circuit between BOB pins 3 & 14 and 3 & 53. If no fault is apparent go to 6, if the screening tests are incorrect go to 7, if other tests incorrect go to 8. 6 Remove the BOB and reconnect the harness to the DCU. Retest the vehicle. 7 Fault with the harness screening. Repair it and retest. 14 DCU Connector Pins Sensor Connector Pins Vehicle harness ENGINE SPEED/ CRANKSHAFT POSITION SENSOR Screen 53 3 A045-019 8 Remove the connector from the sensor and check the pins for damage, backing–off etc. If no fault is apparent go to 10, if it is incorrect go to 9. 9 If damage is apparent, repair it and retest the vehicle. 10 Test and record resistance values for: a) Open–circuit b) Short–circuit on the sensor pins (see table 1 in Section 5.5 for engine speed sensor resistance value). If there are no faults, go to 12, otherwise, go to 11. 11 Fault with the sensor. Replace it and retest the vehicle. If the fault is still present go to 1. 12 Fault with the vehicle harness. Repair it and retest the vehicle. If fault is still present go to 1.
  • 26. EPIC DI Engine Management System – DiagnosticsCoded Faults4 22 4.8 ENGINE COOLANT TEMPERATURE SENSOR Applicable codes: 0116, 0117, 0118 Description of Operation: The sensor is a negative temperature coefficient thermistor (its resistance is inversely proportional to temperature) i.e. Low temperature = high resistance, high temperature = low resistance. The DCU will vary the amount of fuel injected and injection timing, dependent upon engine temperature. This fault code will be displayed if the DCU identifies that the sensor is outside resistance limits. The vehicle symptom is slightly reduced power. Components involved: Engine coolant temperature sensor Harness and plugs DCU 0116 COOLANT TEMPERATURE 0117 COOLANT TEMPERATURE LOW 0118 COOLANT TEMPERATURE HIGH Perform the following: 1 Ensure that the key–switch is off. Remove the connector from the DCU and check the pins for damage, backing–off etc. If there are no faults, go to 3, otherwise, go to 2. 2 If damage is apparent, repair it and retest the vehicle. Fit the BOB. Test and record resistance values for: 3 Test and record resistance values for: a) Open–circuit b) Short–circuit c) Short–to–ground d) Short to +BAT on BOB pins 17 & 50 (see table 3 in Section 5.5 for the Engine coolant temperature sensor resistance values). If there are no faults, go to 4, otherwise, go to 5. 4 Remove the BOB and reconnect the harness to the DCU. Clear any fault codes and retest the vehicle. If the fault still occurs change the DCU. 5 Remove the connector from the sensor and check the pins for damage, backing–off etc. If there are no faults, go to 7, otherwise, go to 6. 6 If damage is apparent, repair it and retest the vehicle. 17 1 2 50 DCU Connector Pins Sensor Connector Pins Vehicle harness ENGINE COOLANT TEMPERATURE SENSOR A045-018 7 Test and record resistance values for: a) open–circuit b) short–circuit on sensor pins 1 & 2 (see table 1 in Section 5.5 for the Engine coolant temperature sensor resistance values). 8 Fault with the sensor. Replace it and retest the vehicle. 9 Fault with the vehicle harness. Repair it and retest the vehicle.
  • 27. 4EPIC DI Engine Management System – Diagnostics Coded Faults 23 4.9 AIR CHARGE TEMPERATURE SENSOR Applicable codes: 0110, 0112, 0113 Description of Operation: The sensor is a negative temperature coefficient thermistor. (Its resistance inversely proportional to temperature) i.e. Iow temperature = high resistance, high temperature = low resistance. The DCU will vary the amount of fuel injected and injection timing, dependent upon air charge temperature. This fault code will be displayed if the DCU identifies that the sensor is outside resistance limits. The vehicle symptom is slight loss of power (reduced fuel). Components involved: Air charge temperature sensor Harness and connectors DCU 0110 AIR TEMPERATURE 0112 AIR TEMPERATURE LOW 0113 AIR TEMPERATURE HIGH Perform the following: 1 Ensure that the key–switch is off. Remove the connector from the DCU and check the pins for damage, backing–off etc. If there are no faults, go to 3, otherwise, go to 2. 2 if damage is apparent, repair it and retest the vehicle. 3 Fit the BOB. Test and record resistance values for: a) open–circuit b) short–circuit c) short–to–ground d) short to +BAT on BOB pins 15 & 50 (see table 4 in Section 5.5 for the air charge temperature sensor resistance values). If there are no faults, go to 4, otherwise, go to 5. 4 Remove the BOB and reconnect the harness to the DCU. Clear any fault codes and retest the vehicle. If the fault still occurs change the DCU. 5 Remove the connector from the sensor and check the pins for damage, backing–off etc. If there are no faults, go to 7, otherwise, go to 6. 6 If damage is apparent, repair it and retest the vehicle. 50 1 2 15 DCU Connector Pins Sensor Connector Pins Vehicle harness AIR CHARGE TEMPERATURE SENSOR A045-017 7 Test and record resistance values for: a) Open–circuit b) Short–circuit on sensor pins 1 & 2. Air charge temperature sensor resistance values can be found in section 5.5. If there are no faults, go to 9, otherwise, go to 8. 8 Fault with the sensor. Replace it and retest the vehicle. 9 Fault with the vehicle harness. Repair it and retest the vehicle.
  • 28. EPIC DI Engine Management System – DiagnosticsCoded Faults4 24 4.10 EXHAUST GAS RECIRCULATION (EGR) Applicable codes : 1402, 0401, 0402, 0400, 1193, 0122,0123,1122,1123,1224,1125 Description of Operation: The LDV EGR system is designed to reduce nitrous oxide (NOx) emissions in the exhaust gases by limiting the amount of oxygen available for combustion at part–load. Reduction of oxygen is achieved by the admission of a controlled amount of exhaust gas into the engine inlet manifold, thus limiting combustion temperature, which is a controlling factor in the formation of NOx. The system has a Current–to–Vacuum Transducer (CVT), controlled by a PWM current (EGR DEMAND) from the DCU, and which applies a variable vacuum to an EGR valve (connected to the exhaust manifold), and a throttle valve which is in the engine air intake system after the turbocharger compressor. The CVT is connected to the vehicle braking system vacuum Supply. A position sensor built–in to the EGR valve provides a signal to the DCU (EGR VLVE POSN). Model year 1997 vehicles have a system which uses an EVR instead of the CVT. These components are not interchangeable. See section 5.6 for an explanation of ‘PWM’. Components involved: CVT Vacuum supply to CVT EGR valve EGR valve position sensor Pipes DCU Harness and connectors 1402 EGR VALVE POSITION SENSOR 0401 EGR SENSOR LOW 0402 EGR SENSOR HIGH These fault codes will be displayed if the DCU identifies that either: i) The sensor value is above ‘high limit’ or below ‘low limit’. ii) EGR valve position does not show movement in th required direction. Perform the following: 1 Check the vacuum supply (engine at idle) to the CVT or EVR by removing the pipe to the EGR valve, and noting if the valve makes a click when it closes. Check that all pipes are clear and not damaged. If there are no faults, go to 3, otherwise, go to 2. 2 If damage is apparent, repair it and retest. 35 2 52 40 47 1 3 2 1- 2+ DCU connector pins Sensor connector pins 48 Vehicle harness EGR VALVE POSITION SENSOR EGR CURRENT-TO-VACUUM TRANSDUCER (CVT) A045-015
  • 29. 4EPIC DI Engine Management System – Diagnostics Coded Faults 25 3 Ensure that the key–switch is off. Remove the connector from the DCU and check the pins for damage, backing– off etc. If no fault is apparent go to 5, if there is a fault go to 4. 4 If damage is apparent, repair it and retest the vehicle. 5 Fit the BOB and disconnect the boost pressure sensor. Test and record resistance values for: a) Open–circuit b) Short–circuit c) Short–to–ground d) Short to +BAT on BOB pins 35 & 52, and 2 & 52 (see table 1 in Section 5.5 for External supply EGR position, and EGR position sensor resistance values). If no fault is apparent go to 6, if there is a fault go to 7. 6 Remove the BOB and reconnect the harness to the DCU. Clear any fault codes and retest the vehicle. If the fault still occurs change the DCU. 7 Remove the connector from the EGR valve position sensor and check the pins for damage, backing–off etc. If there are no faults, go to 9, otherwise, go to 8. 8 If damage is apparent, repair it and retest the vehicle. 9 Test and record resistance values for: a) Open–circuit b) Short–circuit on pins 1 & 2, and 3 & 2 (see table 1 in Section 5.5 for External Supply, EGR position and EGR Position Sensor resistance values). If there are no faults, go to 11, otherwise, go to 10. 10 Fault with the EGR position sensor. Repair it and retest the vehicle. 11 Fault with the vehicle harness. Repair it and retest the vehicle. 0400 EGR CONTROL 1193 EGR DRIVE OVERCURRENT 0122 THROTTLE VALVE LOW 0123 THROTTLE VALVE HIGH 1122 THROTTLE CALIBRATION LOW 1123 THROTTLE CALIBRATION HIGH 1224 THROTTLE CALIBRATION 1125 THROTTLE POSITION FAULT Fault code 0400 will be displayed because: i) The EGR VLVE POSN exceeds demand (EGR DEMAND) and has not reduced since the last reading ii) EGR DEMAND exceeds EGR VLVE POSN and has not reduced since the last reading. Fault code 1193 will be displayed because the DCU– supplied drive current exceeds a maximum limit. Perform the following: 1 Clean the CVT or EVR filter located on the CVT or EVR, beneath the large removable disc. Ensure that the key–switch is off. Connect the LASER 2000, turn the key–switch on, start the engine and run at idle. Set the LASER 2000 to ACTUATOR TESTS/ EGR CURRENT TO VACUUM. Using the DOWN (F2) key, set EGR CVT DEMAND to zero. Using the UP (F4) key, gradually increase the value, noting whether the throttle valve (situated on the air inlet manifold) is moving. If the throttle valve does not move, go to 2. Otherwise go to 3. 2 Ensure that the vacuum pipes are clear, and retest. Re–run 1 and, if the throttle valve still does not move, replace the CVT or EVR. Retest. 3 The vacuum supply is correct. At idle, remove the pipe from the EGR poppet valve, noting whether the valve closes with an audible ‘click’. If the valve does not operate correctly, go to 4. Otherwise go to 5. 4 Replace the EGR valve and retest. 5 Ensure that the key–switch is off. Remove the connector from the DCU and check the pins for damage, backing–off etc. If there is a fault go to 6. If no fault is apparent, go to 7. 6 If damage is apparent, repair it and retest the vehicle. 7 Fit the BOB, and test and record resistance values for: a) Open–circuit b) Short–circuit c) Short–to–ground d) Short to +BAT on BOB pins 40 and 47 (see table 1 in Section 5.5 for CVT or EVR resistance values). Also pins 49 and 47 for Model Year 97 vehicles. It there is a fault, go to 8. If no fault is apparent, go to 9. 8 Remove the BOB and reconnect the harness to the DCU. Clear any fault codes and retest the vehicle. If the fault still occurs change the DCU. Retest. 9 Remove the connector from the CVT or EVR and check the pins for damage, backing–off, etc. If there is a fault, go to 10, otherwise go to 11. 10 If damage is apparent, repair it and retest the vehicle. 11 Test and record resistance values on CVT or EVR pins 1 and 2 (see the table 1 in Section 5.5 for CVT or EVR resistance values). If there are no faults, go to 12, otherwise go to 13. 12 Fault with the vehicle harness. Repair it and retest the vehicle. 13 Fault with the CVT or EVR. Repair it and retest the vehicle.
  • 30. EPIC DI Engine Management System – DiagnosticsCoded Faults4 26 4.11 BOOST PRESSURE SENSOR Applicable codes : 0105, 1108, 1109, 1300, 1301, 1302 Description of Operation: The boost pressure sensor is provided with a 4.75V reference voltage from the DCU. Its output voltage is proportional to boost pressure. The DCU adjusts the amount of fuel injected and the injection timing according to boost pressure. Components involved: Boost sensor Turbocharger DCU Harness and connectors 0105 BOOST SENSOR 1108 BOOST SENSOR HIGH 1109 BOOST SENSOR LOW These fault codes will be displayed if, whilst in ‘precrank’ or ‘idle’, the DCU identifies that the sensor output signal is: i) Above the ‘high–limit’ threshold, or ii) Below the ‘low–limit’ threshold A failed turbocharger or blockage in the air inlet could restrict air flow and thus drop the air pressure below the ‘low–limit’ threshold. If the turbocharger wastegate fails to open, the boost pressure would exceed the ‘high–limit’ threshold. 1300 BOOST CALIBRATION 1301 BOOST CALIBRATION > HIGH LIMIT 1302 BOOST CALIBRATION < LOW LIMIT These fault codes will be displayed if, whilst in ‘precrank’ or ‘idle’, the DCU identifies that the sensor output signal is: i) Above the ‘high–limit’ threshold, or ii) Below the ‘low–limit’ threshold The threshold range is less than for Boost Sensor fault codes. Perform the following: 1 For BOOST CALIBRATION FAULTS go to test 3. For BOOST PRESSURE LOW, check the air inlet for blockage; i.e. at the air fiIter or turbocharger compressor. Also check that the turbocharger is rotating. For BOOST PRESSURE HIGH, check that the turbocharger waste gate is operating. If there are no faults, go to 3, otherwise, go to 2. 35 11 52 A B C DCU Connector Pins Sensor Connector Pins Vehicle harness Boost Pressure Sensor A045-014 2 If blockage or damage is apparent, repair it and retest the vehicle. 3 Ensure that the key–switch is off. Remove the connector from the DCU and check the pins for damage, backing–off etc. If there are no faults, go to 5, otherwise, go to 4. 4 If damage is apparent, repair it and retest the vehicle. 5 Fit the BOB and disconnect the EGR position sensor. Test and record resistance values for: a) Open–circuit b) Short–circuit c) Short–to–ground d) Short to +BAT on BOB pins 35 & 52, and 11 & 52 (see table 1 in Section 5.5 for External supply (boost sensor) and Boost pressure sensor resistance values). If there are no faults, go to 6, otherwise, go to 7. 6 Remove the BOB and reconnect the harness to the DCU and the EGR position sensor. Clear any fault codes and retest the vehicle. If the fault still occurs change the DCU. 7 Remove the connector from the boost sensor and check the pins for damage, backing–off etc. If there are no faults, go to 9, otherwise, go to 8. 8 If damage is apparent, repair it, reconnect the harness and retest the vehicle. 9 Test and record resistance values for: a) Open–circuit b) Short–circuit on pins C & A, and B & A (see Section 5.4 for pin identification and table 1 in Section 5.5 for External supply, and boost pressure sensor resistance values). If no fault is shown then go to 11, if there is a fault go to 10. 10 Fault with the boost sensor. Replace it, reconnect the harness and retest the vehicle. 11 Fault with the vehicle harness. Repair it, reconnect the harness and retest the vehicle.
  • 31. 4EPIC DI Engine Management System – Diagnostics Coded Faults 27 4.12 POWER HOLD RELAY, KEY–SWITCH, AND BATTERY CIRCUIT Applicable codes : 1191, 1196, 1197, 9671, 9317, 9318, 1606 Description of Operation: When the key–switch is turned to position ii (‘key–on’), +BAT is applied to DCU pin 20. The DCU then takes DCU pin 45 to ‘ground’ potential, which energises the power hold relay. +BAT is then applied to the main DCU power pins 47 and 48. During ‘key–off’ the ESOS is immediately de–energised by the DCU. The power hold relay is not de–energised until the engine has stopped. This means that DCU can take alternative action if the ESOS (De–energised) fails to stop the engine. (e.g. the DCU will ensure that the pump rotor is driven to the ‘zero fuel’ position.) The DCU monitors its power supply and will record fault codes if +BAT falls outside set limits. Components involved: Key switch Power hold relay Fuses Battery and cables Harness and connectors DCU 1191 KEY LINE VOLTAGE 1196 KEY–OFF VOLTAGE HIGH 1197 KEY–OFF VOLTAGE LOW These fault codes will be displayed if the sensed voltage on the key–switch line (DCU pin 20) is below 8 Volts or above 16 Volts. NOTE The battery voltage may drop whilst the engine is running if it is being used as a slave battery to start another vehicle, thus creating fault codes. Action Check the two fuses. Replace if faulty, and retest. Perform the following: 1 Check that battery and earth–to–vehicle–body terminals/connectors are clean and tight. With the multimeter set to measure Volts DC, measure voltage across the battery terminals. If below 10 Volts, go to test 2. If above 10 Volts, go to test 3. 2 Carry out battery Volt–drop test using a heavy discharge tester directly on the battery terminals (‘key–off’). If it fails this test, recharge or renew the battery. Retest the vehicle. 3 Start the engine, using a slave battery if necessary, and allow it to idle. Ensure that the charge warning light goes out by increasing engine speed. Return the engine to idle speed and measure the voltage across the vehicle battery terminals. If the voltage exceeds 14 Volts, or the charge warning light does not go out, go to 4. If the battery voltage is below 14 Volts, go to 5. 45 47 DCU Connector Pins Switch Connector Pins Vehicle harness 20 48 54 55 + - 15 0 1 2 350 30 5.0 A 5A KEY-SWITCH (Position 2) To starter solenoid VEHICLE BATTERY POWER HOLD RELAY Link these two pins in order to pull- in the relay A045-020
  • 32. EPIC DI Engine Management System – DiagnosticsCoded Faults4 28 4 There is a fauIt with the charging circuit e.g. the alternator regulator has failed. Rectify it and retest vehicle. 5 Disconnect the plug from the DCU and check pins for damage, backing off etc. If there are no faults, go to 6, otherwise, go to 7. 6 Rectify the fault and retest the vehicle. 7 Fit the BOB with the adaptor cable and turn on the key–switch. Test and record values for open–circuit between pin 20 and the battery positive terminal. If the resistance is greater than 3 Ohms, go to 8. If the resistance is less than 3 Ohms go to 9. 8 Fault with the key switch; rectify or replace it and retest. 9 Test and record values for open–circuit between pin 54 and battery negative terminal, and between pin 55 and the battery negative terminal. If, in test 9, the resistance is greater than 3 Ohms, go to 10. If the resistance is less than 3 Ohms go to 11. 10 Fault with the harness. Rectify it and retest. 11 Remove the BOB, reconnect the DCU and retest the vehicle. If the fault persists change the DCU. 9671 BATTERY VOLTAGE 9317 BATTERY VOLTAGE HIGH 9318 BATTERY VOLTAGE LOW These fault codes will be displayed if the sensed voltage on the power line (DCU pins 47 and 48) is below 8 Volts or above 16 Volts. For low voltage, the symptoms will be a noticeable drop in cranking speed when hot, and no crank when cold. NOTE The battery voltage may drop if it is being used as a slave battery to start another vehicle, thus creating fault codes. Perform the following: 1 With the engine at rest, check the condition of the following cables and connectors between the battery terminals and the vehicle electrical system: D Battery positive to the starter motor D Battery negative to the engine and the vehicle body/chassis With the multimeter set to measure Volts DC, measure the voltage across the battery terminals. If it is below 10 Volts, go to test 2. If it is above 10 Volts, go to test 3. 2 Carry out a battery ‘Volt drop test’ using a heavy discharge tester directly on the battery terminals (‘key–off’). If it fails this test, recharge or renew the battery. Retest the vehicle. 3 Start the engine, using a ‘slave’ battery if necessary, and allow it to idle. Ensure that the charge warning light goes out by increasing engine speed. Return the engine to idle speed and measure the voltage across the vehicle battery terminals. If the voltage exceeds 14 Volts or the charging warning light does not go out, go to test 4. If the battery voltage is below 14 Volts go to 5. 4 There is a fault with the charging circuit e.g. alternator regulator failed. Rectify it and retest the vehicle. 5 Disconnect the plug from the DCU and check pins for damage, backing off etc. If there are no faults, go to 6, otherwise, go to 7. Rectify the fault and retest the vehicle. 7 Fit the BOB with the adaptor cable. Link BOB pins 54 and 45 (this action energises the power hold relay). Test and record values for open–circuit between BOB pin 47 and the battery positive terminal. If the value is greater than 3 Ohms, go to test 8. If the value is less than 3 Ohms, go to test 9. 8 Fault with the power hold relay. Rectify or replace it and retest. 9 Test and record resistance values for: a) Open–circuit b) Short to +BAT between BOB pin 54 and the battery negative terminal, and BOB pin 55 and the battery negative terminal. If the resistance is greater than 3 Ohms, go to 10. If resistance is less than 3 Ohms go to 11. 10 Fault with the harness. Rectify and retest. 11 Remove the BOB, reconnect the DCU and retest the vehicle. If the fault persists change DCU. 1606 ECU POWER HOLD RELAY This fault will be recorded if the DCU is unable to switch off the power hold relay after key–off’. Perform the following: 1 Fit the BOB to the harness. Test and record resistance values for an open–circuit between BOB pin 45 and the battery positive terminal. Power hold relay drive resistance values should be between 80 Ω and 100 Ω. If the value is incorrect, go to 2. If the value is correct, go to test 3. 2 Fault with the power hold relay. Rectify it and retest. 3 Test and record resistance values for: a) open–circuit b) short to +BAT between BOB pin 54 and the battery negative terminal, and BOB pin 55 and the battery negative terminal. If, in test 3, the resistance is greater than 3 Ohms, go to 4. If the resistance is less than 3 Ohms go to 5. 4 Fault with the harness. Rectify it and retest. 5 Remove the BOB, reconnect the DCU and retest the vehicle. If the fault persists change the DCU.
  • 33. 4EPIC DI Engine Management System – Diagnostics Coded Faults 29 4.13 ENGINE–TO PUMP SYNCHRONISATION (PUMP BOLT–UP LIMITS) Applicable codes : 1177, 1178 1178 PUMP BOLT–UP LIMITS This fault indicates that the bolt–up angle has exceeded a high or low threshold. The bolt–up angle is the difference between the positions of the pump and engine position sensors. This fault is usually rectified by retiming the pump to the engine. 1177 ENGINE–PUMP SYNCHRONISATION This fault indicates that there is a ‘speed event’ error, i.e. an error in synchronisation between the pump ‘timing ring’ and the flywheel drillings. It is also displayed if the narrower of the four pump speed ring vanes is not detected once per revolution. Perform the following: The possible faults could be: i) The pump has been incorrectly fitted to the engine. Re– time the pump. ii) The pump timing wheel is loose or broken away. The pump must be repaired. iii) The drive shaft position sensor is loose. The pump must be retimed using the method described in Page 18, Section 4. NOTE A ‘speed event’ is the point at which a pump or engine speed signal is passed to the DCU.
  • 34. EPIC DI Engine Management System – DiagnosticsCoded Faults4 30 4.14 DCU Applicable codes : 1187, 1192, 1195, 0605, 1194, 1605, 1608 1187 DCU VARIANT SELECTION This will indicate that the DCU was not configured when fitted. Check the configuration using the LASER 2000 procedure. 1192 EXTERNAL VOLTAGE (VEXT) 1195 SCP–HBCC FAILED TO INITIALISE 0605 DCU PROCESSOR ROM/RAM 1194 DCU A TO D CONVERTER 1605 DCU EEPROM 1608 DCU WATCHDOGS (SEE NOTE BELOW) If any of these codes are logged, change the DCU. NOTE The DCU ‘watchdog’ is a section of the circuitry which maintains surveillance over all DCU operational activity and which has the authority to close down the system (stop the engine) in the event of a major malfunction. To achieve a lower gear (kickdown) for faster acceleration or for driving uphill, the throttle pedal is fully depressed and the High Pedal Demand Switch (HPDS) instructs the DCU to operate the kickdown relay and the hold relay. The high current required by the kickdown solenoid is supplied by the kickdown relay. The lower current required to hold the solenoid in the kickdown position is supplied by the hold relay. The hold solenoid remains on until the throttle pedal is released or the vehicle achieves 100 kph. NOTE Under no circumstances should the pull–in relay and solenoid be supplied from a power source other than the DCU. ATX Solenoid Failure of this circuit will result in poor/sluggish gear changes or higher vehicle speeds will have to be achieved before gear changes take place. Kickdown pull–in circuit Failure of this circuit will result in no kickdown. Kickdown hold circuit Failure of this circuit will result in no hold. Transmission will change and then release. Incorrect DCU configuration If the DCU is incorrectly configured, that is, if the vehicle has manual transmission but the DCU is programmed for automatic transmission, fault codes will be logged. Check the configuration using the LASER 2000. Acceleration test The DCU drives the electrical system which actuates the gearbox shift control and kickdown. The diagnostic facility only detects failures up to the gearbox control solenoid and the kickdown pull–in and hold relays. The outputs of these devices are not monitored. Correct operation of the system will be confirmed by carrying out a full–throttle acceleration test without kickdown requested (approximately 95% throttle travel), and with kickdown requested (100% throttle travel). The transmission will shift between gears at the speeds defined by the table below. Full throttle acceleration 1st to 2nd 2500 rpm. With kickdown operating at 3800 rpm. 2nd to 3rd 3300 rpm. With kickdown operating at 3950 rpm. Direct drive engagement 4th gear 2900 rpm. 3rd to 4th 2900 rpm. With operating at 3900 rpm. Any failure related to the transmission should be referred to a dealer.
  • 35. 4EPIC DI Engine Management System – Diagnostics Coded Faults 31 4.15 PASSIVE ANTI THEFT SYSTEM (PATS) Applicable codes: 9342 Description of Operation: This is a vehicle immobilisation system. The introduction of Passive Anti–Theft means that vehicles are now fitted with a PATS module which communicates with the DCU upon vehicle ‘key–on’. The module interrogates the DCU and if the code stored in the DCU does not match that of the ignition key used then the vehicle is put into a ‘fail–safe’ mode and will not start. An immobiliser diagnostic light can be found above the windscreen in the centre of the passenger compartment – in ‘fail–safe’ mode this will flash a LDV fault code (otherwise known as ‘blink’ code). Functions and Components Involved: DCU PATS Module PATS NULL CODE 9342 PATS NULL CODE When the ‘ignition’ is first switched on, a transponder on the key transmits a key code to the PATS module. This keycode is compared with both that held in the PATS module and that stored in the DCU . The above fault code appears when the code in the DCU and PATS module does not ‘match’. The fundamental question as to why the DCU and PATS module do not ‘match’ should be asked. Verify the vehicle history. Check the Vehicle Identification Number (VIN) against the engine number on the chassis; ensure that there is no evidence of theft. Check the ‘blink’ code flashed on the immobiliser diagnostic light. A two–digit number will be flashed:– The first digit will be flashed followed by a one–second pause and then the second digit. After a three–second pause the code will be repeated. Code 3.1 – Indicates a wrong code received from the DCU. Please contact a Lucas National Distributor for assistance. Code 3.2 – Indicates a wiring fault in the PATS circuitry or faulty PATS module. No attempt should be made to investigate this; the vehicle must be referred to a LDV dealer. Starting Procedure Fault Codes 9342 PATS nullcode Vehicle system KEY/IGN. Switch Passive Anti-Theft System Key on PATS module checks key response If OK PATS module requests DCU response DCU checks message from PATS module If OK DCU enter run mode DCU responds to PATS module If OK PATS module enables engine crank A045-026
  • 36. EPIC DI Engine Management System – DiagnosticsTechnical Information5 32 5.1 DYNAMIC DATA Screen Message Units Description ENGINE SPEED VEHICLE SPEED COOLANT AIR TEMP PUMP TEMP BOOST PEDAL FUEL MAX A/F DENS. MAX FUEL FUEL DEMAND CYL 3 IDL FUEL CYL 1 OFFSET CYL 2 OFFSET CYL 4 OFFSET IDLE REF IDLE REFT ROTOR DEMAND ROTOR F/B ROTOR DELAY – ROTOR DELAY + CALIBRATION CAM DEMAND CAM FEEDBACK CAM INTEGRAL BOLT – UP TRIM PEDAL POSN. 1 PEDAL POSN. 2 PEDAL EGR DEMAND EGR VLVE POSN RAW EGR POSN BATTERY KEYVOLTS STATUS RECOVERY MODES ENGINE STOPS REDUCED FUEL O/LOOP ROTOR OPEN LOOP CAM RPM kph _C _C _C mbar mm3 mm3 mm3 mm3 mm3 mm3 mm3 mm3 RPM RPM units units units units units units units units Degrees % % % units units units Volts Volts Status ON/OFF ON/OFF ON/OFF ON/OFF Input signal to the DCU from the engine speed sensor. Input signal to the DCU from the vehicle speed sensor. Input signal to the DCU from the engine coolant temperature sensor. Input signal to the DCU from the air charge temperature sensor. Input signal to the DCU from the pump temperature sensor. Input signal to the DCU from the boost pressure sensor. Input signal to the DCU from the pedal position sensor. Maximum air/fuel ratio. Maximum fuel is limited by air density. This is the maximum fuel permitted. Above idle, the value displayed will be the lowest of PEDAL FUEL, MAX A/F DENS or MAX FUEL. Idling fuel on cylinder 3. This offset value plus the CYL3 IDL FUEL gives the idle fuel on cylinder 1. This offset value plus the CYL3 IDL FUEL gives the idle fuel on cylinder 2. This offset value plus the CYL3 IDL FUEL gives the idle fuel on cylinder 4. Target idle RPM (as set when in the IDLE TRIM mode). Idle RPM for all temperatures. This is the desired rotor axial position. This is the measured rotor axial position. (If all the conditions are correct, ROTOR DEMAND and ROTOR FEEDBACK follow each other closely). These values determine the pulse width required to allow the actuators to achieve the rotor demand. Refer to table 2 in Section 5.6 to obtain the calibration resistance value. This is the desired cam position. This is the measured cam position. (CAM FEEDBACK should follow CAM DEMAND closely). This value will be between 45 and 55. This is an indication of pump–to–engine timing. A change will result in a fault code being logged. Pedal position potentiometer track 1. The value indivcates the position of the wiper on the track. Pedal position potentiometer track 2. The value indivcates the position of the wiper on the track. Relate this value to PEDAL FUEL. This is the desired EGR valve position. Result of processing by the DCU of the RAW position. Actual EGR valve position. Battery voltage as measured on DCU pins nos. 47 and 48 (+BAT). Battery voltage as measured on DCU pin 20 (switch line). Engine staus; PRE CRANK, RUNNING or STALLED. Engine stopped due to a major fault. Reduced fuel mode to a fault. Open–loop rotor control due to a fault. Open–loop cam control due to a fault.
  • 37. 5EPIC DI Engine Management System – Diagnostics Technical Information 33 5.2 VEHICLE WIRING DIAGRAM (MY97) Fig. 7 – EPIC – System Wiring Diagram
  • 38. EPIC DI Engine Management System – DiagnosticsTechnical Information5 34
  • 39. 5EPIC DI Engine Management System – Diagnostics Technical Information 35 5.3 COMPONENT LOCATION WP WPWP WB WG BR BW BU BG NR WU WU WU WR WU WU WR WB WG BR BW BU BG NR WG NG WG WR WU YR NRNR NU NR PY PY W Y S N WB 17 19 9 12 38 41 42 43 6 7 2 18 1 14 53 11 40 8 35 52 50 48 47 10 33 29 51 30 NU NY WU W Y S N WB U S U BY BY WP S B B B B BU KW PY BY 21555415223442045 BY BU RY RO BK GU BO O RO O B NW YR YU NW ECU PUPU WP WG NG WG WR NU NY WP WR WG NU W W MainHarness Connection BU W W PY PU GU NW WP PU PW PO PB P NU NR NU NY YU NG WU NW WP WR PU NG WG YG YG WG NG NG RY Eng.Managment WarningLight Battery Positive Terminal Batt Neg. Term. FrontRH BodyEarth Sheildsfor Eng.Speed& Injetor PumpSensors B=Black G=Green K=Pink N=Brown P=Purple R=Red U=Blue W=White Y=Yellow wirecodes A045-027 2 3 4 5 6 8 9 10 7 5 5 5 1 1 2 3 4 5 6 7 8 9 10 illustrationkey Fuseboxanddiagnosticsocket Acceleratorpedalpositionsensor Enginespeedcrankpositionsensor Boostpressuresensor Currentvacuumtransducer Airchargetemperaturesensor Enginecoolanttemperaturesensor EGRvalvepositionsensor Fuelpump Dieselcontrolunit Whenimmobiliser fitted
  • 40. EPIC DI Engine Management System – DiagnosticsTechnical Information5 36 5.4 CONNECTOR PIN IDENTIFICATION DCU 1 3 2 20 38 55 37 191 17 8 4 1 3 AIR CHARGE TEMPERATURE SENSOR ENGINE SPEED SENSOR CURRENT-TO-VACUUM TRANSDUCER ON-BOARD DIAGNOSTICS CONNECTOR 21 (+) 2 1 2 1 2 1 (+) (A) (B) (C) 1 2 3 4 5 6 7 8 9 10 11 12 13 14 15 16 Fig. 8 A045-022 FUEL PUMP PEDAL DEMAND SENSOR BOOST PRESSURE SENSOR EGR VALVE POSITION SENSOR ENGINE COOLANT TEMPERATURE SENSOR 1 5 4 8
  • 41. 5EPIC DI Engine Management System – Diagnostics Technical Information 37 5.5 RESISTANCE VALUES Table 1 CIRCUIT DESCRIPTION BREAK–OUT BOX Pin + Pin – PUMP PIN Pin + RESISTANCE (Ω) Min + Max –DESCRIPTION Pin + Pin – Pin + Pin – Min + Max – Rotor A (feed) Actuator 41 47 6 10 25 35 Rotor B (drain) Actuator 42 47 11 7 25 35 Cam Actuator 43 47 16 12 25 35 ESOS 47 38 2 3 1 3 Rotor Position Sensor 20 °C 9 6 14 17 48 60 Pump Temperature Sensor 19 6 15 9 690 3.5k Cam Position Sensor 18 6 18 19 45 55 Engine Speed Sensor 14 53 1 2 300 1.2k Engine Coolant Temperature 17 50 See table 3 Air Charge Temperature 15 50 See table 4 (MY97) > EGR Position Sensor (disconnect Throttle Sensor and Boost Pressure Sensor) 2 35 52 52 300 1.5k 1k 2k EMS Lamp 44 47 12 55 EVR Valve Actuator (MY97) 47 40 28 38 EVR Throttle Actuator (MY97) 47 49 28 38 EVR CVT (MY95) 47 40 4 10 Boost Pressure Sensor (disconnect Throttle Sensor and EGR Position Sensor) 52 52 35 11 500 10k 3k 300k LPDS (Idle) 8 50 2 8 Open–circuit (o/c) HPDS (Idle) 30 50 4 8 0 3 Pedal Demand Sensor 1 (Full throttle) 10 51 1 7 3k 7k Pedal Demand Sensor 2 (Idle) 29 51 5 7 3k 7k PATS Module 4 GND 4k 7k Power GND Batt–ve GND 0 3 Power Supply 47, 48 Batt +ve Open–circuit (o/c) o/c Abbreviations LPDS – Low Pedal Demand Switch HPDS – High Pedal Demand Signal CVT – Current–to–vacuum Transducer