Download to read offline

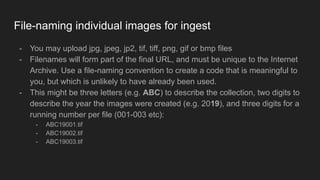
![File-naming multi-page texts for ingest
- It is possible to upload multiple images belonging to a single text, and compile
them into a zip file for ingest as a single digital object.
- Follow the file-naming advice as for images, but use the running number
portion of the filename to indicate the order in which the pages should appear
in the final presentation, e.g.
- Page 1 = XYZ19001.tif
- Page 2 = XYZ19002.tif
- Page 3 = XYZ19003.tif
[prefix] [running number]
- Then, zip all images belonging to the same document/book into a single file
- Filename it with the prefix, followed by _images.zip, e.g. XYZ19_images.zip](https://image.slidesharecdn.com/batchuploadingtotheinternetarchiveusingpython-210319164314/85/Batch-uploading-to-the-Internet-Archive-using-Python-5-320.jpg)

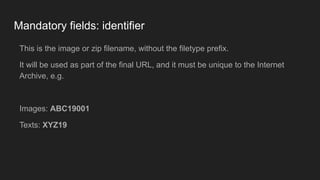

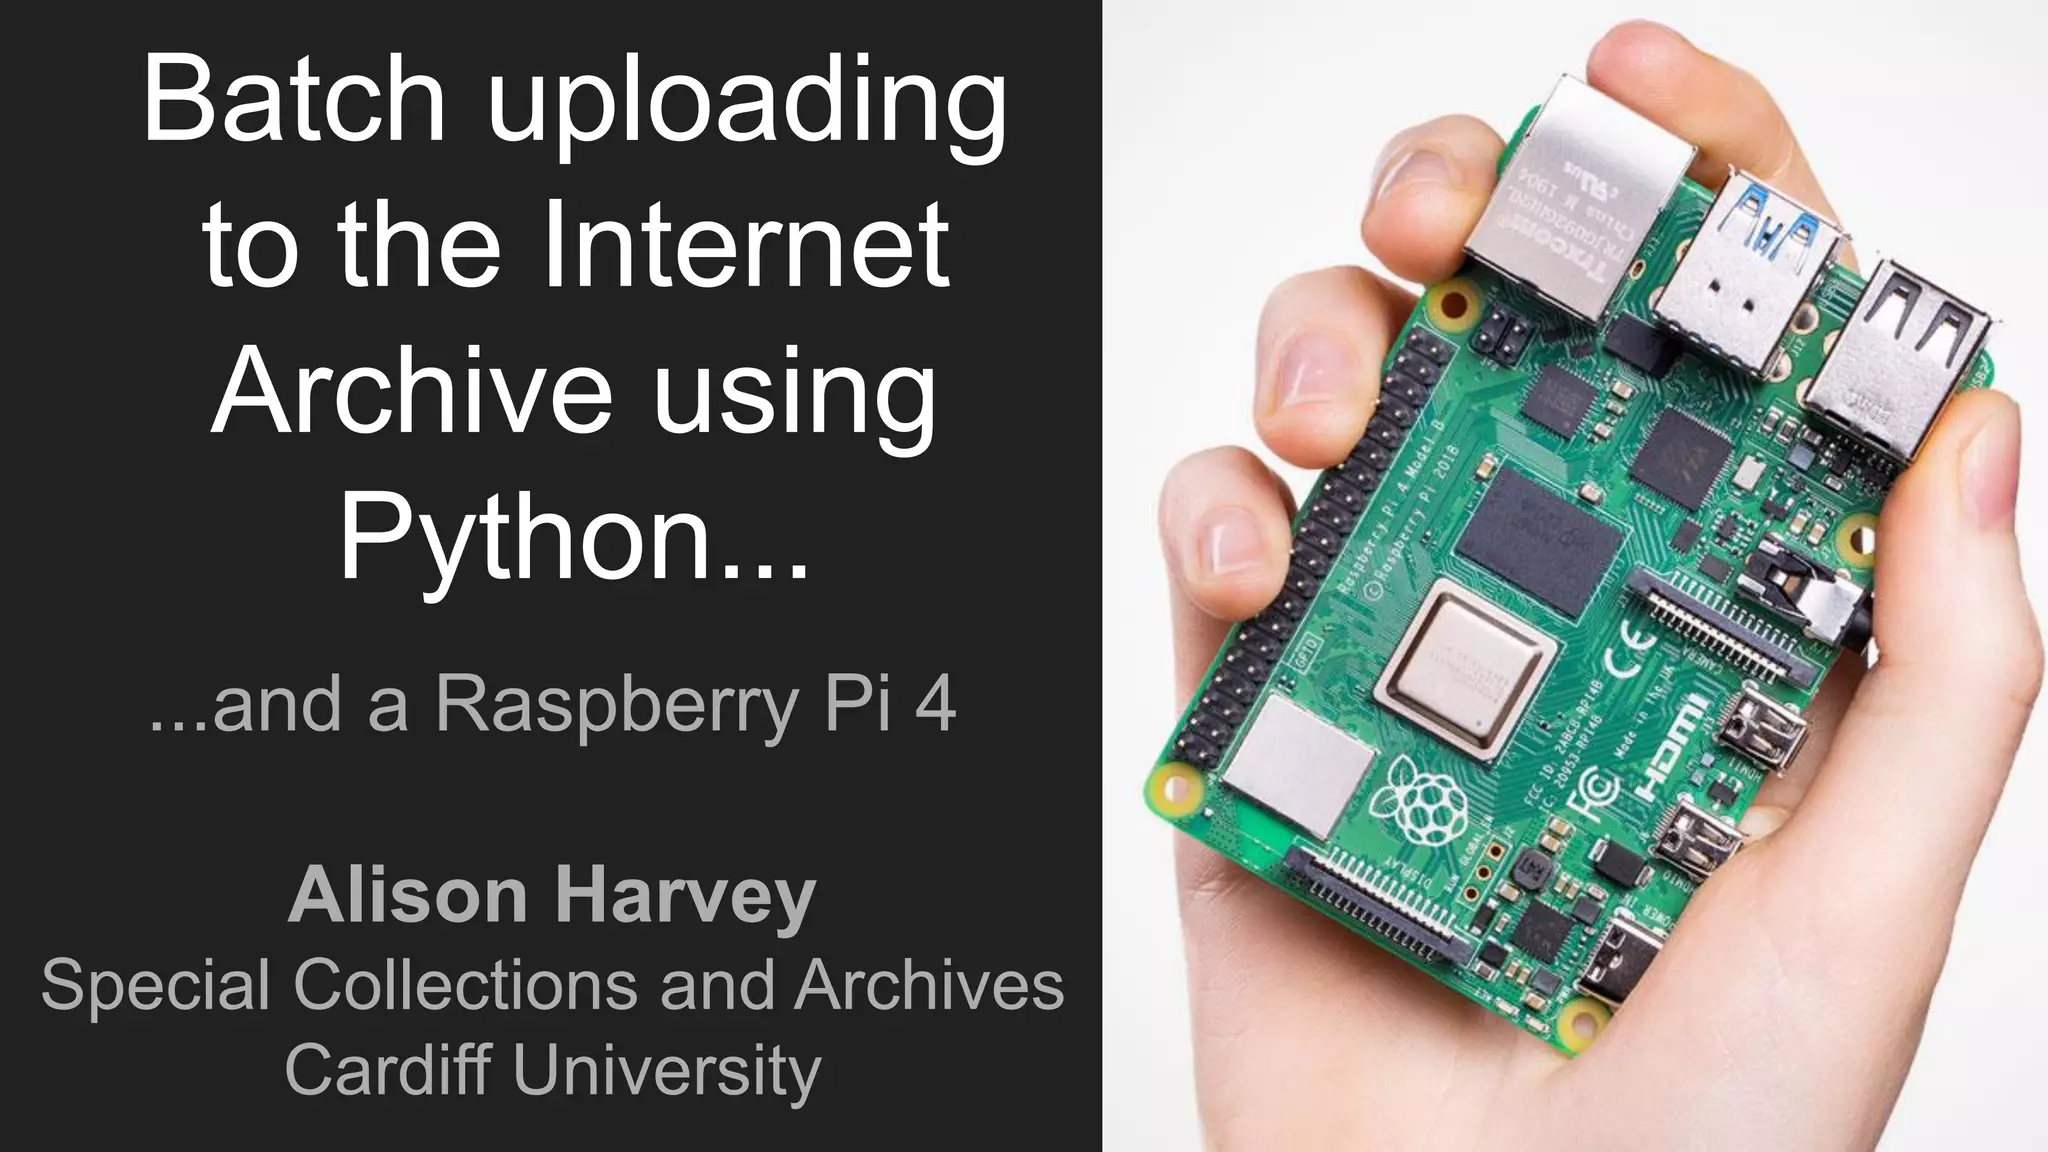
![Mandatory fields: subject
This field can be searched, but also allows users to filter
items on the same topic.
Think about what information would be most helpful for
your users to be able to filter. Use terminology, spelling,
and capitalisation consistently, so that all matches group
successfully under a single heading.
If you have multiple subjects, use the column headings:
- subject[0]
- subject[1]
- subject[2]... and so on.
Always begin counting at 0, and do not add spaces.](https://image.slidesharecdn.com/batchuploadingtotheinternetarchiveusingpython-210319164314/85/Batch-uploading-to-the-Internet-Archive-using-Python-12-320.jpg)


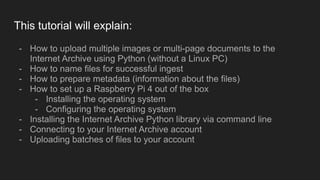
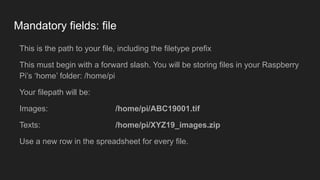
![Optional fields: language
As well as allowing users to search and filter by the language of the text,
completing this field helps the Internet Archive to apply OCR to your items.
OCR, or Optical Character Recognition, analyses the shape of letters found in
images of printed text, and converts it into machine-encoded text. Users are
then able to search for words and phrases found inside the digital objects.
For multilingual texts, use the column headings: language[0], language[1] etc.
Always use the relevant ISO 639-2 code for your language, e.g.
- English (eng)
- Welsh (wel)
- Arabic (ara)](https://image.slidesharecdn.com/batchuploadingtotheinternetarchiveusingpython-210319164314/85/Batch-uploading-to-the-Internet-Archive-using-Python-16-320.jpg)


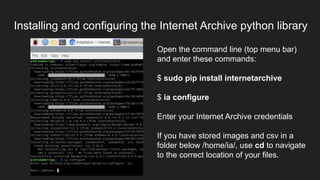
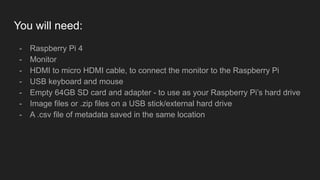
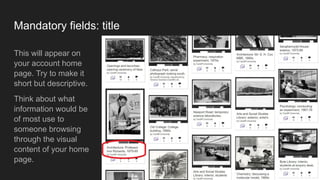
![Installing and configuring the Internet Archive python library
Enter the following command, replacing [filename] with the name of your csv file.
This tells the Pi where to look for your metadata. Then the metadata tells it where
to find the files to upload, and how to describe them.
$ ia upload --spreadsheet=[filename].csv
Depending how many files you are uploading, the programme may run for several
hours. Do not close the command line or disconnect the Raspberry Pi.
Each file will be added to your Internet Archive account as it completes. It can take
up to 24 hours for the final documents to render on the live site.
Congratulations - you have batch uploaded to the Internet Archive!](https://image.slidesharecdn.com/batchuploadingtotheinternetarchiveusingpython-210319164314/85/Batch-uploading-to-the-Internet-Archive-using-Python-34-320.jpg)

This tutorial outlines the process of batch uploading images and multi-page documents to the Internet Archive using Python on a Raspberry Pi 4. It includes steps for file preparation, metadata creation, operating system setup, and the installation of necessary software. Instructions for file naming conventions, CSV formatting, and uploading procedures are also detailed to ensure successful ingestion of content.