SlideShare a Scribd company logo
1 of 8
Download to read offline
5801.XX
VEHICLE OVERHAUL INSTRUCTION
EDINBURGH TRAM
VOI-GTA-04-006
Date: Jul. 12 Page: 1 Issue 1
Rev. 0
VOI-GTA-04-006 COMPRESSOR RUN UP BENCH
JOB CODE – VOI-GTA-04-006
Compressor Testing Using Compressor Run Up Bench
Risk Assessment: 30, 37, 50
APPLICABLE CARS
E: D: G: F: C: B: A:
SPECIAL TOOLS
Item Description Part No. Qty.
S1 ¼” Drive 8mm Socket 1
S2 ¼” Ratchet 1
S3 17mm Ring Spanner 1
S4 28mm Ring Spanner 1
S5 32mm Ring Spanner 1
S6 Flat Ended Screwdriver 1
SUPPLIES
Item Description Part No. Qty.
T1 Compressor Run Up Bench 1
MEASUREMENTS
Item Measure Correct value
M1 Run-Up time 4 Minutes
1 - HAZARDS AND SAFETY CONDITIONS
SAFETY REQUIREMENTS INCLUDED WITHIN SECTION 3800.40 MUST
BE ADHERED TO BEFORE ANY WORK IS UNDERTAKEN.
PRIOR TO TESTING THE COMPRESSOR, THE COMPRESSOR
REPAIRS MUST BE COMPLETELY FINISHED, ALL BOLTS/NUTS
TORQUED & PAINT PENNED AND THE OIL LEVEL CHECKED.
Electrical Shock Hazard, 3 Phase Supply, ensure all electrical covers
are fitted and secure.
The Compressor is only to be powered up after the Compressor Bench
Residual Current Device (RCD) has been tested, the compressor
bench stop button has been tested and the compressor bench
contactor has been tested. All electrical covers are to be in place and
the safety cage secured.
5801.XX
VEHICLE OVERHAUL INSTRUCTION
EDINBURGH TRAM
VOI-GTA-04-006
Date: Jul. 12 Page: 2 Issue 1
Rev. 0
VOI-GTA-04-006 COMPRESSOR RUN UP BENCH
2 - PROCEDURE
2.1 COMPRESSOR RUN-UP BENCH TESTING
1. The start point for testing is with the Compressor Run-Up bench fully isolated
(Figure 1), Lock-Outs fitted to the Compressor Cable Plug (Figure 2) and to the
Bench Cable Plug (Figure 3). All air is to be discharged from the vessel and the
valve left open (Figure 4).
Figure 1. Figure 2. Figure 3. Figure 4.
Do not connect the compressor to the bench at this point as if the RCD
does not pass its safety test, the compressor cannot be tested. Ensure
the red stop button (Figure 6) is pulled out.
2. Prior to testing the compressor, the bench RCD (Figure 5), stop button (Figure 6)
and contactor (Internal) must be tested. To do this, remove the Lock-Out from the
Bench Cable Plug (Figure 3) and plug into the socket on the wall (Figure 7).
Figure 5. Figure 6. Figure 7. Figure 8.
5801.XX
VEHICLE OVERHAUL INSTRUCTION
EDINBURGH TRAM
VOI-GTA-04-006
Date: Jul. 12 Page: 3 Issue 1
Rev. 0
VOI-GTA-04-006 COMPRESSOR RUN UP BENCH
3. Once the plug is connected, energise the switch on the wall and press the RCD
button (Figure 5), the Circuit breaker should trip. If the Circuit breaker does not trip,
the cable plug Lock-Out is to be reinstalled and the key quarantined.
4. If the Circuit breaker does trip, reset the circuit breaker, ensure the red emergency
stop button (Figure 6) is pulled out and press the green start button (Figure 8). On
pressing the green button you should hear the internal contactor pull in. If the
Contactor does not pull in, the cable plug Lock-Out is to be reinstalled and the key
quarantined.
5. If the contactor pulls in, depress the stop button and reset the stop button. The
RCD, circuit breaker and contactor have all been tested and the bench is ready to
use.
2.2 COMPRESSOR TESTING
6. Once the compressor has been lifted onto the compressor run-up bench, align &
secure using the securing bar (Figure 9) and tighten down the two nuts with a
spanner (S3).
Figure 9.
DO NOT REMOVE THE COMPRESSOR CABLE LOCK-OUT AT THIS
POINT. THE LOCKOUT IS ONLY TO BE REMOVED WHEN THE
COMPRESSOR IS SECURE, ELECTRICAL CONNECTIONS
CONNECTED AND ELECTRICAL COVERS INSTALLED.
Electrical Shock Hazard, 3 Phase Supply, ensure all electrical covers
are fitted and secure.
The compressor weighs 20Kg and the compressor mounted on the
compressor bracket weighs 28Kg. When transiting on the shop floor
use the scissor lift in its lowered position and use the scissor lift to
raise and lower the compressor onto the bench. A two person lift can
be used to move the compressor into place if required.
5801.XX
VEHICLE OVERHAUL INSTRUCTION
EDINBURGH TRAM
VOI-GTA-04-006
Date: Jul. 12 Page: 4 Issue 1
Rev. 0
VOI-GTA-04-006 COMPRESSOR RUN UP BENCH
7. Check the secondary earthing strap (Figure 10) is secure at both ends.
Figure 10.
8. Connect the compressor cable (Figure 11) to the compressor by firstly connecting
the green/yellow primary earth cable using a screwdriver (S6) and then the cables
labelled U, V & W using a socket (S1) and ratchet (S2).
Figure 11.
9. Slide the front cover for the electrical cover up the cable, fit the front cover to the
electrical cover and refit the electrical cover (Figure 12 highlighted red) with the two
screws using a screwdriver (S6).
Due to the 3 Phase Supply powering the compressor motor, confirm
all connections are secure and confirm the primary and secondary
earthing cables are secure.
5801.XX
VEHICLE OVERHAUL INSTRUCTION
EDINBURGH TRAM
VOI-GTA-04-006
Date: Jul. 12 Page: 5 Issue 1
Rev. 0
VOI-GTA-04-006 COMPRESSOR RUN UP BENCH
Figure 12.
10.Fit the yellow safety cage (Figure 13) over the compressor using the 4 wing nuts.
Figure 13.
Do not fit the armoured air hose to the compressor as you first need to
confirm the compressor is blowing.
Prior to compressor run up, complete a final visual check to confirm
everything is connected and the safety cage is secure.
Prior to compressor run up, inform everyone in the near area that
compressor run-up is about to take place and a noise hazard will
occur. Mobile screens can be used to further nullify noise.
EAR PROTECTION AND SAFETY GLASSES WILL BE REQUIRED FOR
ANY PERSON IN THE CLOSE PROXIMITY OF THE RUN-UP TESTS.
5801.XX
VEHICLE OVERHAUL INSTRUCTION
EDINBURGH TRAM
VOI-GTA-04-006
Date: Jul. 12 Page: 6 Issue 1
Rev. 0
VOI-GTA-04-006 COMPRESSOR RUN UP BENCH
11.Remove the Lock-Out from the compressor cable and inset the compressor cable
plug into the compressor run-up bench socket.
12.Press the green start button (Figure 8) and confirm air is being blown out of the
compressor. Stop the compressor running by depressing the red emergency stop
button (Figure 6).
13.Remove the yellow safety cage and connect the armoured air hose using a
spanner (S5). Re-fit the yellow safety cage (Figure 14).
Figure 14. Figure 15.
14. Close the red valve (Figure 15) for the air vessel and reset the red stop button.
15. Press the green start button and allow the pressure of the air vessel to build up to
8.8 Bar which is illustrated on the pressure gauge (Figure 16).
Due to the compressor run-up bench not being identically configured
to the tram, the time for charge up of the vessel to 8.8 Bar will be
slightly quicker. Always listen for air leaks and if charging is
prolonged, further investigation may be required.
5801.XX
VEHICLE OVERHAUL INSTRUCTION
EDINBURGH TRAM
VOI-GTA-04-006
Date: Jul. 12 Page: 7 Issue 1
Rev. 0
VOI-GTA-04-006 COMPRESSOR RUN UP BENCH
Figure 16. Figure 17.
16. After reaching 8.8 Bar, the blow off valve will operate and reduce the pressure of
the vessel.
If the compressor bench vessel does not blow off after 8.8 bar, the
emergency stop button on the bench is to be pressed and report the
fault. Go to paragraph 18 and continue.
As long as there is power to the compressor, the charge/discharge cycle will
continue until you depress the red emergency stop button.
5801.XX
VEHICLE OVERHAUL INSTRUCTION
EDINBURGH TRAM
VOI-GTA-04-006
Date: Jul. 12 Page: 8 Issue 1
Rev. 0
VOI-GTA-04-006 COMPRESSOR RUN UP BENCH
17. Let the compressor run for approximately 4 minutes and then stop the cycle using
the red emergency stop button. Turn the wall socket switch off, remove the bench
cable plug from the socket and fit the Lock-Out to the plug. Remove the compressor
cable plug from the compressor run-up bench socket and fit the Lock-Out to the
plug.
18. To depressurise the air vessel, turn the red valve slightly to allow a small flow of
air to leave the vessel. Leave until fully empty and the gauge is reading zero. Fully
open the valve once empty.
19. Remove the yellow safety cage, remove the electrical cover and remove the
compressor cable from the compressor.
20. Remove the armoured air hose using a spanner (S4).
21. Inspect the compressor for oil leaks. If all ok, refit the end cover/serial number
plate, close the Internal Repair Work Order and return the compressor (with
paperwork) to the store.
THE AIR VESSEL IS PRESSURISED, DO NOT DO ANY FURTHER
WORK ON THE COMPRESSOR WITHOUT FIRST DEPRESSURISING
THE AIR VESSEL.
CONFIRM THE COMPRESSOR BENCH PLUG AND COMPRESSOR
PLUG ARE REMOVED AND LOCKED OUT PRIOR TO DOING ANY
FURTHER WORK ON THE COMPRESSOR.
The released air should not be loud, if it is, close the valve until the noise is
at an aceptable level.
REMOVE WIRES LABELED U, V & W AND THEN THE EARTH CABLE.
DO NOT REMOVE IN ANY OTHER ORDER.
When removing the armoured air hose cable from the compressor you may
need two spanners (S4 & S5) to prevent the connector on the side of the
compressor from turning.

More Related Content

Viewers also liked

Mobile, Secure E - Voting Architecture for the Nigerian Electoral System
Mobile, Secure E - Voting Architecture for the Nigerian Electoral SystemMobile, Secure E - Voting Architecture for the Nigerian Electoral System
Mobile, Secure E - Voting Architecture for the Nigerian Electoral Systemiosrjce
 
Hoca Ahmet Yesevi Hayatı, Eğitimi ve Esereri
Hoca Ahmet Yesevi Hayatı, Eğitimi ve EsereriHoca Ahmet Yesevi Hayatı, Eğitimi ve Esereri
Hoca Ahmet Yesevi Hayatı, Eğitimi ve EsereriŞahabettin Akca
 
Intexcoin Sunumu | Yerli Bitcoin
Intexcoin Sunumu | Yerli BitcoinIntexcoin Sunumu | Yerli Bitcoin
Intexcoin Sunumu | Yerli BitcoinEyüp Derdiyok
 
Cold-chain Market prospects in India
Cold-chain Market prospects in IndiaCold-chain Market prospects in India
Cold-chain Market prospects in IndiaPawanexh Kohli
 
Neon Alloys - Manufacturer, Supplier and Exporter of Steel Pipes, Flanges, Fo...
Neon Alloys - Manufacturer, Supplier and Exporter of Steel Pipes, Flanges, Fo...Neon Alloys - Manufacturer, Supplier and Exporter of Steel Pipes, Flanges, Fo...
Neon Alloys - Manufacturer, Supplier and Exporter of Steel Pipes, Flanges, Fo...Neon Alloys
 
primary processing and value addition
primary processing and value addition primary processing and value addition
primary processing and value addition Mallikarjun Patil
 
Transactive networks in the New Zealand retail context
Transactive networks in the New Zealand retail contextTransactive networks in the New Zealand retail context
Transactive networks in the New Zealand retail contextAdvisian
 
Sales and Use Tax: What your Firm Needs to Know
Sales and Use Tax: What your Firm Needs to KnowSales and Use Tax: What your Firm Needs to Know
Sales and Use Tax: What your Firm Needs to KnowCPA.com
 
Felsefeyle Tanışma
Felsefeyle TanışmaFelsefeyle Tanışma
Felsefeyle Tanışmasevim hazar
 

Viewers also liked (10)

Mobile, Secure E - Voting Architecture for the Nigerian Electoral System
Mobile, Secure E - Voting Architecture for the Nigerian Electoral SystemMobile, Secure E - Voting Architecture for the Nigerian Electoral System
Mobile, Secure E - Voting Architecture for the Nigerian Electoral System
 
Hoca Ahmet Yesevi Hayatı, Eğitimi ve Esereri
Hoca Ahmet Yesevi Hayatı, Eğitimi ve EsereriHoca Ahmet Yesevi Hayatı, Eğitimi ve Esereri
Hoca Ahmet Yesevi Hayatı, Eğitimi ve Esereri
 
Intexcoin Sunumu | Yerli Bitcoin
Intexcoin Sunumu | Yerli BitcoinIntexcoin Sunumu | Yerli Bitcoin
Intexcoin Sunumu | Yerli Bitcoin
 
Cold-chain Market prospects in India
Cold-chain Market prospects in IndiaCold-chain Market prospects in India
Cold-chain Market prospects in India
 
Neon Alloys - Manufacturer, Supplier and Exporter of Steel Pipes, Flanges, Fo...
Neon Alloys - Manufacturer, Supplier and Exporter of Steel Pipes, Flanges, Fo...Neon Alloys - Manufacturer, Supplier and Exporter of Steel Pipes, Flanges, Fo...
Neon Alloys - Manufacturer, Supplier and Exporter of Steel Pipes, Flanges, Fo...
 
primary processing and value addition
primary processing and value addition primary processing and value addition
primary processing and value addition
 
Yaratıcılık
YaratıcılıkYaratıcılık
Yaratıcılık
 
Transactive networks in the New Zealand retail context
Transactive networks in the New Zealand retail contextTransactive networks in the New Zealand retail context
Transactive networks in the New Zealand retail context
 
Sales and Use Tax: What your Firm Needs to Know
Sales and Use Tax: What your Firm Needs to KnowSales and Use Tax: What your Firm Needs to Know
Sales and Use Tax: What your Firm Needs to Know
 
Felsefeyle Tanışma
Felsefeyle TanışmaFelsefeyle Tanışma
Felsefeyle Tanışma
 

Similar to Edinburgh Tram Compressor Testing Procedure

Hyster h007 (h8.00 xm europe) forklift service repair manual
Hyster h007 (h8.00 xm europe) forklift service repair manualHyster h007 (h8.00 xm europe) forklift service repair manual
Hyster h007 (h8.00 xm europe) forklift service repair manualfjjskekdmmem
 
Hyster h007 (h10.00 xm europe) forklift service repair manual
Hyster h007 (h10.00 xm europe) forklift service repair manualHyster h007 (h10.00 xm europe) forklift service repair manual
Hyster h007 (h10.00 xm europe) forklift service repair manualfujsejfjksekkkm
 
Hyster h007 (h10.00 xm europe) forklift service repair manual
Hyster h007 (h10.00 xm europe) forklift service repair manualHyster h007 (h10.00 xm europe) forklift service repair manual
Hyster h007 (h10.00 xm europe) forklift service repair manualufjjsjkfkmsem
 
Hyster h007 (h12.00 xm europe) forklift service repair manual
Hyster h007 (h12.00 xm europe) forklift service repair manualHyster h007 (h12.00 xm europe) forklift service repair manual
Hyster h007 (h12.00 xm europe) forklift service repair manualfjsekkdmeik
 
Hyster h007 (h10.00 xm europe) forklift service repair manual
Hyster h007 (h10.00 xm europe) forklift service repair manualHyster h007 (h10.00 xm europe) forklift service repair manual
Hyster h007 (h10.00 xm europe) forklift service repair manualufjjsjefkskekmme
 
Hyster h007 (h8.00 xm europe) forklift service repair manual
Hyster h007 (h8.00 xm europe) forklift service repair manualHyster h007 (h8.00 xm europe) forklift service repair manual
Hyster h007 (h8.00 xm europe) forklift service repair manualufdujjsjekkemme
 
Hyster h007 (h9.00 xm europe) forklift service repair manual
Hyster h007 (h9.00 xm europe) forklift service repair manualHyster h007 (h9.00 xm europe) forklift service repair manual
Hyster h007 (h9.00 xm europe) forklift service repair manualjfksekmmdme
 
Hyster h007 (h9.00 xm europe) forklift service repair manual
Hyster h007 (h9.00 xm europe) forklift service repair manualHyster h007 (h9.00 xm europe) forklift service repair manual
Hyster h007 (h9.00 xm europe) forklift service repair manualoekdmjkemme
 
Hyster h007 (h9.00 xm europe) forklift service repair manual
Hyster h007 (h9.00 xm europe) forklift service repair manualHyster h007 (h9.00 xm europe) forklift service repair manual
Hyster h007 (h9.00 xm europe) forklift service repair manualfujsjefjkskekmem
 
Hyster h007 (h10.00 xm europe) forklift service repair manual
Hyster h007 (h10.00 xm europe) forklift service repair manualHyster h007 (h10.00 xm europe) forklift service repair manual
Hyster h007 (h10.00 xm europe) forklift service repair manualufjjjskkefkmem
 
Hyster h007 (h9.00 xm europe) forklift service repair manual
Hyster h007 (h9.00 xm europe) forklift service repair manualHyster h007 (h9.00 xm europe) forklift service repair manual
Hyster h007 (h9.00 xm europe) forklift service repair manualfjjskekdmmem
 
Hyster h007 (h12.00 xm europe) forklift service repair manual
Hyster h007 (h12.00 xm europe) forklift service repair manualHyster h007 (h12.00 xm europe) forklift service repair manual
Hyster h007 (h12.00 xm europe) forklift service repair manualfjskkesmdmm
 
Hyster h007 (h10.00 xm europe) forklift service repair manual
Hyster h007 (h10.00 xm europe) forklift service repair manualHyster h007 (h10.00 xm europe) forklift service repair manual
Hyster h007 (h10.00 xm europe) forklift service repair manualfjsqazkekdmme
 
Hyster h007 (h12.00 xm europe) forklift service repair manual
Hyster h007 (h12.00 xm europe) forklift service repair manualHyster h007 (h12.00 xm europe) forklift service repair manual
Hyster h007 (h12.00 xm europe) forklift service repair manualfujsjejfkskemm
 
Hyster h007 (h8.00 xm europe) forklift service repair manual
Hyster h007 (h8.00 xm europe) forklift service repair manualHyster h007 (h8.00 xm europe) forklift service repair manual
Hyster h007 (h8.00 xm europe) forklift service repair manualfujsjefjkskekmem
 
Hyster h007 (h12.00 xm europe) forklift service repair manual
Hyster h007 (h12.00 xm europe) forklift service repair manualHyster h007 (h12.00 xm europe) forklift service repair manual
Hyster h007 (h12.00 xm europe) forklift service repair manualfjsjfjskeksmem
 
Hyster h007 (h10.00 xm europe) forklift service repair manual
Hyster h007 (h10.00 xm europe) forklift service repair manualHyster h007 (h10.00 xm europe) forklift service repair manual
Hyster h007 (h10.00 xm europe) forklift service repair manualfjskekdmmem
 
Hyster h007 (h8.00 xm europe) forklift service repair manual
Hyster h007 (h8.00 xm europe) forklift service repair manualHyster h007 (h8.00 xm europe) forklift service repair manual
Hyster h007 (h8.00 xm europe) forklift service repair manualjfksekmmdme
 
Hyster h007 (h8.00 xm europe) forklift service repair manual
Hyster h007 (h8.00 xm europe) forklift service repair manualHyster h007 (h8.00 xm europe) forklift service repair manual
Hyster h007 (h8.00 xm europe) forklift service repair manualoekdmjkemme
 
Caterpillar cat 140 m series 3 motor grader (prefix n9d) service repair manua...
Caterpillar cat 140 m series 3 motor grader (prefix n9d) service repair manua...Caterpillar cat 140 m series 3 motor grader (prefix n9d) service repair manua...
Caterpillar cat 140 m series 3 motor grader (prefix n9d) service repair manua...fjkskefkemm
 

Similar to Edinburgh Tram Compressor Testing Procedure (20)

Hyster h007 (h8.00 xm europe) forklift service repair manual
Hyster h007 (h8.00 xm europe) forklift service repair manualHyster h007 (h8.00 xm europe) forklift service repair manual
Hyster h007 (h8.00 xm europe) forklift service repair manual
 
Hyster h007 (h10.00 xm europe) forklift service repair manual
Hyster h007 (h10.00 xm europe) forklift service repair manualHyster h007 (h10.00 xm europe) forklift service repair manual
Hyster h007 (h10.00 xm europe) forklift service repair manual
 
Hyster h007 (h10.00 xm europe) forklift service repair manual
Hyster h007 (h10.00 xm europe) forklift service repair manualHyster h007 (h10.00 xm europe) forklift service repair manual
Hyster h007 (h10.00 xm europe) forklift service repair manual
 
Hyster h007 (h12.00 xm europe) forklift service repair manual
Hyster h007 (h12.00 xm europe) forklift service repair manualHyster h007 (h12.00 xm europe) forklift service repair manual
Hyster h007 (h12.00 xm europe) forklift service repair manual
 
Hyster h007 (h10.00 xm europe) forklift service repair manual
Hyster h007 (h10.00 xm europe) forklift service repair manualHyster h007 (h10.00 xm europe) forklift service repair manual
Hyster h007 (h10.00 xm europe) forklift service repair manual
 
Hyster h007 (h8.00 xm europe) forklift service repair manual
Hyster h007 (h8.00 xm europe) forklift service repair manualHyster h007 (h8.00 xm europe) forklift service repair manual
Hyster h007 (h8.00 xm europe) forklift service repair manual
 
Hyster h007 (h9.00 xm europe) forklift service repair manual
Hyster h007 (h9.00 xm europe) forklift service repair manualHyster h007 (h9.00 xm europe) forklift service repair manual
Hyster h007 (h9.00 xm europe) forklift service repair manual
 
Hyster h007 (h9.00 xm europe) forklift service repair manual
Hyster h007 (h9.00 xm europe) forklift service repair manualHyster h007 (h9.00 xm europe) forklift service repair manual
Hyster h007 (h9.00 xm europe) forklift service repair manual
 
Hyster h007 (h9.00 xm europe) forklift service repair manual
Hyster h007 (h9.00 xm europe) forklift service repair manualHyster h007 (h9.00 xm europe) forklift service repair manual
Hyster h007 (h9.00 xm europe) forklift service repair manual
 
Hyster h007 (h10.00 xm europe) forklift service repair manual
Hyster h007 (h10.00 xm europe) forklift service repair manualHyster h007 (h10.00 xm europe) forklift service repair manual
Hyster h007 (h10.00 xm europe) forklift service repair manual
 
Hyster h007 (h9.00 xm europe) forklift service repair manual
Hyster h007 (h9.00 xm europe) forklift service repair manualHyster h007 (h9.00 xm europe) forklift service repair manual
Hyster h007 (h9.00 xm europe) forklift service repair manual
 
Hyster h007 (h12.00 xm europe) forklift service repair manual
Hyster h007 (h12.00 xm europe) forklift service repair manualHyster h007 (h12.00 xm europe) forklift service repair manual
Hyster h007 (h12.00 xm europe) forklift service repair manual
 
Hyster h007 (h10.00 xm europe) forklift service repair manual
Hyster h007 (h10.00 xm europe) forklift service repair manualHyster h007 (h10.00 xm europe) forklift service repair manual
Hyster h007 (h10.00 xm europe) forklift service repair manual
 
Hyster h007 (h12.00 xm europe) forklift service repair manual
Hyster h007 (h12.00 xm europe) forklift service repair manualHyster h007 (h12.00 xm europe) forklift service repair manual
Hyster h007 (h12.00 xm europe) forklift service repair manual
 
Hyster h007 (h8.00 xm europe) forklift service repair manual
Hyster h007 (h8.00 xm europe) forklift service repair manualHyster h007 (h8.00 xm europe) forklift service repair manual
Hyster h007 (h8.00 xm europe) forklift service repair manual
 
Hyster h007 (h12.00 xm europe) forklift service repair manual
Hyster h007 (h12.00 xm europe) forklift service repair manualHyster h007 (h12.00 xm europe) forklift service repair manual
Hyster h007 (h12.00 xm europe) forklift service repair manual
 
Hyster h007 (h10.00 xm europe) forklift service repair manual
Hyster h007 (h10.00 xm europe) forklift service repair manualHyster h007 (h10.00 xm europe) forklift service repair manual
Hyster h007 (h10.00 xm europe) forklift service repair manual
 
Hyster h007 (h8.00 xm europe) forklift service repair manual
Hyster h007 (h8.00 xm europe) forklift service repair manualHyster h007 (h8.00 xm europe) forklift service repair manual
Hyster h007 (h8.00 xm europe) forklift service repair manual
 
Hyster h007 (h8.00 xm europe) forklift service repair manual
Hyster h007 (h8.00 xm europe) forklift service repair manualHyster h007 (h8.00 xm europe) forklift service repair manual
Hyster h007 (h8.00 xm europe) forklift service repair manual
 
Caterpillar cat 140 m series 3 motor grader (prefix n9d) service repair manua...
Caterpillar cat 140 m series 3 motor grader (prefix n9d) service repair manua...Caterpillar cat 140 m series 3 motor grader (prefix n9d) service repair manua...
Caterpillar cat 140 m series 3 motor grader (prefix n9d) service repair manua...
 

Edinburgh Tram Compressor Testing Procedure

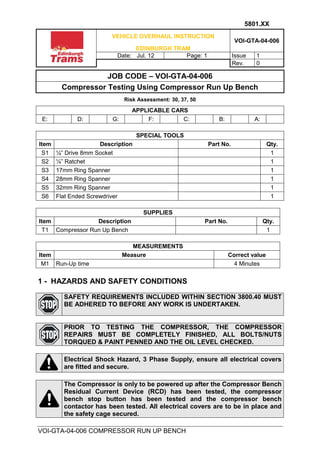
  • 1. 5801.XX VEHICLE OVERHAUL INSTRUCTION EDINBURGH TRAM VOI-GTA-04-006 Date: Jul. 12 Page: 1 Issue 1 Rev. 0 VOI-GTA-04-006 COMPRESSOR RUN UP BENCH JOB CODE – VOI-GTA-04-006 Compressor Testing Using Compressor Run Up Bench Risk Assessment: 30, 37, 50 APPLICABLE CARS E: D: G: F: C: B: A: SPECIAL TOOLS Item Description Part No. Qty. S1 ¼” Drive 8mm Socket 1 S2 ¼” Ratchet 1 S3 17mm Ring Spanner 1 S4 28mm Ring Spanner 1 S5 32mm Ring Spanner 1 S6 Flat Ended Screwdriver 1 SUPPLIES Item Description Part No. Qty. T1 Compressor Run Up Bench 1 MEASUREMENTS Item Measure Correct value M1 Run-Up time 4 Minutes 1 - HAZARDS AND SAFETY CONDITIONS SAFETY REQUIREMENTS INCLUDED WITHIN SECTION 3800.40 MUST BE ADHERED TO BEFORE ANY WORK IS UNDERTAKEN. PRIOR TO TESTING THE COMPRESSOR, THE COMPRESSOR REPAIRS MUST BE COMPLETELY FINISHED, ALL BOLTS/NUTS TORQUED & PAINT PENNED AND THE OIL LEVEL CHECKED. Electrical Shock Hazard, 3 Phase Supply, ensure all electrical covers are fitted and secure. The Compressor is only to be powered up after the Compressor Bench Residual Current Device (RCD) has been tested, the compressor bench stop button has been tested and the compressor bench contactor has been tested. All electrical covers are to be in place and the safety cage secured.
  • 2. 5801.XX VEHICLE OVERHAUL INSTRUCTION EDINBURGH TRAM VOI-GTA-04-006 Date: Jul. 12 Page: 2 Issue 1 Rev. 0 VOI-GTA-04-006 COMPRESSOR RUN UP BENCH 2 - PROCEDURE 2.1 COMPRESSOR RUN-UP BENCH TESTING 1. The start point for testing is with the Compressor Run-Up bench fully isolated (Figure 1), Lock-Outs fitted to the Compressor Cable Plug (Figure 2) and to the Bench Cable Plug (Figure 3). All air is to be discharged from the vessel and the valve left open (Figure 4). Figure 1. Figure 2. Figure 3. Figure 4. Do not connect the compressor to the bench at this point as if the RCD does not pass its safety test, the compressor cannot be tested. Ensure the red stop button (Figure 6) is pulled out. 2. Prior to testing the compressor, the bench RCD (Figure 5), stop button (Figure 6) and contactor (Internal) must be tested. To do this, remove the Lock-Out from the Bench Cable Plug (Figure 3) and plug into the socket on the wall (Figure 7). Figure 5. Figure 6. Figure 7. Figure 8.
  • 3. 5801.XX VEHICLE OVERHAUL INSTRUCTION EDINBURGH TRAM VOI-GTA-04-006 Date: Jul. 12 Page: 3 Issue 1 Rev. 0 VOI-GTA-04-006 COMPRESSOR RUN UP BENCH 3. Once the plug is connected, energise the switch on the wall and press the RCD button (Figure 5), the Circuit breaker should trip. If the Circuit breaker does not trip, the cable plug Lock-Out is to be reinstalled and the key quarantined. 4. If the Circuit breaker does trip, reset the circuit breaker, ensure the red emergency stop button (Figure 6) is pulled out and press the green start button (Figure 8). On pressing the green button you should hear the internal contactor pull in. If the Contactor does not pull in, the cable plug Lock-Out is to be reinstalled and the key quarantined. 5. If the contactor pulls in, depress the stop button and reset the stop button. The RCD, circuit breaker and contactor have all been tested and the bench is ready to use. 2.2 COMPRESSOR TESTING 6. Once the compressor has been lifted onto the compressor run-up bench, align & secure using the securing bar (Figure 9) and tighten down the two nuts with a spanner (S3). Figure 9. DO NOT REMOVE THE COMPRESSOR CABLE LOCK-OUT AT THIS POINT. THE LOCKOUT IS ONLY TO BE REMOVED WHEN THE COMPRESSOR IS SECURE, ELECTRICAL CONNECTIONS CONNECTED AND ELECTRICAL COVERS INSTALLED. Electrical Shock Hazard, 3 Phase Supply, ensure all electrical covers are fitted and secure. The compressor weighs 20Kg and the compressor mounted on the compressor bracket weighs 28Kg. When transiting on the shop floor use the scissor lift in its lowered position and use the scissor lift to raise and lower the compressor onto the bench. A two person lift can be used to move the compressor into place if required.
  • 4. 5801.XX VEHICLE OVERHAUL INSTRUCTION EDINBURGH TRAM VOI-GTA-04-006 Date: Jul. 12 Page: 4 Issue 1 Rev. 0 VOI-GTA-04-006 COMPRESSOR RUN UP BENCH 7. Check the secondary earthing strap (Figure 10) is secure at both ends. Figure 10. 8. Connect the compressor cable (Figure 11) to the compressor by firstly connecting the green/yellow primary earth cable using a screwdriver (S6) and then the cables labelled U, V & W using a socket (S1) and ratchet (S2). Figure 11. 9. Slide the front cover for the electrical cover up the cable, fit the front cover to the electrical cover and refit the electrical cover (Figure 12 highlighted red) with the two screws using a screwdriver (S6). Due to the 3 Phase Supply powering the compressor motor, confirm all connections are secure and confirm the primary and secondary earthing cables are secure.
  • 5. 5801.XX VEHICLE OVERHAUL INSTRUCTION EDINBURGH TRAM VOI-GTA-04-006 Date: Jul. 12 Page: 5 Issue 1 Rev. 0 VOI-GTA-04-006 COMPRESSOR RUN UP BENCH Figure 12. 10.Fit the yellow safety cage (Figure 13) over the compressor using the 4 wing nuts. Figure 13. Do not fit the armoured air hose to the compressor as you first need to confirm the compressor is blowing. Prior to compressor run up, complete a final visual check to confirm everything is connected and the safety cage is secure. Prior to compressor run up, inform everyone in the near area that compressor run-up is about to take place and a noise hazard will occur. Mobile screens can be used to further nullify noise. EAR PROTECTION AND SAFETY GLASSES WILL BE REQUIRED FOR ANY PERSON IN THE CLOSE PROXIMITY OF THE RUN-UP TESTS.
  • 6. 5801.XX VEHICLE OVERHAUL INSTRUCTION EDINBURGH TRAM VOI-GTA-04-006 Date: Jul. 12 Page: 6 Issue 1 Rev. 0 VOI-GTA-04-006 COMPRESSOR RUN UP BENCH 11.Remove the Lock-Out from the compressor cable and inset the compressor cable plug into the compressor run-up bench socket. 12.Press the green start button (Figure 8) and confirm air is being blown out of the compressor. Stop the compressor running by depressing the red emergency stop button (Figure 6). 13.Remove the yellow safety cage and connect the armoured air hose using a spanner (S5). Re-fit the yellow safety cage (Figure 14). Figure 14. Figure 15. 14. Close the red valve (Figure 15) for the air vessel and reset the red stop button. 15. Press the green start button and allow the pressure of the air vessel to build up to 8.8 Bar which is illustrated on the pressure gauge (Figure 16). Due to the compressor run-up bench not being identically configured to the tram, the time for charge up of the vessel to 8.8 Bar will be slightly quicker. Always listen for air leaks and if charging is prolonged, further investigation may be required.
  • 7. 5801.XX VEHICLE OVERHAUL INSTRUCTION EDINBURGH TRAM VOI-GTA-04-006 Date: Jul. 12 Page: 7 Issue 1 Rev. 0 VOI-GTA-04-006 COMPRESSOR RUN UP BENCH Figure 16. Figure 17. 16. After reaching 8.8 Bar, the blow off valve will operate and reduce the pressure of the vessel. If the compressor bench vessel does not blow off after 8.8 bar, the emergency stop button on the bench is to be pressed and report the fault. Go to paragraph 18 and continue. As long as there is power to the compressor, the charge/discharge cycle will continue until you depress the red emergency stop button.
  • 8. 5801.XX VEHICLE OVERHAUL INSTRUCTION EDINBURGH TRAM VOI-GTA-04-006 Date: Jul. 12 Page: 8 Issue 1 Rev. 0 VOI-GTA-04-006 COMPRESSOR RUN UP BENCH 17. Let the compressor run for approximately 4 minutes and then stop the cycle using the red emergency stop button. Turn the wall socket switch off, remove the bench cable plug from the socket and fit the Lock-Out to the plug. Remove the compressor cable plug from the compressor run-up bench socket and fit the Lock-Out to the plug. 18. To depressurise the air vessel, turn the red valve slightly to allow a small flow of air to leave the vessel. Leave until fully empty and the gauge is reading zero. Fully open the valve once empty. 19. Remove the yellow safety cage, remove the electrical cover and remove the compressor cable from the compressor. 20. Remove the armoured air hose using a spanner (S4). 21. Inspect the compressor for oil leaks. If all ok, refit the end cover/serial number plate, close the Internal Repair Work Order and return the compressor (with paperwork) to the store. THE AIR VESSEL IS PRESSURISED, DO NOT DO ANY FURTHER WORK ON THE COMPRESSOR WITHOUT FIRST DEPRESSURISING THE AIR VESSEL. CONFIRM THE COMPRESSOR BENCH PLUG AND COMPRESSOR PLUG ARE REMOVED AND LOCKED OUT PRIOR TO DOING ANY FURTHER WORK ON THE COMPRESSOR. The released air should not be loud, if it is, close the valve until the noise is at an aceptable level. REMOVE WIRES LABELED U, V & W AND THEN THE EARTH CABLE. DO NOT REMOVE IN ANY OTHER ORDER. When removing the armoured air hose cable from the compressor you may need two spanners (S4 & S5) to prevent the connector on the side of the compressor from turning.