SlideShare a Scribd company logo
1 of 124
Download to read offline
GPSMAP® 580/585 
Chartplotter/Combo Fishfinder 
Owner’s Manual
© 2011 Garmin Ltd. or its subsidiaries 
Garmin International, Inc. 
1200 East 151st Street, Olathe, Kansas 66062, USA 
Tel. (913) 397.8200 or (800) 800.1020 
Fax (913) 397.8282 
Garmin (Europe) Ltd. 
Liberty House 
Hounsdown Business Park, 
Southampton, Hampshire, SO40 9LR UKTel. +44 (0) 870.8501241 (outside the UK) 0808 2380000 (within the UK) 
Fax +44 (0) 870.8501251 
Garmin Corporation 
No. 68, Jangshu 2nd Road, Sijhih, Taipei County, Taiwan 
Tel. 886/2.2642.9199 
Fax 886/2.2642.9099 
All rights reserved. Except as expressly provided herein, no part of this manual may be reproduced, copied, transmitted, disseminated, downloaded or stored in any storage medium, for any purpose without the express prior written consent of Garmin. Garmin hereby grants permission to download a single copy of this manual onto a hard drive or other electronic storage medium to be viewed and to print one copy of this manual or of any revision hereto, provided that such electronic or printed copy of this manual must contain the complete text of this copyright notice and provided further that any unauthorized commercial distribution of this manual or any revision hereto is strictly prohibited. 
Information in this document is subject to change without notice. Garmin reserves the right to change or improve its products and to make changes in the content without obligation to notify any person or organization of such changes or improvements. Visit the Garmin Web site (www.garmin.com) for current updates and supplemental information concerning the use and operation of this and other Garmin products. 
Garmin® is a trademark of Garmin Ltd. or its subsidiaries, registered in the USA and other countries. GPSMAP®, AutoLocate®, BlueChart®, BlueChart® g2, TracBack®, BlueChart®, MapSource®, and Ultrascroll™ are trademarks of Garmin Ltd. or its subsidiaries. These trademarks may not be used without the express permission of Garmin. XM WX Weather and XM Radio are trademarks of XM Satellite Radio, Inc. 
January 2011 Part Number 190-01202-00 Rev. B Printed in Taiwan
Introduction 
Thank you for choosing the Garmin® GPSMAP® 580, which uses the proven performance of Garmin GPS and full-featured mapping, to create an unsurpassed marine navigation chartplotter. 
Garmin GPSMAP 580 is a full-function chartplotter, while the GPSMAP 585 contains all the features of the GPSMAP 580 and adds fish finding capabilities.You must purchase a compatible transducer in order to use the fish finder on the GPSMAP 585. 
Refer to http://www8.garmin.com/buzz/marine/m/pdf/Transducers. pdf For more information about compatible transducers. 
About This Manual 
To get the most out of your new navigation system, read this manual and learn the operating procedures for your unit. This manual is organized into the following sections: 
The Introduction contains the Table of Contents, Care Information, and Warnings. 
The Getting Started section provides an overview of the unit, how to turn the unit on, and how to simulate navigation. 
The Operation Mode section provides you with information about navigating with the GPSMAP 580/585 in Operation Mode. 
The Operation Mode pages section reviews the main pages in Operation Mode. 
The Main menu section describes features found on the Main menu, and information on how to change settings. 
The Setting Up and Using Sonar section provides instructions on using with your GPSMAP 580/585 . 
The Appendix contains specifications, optional accessories, maintenance information, and other product information. 
Declaration of Conformity 
Hereby, Garmin International, Inc. declares that this device is in compliance with the essential requirements and other relevant provisions of Directive 1999/5/EC. The Declaration of Conformity may be obtained at www.garmin.com/compliance. 
Product Registration 
Help us better support you by completing our online registration today. Go to http://my.garmin.com. Keep the original sales receipt, or a photocopy, in a safe place. 
GPSMAP 580/585 Owner’s Manual i 
Introduction
Contact Garmin 
Contact Garmin Product Support if you have any questions while using your unit. In the USA, go to www.garmin.com/support, or contact Garmin USA by phone at (913) 397.8200 or (800) 800.1020. 
In the UK, contact Garmin (Europe) Ltd. by phone at 0808 2380000. 
In Europe, go to www.garmin.com/support and click Contact Support for in-country support information, or contact Garmin (Europe) Ltd. by phone at +44 (0) 870.8501241. 
In China, contact Garmin (China) Ltd. by phone at 400-819-1899. CAUTION: Resetting your GPSMAP 580/585If your GPSMAP 580/585 stops functioning, retest your GPSMAP 580/585 by pressing and holding the Power button. 
ii GPSMAP 580/585 Owner’s Manual 
Introduction
Table of Contents 
Introduction............................................................................i 
Caring for the GPSMAP 580/585............................................iv 
Warnings...................................................................................v 
Important Information..............................................................v 
Getting Started......................................................................2 
Unit Overview...........................................................................2 
Turning Your GPSMAP 580/585 On or Off..............................3 
Adjusting the Backlight...........................................................3 
Acquiring GPS Satellite Signals.............................................4 
Using the GPSMAP 580/585 ...................................................8 
Using Simulator Mode...........................................................11 
Operation Mode..................................................................12 
Main Pages..............................................................................12 
Navigating to a Destination...................................................12 
Finding an Item.......................................................................15 
Creating and Using Routes...................................................17 
Creating and Using Waypoints.............................................21 
Creating a Route as a Marking line.......................................31 
Managing Your Tracks...........................................................32 
Operation Mode Pages......................................................36 
Compass Page........................................................................42 
Navigation Page.....................................................................45 
Active Route Page..................................................................47 
Position Data Page.................................................................48 
Main Menu...........................................................................49 
Main Menu Tabs......................................................................49 
GPS Tab...................................................................................50 
Route Tab................................................................................50 
Points Tab...............................................................................51 
Track Tab.................................................................................51 
DSC Tab...................................................................................52 
Sonar Tab................................................................................56 
Alarms Tab..............................................................................56 
Calendar Tab...........................................................................58 
Celestial Tab...........................................................................59 
Message Tab...........................................................................63 
Display Tab.............................................................................64 
Sound Tab...............................................................................65 
Setup Tab................................................................................65 
Setting Up and Using Sonar..............................................69 
Showing Sonar on the Map Page..........................................69 
Using the Sonar Page............................................................70 
Setting Up Sonar....................................................................74 
Appendix.............................................................................78 
Specifications.........................................................................78 
Optional Accessories.............................................................79 
Install the Wiring Harness.....................................................80 
Satellite Information...............................................................83 
Digital Selective Calling.........................................................84 
Messages................................................................................86 
Data Field Options..................................................................88 
Software License Agreement................................................90 
Limited Warranty....................................................................90 
Declaration of Conformity (DoC)..........................................92 
GPSMAP 580/585 Owner’s Manual iii 
Table of Contents
WARNING: See the Important Safety and Product Information guide in the product box for product warnings and other important information. 
Caring for the GPSMAP 580/585 
The case is constructed of high-quality materials and does not require user maintenance, except cleaning. 
Cleaning the Case 
Clean the outer casing of the unit (except for the screen) using a cloth dampened with a mild detergent solution and then wipe dry. Avoid chemical cleaners and solvents that may damage plastic components. 
Cleaning the Screen 
The unit’s lens is coated with a special anti-reflective coating that is sensitive to skin oils, waxes and abrasive cleaners. Cleaners containing ammonia, alcohol, abrasives, or anti-grease detergents will harm the anti-reflective coating. It is important to clean the lens using an eyeglass lens cleaner (that is specified as safe for anti- reflective coatings) and a clean, lint-free cloth. 
Water Immersion 
The unit is waterproof to IEC Standard 60529 IPX7. It can withstand immersion in 1 meter of water for 30 minutes. Prolonged submersion can cause damage to the unit. After submersion, be certain to wipe and air dry the unit before reuse. 
Storage 
Do not store the GPSMAP 580/585 where prolonged exposure to temperature extremes might occur (such as in the trunk of a car) as permanent damage could result. 
iv GPSMAP 580/585 Owner’s Manual 
Caring for the GPSMAP 580/585
Navigation and Installation Warnings 
Failure to avoid the following potentially hazardous situations could result in an accident or collision resulting in death or serious injury. 
When navigating, carefully compare information displayed on the unit to all available navigation sources, including information from visual sightings, and maps. For safety, always resolve any discrepancies or questions before continuing navigation. 
Use the electronic chart in the unit only to facilitate, not to replace, the use of authorized government charts. Official government charts and notices to mariners contain all information needed to navigate safely. 
Use this unit only as a navigational aid. Do not attempt to use the unit for any purpose requiring precise measurement of direction, distance, location, or topography. 
Warnings WARNING: This product, its packaging, and its components contain chemicals known to the State of California to cause cancer, birth defects, or reproductive harm. This Notice is provided in accordance with California’s Proposition 65. See www.garmin.com/prop65 for more information. 
Hg - LAMPS INSIDE THIS PRODUCT CONTAIN MERCURY AND MUST BE RECYCLED OR DISPOSED OF ACCORDING TO LOCAL, STATE, OR FEDERAL LAWS. 
For more information go to: 
http://www8.garmin.com/aboutGarmin/environment/disposal.html 
Important Information 
MAP DATA INFORMATION: One of the goals of Garmin is to provide customers with the most complete and accurate cartography that is available to us at a reasonable cost. We use a combination of governmental and private data sources, which we identify in product literature and copyright messages displayed to the consumer. Virtually all data sources contain some inaccurate or incomplete data. In some countries, complete and accurate map information is either not available or is prohibitively expensive. 
See the Important Safety and Product Information guide in the product box for product warnings and other important information. 
GPSMAP 580/585 Owner’s Manual v 
Warnings
Getting Started 
Unit Overview 
The GPSMAP 580 is a color GPS chartplotter. This GPS navigator features a quality LCD display, a built-in basemap, and fish finder (GPSMAP585.) 
DisplayButtonsSD Card slot 
Power/Serial portConnector for external GPS antenna 
2 GPSMAP 580/585 Owner’s Manual 
Getting Started
Turning Your GPSMAP 580/585 On or Off 
The GPSMAP 580/585 has a built-in, high-sensitivity GPS module. You can use the unit without external GPS antenna; however, you may receive a weak GPS signal when navigating in areas where an external antenna is required. 
To turn the GPSMAP 580/585 on and off: 
1. Press and hold the Power key. When the unit turns on, a tone sounds and the Warning page appears. 
Warning page 
2. Read the warning, and then press Enter to continue. 
3. To turn off the GPSMAP 580/585, press and hold the Power key. 
Adjusting the Backlight 
1. Press and quickly release the Power key. 
2. Press up the Rocker up or down on the Rocker to adjust the brightness. 
Backlight adjustment slider 
GPSMAP 580/585 Owner’s Manual 3 
Getting Started
The first time you turn on your GPSMAP 580/585, the GPS receiver must collect satellite data and establish the current location. 
Acquiring GPS Satellite Signals 
After you turn on the GPSMAP 580/585, the unit automatically begins searching for satellites. The GPS page appears while the unit is gathering satellite signals and acquiring a fix. 
Viewing GPS Status 
The GPS tab provides a visual reference of satellite acquisition, receiver status, and accuracy. The sky view and signal strength bars show the satellites visible to the receiver and if they are being tracked. 
The number below each bar represents the particular satellite being received. WAAS satellites are indicated by numbers 33 and above. Numbers above 33 indicate WAAS satellites. 
The sky view shows a bird’s eye view of the position of each satellite relative to the last known position of the receiver. The outer circle represents the horizon (north up), the inner circle represents 45º above the horizon, and the cEnter point represents a position directly overhead. You can also set the sky view to a Track Up configuration which causes the top of the sky view to display along your current track heading. Press Menu to change the configuration of the sky view. 
GPS StatusReceiver status fieldSky viewSignal strength bars 
4 GPSMAP 580/585 Owner’s Manual 
Getting Started
The progress of satellite acquisition is shown in three stages: 
• No signal strength bars—the receiver is searching for satellites. 
• White signal strength bars—the receiver has found the satellite and is collecting data. 
• Green signal strength bars—the receiver has collected the necessary data for this satellite. 
Receiver Status 
The receiver status field displays one of the following conditions: 
• Searching the Sky—the receiver is searching for satellites. 
• AutoLocate—the receiver is searching for any satellite for which an almanac was collected. 
• Acquiring Satellites—the receiver is searching for, and collecting data from, satellites visible at the last known or initialized location, but has not acquired a fix. 
• 2D GPS Location—At least three satellites are acquired and a two-dimensional position fix is calculated. “2D Differential” appears if you are receiving DGPS corrections in 2D mode, and a “D” appears on the strength bar of satellites being corrected. 
• 3D GPS Location—At least four satellites are acquired and a three-dimensional fix was calculated. “3D Differential” appears if you are receiving DGPS corrections in 3D mode, and a “D” appears on the strength bar of satellites being corrected. 
• Lost Satellite Reception—the receiver is no longer tracking enough satellites for a 2D or 3D fix. 
• Receiver Not Usable—the receiver is unusable, possibly due to interference or abnormal satellite conditions. Restart the unit to reset the receiver. 
• Simulating GPS—the receiver is in Simulator Mode. 
• GPS Off—the GPS receiver is turned off. 
GPSMAP 580/585 Owner’s Manual 5 
Getting Started
GPS Options 
Press Menu twice to open the Main menu. Use the Rocker to highlight the GPS tab. Press Menu to open the options Menu. 
GPS Tab Options menu 
Start/Stop Simulator—starts and stops Simulator mode. 
Enable/Disable WAAS—enables or disables WAAS capability. See the “Appendix” for more information about WAAS. 
Track Up Skyview/North Up Skyview—orients the sky view display to North Up or Track Up. New Location—allows you to reset your location for simulation. 
GPS Tips 
• While the receiver is gathering information, your location on the map might appear different from where you actually are located. As soon as the receiver gathers enough satellite information, your proper location appears on the map. 
• Any time you have traveled more than 500mile (800km) with the GPS receiver turned off, the receiver might take longer than normal to find your location. 
• The GPS receiver can lose satellite signals due to interference from items such as buildings, tunnels, and trees. 
• To learn about GPS, visit www.garmin.com/aboutGPS/. 
6 GPSMAP 580/585 Owner’s Manual 
Getting Started
Zoom IN and Zoom OUT Keys• Press to adjust map zoom range. PAGE Key• Press to cycle through the pages. Quit Key• Press to cancel an unintended function. MARK/Enter Key• Press to select a highlighted option. • Press and hold to mark your current location as a waypoint. NAV/MOB Key• Press to display the Navigate Menu. • Press and hold to navigate to a man overboard (MOB) location. Menu Key• Press to display the options Menu for the current page. • Press twice to open the Main menu. POWER Key• Press and hold to turn the unit on or off. • Press and release to adjust the backlighting. Rocker• Press up, down, left, or right to highlight options and to Enter data, or to pan the arrow on the Map Page. 
GPSMAP 580/585 Owner’s Manual 7 
Getting Started
Using the GPSMAP 580/585 
The advanced keypad system on the GPSMAP 580/585 is designed to allow you to select options and enter data quickly and conveniently. As you progress through this owner’s manual, you are directed to press a specific key or highlight a field on the screen. When you are directed to press a key, you should press and quickly release the key. If the key needs to be held down for a period of time to start a secondary function, the instructions tell you to do so. When a field is selected on the screen, it is highlighted in yellow. 
The following terms are used throughout this manual: 
• Highlight—move the highlighted area on the screen up, down, left, or right with the Rocker to select individual fields. Moving the highlight to a given location allows you to make a selection, begin data entry, or scroll through a list. 
• Field—the location on a page where data or an option can be shown and entered. Highlight a field using the Rocker to begin entering data or selecting options. 
• On-screen button—use the Rocker to highlight a button, and press Enter to select the button. 
• Scroll bar—when viewing a list of items too long to appear on the screen, a scroll bar appears along the right side of the list. To scroll through a list, press up or down on the Rocker. 
• Default—the factory setting saved in the unit’s memory. You can change the settings, but you can also revert to the factory (default) settings when you select Restore Defaults. 
Highlighted fieldFieldOn-screen buttons 
Cartography 
Your unit supports Secure Digital (SD) cards.You can insert an optional BlueChart® g2 SD card to view detailed map features. You can insert blank SD cards to transfer data such as waypoints, routes, and tracks to another compatible Garmin unit or a PC. 
To insert the SD card, press it in until it clicks. You can also choose Garmin Homeport software (marine trip-planning software) that lets you plan and organize routes from the convenience of your computer. 
8 GPSMAP 580/585 Owner’s Manual 
Getting Started
Selecting Options and Entering Data 
Select options and enter data by using the Rocker and Enter key. 
To select and activate an option: 
1. From any page, press Menu. An options menu shows a list of optional features specific to that page. 
Selecting an option from an options Menu 
2. Use the Rocker to move the highlight up, down, right, or left on the menu to the option you want to select. 
3. Press Enter to select the feature. Another window with more options might appear. If so, select an option, and press Enter again. 
To exit a menu or return to the previous setting: 
Press Quit. The Quit key moves backward through your steps. Press Quit repeatedly to return to the starting page. 
To select an on-screen button: 
On a page with on-screen buttons, use the Rocker to highlight an on-screen button, and press Enter. 
On-screen button To mark your current location as a waypoint, press and hold Enter/Mark until the New Waypoint Page opens. 
To enter data in a data field: 
1. Use the Rocker to highlight the data field you want, and press Enter to select the field. 
2. Press up or down on the Rocker to select characters. 
GPSMAP 580/585 Owner’s Manual 9 
Getting Started
Entering data TIP: To clear the entire data field, highlight the left-most character field and press left on the Rocker again. 
Not all fields are programmable. When you are on a page with fields that are not selectable, the highlight skips over them. 
Using the Main Menu 
Use the Main menu on your GPSMAP 580/585 to access various functional tabs --- Waypoint, Route, Tracks, Sonar, Setup, etc. Press the Menu key twice from any page to open the Main menu. 
Main menu 
To select a tab from the Main Menu: 
1. From any page, press Menu twice to open the Main menu. 
2. Press up or down on the Rocker to highlight a tab. The information for the highlighted tab automatically appears on the right. To highlight a sub tab, press left or right on the Rocker, and then press up or down to select individual fields. 
By default, the Main menu tabs are shown as icons along the left side of the screen. You can change the Main menu to show tabs in a text-only format. 
To view the Main Menu icons in text-only format: 
1. Highlight the Display tab, and press Enter. 
2. Select the Main menu field, and press Enter. 
3. Highlight Text Only, and press Enter. 
10 GPSMAP 580/585 Owner’s Manual 
Getting Started
Restoring Default Stettings 
You can restore factory defaults for Track, Alarms, Display, Sound, and Setup on the Main menu. For more information about the Main menu, see the “Main menu” section. 
To restore default settings: 
1. Press Menu twice to open the Main menu. 
2. Use the Rocker to highlight Setup tab, and then press Menu to open the options menu. 
Setup Tab Options menu 
3. Highlight Restore Default, and press Enter. 
Using Simulator Mode 
Simulator mode turns the GPS receiver off for use indoors or for practice. The unit does not track satellites in simulator mode. All waypoints and routes created in Simulator mode are retained for future use. WARNING: Do not try to navigate using simulator mode because the GPS receiver is turned off. Any satellite signal strength bars shown are simulations and do not represent the strength of actual satellite signals. 
To turn on Simulator Mode: 
1. From the Main menu, highlight the GPS tab. 
2. Press Menu to open the GPS tab options menu. 
3. Highlight Start Simulator, and press Enter. 
GPS tabStarting Simulator Mode from the GPS tab 
GPSMAP 580/585 Owner’s Manual 11 
Getting Started
O 
peration Mode 
Main Pages 
The GPSMAP 580/585 has five main pages. If you have an optional transducer connected to the GPSMAP 585, you will be able to see the Sonar page. 
Map page Compass page Navigation page 
Position Data page Active Route page Sonar page (optional) 
Navigating to a Destination 
You can navigate to your destination using the Map page. As you travel, you see a magenta line that always runs from your current location to the destination or to the next turn on the Map page. You can use the Map page, Compass page, Navigation page, and Position Data page to help navigate. 
You can navigate to a destination using one of the following methods: 
• Select a point on the map, and press NAV/MOB. 
• Press NAV/MOB to start a new route using the Find page or start a saved route or track. 
• Press NAV/MOB and select Go To Point to search for a particular item and create a route to it. CAUTION: When using Go To, a direct course and a corrected course may pass over land or shallow water. Use visual sightings and steer to avoid land, shallow water, and other dangerous objects. 
12 GPSMAP 580/585 Owner’s Manual 
Operation Mode
Navigate Options Menu CAUTION: When using Go To, a direct course and a corrected course may pass over land or shallow water. Use visual sightings and steer to avoid land, shallow water, and other dangerous objects. 
Press NAV/MOB to open the Navigate options menu. 
Navigate menu in Operation mode 
Go To Point—allows you to select a waypoint or point of interest from the Find page. 
Navigate Route—allows you to select a route to navigate. 
Navigate Track (TracBack)—allows you to select a saved track to navigate. 
To navigate a point on the map: 
1. On the Map page, highlight a point to navigate to, and press NAV/MOB. 
2. Highlight Go To <point name>, and press Enter. 
Navigate menu 
3. Navigate to your destination. 
To stop navigation: 
1. While navigating to a point, press NAV/MOB. 
2. Highlight Stop Navigation, and press Enter. 
3. Highlight Resume Navigation, and press Enter to resume navigation. 
GPSMAP 580/585 Owner’s Manual 13 
Operation Mode
To search for an item and route to it: 
1. Press NAV/MOB and select Go To Point to open the Find page. 
2. Highlight a category, and press Enter. 
3. Press Enter, and then press the Rocker up or down to enter letters contained in the item name. 
4. Press Enter when finished. 
5. Highlight the item from the list, and press Enter. 
6. Press Enter when the Go To button is highlighted. 
Man Overboard 
Use the MOB function to simultaneously mark your current location and create a direct route back to that location. 
To navigate to a MOB location: 
1. Press NAV/MOB twice. 
2. Press Enter to confirm and begin navigating to the MOB location. 
When a MOB is activated, a MOB waypoint with an international MOB symbol is created, and the unit begins actively navigating to that point. Use any of the Navigation pages to guide you back to the MOB point. The MOB waypoint is stored in the waypoint list and can be deleted like any other waypoint. 
14 GPSMAP 580/585 Owner’s Manual 
Operation Mode
Finding an Item 
Use the Find page to search for Waypoints, Tidal Information, or any recently found items. To open the Find page, press the NAV/MOB Key and then press Go To Point. 
The Find page is comprised of several default categories: Waypoints, Tide Stations. Additional categories such as Marine Navaids or Restricted Areas will appear depending on the optional BlueChart® g2 data card in the unit. 
Find pageShown without additional BlueChart® g2 or MapSource maps installed 
Viewing Recently Found Items 
The Recently Found page shows a list of the items you have recently searched for or navigated to. 
To view recently found items: 
1. Press NAV/MOB and select Go To Point. 
2. Highlight Recently Found, and press Enter to open the list of recently found items. 
3. Press Menu to display the options menu. 
4. Select Show Find History to view the list of items you have searched for recently. OR Select Show Go To History to view the list of items for which you have recently navigated to. 
GPSMAP 580/585 Owner’s Manual 15 
Operation Mode
Viewing the Information Page 
Each item on the map, and each item listed in the results list, contains an information page. 
To view details about an item: 
1. Highlight a point on the map or in the search results list, and press Enter. 
An information page appears with details about the item in a tabbed format. Depending on the type of item selected, and if you are using optional BlueChart® g2 data cards, additional information is available. 
Map Feature Information page 
2. Press Quit to exit the information page. 
Viewing Find Page Options 
1. Press NAV/MOB. 
2. Select Go To a Point. 
3. Press Menu. 
• Enable Auto Arrange—automatically arranges the Find Page. When selected, Disable Auto Arrange and Restore Default options are available. 
• Near Other—selects a new location from which to compile the Find items lists. Using the Rocker, move the map arrow to the location you want, and press Enter. 
• Map Information—shows information about the detailed map data stored on the data card and allows you to select which maps appear on the Map page. 
Additional selections are included in the options menu when you are navigating: 
• Near Next—compiles the Find items lists based on the next turn in the route. 
• Near Destination—compiles the Find items lists based on the route destination. 
• Near Current Route—compiles the Find items lists based on the active route. 
16 GPSMAP 580/585 Owner’s Manual 
Operation Mode
Creating and Using Routes 
The GPSMAP 580/585 allows you to create and store up to 150 routes. 
Creating a New Route 
Use the Route tab to create a route by selecting waypoints from the Find page, or by selecting waypoints or map items from the Map page. 
To create a route using the Find Page: 
1. On the Main menu, highlight the Route tab. 
Route Tab with the Route List 
2. Press Menu to open the Route options menu. 
3. Highlight New Route, and press Enter. 
4. Press Enter to find items to add to the route. 
5. Highlight OK, and press Enter to add a point to the route. 
6. Repeat steps 4 and 5 to add additional points to the route. 
To create a route using the map: 
1. On the Main menu, highlight the Route tab. 
2. Press Menu to open the Route options menu. 
3. Highlight New Route, and press Enter. 
Creating a new route on Route Review Page 
4. Highlight Edit on Map, and press Enter. 
5. Highlight a location on the map, and press Enter. 
6. Repeat step 5 to add additional points to the route. NOTE: If you select an area of the map that is not a feature or a waypoint, a new waypoint is created for that location. Press Enter on the New Waypoint Page to save the location as a waypoint and continue adding points to your route. 
GPSMAP 580/585 Owner’s Manual 17 
Operation Mode
Navigating a Saved Route 
Use the Navigate Route option to select and navigate a saved route. 
To navigate a saved route: 
1. Press NAV/MOB. 
2. Highlight Navigate Route, and press Enter. 
3. Highlight a previously saved route, and press Enter. 
Select the route you want to take. 
Editing a Route 
After you create a route, use the Route Review page to edit, change the name, and review route points of a selected route. 
To change the name of the route: 
1. On the Main menu, highlight the Route tab. 
2. Highlight the name of the route, and press Enter. 
3. With the Route Review page open, highlight the route name field at the top of the page, and press Enter. 
Route Review page 
4. Use the Rocker to enter the route name, and press Enter. 
18 GPSMAP 580/585 Owner’s Manual 
Operation Mode
To review individual route points: 
1. On the Main menu, highlight the Route tab. 
2. Highlight the name of the route, and press Enter. 
3. Highlight a point, and press Enter. 
4. Choose Next, Show Map, or Save, and press Enter. 
If the route point is a user waypoint, you can edit any of the waypoint properties on the Waypoint Page (see the “Creating and Using Waypoints” section beginning on page 21 for details). 
When you return to the Route Review page, the next point in the route is automatically highlighted. You can review each point on the route by pressing Enter. 
To add points to the route: 
1. On the Main menu, highlight the Route tab. 
2. Highlight a route, and press Enter. 
3. Highlight the spot in the route where you want to add the new point. (The new point is added before the highlighted route point). 
4. Press Menu. 
5. Highlight Insert Waypoint, and press Enter. 
Route Review page 
6. Highlight OK, and press Enter to add the new point to the route. 
GPSMAP 580/585 Owner’s Manual 19 
Operation Mode
To edit the route on the map: 
1. On the Main menu, highlight the Route tab. 
2. Select a route, and press Enter. 
3. Press Menu to open the Route Review page options menu. 
4. Highlight Edit on Map, and press Enter. 
5. Select a location on the route (the route turns red when the arrow is over the route), and press Enter. 
6. Use the Rocker to drag the route to the new point location, and press Enter. 
Editing the route on the map 
7. Repeat steps 4 through 5 to add any remaining points to the route. 
To plan your route: 
1. Open the Route Review page options menu. 
2. Highlight Plan Route, and press Enter. 
Entering Speed and Fuel Flow for trip planning 
3. To enter data for Speed, use Rocker to highlight the data field. 
4. Press Enter and use UP/DOWN to key in the number. NOTE: Fuel flow rates are measured in units per hour. System setting changes for units of measure (statute, nautical, or metric) do not affect the fuel flow measure. You should enter fuel flow rates based on information for your vehicle (such as the operator’s manual or performance specifications), and make note of the units of measure (gallons or liters). 
20 GPSMAP 580/585 Owner’s Manual 
Operation Mode
Transitioning to the Next Waypoint 
1. On the Main menu, highlight the Route tab. 
2. Press Menu to open the Route Review page options menu. 
3. Highlight Set Up Routes and press Enter to set the route leg transition (or waypoint transition). 
4. Select distance to enter a radius so that when you are within the entered distance, the GPSMAP 580/585 leads you to the next point on your route. When you select Manual, you can transition to the next waypoint anytime while navigating a route. 
While you are navigating the route, open the Active Route Page, and press Menu. Highlight next Route Waypoint, and press Enter to have the GPSMAP 580/585 start routing you to the next point in your route. 
Creating and Using Waypoints 
Waypoints are locations or landmarks you record and save to your GPS. You can add waypoints to routes, and even navigate directly to the selected waypoint. 
The GPSMAP 580/585 stores up to 6,000 alphanumeric waypoints with user-defined icons, comments, elevation, depth, and temperature available for each waypoint. Waypoints can be created using three basic methods: 
• Enter/Mark—allows you to quickly mark your present location. 
• Graphically—allows you to define a new waypoint location from the map using the Rocker. 
• Text Entry—allows you to manually enter the location coordinates for a new waypoint. 
GPSMAP 580/585 Owner’s Manual 21 
Operation Mode
Marking Your Present Location 
Use the Enter/Mark key to capture your present location to create a new waypoint. You must have a valid position (2D or 3D) fix to mark your present location. 
To mark your present location: 
1. Press and hold the Enter/Mark key until the New Waypoint page opens, then release it. A default four-digit name and symbol are assigned for the new waypoint. 
New Waypoint page 
2. Use the Rocker to highlight OK, and press Enter to accept the waypoint with the default information. 
To change any information on the New Waypoint page, highlight the appropriate field, and press Enter. After entering and confirming your changes, highlight OK, and press Enter. 
Creating Waypoints Using the Map 
You can quickly create a waypoint using the Map page. 
To create a new waypoint using the Map page: 
1. Use the Rocker to move the arrow to the map location or map feature you want. 
2. Press and quickly release Enter/Mark to capture the arrow location. 
If you highlight a map feature, an information page opens after you press Enter. Highlight Save, and press Enter to save the map item as a waypoint. 
3. To accept the waypoint with the default information, highlight OK, and press Enter. 
To change any information on the New Map Waypoint page, highlight the appropriate field, and press Enter. After entering your changes, highlight OK, and press Enter. 
22 GPSMAP 580/585 Owner’s Manual 
Operation Mode
Creating a Waypoint by Entering Coordinates 
You can manually enter location coordinates to create a waypoint. 
To create a new waypoint by entering location coordinates: 
1. Press and hold Enter/Mark to create a waypoint. The new waypoint is created and uses the next available waypoint number and the last known location of the receiver as the default location. 
2. On the New Waypoint page, highlight the Location field, and press Enter. 
Entering location coordinates. 
3. Use the Rocker to enter location coordinates, and press Enter. 
To change any of the other information on the New Map Waypoint page, highlight the appropriate field, and press Enter. After entering your changes, highlight OK, and press Enter. 
Reviewing a Waypoint 
After you create and store a waypoint, you can modify, review, rename, move, or delete it at any time using the Waypoint Review and Waypoint Edit pages. 
To access the Waypoint Review page: 
Highlight a waypoint on the Map page, and then press Enter to open the Waypoint Review page. 
If the waypoint is located on a map feature or BlueChart® g2 feature, the Waypoint Review page might include additional tabs containing information about other features at that location. 
Waypoint Review page 
GPSMAP 580/585 Owner’s Manual 23 
Operation Mode
To access the Waypoint Edit page: 
1. On the Main Menu, select the Points tab. 
2. Select a waypoint from the list. 
Points Tab 
3. Press Enter to open the Waypoint Edit page. NOTE: If the waypoint is located on a map feature or BlueChart® g2 feature, the Waypoint Edit page will not show the details of the other map features. 
Adding a Waypoint to a Route 
Use the Append to Route option to add the selected waypoint to the end of a route. This option is available only when you are not navigating. When you are navigating to a destination, Add to Current Route opens. The selected waypoint is added to the current route before the route destination. 
To add a waypoint to the end of the route: 
1. Open the Waypoint Edit page, and press Menu to open the options menu. 
Waypoint Options menu 
2. Select Append To Route. 
3. Highlight a route, or select New Route, and press Enter. 
4. Highlight OK, and press Enter to save the waypoint. 
24 GPSMAP 580/585 Owner’s Manual 
Operation Mode
Averaging the Waypoint’s Location 
Average Location makes the unit take several sample location measurements for the waypoint and recalculate for a more accurate location reading. NOTE: You must have a GPS satellite fix before you can average a waypoint’s location. 
To calculate the average location: 
1. Open the Waypoint page, and press Menu. 
2. Select Average Location, and press Enter. The fields change as the unit calculates the average location of the waypoint. 
Average Location page 
3. Press Enter to save the location. 
Projecting a Waypoint 
You can also create a new waypoint by projecting the distance and bearing from a specific location to a new location. 
To create a new waypoint by projecting its location: 
1. On the Main menu, highlight the Points tab and select the point which you want to porject from, then press Enter. 
2. Press Menu. 
3. Highlight Project Location, and press Enter. 
Project Location menuEnter the distance, bearing, and location. 
4. To change the location from which you are projecting the new waypoint, highlight the From field, and press Enter. 
5. Select the point from which you can project your new waypoint. 
GPSMAP 580/585 Owner’s Manual 25 
Operation Mode
6. To adjust the distance that the new waypoint is projected beyond the original waypoint, highlight the Distance field, and press Enter. enter the projection distance, and press Enter. 
7. To adjust the bearing that the new waypoint is projected from the original waypoint, highlight the Bearing field, and press Enter. Enter the bearing, and press Enter. 
8. When you have adjusted all elements of the projected location, highlight Save, and press Enter. 
9. Make any other changes to the new waypoint data (such as the name or symbol); highlight OK, and press Enter. 
Editing a Waypoint 
You can edit waypoints using the Points tab on the Main menu. The User sub tab, on the Points tab, shows a master list of all waypoints stored in memory. From the User list, you can review, edit, rename, or delete individual waypoints or delete all user waypoints. 
User sub tab 
To navigate to a waypoint from the Points tab: 
1. On the Main menu, select the Points tab, and then highlight the User sub tab. 
2. Highlight the waypoint you want to navigate to. 
3. Press NAV/MOB to open the Navigate menu. 
4. Highlight Go To <Point Name>, and press Enter. 
To edit a waypoint: 
1. Open the Waypoint Review or Waypoint Edit page. 
2. Highlight the waypoint name, symbol, or field you want to change, and press Enter. 
3. Use the Rocker to select a symbol or enter data, and press Enter. 
26 GPSMAP 580/585 Owner’s Manual 
Operation Mode
Waypoint pageName fieldSymbol field 
You can select different icons by selecting the symbol group. 
Organizing Waypoints into Categories 
You can organize your waypoints into categories to help manage your waypoints. For example, you can create a Vacation category that stores all of the waypoints you want to use for your vacation. You can create up to 15 categories. 
To create a waypoint category: 
1. From any waypoint page, or the Points tab, press Menu. 
2. Select Edit Categories, and press Enter. 
3. Highlight Add, and press Enter. 
Adding a new category 
4. Use the Rocker to enter a name for the category. 
5. Highlight Save, and press Enter. 
GPSMAP 580/585 Owner’s Manual 27 
Operation Mode
To assign a category to a waypoint: 
1. Open the Waypoint Edit page. 
2. Select the Category field, and press Enter. 
3. Select the category for which you want to assign the waypoint, and press Enter. 
Waypoint page 
To delete a category: 
1. Within the Waypoint Categories page, highlight the category you want to delete, and press Menu. 
2. Select Delete Category, and press Enter. 
Waypoint Categories Options menu 
3. Press Enter. 
Deleting Waypoints 
You can delete waypoints from the waypoint list on the Points tab or from the Waypoint page. To delete a waypoint from the Waypoint page, use the Rocker to highlight the on-screen Delete button, and press Enter. NOTE: When you delete a waypoint from the list, it cannot be recovered from the unit. Garmin suggests backing up important waypoints to a computer using Garmin Home Port software. 
To delete a waypoint from the User Points tab: 
1. From the Points tab, highlight the waypoint you want to delete. 
2. Press Menu. 
3. Highlight Delete Waypoint, and press Enter. A confirmation message appears. 
28 GPSMAP 580/585 Owner’s Manual 
Operation Mode
4. Press Enter. 
To delete waypoints by symbol or category: 
1. On the User sub tab, highlight the waypoint to delete, and press Menu. 
2. Highlight Delete by Symbol or Delete by Category, and press Enter. 
3. Highlight the symbol or category you want to delete, and press Enter. 
4. Highlight OK, and press Enter. 
To delete waypoints by distance: 
1. On the User sub tab, highlight the waypoint to delete, and press Menu. 
2. Highlight Delete By Distance, and press Enter. 
3. Select Less Than or More Than, and enter the distance. 
4. Select a waypoint or point of interest as the From location. 
5. Highlight the From field and press Enter. 
6. Select a location on the Find page, and press Enter. 
7. Highlight OK, and press Enter. 
8. Highlight Delete, and press Enter to delete all waypoints within the set location. 
GPSMAP 580/585 Owner’s Manual 29 
Operation Mode
Proximity Points 
Use the Proximity sub tab to define an alarm circle around a stored waypoint location. The alarm circle can help you avoid reefs, rocks, or restricted waters. Up to 100 waypoints can be listed with a maximum alarm radius of 99.99 nautical miles, statute miles, or kilometers. 
If a proximity alarm circle overlaps an existing alarm circle, a “Proximity Overlaps Another Proximity Waypoint” message appears. Because the unit only alerts for one of the overlap points, use caution when navigating in these areas. You are only alerted to the closest proximity waypoint when you enter an alarm circle overlap. 
To turn proximity alarms on or off: 
1. On the Main menu, highlight the Points tab, and then highlight the Proximity sub tab. 
2. Highlight the field below Proximity Alarm, and press Enter. 
3. Select the On or Off setting, and press Enter. 
To add a proximity waypoint: 
1. On the Proximity sub tab, use the Rocker to highlight an empty line on the Proximity List, and press Enter. 
2. Select a waypoint or point of interest from the Find Page. 
3. Highlight OK, and press Enter. 
4. Press Enter to define the proximity radius. 
5. Use the Rocker to enter a distance value (up to 99.99 units), and press Enter. 
To clear one or all proximity waypoints from the list: 
1. On the Main menu, highlight the Points tab, and then highlight the Proximity sub tab. 
2. Highlight the proximity waypoint you want to clear, and press Menu. 
Proximity Points Tab Options menu 
30 GPSMAP 580/585 Owner’s Manual 
Operation Mode
3. To clear a single alarm, highlight Remove Point, and press Enter. To clear all proximity waypoints, select Remove All, and press Enter. 
4. Highlight OK, and press Enter. 
Creating a Route as a Marking line 
In some instances, you may want to display a line need on the map to display a dangerous border or area. 
To begin making a marking line on the map: 
1. On the Route tab, select the route to act as a marking line to display on the map. 
2. Select Show on Map. 
3. Select a color. 
To hide a marking line on the map: 
1. To hide the marking line, deselect the Show on Map checkbox on the Route edit page. NOTE: The maximum number of routes (marking line) that can be displayed is 150 lines. 
GPSMAP 580/585 Owner’s Manual 31 
Operation Mode
Managing Your Tracks 
The GPSMAP 580/585 draws an electronic breadcrumb trail or track log on the Map Page as you travel. The track log contains points along its path, and includes both time and location for each point. 
The track log starts recording as soon as the GPSMAP 580/585 obtains a location fix. For best results, clear the track log before you start traveling as new track points overwrite the oldest track points. 
The percentage of memory used by the current track log appears at the top of the Active tab. After the track log is cleared, it shows zero percent. When the track log reaches 100%, the most recent track points overwrite the oldest track points (if Wrap is selected for Record Mode). To avoid losing track points, save the track log when it approaches the 99% mark. 
Setting Up and Saving Your Tracks 
You must save the track log before you can use the Navigate Track feature. The Save feature allows you to store up to 50 track logs. 
To access the Track tab: 
1. Press Menu twice to open the Main menu. 
2. Highlight the Track tab. 
Track tab 
Record Mode—Wrap records over the oldest tracks when the track log reaches 100%. Fill records a track log until the track log is full (100%). When Off is selected, the unit does not record tracks. 
Interval—Distance records track points after a specified distance is traveled. Time creates track points after a specified time has elapsed. Resolution records track points based higher the resolution entered, the more points the unit creates to make the track. 
Color—allows you to select a color for the track when it appears on the map. 
Value—allows you to record a track according to the Interval and Value. enter a specific distance, time, or resolution. 
32 GPSMAP 580/585 Owner’s Manual 
Operation Mode
To clear the track log: 
1. On the Main menu, highlight the Track tab and then highlight the Active sub tab. 
2. Highlight the Clear button, and press Enter. 
Clearing the track log 
3. Highlight OK, and press Enter. 
To save the entire track log: 
1. On the Main menu, highlight the Track tab and then highlight the Active sub tab. 
2. Select Save, and press Enter. A message appears asking if you want to save the entire track. 
3. Highlight Yes, and press Enter. 
To save a portion of the track log: 
1. On the Main menu, highlight the Track tab and then highlight the Active sub tab. 
2. Select Save, and press Enter. 
3. Highlight No, and press Enter. 
4. Select a beginning point, and press Enter. 
Saving a portion of the track log 
5. Select an ending point, and press Enter. The Track Review page opens automatically. 
6. Highlight OK, and press Enter to save the track. 
GPSMAP 580/585 Owner’s Manual 33 
Operation Mode
Saved Tracks 
The Saved sub tab lists all of the saved tracks in your unit. Press Menu to open the Saved tab options menu. 
Saved sub tab 
Review on Map—allows you to show the highlighted track on the Map page. 
TracBack—allows you to navigate the track. You can navigate the track as it is saved, or you can navigate the track in reverse. 
Delete Track—allows you to erase the highlighted track from the unit’s memory. 
Delete All—allows you to erase all tracks from the unit’s memory. 
To edit a track: 
1. On the Main menu, highlight the Track tab and then select the Saved tab. 
2. Select a track to edit, and press Enter. 
Track Review page 
3. Highlight the Name field, and press Enter. 
4. Use the Rocker to change the name, and press Enter. 
5. Select a different display color to show the track on the map. 
6. Highlight the box next to Show on Map, and press Enter to show the track on the map. 
7. To view the track on the map, highlight Map, and press Enter. 
8. Highlight OK, and press Enter to save your changes. 
34 GPSMAP 580/585 Owner’s Manual 
Operation Mode
Navigating a Saved Track 
You can save your track log to use later as a TracBack, which reduces your track log into a route with up to 300 turns. When initiated, a TracBack route leads you back to the oldest stored track log point. It is a good idea to clear the existing track log before you start your current trip. Also, you must save an active track log before you can navigate it as a TracBack. 
To start a TracBack using the NAV/MOB key: 
1. Press NAV/MOB, highlight Navigate Track, and press Enter. 
2. Highlight the track you want to navigate, and press Enter. 
Selecting a saved track. 
3. Select the point you want to navigate (TracBack) to, and press Enter. 
TracBack Tips 
When a TracBack is initiated, the GPSMAP 580/585 divides the track into segments called legs. To get the most out of the TracBack feature, remember these tips: 
• Always clear the track log at the point at which you want to go back (such as a dock or campsite). 
• The Record Mode option on the Active Track tab must be set to Fill or Wrap. 
• If the track log Interval option on the Active tab is set to the Time option, the route might not navigate your exact path (keep the interval set to Resolution for best performance). 
• If the receiver is turned off, or satellite coverage is lost during your trip, TracBack draws a straight line between any point where coverage was lost and where it resumed. 
• If the changes in distance and direction of your track are too complex, 50,000 waypoints may not mark your path accurately. The receiver then uses the most significant points of your track so there are fewer changes in direction. 
GPSMAP 580/585 Owner’s Manual 35 
Operation Mode
O 
peration Mode Pages 
Five pages are available in Operation Mode—Map, Compass, Navigation, Active Route, and Position Data. 
Map Page 
When you turn on the GPSMAP 580/585 , the Map page appears after the unit acquires a satellite signal. The position marker shows your current location on the map. 
The Map page shows map information (digital cartography). Use the dedicated zoom keys (IN and OUT) to adjust the Map page scale. 
Two map operating modes, position mode and pan mode, determine what cartography is shown on the map. Position mode pans the map to keep your present location in the display area. The position marker shows your travel on the Map page. The GPSMAP 580/585 always turns on in position mode, with the last known location centered on the map. When you press the Rocker, the GPSMAP 580/585 enters pan mode, which moves the map to keep the white arrow (map pointer) within the display area. 
In Operation mode, four user-selectable data fields appear on the right side of the screen that can be configured to show any one of the possible data options. You can also add additional data fields to the page or select a full screen map without data fields. 
Map pageData fieldsMap zoom rangeCurrent location 
36 GPSMAP 580/585 Owner’s Manual 
Operation Mode Pages
Changing the Page Layout and Data Fields 
You can adjust how the following pages appear: Map, Compass, Navigation, Position Data, Trip Computer, and optional Sonar Pages. You can also adjust the data fields on each page. 
To set up the page layout: 
1. Press Menu to open the options menu. 
2. Highlight Set Up Page Layout, and press Enter. 
Selecting the page layout. 
3. Select a page layout option, and press Enter. 
To change a data field: 
1. Press Menu to open the options menu. 
2. Highlight Change Data Fields, and press Enter. 
3. Highlight the data field to change, and press Enter. 
4. Highlight the type of data you want to show, and press Enter. 
Changing a data field. 
GPSMAP 580/585 Owner’s Manual 37 
Operation Mode Pages
Setting Up the Map Page 
Use the Set Up Map option to adjust how items appear on the Map page. 
To change a map setup option: 
1. On the Map page, press Menu to open the options menu. 
2. Highlight Set Up Map, and press Enter. 
Setting up the Map page. 
3. Press left or right on the Rocker to highlight a tab; press up or down on the Rocker to highlight the field you want to change, and press Enter. 
4. Highlight a setting, and press Enter. 
Viewing Additional Map Data 
Use the Map information page to view the data loaded on your GPSMAP 580/585 unit and data card. 
To review/change map information: 
1. On the Map page, press Menu. 
2. Highlight Map Information, and press Enter. 
3. To change the setting for a map family, highlight the box next to the map family name and press Enter to select (check mark) or deselect (no check mark) the Show setting. 
4. To view the list of maps within a map family, highlight the name of the map family, and press Enter. 
38 GPSMAP 580/585 Owner’s Manual 
Operation Mode Pages
Map Orientation 
There are three map orientation options: 
North Up - orients the map like a paper map. 
Track Up - orients the map in the direction of travel. 
Course Up - orients the map so the direction of navigation is always up. 
When using Track Up or Course Up, the North arrow indicates the orientation. 
Changing the Map Orientation 
1. Press Menu to open the Map page. 
2. Press Menu and select Set Up Map. 
3. Press Enter 
Zooming In and Out of the Map 
The map display has 28 available map zoom ranges ranging from 20 ft to 800 nm (20 ft to 800 mi or 5 m to 1200 km). The map zoom range is controlled by the IN and OUT keys, with the current scale shown at the bottom right of the data window. NOTE: The scale value represents the distance from one end of the scale bar () to the other. 
To select a map zoom range (zoom in and out): 
Press the OUT key to zoom out, press the IN key to zoom in. 
Panning the Map 
Use the panning arrow to pan the map to view other map areas. As you pan past the edge of the current map display, the screen moves to provide continuous map coverage. The position icon stays in your present location and might not be visible on the screen when you pan the map. 
To pan the map: 
Press up, down, right, or left on the Rocker. The panning arrow moves the map so you can view different parts of the map. 
Map feature highlighted 
As you move the arrow, the distance and bearing from your present location to the arrow appears in the data window, along with the coordinates of the arrow. When the arrow is stationary, the arrow stays centered on the screen. 
You can also use the arrow to select on-screen map items, which 
GPSMAP 580/585 Owner’s Manual 39 
Operation Mode Pages
allows you to review a selected item directly from the map. 
To view details about an on-screen point: 
1. Use the Rocker to move the arrow to a waypoint or map item. If several items are grouped closely together, zoom in closer for a better view. 
When a waypoint or map item is selected, it is highlighted on- screen with the name and location shown at the top of the screen, along with the distance and bearing from your current location. 
2. Press Enter to view more information about the point. The information and on-screen buttons shown vary depending on the type of item selected. In some cases, additional information tabs appear at the top of the information page or Waypoint page. 
3. Use the Rocker to highlight the extra tabs and view the information. 
4. Select an on-screen button, and press Enter. 
Map Feature Information page 
Clearing Unwanted Details from the Map 
You can remove items from the Map page (declutter the display) to remove unwanted items. 
To declutter the Map page: 
1. On the Map page, press Menu to open the options menu. 
2. Highlight Declutter, and press Enter. 
3. Press Enter. 
40 GPSMAP 580/585 Owner’s Manual 
Operation Mode Pages
Measuring Distance 
You can measure the distance and bearing between two map items. 
To measure the bearing/distance between two points: 
1. On the Map page, press Menu to open the options menu. 
2. Highlight Measure Distance, and press Enter. An on-screen arrow appears on the map at your present location with ENT REF below it. 
3. Move the arrow to the reference point (the starting point that you want to measure from), and press Enter. A push pin icon marks the starting point. 
4. Move the arrow to the point of which you want to measure. The bearing and distance from the reference point and arrow coordinates appear in the data window at the top of the screen. 
Measure DistanceEnd point of measurement, labeled ENT REFPush pin indicating the beginning point of the measurement 
GPSMAP 580/585 Owner’s Manual 41 
Operation Mode Pages
Compass Page 
During active navigation, the Compass page guides you to your destination with a graphic compass and a bearing pointer. When the pointer is pointing straight up, you are heading directly to your destination. 
Compass Page in Operation modeRotating compass ringCourse to steer indicatorCompass arrowData fields 
The middle of the page features a rotating compass ring that shows your course over ground (track) while you are moving. Your present course over ground is indicated at the top of the compass ring. The direction of the destination (bearing) relative to the course over ground is indicated by an arrow in the middle of the compass ring and a course to steer “bug” on the outside of the compass ring. The course to steer represents the direction to steer to get back to the course line. 
If the arrow points up, you are going directly to the waypoint. If the arrow points any direction other than up, turn toward the arrow until it points up, and then continue in that direction. NOTE: You must be moving for the compass to accurately update and show your heading. 
Turning On the Compass Page 
To show the Compass page: 
1. On the Main menu, highlight Display. 
2. Highlight the Compass Page field, and press Enter. 
3. Select On, and press Enter. 
Turning on the Compass page 
42 GPSMAP 580/585 Owner’s Manual 
Operation Mode Pages
Compass Page Options 
Use the options menu on the Compass page to customize the Compass page. 
1. Press Page until the Compass page appears. 
2. Press Menu to open the Compass page options menu. 
Set Up Page Layout—allows you to select the page layout. 
Show Course Pointer/Show Compass—allows you to toggle between showing the Course Pointer, which shows how far off you are from your course and how to get back on course, or shows the compass arrow. The Course Pointer is also referred to as a CDI or Course Deviation Indictor. 
Show (Hide) Bug Indicator—shows the course to steer bug indicator (the purple tick mark on the compass ring). 
Change Data Fields—allows you to change on-screen data fields. 
Using the Marine Timer 
The Marine Timer, specifically designed for sail boat racing, allows you to easily count up or down by specified time increments. As is common in sail boat racing, there is often a 5-minute warning countdown, followed by a 4-minute preparation countdown, and finally a 1-minute final countdown. 
You can use your GPSMAP 580/585 to perform each of these different countdowns. 
To open the Marine Timer: 
1. On the Compass page, press Menu. 
2. Highlight Set Up Page Layout, and press Enter. 
3. Highlight 2 Columns With Timer, and press Enter. The Marine Timer appears in the lower right corner. 
GPSMAP 580/585 Owner’s Manual 43 
Operation Mode Pages
To use the Marine Timer: 
1. Press the Rocker up or down to select the time you want to count. 5-minutes is the default. 
2. Press Enter to start the timer. Use the Rocker during the timing to quickly select a different length of time. 
3. Press Enter to stop timing. 
Marine Timer on the Compass page 
As discussed previously, the timer is set to count down 5-minutes. If you want to change the length of time and the behavior of the timer, highlight the Setup tab on the Main menu, and then select the Timers sub tab. NOTE: You can set the timer countdown for up to 60 minutes. 
To set the Marine Timer: 
1. On the Main menu, highlight the Setup tab, and then select the Timers sub tab. 
2. Highlight Stop to change the timer. 
3. To enter a new time, highlight the time field, press Enter, and then use the Rocker. 
44 GPSMAP 580/585 Owner’s Manual 
Operation Mode Pages
Navigation Page 
Navigation page 
When you are navigating, the Navigation page provides digital and graphic steering guidance to the destination. The right side of the Navigation page features user-selectable data fields showing useful navigation information. A compass ribbon appears at the top of the page to show your current heading, represented by the violet bar. The red vertical bar represents the bearing to your course. To stay on course, steer toward the red vertical indicator (or arrows) until it lines up with the violet bar in the middle. The bottom of the screen provides visual guidance to the waypoint. The line down the center of the Navigation represents your preferred track line. 
To hide or show the Navigation page: 
1. On the Main menu, highlight the Display tab. 
2. Highlight the Navigation Page field, and press Enter. 
3. Select Off to hide or On to show, and press Enter. 
Using the Navigation Page 
As you head toward your destination, the Navigation perspective moves to indicate your progress to the waypoint and the direction you should steer to stay on course. If you are navigating a route, the Navigation page shows each route waypoint connected in sequence by a black “road” with a white line down the middle. Nearby waypoints that are not on the active route can also be shown. 
To change the Navigation perspective scale: 
On the Navigation page, press IN to zoom in; press OUT to zoom out. 
GPSMAP 580/585 Owner’s Manual 45 
Operation Mode Pages
Navigation Page Options 
Use the Navigation page options menu to define the data fields and to select which waypoints and tracks appear on the screen. 
To show and select the Navigation Page Options: 
1. Press PAGE until the Navigation page appears. 
2. Press Menu. 
3. Highlight an option, and press Enter. 
Navigation page Options menu 
The following options are available from the Navigation page options menu: 
Set Up Page Layout—allows you to select the page layout. 
Change Data Fields—allows you to change on-screen data fields. 
Set Up Navigation—shows an options menu with two sub tabs: Line and Waypoint. Each tab has on/off settings for options, including enabling the line for the Active Leg and Track Log. 
Set Up Navigation 
46 GPSMAP 580/585 Owner’s Manual 
Operation Mode Pages
Active Route Page 
While navigating a route, your GPSMAP 580/585, the Active Route page shows each point (waypoint or map item) on the active route. The point name, course, distance, and other information for each waypoint is displayed.. The current destination point, or active point, is marked with an arrow icon. As you navigate a route, the list automatically updates to indicate the next active point. The Active Route and Route Review pages share many of the same features and options. 
Active Route page 
Active Route Page Options 
1. Press Page until the Active Route page appears. 
2. Press Menu to open the Active Route page options menu. 
Active Route page Options menu 
Deactivate—allows you to stop route navigation. 
Edit on Map—allows you to edit the route on the map. 
Add Waypoint—allows you to insert a point before the highlighted waypoint or add a point to the end of the route. 
Remove Waypoint—allows you to delete a highlighted waypoint, from the route. 
Invert—allows you to reverse the order of the route. 
Plan Route—allows you to enter information about your route to predict your arrival time(s). 
Change Data Fields—allows you to customize the data fields shown on the Active Route page. 
GPSMAP 580/585 Owner’s Manual 47 
Operation Mode Pages
Position Data Page 
The Position Data page shows important navigation data while navigating a route in Operation mode. By default, the Position Data page shows a compass ribbon, your current latitude and longitude, date and time, your location in relation to a prominent nearby landmark (such as a waypoint or city), and eight user-selectable data fields. The compass ribbon appears at the top of the page to show your current heading with a red, vertical bar. To stay on course, steer toward the violet bar (or arrows) until it is aligned with the red bar. 
Position Data page 
Position Data Page Options 
1. Press Page until the Position Data page appears. 
2. Press Menu to open the Position Data page options menu. 
Change Nearest Type—allows you to specify the type of item used as the nearest item (shown in the lower-left data field). The choices change based on the current usage mode. 
Reset Trip—allows you to clear trip information, except the maximum speed and the odometer. 
Reset Max Speed—allows you to clear the maximum speed. 
Reset Odometer—allows you to clear the running total of the distance traveled since the odometer was last reset. 
Reset All—allows you to clear all trip information, including the maximum speed and odometer. 
48 GPSMAP 580/585 Owner’s Manual 
Operation Mode Pages
Main Menu 
The Main menu provides access to various waypoint, system, navigation and interface management, and setup menus. 
Main menu 
To select a tab from the Main menu: 
1. From any page, press Menu twice to open the Main menu. 
2. Highlight the appropriate tab. The information for the highlighted tab automatically appears on the right. To highlight a sub tab, press left or right on the Rocker, and then press up or down to select individual fields. 
Main Menu Tabs 
• GPS—allows you to view satellite information. 
• Route—allows you to create and navigate routes. 
• Points—allows you to view stored waypoints. 
• Track—allows you to record and save tracks. 
• DSC—allows you to set up digital select (DSC) calling features. 
• Sonar—allows you to configure sonar options. 
• Alarms—allows you to define alarm settings. 
• Calendar—allows you to view sun/moon and hunting/fishing information for a specific day. 
• Celestial—allows you to view tide, hunting & fishing, and sun & moon information. 
• Message—allows you to view system generated messages. 
• Display—allows you to adjust the backlight and page display. 
• Sound—allows you to customize GPSMAP 580/585 sounds. 
• Setup—allows you to adjust system settings. 
GPSMAP 580/585 Owner’s Manual 49 
Main Menu
GPS Tab 
The GPS tab provides a visual reference of satellite acquisition, receiver status, and accuracy. The sky view and signal strength bars indicates satellites that are visible to the receiver and whether they are being tracked. 
Main menu—GPS tab 
Route Tab 
The Route tab shows all the routes currently stored in memory, along with a descriptive name for each route. 
Use the Route tab to create and store up to 150 reversible routes, with up to 250 points each. See the “Creating and Using Routes” section beginning on page 17 for more information about routes. 
Main menu—Route tab 
50 GPSMAP 580/585 Owner’s Manual 
Main Menu
Points Tab 
The Points tab contains two sub tabs, User and Proximity, which allow you to manage a large number of waypoints quickly and efficiently. For more information about waypoints, see the “Creating and Using Waypoints” section beginning on page 21. 
Main menu—Points tab 
User Sub Tab 
The User sub tab shows a master list of all waypoints currently stored in memory. The total number of stored and available waypoints appear at the bottom of the User sub tab. 
Proximity Sub Tab 
Use the Proximity sub tab to define an alarm circle around a stored waypoint location. 
Track Tab 
Use the Track tab to specify whether or not to record a track log, define how it is recorded, or save the track log data for future use. The Track tab is divided into two sub tabs: Active and Saved. For more information about tracks, see the “Managing Your Tracks” section beginning on page 32. 
Main menu—Track tab 
Active Sub Tab 
The Active sub tab is for the active log (the log currently being recorded). It shows the amount of track memory used and current settings. 
Saved Sub Tab 
The Saved sub tab shows a list of all saved tracks in your GPSMAP 580/585. 
GPSMAP 580/585 Owner’s Manual 51 
Main Menu
DSC Tab 
Use the DSC tab (Operation mode only) to control and set up the Digital Selective Calling (DSC) features. DSC uses marine VHF radio, and GPS, to transmit and receive location information. DSC is used by mariners for distress calls and position reporting. 
For more information about DSC and Maritime Mobile Service Identity (MMSI) numbers, see pages in the “Appendix”. 
DSC page 
Understanding Distress Calls 
With your GPSMAP 580/585 properly connected to a VHF radio with DSC output, you can receive any DSC distress call within range. An alert message appears and a tone sounds when a distress call is received. The alarm only sounds on a distress call; position reports do not sound the alarm. Distress calls are broadcast to all DSC users in radio range and appear with a blue and white checkered icon on the DSC Call List and Log tabs. 
You can enter the name of a caller, if it is known. The name of the caller replaces the MMSI number as a reference after it is entered. 
Understanding Position Reports 
The Position Report operates similarly to the distress call. This type of contact is like a phone call; no emergency alarms are set off. Position reports are not broadcast to all DSC users and appear with a gold boat icon. 
Receiving DSC Calls 
Each time you receive a distress call or position report, a review page opens—either a DSC Position Report page or a Distress Call page. Both pages contain identical fields to the DSC Entry Review page. 
52 GPSMAP 580/585 Owner’s Manual 
Main Menu
Each entry in the Call List and Log has a corresponding DSC Entry Review page. This page operates similarly to the Distress page and Position Report page. From the DSC Entry Review page, you can Delete the entry, Save it as a waypoint, or show the location on the map. 
To review a call or log entry: 
1. Open the Call List or Log from the DSC tab. 
2. Highlight the call you want to review. 
3. Press Enter to open the DSC Entry Review Page. 
DSC Entry Review page 
DSC Call List 
The Call List sub tab shows the 50 most recent calls, even if the unit is left unattended. The Call List only shows the most recent call from a vessel. If a second call is received, it replaces the first call in the Call List. Press Menu to sort the list and delete entries. 
DSC Call List 
DSC Log 
When DSC calls are received, they are automatically stored in the Log, with the most recent call at the top. The unit can store up to 100 calls; after 100 calls are received, the oldest log file is removed when a new call is received. 
GPSMAP 580/585 Owner’s Manual 53 
Main Menu
DSC Log 
Receiving a Position Report or Distress Call 
After you receive a Position Report or a Distress Call, you can quickly navigate to the location. 
1. Highlight a call from the Call List or Log. 
2. Press Direct To. The top selection in the Navigate menu is highlighted. 
3. Press Enter to go to the location. 
DSC Directory 
The DSC Directory is like a phone book and can hold up to 50 entries. 
DSC Directory ListDSC directory entries. Press Enter to open the Entry Review page. Blank entry. Press Enter to add a DSC directory entry. 
To add a new directory entry: 
1. On the Main menu, open the DSC Directory. 
2. Highlight the first blank space in the directory list, and press Enter. OR Press Menu, highlight New Item, and press Enter. 
3. Enter the MMSI number, the name, and any comments. 
4. When finished, highlight OK, and press Enter. 
New Directory Item page 
54 GPSMAP 580/585 Owner’s Manual 
Main Menu
After creating a New Directory Item, the name created is attached to that particular MMSI number. If you return to the Log, the new name appears under the corresponding MMSI number. 
Another way to input a name is from the Entry Review page or the DSC Distress Call or DSC Position Report pages. The name and MMSI are sent to other Garmin GPS units. Only the MMSI numbers are sent to other non-Garmin DSC users. 
Making a Distress Call 
To make a distress call, press the Mayday button on your VHF radio. If you have DSC support, the call transmits on an emergency channel with the MMSI number attached to the call. Any DSC- equipped mariner (on sea or land) within range can receive the call. 
Setting Up DSC 
Use the Setup sub tab to turn DSC on and off. If you have more than one chartplotter and only want DSC to show on another chartplotter, turn DSC off on this unit. 
This Setup sub tab also allows you to simulate distress calls and position reports while the unit is in Simulator mode. The Distress Call simulator also helps to check if alarms are working properly. 
DSC Setup 
GPSMAP 580/585 Owner’s Manual 55 
Main Menu
Sonar Tab 
Use the Sonar tab to set up and configure sonar. See the “Setting Up and Using Sonar” section. NOTE: You must have a transducer connected to your GPSMAP 580/585 to use sonar. 
Main Menu—Sonar tab 
Alarms Tab 
Use the Alarms tab to define alarm settings. When an alarm goes off, the alarm message appears on the GPSMAP 580/585 and the unit emits five (5) beeps. 
Main Menu—Alarms tab 
To set an alarm: 
1. On the Main menu, highlight the Alarms tab. 
2. Select the alarm to set, and press Enter. 
3. Change the setting to On, and press Enter. If necessary, highlight the next field to the right, and press Enter. Enter the settings you want. 
4. Press Enter. 
56 GPSMAP 580/585 Owner’s Manual 
Main Menu
To set a persistent alarm: 
1. On the Main menu, highlight the Alarms tab. 
2. Highlight the box next to the persistent alarm you want to enable. 
3. Press Enter to place a check mark in the Persist box. 
Navigation (Nav) Alarms 
The Nav sub tab contains the following alarms: 
Next Turn—allows you to set an alarm to indicate the next turn in a route. Select Dist to specify a distance before you reach the next turn to sound the alarm. Select Time to specify a time before the turn for the alarm to go off. Select Auto for the unit to provide a Next Turn alarm at its discretion. 
Arrival—allows you to set an alarm to sound when you are a specified distance or time away from a destination waypoint. Select Auto for the unit to provide an Arrival alarm at its discretion. 
Off Course—allows you to set an alarm to sound when off course. Select On, then enter a distance. 
Anchor Drag—allows you to set an alarm to sound when you exceed a specified drift distance. Select On, and then enter a distance. 
System Alarms 
Clock—sets an alarm based on the unit clock. Select On, and then enter a specific time for when you want the alarm to sound. The GPSMAP 580/585 must be on for the clock alarm to work. 
DGPS—allows you to set an alarm to sound when the GPSMAP 580/585 loses a differential fix. 
Accuracy—allows you to set an alarm to sound when GPS accuracy falls outside of the user-set value. Select On, and then Enter a specific distance. 
GPSMAP 580/585 Owner’s Manual 57 
Main Menu
Sonar Alarms CAUTION: The Safe Depth and Safe Height settings influence how the chartplotter calculates an Auto Guidance line. If an area has an unknown water depth or an unknown obstacle height, the Auto Guidance line is not calculated in that area. If an area at the beginning or the end of an Auto Guidance line is shallower than the safe water depth or lower than the safe obstacle height, the Auto Guidance line is not calculated in that area. On the chart, the course through those areas appears as a gray line. When your boat enters one of those areas, a message appears. 
Shallow Water/Deep Water—allows you to set an alarm to sound when you enter an area of water that is too shallow or deep. Select On, and then specify a depth. You must be receiving sonar NMEA data for this function to work. 
Water Temp—allows you to set an alarm to indicate if the water temperature has exceeded or dropped below a specific temperature, or fallen outside/inside a specific temperature range. Select Above or Below, and then enter a specific temperature, or select Inside or Outside and enter a range of temperatures. You must be receiving sonar NMEA data for this function to work. 
Drift—allows you to set an alarm to sound when you exceed a specified drift distance. Select On, and then enter a specific distance. 
Fish—allows you to set an alarm to sound when fish are detected with sonar. 
Calendar Tab 
Use the Calendar tab to plan trips, as well as view sun and moon, and hunting and fishing information for the day. 
Calendar Tab in Day ViewHighlight an arrow, and press Enter to change the date in view. Sunrise and sunset times for the current location and date. List of points and routes added to this date. 
Calendar Options 
The options menu is available in all three calendar views. Press Menu on any of the calendar views to open the options menu. To view the Sun & Moon or Hunt & Fish sub tab, highlight View Sun and Moon or View Hunt and Fish, and press Enter. 
58 GPSMAP 580/585 Owner’s Manual 
Main Menu
To add a route (or point) to the calendar: 
1. On the Main menu, highlight the Calendar tab. 
2. Press Menu to open the options menu. Highlight Add Route (or Add Point), and press Enter. 
3. From the pop-up route list (or the Find page if Add Point was selected), select the route you want to add to the calendar, and press Enter. 
Day View Sub Tab 
The Day View sub tab shows sunrise and sunset times for your current date and location. Points and routes for the day appear in a list. 
Week View Sub Tab 
The Week View sub tab provides the same elements as Day View, but the entire week is visible. Days with added points or routes are shown highlighted in green. Icons for the points and routes assigned to the date are shown along the bottom of the screen. 
Month View Sub Tab 
The Month View sub tab provides the same elements as Day View, but the entire month is visible. Days with added points or routes are shown highlighted in green. Icons for the points and routes assigned to the date are shown along the bottom of the screen. 
Celestial Tab 
The Celestial tab shows tide information, sun and moon information, and hunting and fishing information. You can view this data for your current location, a location from the map, or a waypoint location. Also, you can select a different date and time, or use the current data. 
Main menu—Celestial tab 
To access the Celestial tab: 
1. On the Main menu, highlight the Celestial tab. 
2. Use the Rocker to view the sub tab you want, such as Sun & Moon. 
GPSMAP 580/585 Owner’s Manual 59 
Main Menu
Tide Sub Tab 
The Tide sub tab contains a graphical chart that shows tide station information in a 24-hour span starting at midnight station time. You can choose from different dates and more than 3,000 tide stations. 
Height of tideSmallest and largest tides for the AM hoursSelect the tide station for which you want to view the information. Enter the date for which you want to view the tide information. Tide sub tabTimeSmallest and largest tides for the PM hours 
The top of the page shows the tide station and date referenced. The chart shows a 24-hour block of time, with the time progressing from left to right. The solid vertical lines represent 4-hour increments; the dotted vertical lines represent 1-hour increments. 
The tide curve appears as a shaded area; higher tides are taller and lower tides are shorter. The bottom of the page indicates the times with the highest and lowest tides. 
To view a tide chart for a different tide station: 
1. From the Tide sub tab, highlight the At field, and press Enter. 
2. Press Menu, and select Near Current Location, Near Current Route, Near Other (select another location using the map), or Near Destination. The list updates with your search requirements. 
3. Select a tide station from the list, and press Enter. 
4. Highlight OK, and press Enter. 
To view the tide chart for another date: 
1. From the Tide sub tab with a chart open, highlight the On field, and press Enter. 
2. Enter the date with the Rocker, and press Enter. You can also use the zoom IN and OUT keys to view information for another date. Press and hold IN or OUT to scroll quickly through dates. 
3. Press Enter. 
To use the current date again, highlight the On (Date) field. Press Menu, highlight Use Current Date, and press Enter. 
60 GPSMAP 580/585 Owner’s Manual 
Main Menu
To view a chart’s details for another time during the day (other than current time): 
1. From the Tide sub tab with the chart you want to view, press Menu, and then select Move Cursor. 
2. Press the Rocker right or left to view the chart at another time. 
3. To return to the current time, press Menu, and select Stop Moving Cursor. 
To automatically start cursor mode to scroll the chart: 
1. Highlight the On (Date) field. Then press down to start the pointer (pan) mode. 
2. Scroll the chart right to view the next day or left to view the previous day. 
Sun & Moon Sub Tab 
The Sun & Moon sub tab provides you with sunrise/sunset and moon rise/set times. A graphic of the moon phase also appears. You can view Sun & Moon information for any date or location. You can also use the play, fast forward, and stop buttons to view an animation of the Sun & Moon sub tab. 
To view sun and moon information for a different date: 
1. Highlight the Date field, and press Enter. 
2. Use the Rocker to change the digits of the date to the date you want. You can also use the zoom IN and OUT keys to view information for another date. Press and hold IN or OUT to scroll quickly through dates. 
3. Press Enter when finished. The unit shows the sun and moon information for the selected date. 
Sun & Moon sub tabMoon phaseAnimation controls for the sky viewSelect the date and locationLocation of the sun and moon in the sky view 
GPSMAP 580/585 Owner’s Manual 61 
Main Menu
To view sun and moon information for a different location: 
1. Highlight the From field, and press Enter. 
2. Highlight Use Find Page, and press Enter. 
3. Select a waypoint or point of interest, and press Enter. 
4. On the waypoint information page, press Enter. The unit shows the sun and moon information for the location you selected. 
Hunt & Fish Sub Tab 
The Hunt & Fish sub tab provides you with predictions of the best times to hunt and fish in a selected location on a specific date. 
To show the Hunt & Fish information: 
1. On the Main menu, highlight the Celestial tab. 
2. Select the Hunt & Fish sub tab. 
Hunt & Fish sub tab 
To view hunt and fish information for a different date: 
1. Highlight the Date field, and press Enter. 
2. Use the Rocker to change the digits of the date. You can also use the zoom IN and OUT keys to view information for another date. Press and hold IN or OUT to scroll quickly through dates. 
3. Press Enter when finished. 
62 GPSMAP 580/585 Owner’s Manual 
Main Menu
To view hunt and fish information for a different location: 
1. Highlight the From field, and press Enter. 
2. Highlight Use Find Page, and press Enter. 
3. Select a point, and press Enter. 
4. On the information page, press Enter. 
To use the current location: 
1. Highlight the From field, and press Enter. 
2. Highlight Current Location, and press Enter. 
Message Tab 
The Message tab shows a list of messages generated by the GPSMAP 580/585 . Use the Rocker to scroll through the list of messages on the Log sub tab. Use the Log Filter sub tab to show only the message types that you want to view. 
Main menu—Message tab 
To view messages: 
1. On the Main menu, highlight the Message tab. 
2. Highlight a message. 
3. Press Enter to view detailed information about the message. 
GPSMAP 580/585 Owner’s Manual 63 
Main Menu
To show or hide messages using the log filter: 
1. On the Main menu, highlight the Message tab. 
2. Highlight the Log Filter sub tab. All messages appear by default. 
Message Log Filter tab 
3. Highlight the message type you want to hide, and press Enter. The message name appears in the Hide window. 
4. Highlight the message, and press Enter to show it again. 
Display Tab 
Use the Display tab to set display features, such as pages to show in the main page sequence and how long the backlight stays on. 
Main menu—Display tab 
Main Menu—allows you to indicate whether the Main menu tabs contain text and icons (default) or text tabs only. 
Color mode—allows you to set the display to Day, Night, or Auto color mode. Select Auto to automatically switch from day to night at sunset and change back at sunrise. 
Twilight Adjustment—allows the unit to adjust the backlight for optimum viewing during twilight times. 
Navigation Page—allows you to indicate whether the navigation page appears in the main page sequence. 
Compass Page—allows you to indicate whether the Compass page appears in the main page sequence. 
Backlight Intensity—allows you to turn the backlight up or down. 
64 GPSMAP 580/585 Owner’s Manual 
Main Menu
Sound Tab 
Use the Sound tab to customize the sounds made by your GPSMAP 580/585. 
Main menu—Sound tab 
Beeper—allows you to set the beeper to chime during keypresses and alarms (Key and Alarm) or on Alarms Only. 
Attention Tone—allows you to turn on and off the attention tone that sounds before the vocal prompts. 
Setup Tab 
To customize how your GPSMAP 580/585 looks, use the System tab to adjust certain system settings. 
System Sub Tab 
Use the System sub tab to control settings for system mode, speed filter, language, and external power. 
To access the System sub tab: 
1. Select the Setup tab on the Main menu. 
2. Select the System sub tab. 
Main menu—System Setup tab 
System Mode—allows you to set the unit to operate in Normal mode or Simulator mode (for practice ONLY). 
Speed Filter—allows the unit to average speed readings. Choose from Off, Auto (automatically controls filtering), or On (allows you to enter a value in seconds). 
Text Language—allows you to set the on-screen language for the unit. 
WAAS—allows you to enable or disable WAAS. 
GPSMAP 580/585 Owner’s Manual 65 
Main Menu
Timers Sub Tab 
Use the Timers sub tab to set timers and view information about how long the unit has been on. 
To access the Timers sub tab: 
1. On the Main menu, highlight the Setup tab. 
2. Select the Timers sub tab. 
Timers sub tab 
User—allows you to set the timer to Count Up or Count Down. You can also Reset the timer and turn it Off. Enter a time to use when counting up or down. 
Marine—appears on the Compass Page in Operation mode. 
Since Midnight—allows you to show the time the unit was turned on since midnight. To reset, select All Unit Defaults on the System sub tab. 
Time Sub Tab 
Use the Time sub tab to set the time format and zone, and set the unit to conform to Daylight Saving Time. The current time and date appear in the Current Time and Date field. 
To access the Time sub tab: 
1. On the Main menu, highlight the Setup tab. 
2. Select the Time sub tab. 
Time sub tab 
Time Zone—allows you to choose the time zone for your city so the GPSMAP 580/585 shows the correct local time. Select Other to enter a UTC Offset. 
If the wrong date appears, press Menu, highlight Set Date, and press Enter. You are prompted to enter the current year. The GPSMAP 580/585 uses this information when gathering satellite data to show the correct date. 
66 GPSMAP 580/585 Owner’s Manual 
Main Menu
Units Sub Tab 
Use the Units sub tab to customize measurement units. 
To access the Units sub tab: 
1. On the Main menu, highlight the Setup tab. 
2. Select the Units sub tab. 
Distance and Speed—allows you to select the unit of measure to show your speed and distance traveled. 
Direction Display—allows you to select the unit of measure to show your direction. 
Temperature—allows you to select the unit of measure to show the temperature. 
Elevation—allows you to select the unit of measure to show your altitude. 
Depth—allows you to select the unit of measure to show the depth. 
Vertical Speed—allows you to select the unit of measure to show the vertical speed. 
Location Sub Tab 
Use the Location sub tab to change location setting information. 
To access the Location sub tab: 
1. On the Main menu, highlight the Setup tab. 
2. Select the Location sub tab. 
See the “Appendix” for more information about location formats and map datums. 
Changing the Location Format 
When you change the Location Format, you change the coordinate system in which a given location reading appears. The default format is latitude and longitude in degrees, minutes, and thousandths of a minute (hddd°mm.mmm). Only change the location format if you are using a map or chart that specifies a different location format or you want to use a format you are familiar with. 
Selecting a Different Map Datum 
Datums are used to describe geographic positions for surveying, mapping, and navigation and are not actual maps built in the unit. Only change the datum if you are using a map or chart that specifies a different datum. 
The default setting is WGS 84. The unit automatically selects the best datum depending on your chosen location format. 
GPSMAP 580/585 Owner’s Manual 67 
Main Menu
WARNING: Selecting the wrong map datum can result in substantial position errors. When in doubt, use the default WGS 84 datum for best overall performance. 
Selecting a Different Heading Reference 
You can select from Auto Mag Var, True, Grid, and User Mag Var. Auto Mag Var provides magnetic north heading references that are automatically determined from your current location. True provides headings based on a true north reference. Grid provides headings based on a grid north reference (and is used in conjunction with the grid position formats). User Mag Var allows you to specify the magnetic variation at your current location and provides magnetic north heading references based on the variation you enter. Enter the magnetic variation of your current location in the Magnetic Variation field if you selected User Mag Var for the heading. WARNING: If User Mag Var is selected, the unit does not automatically calculate and update the magnetic variation at your present location. You must update the magnetic variation as your location changes. Failure to update this setting can result in substantial differences between the information shown on your unit and external references, such as a magnetic compass. 
Com 1 and Com 2 Sub Tabs 
Use the Com 1and Com 2 sub tabs to change the data format and control the input/output format used when connecting your unit to external devices. 
To access the Com 1 and Com 2 sub tabs: 
1. On the Main menu, highlight the Setup tab. 
2. Select the Com 1or Com 2 sub tab. 
Com 1 sub tab 
Serial Data Format—allows you to set the data format to one of the following: 
• Garmin Data Transfer—provides the proprietary format used to exchange data with a computer or another Garmin GPSMAP 580/585 . 
• NMEA In/NMEA Out—supports the input/output of standard NMEA 0183 version 3.01 data and sonar NMEA input support for the DBT, DSE, DPT, MTW, and VHW 68 GPSMAP 580/585 Owner’s Manual 
Main Menu
sentences. 
• High Speed NMEAIn/NMEA Out —supports the input/ output of high baud rate NMEA devices like AIS. 
• None—provides no interfacing capabilities. 
Advanced NMEA Output Setup 
If you are going to interface the GPSMAP 580/585 with another piece of equipment (such as a radar or autopilot), the unit must to be set to output NMEA data. The NMEA data transmission can be customized to keep the output rate at two seconds. If too many NMEA sentences are started, the unit may take longer than two seconds to update. 
You can also set the Output Rate to Fast which outputs a minimum number of NMEA sentences at 1-second intervals. 
To access the Advanced NMEA Output Setup: 
1. On the Main menu, highlight the Setup tab. 
2. Select the COM 1 or COM 2 sub tab. 
3. Highlight the Serial Data Format field, and press Enter. 
4. Select NMEAIn/NMEA Out, and press Enter. 
5. Press Menu. 
6. Select Advanced NMEA Setup, and press Enter. 
Setting Up and Using Sonar 
This section covers the sonar options that become available when an optional transducer is connected to the GPSMAP 585. 
When you turn on your GPSMAP 585, the sounder module automatically turns on. NOTE: You MUST have a transducer installed and connected to your GPSMAP585to use the sonar features. 
The Sonar page is added to the end of the page sequence when you are in Operation mode. Press Page until the Sonar page appears. 
Showing Sonar on the Map Page 
You can change the layout of the Map page to show a split screen to show the sonar on the Map page. You must be in Operation mode to use sonar. 
To show the Sonar page on the Map page: 
1. Press and hold PAGE. 
2. Highlight Marine, and press Enter. 
3. Press Page or Quit. 
4. Press Menu. 
5. Highlight Set Up Page Layout, and press Enter. 
6. Highlight Map With Sonar, and press Enter. 
GPSMAP 580/585 Owner’s Manual 69 
Setting Up and Using Sonar
Map page with Split Screen 
To resize the Map page sonar split screen: 
1. After showing the Sonar and Map pages together in the split screen as described in the previous steps, press Menu. 
2. Highlight Size Split, and press Enter. 
3. Use the Rocker to move the sizing-arrow right or left. 
4. Press Enter. 
5. Press Quit to stop resizing the screen.You can also press Menu, highlight Stop Resizing, and press Enter to stop resizing the screen and retain the previous split setting. 
Using the Sonar Page 
GPSMAP 585 has an built-in sonar module which allows you to simply plug in the optional transducer to make GPSMAP 585 a powerful fishfinder/flasher. “Sonar Turned Off Please Check the Transducer Connection” message appears on the Sonar page if the transducer is not properly attached.. 
The middle of the page contains a right-to-left scrolling sonar image of the water beneath your boat. Items appear as they pass under the transducer. The adjustable scale displays the depth of the water. The information in the upper-left corner allows you to adjust the scale and displays the water temperature. 
Sonar page 
70 GPSMAP 580/585 Owner’s Manual 
Setting Up and Using Sonar
The sonar returns show as red (strongest), then orange (strong), yellow (medium), green (weaker), and blue (weakest). The Fish Symbols option allows you to view the actual sonar data, a fish symbol, or a combination of both. When the unit is set to Dual, the appearance of the fish symbols changes. Returns from the center of the beam (200 kHz) display solid (or narrow arches), and returns from the edges of the beam (50 kHz) display hollow (or wide arches). 
The sonar display can also be set to show a split screen view of a zoomed portion of the sonar, bottom lock (display scaled from the bottom up), or a combination of these options. For example, you can choose to show dual frequency at a 2X zoom (Dual 2X) on one half and normal range dual frequency (Dual) on the other half. The current display mode appears at the bottom of each sonar display. 
Adjusting the Sonar Page 
Use the Adjustment menu to access the settings and features most commonly used on the Sonar page. Ten main adjustment options are available: Range, Zoom, View, Gain, Target Level, Whiteline, Frequency, Depth Line, Noise Reject, and Scroll. The selected option appears in the upper-left corner. 
To select an adjustment option: 
Use one of the following methods to select an adjustment option: 
• Press the Rocker right or left to scroll through the adjustment options. When the adjustment option you want appears, press Enter. 
• Press Menu, highlight Adjustments, and press Enter. Use the Rocker to highlight the adjustment, and press Enter. 
After you select an adjustment option, press the Rocker up or down to change the setting. 
You can also press Menu and highlight a shortcut setting to quickly change to commonly used settings and values. 
Press Enter to accept the new setting (or press Quit to cancel) and return to the Sonar Page. 
GPSMAP 580/585 Owner’s Manual 71 
Setting Up and Using Sonar
Jual Gps Garmin Map 585 Rumahgps.com

More Related Content

Similar to Jual Gps Garmin Map 585 Rumahgps.com

1419 Garmin Mobile Xt Owners Manual
1419 Garmin Mobile Xt Owners Manual1419 Garmin Mobile Xt Owners Manual
1419 Garmin Mobile Xt Owners Manual
pleasedoyourownthing
 
F59207aade749f7fefff1702f77debd7
F59207aade749f7fefff1702f77debd7F59207aade749f7fefff1702f77debd7
F59207aade749f7fefff1702f77debd7
guest5fd4045e
 
Alam Survey - Jual GPS Garmin 78S, 72H, 62s - 082119696710
Alam Survey - Jual GPS Garmin 78S, 72H, 62s - 082119696710Alam Survey - Jual GPS Garmin 78S, 72H, 62s - 082119696710
Alam Survey - Jual GPS Garmin 78S, 72H, 62s - 082119696710
surveying instrument
 
Map source mapsourceusersguide
Map source mapsourceusersguideMap source mapsourceusersguide
Map source mapsourceusersguide
isbcoum
 
Alam Survey - Jual GPS Garmin Fisfinder 500c, 350c, 100c, 128 - 082119696710
Alam Survey - Jual GPS Garmin Fisfinder 500c, 350c, 100c, 128 - 082119696710Alam Survey - Jual GPS Garmin Fisfinder 500c, 350c, 100c, 128 - 082119696710
Alam Survey - Jual GPS Garmin Fisfinder 500c, 350c, 100c, 128 - 082119696710
surveying instrument
 

Similar to Jual Gps Garmin Map 585 Rumahgps.com (20)

1419 Garmin Mobile Xt Owners Manual
1419 Garmin Mobile Xt Owners Manual1419 Garmin Mobile Xt Owners Manual
1419 Garmin Mobile Xt Owners Manual
 
Garmin
GarminGarmin
Garmin
 
294 sl40 pilotsguide
294 sl40 pilotsguide294 sl40 pilotsguide
294 sl40 pilotsguide
 
F59207aade749f7fefff1702f77debd7
F59207aade749f7fefff1702f77debd7F59207aade749f7fefff1702f77debd7
F59207aade749f7fefff1702f77debd7
 
Foretrex Om En
Foretrex Om EnForetrex Om En
Foretrex Om En
 
Alam Survey - Jual GPS Garmin 78S, 72H, 62s - 082119696710
Alam Survey - Jual GPS Garmin 78S, 72H, 62s - 082119696710Alam Survey - Jual GPS Garmin 78S, 72H, 62s - 082119696710
Alam Survey - Jual GPS Garmin 78S, 72H, 62s - 082119696710
 
Etrex basic
Etrex basicEtrex basic
Etrex basic
 
Map source mapsourceusersguide
Map source mapsourceusersguideMap source mapsourceusersguide
Map source mapsourceusersguide
 
Gek
GekGek
Gek
 
Gek
GekGek
Gek
 
Alam Survey - Jual GPS Garmin Fisfinder 500c, 350c, 100c, 128 - 082119696710
Alam Survey - Jual GPS Garmin Fisfinder 500c, 350c, 100c, 128 - 082119696710Alam Survey - Jual GPS Garmin Fisfinder 500c, 350c, 100c, 128 - 082119696710
Alam Survey - Jual GPS Garmin Fisfinder 500c, 350c, 100c, 128 - 082119696710
 
Js2 hd manual(v1.0)
Js2 hd manual(v1.0)Js2 hd manual(v1.0)
Js2 hd manual(v1.0)
 
Marc Correra Garmin Swim 2 Owner's Manual
Marc Correra Garmin Swim 2 Owner's ManualMarc Correra Garmin Swim 2 Owner's Manual
Marc Correra Garmin Swim 2 Owner's Manual
 
Garmin edge 305 manual
Garmin edge 305 manualGarmin edge 305 manual
Garmin edge 305 manual
 
maxxforce-7-manual.pdf
maxxforce-7-manual.pdfmaxxforce-7-manual.pdf
maxxforce-7-manual.pdf
 
Janus:pm:spirent:6450:wp(1)
Janus:pm:spirent:6450:wp(1)Janus:pm:spirent:6450:wp(1)
Janus:pm:spirent:6450:wp(1)
 
Ptp600 hazardous location guide
Ptp600 hazardous location guidePtp600 hazardous location guide
Ptp600 hazardous location guide
 
Ptp600 hazardous location guide
Ptp600 hazardous location guidePtp600 hazardous location guide
Ptp600 hazardous location guide
 
Ptp600 hazardous location guide
Ptp600 hazardous location guidePtp600 hazardous location guide
Ptp600 hazardous location guide
 
Cdi manual-forerunner 910-xt
Cdi manual-forerunner 910-xtCdi manual-forerunner 910-xt
Cdi manual-forerunner 910-xt
 

Recently uploaded

+971581248768>> SAFE AND ORIGINAL ABORTION PILLS FOR SALE IN DUBAI AND ABUDHA...
+971581248768>> SAFE AND ORIGINAL ABORTION PILLS FOR SALE IN DUBAI AND ABUDHA...+971581248768>> SAFE AND ORIGINAL ABORTION PILLS FOR SALE IN DUBAI AND ABUDHA...
+971581248768>> SAFE AND ORIGINAL ABORTION PILLS FOR SALE IN DUBAI AND ABUDHA...
?#DUbAI#??##{{(☎️+971_581248768%)**%*]'#abortion pills for sale in dubai@
 
Cloud Frontiers: A Deep Dive into Serverless Spatial Data and FME
Cloud Frontiers:  A Deep Dive into Serverless Spatial Data and FMECloud Frontiers:  A Deep Dive into Serverless Spatial Data and FME
Cloud Frontiers: A Deep Dive into Serverless Spatial Data and FME
Safe Software
 
Cloud Frontiers: A Deep Dive into Serverless Spatial Data and FME
Cloud Frontiers:  A Deep Dive into Serverless Spatial Data and FMECloud Frontiers:  A Deep Dive into Serverless Spatial Data and FME
Cloud Frontiers: A Deep Dive into Serverless Spatial Data and FME
Safe Software
 
Architecting Cloud Native Applications
Architecting Cloud Native ApplicationsArchitecting Cloud Native Applications
Architecting Cloud Native Applications
WSO2
 

Recently uploaded (20)

Exploring Multimodal Embeddings with Milvus
Exploring Multimodal Embeddings with MilvusExploring Multimodal Embeddings with Milvus
Exploring Multimodal Embeddings with Milvus
 
ICT role in 21st century education and its challenges
ICT role in 21st century education and its challengesICT role in 21st century education and its challenges
ICT role in 21st century education and its challenges
 
DEV meet-up UiPath Document Understanding May 7 2024 Amsterdam
DEV meet-up UiPath Document Understanding May 7 2024 AmsterdamDEV meet-up UiPath Document Understanding May 7 2024 Amsterdam
DEV meet-up UiPath Document Understanding May 7 2024 Amsterdam
 
How to Troubleshoot Apps for the Modern Connected Worker
How to Troubleshoot Apps for the Modern Connected WorkerHow to Troubleshoot Apps for the Modern Connected Worker
How to Troubleshoot Apps for the Modern Connected Worker
 
+971581248768>> SAFE AND ORIGINAL ABORTION PILLS FOR SALE IN DUBAI AND ABUDHA...
+971581248768>> SAFE AND ORIGINAL ABORTION PILLS FOR SALE IN DUBAI AND ABUDHA...+971581248768>> SAFE AND ORIGINAL ABORTION PILLS FOR SALE IN DUBAI AND ABUDHA...
+971581248768>> SAFE AND ORIGINAL ABORTION PILLS FOR SALE IN DUBAI AND ABUDHA...
 
"I see eyes in my soup": How Delivery Hero implemented the safety system for ...
"I see eyes in my soup": How Delivery Hero implemented the safety system for ..."I see eyes in my soup": How Delivery Hero implemented the safety system for ...
"I see eyes in my soup": How Delivery Hero implemented the safety system for ...
 
Rising Above_ Dubai Floods and the Fortitude of Dubai International Airport.pdf
Rising Above_ Dubai Floods and the Fortitude of Dubai International Airport.pdfRising Above_ Dubai Floods and the Fortitude of Dubai International Airport.pdf
Rising Above_ Dubai Floods and the Fortitude of Dubai International Airport.pdf
 
Cloud Frontiers: A Deep Dive into Serverless Spatial Data and FME
Cloud Frontiers:  A Deep Dive into Serverless Spatial Data and FMECloud Frontiers:  A Deep Dive into Serverless Spatial Data and FME
Cloud Frontiers: A Deep Dive into Serverless Spatial Data and FME
 
Artificial Intelligence Chap.5 : Uncertainty
Artificial Intelligence Chap.5 : UncertaintyArtificial Intelligence Chap.5 : Uncertainty
Artificial Intelligence Chap.5 : Uncertainty
 
Introduction to Multilingual Retrieval Augmented Generation (RAG)
Introduction to Multilingual Retrieval Augmented Generation (RAG)Introduction to Multilingual Retrieval Augmented Generation (RAG)
Introduction to Multilingual Retrieval Augmented Generation (RAG)
 
Biography Of Angeliki Cooney | Senior Vice President Life Sciences | Albany, ...
Biography Of Angeliki Cooney | Senior Vice President Life Sciences | Albany, ...Biography Of Angeliki Cooney | Senior Vice President Life Sciences | Albany, ...
Biography Of Angeliki Cooney | Senior Vice President Life Sciences | Albany, ...
 
TrustArc Webinar - Unlock the Power of AI-Driven Data Discovery
TrustArc Webinar - Unlock the Power of AI-Driven Data DiscoveryTrustArc Webinar - Unlock the Power of AI-Driven Data Discovery
TrustArc Webinar - Unlock the Power of AI-Driven Data Discovery
 
Apidays New York 2024 - The value of a flexible API Management solution for O...
Apidays New York 2024 - The value of a flexible API Management solution for O...Apidays New York 2024 - The value of a flexible API Management solution for O...
Apidays New York 2024 - The value of a flexible API Management solution for O...
 
Six Myths about Ontologies: The Basics of Formal Ontology
Six Myths about Ontologies: The Basics of Formal OntologySix Myths about Ontologies: The Basics of Formal Ontology
Six Myths about Ontologies: The Basics of Formal Ontology
 
Polkadot JAM Slides - Token2049 - By Dr. Gavin Wood
Polkadot JAM Slides - Token2049 - By Dr. Gavin WoodPolkadot JAM Slides - Token2049 - By Dr. Gavin Wood
Polkadot JAM Slides - Token2049 - By Dr. Gavin Wood
 
Cloud Frontiers: A Deep Dive into Serverless Spatial Data and FME
Cloud Frontiers:  A Deep Dive into Serverless Spatial Data and FMECloud Frontiers:  A Deep Dive into Serverless Spatial Data and FME
Cloud Frontiers: A Deep Dive into Serverless Spatial Data and FME
 
Architecting Cloud Native Applications
Architecting Cloud Native ApplicationsArchitecting Cloud Native Applications
Architecting Cloud Native Applications
 
Apidays New York 2024 - Passkeys: Developing APIs to enable passwordless auth...
Apidays New York 2024 - Passkeys: Developing APIs to enable passwordless auth...Apidays New York 2024 - Passkeys: Developing APIs to enable passwordless auth...
Apidays New York 2024 - Passkeys: Developing APIs to enable passwordless auth...
 
Understanding the FAA Part 107 License ..
Understanding the FAA Part 107 License ..Understanding the FAA Part 107 License ..
Understanding the FAA Part 107 License ..
 
Strategies for Landing an Oracle DBA Job as a Fresher
Strategies for Landing an Oracle DBA Job as a FresherStrategies for Landing an Oracle DBA Job as a Fresher
Strategies for Landing an Oracle DBA Job as a Fresher
 

Jual Gps Garmin Map 585 Rumahgps.com

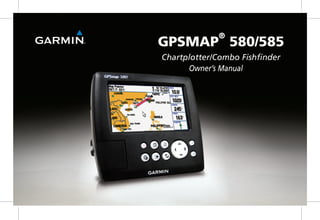
  • 1. GPSMAP® 580/585 Chartplotter/Combo Fishfinder Owner’s Manual
  • 2. © 2011 Garmin Ltd. or its subsidiaries Garmin International, Inc. 1200 East 151st Street, Olathe, Kansas 66062, USA Tel. (913) 397.8200 or (800) 800.1020 Fax (913) 397.8282 Garmin (Europe) Ltd. Liberty House Hounsdown Business Park, Southampton, Hampshire, SO40 9LR UKTel. +44 (0) 870.8501241 (outside the UK) 0808 2380000 (within the UK) Fax +44 (0) 870.8501251 Garmin Corporation No. 68, Jangshu 2nd Road, Sijhih, Taipei County, Taiwan Tel. 886/2.2642.9199 Fax 886/2.2642.9099 All rights reserved. Except as expressly provided herein, no part of this manual may be reproduced, copied, transmitted, disseminated, downloaded or stored in any storage medium, for any purpose without the express prior written consent of Garmin. Garmin hereby grants permission to download a single copy of this manual onto a hard drive or other electronic storage medium to be viewed and to print one copy of this manual or of any revision hereto, provided that such electronic or printed copy of this manual must contain the complete text of this copyright notice and provided further that any unauthorized commercial distribution of this manual or any revision hereto is strictly prohibited. Information in this document is subject to change without notice. Garmin reserves the right to change or improve its products and to make changes in the content without obligation to notify any person or organization of such changes or improvements. Visit the Garmin Web site (www.garmin.com) for current updates and supplemental information concerning the use and operation of this and other Garmin products. Garmin® is a trademark of Garmin Ltd. or its subsidiaries, registered in the USA and other countries. GPSMAP®, AutoLocate®, BlueChart®, BlueChart® g2, TracBack®, BlueChart®, MapSource®, and Ultrascroll™ are trademarks of Garmin Ltd. or its subsidiaries. These trademarks may not be used without the express permission of Garmin. XM WX Weather and XM Radio are trademarks of XM Satellite Radio, Inc. January 2011 Part Number 190-01202-00 Rev. B Printed in Taiwan
  • 3. Introduction Thank you for choosing the Garmin® GPSMAP® 580, which uses the proven performance of Garmin GPS and full-featured mapping, to create an unsurpassed marine navigation chartplotter. Garmin GPSMAP 580 is a full-function chartplotter, while the GPSMAP 585 contains all the features of the GPSMAP 580 and adds fish finding capabilities.You must purchase a compatible transducer in order to use the fish finder on the GPSMAP 585. Refer to http://www8.garmin.com/buzz/marine/m/pdf/Transducers. pdf For more information about compatible transducers. About This Manual To get the most out of your new navigation system, read this manual and learn the operating procedures for your unit. This manual is organized into the following sections: The Introduction contains the Table of Contents, Care Information, and Warnings. The Getting Started section provides an overview of the unit, how to turn the unit on, and how to simulate navigation. The Operation Mode section provides you with information about navigating with the GPSMAP 580/585 in Operation Mode. The Operation Mode pages section reviews the main pages in Operation Mode. The Main menu section describes features found on the Main menu, and information on how to change settings. The Setting Up and Using Sonar section provides instructions on using with your GPSMAP 580/585 . The Appendix contains specifications, optional accessories, maintenance information, and other product information. Declaration of Conformity Hereby, Garmin International, Inc. declares that this device is in compliance with the essential requirements and other relevant provisions of Directive 1999/5/EC. The Declaration of Conformity may be obtained at www.garmin.com/compliance. Product Registration Help us better support you by completing our online registration today. Go to http://my.garmin.com. Keep the original sales receipt, or a photocopy, in a safe place. GPSMAP 580/585 Owner’s Manual i Introduction
  • 4. Contact Garmin Contact Garmin Product Support if you have any questions while using your unit. In the USA, go to www.garmin.com/support, or contact Garmin USA by phone at (913) 397.8200 or (800) 800.1020. In the UK, contact Garmin (Europe) Ltd. by phone at 0808 2380000. In Europe, go to www.garmin.com/support and click Contact Support for in-country support information, or contact Garmin (Europe) Ltd. by phone at +44 (0) 870.8501241. In China, contact Garmin (China) Ltd. by phone at 400-819-1899. CAUTION: Resetting your GPSMAP 580/585If your GPSMAP 580/585 stops functioning, retest your GPSMAP 580/585 by pressing and holding the Power button. ii GPSMAP 580/585 Owner’s Manual Introduction
  • 5. Table of Contents Introduction............................................................................i Caring for the GPSMAP 580/585............................................iv Warnings...................................................................................v Important Information..............................................................v Getting Started......................................................................2 Unit Overview...........................................................................2 Turning Your GPSMAP 580/585 On or Off..............................3 Adjusting the Backlight...........................................................3 Acquiring GPS Satellite Signals.............................................4 Using the GPSMAP 580/585 ...................................................8 Using Simulator Mode...........................................................11 Operation Mode..................................................................12 Main Pages..............................................................................12 Navigating to a Destination...................................................12 Finding an Item.......................................................................15 Creating and Using Routes...................................................17 Creating and Using Waypoints.............................................21 Creating a Route as a Marking line.......................................31 Managing Your Tracks...........................................................32 Operation Mode Pages......................................................36 Compass Page........................................................................42 Navigation Page.....................................................................45 Active Route Page..................................................................47 Position Data Page.................................................................48 Main Menu...........................................................................49 Main Menu Tabs......................................................................49 GPS Tab...................................................................................50 Route Tab................................................................................50 Points Tab...............................................................................51 Track Tab.................................................................................51 DSC Tab...................................................................................52 Sonar Tab................................................................................56 Alarms Tab..............................................................................56 Calendar Tab...........................................................................58 Celestial Tab...........................................................................59 Message Tab...........................................................................63 Display Tab.............................................................................64 Sound Tab...............................................................................65 Setup Tab................................................................................65 Setting Up and Using Sonar..............................................69 Showing Sonar on the Map Page..........................................69 Using the Sonar Page............................................................70 Setting Up Sonar....................................................................74 Appendix.............................................................................78 Specifications.........................................................................78 Optional Accessories.............................................................79 Install the Wiring Harness.....................................................80 Satellite Information...............................................................83 Digital Selective Calling.........................................................84 Messages................................................................................86 Data Field Options..................................................................88 Software License Agreement................................................90 Limited Warranty....................................................................90 Declaration of Conformity (DoC)..........................................92 GPSMAP 580/585 Owner’s Manual iii Table of Contents
  • 6. WARNING: See the Important Safety and Product Information guide in the product box for product warnings and other important information. Caring for the GPSMAP 580/585 The case is constructed of high-quality materials and does not require user maintenance, except cleaning. Cleaning the Case Clean the outer casing of the unit (except for the screen) using a cloth dampened with a mild detergent solution and then wipe dry. Avoid chemical cleaners and solvents that may damage plastic components. Cleaning the Screen The unit’s lens is coated with a special anti-reflective coating that is sensitive to skin oils, waxes and abrasive cleaners. Cleaners containing ammonia, alcohol, abrasives, or anti-grease detergents will harm the anti-reflective coating. It is important to clean the lens using an eyeglass lens cleaner (that is specified as safe for anti- reflective coatings) and a clean, lint-free cloth. Water Immersion The unit is waterproof to IEC Standard 60529 IPX7. It can withstand immersion in 1 meter of water for 30 minutes. Prolonged submersion can cause damage to the unit. After submersion, be certain to wipe and air dry the unit before reuse. Storage Do not store the GPSMAP 580/585 where prolonged exposure to temperature extremes might occur (such as in the trunk of a car) as permanent damage could result. iv GPSMAP 580/585 Owner’s Manual Caring for the GPSMAP 580/585
  • 7. Navigation and Installation Warnings Failure to avoid the following potentially hazardous situations could result in an accident or collision resulting in death or serious injury. When navigating, carefully compare information displayed on the unit to all available navigation sources, including information from visual sightings, and maps. For safety, always resolve any discrepancies or questions before continuing navigation. Use the electronic chart in the unit only to facilitate, not to replace, the use of authorized government charts. Official government charts and notices to mariners contain all information needed to navigate safely. Use this unit only as a navigational aid. Do not attempt to use the unit for any purpose requiring precise measurement of direction, distance, location, or topography. Warnings WARNING: This product, its packaging, and its components contain chemicals known to the State of California to cause cancer, birth defects, or reproductive harm. This Notice is provided in accordance with California’s Proposition 65. See www.garmin.com/prop65 for more information. Hg - LAMPS INSIDE THIS PRODUCT CONTAIN MERCURY AND MUST BE RECYCLED OR DISPOSED OF ACCORDING TO LOCAL, STATE, OR FEDERAL LAWS. For more information go to: http://www8.garmin.com/aboutGarmin/environment/disposal.html Important Information MAP DATA INFORMATION: One of the goals of Garmin is to provide customers with the most complete and accurate cartography that is available to us at a reasonable cost. We use a combination of governmental and private data sources, which we identify in product literature and copyright messages displayed to the consumer. Virtually all data sources contain some inaccurate or incomplete data. In some countries, complete and accurate map information is either not available or is prohibitively expensive. See the Important Safety and Product Information guide in the product box for product warnings and other important information. GPSMAP 580/585 Owner’s Manual v Warnings
  • 8. Getting Started Unit Overview The GPSMAP 580 is a color GPS chartplotter. This GPS navigator features a quality LCD display, a built-in basemap, and fish finder (GPSMAP585.) DisplayButtonsSD Card slot Power/Serial portConnector for external GPS antenna 2 GPSMAP 580/585 Owner’s Manual Getting Started
  • 9. Turning Your GPSMAP 580/585 On or Off The GPSMAP 580/585 has a built-in, high-sensitivity GPS module. You can use the unit without external GPS antenna; however, you may receive a weak GPS signal when navigating in areas where an external antenna is required. To turn the GPSMAP 580/585 on and off: 1. Press and hold the Power key. When the unit turns on, a tone sounds and the Warning page appears. Warning page 2. Read the warning, and then press Enter to continue. 3. To turn off the GPSMAP 580/585, press and hold the Power key. Adjusting the Backlight 1. Press and quickly release the Power key. 2. Press up the Rocker up or down on the Rocker to adjust the brightness. Backlight adjustment slider GPSMAP 580/585 Owner’s Manual 3 Getting Started
  • 10. The first time you turn on your GPSMAP 580/585, the GPS receiver must collect satellite data and establish the current location. Acquiring GPS Satellite Signals After you turn on the GPSMAP 580/585, the unit automatically begins searching for satellites. The GPS page appears while the unit is gathering satellite signals and acquiring a fix. Viewing GPS Status The GPS tab provides a visual reference of satellite acquisition, receiver status, and accuracy. The sky view and signal strength bars show the satellites visible to the receiver and if they are being tracked. The number below each bar represents the particular satellite being received. WAAS satellites are indicated by numbers 33 and above. Numbers above 33 indicate WAAS satellites. The sky view shows a bird’s eye view of the position of each satellite relative to the last known position of the receiver. The outer circle represents the horizon (north up), the inner circle represents 45º above the horizon, and the cEnter point represents a position directly overhead. You can also set the sky view to a Track Up configuration which causes the top of the sky view to display along your current track heading. Press Menu to change the configuration of the sky view. GPS StatusReceiver status fieldSky viewSignal strength bars 4 GPSMAP 580/585 Owner’s Manual Getting Started
  • 11. The progress of satellite acquisition is shown in three stages: • No signal strength bars—the receiver is searching for satellites. • White signal strength bars—the receiver has found the satellite and is collecting data. • Green signal strength bars—the receiver has collected the necessary data for this satellite. Receiver Status The receiver status field displays one of the following conditions: • Searching the Sky—the receiver is searching for satellites. • AutoLocate—the receiver is searching for any satellite for which an almanac was collected. • Acquiring Satellites—the receiver is searching for, and collecting data from, satellites visible at the last known or initialized location, but has not acquired a fix. • 2D GPS Location—At least three satellites are acquired and a two-dimensional position fix is calculated. “2D Differential” appears if you are receiving DGPS corrections in 2D mode, and a “D” appears on the strength bar of satellites being corrected. • 3D GPS Location—At least four satellites are acquired and a three-dimensional fix was calculated. “3D Differential” appears if you are receiving DGPS corrections in 3D mode, and a “D” appears on the strength bar of satellites being corrected. • Lost Satellite Reception—the receiver is no longer tracking enough satellites for a 2D or 3D fix. • Receiver Not Usable—the receiver is unusable, possibly due to interference or abnormal satellite conditions. Restart the unit to reset the receiver. • Simulating GPS—the receiver is in Simulator Mode. • GPS Off—the GPS receiver is turned off. GPSMAP 580/585 Owner’s Manual 5 Getting Started
  • 12. GPS Options Press Menu twice to open the Main menu. Use the Rocker to highlight the GPS tab. Press Menu to open the options Menu. GPS Tab Options menu Start/Stop Simulator—starts and stops Simulator mode. Enable/Disable WAAS—enables or disables WAAS capability. See the “Appendix” for more information about WAAS. Track Up Skyview/North Up Skyview—orients the sky view display to North Up or Track Up. New Location—allows you to reset your location for simulation. GPS Tips • While the receiver is gathering information, your location on the map might appear different from where you actually are located. As soon as the receiver gathers enough satellite information, your proper location appears on the map. • Any time you have traveled more than 500mile (800km) with the GPS receiver turned off, the receiver might take longer than normal to find your location. • The GPS receiver can lose satellite signals due to interference from items such as buildings, tunnels, and trees. • To learn about GPS, visit www.garmin.com/aboutGPS/. 6 GPSMAP 580/585 Owner’s Manual Getting Started
  • 13. Zoom IN and Zoom OUT Keys• Press to adjust map zoom range. PAGE Key• Press to cycle through the pages. Quit Key• Press to cancel an unintended function. MARK/Enter Key• Press to select a highlighted option. • Press and hold to mark your current location as a waypoint. NAV/MOB Key• Press to display the Navigate Menu. • Press and hold to navigate to a man overboard (MOB) location. Menu Key• Press to display the options Menu for the current page. • Press twice to open the Main menu. POWER Key• Press and hold to turn the unit on or off. • Press and release to adjust the backlighting. Rocker• Press up, down, left, or right to highlight options and to Enter data, or to pan the arrow on the Map Page. GPSMAP 580/585 Owner’s Manual 7 Getting Started
  • 14. Using the GPSMAP 580/585 The advanced keypad system on the GPSMAP 580/585 is designed to allow you to select options and enter data quickly and conveniently. As you progress through this owner’s manual, you are directed to press a specific key or highlight a field on the screen. When you are directed to press a key, you should press and quickly release the key. If the key needs to be held down for a period of time to start a secondary function, the instructions tell you to do so. When a field is selected on the screen, it is highlighted in yellow. The following terms are used throughout this manual: • Highlight—move the highlighted area on the screen up, down, left, or right with the Rocker to select individual fields. Moving the highlight to a given location allows you to make a selection, begin data entry, or scroll through a list. • Field—the location on a page where data or an option can be shown and entered. Highlight a field using the Rocker to begin entering data or selecting options. • On-screen button—use the Rocker to highlight a button, and press Enter to select the button. • Scroll bar—when viewing a list of items too long to appear on the screen, a scroll bar appears along the right side of the list. To scroll through a list, press up or down on the Rocker. • Default—the factory setting saved in the unit’s memory. You can change the settings, but you can also revert to the factory (default) settings when you select Restore Defaults. Highlighted fieldFieldOn-screen buttons Cartography Your unit supports Secure Digital (SD) cards.You can insert an optional BlueChart® g2 SD card to view detailed map features. You can insert blank SD cards to transfer data such as waypoints, routes, and tracks to another compatible Garmin unit or a PC. To insert the SD card, press it in until it clicks. You can also choose Garmin Homeport software (marine trip-planning software) that lets you plan and organize routes from the convenience of your computer. 8 GPSMAP 580/585 Owner’s Manual Getting Started
  • 15. Selecting Options and Entering Data Select options and enter data by using the Rocker and Enter key. To select and activate an option: 1. From any page, press Menu. An options menu shows a list of optional features specific to that page. Selecting an option from an options Menu 2. Use the Rocker to move the highlight up, down, right, or left on the menu to the option you want to select. 3. Press Enter to select the feature. Another window with more options might appear. If so, select an option, and press Enter again. To exit a menu or return to the previous setting: Press Quit. The Quit key moves backward through your steps. Press Quit repeatedly to return to the starting page. To select an on-screen button: On a page with on-screen buttons, use the Rocker to highlight an on-screen button, and press Enter. On-screen button To mark your current location as a waypoint, press and hold Enter/Mark until the New Waypoint Page opens. To enter data in a data field: 1. Use the Rocker to highlight the data field you want, and press Enter to select the field. 2. Press up or down on the Rocker to select characters. GPSMAP 580/585 Owner’s Manual 9 Getting Started
  • 16. Entering data TIP: To clear the entire data field, highlight the left-most character field and press left on the Rocker again. Not all fields are programmable. When you are on a page with fields that are not selectable, the highlight skips over them. Using the Main Menu Use the Main menu on your GPSMAP 580/585 to access various functional tabs --- Waypoint, Route, Tracks, Sonar, Setup, etc. Press the Menu key twice from any page to open the Main menu. Main menu To select a tab from the Main Menu: 1. From any page, press Menu twice to open the Main menu. 2. Press up or down on the Rocker to highlight a tab. The information for the highlighted tab automatically appears on the right. To highlight a sub tab, press left or right on the Rocker, and then press up or down to select individual fields. By default, the Main menu tabs are shown as icons along the left side of the screen. You can change the Main menu to show tabs in a text-only format. To view the Main Menu icons in text-only format: 1. Highlight the Display tab, and press Enter. 2. Select the Main menu field, and press Enter. 3. Highlight Text Only, and press Enter. 10 GPSMAP 580/585 Owner’s Manual Getting Started
  • 17. Restoring Default Stettings You can restore factory defaults for Track, Alarms, Display, Sound, and Setup on the Main menu. For more information about the Main menu, see the “Main menu” section. To restore default settings: 1. Press Menu twice to open the Main menu. 2. Use the Rocker to highlight Setup tab, and then press Menu to open the options menu. Setup Tab Options menu 3. Highlight Restore Default, and press Enter. Using Simulator Mode Simulator mode turns the GPS receiver off for use indoors or for practice. The unit does not track satellites in simulator mode. All waypoints and routes created in Simulator mode are retained for future use. WARNING: Do not try to navigate using simulator mode because the GPS receiver is turned off. Any satellite signal strength bars shown are simulations and do not represent the strength of actual satellite signals. To turn on Simulator Mode: 1. From the Main menu, highlight the GPS tab. 2. Press Menu to open the GPS tab options menu. 3. Highlight Start Simulator, and press Enter. GPS tabStarting Simulator Mode from the GPS tab GPSMAP 580/585 Owner’s Manual 11 Getting Started
  • 18. O peration Mode Main Pages The GPSMAP 580/585 has five main pages. If you have an optional transducer connected to the GPSMAP 585, you will be able to see the Sonar page. Map page Compass page Navigation page Position Data page Active Route page Sonar page (optional) Navigating to a Destination You can navigate to your destination using the Map page. As you travel, you see a magenta line that always runs from your current location to the destination or to the next turn on the Map page. You can use the Map page, Compass page, Navigation page, and Position Data page to help navigate. You can navigate to a destination using one of the following methods: • Select a point on the map, and press NAV/MOB. • Press NAV/MOB to start a new route using the Find page or start a saved route or track. • Press NAV/MOB and select Go To Point to search for a particular item and create a route to it. CAUTION: When using Go To, a direct course and a corrected course may pass over land or shallow water. Use visual sightings and steer to avoid land, shallow water, and other dangerous objects. 12 GPSMAP 580/585 Owner’s Manual Operation Mode
  • 19. Navigate Options Menu CAUTION: When using Go To, a direct course and a corrected course may pass over land or shallow water. Use visual sightings and steer to avoid land, shallow water, and other dangerous objects. Press NAV/MOB to open the Navigate options menu. Navigate menu in Operation mode Go To Point—allows you to select a waypoint or point of interest from the Find page. Navigate Route—allows you to select a route to navigate. Navigate Track (TracBack)—allows you to select a saved track to navigate. To navigate a point on the map: 1. On the Map page, highlight a point to navigate to, and press NAV/MOB. 2. Highlight Go To <point name>, and press Enter. Navigate menu 3. Navigate to your destination. To stop navigation: 1. While navigating to a point, press NAV/MOB. 2. Highlight Stop Navigation, and press Enter. 3. Highlight Resume Navigation, and press Enter to resume navigation. GPSMAP 580/585 Owner’s Manual 13 Operation Mode
  • 20. To search for an item and route to it: 1. Press NAV/MOB and select Go To Point to open the Find page. 2. Highlight a category, and press Enter. 3. Press Enter, and then press the Rocker up or down to enter letters contained in the item name. 4. Press Enter when finished. 5. Highlight the item from the list, and press Enter. 6. Press Enter when the Go To button is highlighted. Man Overboard Use the MOB function to simultaneously mark your current location and create a direct route back to that location. To navigate to a MOB location: 1. Press NAV/MOB twice. 2. Press Enter to confirm and begin navigating to the MOB location. When a MOB is activated, a MOB waypoint with an international MOB symbol is created, and the unit begins actively navigating to that point. Use any of the Navigation pages to guide you back to the MOB point. The MOB waypoint is stored in the waypoint list and can be deleted like any other waypoint. 14 GPSMAP 580/585 Owner’s Manual Operation Mode
  • 21. Finding an Item Use the Find page to search for Waypoints, Tidal Information, or any recently found items. To open the Find page, press the NAV/MOB Key and then press Go To Point. The Find page is comprised of several default categories: Waypoints, Tide Stations. Additional categories such as Marine Navaids or Restricted Areas will appear depending on the optional BlueChart® g2 data card in the unit. Find pageShown without additional BlueChart® g2 or MapSource maps installed Viewing Recently Found Items The Recently Found page shows a list of the items you have recently searched for or navigated to. To view recently found items: 1. Press NAV/MOB and select Go To Point. 2. Highlight Recently Found, and press Enter to open the list of recently found items. 3. Press Menu to display the options menu. 4. Select Show Find History to view the list of items you have searched for recently. OR Select Show Go To History to view the list of items for which you have recently navigated to. GPSMAP 580/585 Owner’s Manual 15 Operation Mode
  • 22. Viewing the Information Page Each item on the map, and each item listed in the results list, contains an information page. To view details about an item: 1. Highlight a point on the map or in the search results list, and press Enter. An information page appears with details about the item in a tabbed format. Depending on the type of item selected, and if you are using optional BlueChart® g2 data cards, additional information is available. Map Feature Information page 2. Press Quit to exit the information page. Viewing Find Page Options 1. Press NAV/MOB. 2. Select Go To a Point. 3. Press Menu. • Enable Auto Arrange—automatically arranges the Find Page. When selected, Disable Auto Arrange and Restore Default options are available. • Near Other—selects a new location from which to compile the Find items lists. Using the Rocker, move the map arrow to the location you want, and press Enter. • Map Information—shows information about the detailed map data stored on the data card and allows you to select which maps appear on the Map page. Additional selections are included in the options menu when you are navigating: • Near Next—compiles the Find items lists based on the next turn in the route. • Near Destination—compiles the Find items lists based on the route destination. • Near Current Route—compiles the Find items lists based on the active route. 16 GPSMAP 580/585 Owner’s Manual Operation Mode
  • 23. Creating and Using Routes The GPSMAP 580/585 allows you to create and store up to 150 routes. Creating a New Route Use the Route tab to create a route by selecting waypoints from the Find page, or by selecting waypoints or map items from the Map page. To create a route using the Find Page: 1. On the Main menu, highlight the Route tab. Route Tab with the Route List 2. Press Menu to open the Route options menu. 3. Highlight New Route, and press Enter. 4. Press Enter to find items to add to the route. 5. Highlight OK, and press Enter to add a point to the route. 6. Repeat steps 4 and 5 to add additional points to the route. To create a route using the map: 1. On the Main menu, highlight the Route tab. 2. Press Menu to open the Route options menu. 3. Highlight New Route, and press Enter. Creating a new route on Route Review Page 4. Highlight Edit on Map, and press Enter. 5. Highlight a location on the map, and press Enter. 6. Repeat step 5 to add additional points to the route. NOTE: If you select an area of the map that is not a feature or a waypoint, a new waypoint is created for that location. Press Enter on the New Waypoint Page to save the location as a waypoint and continue adding points to your route. GPSMAP 580/585 Owner’s Manual 17 Operation Mode
  • 24. Navigating a Saved Route Use the Navigate Route option to select and navigate a saved route. To navigate a saved route: 1. Press NAV/MOB. 2. Highlight Navigate Route, and press Enter. 3. Highlight a previously saved route, and press Enter. Select the route you want to take. Editing a Route After you create a route, use the Route Review page to edit, change the name, and review route points of a selected route. To change the name of the route: 1. On the Main menu, highlight the Route tab. 2. Highlight the name of the route, and press Enter. 3. With the Route Review page open, highlight the route name field at the top of the page, and press Enter. Route Review page 4. Use the Rocker to enter the route name, and press Enter. 18 GPSMAP 580/585 Owner’s Manual Operation Mode
  • 25. To review individual route points: 1. On the Main menu, highlight the Route tab. 2. Highlight the name of the route, and press Enter. 3. Highlight a point, and press Enter. 4. Choose Next, Show Map, or Save, and press Enter. If the route point is a user waypoint, you can edit any of the waypoint properties on the Waypoint Page (see the “Creating and Using Waypoints” section beginning on page 21 for details). When you return to the Route Review page, the next point in the route is automatically highlighted. You can review each point on the route by pressing Enter. To add points to the route: 1. On the Main menu, highlight the Route tab. 2. Highlight a route, and press Enter. 3. Highlight the spot in the route where you want to add the new point. (The new point is added before the highlighted route point). 4. Press Menu. 5. Highlight Insert Waypoint, and press Enter. Route Review page 6. Highlight OK, and press Enter to add the new point to the route. GPSMAP 580/585 Owner’s Manual 19 Operation Mode
  • 26. To edit the route on the map: 1. On the Main menu, highlight the Route tab. 2. Select a route, and press Enter. 3. Press Menu to open the Route Review page options menu. 4. Highlight Edit on Map, and press Enter. 5. Select a location on the route (the route turns red when the arrow is over the route), and press Enter. 6. Use the Rocker to drag the route to the new point location, and press Enter. Editing the route on the map 7. Repeat steps 4 through 5 to add any remaining points to the route. To plan your route: 1. Open the Route Review page options menu. 2. Highlight Plan Route, and press Enter. Entering Speed and Fuel Flow for trip planning 3. To enter data for Speed, use Rocker to highlight the data field. 4. Press Enter and use UP/DOWN to key in the number. NOTE: Fuel flow rates are measured in units per hour. System setting changes for units of measure (statute, nautical, or metric) do not affect the fuel flow measure. You should enter fuel flow rates based on information for your vehicle (such as the operator’s manual or performance specifications), and make note of the units of measure (gallons or liters). 20 GPSMAP 580/585 Owner’s Manual Operation Mode
  • 27. Transitioning to the Next Waypoint 1. On the Main menu, highlight the Route tab. 2. Press Menu to open the Route Review page options menu. 3. Highlight Set Up Routes and press Enter to set the route leg transition (or waypoint transition). 4. Select distance to enter a radius so that when you are within the entered distance, the GPSMAP 580/585 leads you to the next point on your route. When you select Manual, you can transition to the next waypoint anytime while navigating a route. While you are navigating the route, open the Active Route Page, and press Menu. Highlight next Route Waypoint, and press Enter to have the GPSMAP 580/585 start routing you to the next point in your route. Creating and Using Waypoints Waypoints are locations or landmarks you record and save to your GPS. You can add waypoints to routes, and even navigate directly to the selected waypoint. The GPSMAP 580/585 stores up to 6,000 alphanumeric waypoints with user-defined icons, comments, elevation, depth, and temperature available for each waypoint. Waypoints can be created using three basic methods: • Enter/Mark—allows you to quickly mark your present location. • Graphically—allows you to define a new waypoint location from the map using the Rocker. • Text Entry—allows you to manually enter the location coordinates for a new waypoint. GPSMAP 580/585 Owner’s Manual 21 Operation Mode
  • 28. Marking Your Present Location Use the Enter/Mark key to capture your present location to create a new waypoint. You must have a valid position (2D or 3D) fix to mark your present location. To mark your present location: 1. Press and hold the Enter/Mark key until the New Waypoint page opens, then release it. A default four-digit name and symbol are assigned for the new waypoint. New Waypoint page 2. Use the Rocker to highlight OK, and press Enter to accept the waypoint with the default information. To change any information on the New Waypoint page, highlight the appropriate field, and press Enter. After entering and confirming your changes, highlight OK, and press Enter. Creating Waypoints Using the Map You can quickly create a waypoint using the Map page. To create a new waypoint using the Map page: 1. Use the Rocker to move the arrow to the map location or map feature you want. 2. Press and quickly release Enter/Mark to capture the arrow location. If you highlight a map feature, an information page opens after you press Enter. Highlight Save, and press Enter to save the map item as a waypoint. 3. To accept the waypoint with the default information, highlight OK, and press Enter. To change any information on the New Map Waypoint page, highlight the appropriate field, and press Enter. After entering your changes, highlight OK, and press Enter. 22 GPSMAP 580/585 Owner’s Manual Operation Mode
  • 29. Creating a Waypoint by Entering Coordinates You can manually enter location coordinates to create a waypoint. To create a new waypoint by entering location coordinates: 1. Press and hold Enter/Mark to create a waypoint. The new waypoint is created and uses the next available waypoint number and the last known location of the receiver as the default location. 2. On the New Waypoint page, highlight the Location field, and press Enter. Entering location coordinates. 3. Use the Rocker to enter location coordinates, and press Enter. To change any of the other information on the New Map Waypoint page, highlight the appropriate field, and press Enter. After entering your changes, highlight OK, and press Enter. Reviewing a Waypoint After you create and store a waypoint, you can modify, review, rename, move, or delete it at any time using the Waypoint Review and Waypoint Edit pages. To access the Waypoint Review page: Highlight a waypoint on the Map page, and then press Enter to open the Waypoint Review page. If the waypoint is located on a map feature or BlueChart® g2 feature, the Waypoint Review page might include additional tabs containing information about other features at that location. Waypoint Review page GPSMAP 580/585 Owner’s Manual 23 Operation Mode
  • 30. To access the Waypoint Edit page: 1. On the Main Menu, select the Points tab. 2. Select a waypoint from the list. Points Tab 3. Press Enter to open the Waypoint Edit page. NOTE: If the waypoint is located on a map feature or BlueChart® g2 feature, the Waypoint Edit page will not show the details of the other map features. Adding a Waypoint to a Route Use the Append to Route option to add the selected waypoint to the end of a route. This option is available only when you are not navigating. When you are navigating to a destination, Add to Current Route opens. The selected waypoint is added to the current route before the route destination. To add a waypoint to the end of the route: 1. Open the Waypoint Edit page, and press Menu to open the options menu. Waypoint Options menu 2. Select Append To Route. 3. Highlight a route, or select New Route, and press Enter. 4. Highlight OK, and press Enter to save the waypoint. 24 GPSMAP 580/585 Owner’s Manual Operation Mode
  • 31. Averaging the Waypoint’s Location Average Location makes the unit take several sample location measurements for the waypoint and recalculate for a more accurate location reading. NOTE: You must have a GPS satellite fix before you can average a waypoint’s location. To calculate the average location: 1. Open the Waypoint page, and press Menu. 2. Select Average Location, and press Enter. The fields change as the unit calculates the average location of the waypoint. Average Location page 3. Press Enter to save the location. Projecting a Waypoint You can also create a new waypoint by projecting the distance and bearing from a specific location to a new location. To create a new waypoint by projecting its location: 1. On the Main menu, highlight the Points tab and select the point which you want to porject from, then press Enter. 2. Press Menu. 3. Highlight Project Location, and press Enter. Project Location menuEnter the distance, bearing, and location. 4. To change the location from which you are projecting the new waypoint, highlight the From field, and press Enter. 5. Select the point from which you can project your new waypoint. GPSMAP 580/585 Owner’s Manual 25 Operation Mode
  • 32. 6. To adjust the distance that the new waypoint is projected beyond the original waypoint, highlight the Distance field, and press Enter. enter the projection distance, and press Enter. 7. To adjust the bearing that the new waypoint is projected from the original waypoint, highlight the Bearing field, and press Enter. Enter the bearing, and press Enter. 8. When you have adjusted all elements of the projected location, highlight Save, and press Enter. 9. Make any other changes to the new waypoint data (such as the name or symbol); highlight OK, and press Enter. Editing a Waypoint You can edit waypoints using the Points tab on the Main menu. The User sub tab, on the Points tab, shows a master list of all waypoints stored in memory. From the User list, you can review, edit, rename, or delete individual waypoints or delete all user waypoints. User sub tab To navigate to a waypoint from the Points tab: 1. On the Main menu, select the Points tab, and then highlight the User sub tab. 2. Highlight the waypoint you want to navigate to. 3. Press NAV/MOB to open the Navigate menu. 4. Highlight Go To <Point Name>, and press Enter. To edit a waypoint: 1. Open the Waypoint Review or Waypoint Edit page. 2. Highlight the waypoint name, symbol, or field you want to change, and press Enter. 3. Use the Rocker to select a symbol or enter data, and press Enter. 26 GPSMAP 580/585 Owner’s Manual Operation Mode
  • 33. Waypoint pageName fieldSymbol field You can select different icons by selecting the symbol group. Organizing Waypoints into Categories You can organize your waypoints into categories to help manage your waypoints. For example, you can create a Vacation category that stores all of the waypoints you want to use for your vacation. You can create up to 15 categories. To create a waypoint category: 1. From any waypoint page, or the Points tab, press Menu. 2. Select Edit Categories, and press Enter. 3. Highlight Add, and press Enter. Adding a new category 4. Use the Rocker to enter a name for the category. 5. Highlight Save, and press Enter. GPSMAP 580/585 Owner’s Manual 27 Operation Mode
  • 34. To assign a category to a waypoint: 1. Open the Waypoint Edit page. 2. Select the Category field, and press Enter. 3. Select the category for which you want to assign the waypoint, and press Enter. Waypoint page To delete a category: 1. Within the Waypoint Categories page, highlight the category you want to delete, and press Menu. 2. Select Delete Category, and press Enter. Waypoint Categories Options menu 3. Press Enter. Deleting Waypoints You can delete waypoints from the waypoint list on the Points tab or from the Waypoint page. To delete a waypoint from the Waypoint page, use the Rocker to highlight the on-screen Delete button, and press Enter. NOTE: When you delete a waypoint from the list, it cannot be recovered from the unit. Garmin suggests backing up important waypoints to a computer using Garmin Home Port software. To delete a waypoint from the User Points tab: 1. From the Points tab, highlight the waypoint you want to delete. 2. Press Menu. 3. Highlight Delete Waypoint, and press Enter. A confirmation message appears. 28 GPSMAP 580/585 Owner’s Manual Operation Mode
  • 35. 4. Press Enter. To delete waypoints by symbol or category: 1. On the User sub tab, highlight the waypoint to delete, and press Menu. 2. Highlight Delete by Symbol or Delete by Category, and press Enter. 3. Highlight the symbol or category you want to delete, and press Enter. 4. Highlight OK, and press Enter. To delete waypoints by distance: 1. On the User sub tab, highlight the waypoint to delete, and press Menu. 2. Highlight Delete By Distance, and press Enter. 3. Select Less Than or More Than, and enter the distance. 4. Select a waypoint or point of interest as the From location. 5. Highlight the From field and press Enter. 6. Select a location on the Find page, and press Enter. 7. Highlight OK, and press Enter. 8. Highlight Delete, and press Enter to delete all waypoints within the set location. GPSMAP 580/585 Owner’s Manual 29 Operation Mode
  • 36. Proximity Points Use the Proximity sub tab to define an alarm circle around a stored waypoint location. The alarm circle can help you avoid reefs, rocks, or restricted waters. Up to 100 waypoints can be listed with a maximum alarm radius of 99.99 nautical miles, statute miles, or kilometers. If a proximity alarm circle overlaps an existing alarm circle, a “Proximity Overlaps Another Proximity Waypoint” message appears. Because the unit only alerts for one of the overlap points, use caution when navigating in these areas. You are only alerted to the closest proximity waypoint when you enter an alarm circle overlap. To turn proximity alarms on or off: 1. On the Main menu, highlight the Points tab, and then highlight the Proximity sub tab. 2. Highlight the field below Proximity Alarm, and press Enter. 3. Select the On or Off setting, and press Enter. To add a proximity waypoint: 1. On the Proximity sub tab, use the Rocker to highlight an empty line on the Proximity List, and press Enter. 2. Select a waypoint or point of interest from the Find Page. 3. Highlight OK, and press Enter. 4. Press Enter to define the proximity radius. 5. Use the Rocker to enter a distance value (up to 99.99 units), and press Enter. To clear one or all proximity waypoints from the list: 1. On the Main menu, highlight the Points tab, and then highlight the Proximity sub tab. 2. Highlight the proximity waypoint you want to clear, and press Menu. Proximity Points Tab Options menu 30 GPSMAP 580/585 Owner’s Manual Operation Mode
  • 37. 3. To clear a single alarm, highlight Remove Point, and press Enter. To clear all proximity waypoints, select Remove All, and press Enter. 4. Highlight OK, and press Enter. Creating a Route as a Marking line In some instances, you may want to display a line need on the map to display a dangerous border or area. To begin making a marking line on the map: 1. On the Route tab, select the route to act as a marking line to display on the map. 2. Select Show on Map. 3. Select a color. To hide a marking line on the map: 1. To hide the marking line, deselect the Show on Map checkbox on the Route edit page. NOTE: The maximum number of routes (marking line) that can be displayed is 150 lines. GPSMAP 580/585 Owner’s Manual 31 Operation Mode
  • 38. Managing Your Tracks The GPSMAP 580/585 draws an electronic breadcrumb trail or track log on the Map Page as you travel. The track log contains points along its path, and includes both time and location for each point. The track log starts recording as soon as the GPSMAP 580/585 obtains a location fix. For best results, clear the track log before you start traveling as new track points overwrite the oldest track points. The percentage of memory used by the current track log appears at the top of the Active tab. After the track log is cleared, it shows zero percent. When the track log reaches 100%, the most recent track points overwrite the oldest track points (if Wrap is selected for Record Mode). To avoid losing track points, save the track log when it approaches the 99% mark. Setting Up and Saving Your Tracks You must save the track log before you can use the Navigate Track feature. The Save feature allows you to store up to 50 track logs. To access the Track tab: 1. Press Menu twice to open the Main menu. 2. Highlight the Track tab. Track tab Record Mode—Wrap records over the oldest tracks when the track log reaches 100%. Fill records a track log until the track log is full (100%). When Off is selected, the unit does not record tracks. Interval—Distance records track points after a specified distance is traveled. Time creates track points after a specified time has elapsed. Resolution records track points based higher the resolution entered, the more points the unit creates to make the track. Color—allows you to select a color for the track when it appears on the map. Value—allows you to record a track according to the Interval and Value. enter a specific distance, time, or resolution. 32 GPSMAP 580/585 Owner’s Manual Operation Mode
  • 39. To clear the track log: 1. On the Main menu, highlight the Track tab and then highlight the Active sub tab. 2. Highlight the Clear button, and press Enter. Clearing the track log 3. Highlight OK, and press Enter. To save the entire track log: 1. On the Main menu, highlight the Track tab and then highlight the Active sub tab. 2. Select Save, and press Enter. A message appears asking if you want to save the entire track. 3. Highlight Yes, and press Enter. To save a portion of the track log: 1. On the Main menu, highlight the Track tab and then highlight the Active sub tab. 2. Select Save, and press Enter. 3. Highlight No, and press Enter. 4. Select a beginning point, and press Enter. Saving a portion of the track log 5. Select an ending point, and press Enter. The Track Review page opens automatically. 6. Highlight OK, and press Enter to save the track. GPSMAP 580/585 Owner’s Manual 33 Operation Mode
  • 40. Saved Tracks The Saved sub tab lists all of the saved tracks in your unit. Press Menu to open the Saved tab options menu. Saved sub tab Review on Map—allows you to show the highlighted track on the Map page. TracBack—allows you to navigate the track. You can navigate the track as it is saved, or you can navigate the track in reverse. Delete Track—allows you to erase the highlighted track from the unit’s memory. Delete All—allows you to erase all tracks from the unit’s memory. To edit a track: 1. On the Main menu, highlight the Track tab and then select the Saved tab. 2. Select a track to edit, and press Enter. Track Review page 3. Highlight the Name field, and press Enter. 4. Use the Rocker to change the name, and press Enter. 5. Select a different display color to show the track on the map. 6. Highlight the box next to Show on Map, and press Enter to show the track on the map. 7. To view the track on the map, highlight Map, and press Enter. 8. Highlight OK, and press Enter to save your changes. 34 GPSMAP 580/585 Owner’s Manual Operation Mode
  • 41. Navigating a Saved Track You can save your track log to use later as a TracBack, which reduces your track log into a route with up to 300 turns. When initiated, a TracBack route leads you back to the oldest stored track log point. It is a good idea to clear the existing track log before you start your current trip. Also, you must save an active track log before you can navigate it as a TracBack. To start a TracBack using the NAV/MOB key: 1. Press NAV/MOB, highlight Navigate Track, and press Enter. 2. Highlight the track you want to navigate, and press Enter. Selecting a saved track. 3. Select the point you want to navigate (TracBack) to, and press Enter. TracBack Tips When a TracBack is initiated, the GPSMAP 580/585 divides the track into segments called legs. To get the most out of the TracBack feature, remember these tips: • Always clear the track log at the point at which you want to go back (such as a dock or campsite). • The Record Mode option on the Active Track tab must be set to Fill or Wrap. • If the track log Interval option on the Active tab is set to the Time option, the route might not navigate your exact path (keep the interval set to Resolution for best performance). • If the receiver is turned off, or satellite coverage is lost during your trip, TracBack draws a straight line between any point where coverage was lost and where it resumed. • If the changes in distance and direction of your track are too complex, 50,000 waypoints may not mark your path accurately. The receiver then uses the most significant points of your track so there are fewer changes in direction. GPSMAP 580/585 Owner’s Manual 35 Operation Mode
  • 42. O peration Mode Pages Five pages are available in Operation Mode—Map, Compass, Navigation, Active Route, and Position Data. Map Page When you turn on the GPSMAP 580/585 , the Map page appears after the unit acquires a satellite signal. The position marker shows your current location on the map. The Map page shows map information (digital cartography). Use the dedicated zoom keys (IN and OUT) to adjust the Map page scale. Two map operating modes, position mode and pan mode, determine what cartography is shown on the map. Position mode pans the map to keep your present location in the display area. The position marker shows your travel on the Map page. The GPSMAP 580/585 always turns on in position mode, with the last known location centered on the map. When you press the Rocker, the GPSMAP 580/585 enters pan mode, which moves the map to keep the white arrow (map pointer) within the display area. In Operation mode, four user-selectable data fields appear on the right side of the screen that can be configured to show any one of the possible data options. You can also add additional data fields to the page or select a full screen map without data fields. Map pageData fieldsMap zoom rangeCurrent location 36 GPSMAP 580/585 Owner’s Manual Operation Mode Pages
  • 43. Changing the Page Layout and Data Fields You can adjust how the following pages appear: Map, Compass, Navigation, Position Data, Trip Computer, and optional Sonar Pages. You can also adjust the data fields on each page. To set up the page layout: 1. Press Menu to open the options menu. 2. Highlight Set Up Page Layout, and press Enter. Selecting the page layout. 3. Select a page layout option, and press Enter. To change a data field: 1. Press Menu to open the options menu. 2. Highlight Change Data Fields, and press Enter. 3. Highlight the data field to change, and press Enter. 4. Highlight the type of data you want to show, and press Enter. Changing a data field. GPSMAP 580/585 Owner’s Manual 37 Operation Mode Pages
  • 44. Setting Up the Map Page Use the Set Up Map option to adjust how items appear on the Map page. To change a map setup option: 1. On the Map page, press Menu to open the options menu. 2. Highlight Set Up Map, and press Enter. Setting up the Map page. 3. Press left or right on the Rocker to highlight a tab; press up or down on the Rocker to highlight the field you want to change, and press Enter. 4. Highlight a setting, and press Enter. Viewing Additional Map Data Use the Map information page to view the data loaded on your GPSMAP 580/585 unit and data card. To review/change map information: 1. On the Map page, press Menu. 2. Highlight Map Information, and press Enter. 3. To change the setting for a map family, highlight the box next to the map family name and press Enter to select (check mark) or deselect (no check mark) the Show setting. 4. To view the list of maps within a map family, highlight the name of the map family, and press Enter. 38 GPSMAP 580/585 Owner’s Manual Operation Mode Pages
  • 45. Map Orientation There are three map orientation options: North Up - orients the map like a paper map. Track Up - orients the map in the direction of travel. Course Up - orients the map so the direction of navigation is always up. When using Track Up or Course Up, the North arrow indicates the orientation. Changing the Map Orientation 1. Press Menu to open the Map page. 2. Press Menu and select Set Up Map. 3. Press Enter Zooming In and Out of the Map The map display has 28 available map zoom ranges ranging from 20 ft to 800 nm (20 ft to 800 mi or 5 m to 1200 km). The map zoom range is controlled by the IN and OUT keys, with the current scale shown at the bottom right of the data window. NOTE: The scale value represents the distance from one end of the scale bar () to the other. To select a map zoom range (zoom in and out): Press the OUT key to zoom out, press the IN key to zoom in. Panning the Map Use the panning arrow to pan the map to view other map areas. As you pan past the edge of the current map display, the screen moves to provide continuous map coverage. The position icon stays in your present location and might not be visible on the screen when you pan the map. To pan the map: Press up, down, right, or left on the Rocker. The panning arrow moves the map so you can view different parts of the map. Map feature highlighted As you move the arrow, the distance and bearing from your present location to the arrow appears in the data window, along with the coordinates of the arrow. When the arrow is stationary, the arrow stays centered on the screen. You can also use the arrow to select on-screen map items, which GPSMAP 580/585 Owner’s Manual 39 Operation Mode Pages
  • 46. allows you to review a selected item directly from the map. To view details about an on-screen point: 1. Use the Rocker to move the arrow to a waypoint or map item. If several items are grouped closely together, zoom in closer for a better view. When a waypoint or map item is selected, it is highlighted on- screen with the name and location shown at the top of the screen, along with the distance and bearing from your current location. 2. Press Enter to view more information about the point. The information and on-screen buttons shown vary depending on the type of item selected. In some cases, additional information tabs appear at the top of the information page or Waypoint page. 3. Use the Rocker to highlight the extra tabs and view the information. 4. Select an on-screen button, and press Enter. Map Feature Information page Clearing Unwanted Details from the Map You can remove items from the Map page (declutter the display) to remove unwanted items. To declutter the Map page: 1. On the Map page, press Menu to open the options menu. 2. Highlight Declutter, and press Enter. 3. Press Enter. 40 GPSMAP 580/585 Owner’s Manual Operation Mode Pages
  • 47. Measuring Distance You can measure the distance and bearing between two map items. To measure the bearing/distance between two points: 1. On the Map page, press Menu to open the options menu. 2. Highlight Measure Distance, and press Enter. An on-screen arrow appears on the map at your present location with ENT REF below it. 3. Move the arrow to the reference point (the starting point that you want to measure from), and press Enter. A push pin icon marks the starting point. 4. Move the arrow to the point of which you want to measure. The bearing and distance from the reference point and arrow coordinates appear in the data window at the top of the screen. Measure DistanceEnd point of measurement, labeled ENT REFPush pin indicating the beginning point of the measurement GPSMAP 580/585 Owner’s Manual 41 Operation Mode Pages
  • 48. Compass Page During active navigation, the Compass page guides you to your destination with a graphic compass and a bearing pointer. When the pointer is pointing straight up, you are heading directly to your destination. Compass Page in Operation modeRotating compass ringCourse to steer indicatorCompass arrowData fields The middle of the page features a rotating compass ring that shows your course over ground (track) while you are moving. Your present course over ground is indicated at the top of the compass ring. The direction of the destination (bearing) relative to the course over ground is indicated by an arrow in the middle of the compass ring and a course to steer “bug” on the outside of the compass ring. The course to steer represents the direction to steer to get back to the course line. If the arrow points up, you are going directly to the waypoint. If the arrow points any direction other than up, turn toward the arrow until it points up, and then continue in that direction. NOTE: You must be moving for the compass to accurately update and show your heading. Turning On the Compass Page To show the Compass page: 1. On the Main menu, highlight Display. 2. Highlight the Compass Page field, and press Enter. 3. Select On, and press Enter. Turning on the Compass page 42 GPSMAP 580/585 Owner’s Manual Operation Mode Pages
  • 49. Compass Page Options Use the options menu on the Compass page to customize the Compass page. 1. Press Page until the Compass page appears. 2. Press Menu to open the Compass page options menu. Set Up Page Layout—allows you to select the page layout. Show Course Pointer/Show Compass—allows you to toggle between showing the Course Pointer, which shows how far off you are from your course and how to get back on course, or shows the compass arrow. The Course Pointer is also referred to as a CDI or Course Deviation Indictor. Show (Hide) Bug Indicator—shows the course to steer bug indicator (the purple tick mark on the compass ring). Change Data Fields—allows you to change on-screen data fields. Using the Marine Timer The Marine Timer, specifically designed for sail boat racing, allows you to easily count up or down by specified time increments. As is common in sail boat racing, there is often a 5-minute warning countdown, followed by a 4-minute preparation countdown, and finally a 1-minute final countdown. You can use your GPSMAP 580/585 to perform each of these different countdowns. To open the Marine Timer: 1. On the Compass page, press Menu. 2. Highlight Set Up Page Layout, and press Enter. 3. Highlight 2 Columns With Timer, and press Enter. The Marine Timer appears in the lower right corner. GPSMAP 580/585 Owner’s Manual 43 Operation Mode Pages
  • 50. To use the Marine Timer: 1. Press the Rocker up or down to select the time you want to count. 5-minutes is the default. 2. Press Enter to start the timer. Use the Rocker during the timing to quickly select a different length of time. 3. Press Enter to stop timing. Marine Timer on the Compass page As discussed previously, the timer is set to count down 5-minutes. If you want to change the length of time and the behavior of the timer, highlight the Setup tab on the Main menu, and then select the Timers sub tab. NOTE: You can set the timer countdown for up to 60 minutes. To set the Marine Timer: 1. On the Main menu, highlight the Setup tab, and then select the Timers sub tab. 2. Highlight Stop to change the timer. 3. To enter a new time, highlight the time field, press Enter, and then use the Rocker. 44 GPSMAP 580/585 Owner’s Manual Operation Mode Pages
  • 51. Navigation Page Navigation page When you are navigating, the Navigation page provides digital and graphic steering guidance to the destination. The right side of the Navigation page features user-selectable data fields showing useful navigation information. A compass ribbon appears at the top of the page to show your current heading, represented by the violet bar. The red vertical bar represents the bearing to your course. To stay on course, steer toward the red vertical indicator (or arrows) until it lines up with the violet bar in the middle. The bottom of the screen provides visual guidance to the waypoint. The line down the center of the Navigation represents your preferred track line. To hide or show the Navigation page: 1. On the Main menu, highlight the Display tab. 2. Highlight the Navigation Page field, and press Enter. 3. Select Off to hide or On to show, and press Enter. Using the Navigation Page As you head toward your destination, the Navigation perspective moves to indicate your progress to the waypoint and the direction you should steer to stay on course. If you are navigating a route, the Navigation page shows each route waypoint connected in sequence by a black “road” with a white line down the middle. Nearby waypoints that are not on the active route can also be shown. To change the Navigation perspective scale: On the Navigation page, press IN to zoom in; press OUT to zoom out. GPSMAP 580/585 Owner’s Manual 45 Operation Mode Pages
  • 52. Navigation Page Options Use the Navigation page options menu to define the data fields and to select which waypoints and tracks appear on the screen. To show and select the Navigation Page Options: 1. Press PAGE until the Navigation page appears. 2. Press Menu. 3. Highlight an option, and press Enter. Navigation page Options menu The following options are available from the Navigation page options menu: Set Up Page Layout—allows you to select the page layout. Change Data Fields—allows you to change on-screen data fields. Set Up Navigation—shows an options menu with two sub tabs: Line and Waypoint. Each tab has on/off settings for options, including enabling the line for the Active Leg and Track Log. Set Up Navigation 46 GPSMAP 580/585 Owner’s Manual Operation Mode Pages
  • 53. Active Route Page While navigating a route, your GPSMAP 580/585, the Active Route page shows each point (waypoint or map item) on the active route. The point name, course, distance, and other information for each waypoint is displayed.. The current destination point, or active point, is marked with an arrow icon. As you navigate a route, the list automatically updates to indicate the next active point. The Active Route and Route Review pages share many of the same features and options. Active Route page Active Route Page Options 1. Press Page until the Active Route page appears. 2. Press Menu to open the Active Route page options menu. Active Route page Options menu Deactivate—allows you to stop route navigation. Edit on Map—allows you to edit the route on the map. Add Waypoint—allows you to insert a point before the highlighted waypoint or add a point to the end of the route. Remove Waypoint—allows you to delete a highlighted waypoint, from the route. Invert—allows you to reverse the order of the route. Plan Route—allows you to enter information about your route to predict your arrival time(s). Change Data Fields—allows you to customize the data fields shown on the Active Route page. GPSMAP 580/585 Owner’s Manual 47 Operation Mode Pages
  • 54. Position Data Page The Position Data page shows important navigation data while navigating a route in Operation mode. By default, the Position Data page shows a compass ribbon, your current latitude and longitude, date and time, your location in relation to a prominent nearby landmark (such as a waypoint or city), and eight user-selectable data fields. The compass ribbon appears at the top of the page to show your current heading with a red, vertical bar. To stay on course, steer toward the violet bar (or arrows) until it is aligned with the red bar. Position Data page Position Data Page Options 1. Press Page until the Position Data page appears. 2. Press Menu to open the Position Data page options menu. Change Nearest Type—allows you to specify the type of item used as the nearest item (shown in the lower-left data field). The choices change based on the current usage mode. Reset Trip—allows you to clear trip information, except the maximum speed and the odometer. Reset Max Speed—allows you to clear the maximum speed. Reset Odometer—allows you to clear the running total of the distance traveled since the odometer was last reset. Reset All—allows you to clear all trip information, including the maximum speed and odometer. 48 GPSMAP 580/585 Owner’s Manual Operation Mode Pages
  • 55. Main Menu The Main menu provides access to various waypoint, system, navigation and interface management, and setup menus. Main menu To select a tab from the Main menu: 1. From any page, press Menu twice to open the Main menu. 2. Highlight the appropriate tab. The information for the highlighted tab automatically appears on the right. To highlight a sub tab, press left or right on the Rocker, and then press up or down to select individual fields. Main Menu Tabs • GPS—allows you to view satellite information. • Route—allows you to create and navigate routes. • Points—allows you to view stored waypoints. • Track—allows you to record and save tracks. • DSC—allows you to set up digital select (DSC) calling features. • Sonar—allows you to configure sonar options. • Alarms—allows you to define alarm settings. • Calendar—allows you to view sun/moon and hunting/fishing information for a specific day. • Celestial—allows you to view tide, hunting & fishing, and sun & moon information. • Message—allows you to view system generated messages. • Display—allows you to adjust the backlight and page display. • Sound—allows you to customize GPSMAP 580/585 sounds. • Setup—allows you to adjust system settings. GPSMAP 580/585 Owner’s Manual 49 Main Menu
  • 56. GPS Tab The GPS tab provides a visual reference of satellite acquisition, receiver status, and accuracy. The sky view and signal strength bars indicates satellites that are visible to the receiver and whether they are being tracked. Main menu—GPS tab Route Tab The Route tab shows all the routes currently stored in memory, along with a descriptive name for each route. Use the Route tab to create and store up to 150 reversible routes, with up to 250 points each. See the “Creating and Using Routes” section beginning on page 17 for more information about routes. Main menu—Route tab 50 GPSMAP 580/585 Owner’s Manual Main Menu
  • 57. Points Tab The Points tab contains two sub tabs, User and Proximity, which allow you to manage a large number of waypoints quickly and efficiently. For more information about waypoints, see the “Creating and Using Waypoints” section beginning on page 21. Main menu—Points tab User Sub Tab The User sub tab shows a master list of all waypoints currently stored in memory. The total number of stored and available waypoints appear at the bottom of the User sub tab. Proximity Sub Tab Use the Proximity sub tab to define an alarm circle around a stored waypoint location. Track Tab Use the Track tab to specify whether or not to record a track log, define how it is recorded, or save the track log data for future use. The Track tab is divided into two sub tabs: Active and Saved. For more information about tracks, see the “Managing Your Tracks” section beginning on page 32. Main menu—Track tab Active Sub Tab The Active sub tab is for the active log (the log currently being recorded). It shows the amount of track memory used and current settings. Saved Sub Tab The Saved sub tab shows a list of all saved tracks in your GPSMAP 580/585. GPSMAP 580/585 Owner’s Manual 51 Main Menu
  • 58. DSC Tab Use the DSC tab (Operation mode only) to control and set up the Digital Selective Calling (DSC) features. DSC uses marine VHF radio, and GPS, to transmit and receive location information. DSC is used by mariners for distress calls and position reporting. For more information about DSC and Maritime Mobile Service Identity (MMSI) numbers, see pages in the “Appendix”. DSC page Understanding Distress Calls With your GPSMAP 580/585 properly connected to a VHF radio with DSC output, you can receive any DSC distress call within range. An alert message appears and a tone sounds when a distress call is received. The alarm only sounds on a distress call; position reports do not sound the alarm. Distress calls are broadcast to all DSC users in radio range and appear with a blue and white checkered icon on the DSC Call List and Log tabs. You can enter the name of a caller, if it is known. The name of the caller replaces the MMSI number as a reference after it is entered. Understanding Position Reports The Position Report operates similarly to the distress call. This type of contact is like a phone call; no emergency alarms are set off. Position reports are not broadcast to all DSC users and appear with a gold boat icon. Receiving DSC Calls Each time you receive a distress call or position report, a review page opens—either a DSC Position Report page or a Distress Call page. Both pages contain identical fields to the DSC Entry Review page. 52 GPSMAP 580/585 Owner’s Manual Main Menu
  • 59. Each entry in the Call List and Log has a corresponding DSC Entry Review page. This page operates similarly to the Distress page and Position Report page. From the DSC Entry Review page, you can Delete the entry, Save it as a waypoint, or show the location on the map. To review a call or log entry: 1. Open the Call List or Log from the DSC tab. 2. Highlight the call you want to review. 3. Press Enter to open the DSC Entry Review Page. DSC Entry Review page DSC Call List The Call List sub tab shows the 50 most recent calls, even if the unit is left unattended. The Call List only shows the most recent call from a vessel. If a second call is received, it replaces the first call in the Call List. Press Menu to sort the list and delete entries. DSC Call List DSC Log When DSC calls are received, they are automatically stored in the Log, with the most recent call at the top. The unit can store up to 100 calls; after 100 calls are received, the oldest log file is removed when a new call is received. GPSMAP 580/585 Owner’s Manual 53 Main Menu
  • 60. DSC Log Receiving a Position Report or Distress Call After you receive a Position Report or a Distress Call, you can quickly navigate to the location. 1. Highlight a call from the Call List or Log. 2. Press Direct To. The top selection in the Navigate menu is highlighted. 3. Press Enter to go to the location. DSC Directory The DSC Directory is like a phone book and can hold up to 50 entries. DSC Directory ListDSC directory entries. Press Enter to open the Entry Review page. Blank entry. Press Enter to add a DSC directory entry. To add a new directory entry: 1. On the Main menu, open the DSC Directory. 2. Highlight the first blank space in the directory list, and press Enter. OR Press Menu, highlight New Item, and press Enter. 3. Enter the MMSI number, the name, and any comments. 4. When finished, highlight OK, and press Enter. New Directory Item page 54 GPSMAP 580/585 Owner’s Manual Main Menu
  • 61. After creating a New Directory Item, the name created is attached to that particular MMSI number. If you return to the Log, the new name appears under the corresponding MMSI number. Another way to input a name is from the Entry Review page or the DSC Distress Call or DSC Position Report pages. The name and MMSI are sent to other Garmin GPS units. Only the MMSI numbers are sent to other non-Garmin DSC users. Making a Distress Call To make a distress call, press the Mayday button on your VHF radio. If you have DSC support, the call transmits on an emergency channel with the MMSI number attached to the call. Any DSC- equipped mariner (on sea or land) within range can receive the call. Setting Up DSC Use the Setup sub tab to turn DSC on and off. If you have more than one chartplotter and only want DSC to show on another chartplotter, turn DSC off on this unit. This Setup sub tab also allows you to simulate distress calls and position reports while the unit is in Simulator mode. The Distress Call simulator also helps to check if alarms are working properly. DSC Setup GPSMAP 580/585 Owner’s Manual 55 Main Menu
  • 62. Sonar Tab Use the Sonar tab to set up and configure sonar. See the “Setting Up and Using Sonar” section. NOTE: You must have a transducer connected to your GPSMAP 580/585 to use sonar. Main Menu—Sonar tab Alarms Tab Use the Alarms tab to define alarm settings. When an alarm goes off, the alarm message appears on the GPSMAP 580/585 and the unit emits five (5) beeps. Main Menu—Alarms tab To set an alarm: 1. On the Main menu, highlight the Alarms tab. 2. Select the alarm to set, and press Enter. 3. Change the setting to On, and press Enter. If necessary, highlight the next field to the right, and press Enter. Enter the settings you want. 4. Press Enter. 56 GPSMAP 580/585 Owner’s Manual Main Menu
  • 63. To set a persistent alarm: 1. On the Main menu, highlight the Alarms tab. 2. Highlight the box next to the persistent alarm you want to enable. 3. Press Enter to place a check mark in the Persist box. Navigation (Nav) Alarms The Nav sub tab contains the following alarms: Next Turn—allows you to set an alarm to indicate the next turn in a route. Select Dist to specify a distance before you reach the next turn to sound the alarm. Select Time to specify a time before the turn for the alarm to go off. Select Auto for the unit to provide a Next Turn alarm at its discretion. Arrival—allows you to set an alarm to sound when you are a specified distance or time away from a destination waypoint. Select Auto for the unit to provide an Arrival alarm at its discretion. Off Course—allows you to set an alarm to sound when off course. Select On, then enter a distance. Anchor Drag—allows you to set an alarm to sound when you exceed a specified drift distance. Select On, and then enter a distance. System Alarms Clock—sets an alarm based on the unit clock. Select On, and then enter a specific time for when you want the alarm to sound. The GPSMAP 580/585 must be on for the clock alarm to work. DGPS—allows you to set an alarm to sound when the GPSMAP 580/585 loses a differential fix. Accuracy—allows you to set an alarm to sound when GPS accuracy falls outside of the user-set value. Select On, and then Enter a specific distance. GPSMAP 580/585 Owner’s Manual 57 Main Menu
  • 64. Sonar Alarms CAUTION: The Safe Depth and Safe Height settings influence how the chartplotter calculates an Auto Guidance line. If an area has an unknown water depth or an unknown obstacle height, the Auto Guidance line is not calculated in that area. If an area at the beginning or the end of an Auto Guidance line is shallower than the safe water depth or lower than the safe obstacle height, the Auto Guidance line is not calculated in that area. On the chart, the course through those areas appears as a gray line. When your boat enters one of those areas, a message appears. Shallow Water/Deep Water—allows you to set an alarm to sound when you enter an area of water that is too shallow or deep. Select On, and then specify a depth. You must be receiving sonar NMEA data for this function to work. Water Temp—allows you to set an alarm to indicate if the water temperature has exceeded or dropped below a specific temperature, or fallen outside/inside a specific temperature range. Select Above or Below, and then enter a specific temperature, or select Inside or Outside and enter a range of temperatures. You must be receiving sonar NMEA data for this function to work. Drift—allows you to set an alarm to sound when you exceed a specified drift distance. Select On, and then enter a specific distance. Fish—allows you to set an alarm to sound when fish are detected with sonar. Calendar Tab Use the Calendar tab to plan trips, as well as view sun and moon, and hunting and fishing information for the day. Calendar Tab in Day ViewHighlight an arrow, and press Enter to change the date in view. Sunrise and sunset times for the current location and date. List of points and routes added to this date. Calendar Options The options menu is available in all three calendar views. Press Menu on any of the calendar views to open the options menu. To view the Sun & Moon or Hunt & Fish sub tab, highlight View Sun and Moon or View Hunt and Fish, and press Enter. 58 GPSMAP 580/585 Owner’s Manual Main Menu
  • 65. To add a route (or point) to the calendar: 1. On the Main menu, highlight the Calendar tab. 2. Press Menu to open the options menu. Highlight Add Route (or Add Point), and press Enter. 3. From the pop-up route list (or the Find page if Add Point was selected), select the route you want to add to the calendar, and press Enter. Day View Sub Tab The Day View sub tab shows sunrise and sunset times for your current date and location. Points and routes for the day appear in a list. Week View Sub Tab The Week View sub tab provides the same elements as Day View, but the entire week is visible. Days with added points or routes are shown highlighted in green. Icons for the points and routes assigned to the date are shown along the bottom of the screen. Month View Sub Tab The Month View sub tab provides the same elements as Day View, but the entire month is visible. Days with added points or routes are shown highlighted in green. Icons for the points and routes assigned to the date are shown along the bottom of the screen. Celestial Tab The Celestial tab shows tide information, sun and moon information, and hunting and fishing information. You can view this data for your current location, a location from the map, or a waypoint location. Also, you can select a different date and time, or use the current data. Main menu—Celestial tab To access the Celestial tab: 1. On the Main menu, highlight the Celestial tab. 2. Use the Rocker to view the sub tab you want, such as Sun & Moon. GPSMAP 580/585 Owner’s Manual 59 Main Menu
  • 66. Tide Sub Tab The Tide sub tab contains a graphical chart that shows tide station information in a 24-hour span starting at midnight station time. You can choose from different dates and more than 3,000 tide stations. Height of tideSmallest and largest tides for the AM hoursSelect the tide station for which you want to view the information. Enter the date for which you want to view the tide information. Tide sub tabTimeSmallest and largest tides for the PM hours The top of the page shows the tide station and date referenced. The chart shows a 24-hour block of time, with the time progressing from left to right. The solid vertical lines represent 4-hour increments; the dotted vertical lines represent 1-hour increments. The tide curve appears as a shaded area; higher tides are taller and lower tides are shorter. The bottom of the page indicates the times with the highest and lowest tides. To view a tide chart for a different tide station: 1. From the Tide sub tab, highlight the At field, and press Enter. 2. Press Menu, and select Near Current Location, Near Current Route, Near Other (select another location using the map), or Near Destination. The list updates with your search requirements. 3. Select a tide station from the list, and press Enter. 4. Highlight OK, and press Enter. To view the tide chart for another date: 1. From the Tide sub tab with a chart open, highlight the On field, and press Enter. 2. Enter the date with the Rocker, and press Enter. You can also use the zoom IN and OUT keys to view information for another date. Press and hold IN or OUT to scroll quickly through dates. 3. Press Enter. To use the current date again, highlight the On (Date) field. Press Menu, highlight Use Current Date, and press Enter. 60 GPSMAP 580/585 Owner’s Manual Main Menu
  • 67. To view a chart’s details for another time during the day (other than current time): 1. From the Tide sub tab with the chart you want to view, press Menu, and then select Move Cursor. 2. Press the Rocker right or left to view the chart at another time. 3. To return to the current time, press Menu, and select Stop Moving Cursor. To automatically start cursor mode to scroll the chart: 1. Highlight the On (Date) field. Then press down to start the pointer (pan) mode. 2. Scroll the chart right to view the next day or left to view the previous day. Sun & Moon Sub Tab The Sun & Moon sub tab provides you with sunrise/sunset and moon rise/set times. A graphic of the moon phase also appears. You can view Sun & Moon information for any date or location. You can also use the play, fast forward, and stop buttons to view an animation of the Sun & Moon sub tab. To view sun and moon information for a different date: 1. Highlight the Date field, and press Enter. 2. Use the Rocker to change the digits of the date to the date you want. You can also use the zoom IN and OUT keys to view information for another date. Press and hold IN or OUT to scroll quickly through dates. 3. Press Enter when finished. The unit shows the sun and moon information for the selected date. Sun & Moon sub tabMoon phaseAnimation controls for the sky viewSelect the date and locationLocation of the sun and moon in the sky view GPSMAP 580/585 Owner’s Manual 61 Main Menu
  • 68. To view sun and moon information for a different location: 1. Highlight the From field, and press Enter. 2. Highlight Use Find Page, and press Enter. 3. Select a waypoint or point of interest, and press Enter. 4. On the waypoint information page, press Enter. The unit shows the sun and moon information for the location you selected. Hunt & Fish Sub Tab The Hunt & Fish sub tab provides you with predictions of the best times to hunt and fish in a selected location on a specific date. To show the Hunt & Fish information: 1. On the Main menu, highlight the Celestial tab. 2. Select the Hunt & Fish sub tab. Hunt & Fish sub tab To view hunt and fish information for a different date: 1. Highlight the Date field, and press Enter. 2. Use the Rocker to change the digits of the date. You can also use the zoom IN and OUT keys to view information for another date. Press and hold IN or OUT to scroll quickly through dates. 3. Press Enter when finished. 62 GPSMAP 580/585 Owner’s Manual Main Menu
  • 69. To view hunt and fish information for a different location: 1. Highlight the From field, and press Enter. 2. Highlight Use Find Page, and press Enter. 3. Select a point, and press Enter. 4. On the information page, press Enter. To use the current location: 1. Highlight the From field, and press Enter. 2. Highlight Current Location, and press Enter. Message Tab The Message tab shows a list of messages generated by the GPSMAP 580/585 . Use the Rocker to scroll through the list of messages on the Log sub tab. Use the Log Filter sub tab to show only the message types that you want to view. Main menu—Message tab To view messages: 1. On the Main menu, highlight the Message tab. 2. Highlight a message. 3. Press Enter to view detailed information about the message. GPSMAP 580/585 Owner’s Manual 63 Main Menu
  • 70. To show or hide messages using the log filter: 1. On the Main menu, highlight the Message tab. 2. Highlight the Log Filter sub tab. All messages appear by default. Message Log Filter tab 3. Highlight the message type you want to hide, and press Enter. The message name appears in the Hide window. 4. Highlight the message, and press Enter to show it again. Display Tab Use the Display tab to set display features, such as pages to show in the main page sequence and how long the backlight stays on. Main menu—Display tab Main Menu—allows you to indicate whether the Main menu tabs contain text and icons (default) or text tabs only. Color mode—allows you to set the display to Day, Night, or Auto color mode. Select Auto to automatically switch from day to night at sunset and change back at sunrise. Twilight Adjustment—allows the unit to adjust the backlight for optimum viewing during twilight times. Navigation Page—allows you to indicate whether the navigation page appears in the main page sequence. Compass Page—allows you to indicate whether the Compass page appears in the main page sequence. Backlight Intensity—allows you to turn the backlight up or down. 64 GPSMAP 580/585 Owner’s Manual Main Menu
  • 71. Sound Tab Use the Sound tab to customize the sounds made by your GPSMAP 580/585. Main menu—Sound tab Beeper—allows you to set the beeper to chime during keypresses and alarms (Key and Alarm) or on Alarms Only. Attention Tone—allows you to turn on and off the attention tone that sounds before the vocal prompts. Setup Tab To customize how your GPSMAP 580/585 looks, use the System tab to adjust certain system settings. System Sub Tab Use the System sub tab to control settings for system mode, speed filter, language, and external power. To access the System sub tab: 1. Select the Setup tab on the Main menu. 2. Select the System sub tab. Main menu—System Setup tab System Mode—allows you to set the unit to operate in Normal mode or Simulator mode (for practice ONLY). Speed Filter—allows the unit to average speed readings. Choose from Off, Auto (automatically controls filtering), or On (allows you to enter a value in seconds). Text Language—allows you to set the on-screen language for the unit. WAAS—allows you to enable or disable WAAS. GPSMAP 580/585 Owner’s Manual 65 Main Menu
  • 72. Timers Sub Tab Use the Timers sub tab to set timers and view information about how long the unit has been on. To access the Timers sub tab: 1. On the Main menu, highlight the Setup tab. 2. Select the Timers sub tab. Timers sub tab User—allows you to set the timer to Count Up or Count Down. You can also Reset the timer and turn it Off. Enter a time to use when counting up or down. Marine—appears on the Compass Page in Operation mode. Since Midnight—allows you to show the time the unit was turned on since midnight. To reset, select All Unit Defaults on the System sub tab. Time Sub Tab Use the Time sub tab to set the time format and zone, and set the unit to conform to Daylight Saving Time. The current time and date appear in the Current Time and Date field. To access the Time sub tab: 1. On the Main menu, highlight the Setup tab. 2. Select the Time sub tab. Time sub tab Time Zone—allows you to choose the time zone for your city so the GPSMAP 580/585 shows the correct local time. Select Other to enter a UTC Offset. If the wrong date appears, press Menu, highlight Set Date, and press Enter. You are prompted to enter the current year. The GPSMAP 580/585 uses this information when gathering satellite data to show the correct date. 66 GPSMAP 580/585 Owner’s Manual Main Menu
  • 73. Units Sub Tab Use the Units sub tab to customize measurement units. To access the Units sub tab: 1. On the Main menu, highlight the Setup tab. 2. Select the Units sub tab. Distance and Speed—allows you to select the unit of measure to show your speed and distance traveled. Direction Display—allows you to select the unit of measure to show your direction. Temperature—allows you to select the unit of measure to show the temperature. Elevation—allows you to select the unit of measure to show your altitude. Depth—allows you to select the unit of measure to show the depth. Vertical Speed—allows you to select the unit of measure to show the vertical speed. Location Sub Tab Use the Location sub tab to change location setting information. To access the Location sub tab: 1. On the Main menu, highlight the Setup tab. 2. Select the Location sub tab. See the “Appendix” for more information about location formats and map datums. Changing the Location Format When you change the Location Format, you change the coordinate system in which a given location reading appears. The default format is latitude and longitude in degrees, minutes, and thousandths of a minute (hddd°mm.mmm). Only change the location format if you are using a map or chart that specifies a different location format or you want to use a format you are familiar with. Selecting a Different Map Datum Datums are used to describe geographic positions for surveying, mapping, and navigation and are not actual maps built in the unit. Only change the datum if you are using a map or chart that specifies a different datum. The default setting is WGS 84. The unit automatically selects the best datum depending on your chosen location format. GPSMAP 580/585 Owner’s Manual 67 Main Menu
  • 74. WARNING: Selecting the wrong map datum can result in substantial position errors. When in doubt, use the default WGS 84 datum for best overall performance. Selecting a Different Heading Reference You can select from Auto Mag Var, True, Grid, and User Mag Var. Auto Mag Var provides magnetic north heading references that are automatically determined from your current location. True provides headings based on a true north reference. Grid provides headings based on a grid north reference (and is used in conjunction with the grid position formats). User Mag Var allows you to specify the magnetic variation at your current location and provides magnetic north heading references based on the variation you enter. Enter the magnetic variation of your current location in the Magnetic Variation field if you selected User Mag Var for the heading. WARNING: If User Mag Var is selected, the unit does not automatically calculate and update the magnetic variation at your present location. You must update the magnetic variation as your location changes. Failure to update this setting can result in substantial differences between the information shown on your unit and external references, such as a magnetic compass. Com 1 and Com 2 Sub Tabs Use the Com 1and Com 2 sub tabs to change the data format and control the input/output format used when connecting your unit to external devices. To access the Com 1 and Com 2 sub tabs: 1. On the Main menu, highlight the Setup tab. 2. Select the Com 1or Com 2 sub tab. Com 1 sub tab Serial Data Format—allows you to set the data format to one of the following: • Garmin Data Transfer—provides the proprietary format used to exchange data with a computer or another Garmin GPSMAP 580/585 . • NMEA In/NMEA Out—supports the input/output of standard NMEA 0183 version 3.01 data and sonar NMEA input support for the DBT, DSE, DPT, MTW, and VHW 68 GPSMAP 580/585 Owner’s Manual Main Menu
  • 75. sentences. • High Speed NMEAIn/NMEA Out —supports the input/ output of high baud rate NMEA devices like AIS. • None—provides no interfacing capabilities. Advanced NMEA Output Setup If you are going to interface the GPSMAP 580/585 with another piece of equipment (such as a radar or autopilot), the unit must to be set to output NMEA data. The NMEA data transmission can be customized to keep the output rate at two seconds. If too many NMEA sentences are started, the unit may take longer than two seconds to update. You can also set the Output Rate to Fast which outputs a minimum number of NMEA sentences at 1-second intervals. To access the Advanced NMEA Output Setup: 1. On the Main menu, highlight the Setup tab. 2. Select the COM 1 or COM 2 sub tab. 3. Highlight the Serial Data Format field, and press Enter. 4. Select NMEAIn/NMEA Out, and press Enter. 5. Press Menu. 6. Select Advanced NMEA Setup, and press Enter. Setting Up and Using Sonar This section covers the sonar options that become available when an optional transducer is connected to the GPSMAP 585. When you turn on your GPSMAP 585, the sounder module automatically turns on. NOTE: You MUST have a transducer installed and connected to your GPSMAP585to use the sonar features. The Sonar page is added to the end of the page sequence when you are in Operation mode. Press Page until the Sonar page appears. Showing Sonar on the Map Page You can change the layout of the Map page to show a split screen to show the sonar on the Map page. You must be in Operation mode to use sonar. To show the Sonar page on the Map page: 1. Press and hold PAGE. 2. Highlight Marine, and press Enter. 3. Press Page or Quit. 4. Press Menu. 5. Highlight Set Up Page Layout, and press Enter. 6. Highlight Map With Sonar, and press Enter. GPSMAP 580/585 Owner’s Manual 69 Setting Up and Using Sonar
  • 76. Map page with Split Screen To resize the Map page sonar split screen: 1. After showing the Sonar and Map pages together in the split screen as described in the previous steps, press Menu. 2. Highlight Size Split, and press Enter. 3. Use the Rocker to move the sizing-arrow right or left. 4. Press Enter. 5. Press Quit to stop resizing the screen.You can also press Menu, highlight Stop Resizing, and press Enter to stop resizing the screen and retain the previous split setting. Using the Sonar Page GPSMAP 585 has an built-in sonar module which allows you to simply plug in the optional transducer to make GPSMAP 585 a powerful fishfinder/flasher. “Sonar Turned Off Please Check the Transducer Connection” message appears on the Sonar page if the transducer is not properly attached.. The middle of the page contains a right-to-left scrolling sonar image of the water beneath your boat. Items appear as they pass under the transducer. The adjustable scale displays the depth of the water. The information in the upper-left corner allows you to adjust the scale and displays the water temperature. Sonar page 70 GPSMAP 580/585 Owner’s Manual Setting Up and Using Sonar
  • 77. The sonar returns show as red (strongest), then orange (strong), yellow (medium), green (weaker), and blue (weakest). The Fish Symbols option allows you to view the actual sonar data, a fish symbol, or a combination of both. When the unit is set to Dual, the appearance of the fish symbols changes. Returns from the center of the beam (200 kHz) display solid (or narrow arches), and returns from the edges of the beam (50 kHz) display hollow (or wide arches). The sonar display can also be set to show a split screen view of a zoomed portion of the sonar, bottom lock (display scaled from the bottom up), or a combination of these options. For example, you can choose to show dual frequency at a 2X zoom (Dual 2X) on one half and normal range dual frequency (Dual) on the other half. The current display mode appears at the bottom of each sonar display. Adjusting the Sonar Page Use the Adjustment menu to access the settings and features most commonly used on the Sonar page. Ten main adjustment options are available: Range, Zoom, View, Gain, Target Level, Whiteline, Frequency, Depth Line, Noise Reject, and Scroll. The selected option appears in the upper-left corner. To select an adjustment option: Use one of the following methods to select an adjustment option: • Press the Rocker right or left to scroll through the adjustment options. When the adjustment option you want appears, press Enter. • Press Menu, highlight Adjustments, and press Enter. Use the Rocker to highlight the adjustment, and press Enter. After you select an adjustment option, press the Rocker up or down to change the setting. You can also press Menu and highlight a shortcut setting to quickly change to commonly used settings and values. Press Enter to accept the new setting (or press Quit to cancel) and return to the Sonar Page. GPSMAP 580/585 Owner’s Manual 71 Setting Up and Using Sonar