SlideShare a Scribd company logo
1 of 29
Download to read offline
FrameWRXTM
HD
(High Density Moveable)
Page 1OP-0711 Rev 09_11
Indicates a hazard that if not avoided,
could result in death or serious injury.
NOTICE
Indicates a property damage message.
Installation Instructions
by Spacesaver®
920-563-6362
E-mail: ssc@spacesaver.com
Internet: www.spacesaver.com
SECTION I
INTRODUCTION
SECTION II
FLOOR INSTALLATION
SECTION III
FIXED WALL FRAMES AND
OVERHEAD GUIDES
SECTION IV
MOVABLE SHELVING UNITS
SECTION V
BIN RAILS AND BIN SHELVES
SECTION VI
WORK SURFACES
www.southwestsolutions.com
TABLE OF CONTENTS
PAGE NO. SECTION I - INTRODUCTION
3 Tool Requirements
SECTION II - FLOOR INSTALLATION
5 Floor Preparation
7 Floor Leveling
SECTION III - FIXED WALL FRAMES AND OVERHEAD GUIDES
9 Fixed Wall Frame Weldments
15 Overhead Guide Rails
SECTION IV - MOVEABLE SHELVING UNITS
19 Moveable Frame Weldments
20 Dust Covers and Pistons
22 Handle Installation
SECTION V - BIN RAILS AND BIN SHELVES
24 Bin Rails
26 Bin Shelves
SECTION VI - WORK SURFACES
27 Work Surface Overview
28 Work Surface Installation
OP-0711 Rev 09_11
Page 2
www.southwestsolutions.com
Page 3
Tools Required:
Safety Glasses
Hearing Protection
Hammer Drill
- Concrete bit
Cordless Screwdriver
- Phillips Head Bit
- 9/64" Drill Bit
- 5/16 Socket Bit (for Tek screws)
Dead Blow Hammer
Tape Measure
6' Ladder
4' Level
Phillips Head Screwdriver
Wrench Set
- 9/16"
Socket and Ratchet Set
- 9/16"
Allen Wrench
- 5/32"
Shop Vacuum
OP-0711 Rev 09_11
SECTION I
INTRODUCTION
www.southwestsolutions.com
End Plate
Dust Cover
Anchor Bracket
Mid Frame
End/Intermediate Frame
Overhead Rail
Piston Assembly
Movable Fame
Handle
Floor and Rail Assembly
Component Identification
Page 4OP-0711 Rev 09_11
www.southwestsolutions.com
1.2
Locate the hardware needed to connect
the floor panels.
There will be 2 steel biscuits, 2 cam lock
bolts, 4 cam lock nuts and 1 rail pin per
floor joint.
Floor Preparation
STEP 1
1.1
Locate the area that the FrameWRXTM
HD
is to be installed. Find the high point in the
floor using a level.
1.3
Insert cam nuts in appropriate holes on the
top of the floor near where the floor panels
will butt together.
OP-0711 Rev 09_11 Page 5
SECTION II
FLOOR INSTALLATION
950095.001
Note: Steps 1.2-1.7 Only apply if
joining floor sections
www.southwestsolutions.com
Page 6
1.4
Make sure the arrow on the cam nut faces
edges to be joined.
1.5
Insert cam bolts, steel biscuits and rail pins
in one piece of floor.
1.6
Insert cam locks into the adjoining floor
panel, again ensuring the arrow on the
cam nut faces edges to be joined.
OP-0711 Rev 09_11
950096.001
910063.003
www.southwestsolutions.com
Page 7
1.7
Butt the 2 floor pieces together and tighten
the cam locks 90 degrees clockwise.
Floor Leveling
STEP 2
2.1
Find the appropriate leveling screws need-
ed. You will receive enough ¾" levelers to
level the entire floor, plus 10% extra 1" lev-
elers to use if your existing floor is
extremely out of level.
Levelers require a 5/32” internal hex (allen
wrench) bit.
OP-0711 Rev 09_11
2.2
Use a cordless screwdriver to run levelers
into the floor from the top. Raise panels
1/16" off the highest point of the floor.
Wear hearing and eye protection when
using power tools.
990036.001
990036.007
www.southwestsolutions.com
Page 8
2.3
After raising to the high point, move to the
corners and insert levelers. Use a 4' level
to level these.
2.4
After the corners are level, insert and level
the remaining leveler locations.
NOTE: Use an allen wrench rather than
a cordless screwdriver for fine-tuning to
ensure floor is completely level. It may
be necessary to apply some weight to
the floor to keep it from moving.
OP-0711 Rev 09_11
www.southwestsolutions.com
Page 9
Fixed Wall Frames
STEP 3
3.1
Locate the end/intermediate frames
and the fixed Mid frame weldments.
(NOTE: The end/intermediate
frames are the same part. They
serve as both the end frames,
and the link between frame weld-
ments.)
SECTION III
FIXED MID FRAMES AND OVERHEAD GUIDES
3.2
Take one end frame and butt it up against
the frame weldment.
OP-0711 Rev 09_11
End/Intermediate FrameFrame Weldment
www.southwestsolutions.com
3.3
Locate the mounting hardware for the frames.
These are 3/8"x 1-3/4" bolts and nuts.
95021.03
93015.08
3.4
Insert the 3/8"x1-3/4" bolt through the out-
side of the end frame, through the frame
weldment at the middle and lower posi-
tions.
The bolt head must be on the outside of
the end frame. Attach nut. Do this in all
three holes throughout the length of the
end frame.
NOTE: At this point only hand tighten
these bolts. This will make the process
of attaching the back frames to the floor
easier.
OP-0711 Rev 09_11 Page 10www.southwestsolutions.com
Page 11
3.7
Locate the intermediate frames. Sandwich
the intermediate frame between the weldment
you just installed and the next weldment.
While holding in place, insert the 3/8"x1-3/4"
bolts through both frame weldments and the
intermediate frames. Place nuts on the ends
of these 3 bolts, and hand tighten them.
3.8
Repeat previous steps the entire length of the
floor, finishing with an end frame at the end.
OP-0711 Rev 09_11
3.6
Insert bolt thru End Plate, End Frame and
Mid Frame at top location. Hand tighten nut.
3.5
Locate the End Plates. One will be
required for each end.
www.southwestsolutions.com
Page 12
3.9
Attach the anchor clips with 3/8"x1-3/4"
bolts and nuts. The end frames use 1
anchor clip, while the intermediate frames
use 2.
NOTE: The slot side of the anchor clip
must be on the floor.
3.10
Make sure that the bolt head is on the out-
side of the end frame for overall appear-
ance. Hand tighten only.
3.11
Anchor the intermediate frames through the
floor assembly into the subfloor with a mini-
mum 3/16” anchor. Follow the manufacturers
instructions. We do not provide anchors as
requirements or codes may vary.
Wear hearing and eye protection when
using power tools.
OP-0711 Rev 09_11
95021.03
93015.08
Bracket # 401498.001
www.southwestsolutions.com
Page 13
3.12
After all the anchor screws are in place,
tighten all the bolts holding the anchor
clips to the frames. When these are tight-
ened, you can finish tightening all the bolts
on the frames.
3.13
After all bolts are tightened, insert the
black plastic end caps. There are 2 caps
per end and intermediate frame, one locat-
ed at the top and one at the bottom.
OP-0711 Rev 09_11
3.14
When finished, the end caps should look
like this.
Cap part # 780043.001
www.southwestsolutions.com
Page 14OP-0711 Rev 09_11
3.15
Locate the wall anchor brackets. These can
be placed anywhere along the top of each
weldment.
3.16
Drill appropriate holes and bolt in the wall
brackets.
NOTE: Fastening hardware is not pro-
vided as stud materials vary. Shims may
also be required to accommodate the
inconsistencies between the back frame
and the wall. Washers work well, but are
not provided.
Every frame must be anchored into a solid
mounting location, such as a wall stud.
3.17
Check all frames for plumb.
Tighten all hardware atr this time.
NOTICE
www.southwestsolutions.com
Page 15
Overhead Guide Rails
STEP 4
4.1
Locate the aluminum overhead guide rails,
square-nuts, and connecting pins.
OP-0711 Rev 09_11
4.2
Insert square-nuts in the overhead guide
rail. Each guide rail should have one
square-nut for each end frame and two
splice nuts for each intermediate frame.
Start with one nut 3" from the left and
place 2 every 30" of rail section, ending
with a square nut 3" from the right.
930091.001
4.3
Insert the (2) 3/16” dia. x 2.00” long connect-
ing pins on one end of the rail where it will
be used to connect the other rail.
910070.001
4.4
Locate the hardware for bolting the guide
rails to the frames. The 2 end frames will
get (1) bolt, keps nut, and angle bracket.
The intermediate frames will get (2) angle
brackets, (1) bolt, and keps nut.
Bracket # 401616.001
Bolt # 95021.02
Nut # 93015.08
www.southwestsolutions.com
Page 16OP-0711 Rev 09_11
4.5
Place bolt thru End Plate, End Frame and
Angle Bracket. finger tighten nut at this
time.
4.6
Install two Angle Brackets onto each
Intermediate Frames. Do not tighten hard-
ware at this time.
www.southwestsolutions.com
Page 17
4.7
Lift the first overhead rail section into
place.
4.9
Each additional Top Guide Raill will be rein-
forecd with pins at each splice. Install these
into one rail, then slide into the adjacent rail.
4.10
When you are satisfied with the position of
the rail, tighten all bolts on the angles and
overhead guide rail.
OP-0711 Rev 09_11
4.8
Insert a bolt thru the bottom of the angle
into the square-nut in the overhead guide.
Do not tighten hardware untill instructed to
do so.
Bolt # 95021.08
www.southwestsolutions.com
4.12
Attach the magnets to the end caps with the supplied
nut and washers. The magnet needs to be facing
towards the inside of the system. Assemble in this
order:
1. Magnet
2. Rubber Washer
3. End Plate
4. Rubber Washer
5. Flat Washer
6. Machine Screw Nut
7. Spring Lock Washer
8. Machine Screw Nut
NOTE: The end plates for the right side will have
the magnets placed in the back vertical slot. The
magnets on the left side will be placed in the
front vertical slot. These will match up with the
piston assemblies on the overhead dust covers.
4.11
Locate the magnet assemblies.
NOTE: Magnet assemblies come as part of the air
shock/piston assembly kit, which includes both the
magnet and piston assembly. Part # 550501.001
4.13
Using two #12 X 1” tech screws, screw the
End Plate to the Top Rail.
Repeat on each end.
96060.01
Page 18
Page 18Page 18
OP-0711 Rev 09_11www.southwestsolutions.com
Page 19
Moveable Frame Weldments
STEP 5
5.1
Locate the moveable frame weldments.
These will have the wheel sections
attached. All moveable frames will have
rubber bumpers on both sides of the top
and bottom of the frames.
SECTION IV
MOVABLE WELDMENTS
OP-0711 Rev 09_11
5.2
The easiest way to install the moveable
frame is to tilt the frame, inserting the
guide wheels into the overhead guide rail.
Lift the frame up and engage the bottom
wheels onto the floor rail. Slide back and
forth a couple of times to ensure that the
wheel section is sitting properly on the rail.
Repeat this step with the other moveable
frame sections.
www.southwestsolutions.com
Page 20
6.2
Locate the dust cover hardware. Each dust
cover requires 4 1/4-20 UNC bolts and 4 1/4-20
UNC keps nuts.
OP-0711 Rev 09_11
93015.02
96057.04
Dust Covers and Pistons
STEP 6
6.1
Locate the dust covers. The dust covers without
piston assemblies will be used as canopy tops on
the fixed frames. The dust covers with the pre-
installed piston assemblies will be used for the
moveable frames.
On the moveable frames, the far left dust cover
will have 2 piston assemblies, while the rest will
only have 1.
NOTICE
6.3
Place the 1/4-20x1” bolt through the hole on
the rear of the dust cover. Lift the dust cover
and place on the frame weldment, threading
the keps nut on the inside of the weldment
post. Use the third hole from the top on the
frame weldment for the top bolt of the cover.
Only hand-tighten. Do this with the other three
bolts & nuts. When all 4 are in, adjust so the
dust cover is level. Repeat this process on all
weldments.
www.southwestsolutions.com
OP-0711 Rev 09_11
6.5
When all the dust covers are installed, you
can adjust the tension on the piston
assemblies. To adjust, loosen the knurled
jam nut. Turn the screw into the piston for
a firmer piston. For a softer piston, turn
the screw outward from the piston. When
the desired setting is reached, tighten the
lock nut on each piston assembly.
Roll frames back and forth to test piston
settings and readjust as necessary.
Once system is fully loaded roll frames back
and forth to check piston settings. Re-adjust
pistons as necessary to provide cushioned
stopping.
6.4
Repeat this step on the remainder of the
frames.
The location of the piston on the dust covers
will be staggered. Make sure each piston hits
the adjacent stops.
Page 21
NOTICE
NOTICE
www.southwestsolutions.com
Page 22
Handle Installation
STEP 7
7.1
Locate the handle and 4 #10 tek screws.
7.2
Hang the handle in the center of the mid-
dle spreader on each moveable frame.
7.3
Drive (2) self tapping tek screws thru the
pre-drilled holes on the handle into the
back of the bar spreader.
OP-0711 Rev 09_11
www.southwestsolutions.com
Page 23
7.4
Ensure that the handle is secure before
using.
OP-0711 Rev 09_11
www.southwestsolutions.com
Page 24
EZ Rail Installation
STEP 8
8.1
Locate EZ Rails.
SECTION V
EZ RAILS AND BIN SHELVES/TRAYS
Note: EZ Rails have 3 mounting tabs.
This allows the rail to be adjusted from
a normal vertical position to one that
angles down approximately 18 degrees.
8.2
Vertical Position
Use the top 2 tabs on the EZ Rail and
insert into the slots on the welded frame.
Make sure that both sides are evenly
spaced in height.
OP-0711 Rev 09_11
www.southwestsolutions.com
Page 25
8.3
Angled Position
To slant the EZ Rail forward, use the bot-
tom 2 tabs. Insert them into the slots on
the welded frame.
8.4
EZ Rails can be used to accommodate slat
wall pegs. To install, hook the top of the
peg bracket up-and-in the top guide of the
EZ Rail.
8.5
Plastic storage bins hang on the top lip of
the EZ Rail.
OP-0711 Rev 09_11
www.southwestsolutions.com
Page 26
Bin Shelf/Tray Installation
STEP 9
9.1
Locate bin shelves/trays.
Note: Bin shelves/trays have 3 mount-
ing tabs. This allows the bin rail to be
adjusted from a normal vertical position
to one that angles down approximately
18 degrees.
9.2
Vertical Position
Use the top 2 tabs on the bin shelf/trays
and insert into the slots on the welded
frame. Make sure that both sides are even-
ly spaced in height.
9.3
Angled Position
To slant the bin shelf/tray forward, use the
bottom 2 tabs. Insert them into the slots on
the welded frame. Make sure that both
sides are evenly spaced in height.
OP-0711 Rev 09_11
www.southwestsolutions.com
Page 27
Work surfaces
These come in 2 standard materials-
laminate and non-porous
There are four different configurations
(double, rectangle, right, left chamfer)
Work Surfaces that span across 2
frames require that 2 bracket kits (4
brackets) be used
SECTION VI
WORK SURFACES
Double Chamfer
Rectangle
OP-0711 Rev 09_11
www.southwestsolutions.com
Page 28
Right Chamfer
Left Chamfer
Step 9.1
Insert work surface brackets into the slots
in the welded frame. make sure that you
place the brackets the same distance from
the floor on all frames so the work surface
height is consistent.
Left and right brackets are different. Point
the mounting tabs inward.
OP-0711 Rev 09_11
L
R
www.southwestsolutions.com
Page 29
Step 9.2
Set the work surface on top of the brackets.
Drive 2 self tapping screws thru the pre-
drilled holes on the brackets, into the under-
side of the work surface panel.
Step 9.3
Repeat process on other work surfaces.
Make sure that work surfaces line up with
each other.
OP-0711 Rev 09_11
www.southwestsolutions.com

More Related Content

What's hot

1/8 scale Piper PA-12 “Super Cruiser” ARF
1/8 scale Piper PA-12 “Super Cruiser” ARF1/8 scale Piper PA-12 “Super Cruiser” ARF
1/8 scale Piper PA-12 “Super Cruiser” ARFAizuddin Malek
 
iMovR ZipView Unison Dual Monitor Arm with Handle - Instruction Manual
iMovR ZipView Unison Dual Monitor Arm with Handle - Instruction ManualiMovR ZipView Unison Dual Monitor Arm with Handle - Instruction Manual
iMovR ZipView Unison Dual Monitor Arm with Handle - Instruction ManualiMovR
 
Posturematic classic-manual
Posturematic classic-manualPosturematic classic-manual
Posturematic classic-manualSealy
 
iMovR Xtend Monitor Arm Manual
iMovR Xtend Monitor Arm ManualiMovR Xtend Monitor Arm Manual
iMovR Xtend Monitor Arm ManualiMovR
 
ZipView Single Monitor Arm - Assembly
ZipView Single Monitor Arm - AssemblyZipView Single Monitor Arm - Assembly
ZipView Single Monitor Arm - AssemblyiMovR
 
Tempo tread top-office_chair_manual
Tempo tread top-office_chair_manualTempo tread top-office_chair_manual
Tempo tread top-office_chair_manualiMovR
 
Cadence plus installation manual
Cadence plus installation manualCadence plus installation manual
Cadence plus installation manualiMovR
 
Xtend Dual Screen Crossbar Monitor Arm - Assembly
Xtend Dual Screen Crossbar Monitor Arm - AssemblyXtend Dual Screen Crossbar Monitor Arm - Assembly
Xtend Dual Screen Crossbar Monitor Arm - AssemblyiMovR
 
Tempo Dual Screen Two-Arm Manual
Tempo Dual Screen Two-Arm ManualTempo Dual Screen Two-Arm Manual
Tempo Dual Screen Two-Arm ManualiMovR
 
Posturematic deluxe-manual
Posturematic deluxe-manualPosturematic deluxe-manual
Posturematic deluxe-manualSealy
 
Omega Denali Adjustable-Height Desk Manual
Omega Denali Adjustable-Height Desk ManualOmega Denali Adjustable-Height Desk Manual
Omega Denali Adjustable-Height Desk ManualiMovR
 
iMovr Omega Olympus Manual 12 24-15
iMovr Omega Olympus Manual 12 24-15iMovr Omega Olympus Manual 12 24-15
iMovr Omega Olympus Manual 12 24-15iMovR
 
Installation instruction Mineral wool sandwich panels
Installation instruction Mineral wool sandwich panelsInstallation instruction Mineral wool sandwich panels
Installation instruction Mineral wool sandwich panelsMot panels
 
iMovR Cadence Standing Desk Converter Installation Manual
iMovR Cadence Standing Desk Converter Installation ManualiMovR Cadence Standing Desk Converter Installation Manual
iMovR Cadence Standing Desk Converter Installation ManualiMovR
 
ZipView Dual Monitor Arm - Assembly
ZipView Dual Monitor Arm - AssemblyZipView Dual Monitor Arm - Assembly
ZipView Dual Monitor Arm - AssemblyiMovR
 
ZipView Unison Dual Monitor Arm with Handle User Manual
ZipView Unison Dual Monitor Arm with Handle User ManualZipView Unison Dual Monitor Arm with Handle User Manual
ZipView Unison Dual Monitor Arm with Handle User ManualiMovR
 
Victory rig
Victory rigVictory rig
Victory rigJLRev
 
Spacer kit instructions
Spacer kit instructions Spacer kit instructions
Spacer kit instructions iMovR
 

What's hot (19)

1/8 scale Piper PA-12 “Super Cruiser” ARF
1/8 scale Piper PA-12 “Super Cruiser” ARF1/8 scale Piper PA-12 “Super Cruiser” ARF
1/8 scale Piper PA-12 “Super Cruiser” ARF
 
iMovR ZipView Unison Dual Monitor Arm with Handle - Instruction Manual
iMovR ZipView Unison Dual Monitor Arm with Handle - Instruction ManualiMovR ZipView Unison Dual Monitor Arm with Handle - Instruction Manual
iMovR ZipView Unison Dual Monitor Arm with Handle - Instruction Manual
 
Posturematic classic-manual
Posturematic classic-manualPosturematic classic-manual
Posturematic classic-manual
 
iMovR Xtend Monitor Arm Manual
iMovR Xtend Monitor Arm ManualiMovR Xtend Monitor Arm Manual
iMovR Xtend Monitor Arm Manual
 
ZipView Single Monitor Arm - Assembly
ZipView Single Monitor Arm - AssemblyZipView Single Monitor Arm - Assembly
ZipView Single Monitor Arm - Assembly
 
Tempo tread top-office_chair_manual
Tempo tread top-office_chair_manualTempo tread top-office_chair_manual
Tempo tread top-office_chair_manual
 
Cadence plus installation manual
Cadence plus installation manualCadence plus installation manual
Cadence plus installation manual
 
Xtend Dual Screen Crossbar Monitor Arm - Assembly
Xtend Dual Screen Crossbar Monitor Arm - AssemblyXtend Dual Screen Crossbar Monitor Arm - Assembly
Xtend Dual Screen Crossbar Monitor Arm - Assembly
 
Tempo Dual Screen Two-Arm Manual
Tempo Dual Screen Two-Arm ManualTempo Dual Screen Two-Arm Manual
Tempo Dual Screen Two-Arm Manual
 
Posturematic deluxe-manual
Posturematic deluxe-manualPosturematic deluxe-manual
Posturematic deluxe-manual
 
Beammmk
BeammmkBeammmk
Beammmk
 
Omega Denali Adjustable-Height Desk Manual
Omega Denali Adjustable-Height Desk ManualOmega Denali Adjustable-Height Desk Manual
Omega Denali Adjustable-Height Desk Manual
 
iMovr Omega Olympus Manual 12 24-15
iMovr Omega Olympus Manual 12 24-15iMovr Omega Olympus Manual 12 24-15
iMovr Omega Olympus Manual 12 24-15
 
Installation instruction Mineral wool sandwich panels
Installation instruction Mineral wool sandwich panelsInstallation instruction Mineral wool sandwich panels
Installation instruction Mineral wool sandwich panels
 
iMovR Cadence Standing Desk Converter Installation Manual
iMovR Cadence Standing Desk Converter Installation ManualiMovR Cadence Standing Desk Converter Installation Manual
iMovR Cadence Standing Desk Converter Installation Manual
 
ZipView Dual Monitor Arm - Assembly
ZipView Dual Monitor Arm - AssemblyZipView Dual Monitor Arm - Assembly
ZipView Dual Monitor Arm - Assembly
 
ZipView Unison Dual Monitor Arm with Handle User Manual
ZipView Unison Dual Monitor Arm with Handle User ManualZipView Unison Dual Monitor Arm with Handle User Manual
ZipView Unison Dual Monitor Arm with Handle User Manual
 
Victory rig
Victory rigVictory rig
Victory rig
 
Spacer kit instructions
Spacer kit instructions Spacer kit instructions
Spacer kit instructions
 

Similar to FrameWRX Installation Instructions

Fabral SSR Metal Roofing Installation Manual
Fabral SSR Metal Roofing Installation ManualFabral SSR Metal Roofing Installation Manual
Fabral SSR Metal Roofing Installation ManualWestern-Building-Center
 
Catalog busbar ls 09. busduct installation&maintenance rev2
Catalog busbar ls 09. busduct installation&maintenance rev2Catalog busbar ls 09. busduct installation&maintenance rev2
Catalog busbar ls 09. busduct installation&maintenance rev2Dien Ha The
 
Ug lunette projection screen
Ug lunette projection screenUg lunette projection screen
Ug lunette projection screenDukaneAVMarketing
 
Quad-Lock Insulated Concrete Forms Installation Guide
Quad-Lock Insulated Concrete Forms Installation GuideQuad-Lock Insulated Concrete Forms Installation Guide
Quad-Lock Insulated Concrete Forms Installation GuideWestern-Building-Center
 
SunMaxx Installation Manual - TitanPower ALDH29 Flat Plate Collector - Flush ...
SunMaxx Installation Manual - TitanPower ALDH29 Flat Plate Collector - Flush ...SunMaxx Installation Manual - TitanPower ALDH29 Flat Plate Collector - Flush ...
SunMaxx Installation Manual - TitanPower ALDH29 Flat Plate Collector - Flush ...SunMaxx Solar
 
CoFold Mortice Sliding Folding Door Gear Installation Instructions
CoFold Mortice Sliding Folding Door Gear Installation InstructionsCoFold Mortice Sliding Folding Door Gear Installation Instructions
CoFold Mortice Sliding Folding Door Gear Installation InstructionsCoastal Joinery Hardware
 
Ridge Vent Installation Instructions for Hip Roofs
Ridge Vent Installation Instructions for Hip RoofsRidge Vent Installation Instructions for Hip Roofs
Ridge Vent Installation Instructions for Hip RoofsQuarrix
 
Cantilever Heavy Duty Ladder plus Work Platform
Cantilever Heavy Duty Ladder plus Work PlatformCantilever Heavy Duty Ladder plus Work Platform
Cantilever Heavy Duty Ladder plus Work PlatformJanine O
 
FloodBreak Installation Guide
FloodBreak Installation Guide   FloodBreak Installation Guide
FloodBreak Installation Guide FloodBreak
 
Penetrating snow guard installation
Penetrating snow guard installationPenetrating snow guard installation
Penetrating snow guard installationRoofers World
 
Sluice Gate Installation Guide - Watch Technologies
Sluice Gate Installation Guide - Watch TechnologiesSluice Gate Installation Guide - Watch Technologies
Sluice Gate Installation Guide - Watch TechnologiesWatch Technologies
 
Non penetrating snow guard installation
Non penetrating snow guard installationNon penetrating snow guard installation
Non penetrating snow guard installationRoofers World
 
Instruction- 3 Core Polymeric (XLPE EPR) 6.6kV-7.2kV Heat Shrink Cable Termin...
Instruction- 3 Core Polymeric (XLPE EPR) 6.6kV-7.2kV Heat Shrink Cable Termin...Instruction- 3 Core Polymeric (XLPE EPR) 6.6kV-7.2kV Heat Shrink Cable Termin...
Instruction- 3 Core Polymeric (XLPE EPR) 6.6kV-7.2kV Heat Shrink Cable Termin...Thorne & Derrick International
 

Similar to FrameWRX Installation Instructions (20)

Rolling Art Rack Panels Installation Instructions
Rolling Art Rack Panels Installation InstructionsRolling Art Rack Panels Installation Instructions
Rolling Art Rack Panels Installation Instructions
 
How to install False Ceiling?
How to install False Ceiling?How to install False Ceiling?
How to install False Ceiling?
 
Fabral SSR Metal Roofing Installation Manual
Fabral SSR Metal Roofing Installation ManualFabral SSR Metal Roofing Installation Manual
Fabral SSR Metal Roofing Installation Manual
 
Catalog busbar ls 09. busduct installation&maintenance rev2
Catalog busbar ls 09. busduct installation&maintenance rev2Catalog busbar ls 09. busduct installation&maintenance rev2
Catalog busbar ls 09. busduct installation&maintenance rev2
 
Ug lunette
Ug lunette Ug lunette
Ug lunette
 
Ug lunette projection screen
Ug lunette projection screenUg lunette projection screen
Ug lunette projection screen
 
Ug lunette
Ug lunette Ug lunette
Ug lunette
 
Ug lunette rev101012
Ug lunette rev101012Ug lunette rev101012
Ug lunette rev101012
 
Quad-Lock Insulated Concrete Forms Installation Guide
Quad-Lock Insulated Concrete Forms Installation GuideQuad-Lock Insulated Concrete Forms Installation Guide
Quad-Lock Insulated Concrete Forms Installation Guide
 
SunMaxx Installation Manual - TitanPower ALDH29 Flat Plate Collector - Flush ...
SunMaxx Installation Manual - TitanPower ALDH29 Flat Plate Collector - Flush ...SunMaxx Installation Manual - TitanPower ALDH29 Flat Plate Collector - Flush ...
SunMaxx Installation Manual - TitanPower ALDH29 Flat Plate Collector - Flush ...
 
CoFold Mortice Sliding Folding Door Gear Installation Instructions
CoFold Mortice Sliding Folding Door Gear Installation InstructionsCoFold Mortice Sliding Folding Door Gear Installation Instructions
CoFold Mortice Sliding Folding Door Gear Installation Instructions
 
Ridge Vent Installation Instructions for Hip Roofs
Ridge Vent Installation Instructions for Hip RoofsRidge Vent Installation Instructions for Hip Roofs
Ridge Vent Installation Instructions for Hip Roofs
 
Navassa 5.pdf
Navassa 5.pdfNavassa 5.pdf
Navassa 5.pdf
 
Cantilever Heavy Duty Ladder plus Work Platform
Cantilever Heavy Duty Ladder plus Work PlatformCantilever Heavy Duty Ladder plus Work Platform
Cantilever Heavy Duty Ladder plus Work Platform
 
FloodBreak Installation Guide
FloodBreak Installation Guide   FloodBreak Installation Guide
FloodBreak Installation Guide
 
F5 assembly instructions
F5 assembly instructionsF5 assembly instructions
F5 assembly instructions
 
Penetrating snow guard installation
Penetrating snow guard installationPenetrating snow guard installation
Penetrating snow guard installation
 
Sluice Gate Installation Guide - Watch Technologies
Sluice Gate Installation Guide - Watch TechnologiesSluice Gate Installation Guide - Watch Technologies
Sluice Gate Installation Guide - Watch Technologies
 
Non penetrating snow guard installation
Non penetrating snow guard installationNon penetrating snow guard installation
Non penetrating snow guard installation
 
Instruction- 3 Core Polymeric (XLPE EPR) 6.6kV-7.2kV Heat Shrink Cable Termin...
Instruction- 3 Core Polymeric (XLPE EPR) 6.6kV-7.2kV Heat Shrink Cable Termin...Instruction- 3 Core Polymeric (XLPE EPR) 6.6kV-7.2kV Heat Shrink Cable Termin...
Instruction- 3 Core Polymeric (XLPE EPR) 6.6kV-7.2kV Heat Shrink Cable Termin...
 

More from Installation Manuals - Southwest Solutions Group (7)

Spacesaver Products Color Chart
Spacesaver Products Color ChartSpacesaver Products Color Chart
Spacesaver Products Color Chart
 
Worktable Benches with Tubular Base Legs Assembly Instructions
Worktable Benches with Tubular Base Legs Assembly InstructionsWorktable Benches with Tubular Base Legs Assembly Instructions
Worktable Benches with Tubular Base Legs Assembly Instructions
 
Mobile Wire Shelving Installation Instructions
Mobile Wire Shelving Installation InstructionsMobile Wire Shelving Installation Instructions
Mobile Wire Shelving Installation Instructions
 
UWR Weapon Racks Installation Instructions
UWR Weapon Racks Installation InstructionsUWR Weapon Racks Installation Instructions
UWR Weapon Racks Installation Instructions
 
Locker Installation Manual
Locker Installation ManualLocker Installation Manual
Locker Installation Manual
 
Hinged Door Installation Guide
Hinged Door Installation GuideHinged Door Installation Guide
Hinged Door Installation Guide
 
Fire Hose Rack Installation Manual
Fire Hose Rack Installation Manual Fire Hose Rack Installation Manual
Fire Hose Rack Installation Manual
 

Recently uploaded

Monte Carlo simulation : Simulation using MCSM
Monte Carlo simulation : Simulation using MCSMMonte Carlo simulation : Simulation using MCSM
Monte Carlo simulation : Simulation using MCSMRavindra Nath Shukla
 
The Path to Product Excellence: Avoiding Common Pitfalls and Enhancing Commun...
The Path to Product Excellence: Avoiding Common Pitfalls and Enhancing Commun...The Path to Product Excellence: Avoiding Common Pitfalls and Enhancing Commun...
The Path to Product Excellence: Avoiding Common Pitfalls and Enhancing Commun...Aggregage
 
Call Girls Electronic City Just Call 👗 7737669865 👗 Top Class Call Girl Servi...
Call Girls Electronic City Just Call 👗 7737669865 👗 Top Class Call Girl Servi...Call Girls Electronic City Just Call 👗 7737669865 👗 Top Class Call Girl Servi...
Call Girls Electronic City Just Call 👗 7737669865 👗 Top Class Call Girl Servi...amitlee9823
 
Call Girls Hebbal Just Call 👗 7737669865 👗 Top Class Call Girl Service Bangalore
Call Girls Hebbal Just Call 👗 7737669865 👗 Top Class Call Girl Service BangaloreCall Girls Hebbal Just Call 👗 7737669865 👗 Top Class Call Girl Service Bangalore
Call Girls Hebbal Just Call 👗 7737669865 👗 Top Class Call Girl Service Bangaloreamitlee9823
 
B.COM Unit – 4 ( CORPORATE SOCIAL RESPONSIBILITY ( CSR ).pptx
B.COM Unit – 4 ( CORPORATE SOCIAL RESPONSIBILITY ( CSR ).pptxB.COM Unit – 4 ( CORPORATE SOCIAL RESPONSIBILITY ( CSR ).pptx
B.COM Unit – 4 ( CORPORATE SOCIAL RESPONSIBILITY ( CSR ).pptxpriyanshujha201
 
0183760ssssssssssssssssssssssssssss00101011 (27).pdf
0183760ssssssssssssssssssssssssssss00101011 (27).pdf0183760ssssssssssssssssssssssssssss00101011 (27).pdf
0183760ssssssssssssssssssssssssssss00101011 (27).pdfRenandantas16
 
Call Girls In DLf Gurgaon ➥99902@11544 ( Best price)100% Genuine Escort In 24...
Call Girls In DLf Gurgaon ➥99902@11544 ( Best price)100% Genuine Escort In 24...Call Girls In DLf Gurgaon ➥99902@11544 ( Best price)100% Genuine Escort In 24...
Call Girls In DLf Gurgaon ➥99902@11544 ( Best price)100% Genuine Escort In 24...lizamodels9
 
Organizational Transformation Lead with Culture
Organizational Transformation Lead with CultureOrganizational Transformation Lead with Culture
Organizational Transformation Lead with CultureSeta Wicaksana
 
Value Proposition canvas- Customer needs and pains
Value Proposition canvas- Customer needs and painsValue Proposition canvas- Customer needs and pains
Value Proposition canvas- Customer needs and painsP&CO
 
Best VIP Call Girls Noida Sector 40 Call Me: 8448380779
Best VIP Call Girls Noida Sector 40 Call Me: 8448380779Best VIP Call Girls Noida Sector 40 Call Me: 8448380779
Best VIP Call Girls Noida Sector 40 Call Me: 8448380779Delhi Call girls
 
KYC-Verified Accounts: Helping Companies Handle Challenging Regulatory Enviro...
KYC-Verified Accounts: Helping Companies Handle Challenging Regulatory Enviro...KYC-Verified Accounts: Helping Companies Handle Challenging Regulatory Enviro...
KYC-Verified Accounts: Helping Companies Handle Challenging Regulatory Enviro...Any kyc Account
 
Yaroslav Rozhankivskyy: Три складові і три передумови максимальної продуктивн...
Yaroslav Rozhankivskyy: Три складові і три передумови максимальної продуктивн...Yaroslav Rozhankivskyy: Три складові і три передумови максимальної продуктивн...
Yaroslav Rozhankivskyy: Три складові і три передумови максимальної продуктивн...Lviv Startup Club
 
Lucknow 💋 Escorts in Lucknow - 450+ Call Girl Cash Payment 8923113531 Neha Th...
Lucknow 💋 Escorts in Lucknow - 450+ Call Girl Cash Payment 8923113531 Neha Th...Lucknow 💋 Escorts in Lucknow - 450+ Call Girl Cash Payment 8923113531 Neha Th...
Lucknow 💋 Escorts in Lucknow - 450+ Call Girl Cash Payment 8923113531 Neha Th...anilsa9823
 
Mysore Call Girls 8617370543 WhatsApp Number 24x7 Best Services
Mysore Call Girls 8617370543 WhatsApp Number 24x7 Best ServicesMysore Call Girls 8617370543 WhatsApp Number 24x7 Best Services
Mysore Call Girls 8617370543 WhatsApp Number 24x7 Best ServicesDipal Arora
 
Cracking the Cultural Competence Code.pptx
Cracking the Cultural Competence Code.pptxCracking the Cultural Competence Code.pptx
Cracking the Cultural Competence Code.pptxWorkforce Group
 
Dr. Admir Softic_ presentation_Green Club_ENG.pdf
Dr. Admir Softic_ presentation_Green Club_ENG.pdfDr. Admir Softic_ presentation_Green Club_ENG.pdf
Dr. Admir Softic_ presentation_Green Club_ENG.pdfAdmir Softic
 
A DAY IN THE LIFE OF A SALESMAN / WOMAN
A DAY IN THE LIFE OF A  SALESMAN / WOMANA DAY IN THE LIFE OF A  SALESMAN / WOMAN
A DAY IN THE LIFE OF A SALESMAN / WOMANIlamathiKannappan
 
It will be International Nurses' Day on 12 May
It will be International Nurses' Day on 12 MayIt will be International Nurses' Day on 12 May
It will be International Nurses' Day on 12 MayNZSG
 

Recently uploaded (20)

Monte Carlo simulation : Simulation using MCSM
Monte Carlo simulation : Simulation using MCSMMonte Carlo simulation : Simulation using MCSM
Monte Carlo simulation : Simulation using MCSM
 
The Path to Product Excellence: Avoiding Common Pitfalls and Enhancing Commun...
The Path to Product Excellence: Avoiding Common Pitfalls and Enhancing Commun...The Path to Product Excellence: Avoiding Common Pitfalls and Enhancing Commun...
The Path to Product Excellence: Avoiding Common Pitfalls and Enhancing Commun...
 
Call Girls Electronic City Just Call 👗 7737669865 👗 Top Class Call Girl Servi...
Call Girls Electronic City Just Call 👗 7737669865 👗 Top Class Call Girl Servi...Call Girls Electronic City Just Call 👗 7737669865 👗 Top Class Call Girl Servi...
Call Girls Electronic City Just Call 👗 7737669865 👗 Top Class Call Girl Servi...
 
Call Girls Hebbal Just Call 👗 7737669865 👗 Top Class Call Girl Service Bangalore
Call Girls Hebbal Just Call 👗 7737669865 👗 Top Class Call Girl Service BangaloreCall Girls Hebbal Just Call 👗 7737669865 👗 Top Class Call Girl Service Bangalore
Call Girls Hebbal Just Call 👗 7737669865 👗 Top Class Call Girl Service Bangalore
 
B.COM Unit – 4 ( CORPORATE SOCIAL RESPONSIBILITY ( CSR ).pptx
B.COM Unit – 4 ( CORPORATE SOCIAL RESPONSIBILITY ( CSR ).pptxB.COM Unit – 4 ( CORPORATE SOCIAL RESPONSIBILITY ( CSR ).pptx
B.COM Unit – 4 ( CORPORATE SOCIAL RESPONSIBILITY ( CSR ).pptx
 
0183760ssssssssssssssssssssssssssss00101011 (27).pdf
0183760ssssssssssssssssssssssssssss00101011 (27).pdf0183760ssssssssssssssssssssssssssss00101011 (27).pdf
0183760ssssssssssssssssssssssssssss00101011 (27).pdf
 
Call Girls In DLf Gurgaon ➥99902@11544 ( Best price)100% Genuine Escort In 24...
Call Girls In DLf Gurgaon ➥99902@11544 ( Best price)100% Genuine Escort In 24...Call Girls In DLf Gurgaon ➥99902@11544 ( Best price)100% Genuine Escort In 24...
Call Girls In DLf Gurgaon ➥99902@11544 ( Best price)100% Genuine Escort In 24...
 
Organizational Transformation Lead with Culture
Organizational Transformation Lead with CultureOrganizational Transformation Lead with Culture
Organizational Transformation Lead with Culture
 
Forklift Operations: Safety through Cartoons
Forklift Operations: Safety through CartoonsForklift Operations: Safety through Cartoons
Forklift Operations: Safety through Cartoons
 
Value Proposition canvas- Customer needs and pains
Value Proposition canvas- Customer needs and painsValue Proposition canvas- Customer needs and pains
Value Proposition canvas- Customer needs and pains
 
Best VIP Call Girls Noida Sector 40 Call Me: 8448380779
Best VIP Call Girls Noida Sector 40 Call Me: 8448380779Best VIP Call Girls Noida Sector 40 Call Me: 8448380779
Best VIP Call Girls Noida Sector 40 Call Me: 8448380779
 
KYC-Verified Accounts: Helping Companies Handle Challenging Regulatory Enviro...
KYC-Verified Accounts: Helping Companies Handle Challenging Regulatory Enviro...KYC-Verified Accounts: Helping Companies Handle Challenging Regulatory Enviro...
KYC-Verified Accounts: Helping Companies Handle Challenging Regulatory Enviro...
 
Yaroslav Rozhankivskyy: Три складові і три передумови максимальної продуктивн...
Yaroslav Rozhankivskyy: Три складові і три передумови максимальної продуктивн...Yaroslav Rozhankivskyy: Три складові і три передумови максимальної продуктивн...
Yaroslav Rozhankivskyy: Три складові і три передумови максимальної продуктивн...
 
Lucknow 💋 Escorts in Lucknow - 450+ Call Girl Cash Payment 8923113531 Neha Th...
Lucknow 💋 Escorts in Lucknow - 450+ Call Girl Cash Payment 8923113531 Neha Th...Lucknow 💋 Escorts in Lucknow - 450+ Call Girl Cash Payment 8923113531 Neha Th...
Lucknow 💋 Escorts in Lucknow - 450+ Call Girl Cash Payment 8923113531 Neha Th...
 
VVVIP Call Girls In Greater Kailash ➡️ Delhi ➡️ 9999965857 🚀 No Advance 24HRS...
VVVIP Call Girls In Greater Kailash ➡️ Delhi ➡️ 9999965857 🚀 No Advance 24HRS...VVVIP Call Girls In Greater Kailash ➡️ Delhi ➡️ 9999965857 🚀 No Advance 24HRS...
VVVIP Call Girls In Greater Kailash ➡️ Delhi ➡️ 9999965857 🚀 No Advance 24HRS...
 
Mysore Call Girls 8617370543 WhatsApp Number 24x7 Best Services
Mysore Call Girls 8617370543 WhatsApp Number 24x7 Best ServicesMysore Call Girls 8617370543 WhatsApp Number 24x7 Best Services
Mysore Call Girls 8617370543 WhatsApp Number 24x7 Best Services
 
Cracking the Cultural Competence Code.pptx
Cracking the Cultural Competence Code.pptxCracking the Cultural Competence Code.pptx
Cracking the Cultural Competence Code.pptx
 
Dr. Admir Softic_ presentation_Green Club_ENG.pdf
Dr. Admir Softic_ presentation_Green Club_ENG.pdfDr. Admir Softic_ presentation_Green Club_ENG.pdf
Dr. Admir Softic_ presentation_Green Club_ENG.pdf
 
A DAY IN THE LIFE OF A SALESMAN / WOMAN
A DAY IN THE LIFE OF A  SALESMAN / WOMANA DAY IN THE LIFE OF A  SALESMAN / WOMAN
A DAY IN THE LIFE OF A SALESMAN / WOMAN
 
It will be International Nurses' Day on 12 May
It will be International Nurses' Day on 12 MayIt will be International Nurses' Day on 12 May
It will be International Nurses' Day on 12 May
 

FrameWRX Installation Instructions

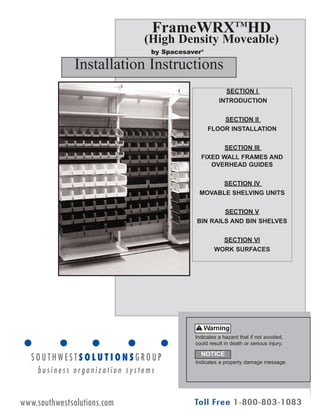
  • 1. FrameWRXTM HD (High Density Moveable) Page 1OP-0711 Rev 09_11 Indicates a hazard that if not avoided, could result in death or serious injury. NOTICE Indicates a property damage message. Installation Instructions by Spacesaver® 920-563-6362 E-mail: ssc@spacesaver.com Internet: www.spacesaver.com SECTION I INTRODUCTION SECTION II FLOOR INSTALLATION SECTION III FIXED WALL FRAMES AND OVERHEAD GUIDES SECTION IV MOVABLE SHELVING UNITS SECTION V BIN RAILS AND BIN SHELVES SECTION VI WORK SURFACES www.southwestsolutions.com
  • 2. TABLE OF CONTENTS PAGE NO. SECTION I - INTRODUCTION 3 Tool Requirements SECTION II - FLOOR INSTALLATION 5 Floor Preparation 7 Floor Leveling SECTION III - FIXED WALL FRAMES AND OVERHEAD GUIDES 9 Fixed Wall Frame Weldments 15 Overhead Guide Rails SECTION IV - MOVEABLE SHELVING UNITS 19 Moveable Frame Weldments 20 Dust Covers and Pistons 22 Handle Installation SECTION V - BIN RAILS AND BIN SHELVES 24 Bin Rails 26 Bin Shelves SECTION VI - WORK SURFACES 27 Work Surface Overview 28 Work Surface Installation OP-0711 Rev 09_11 Page 2 www.southwestsolutions.com
  • 3. Page 3 Tools Required: Safety Glasses Hearing Protection Hammer Drill - Concrete bit Cordless Screwdriver - Phillips Head Bit - 9/64" Drill Bit - 5/16 Socket Bit (for Tek screws) Dead Blow Hammer Tape Measure 6' Ladder 4' Level Phillips Head Screwdriver Wrench Set - 9/16" Socket and Ratchet Set - 9/16" Allen Wrench - 5/32" Shop Vacuum OP-0711 Rev 09_11 SECTION I INTRODUCTION www.southwestsolutions.com
  • 4. End Plate Dust Cover Anchor Bracket Mid Frame End/Intermediate Frame Overhead Rail Piston Assembly Movable Fame Handle Floor and Rail Assembly Component Identification Page 4OP-0711 Rev 09_11 www.southwestsolutions.com
  • 5. 1.2 Locate the hardware needed to connect the floor panels. There will be 2 steel biscuits, 2 cam lock bolts, 4 cam lock nuts and 1 rail pin per floor joint. Floor Preparation STEP 1 1.1 Locate the area that the FrameWRXTM HD is to be installed. Find the high point in the floor using a level. 1.3 Insert cam nuts in appropriate holes on the top of the floor near where the floor panels will butt together. OP-0711 Rev 09_11 Page 5 SECTION II FLOOR INSTALLATION 950095.001 Note: Steps 1.2-1.7 Only apply if joining floor sections www.southwestsolutions.com
  • 6. Page 6 1.4 Make sure the arrow on the cam nut faces edges to be joined. 1.5 Insert cam bolts, steel biscuits and rail pins in one piece of floor. 1.6 Insert cam locks into the adjoining floor panel, again ensuring the arrow on the cam nut faces edges to be joined. OP-0711 Rev 09_11 950096.001 910063.003 www.southwestsolutions.com
  • 7. Page 7 1.7 Butt the 2 floor pieces together and tighten the cam locks 90 degrees clockwise. Floor Leveling STEP 2 2.1 Find the appropriate leveling screws need- ed. You will receive enough ¾" levelers to level the entire floor, plus 10% extra 1" lev- elers to use if your existing floor is extremely out of level. Levelers require a 5/32” internal hex (allen wrench) bit. OP-0711 Rev 09_11 2.2 Use a cordless screwdriver to run levelers into the floor from the top. Raise panels 1/16" off the highest point of the floor. Wear hearing and eye protection when using power tools. 990036.001 990036.007 www.southwestsolutions.com
  • 8. Page 8 2.3 After raising to the high point, move to the corners and insert levelers. Use a 4' level to level these. 2.4 After the corners are level, insert and level the remaining leveler locations. NOTE: Use an allen wrench rather than a cordless screwdriver for fine-tuning to ensure floor is completely level. It may be necessary to apply some weight to the floor to keep it from moving. OP-0711 Rev 09_11 www.southwestsolutions.com
  • 9. Page 9 Fixed Wall Frames STEP 3 3.1 Locate the end/intermediate frames and the fixed Mid frame weldments. (NOTE: The end/intermediate frames are the same part. They serve as both the end frames, and the link between frame weld- ments.) SECTION III FIXED MID FRAMES AND OVERHEAD GUIDES 3.2 Take one end frame and butt it up against the frame weldment. OP-0711 Rev 09_11 End/Intermediate FrameFrame Weldment www.southwestsolutions.com
  • 10. 3.3 Locate the mounting hardware for the frames. These are 3/8"x 1-3/4" bolts and nuts. 95021.03 93015.08 3.4 Insert the 3/8"x1-3/4" bolt through the out- side of the end frame, through the frame weldment at the middle and lower posi- tions. The bolt head must be on the outside of the end frame. Attach nut. Do this in all three holes throughout the length of the end frame. NOTE: At this point only hand tighten these bolts. This will make the process of attaching the back frames to the floor easier. OP-0711 Rev 09_11 Page 10www.southwestsolutions.com
  • 11. Page 11 3.7 Locate the intermediate frames. Sandwich the intermediate frame between the weldment you just installed and the next weldment. While holding in place, insert the 3/8"x1-3/4" bolts through both frame weldments and the intermediate frames. Place nuts on the ends of these 3 bolts, and hand tighten them. 3.8 Repeat previous steps the entire length of the floor, finishing with an end frame at the end. OP-0711 Rev 09_11 3.6 Insert bolt thru End Plate, End Frame and Mid Frame at top location. Hand tighten nut. 3.5 Locate the End Plates. One will be required for each end. www.southwestsolutions.com
  • 12. Page 12 3.9 Attach the anchor clips with 3/8"x1-3/4" bolts and nuts. The end frames use 1 anchor clip, while the intermediate frames use 2. NOTE: The slot side of the anchor clip must be on the floor. 3.10 Make sure that the bolt head is on the out- side of the end frame for overall appear- ance. Hand tighten only. 3.11 Anchor the intermediate frames through the floor assembly into the subfloor with a mini- mum 3/16” anchor. Follow the manufacturers instructions. We do not provide anchors as requirements or codes may vary. Wear hearing and eye protection when using power tools. OP-0711 Rev 09_11 95021.03 93015.08 Bracket # 401498.001 www.southwestsolutions.com
  • 13. Page 13 3.12 After all the anchor screws are in place, tighten all the bolts holding the anchor clips to the frames. When these are tight- ened, you can finish tightening all the bolts on the frames. 3.13 After all bolts are tightened, insert the black plastic end caps. There are 2 caps per end and intermediate frame, one locat- ed at the top and one at the bottom. OP-0711 Rev 09_11 3.14 When finished, the end caps should look like this. Cap part # 780043.001 www.southwestsolutions.com
  • 14. Page 14OP-0711 Rev 09_11 3.15 Locate the wall anchor brackets. These can be placed anywhere along the top of each weldment. 3.16 Drill appropriate holes and bolt in the wall brackets. NOTE: Fastening hardware is not pro- vided as stud materials vary. Shims may also be required to accommodate the inconsistencies between the back frame and the wall. Washers work well, but are not provided. Every frame must be anchored into a solid mounting location, such as a wall stud. 3.17 Check all frames for plumb. Tighten all hardware atr this time. NOTICE www.southwestsolutions.com
  • 15. Page 15 Overhead Guide Rails STEP 4 4.1 Locate the aluminum overhead guide rails, square-nuts, and connecting pins. OP-0711 Rev 09_11 4.2 Insert square-nuts in the overhead guide rail. Each guide rail should have one square-nut for each end frame and two splice nuts for each intermediate frame. Start with one nut 3" from the left and place 2 every 30" of rail section, ending with a square nut 3" from the right. 930091.001 4.3 Insert the (2) 3/16” dia. x 2.00” long connect- ing pins on one end of the rail where it will be used to connect the other rail. 910070.001 4.4 Locate the hardware for bolting the guide rails to the frames. The 2 end frames will get (1) bolt, keps nut, and angle bracket. The intermediate frames will get (2) angle brackets, (1) bolt, and keps nut. Bracket # 401616.001 Bolt # 95021.02 Nut # 93015.08 www.southwestsolutions.com
  • 16. Page 16OP-0711 Rev 09_11 4.5 Place bolt thru End Plate, End Frame and Angle Bracket. finger tighten nut at this time. 4.6 Install two Angle Brackets onto each Intermediate Frames. Do not tighten hard- ware at this time. www.southwestsolutions.com
  • 17. Page 17 4.7 Lift the first overhead rail section into place. 4.9 Each additional Top Guide Raill will be rein- forecd with pins at each splice. Install these into one rail, then slide into the adjacent rail. 4.10 When you are satisfied with the position of the rail, tighten all bolts on the angles and overhead guide rail. OP-0711 Rev 09_11 4.8 Insert a bolt thru the bottom of the angle into the square-nut in the overhead guide. Do not tighten hardware untill instructed to do so. Bolt # 95021.08 www.southwestsolutions.com
  • 18. 4.12 Attach the magnets to the end caps with the supplied nut and washers. The magnet needs to be facing towards the inside of the system. Assemble in this order: 1. Magnet 2. Rubber Washer 3. End Plate 4. Rubber Washer 5. Flat Washer 6. Machine Screw Nut 7. Spring Lock Washer 8. Machine Screw Nut NOTE: The end plates for the right side will have the magnets placed in the back vertical slot. The magnets on the left side will be placed in the front vertical slot. These will match up with the piston assemblies on the overhead dust covers. 4.11 Locate the magnet assemblies. NOTE: Magnet assemblies come as part of the air shock/piston assembly kit, which includes both the magnet and piston assembly. Part # 550501.001 4.13 Using two #12 X 1” tech screws, screw the End Plate to the Top Rail. Repeat on each end. 96060.01 Page 18 Page 18Page 18 OP-0711 Rev 09_11www.southwestsolutions.com
  • 19. Page 19 Moveable Frame Weldments STEP 5 5.1 Locate the moveable frame weldments. These will have the wheel sections attached. All moveable frames will have rubber bumpers on both sides of the top and bottom of the frames. SECTION IV MOVABLE WELDMENTS OP-0711 Rev 09_11 5.2 The easiest way to install the moveable frame is to tilt the frame, inserting the guide wheels into the overhead guide rail. Lift the frame up and engage the bottom wheels onto the floor rail. Slide back and forth a couple of times to ensure that the wheel section is sitting properly on the rail. Repeat this step with the other moveable frame sections. www.southwestsolutions.com
  • 20. Page 20 6.2 Locate the dust cover hardware. Each dust cover requires 4 1/4-20 UNC bolts and 4 1/4-20 UNC keps nuts. OP-0711 Rev 09_11 93015.02 96057.04 Dust Covers and Pistons STEP 6 6.1 Locate the dust covers. The dust covers without piston assemblies will be used as canopy tops on the fixed frames. The dust covers with the pre- installed piston assemblies will be used for the moveable frames. On the moveable frames, the far left dust cover will have 2 piston assemblies, while the rest will only have 1. NOTICE 6.3 Place the 1/4-20x1” bolt through the hole on the rear of the dust cover. Lift the dust cover and place on the frame weldment, threading the keps nut on the inside of the weldment post. Use the third hole from the top on the frame weldment for the top bolt of the cover. Only hand-tighten. Do this with the other three bolts & nuts. When all 4 are in, adjust so the dust cover is level. Repeat this process on all weldments. www.southwestsolutions.com
  • 21. OP-0711 Rev 09_11 6.5 When all the dust covers are installed, you can adjust the tension on the piston assemblies. To adjust, loosen the knurled jam nut. Turn the screw into the piston for a firmer piston. For a softer piston, turn the screw outward from the piston. When the desired setting is reached, tighten the lock nut on each piston assembly. Roll frames back and forth to test piston settings and readjust as necessary. Once system is fully loaded roll frames back and forth to check piston settings. Re-adjust pistons as necessary to provide cushioned stopping. 6.4 Repeat this step on the remainder of the frames. The location of the piston on the dust covers will be staggered. Make sure each piston hits the adjacent stops. Page 21 NOTICE NOTICE www.southwestsolutions.com
  • 22. Page 22 Handle Installation STEP 7 7.1 Locate the handle and 4 #10 tek screws. 7.2 Hang the handle in the center of the mid- dle spreader on each moveable frame. 7.3 Drive (2) self tapping tek screws thru the pre-drilled holes on the handle into the back of the bar spreader. OP-0711 Rev 09_11 www.southwestsolutions.com
  • 23. Page 23 7.4 Ensure that the handle is secure before using. OP-0711 Rev 09_11 www.southwestsolutions.com
  • 24. Page 24 EZ Rail Installation STEP 8 8.1 Locate EZ Rails. SECTION V EZ RAILS AND BIN SHELVES/TRAYS Note: EZ Rails have 3 mounting tabs. This allows the rail to be adjusted from a normal vertical position to one that angles down approximately 18 degrees. 8.2 Vertical Position Use the top 2 tabs on the EZ Rail and insert into the slots on the welded frame. Make sure that both sides are evenly spaced in height. OP-0711 Rev 09_11 www.southwestsolutions.com
  • 25. Page 25 8.3 Angled Position To slant the EZ Rail forward, use the bot- tom 2 tabs. Insert them into the slots on the welded frame. 8.4 EZ Rails can be used to accommodate slat wall pegs. To install, hook the top of the peg bracket up-and-in the top guide of the EZ Rail. 8.5 Plastic storage bins hang on the top lip of the EZ Rail. OP-0711 Rev 09_11 www.southwestsolutions.com
  • 26. Page 26 Bin Shelf/Tray Installation STEP 9 9.1 Locate bin shelves/trays. Note: Bin shelves/trays have 3 mount- ing tabs. This allows the bin rail to be adjusted from a normal vertical position to one that angles down approximately 18 degrees. 9.2 Vertical Position Use the top 2 tabs on the bin shelf/trays and insert into the slots on the welded frame. Make sure that both sides are even- ly spaced in height. 9.3 Angled Position To slant the bin shelf/tray forward, use the bottom 2 tabs. Insert them into the slots on the welded frame. Make sure that both sides are evenly spaced in height. OP-0711 Rev 09_11 www.southwestsolutions.com
  • 27. Page 27 Work surfaces These come in 2 standard materials- laminate and non-porous There are four different configurations (double, rectangle, right, left chamfer) Work Surfaces that span across 2 frames require that 2 bracket kits (4 brackets) be used SECTION VI WORK SURFACES Double Chamfer Rectangle OP-0711 Rev 09_11 www.southwestsolutions.com
  • 28. Page 28 Right Chamfer Left Chamfer Step 9.1 Insert work surface brackets into the slots in the welded frame. make sure that you place the brackets the same distance from the floor on all frames so the work surface height is consistent. Left and right brackets are different. Point the mounting tabs inward. OP-0711 Rev 09_11 L R www.southwestsolutions.com
  • 29. Page 29 Step 9.2 Set the work surface on top of the brackets. Drive 2 self tapping screws thru the pre- drilled holes on the brackets, into the under- side of the work surface panel. Step 9.3 Repeat process on other work surfaces. Make sure that work surfaces line up with each other. OP-0711 Rev 09_11 www.southwestsolutions.com