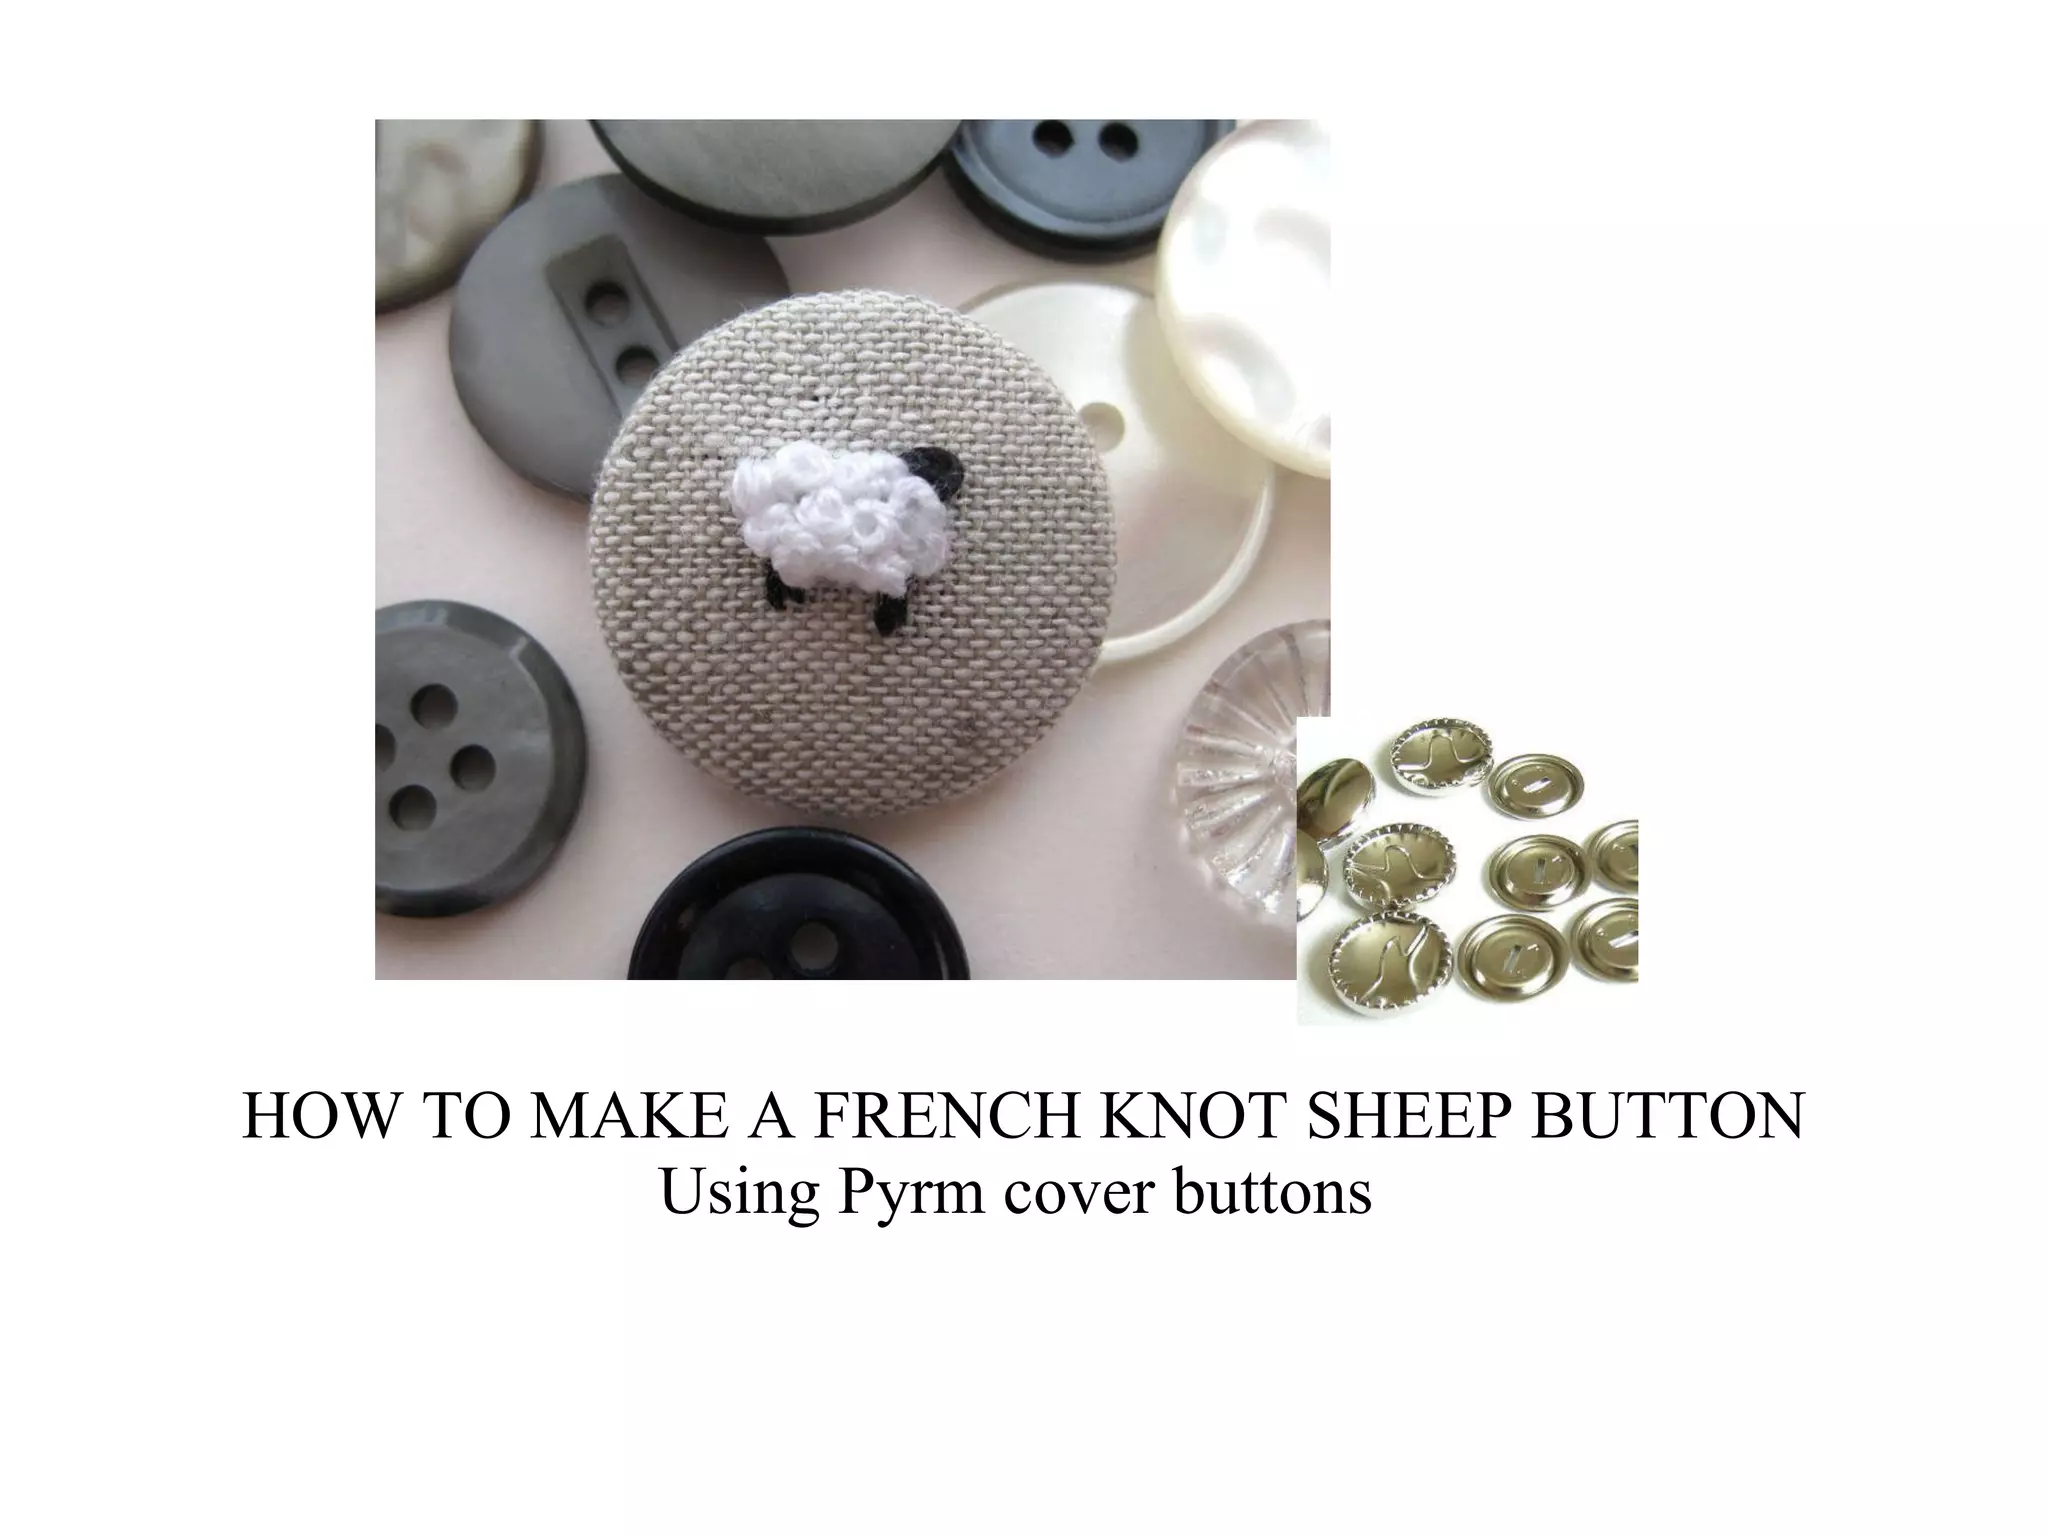
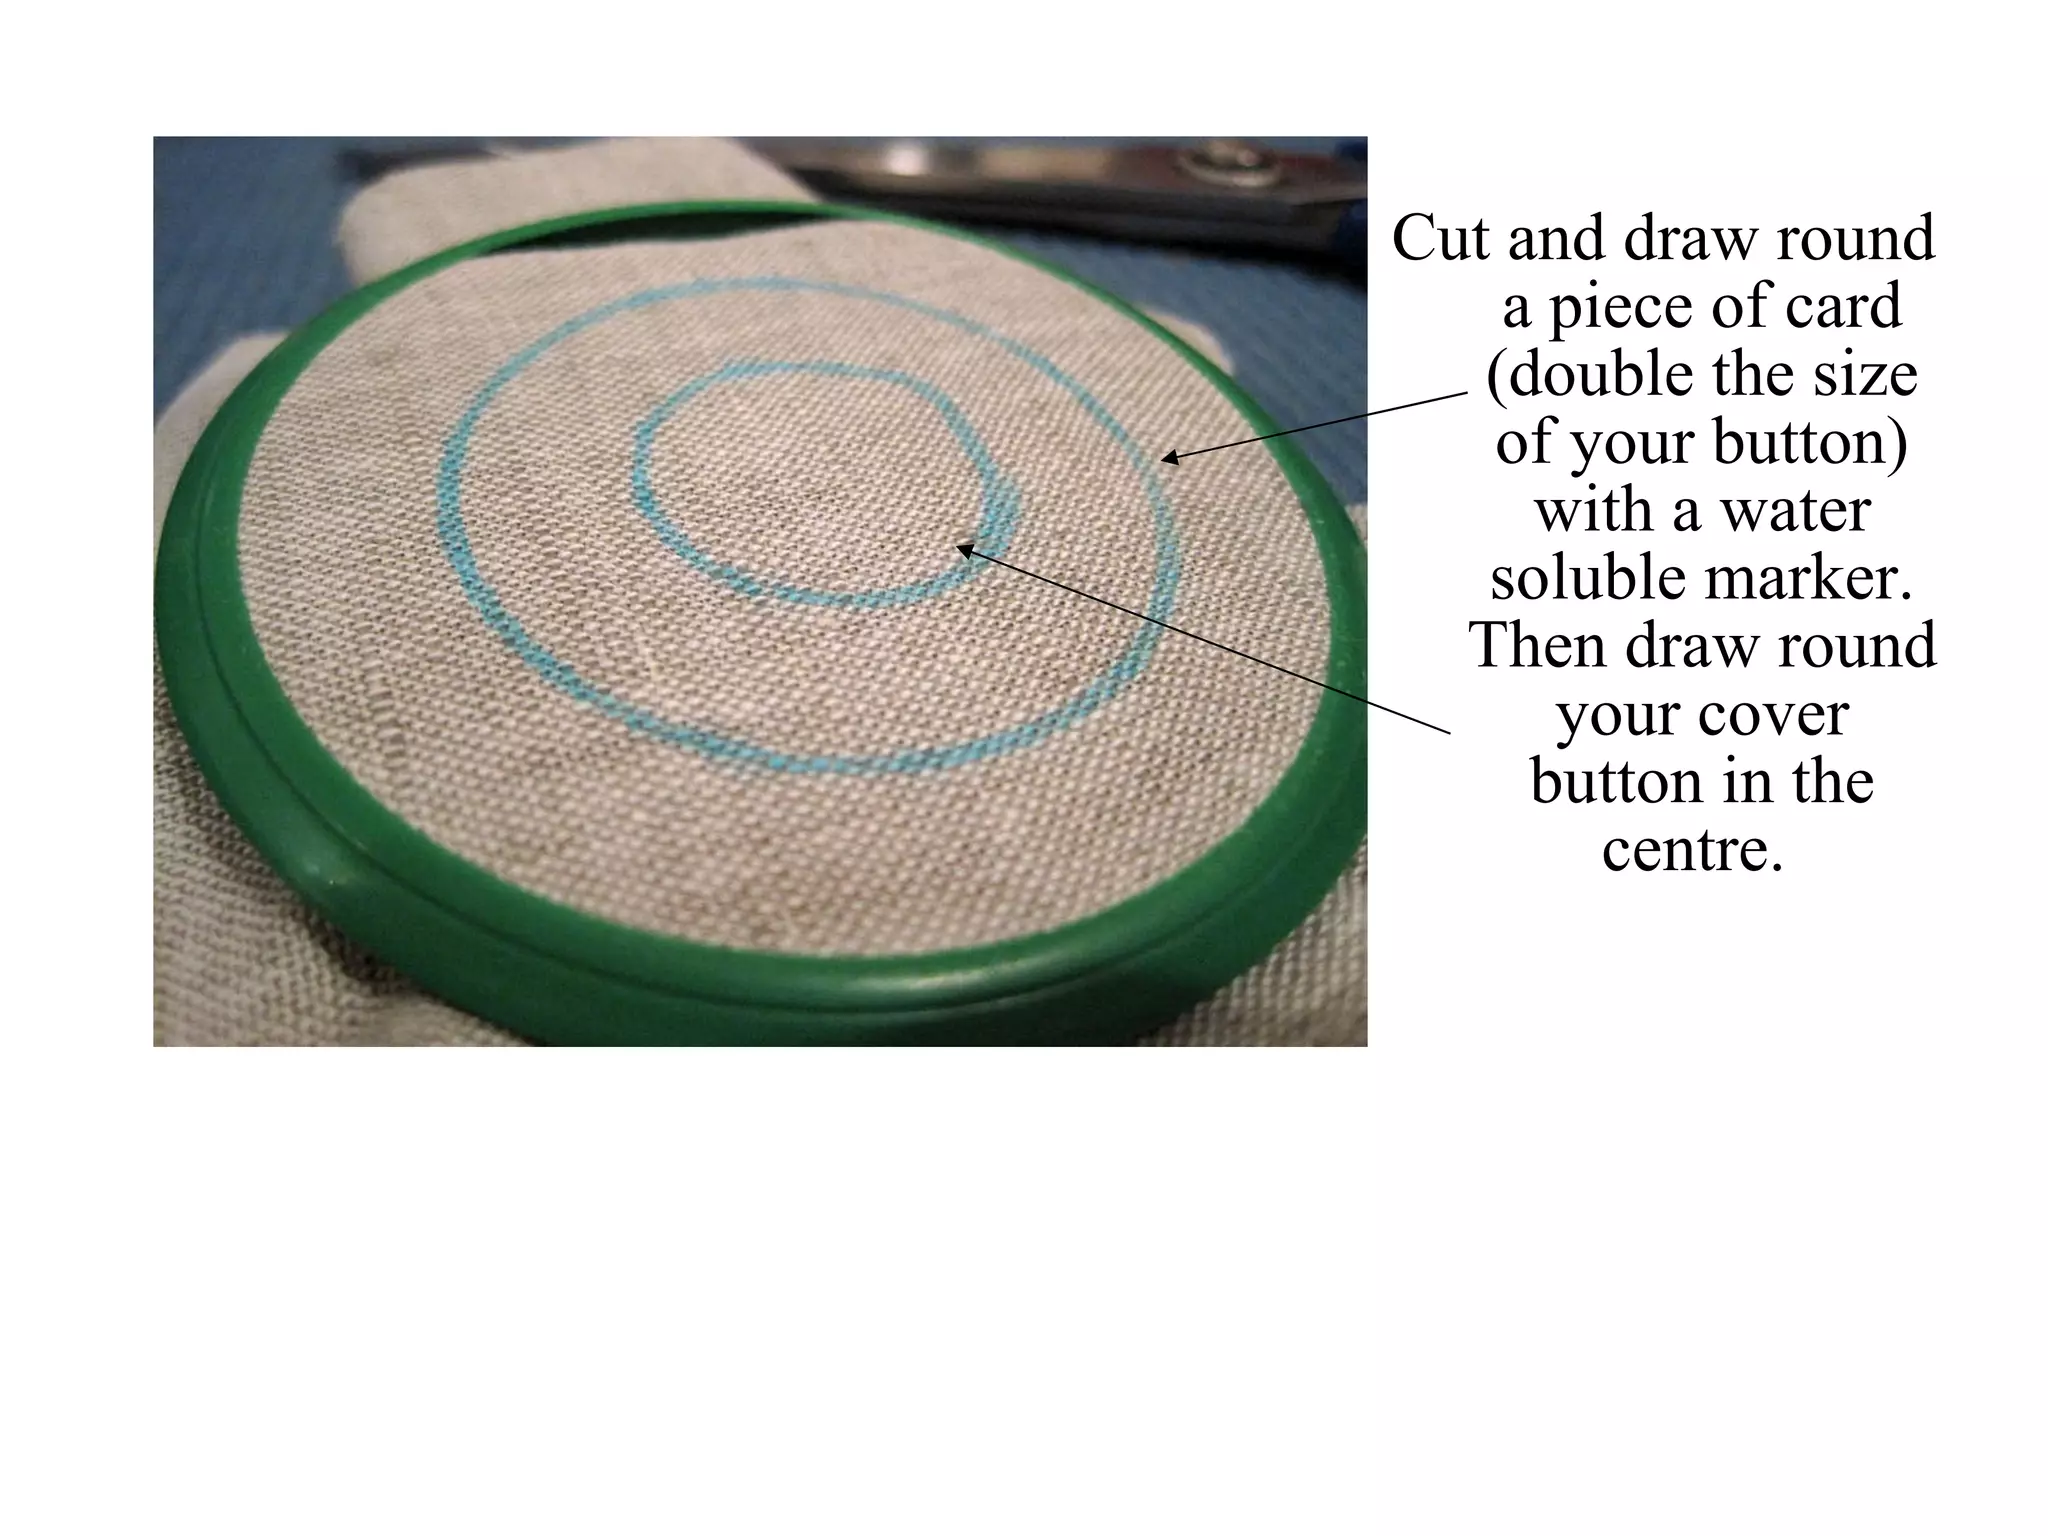
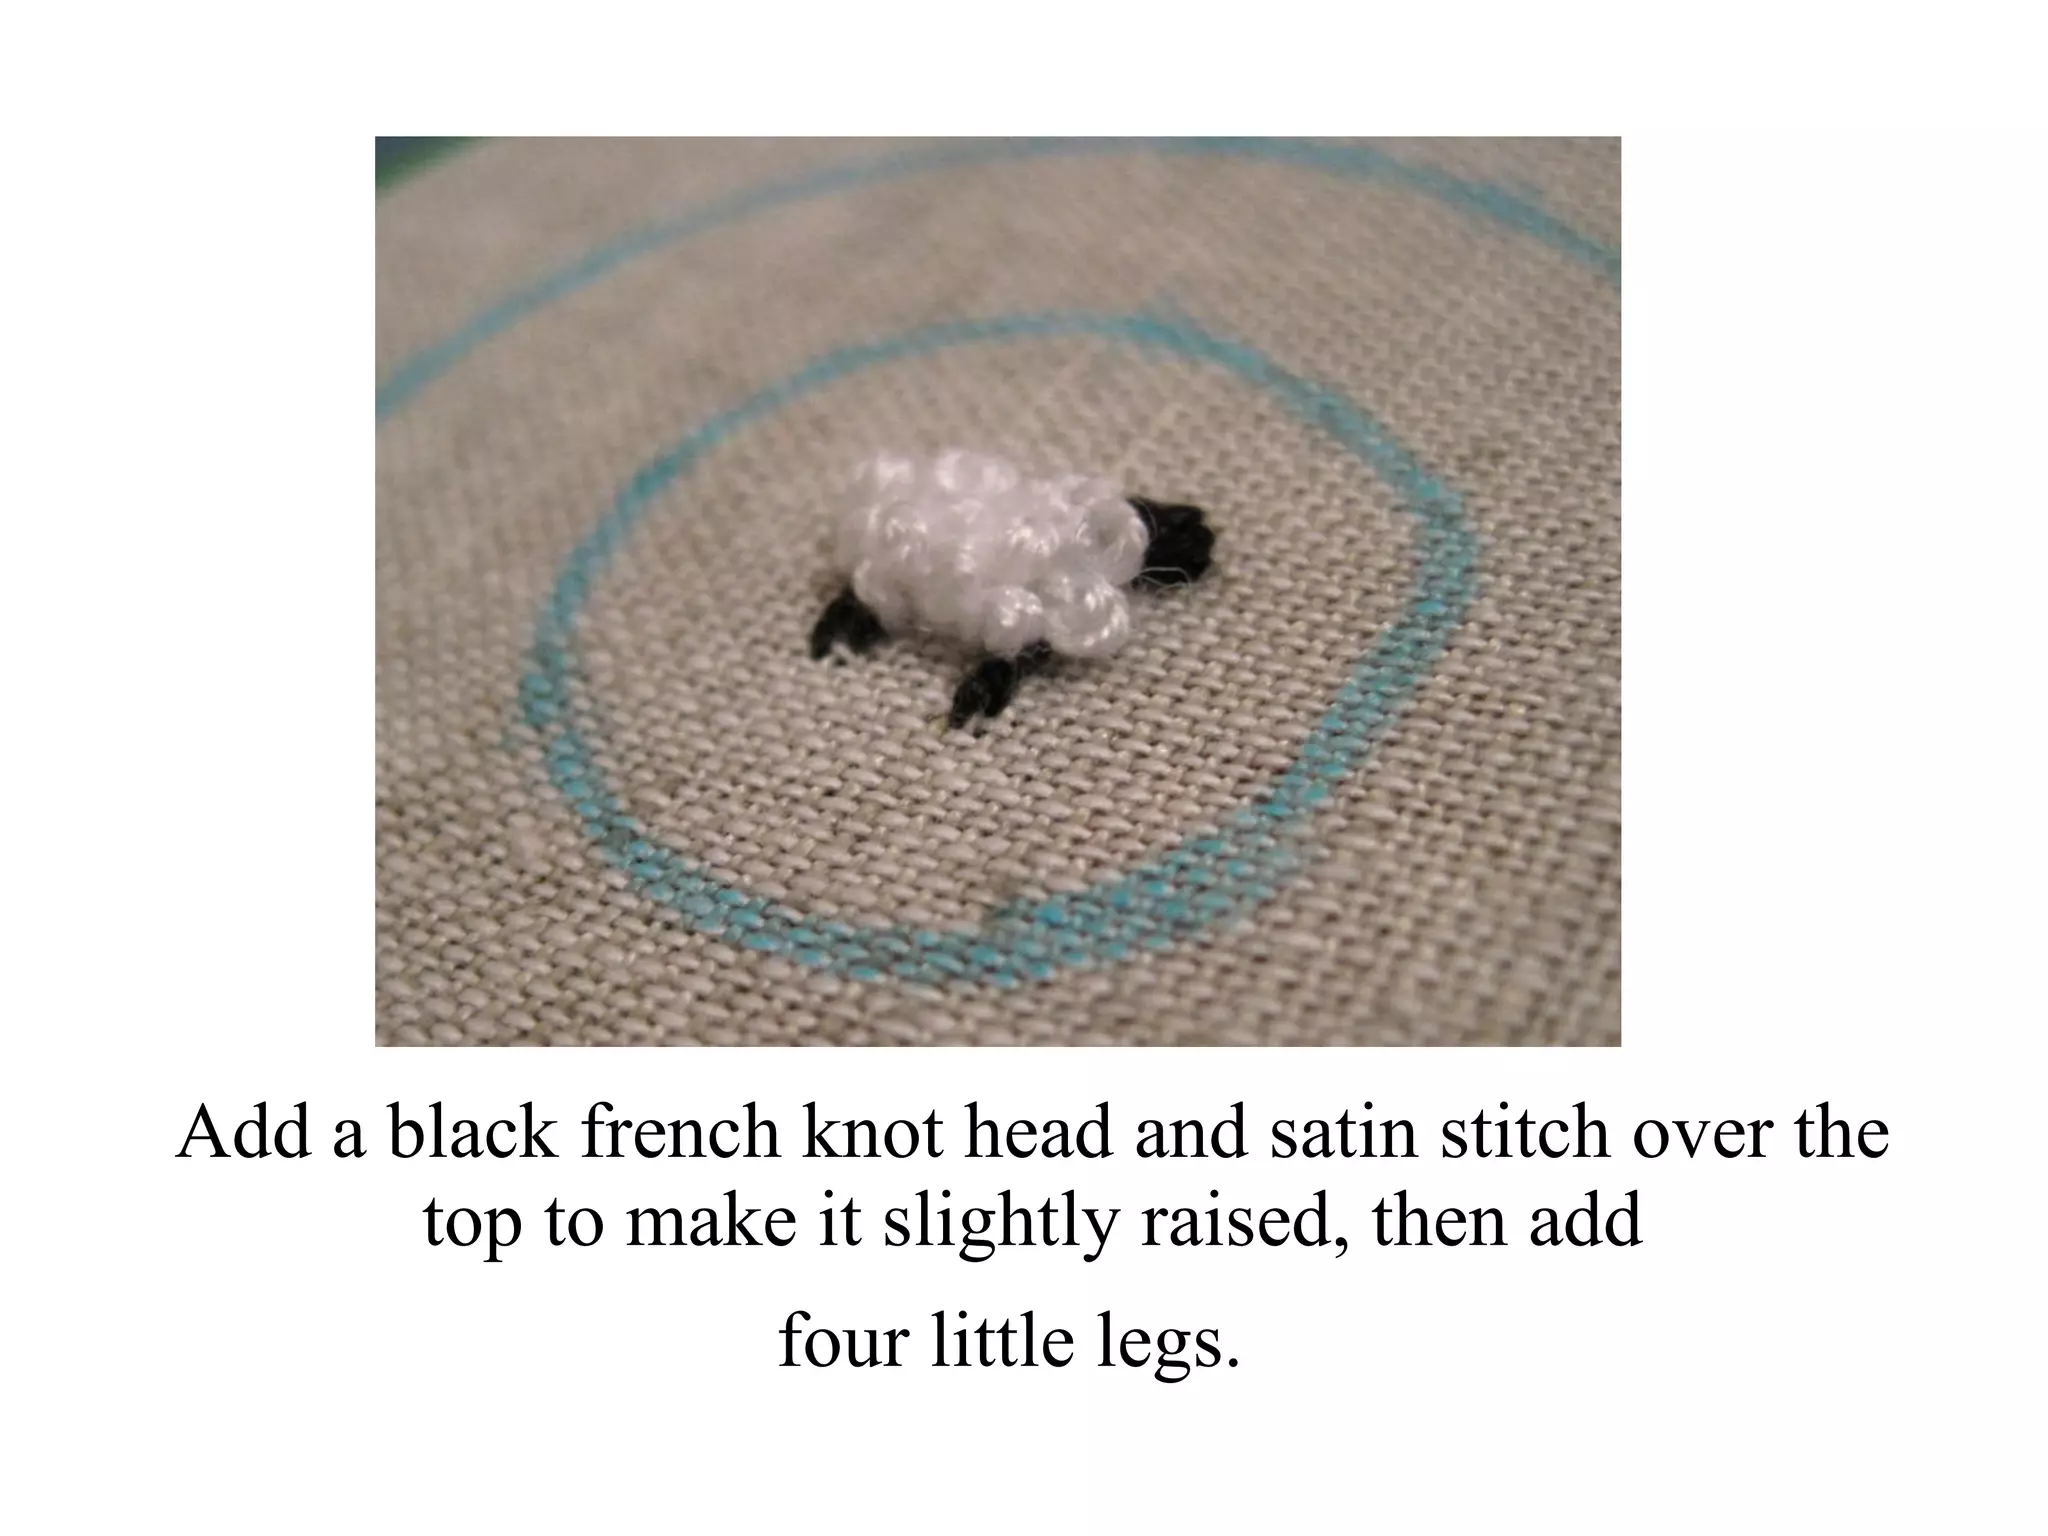
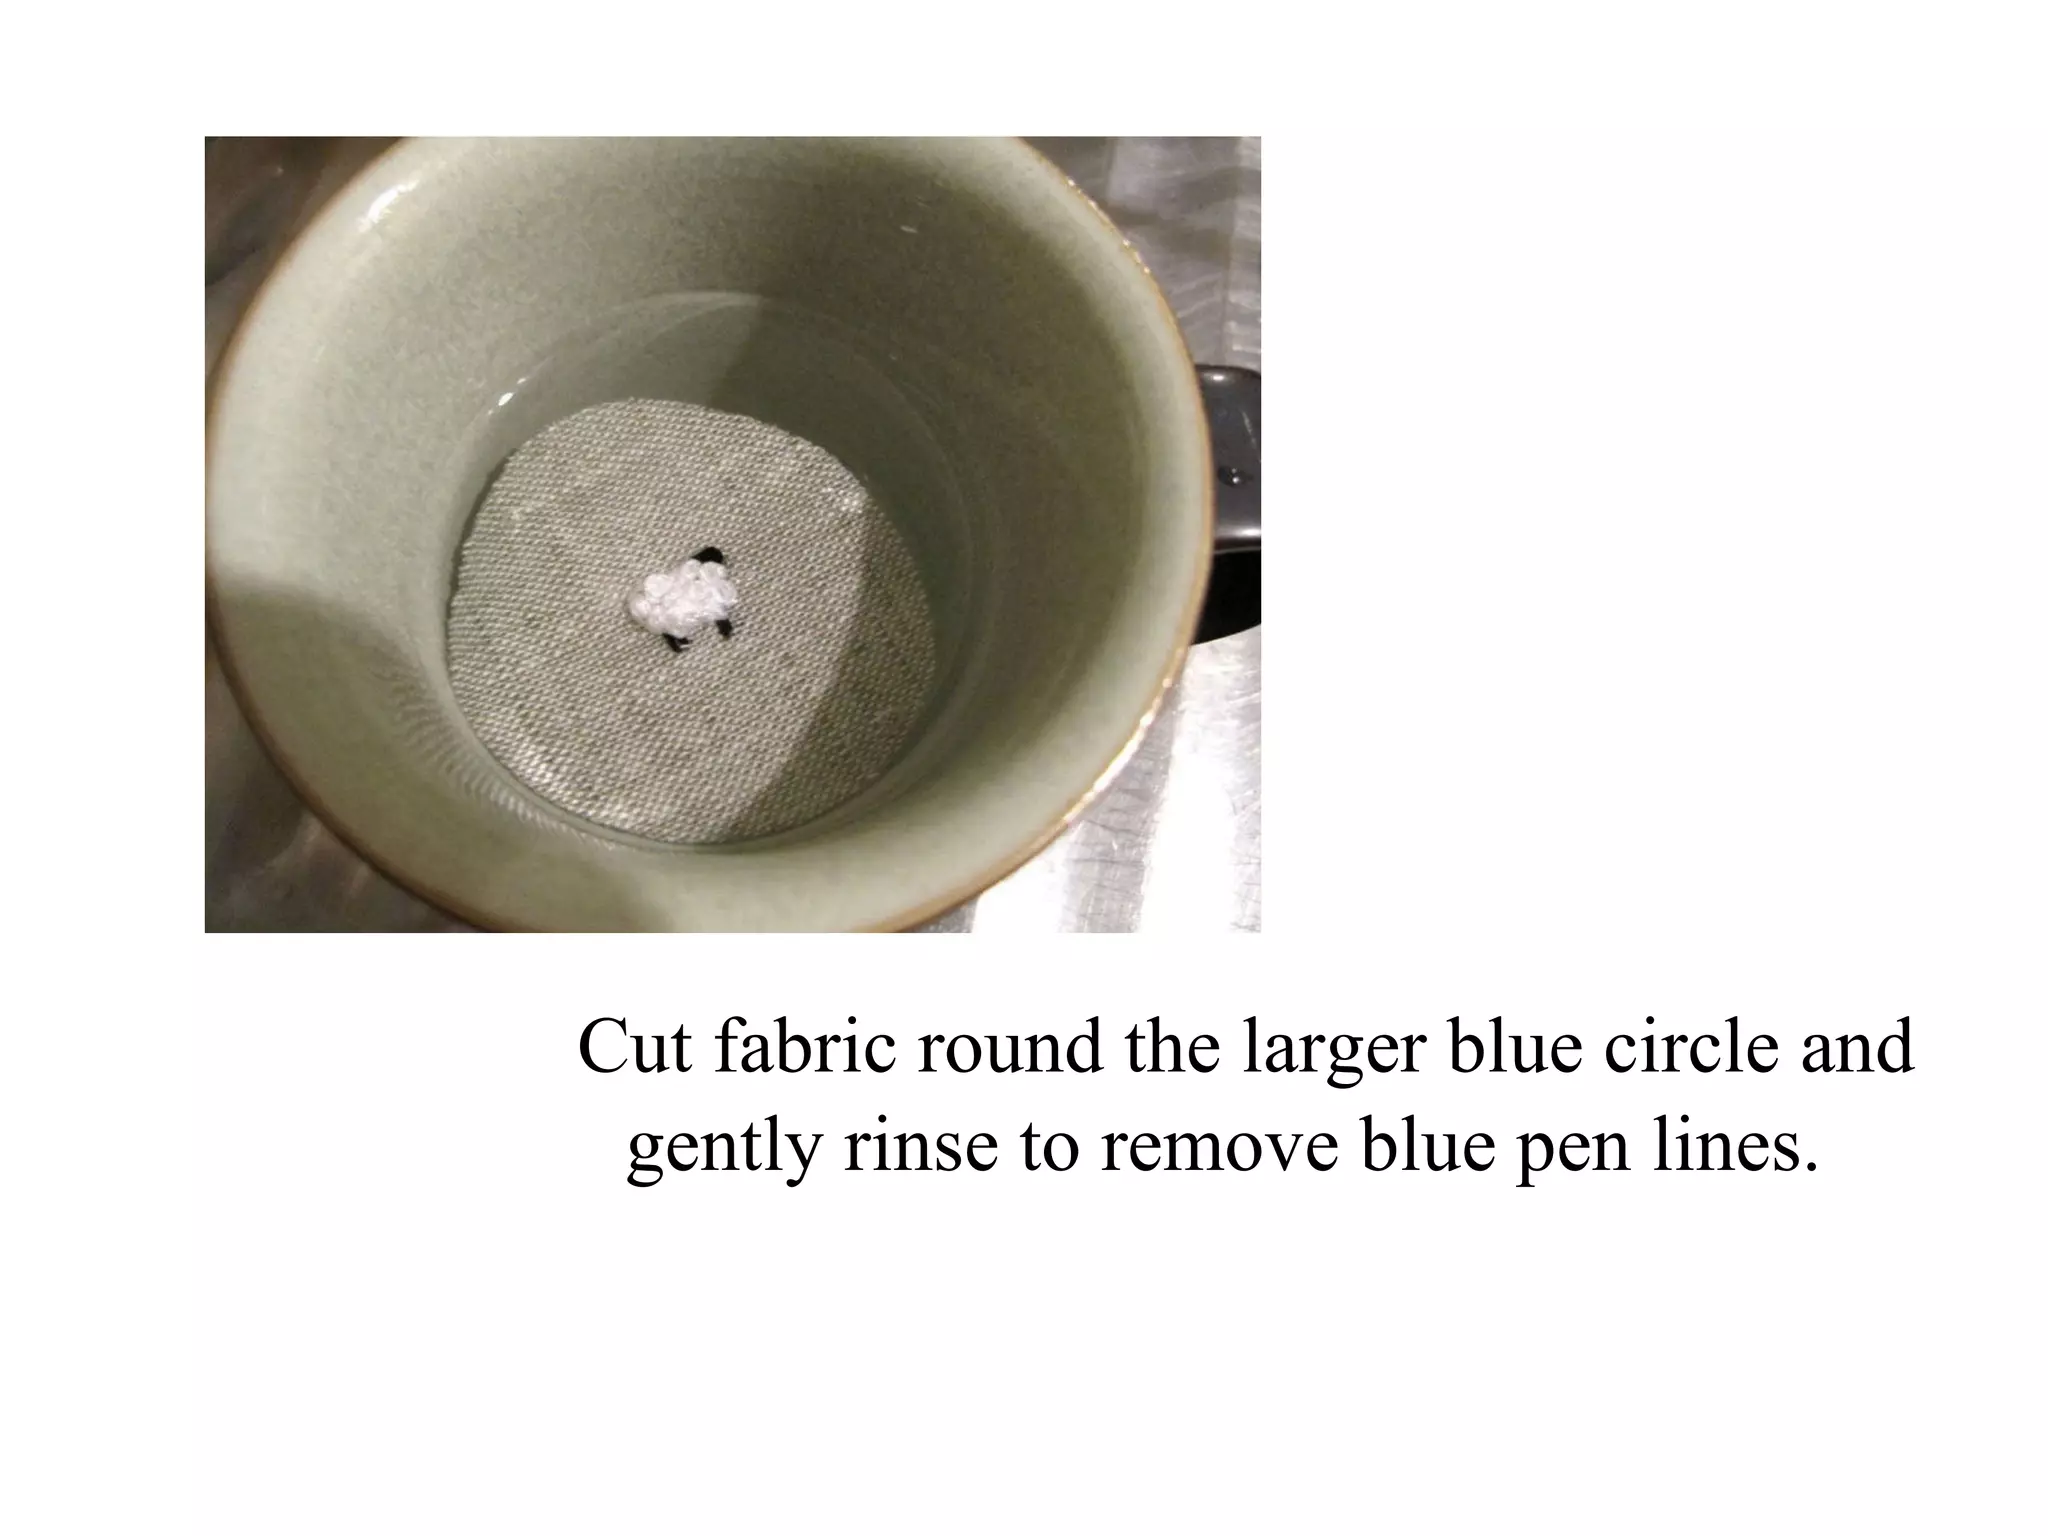
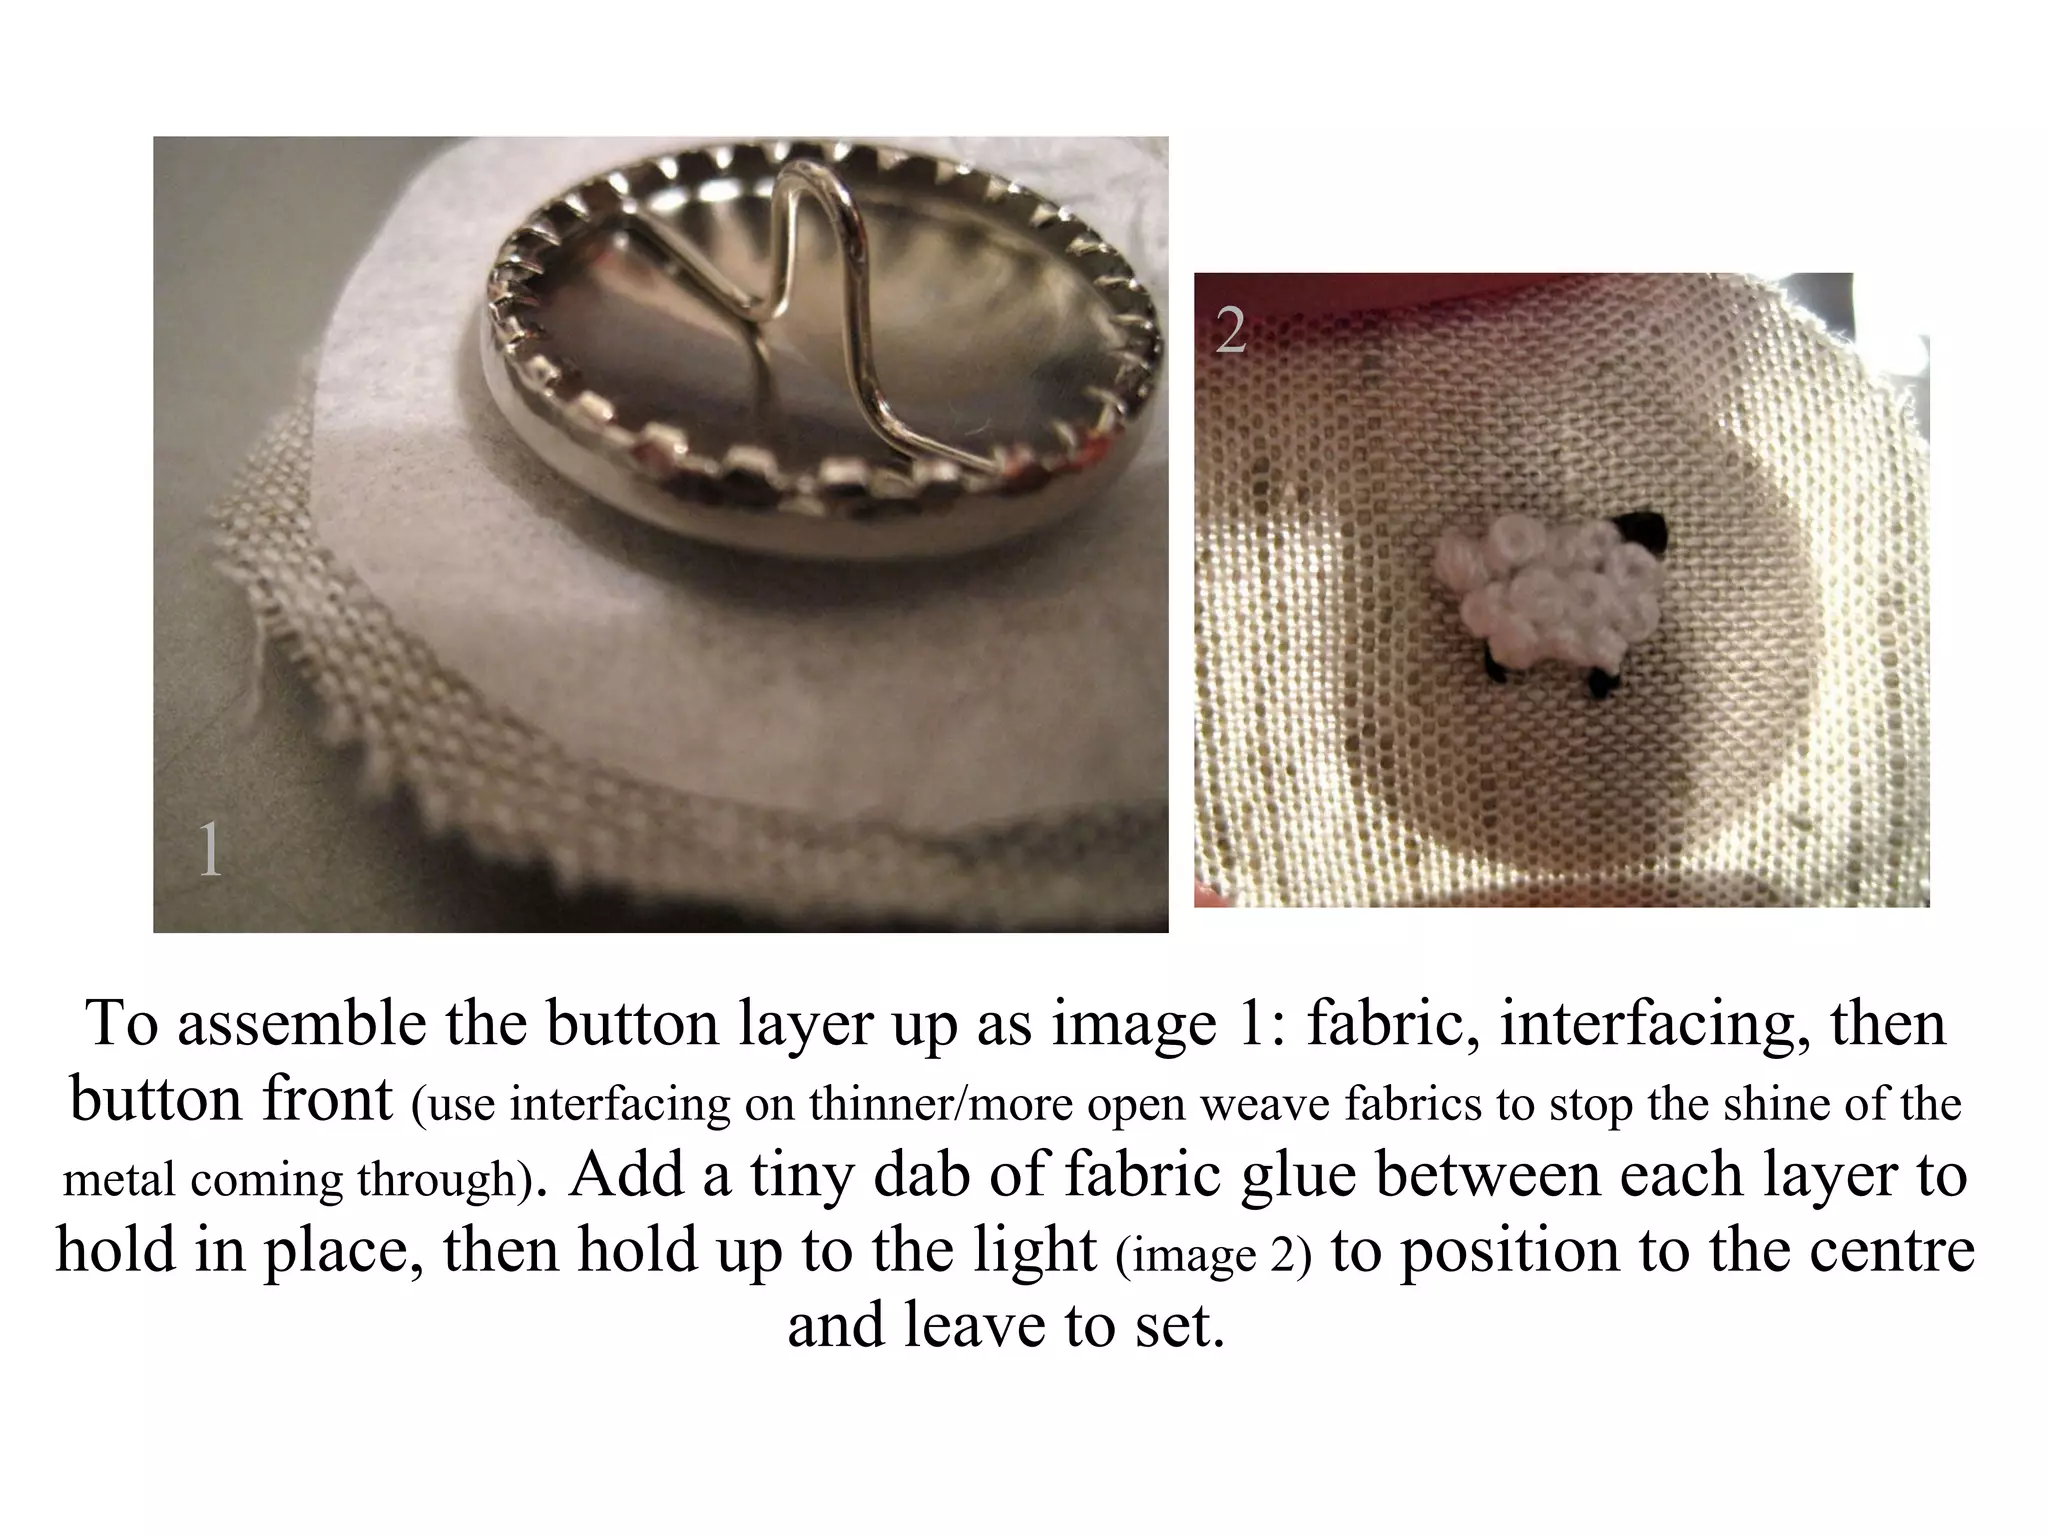
HOW TO MAKE A FRENCH KNOT SHEEP BUTTON Using Pyrm cover buttons
Cut and draw round a piece of card (double the size of your button) with a water soluble marker. Then draw round your cover button in the centre.
Stitch a little cloud of french knots in the centre for the body…
Add a black french knot head and satin stitch over the top to make it slightly raised, then add four little legs.
Cut fabric round the larger blue circle and gently rinse to remove blue pen lines.
To assemble the button layer up as image 1: fabric, interfacing, then button front  (use interfacing on thinner/more open weave fabrics to stop the shine of the metal coming through) . Add a tiny dab of fabric glue between each layer to hold in place, then hold up to the light  (image 2)  to position to the centre and leave to set.  1 2
Now carefully smooth the fabric over the sides of the button and grip over the teeth on the reverse. This works best by slowly working round the button and pushing quite firmly so that the teeth go through the fabric as much as possible to hold in place.
To finish: Place the button back on, then  turn fabric side up   and  push the edge down on a hard surface and rotate till the back ‘pops’ on!  incywincystiches

How To: French Knot Sheep Button

  • 1.
    HOW TO MAKEA FRENCH KNOT SHEEP BUTTON Using Pyrm cover buttons
  • 2.
    Cut and drawround a piece of card (double the size of your button) with a water soluble marker. Then draw round your cover button in the centre.
  • 3.
    Stitch a littlecloud of french knots in the centre for the body…
  • 4.
    Add a blackfrench knot head and satin stitch over the top to make it slightly raised, then add four little legs.
  • 5.
    Cut fabric roundthe larger blue circle and gently rinse to remove blue pen lines.
  • 6.
    To assemble thebutton layer up as image 1: fabric, interfacing, then button front (use interfacing on thinner/more open weave fabrics to stop the shine of the metal coming through) . Add a tiny dab of fabric glue between each layer to hold in place, then hold up to the light (image 2) to position to the centre and leave to set. 1 2
  • 7.
    Now carefully smooththe fabric over the sides of the button and grip over the teeth on the reverse. This works best by slowly working round the button and pushing quite firmly so that the teeth go through the fabric as much as possible to hold in place.
  • 8.
    To finish: Placethe button back on, then turn fabric side up and push the edge down on a hard surface and rotate till the back ‘pops’ on! incywincystiches