SlideShare a Scribd company logo
1 of 11
Download to read offline
Learn to Draw an Oak Tree
As we have now finished the tutorials based on the Gilbert Home Portrait, it is time to start the
one based on a large old Oak, featured in the "Between Two Trees" drawing of the Elwer Family
Barn and property.

If you have worked through the tutorials from the "Gilbert Home Portrait" you will have found
that the tree bark work is accomplished by using a series of lines, squiggles, dots (called stipple
work) and tone work done by a "drag method" I have developed, in a layering process that
produces a believable rendering. The layers build depth and tone and can yield values in as many
as 7 strengths. The process requires patience and a very light touch but can produce very
believable trees.

The main tree in the "Gilbert Home Portrait" was a Maple. This tree, an Oak, has a coarse bark
and has wonderful characteristics. The Oak that we will now cover has even more character and
depth than the maple. This old Oak has been on the property for ever it seems. I choice to do this
drawing originally because of this tree and then heard that the barn was to be taken down. Once I
heard that, I decided to take a look at it again and eventually decided I could draw the trees I
liked and place the barn in the background as it set in real life. That's what I did.

Part 1 - Let's get started...
As with the beginning work on the tree from the Gilbert Home property, I start with a light
pencil sketch or outline of the old oak, you can see this from the Layout image compared to the
Oak Tree reference:
With the fine point pen, I ensure that I have good ink flow on a scrap piece of paper and then
wipe the ball tip clean. Starting as before in the Maple tree tutorial, at the base of the trunk where
the roots go into the ground at the viewer’s bottom right of the tree base I define, with light
pressure, the direction of the bark growth. This helps to give dimension and shape to the bark
and the root base itself. You can see this in the close-up view of WIP image no.1


Take into consideration the three dimensional view of the tree trunk. By thinking of this tree that
way and not as a line on a flat piece of paper you will be able to place the line work to help build
a more believable three dimensional object. After working this first section of the tree stump or
trunk you will end up with an image that should reflect the first layer of tone in the trunk. You
should be able to see the bark direction and the basic growth pattern in the tree. Look at WIP
Image no.2 to see what I am talking about

I continue my light tone work all the way up the main trunk and then move back down to the
bottom of the trunk to start again. I keep working my way around the tree stump until I have the
base worked in and then start working up the trunk again. Once the basic layout shapes and lines
are in you will end up with a single tone and layer image that is a composite of the main design
of the tree trunk. I then take my medium point pen and begin to work in the darker tones along
the layout lines that will make up the shadowed areas in the bark work itself. The medium point
pen is the best tool for this job as it is a bit broader in line. I still only use light pressure with this
pen. If you go too dark at first you will be fighting to try and get the layers of value that are
necessary to yield a believable three dimensional tree.

! Remember, with ball point pen it is always easier to add layers of tone than to try to remove
them.

After the medium point tone layers are in you can begin to put in the small angled lines to build
out the shadowed areas along the bark edges in the trunk.

! Remember, keep a consistent light source in your work.

The next layer of tone that will be used is with the medium point pen again but, is done by
stipple work. This helps to build up texture and increase areas of shadow in the bark work.


Start at the bottom of the trunk at where the roots come out of the ground. Keeping in mind the
shadow areas that will be cast in reference to the light source, add the quick stipple work to the
tree trunk work. You won't add stipple work to the whole trunk in every area. Once the stipple
work is in you will have a pretty good looking work in progress tree trunk. See images no. 3 and
4:

The last layer is done with the medium point pen again. This is where you use the "Drag"
method that we discussed earlier in the tutorial on the maple tree from the Gilbert home portrait.
Laying the pen tip more on its side begin with a light touch and drag the tip over the area that
you want to add tone to. It's a pretty quick movement and not meant to leave a distinct line rather
more to leave a streak or smeared like layer of tone. You can also blend some of the ink with a
blending stump or paper towel rolled tightly together and use just the very pointed tip. You don't
want to overly blend any one spot though as you will begin to see a shine on the surface.

The last layer of line work is done with the Fine point pen. This is where you go in and define
some fine details in the bark. I find points that I want to bring out a bit more and reinforce the
line that is already there. I also take this time to add any fine line light strokes that need to be
added to help build the density of the object. See image no. 5:

Now that we have a good start on the tree trunk, it's time to take into considerations the details
that have made this Old Oak so interesting to me. The trunk has three large bumps of growth on
it just below the first small branches. These are large raised, bark covered objects of growth.
They are not that difficult to put in and keep the tree interesting.

Part 2 - moving on...
Oak Tree - Step #5
Let’s start by looking at how they appear in the reference photo


Notice that they have a highlighted side and a shadowed side. Also, that the bark is much tighter
as it works around the growth. The goal is to work your bark growth lines up to the point just
below the bottom of the first growth bump. Then begin to work the lines in a very light tone from
the trees left side into the center of the bump.
Next work the right side of the growth bump. Here is where you want to build the darker
shadows that will force the highlighted portion of the bump to appear to come forward away
from the rest of the trunk and bark work. I switch to the medium point pen now and go back and
add the next layer of tone to the shadowed area of the bumps.

You should have an image that resembles image # 6
From this point I work toward the first limb and branches with growth lines in the bark that lead
you to them. I choose the limbs I want to render and determine which would be drawn first and if
there will be any over-lapping limbs or branches. Work out to where the over-lap will be and
then stop. Work the next limb or branch to and through the place of the overlap. I keep in mind
my light source as I put in my shading and depth lines in each branch and limb.

The farther up the tree you go the farther away from the viewer it will get and you will need to
decrease the amount of detail in the bark lines that are seen. Make them closer together and the
overall tone of the tree darker as it goes up and the branches and limb go away. Again, light
layers at first make up the limbs and branches. As you put the following layers on remember
your light source and keep the highlighted side lighter. You can use the drag method in the limbs
and branch work to create the shadowed sides. You can see a small example of the branch and
limb work in WIP image # 7
The next portion of the drawing work in the oak tree is to finish the limb and branch work. Using
the methods that we used in the bark work, continue the line layers in the growth direction. I use
light pencil lines to put in the basic direction that I want the limbs and branches to go in keeping
with the reference photo. There will be less detail line work in the smaller limbs and even less to
none in the smaller branches and twigs that get farther away from the viewer in the scene. This is
also true just due to the size of the branches and twigs.

Keep in mind where limbs and larger branches will over-lap and run in front or behind each
other. This is also a point that you can add in cast shadows to lower branches from those above
or beside. These little details help build the depth and dimension in the tree drawing itself. This
is where the darker tones in the branches come in as you work up the tree.
Remember that there are very few to no perfectly straight lines that occur in the growth of a tree
in nature especially in this type of Oak tree so, as you work through the limbs and branches keep
your lines flowing off the straight and flat path. Gravity and the wind have a lot to do with how a
tree grows and looks in nature. Think about the weight that would be in the limbs. Show the
stress of that weight in each branch as gravity tugs and pulls each one toward the ground as it
struggles to grow Up and Out reaching for the sun light it needs. It’s a living thing that struggles
against the elements to survive. Let that struggle show in your rendering of the tree in each
branch and limb.

Then as you get to the ends of the limbs and branches notice that the twigs arch slightly upwards.
This is that struggle of the tree to constantly keep itself pushing upwards to the suns rays. I love
to draw these grand old trees when the foliage is gone. It allows me to show each of the turns and
bends that time and the elements have brought the tree through.

Each tree has a character all its own. I strive to show that character in each drawing I do.

Give them life.
If you notice this last Work In Progress image, you will see that I have already added the oak’s
first resident... a bird resting on a branch. There will be many more of these to come before I call
the drawing finished.

To finish the tree I work the rest of the limbs and branches to the edge of the page and out into
the scene. The diameter of the limbs and branches get smaller as I said before, the farther away
from the viewer they get and the more toward the end of the branch that they grow.


I hope that this tutorial has been and will be helpful to you to see how to render the different
types of trees out there. This is in no way meant to be an exhaustive study on all trees. It is meant
to help guide you as you study to develop your own skills as an artist. If you have any specific
questions for me please email me and I will be happy to answer them.

Vincent D. Whitehead
“Keep On Creating!”
May 2010

More Related Content

Viewers also liked

Value handout
Value handoutValue handout
Value handoutcdpenamtz
 
5 watercolor practice 3 1
5 watercolor practice 3 15 watercolor practice 3 1
5 watercolor practice 3 1cdpenamtz
 
Apocalypse In Death Valley - Chapter 4.1 - Family Reunion
Apocalypse In Death Valley - Chapter 4.1 - Family ReunionApocalypse In Death Valley - Chapter 4.1 - Family Reunion
Apocalypse In Death Valley - Chapter 4.1 - Family ReunionDellyo_82
 
Blogs and computers
Blogs and computersBlogs and computers
Blogs and computerstnicholem11
 
11th, Perspective Drawing Workshop, Bim 1, 2011
11th, Perspective Drawing Workshop, Bim 1, 201111th, Perspective Drawing Workshop, Bim 1, 2011
11th, Perspective Drawing Workshop, Bim 1, 2011Artistic Education
 
Watercolor project sheet
Watercolor project sheetWatercolor project sheet
Watercolor project sheetcdpenamtz
 
Space
SpaceSpace
Spacetvd
 
Barile S., Polese F., Saviano M., Di Nauta P., Drawing boundaries in complex ...
Barile S., Polese F., Saviano M., Di Nauta P., Drawing boundaries in complex ...Barile S., Polese F., Saviano M., Di Nauta P., Drawing boundaries in complex ...
Barile S., Polese F., Saviano M., Di Nauta P., Drawing boundaries in complex ...pdinauta
 
Perspective step by step
Perspective step by stepPerspective step by step
Perspective step by stepmarciehull
 
4 watercolor practice 2
4 watercolor practice 24 watercolor practice 2
4 watercolor practice 2cdpenamtz
 
Braille course
Braille courseBraille course
Braille courseAnpviOnlus
 
Risk Assessment - Art Classroom Scenes
Risk Assessment - Art Classroom ScenesRisk Assessment - Art Classroom Scenes
Risk Assessment - Art Classroom Scenesdusty96
 
1 point perspective
1 point perspective1 point perspective
1 point perspectiveangiehershey
 
Line drawing exercise
Line   drawing exerciseLine   drawing exercise
Line drawing exercisecdpenamtz
 
Presentation 3640
Presentation 3640Presentation 3640
Presentation 3640tnicholem11
 
Tessellation Lesson Plan
Tessellation Lesson PlanTessellation Lesson Plan
Tessellation Lesson Plancdpenamtz
 
Perspective Lesson Presentation
Perspective Lesson PresentationPerspective Lesson Presentation
Perspective Lesson PresentationRachel Porter
 

Viewers also liked (20)

Value handout
Value handoutValue handout
Value handout
 
5 watercolor practice 3 1
5 watercolor practice 3 15 watercolor practice 3 1
5 watercolor practice 3 1
 
Apocalypse In Death Valley - Chapter 4.1 - Family Reunion
Apocalypse In Death Valley - Chapter 4.1 - Family ReunionApocalypse In Death Valley - Chapter 4.1 - Family Reunion
Apocalypse In Death Valley - Chapter 4.1 - Family Reunion
 
CM30S - 1.4
CM30S - 1.4CM30S - 1.4
CM30S - 1.4
 
Blogs and computers
Blogs and computersBlogs and computers
Blogs and computers
 
11th, Perspective Drawing Workshop, Bim 1, 2011
11th, Perspective Drawing Workshop, Bim 1, 201111th, Perspective Drawing Workshop, Bim 1, 2011
11th, Perspective Drawing Workshop, Bim 1, 2011
 
Perspective drawing
Perspective drawingPerspective drawing
Perspective drawing
 
Watercolor project sheet
Watercolor project sheetWatercolor project sheet
Watercolor project sheet
 
Space
SpaceSpace
Space
 
Barile S., Polese F., Saviano M., Di Nauta P., Drawing boundaries in complex ...
Barile S., Polese F., Saviano M., Di Nauta P., Drawing boundaries in complex ...Barile S., Polese F., Saviano M., Di Nauta P., Drawing boundaries in complex ...
Barile S., Polese F., Saviano M., Di Nauta P., Drawing boundaries in complex ...
 
Perspective step by step
Perspective step by stepPerspective step by step
Perspective step by step
 
4 watercolor practice 2
4 watercolor practice 24 watercolor practice 2
4 watercolor practice 2
 
CM30S - 1.1
CM30S - 1.1CM30S - 1.1
CM30S - 1.1
 
Braille course
Braille courseBraille course
Braille course
 
Risk Assessment - Art Classroom Scenes
Risk Assessment - Art Classroom ScenesRisk Assessment - Art Classroom Scenes
Risk Assessment - Art Classroom Scenes
 
1 point perspective
1 point perspective1 point perspective
1 point perspective
 
Line drawing exercise
Line   drawing exerciseLine   drawing exercise
Line drawing exercise
 
Presentation 3640
Presentation 3640Presentation 3640
Presentation 3640
 
Tessellation Lesson Plan
Tessellation Lesson PlanTessellation Lesson Plan
Tessellation Lesson Plan
 
Perspective Lesson Presentation
Perspective Lesson PresentationPerspective Lesson Presentation
Perspective Lesson Presentation
 

More from cdpenamtz

Kimmy cantrell
Kimmy cantrellKimmy cantrell
Kimmy cantrellcdpenamtz
 
Acrylic painting: A Beginners Guide
Acrylic painting: A Beginners GuideAcrylic painting: A Beginners Guide
Acrylic painting: A Beginners Guidecdpenamtz
 
What dreams may come
What dreams may comeWhat dreams may come
What dreams may comecdpenamtz
 
Everything that defines me in line - By: Lynnette Gilbert
Everything that defines me in line - By: Lynnette GilbertEverything that defines me in line - By: Lynnette Gilbert
Everything that defines me in line - By: Lynnette Gilbertcdpenamtz
 
Looking & learning - telling stories
Looking & learning - telling storiesLooking & learning - telling stories
Looking & learning - telling storiescdpenamtz
 
Grade 7 one-point perspective Lesson Plan
Grade 7 one-point perspective Lesson PlanGrade 7 one-point perspective Lesson Plan
Grade 7 one-point perspective Lesson Plancdpenamtz
 
Jr. High Lesson Plan - Fish Sculpture using recycled materials
Jr. High Lesson Plan - Fish Sculpture using recycled materialsJr. High Lesson Plan - Fish Sculpture using recycled materials
Jr. High Lesson Plan - Fish Sculpture using recycled materialscdpenamtz
 
Ipg lesson plan all-in_the_cards
Ipg lesson plan all-in_the_cardsIpg lesson plan all-in_the_cards
Ipg lesson plan all-in_the_cardscdpenamtz
 
Sell your product slide show
Sell your product  slide showSell your product  slide show
Sell your product slide showcdpenamtz
 
Ipg sell your product poster
Ipg sell your product posterIpg sell your product poster
Ipg sell your product postercdpenamtz
 

More from cdpenamtz (11)

Kimmy cantrell
Kimmy cantrellKimmy cantrell
Kimmy cantrell
 
Kara walker
Kara walkerKara walker
Kara walker
 
Acrylic painting: A Beginners Guide
Acrylic painting: A Beginners GuideAcrylic painting: A Beginners Guide
Acrylic painting: A Beginners Guide
 
What dreams may come
What dreams may comeWhat dreams may come
What dreams may come
 
Everything that defines me in line - By: Lynnette Gilbert
Everything that defines me in line - By: Lynnette GilbertEverything that defines me in line - By: Lynnette Gilbert
Everything that defines me in line - By: Lynnette Gilbert
 
Looking & learning - telling stories
Looking & learning - telling storiesLooking & learning - telling stories
Looking & learning - telling stories
 
Grade 7 one-point perspective Lesson Plan
Grade 7 one-point perspective Lesson PlanGrade 7 one-point perspective Lesson Plan
Grade 7 one-point perspective Lesson Plan
 
Jr. High Lesson Plan - Fish Sculpture using recycled materials
Jr. High Lesson Plan - Fish Sculpture using recycled materialsJr. High Lesson Plan - Fish Sculpture using recycled materials
Jr. High Lesson Plan - Fish Sculpture using recycled materials
 
Ipg lesson plan all-in_the_cards
Ipg lesson plan all-in_the_cardsIpg lesson plan all-in_the_cards
Ipg lesson plan all-in_the_cards
 
Sell your product slide show
Sell your product  slide showSell your product  slide show
Sell your product slide show
 
Ipg sell your product poster
Ipg sell your product posterIpg sell your product poster
Ipg sell your product poster
 

Recently uploaded

Spellings Wk 3 English CAPS CARES Please Practise
Spellings Wk 3 English CAPS CARES Please PractiseSpellings Wk 3 English CAPS CARES Please Practise
Spellings Wk 3 English CAPS CARES Please PractiseAnaAcapella
 
ICT Role in 21st Century Education & its Challenges.pptx
ICT Role in 21st Century Education & its Challenges.pptxICT Role in 21st Century Education & its Challenges.pptx
ICT Role in 21st Century Education & its Challenges.pptxAreebaZafar22
 
Python Notes for mca i year students osmania university.docx
Python Notes for mca i year students osmania university.docxPython Notes for mca i year students osmania university.docx
Python Notes for mca i year students osmania university.docxRamakrishna Reddy Bijjam
 
Food safety_Challenges food safety laboratories_.pdf
Food safety_Challenges food safety laboratories_.pdfFood safety_Challenges food safety laboratories_.pdf
Food safety_Challenges food safety laboratories_.pdfSherif Taha
 
Basic Civil Engineering first year Notes- Chapter 4 Building.pptx
Basic Civil Engineering first year Notes- Chapter 4 Building.pptxBasic Civil Engineering first year Notes- Chapter 4 Building.pptx
Basic Civil Engineering first year Notes- Chapter 4 Building.pptxDenish Jangid
 
Kodo Millet PPT made by Ghanshyam bairwa college of Agriculture kumher bhara...
Kodo Millet  PPT made by Ghanshyam bairwa college of Agriculture kumher bhara...Kodo Millet  PPT made by Ghanshyam bairwa college of Agriculture kumher bhara...
Kodo Millet PPT made by Ghanshyam bairwa college of Agriculture kumher bhara...pradhanghanshyam7136
 
Seal of Good Local Governance (SGLG) 2024Final.pptx
Seal of Good Local Governance (SGLG) 2024Final.pptxSeal of Good Local Governance (SGLG) 2024Final.pptx
Seal of Good Local Governance (SGLG) 2024Final.pptxnegromaestrong
 
Introduction to Nonprofit Accounting: The Basics
Introduction to Nonprofit Accounting: The BasicsIntroduction to Nonprofit Accounting: The Basics
Introduction to Nonprofit Accounting: The BasicsTechSoup
 
Understanding Accommodations and Modifications
Understanding  Accommodations and ModificationsUnderstanding  Accommodations and Modifications
Understanding Accommodations and ModificationsMJDuyan
 
Unit-V; Pricing (Pharma Marketing Management).pptx
Unit-V; Pricing (Pharma Marketing Management).pptxUnit-V; Pricing (Pharma Marketing Management).pptx
Unit-V; Pricing (Pharma Marketing Management).pptxVishalSingh1417
 
Making communications land - Are they received and understood as intended? we...
Making communications land - Are they received and understood as intended? we...Making communications land - Are they received and understood as intended? we...
Making communications land - Are they received and understood as intended? we...Association for Project Management
 
microwave assisted reaction. General introduction
microwave assisted reaction. General introductionmicrowave assisted reaction. General introduction
microwave assisted reaction. General introductionMaksud Ahmed
 
General Principles of Intellectual Property: Concepts of Intellectual Proper...
General Principles of Intellectual Property: Concepts of Intellectual  Proper...General Principles of Intellectual Property: Concepts of Intellectual  Proper...
General Principles of Intellectual Property: Concepts of Intellectual Proper...Poonam Aher Patil
 
Grant Readiness 101 TechSoup and Remy Consulting
Grant Readiness 101 TechSoup and Remy ConsultingGrant Readiness 101 TechSoup and Remy Consulting
Grant Readiness 101 TechSoup and Remy ConsultingTechSoup
 
psychiatric nursing HISTORY COLLECTION .docx
psychiatric  nursing HISTORY  COLLECTION  .docxpsychiatric  nursing HISTORY  COLLECTION  .docx
psychiatric nursing HISTORY COLLECTION .docxPoojaSen20
 
TỔNG ÔN TẬP THI VÀO LỚP 10 MÔN TIẾNG ANH NĂM HỌC 2023 - 2024 CÓ ĐÁP ÁN (NGỮ Â...
TỔNG ÔN TẬP THI VÀO LỚP 10 MÔN TIẾNG ANH NĂM HỌC 2023 - 2024 CÓ ĐÁP ÁN (NGỮ Â...TỔNG ÔN TẬP THI VÀO LỚP 10 MÔN TIẾNG ANH NĂM HỌC 2023 - 2024 CÓ ĐÁP ÁN (NGỮ Â...
TỔNG ÔN TẬP THI VÀO LỚP 10 MÔN TIẾNG ANH NĂM HỌC 2023 - 2024 CÓ ĐÁP ÁN (NGỮ Â...Nguyen Thanh Tu Collection
 
ICT role in 21st century education and it's challenges.
ICT role in 21st century education and it's challenges.ICT role in 21st century education and it's challenges.
ICT role in 21st century education and it's challenges.MaryamAhmad92
 
How to Give a Domain for a Field in Odoo 17
How to Give a Domain for a Field in Odoo 17How to Give a Domain for a Field in Odoo 17
How to Give a Domain for a Field in Odoo 17Celine George
 
Dyslexia AI Workshop for Slideshare.pptx
Dyslexia AI Workshop for Slideshare.pptxDyslexia AI Workshop for Slideshare.pptx
Dyslexia AI Workshop for Slideshare.pptxcallscotland1987
 

Recently uploaded (20)

Spellings Wk 3 English CAPS CARES Please Practise
Spellings Wk 3 English CAPS CARES Please PractiseSpellings Wk 3 English CAPS CARES Please Practise
Spellings Wk 3 English CAPS CARES Please Practise
 
ICT Role in 21st Century Education & its Challenges.pptx
ICT Role in 21st Century Education & its Challenges.pptxICT Role in 21st Century Education & its Challenges.pptx
ICT Role in 21st Century Education & its Challenges.pptx
 
Python Notes for mca i year students osmania university.docx
Python Notes for mca i year students osmania university.docxPython Notes for mca i year students osmania university.docx
Python Notes for mca i year students osmania university.docx
 
Food safety_Challenges food safety laboratories_.pdf
Food safety_Challenges food safety laboratories_.pdfFood safety_Challenges food safety laboratories_.pdf
Food safety_Challenges food safety laboratories_.pdf
 
Basic Civil Engineering first year Notes- Chapter 4 Building.pptx
Basic Civil Engineering first year Notes- Chapter 4 Building.pptxBasic Civil Engineering first year Notes- Chapter 4 Building.pptx
Basic Civil Engineering first year Notes- Chapter 4 Building.pptx
 
Kodo Millet PPT made by Ghanshyam bairwa college of Agriculture kumher bhara...
Kodo Millet  PPT made by Ghanshyam bairwa college of Agriculture kumher bhara...Kodo Millet  PPT made by Ghanshyam bairwa college of Agriculture kumher bhara...
Kodo Millet PPT made by Ghanshyam bairwa college of Agriculture kumher bhara...
 
Spatium Project Simulation student brief
Spatium Project Simulation student briefSpatium Project Simulation student brief
Spatium Project Simulation student brief
 
Seal of Good Local Governance (SGLG) 2024Final.pptx
Seal of Good Local Governance (SGLG) 2024Final.pptxSeal of Good Local Governance (SGLG) 2024Final.pptx
Seal of Good Local Governance (SGLG) 2024Final.pptx
 
Introduction to Nonprofit Accounting: The Basics
Introduction to Nonprofit Accounting: The BasicsIntroduction to Nonprofit Accounting: The Basics
Introduction to Nonprofit Accounting: The Basics
 
Understanding Accommodations and Modifications
Understanding  Accommodations and ModificationsUnderstanding  Accommodations and Modifications
Understanding Accommodations and Modifications
 
Unit-V; Pricing (Pharma Marketing Management).pptx
Unit-V; Pricing (Pharma Marketing Management).pptxUnit-V; Pricing (Pharma Marketing Management).pptx
Unit-V; Pricing (Pharma Marketing Management).pptx
 
Making communications land - Are they received and understood as intended? we...
Making communications land - Are they received and understood as intended? we...Making communications land - Are they received and understood as intended? we...
Making communications land - Are they received and understood as intended? we...
 
microwave assisted reaction. General introduction
microwave assisted reaction. General introductionmicrowave assisted reaction. General introduction
microwave assisted reaction. General introduction
 
General Principles of Intellectual Property: Concepts of Intellectual Proper...
General Principles of Intellectual Property: Concepts of Intellectual  Proper...General Principles of Intellectual Property: Concepts of Intellectual  Proper...
General Principles of Intellectual Property: Concepts of Intellectual Proper...
 
Grant Readiness 101 TechSoup and Remy Consulting
Grant Readiness 101 TechSoup and Remy ConsultingGrant Readiness 101 TechSoup and Remy Consulting
Grant Readiness 101 TechSoup and Remy Consulting
 
psychiatric nursing HISTORY COLLECTION .docx
psychiatric  nursing HISTORY  COLLECTION  .docxpsychiatric  nursing HISTORY  COLLECTION  .docx
psychiatric nursing HISTORY COLLECTION .docx
 
TỔNG ÔN TẬP THI VÀO LỚP 10 MÔN TIẾNG ANH NĂM HỌC 2023 - 2024 CÓ ĐÁP ÁN (NGỮ Â...
TỔNG ÔN TẬP THI VÀO LỚP 10 MÔN TIẾNG ANH NĂM HỌC 2023 - 2024 CÓ ĐÁP ÁN (NGỮ Â...TỔNG ÔN TẬP THI VÀO LỚP 10 MÔN TIẾNG ANH NĂM HỌC 2023 - 2024 CÓ ĐÁP ÁN (NGỮ Â...
TỔNG ÔN TẬP THI VÀO LỚP 10 MÔN TIẾNG ANH NĂM HỌC 2023 - 2024 CÓ ĐÁP ÁN (NGỮ Â...
 
ICT role in 21st century education and it's challenges.
ICT role in 21st century education and it's challenges.ICT role in 21st century education and it's challenges.
ICT role in 21st century education and it's challenges.
 
How to Give a Domain for a Field in Odoo 17
How to Give a Domain for a Field in Odoo 17How to Give a Domain for a Field in Odoo 17
How to Give a Domain for a Field in Odoo 17
 
Dyslexia AI Workshop for Slideshare.pptx
Dyslexia AI Workshop for Slideshare.pptxDyslexia AI Workshop for Slideshare.pptx
Dyslexia AI Workshop for Slideshare.pptx
 

Learn to draw an oak tree

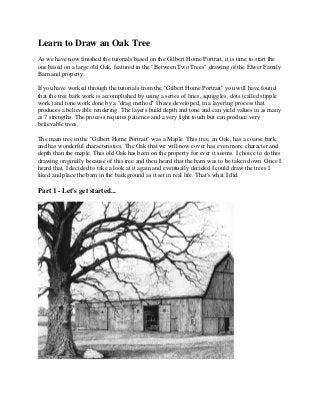
  • 1. Learn to Draw an Oak Tree As we have now finished the tutorials based on the Gilbert Home Portrait, it is time to start the one based on a large old Oak, featured in the "Between Two Trees" drawing of the Elwer Family Barn and property. If you have worked through the tutorials from the "Gilbert Home Portrait" you will have found that the tree bark work is accomplished by using a series of lines, squiggles, dots (called stipple work) and tone work done by a "drag method" I have developed, in a layering process that produces a believable rendering. The layers build depth and tone and can yield values in as many as 7 strengths. The process requires patience and a very light touch but can produce very believable trees. The main tree in the "Gilbert Home Portrait" was a Maple. This tree, an Oak, has a coarse bark and has wonderful characteristics. The Oak that we will now cover has even more character and depth than the maple. This old Oak has been on the property for ever it seems. I choice to do this drawing originally because of this tree and then heard that the barn was to be taken down. Once I heard that, I decided to take a look at it again and eventually decided I could draw the trees I liked and place the barn in the background as it set in real life. That's what I did. Part 1 - Let's get started...
  • 2. As with the beginning work on the tree from the Gilbert Home property, I start with a light pencil sketch or outline of the old oak, you can see this from the Layout image compared to the Oak Tree reference:
  • 3. With the fine point pen, I ensure that I have good ink flow on a scrap piece of paper and then wipe the ball tip clean. Starting as before in the Maple tree tutorial, at the base of the trunk where the roots go into the ground at the viewer’s bottom right of the tree base I define, with light pressure, the direction of the bark growth. This helps to give dimension and shape to the bark and the root base itself. You can see this in the close-up view of WIP image no.1 Take into consideration the three dimensional view of the tree trunk. By thinking of this tree that way and not as a line on a flat piece of paper you will be able to place the line work to help build a more believable three dimensional object. After working this first section of the tree stump or trunk you will end up with an image that should reflect the first layer of tone in the trunk. You should be able to see the bark direction and the basic growth pattern in the tree. Look at WIP Image no.2 to see what I am talking about I continue my light tone work all the way up the main trunk and then move back down to the bottom of the trunk to start again. I keep working my way around the tree stump until I have the base worked in and then start working up the trunk again. Once the basic layout shapes and lines are in you will end up with a single tone and layer image that is a composite of the main design of the tree trunk. I then take my medium point pen and begin to work in the darker tones along the layout lines that will make up the shadowed areas in the bark work itself. The medium point pen is the best tool for this job as it is a bit broader in line. I still only use light pressure with this
  • 4. pen. If you go too dark at first you will be fighting to try and get the layers of value that are necessary to yield a believable three dimensional tree. ! Remember, with ball point pen it is always easier to add layers of tone than to try to remove them. After the medium point tone layers are in you can begin to put in the small angled lines to build out the shadowed areas along the bark edges in the trunk. ! Remember, keep a consistent light source in your work. The next layer of tone that will be used is with the medium point pen again but, is done by stipple work. This helps to build up texture and increase areas of shadow in the bark work. Start at the bottom of the trunk at where the roots come out of the ground. Keeping in mind the shadow areas that will be cast in reference to the light source, add the quick stipple work to the tree trunk work. You won't add stipple work to the whole trunk in every area. Once the stipple work is in you will have a pretty good looking work in progress tree trunk. See images no. 3 and 4: The last layer is done with the medium point pen again. This is where you use the "Drag" method that we discussed earlier in the tutorial on the maple tree from the Gilbert home portrait.
  • 5. Laying the pen tip more on its side begin with a light touch and drag the tip over the area that you want to add tone to. It's a pretty quick movement and not meant to leave a distinct line rather more to leave a streak or smeared like layer of tone. You can also blend some of the ink with a blending stump or paper towel rolled tightly together and use just the very pointed tip. You don't want to overly blend any one spot though as you will begin to see a shine on the surface. The last layer of line work is done with the Fine point pen. This is where you go in and define some fine details in the bark. I find points that I want to bring out a bit more and reinforce the line that is already there. I also take this time to add any fine line light strokes that need to be added to help build the density of the object. See image no. 5: Now that we have a good start on the tree trunk, it's time to take into considerations the details that have made this Old Oak so interesting to me. The trunk has three large bumps of growth on it just below the first small branches. These are large raised, bark covered objects of growth. They are not that difficult to put in and keep the tree interesting. Part 2 - moving on... Oak Tree - Step #5
  • 6. Let’s start by looking at how they appear in the reference photo Notice that they have a highlighted side and a shadowed side. Also, that the bark is much tighter as it works around the growth. The goal is to work your bark growth lines up to the point just below the bottom of the first growth bump. Then begin to work the lines in a very light tone from the trees left side into the center of the bump.
  • 7. Next work the right side of the growth bump. Here is where you want to build the darker shadows that will force the highlighted portion of the bump to appear to come forward away from the rest of the trunk and bark work. I switch to the medium point pen now and go back and add the next layer of tone to the shadowed area of the bumps. You should have an image that resembles image # 6
  • 8. From this point I work toward the first limb and branches with growth lines in the bark that lead you to them. I choose the limbs I want to render and determine which would be drawn first and if there will be any over-lapping limbs or branches. Work out to where the over-lap will be and then stop. Work the next limb or branch to and through the place of the overlap. I keep in mind my light source as I put in my shading and depth lines in each branch and limb. The farther up the tree you go the farther away from the viewer it will get and you will need to decrease the amount of detail in the bark lines that are seen. Make them closer together and the overall tone of the tree darker as it goes up and the branches and limb go away. Again, light layers at first make up the limbs and branches. As you put the following layers on remember your light source and keep the highlighted side lighter. You can use the drag method in the limbs and branch work to create the shadowed sides. You can see a small example of the branch and limb work in WIP image # 7
  • 9. The next portion of the drawing work in the oak tree is to finish the limb and branch work. Using the methods that we used in the bark work, continue the line layers in the growth direction. I use light pencil lines to put in the basic direction that I want the limbs and branches to go in keeping with the reference photo. There will be less detail line work in the smaller limbs and even less to none in the smaller branches and twigs that get farther away from the viewer in the scene. This is also true just due to the size of the branches and twigs. Keep in mind where limbs and larger branches will over-lap and run in front or behind each other. This is also a point that you can add in cast shadows to lower branches from those above or beside. These little details help build the depth and dimension in the tree drawing itself. This is where the darker tones in the branches come in as you work up the tree.
  • 10. Remember that there are very few to no perfectly straight lines that occur in the growth of a tree in nature especially in this type of Oak tree so, as you work through the limbs and branches keep your lines flowing off the straight and flat path. Gravity and the wind have a lot to do with how a tree grows and looks in nature. Think about the weight that would be in the limbs. Show the stress of that weight in each branch as gravity tugs and pulls each one toward the ground as it struggles to grow Up and Out reaching for the sun light it needs. It’s a living thing that struggles against the elements to survive. Let that struggle show in your rendering of the tree in each branch and limb. Then as you get to the ends of the limbs and branches notice that the twigs arch slightly upwards. This is that struggle of the tree to constantly keep itself pushing upwards to the suns rays. I love to draw these grand old trees when the foliage is gone. It allows me to show each of the turns and bends that time and the elements have brought the tree through. Each tree has a character all its own. I strive to show that character in each drawing I do. Give them life.
  • 11. If you notice this last Work In Progress image, you will see that I have already added the oak’s first resident... a bird resting on a branch. There will be many more of these to come before I call the drawing finished. To finish the tree I work the rest of the limbs and branches to the edge of the page and out into the scene. The diameter of the limbs and branches get smaller as I said before, the farther away from the viewer they get and the more toward the end of the branch that they grow. I hope that this tutorial has been and will be helpful to you to see how to render the different types of trees out there. This is in no way meant to be an exhaustive study on all trees. It is meant to help guide you as you study to develop your own skills as an artist. If you have any specific questions for me please email me and I will be happy to answer them. Vincent D. Whitehead “Keep On Creating!” May 2010