
Recommended
More Related Content
Viewers also liked
Similar to A Fast Introduction to Arduino and Addressable LED Strips
Similar to A Fast Introduction to Arduino and Addressable LED Strips (20)
Recently uploaded
Recently uploaded (20)
A Fast Introduction to Arduino and Addressable LED Strips
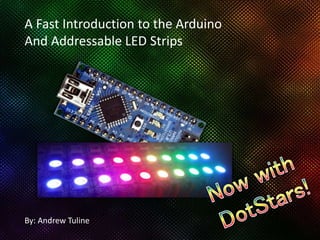
- 1. By: Andrew Tuline A Fast Introduction to the Arduino And Addressable LED Strips
- 3. Spark FUN
- 6. Too Many Pins Someone has more skills, patience and time than I do!
- 7. Addressable LED Strips • Addressable LED strips provide circuitry to communicate serially • Each LED has a chip to receive, decode, drive LED’s and propagate data
- 8. Form Factors Also 30, 60, 144 pixels/m
- 9. Enter Adafruit • Adafruit has branded WS2812’s and APA102C’s • They are called NeoPixels and DotStars Adafruit sells addressable LED’s in many shapes and sizes!
- 10. NeoPixels vs. DotStars DotStars • Data and clock pin • High data rate • Interrupt compatible • More $$ • Currently strip only • APA102C https://learn.adafruit.com/adafruit-dotstar-leds/overview NeoPixels • Data pin only • Slow data rate • Not interrupt compatible • Less $$ • Strips and more • WS2812 & WS2812B
- 11. A Typical Addressable Strip Strips include: • WS2812, WS2812B • APA102, APA102C • WS2801, others . . 12V accent lighting strips don’t count!
- 12. Simple APA102C Connection D12 – D11 – 5V – Gnd – Vin – Data in Clock in 5V Gnd, Battery - Battery + If using the Arduino 5V pin, keep the strip SHORT and reduce brightness!
- 13. Addressable LED Libraries • Adafruit NeoPixel library • Adafruit DotStar library And then there’s: • FastLED
- 14. Why FastLED? • FastLED is a fast, easy-to-use Arduino library for programming addressable LED strips. • It supports multiple microcontroller platforms. • It supports multiple addressable LED types. • It has a lots of of function calls. • FastLED is used by thousands of developers. • The developers count clock cycles. Do a YouTube search for ‘FastLED’
- 15. Downloading FastLED • Follow the link at www.fastled.io • The current version is on GitHub at: https://github.com/FastLED/FastLED • Download the zip file • Extract the directory FastLED-master. • Rename the directory from: FastLED-master to FastLED • Place that directory into: C:Program Files(x86)Arduinolibraries I use the development version (currently 3.1)!
- 16. FirstLight Example • In the Arduino IDE, select ‘File | Examples | FastLED | FirstLight’ • I’m using APA102C, so I need to change some definitions We need to configure it for our LED strip!
- 17. Modified FirstLight Code #include "FastLED.h" #define NUM_LEDS 20 #define DATA_PIN 12 #define CLOCK_PIN 11 uint8_t max_bright = 64; CRGB leds[NUM_LEDS]; void setup() { FastLED.addLeds<APA102, DATA_PIN, CLOCK_PIN, BGR>(leds, NUM_LEDS); FastLED.setBrightness(max_bright); } void loop() { for (int count = 0; count < NUM_LEDS; count++) { leds[count] = CRGB::White; FastLED.show(); delay(100); leds[count] = CRGB::Black; } } The white LED should march across the array. // Include the library // Number of LED’s // Our data pin // Our clock pin // Define brightness limiter // Define the LED array // Run once // Initialize the LED library // Limit the brightness // Run continuously // Cycle through all LED’s // Set the current one white // Show it // Wait for a bit // Set it to black
- 18. Setting LED values • leds[9] = CRGB::Cyan; // Web colours • leds[9].g = 255; // Just set green • leds[0] = CRGB(255,0,0); // CRGB values (red, green, blue) • leds[0] = 0x0000ff; // Use a long hex value Or via HSV • leds[9] = CSHV(hue, sat, bright); // Each goes up to 255 FastLED provides lots more ways to assign colours to LED’s
- 19. FastLED Is Just Getting Started FastLED contains a LOT of functions including: • Random number generation • Fast 8 and 16 bit basic math functions • Fast trigonometry • Setting RGB and HSV values • fill_rainbow, fill_gradient, fading, scaling, blending, noise, palettes, palette blending, beats and more. . . • Power management We’re talking loads of functionality and FAST
- 21. Rainbow March #include "FastLED.h" #define LED_DT 12 // Data & clock pin #define NUM_LEDS 20 // Number of LED's #define COLOR_ORDER BRG // Change the order as necessary #define LED_TYPE WS2812 // What kind of strip are you using? uint8_t max_bright = 64; // How bright do we want to go struct CRGB leds[NUM_LEDS]; // Initialize our array uint8_t thisdelay = 8; // A delay value for the sequence uint8_t thishue = 0; // Starting hue value. uint8_t deltahue = 5; // Difference in hue between LED’s Use variables where possible
- 22. Rainbow March cont’d void setup() { LEDS.addLeds<LED_TYPE, LED_DT, COLOR_ORDER>(leds, NUM_LEDS); FastLED.setBrightness(max_bright); } void loop () { rainbow_march(); FastLED.show(); delay(thisdelay); // or FastLED.delay(thisdelay); } void rainbow_march() { thishue++; fill_rainbow (leds, NUM_LEDS, thishue, deltahue); // FastLED does the heavy lifting } It boils down to just a few lines of loop code
- 23. Power Managed Rainbow March 1) In setup add: set_max_power_in_volts_and_milliamps(5, 500); // Power management set at 5V, 500mA. 2) Change delay from: delay(thisdelay); // or FastLED.delay(thisdelay); To: delay_at_max_brightness_for_power(thisdelay); // Power managed FastLED delay. 3) Change show from: FastLED.show(); To: show_at_max_brightness_for_power(); // Power managed display of LED's.
- 24. More FastLED Demos • FastLED provides several demos with the library • I’ve also written several demos downloadable at: https://github.com/atuline/FastLED-Demos • There’s loads of other demos available The FastLED community is at Google+
- 25. My Demos include • one_sine demo • pop_fade_demo • ripple • two_sin_demo • noise16_demo • three_sin_demo • rainbow_march_demo • aalight aalight provides many routines, IR, keyboard, serial and button input • fht_log • matrix_demo • soundbracelet • soundmems • and more. .
- 26. High School Trigonometry • An increasing linear input value yields a sine wave output value • Map the output to brightness or location • Change frequency, phase, amplitude • Mix multiple sine waves • 8 or 16 bit Why count pixels when you can use sine waves
- 27. More Topics • Power issues • Data line conditioning • Troubleshooting, getting support • Diffusers • 2D matrix • POV • Sound reactive, MSGEQ7 vs FFT • Other platforms (ie. Teensy 3.1, Octo WS2811) • IR and other kinds of control • DMX • Loop friendly routines
- 28. LED Research • fastled.io • github.com • pastebin.com • arduino.cc/tutorial • playground.arduino.cc • learn.adafruit.com I mostly use my Google-fu
- 29. Sources for Parts • Lee’s Electronics • Adafruit • Sparkfun • eBay • Aliexpress All it takes is a VISA card and your imagination
- 30. Demo Time
Editor's Notes
- - Who's already using an Arduino? - Who's already using addressable LED's? - Adafruit library? FastLED?
- A trade-off between time and money.
- Let’s go through some menu items.
- You can reduce pin counts by multiplexing (or strobing various pins). Use shift registers to support all these pins.
- I’m not talking the 12V analog RGB strips. One or two pins can support a lot of LED’s, each with a unique colour.
- Use Neopixels where you want multiple lines. Use DotStars for POV and for use with interrupt driven libraries, i.e. IR.
- That would be 5V, not 7V, not 12V. APA102C is round, has 6 pins WS2812 is LED+chip and has 6 pins WS2801 has separate LED+chip and 6 pins for LED. APA102 is square insides, WS2812B has 4 pins. WS2811 is a driver chip, while WS2812 is LED+driver chip (and 6 pins at that). https://cpldcpu.wordpress.com/2014/08/27/apa102/ (tims blog apa102)
- This is a simplified connection for short strips. I now use 5V USB rechargeable power banks for my short strips. Once you go over ~400mA to the strip, you should start using a dedicated 5V power supply.
- If you saw something cool at Burning Man, it probably used FastLED. Arduino’s, Adafruit Flora/Gemma & Trinket (ATTINY based), PJRC Teensy (ARM based)
- I use the development version 3.1
- FastLED supports multiple data pins.
- You need to add the ‘Wheel’ function for similar functionality with the Neopixel library.
- Great for portable strips.
- Perlin Simplex noise generation.
- Use sine waves to go back and forth
- http://ledwallproject.blogspot.ca/2014/05/making-5v-signals-for-ws2812-with-logic.html?m=1
- Power banks use rechargeable 18650 batteries. Power can be the biggest challenge. Long strips require extra power design. Resistor to the data lines (if long). Capacitors to the power lines. Apply power directly to each strip. Common grounds.