
Recommended
More Related Content
What's hot
What's hot (20)
Viewers also liked
Similar to SIP Pap2 T Sip 1 SETTING
Similar to SIP Pap2 T Sip 1 SETTING (20)
Recently uploaded
Recently uploaded (20)
SIP Pap2 T Sip 1 SETTING
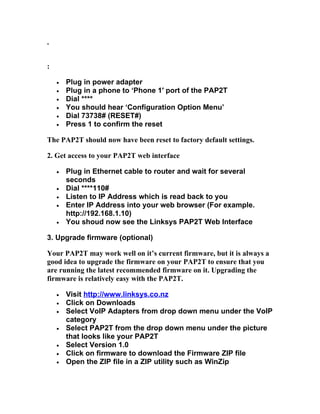
- 1. . : • Plug in power adapter • Plug in a phone to ‘Phone 1′ port of the PAP2T • Dial **** • You should hear ‘Configuration Option Menu’ • Dial 73738# (RESET#) • Press 1 to confirm the reset The PAP2T should now have been reset to factory default settings. 2. Get access to your PAP2T web interface • Plug in Ethernet cable to router and wait for several seconds • Dial ****110# • Listen to IP Address which is read back to you • Enter IP Address into your web browser (For example. http://192.168.1.10) • You shoud now see the Linksys PAP2T Web Interface 3. Upgrade firmware (optional) Your PAP2T may work well on it’s current firmware, but it is always a good idea to upgrade the firmware on your PAP2T to ensure that you are running the latest recommended firmware on it. Upgrading the firmware is relatively easy with the PAP2T. • Visit http://www.linksys.co.nz • Click on Downloads • Select VoIP Adapters from drop down menu under the VoIP category • Select PAP2T from the drop down menu under the picture that looks like your PAP2T • Select Version 1.0 • Click on firmware to download the Firmware ZIP file • Open the ZIP file in a ZIP utility such as WinZip
- 2. • Click Extract and extract your files to a folder you choose (e.g. C:PAP2T) • Use Windows Explorer to open a window on your selected folder • Click on the .exe Application (named something like upg- pap2t-5-1-3-LS.exe) • Accept the warning and Click Continue • Enter the IP Address of the PAP2T above into the Window and click OK • Click Upgrade to update your PAP2T firmware to the new version you have downloaded • Wait until the progress indicator has finished doing the upgrade. Do NOT unplug your PAP2T during the upgrade. • When successfully upgraded you should see a message like ‘Your SPA has been successfully upgraded to the version shown below’ (Latest version at time of writing was 5.1.3(LS) • Now in your web browser put in the PAP2T IP Address again and on the Info page you should see the new firmware version displayed beside ‘Software Version’ 4. Getting Admin access on your PAP2T You need to get administrator access to change many of the settings of your PAP2T to do this go the web interface and click on ‘Admin Login’ followed by ‘Switch to advanced view’
- 3. 5. Changing your System Settings • Click on the ‘System’ tab • It is recommended you set a User and Admin password on the web interface of the PAP2T to avoid unauthorised access. • Set ‘Admin Passwd’ and ‘User Password’ to a password of your choosing and write it down so you don’t forget it. • Click ‘Save Settings’ • The unit will reset and now prompt you for your username and password. • Enter ‘admin’ as the username and your new password to access your PAP2T
- 4. 6. Changing your SIP Settings • Click on the ‘SIP’ tab • Change the following SIP Timer Values: o Reg Max Expires = 600 o Reg Retry Intvl = 10 o Reg Retry Long Intvl = 20 (Changing the above will allow your PAP2T to recover from registration failures more quickly.)
- 5. • Change the following SDP Payload Types: o RTP-Start-Loopback-Codec: G711a • Change the following NAT Support Parameters (optional): o STUN Enable: yes o STUN Test Enable: yes o STUN Server: stun.2talk.co.nz (The STUN settings should be optional. Your PAP2T should work fine without STUN enabled, so you can enable/disable these settings if you are having issues registering.) • Click on ‘Save Settings’
- 7. 7. Changing your Provisioning Settings • Click on the ‘Provisioning’ tab • Change the following in the Configuration Profile: o Provision Enable: no • Change the following in the Firmware Upgrade parameters: o Upgrade Enable: no • Click on ‘Save Settings’ 8. Changing your Regional settings If you wish to support the New Zealand Tones for your phones and set the date/time then you can setup the following. There are a lot of settings here that are not strictly necessary for a
- 8. functional phone, but if you wish the PAP2T to behave similar to a Telecom landline then you are best changing the settings on this page. • Call Progress Tones o Dial Tone: 400@-9;30(*/0/1) o Second Dial Tone: 420@-19,520@-19;10(*/0/1+2) o Outside Dial Tone: 420@-16;10(*/0/1) o Prompt Tone: 520@-19,620@-19;10(*/0/1+2) o Busy Tone: 400@-9;*(.5/.5/1) o Reorder Tone: 400@-9;15(.25/.25/1+2) o Off Hook Warning Tone: 400@-10,680@0;*(.125/.125/1+2) o Ring Back Tone: 400@-19,450@-19;*(.4/.2/1+2,.4/.2/1+2,2/0/0) o Confirm Tone: 600@-16;1(.25/.25/1) o SIT1 Tone: 985@-16,1428@-16,1777@-16;20(.380/0/1,.380/0/2,.380 /0/3,0/4/0) o SIT2 Tone: 914@-16,1371@-16,1777@-16;20(.274/0/1,.274/0/2,.380 /0/3,0/4/0) o SIT3 Tone: 914@-16,1371@-16,1777@-16;20(.380/0/1,.380/0/2,.380 /0/3,0/4/0) o SIT4 Tone: 985@-16,1371@-16,1777@-16;20(.380/0/1,.274/0/2,.380 /0/3,0/4/0) o MWI Dial Tone: 400@-19;2(.1/.1/1);28(*/0/1) o Cfwd Dial Tone: 350@-19,440@-19;2(.2/.2/1+2);10(*/0/1+2) o DND Dial Tone: 350@-19,440@-19;2(.2/.2/2);10(*/0/1+2) o Holding Tone: 600@-19;*(.1/.1/1,.1/.1/1,.1/9.5/1) o Conference Tone: 350@-19;20(.1/.1/1,.1/9.7/1) o Secure Call Indication Tone: 397@-19,507@-19;15(0/2/0,.2/.1/1,.1/2.1/2) o Feature Invocation Tone: 350@-16;*(.1/.1/1) • Distinctive Ring Patterns o Ring1 Cadence: 60(.4/.2,.4/2)
- 9. o Ring2 Cadence: 60(.3/.2,1/.2,.3/4) o Ring3 Cadence: 60(.8/.4,.8/4) o Ring4 Cadence: 60(.4/.2,.3/.2,.8/4) o Ring5 Cadence: 60(.2/.2,.2/.2,.2/.2,1/4) o Ring6 Cadence: 60(.2/.4,.2/.4,.2/4) o Ring7 Cadence: 60(.4/.2,.4/.2,.4/4) o Ring8 Cadence: 60(0.25/9.75) • Distinctive Call Waiting Tone Patterns o CWT1 Cadence: 30(.3/9.7) o CWT2 Cadence: 30(.1/.1, .1/9.7) o CWT3 Cadence: 30(.1/.1, .3/.1, .1/9.3) o CWT4 Cadence: 30(.1/.1,.1/.1,.1/9.5) o CWT5 Cadence: 30(.3/.1,.1/.1,.3/9.1) o CWT6 Cadence: 30(.1/.1,.3/.2,.3/9.1) o CWT7 Cadence: 30(.3/.1,.3/.1,.1/9.1) o CWT8 Cadence: 2.3(.3/2) • Ring and Call Waiting Tone Spec o Ring Waveform: Sinusoid o Ring Frequency: 25 o Ring Voltage: 70 o CWT Frequency: 400@-10 o Synchronized Ring: no
- 11. • Miscellaneouset Local Date (mm/dd): (Set current month and day) o Set Local Time (HH/mm): (Set current hour and minute) o Time Zone: GMT+12 o FXS Port Impedance: 220+8200 - - 120nF o Daylight Saving Time Rule: start=10/1/7/2;3/15/7/3;save=1 o FXS Port Input Gain: -4 o FXS Port Output Gain: -10 o DTMF Playback Level: 0 o DTMF Playback Length: .1 o Detect ABCD: no o Playback ABCD: yes o Caller ID Method: Bellcore(N.Amer,China) o FXS Port Power Limit: 4 9. Configure each of your Lines by clicking on the ‘Line 1′ or ‘Line 2′ tabs • Network Settings parameters: o Network Jitter Level: extremely high (Setting the jitter level to extremely high will add extra latency to the call but will make the voice quality more reliable over most broadband connections. Unless you believe your internet connection is very stable
- 12. and does not suffer from high latency or latency variations it is recommended to keep this level extremely high) • Proxy and Registration Settings: o Proxy: 2talk.co.nz o Use Outbound Proxy: yes o Outbound Proxy: 2talk.co.nz o Use OB Proxy In Dialog: yes o Register: yes o Make call without Reg: no o Register Expires: 600 o Ans call without Reg: yes o Use DNS SRV: yes o DNS SRV Auto Prefix: no o Proxy Fallback Intvl: 600 o Proxy Redundancy Method: normal • Subscriber Information: o Display Name: <Your Name> (Replace with your real name) o User ID: <Your number> (Replace with your 2talk phone number e.g. 028890000) o Password: <Your password> (Replace with your 2talk phone password) o Use Auth ID: yes o Auth ID: <Your number> (Replace with your 2talk phone number e.g. 028890000)
- 13. • Supplementary Service Subscription settings: o If you choose to leave many of the supplementary services enabled on the PAP2T then the star codes
- 14. that you use to activate/deactivate services with 2talk will not work as the PAP2T uses many of the same star codes and will intercept them when you try to dial through to 2talk. It is therefore recommended that you disable some of the key services such as: Block CID Serv: no Block ANC Serv: no Cfwd All Serv: no Cfwd Busy Serv: no Cfwd No Ans Serv: no Cfwd Sel Serv: no Cfwd Last Serv: no Block Last Serv: no Accept Last Serv: no DND Serv: no Call Return Serv: no Speed Dial Serv: no • Audio Configuration parameters: o Preferred Codec: G729a o Silence Supp Enable: no o Use Pref Codec Only: no o G729a Enable: yes o Echo Canc Enable: yes o Echo Canc Adapt Enable: yes o Echo Supp Enable: yes o FAX CED Detect Enable: yes o FAX CNG Detect Enable: yes o FAX Passthru Codec: G711a o FAX Codec Symmetric: yes o FAX Passthru Method: NSE o DTMF Tx Method: AVT o FAX Process NSE: yes o FAX Disable ECAN: no NOTE: Since the 2talk FAX service requires that the customer device support the T.38 fax protocol for reliable IP fax communications and the PAP2T does not currently support T.38 – you will not be able to get
- 15. a fax machine working through 2talk using the PAP2T device. We recommend instead you purchase a Linksys SPA2102 or SPA3102 if you wish connect a fax machine to 2talk which both support T.38 and are known to work well with 2talk. • Dial Plan parameters: o You can build your own NZ dial plan. Below is an example dial plan you can use. Dial Plan: (0[2-9][2-9]xxxxxx|[2-9]xxxxxx|021x.| 022x.|0508x.|0800x.|025x.|027x.|028x.|029x.|00x.| 1xx|01x|*x.) Emergency Number: 111 • FXS Port Polarity Configuration: o Idle Polarity: Forward o Caller Conn Polarity: Forward o Callee Conn Polarity: Forward
- 17. If you are still having problems getting your PAP2T to register with 2talk then you can try disabling or enabling the STUN settings as mentioned earlier. Another thing you can try is changing your SIP Port from ‘5060′ to ‘50600′ in the SIP Settings under each line Another thing you can try is to change the ‘Proxy’ and ‘Outbound Proxy’ from ‘2talk.co.nz’ to ‘2talk.co.nz:50600′ in the Proxy and Registration settings under each line