SlideShare a Scribd company logo
1 of 29
Download to read offline
Product: TRACK-TYPE TRACTOR
Model: D9R TRACK-TYPE TRACTOR 8BL
Configuration: D9R Track-Type Tractor Power Shift 8BL01053-UP (MACHINE) POWERED BY 3408 Engine
Disassembly and Assembly
D9R Track-Type Tractor Power Train
Media Number -SENR5387-14 Publication Date -01/08/2018 Date Updated -30/08/2018
i05768467
Final Drive Planetary Carrier (In Chassis) - Install
SMCS - 4092-012
Installation Procedure
Table 1
Required Tools
Tool Part Number Part Description Qty
A
5P-8622 Shackle 1
151-2816 Plate 1
142-6893 Adjustable Hook Gp 1
5P-8732 Adapter 1
1D-4609 Bolt 3
2J-3505 Full Nut 3
5H-1504 Hard Washer 6
B
6V-3170 Double Acting Cylinder 1
6V-3009 Crossbar 1
9U-6600 Hand Hydraulic Pump 1
C 1P-1837 Bearing Puller Adapter 2
D 1P-0520 Driver Group 1
1. Make sure that all of the parts are clean. Inspect all of the parts. Make replacements, if
necessary.
1/6
D9R Track-Type Tractor Power Shift 8BL01053-UP (MACHINE) POWERED BY 34...
2021/10/27
https://127.0.0.1/sisweb/sisweb/techdoc/techdoc_print_page.jsp?returnurl=/sis...
Illustration 1 g00627127
Illustration 2 g00627126
2. Lower the temperature of the sleeve bearing if sleeve bearing (19) has been removed. Install
the sleeve bearing with Tooling (D) .
3. Use Tooling (D) to install the lip seal in the hub. If Tooling (D) is not available, retainer
(15) may be installed. Ring (6) and a soft hammer may be used to install lip seal (18) .
4. Put clean oil on the lip of the seal.
2/6
D9R Track-Type Tractor Power Shift 8BL01053-UP (MACHINE) POWERED BY 34...
2021/10/27
https://127.0.0.1/sisweb/sisweb/techdoc/techdoc_print_page.jsp?returnurl=/sis...
Illustration 3 g01092639
5. Use Tooling (D) and a suitable press in order to install ring (16) in retainer (15) .
Illustration 4 g00627125
6. Install pins (17) in the holes that are in the hub.
Illustration 5 g00627123
3/6
D9R Track-Type Tractor Power Shift 8BL01053-UP (MACHINE) POWERED BY 34...
2021/10/27
https://127.0.0.1/sisweb/sisweb/techdoc/techdoc_print_page.jsp?returnurl=/sis...
7. Put retainer (15) in position on the hub. Install bolts (14) that hold the retainer in place.
Tighten the bolts to a torque of 135 ± 15 N·m (100 ± 11 lb ft).
Illustration 6 g00627129
8. Remove Tooling (B) and Tooling (C) from the final drive.
Note: For assembly of the planetary carriers, see Disassembly and Assembly, "Final Drive -
Assemble".
Illustration 7 g00627120
9. Put sun gear (13) in position in the planetary carrier.
4/6
D9R Track-Type Tractor Power Shift 8BL01053-UP (MACHINE) POWERED BY 34...
2021/10/27
https://127.0.0.1/sisweb/sisweb/techdoc/techdoc_print_page.jsp?returnurl=/sis...
Illustration 8 g00627130
10. Put Tooling (A) in position on the planetary carrier. Make sure that O-ring seal (19) is in
position on the hub.
11. Make an alignment of the gears and slide planetary carrier (11) into the hub. Push the
planetary carrier inward. The planetary carriers should be approximately 2.54 cm (1.000
inch) from the final drive hub.
Illustration 9 g01092638
12. Install three bolts (10) that are 3/4 inch - 10 NC x 3.5 inch. The bolts should be installed at
even distances from each other. Remove Tooling (A) . Install bolts (8) that hold the
planetary carrier in position. Remove bolts (10) and install the other three bolts that hold the
planetary carrier in position. Tighten bolts (8) to a torque of 430 ± 60 N·m (317 ± 44 lb ft).
5/6
D9R Track-Type Tractor Power Shift 8BL01053-UP (MACHINE) POWERED BY 34...
2021/10/27
https://127.0.0.1/sisweb/sisweb/techdoc/techdoc_print_page.jsp?returnurl=/sis...
Illustration 10 g01092637
13. Remove three bolts (7) from the center of cover (6) . Remove three bolts (9) and cover (6)
from the final drive.
Illustration 11 g00627133
14. Remove spiral lockring (5) , ring (4) , and retainer (3) .
End By: Install the axles. See Disassembly and Assembly, "Axle - Install".
6/6
D9R Track-Type Tractor Power Shift 8BL01053-UP (MACHINE) POWERED BY 34...
2021/10/27
https://127.0.0.1/sisweb/sisweb/techdoc/techdoc_print_page.jsp?returnurl=/sis...
Product: TRACK-TYPE TRACTOR
Model: D9R TRACK-TYPE TRACTOR 8BL
Configuration: D9R Track-Type Tractor Power Shift 8BL01053-UP (MACHINE) POWERED BY 3408 Engine
Disassembly and Assembly
D9R Track-Type Tractor Power Train
Media Number -SENR5387-14 Publication Date -01/08/2018 Date Updated -30/08/2018
i03477582
Final Drive - Disassemble
SMCS - 4050-015
Disassembly Procedure
Table 1
Required Tools
Tool Part Number Part Description Qty
A 138-7575 Link Bracket 3
B
8B-7548 Push-Puller Tool Group 1
8H-0684 Ratchet Wrench 1
8B-7554 Bearing Cup Puller 1
C 138-7573 Link Bracket 3
D 1P-0520 Driver Group 1
E
1P-0527 Plate 1
6V-3160 Hydraulic Cylinder Gp 1
5P-9695 Pressure Plate 1
2S-4680 Stud 3
5H-1504 Hard Washer 3
6B-6682 Full Nut 3
FT-1409 Spacer 6
9U-6600 Hand Hydraulic Pump 1
F 138-7574 Link Bracket 2
1/13
D9R Track-Type Tractor Power Shift 8BL01053-UP (MACHINE) POWERED BY 34...
2021/10/27
https://127.0.0.1/sisweb/sisweb/techdoc/techdoc_print_page.jsp?returnurl=/sis...
Start By:
a. Remove the final drive. See Disassembly and Assembly, "Final Drive - Remove".
When you are using hydraulic cylinders and puller studs, always ensure
that the rated capacity of the puller stud meets or exceeds the rated
capacity of the hydraulic cylinder. If the puller stud does not meet or
exceed the rated capacity of the hydraulic cylinder, a sudden failure of
the puller stud could occur. The sudden failure of the puller stud could
result in personal injury or death.
NOTICE
Do not use threaded rods that have not been hardened as tooling with
hydraulic cylinders. The maximum rated tonnage should be stamped
on one end of the puller studs. Do not use threaded rods that have not
been stamped with the rated tonnage.
2/13
D9R Track-Type Tractor Power Shift 8BL01053-UP (MACHINE) POWERED BY 34...
2021/10/27
https://127.0.0.1/sisweb/sisweb/techdoc/techdoc_print_page.jsp?returnurl=/sis...
Illustration 1 g01086838
1. Install Tooling (A) on the planetary carrier. Fasten a suitable lifting device to Tooling (A).
2. Remove bolts (1) that hold the planetary carrier to the hub.
3. Remove planetary carrier (2) from the hub. The weight is approximately 170 kg (375 lb).
Illustration 2 g00627501
4. Remove bolts (3) and three plates (4). Remove the O-ring seals from the plates.
3/13
D9R Track-Type Tractor Power Shift 8BL01053-UP (MACHINE) POWERED BY 34...
2021/10/27
https://127.0.0.1/sisweb/sisweb/techdoc/techdoc_print_page.jsp?returnurl=/sis...
Illustration 3 g00627502
5. Use a suitable press to remove shafts (5) from the planetary carrier.
Illustration 4 g00627505
6. Remove gears (7) from the planetary carrier.
7. Remove bearing cones (6) from each side of gears (7).
Illustration 5 g01086839
8. Remove bearing cups (8) from each side of gears (7) with Tooling (B).
4/13
D9R Track-Type Tractor Power Shift 8BL01053-UP (MACHINE) POWERED BY 34...
2021/10/27
https://127.0.0.1/sisweb/sisweb/techdoc/techdoc_print_page.jsp?returnurl=/sis...
Illustration 6 g01086869
9. Install Tooling (C) on the planetary carrier, as shown. Fasten an appropriate lifting device to
Tooling (C).
Note: There is a sun gear in the middle of the planetary carrier. The sun gear is free to fall if
the gear stays with the planetary carrier.
10. Remove sun gear (10) and planetary carrier (9) as an assembly from the hub. The weight is
approximately 95 kg (210 lb).
Illustration 7 g00627509
11. Remove spiral ring (11) from the sun gear.
5/13
D9R Track-Type Tractor Power Shift 8BL01053-UP (MACHINE) POWERED BY 34...
2021/10/27
https://127.0.0.1/sisweb/sisweb/techdoc/techdoc_print_page.jsp?returnurl=/sis...
Illustration 8 g01086870
12. Fasten a suitable lifting device in order to remove planetary carrier (9) from sun gear (10).
The weight of the planetary carrier is approximately 68 kg (150 lb).
Illustration 9 g00627511
13. Remove bolts (12) and plates (13).
6/13
D9R Track-Type Tractor Power Shift 8BL01053-UP (MACHINE) POWERED BY 34...
2021/10/27
https://127.0.0.1/sisweb/sisweb/techdoc/techdoc_print_page.jsp?returnurl=/sis...
Illustration 10 g01086871
14. Use a suitable press to remove shafts (14) from the planetary carrier.
15. Remove gears (15) from the planetary carrier.
Illustration 11 g00627520
16. Remove bearing cone (16) from each side of gears (15).
Illustration 12 g00627522
17. Remove bearing cup (17) from each side of gear (15).
7/13
D9R Track-Type Tractor Power Shift 8BL01053-UP (MACHINE) POWERED BY 34...
2021/10/27
https://127.0.0.1/sisweb/sisweb/techdoc/techdoc_print_page.jsp?returnurl=/sis...
Illustration 13 g00627524
18. Remove lockring (18) from each of the gears.
Illustration 14 g00627525
19. Remove sun gear (19).
Illustration 15 g00627542
20. Remove bolts and retainer (20). Use Tooling (D) and a suitable press to remove ring (21)
from retainer (20) if a replacement of either part is needed.
8/13
D9R Track-Type Tractor Power Shift 8BL01053-UP (MACHINE) POWERED BY 34...
2021/10/27
https://127.0.0.1/sisweb/sisweb/techdoc/techdoc_print_page.jsp?returnurl=/sis...
Illustration 16 g00627543
21. Use a magnet to remove pins (22) from the hub.
22. Install Tooling (A) on the hub. Fasten an appropriate lifting device to Tooling (A). Remove
the hub and ring gear (23) from hub (24). The weight of the hub and ring gear is
approximately 136 kg (300 lb).
Illustration 17 g01096464
23. Turn over the hub and the ring gear. Remove retainer ring (23) from the hub.
9/13
D9R Track-Type Tractor Power Shift 8BL01053-UP (MACHINE) POWERED BY 34...
2021/10/27
https://127.0.0.1/sisweb/sisweb/techdoc/techdoc_print_page.jsp?returnurl=/sis...
Illustration 18 g01086875
24. Install Tooling (A) on hub (25). Fasten an appropriate lifting device to Tooling (A). Remove
hub (25) from ring (24). The weight of the hub is approximately 41 kg (90 lb).
Illustration 19 g01096496
25. Install Tooling (E). The rod end should be down. Make sure that the hydraulic cylinder is in
the center of the 5P-9695 Pressure Plate. Make sure that the 1P-0527 Plate is between the
hydraulic cylinder and the hub.
26. Loosen hub (26) from hub (28) with Tooling (E) until the bearing is free. It is possible that
the bearing cone will need to be heated with a torch.
10/13
D9R Track-Type Tractor Power Shift 8BL01053-UP (MACHINE) POWERED BY ...
2021/10/27
https://127.0.0.1/sisweb/sisweb/techdoc/techdoc_print_page.jsp?returnurl=/sis...
Illustration 20 g00627549
27. Remove Tooling (E). Remove bearing cone (27).
Illustration 21 g01086876
28. Install Tooling (F) on hub (26). Fasten a suitable lifting device to Tooling (F). Remove hub
(26) from hub (28). The weight of the hub is approximately 352 kg (775 lb).
11/13
D9R Track-Type Tractor Power Shift 8BL01053-UP (MACHINE) POWERED BY ...
2021/10/27
https://127.0.0.1/sisweb/sisweb/techdoc/techdoc_print_page.jsp?returnurl=/sis...
Illustration 22 g00627551
29. Remove Duo-Cone seal (29) from the hub.
Illustration 23 g00627552
30. Remove bearing cup (31) from the hub with a punch and a hammer.
31. Turn over the hub. Remove bearing cup (30) from the hub with a punch and a hammer.
Illustration 24 g00627553
32. Remove Duo-Cone seal (32) from hub (28). Put identification on the seal for installation.
12/13
D9R Track-Type Tractor Power Shift 8BL01053-UP (MACHINE) POWERED BY ...
2021/10/27
https://127.0.0.1/sisweb/sisweb/techdoc/techdoc_print_page.jsp?returnurl=/sis...
Illustration 25 g00627555
33. If necessary, remove bearing cone (33) from the hub. Securely support the hub. Heat the
circumference of the cone evenly. Do not stop the torch and heat the cone in any one place.
If the hub is heated excessively during bearing removal 150 °C (300 °F), the future service
life may be reduced. If the bearing cone is heated in any one place to a temperature above
120 °C (248 °F), the heat treatment will be destroyed. A bearing failure is probable if the
bearing is used again.
Illustration 26 g00627556
34. Remove lip seal (34) from the hub.
35. Inspect sleeve bearing (35). If necessary, remove the sleeve bearing from the hub.
13/13
D9R Track-Type Tractor Power Shift 8BL01053-UP (MACHINE) POWERED BY ...
2021/10/27
https://127.0.0.1/sisweb/sisweb/techdoc/techdoc_print_page.jsp?returnurl=/sis...
Product: TRACK-TYPE TRACTOR
Model: D9R TRACK-TYPE TRACTOR 8BL
Configuration: D9R Track-Type Tractor Power Shift 8BL01053-UP (MACHINE) POWERED BY 3408 Engine
Disassembly and Assembly
D9R Track-Type Tractor Power Train
Media Number -SENR5387-14 Publication Date -01/08/2018 Date Updated -30/08/2018
i02140464
Final Drive - Assemble
SMCS - 4050-016
Assembly Procedure
Table 1
Required Tools
Tool Part Number Part Description Qty
A 138-7575 Link Bracket 3
C 138-7573 Link Bracket 3
D 1P-0520 Driver Group 1
F 138-7574 Link Bracket 2
G 1U-5934 Duo-Cone Seal Installer As 1
H 140-2286 Spacer 1
J 169-0503 Installation Kit 1
1/14
D9R Track-Type Tractor Power Shift 8BL01053-UP (MACHINE) POWERED BY 34...
2021/10/27
https://127.0.0.1/sisweb/sisweb/techdoc/techdoc_print_page.jsp?returnurl=/sis...
Illustration 1 g00642301
Note: Lower the temperature of the sleeve bearing. Use Tooling (D) to install sleeve
bearing (35).
1. Inspect all of the parts for damage. Make replacements, if necessary. Ensure that all of the
parts are clean.
Illustration 2 g01096508
2. Install lip seal (34) in the hub with Tooling (D).
2/14
D9R Track-Type Tractor Power Shift 8BL01053-UP (MACHINE) POWERED BY 34...
2021/10/27
https://127.0.0.1/sisweb/sisweb/techdoc/techdoc_print_page.jsp?returnurl=/sis...
Illustration 3 g00627559
3. Raise bearing cone (33) to a maximum temperature of 135 °C (275 °F). Install bearing cone
(33) on hub (28).
Note: Before you install any of the Duo-Cone seals, see Installation of the Duo-Cone
Floating Seals in this module. Use Tooling (J) for preparation of the seal.
Illustration 4 g01096509
4. Use Tooling (G) to install Duo-Cone seal (32) on the hub, as shown.
Illustration 5 g00627562
3/14
D9R Track-Type Tractor Power Shift 8BL01053-UP (MACHINE) POWERED BY 34...
2021/10/27
https://127.0.0.1/sisweb/sisweb/techdoc/techdoc_print_page.jsp?returnurl=/sis...
5. Lower the temperature of bearing cups (30) and (31). Install bearing cups (30) and (31) in
hub (24). Check with a 0.038 mm (0.0015 inch) feeler gauge. Ensure that the bearing cup is
seated against the bottom of the bore all the way around.
Illustration 6 g01096510
6. Use Tooling (G) to install Duo-Cone seal (29) in hub (24).
Illustration 7 g01086876
Note: Do not put hub (24) on the Duo-Cone seal when the hub is turned over.
4/14
D9R Track-Type Tractor Power Shift 8BL01053-UP (MACHINE) POWERED BY 34...
2021/10/27
https://127.0.0.1/sisweb/sisweb/techdoc/techdoc_print_page.jsp?returnurl=/sis...
7. Turn over hub (24). Install Tooling (F) in the hub and fasten a suitable lifting device to the
Tooling. Put hub (24) in position on hub (28), as shown.
Illustration 8 g00627566
8. Raise bearing cone (27) to a maximum temperature of 135 °C (275 °F). Install bearing cone
(27) on the hub.
Illustration 9 g01096511
9. Put Tooling (H) in position while the bearing cone is still hot. Install retainer (20). Turn the
hub while the bolts that hold the retainer are tightened to a torque of 135 ± 15 N·m
(100 ± 11 lb ft). Permit the bearing cone to return to room temperature before the retainer
and Tooling (F) are removed.
5/14
D9R Track-Type Tractor Power Shift 8BL01053-UP (MACHINE) POWERED BY 34...
2021/10/27
https://127.0.0.1/sisweb/sisweb/techdoc/techdoc_print_page.jsp?returnurl=/sis...
Illustration 10 g01086875
10. Install Tooling (A) on hub (25). Fasten an suitable lifting device to Tooling (A). Put hub
(25) in position in ring gear (24).
Illustration 11 g01096464
11. Install retainer ring (23) in the groove in ring gear (24).
6/14
D9R Track-Type Tractor Power Shift 8BL01053-UP (MACHINE) POWERED BY 34...
2021/10/27
https://127.0.0.1/sisweb/sisweb/techdoc/techdoc_print_page.jsp?returnurl=/sis...
Illustration 12 g01087059
12. Turn over the hub and the gear. Install Tooling (A) onto hub (25). Fasten an suitable lifting
device to Tooling (A). Install ring gear (24) and the hub as a unit.
Illustration 13 g00627576
13. Put pins (22) in position in the hub.
7/14
D9R Track-Type Tractor Power Shift 8BL01053-UP (MACHINE) POWERED BY 34...
2021/10/27
https://127.0.0.1/sisweb/sisweb/techdoc/techdoc_print_page.jsp?returnurl=/sis...
Illustration 14 g00627578
14. If a replacement is needed, use Tooling (A) and a suitable press to install ring (21) in
retainer (20).
15. Put retainer (20) in position on the hub.
Illustration 15 g00627580
16. Install bolts (35) that hold retainer (20) in position. Tighten the bolts to a torque of
135 ± 15 N·m (100 ± 11 lb ft).
Illustration 16 g00627582
8/14
D9R Track-Type Tractor Power Shift 8BL01053-UP (MACHINE) POWERED BY 34...
2021/10/27
https://127.0.0.1/sisweb/sisweb/techdoc/techdoc_print_page.jsp?returnurl=/sis...
17. Use feeler gauge (36) to measure the distance between retainer (20) and pins (22). The
clearance must be 0.08 ± 0.05 mm (0.003 ± 0.002 inch).
Note: There must be metal to metal contact between hub (28) and retainer (20). If there is
no gap, bearing cone (27) was not pressed correctly with Tooling (H). See step 9. A gap
between pins (22) and retainer (20) allows metal to metal contact between retainer (20) and
hub (28).
Illustration 17 g00627583
18. Install lockring (18) in gears (15).
Illustration 18 g00627522
19. Lower the temperature of bearing cups (17). Install bearing cups (17) in gears (15).
9/14
D9R Track-Type Tractor Power Shift 8BL01053-UP (MACHINE) POWERED BY 34...
2021/10/27
https://127.0.0.1/sisweb/sisweb/techdoc/techdoc_print_page.jsp?returnurl=/sis...
Suggest:
If the above button click is invalid.
Please download this document
first, and then click the above link
to download the complete manual.
Thank you so much for reading

More Related Content

More from ze3xiandiao

Lamborghini nitro 110 t4i vrt Tractor Service Repair Manual Instant Download.pdf
Lamborghini nitro 110 t4i vrt Tractor Service Repair Manual Instant Download.pdfLamborghini nitro 110 t4i vrt Tractor Service Repair Manual Instant Download.pdf
Lamborghini nitro 110 t4i vrt Tractor Service Repair Manual Instant Download.pdfze3xiandiao
 
Caterpillar Cat M315D WHEELED Excavator (Prefix W5M) Service Repair Manual In...
Caterpillar Cat M315D WHEELED Excavator (Prefix W5M) Service Repair Manual In...Caterpillar Cat M315D WHEELED Excavator (Prefix W5M) Service Repair Manual In...
Caterpillar Cat M315D WHEELED Excavator (Prefix W5M) Service Repair Manual In...ze3xiandiao
 
Caterpillar Cat M315D WHEELED Excavator (Prefix K5E) Service Repair Manual In...
Caterpillar Cat M315D WHEELED Excavator (Prefix K5E) Service Repair Manual In...Caterpillar Cat M315D WHEELED Excavator (Prefix K5E) Service Repair Manual In...
Caterpillar Cat M315D WHEELED Excavator (Prefix K5E) Service Repair Manual In...ze3xiandiao
 
Caterpillar Cat M315D WHEELED Excavator (Prefix J5B) Service Repair Manual In...
Caterpillar Cat M315D WHEELED Excavator (Prefix J5B) Service Repair Manual In...Caterpillar Cat M315D WHEELED Excavator (Prefix J5B) Service Repair Manual In...
Caterpillar Cat M315D WHEELED Excavator (Prefix J5B) Service Repair Manual In...ze3xiandiao
 
Caterpillar Cat D10 TRACK-TYPE TRACTOR (Prefix 76X) Service Repair Manual Ins...
Caterpillar Cat D10 TRACK-TYPE TRACTOR (Prefix 76X) Service Repair Manual Ins...Caterpillar Cat D10 TRACK-TYPE TRACTOR (Prefix 76X) Service Repair Manual Ins...
Caterpillar Cat D10 TRACK-TYPE TRACTOR (Prefix 76X) Service Repair Manual Ins...ze3xiandiao
 
Caterpillar Cat D9R TRACK-TYPE TRACTOR (Prefix 7TL) Service Repair Manual Ins...
Caterpillar Cat D9R TRACK-TYPE TRACTOR (Prefix 7TL) Service Repair Manual Ins...Caterpillar Cat D9R TRACK-TYPE TRACTOR (Prefix 7TL) Service Repair Manual Ins...
Caterpillar Cat D9R TRACK-TYPE TRACTOR (Prefix 7TL) Service Repair Manual Ins...ze3xiandiao
 
Caterpillar Cat D7R TRACK-TYPE TRACTOR (Prefix 3ZR) Service Repair Manual Ins...
Caterpillar Cat D7R TRACK-TYPE TRACTOR (Prefix 3ZR) Service Repair Manual Ins...Caterpillar Cat D7R TRACK-TYPE TRACTOR (Prefix 3ZR) Service Repair Manual Ins...
Caterpillar Cat D7R TRACK-TYPE TRACTOR (Prefix 3ZR) Service Repair Manual Ins...ze3xiandiao
 
Caterpillar Cat D7R TRACK-TYPE TRACTOR (Prefix 3DN) Service Repair Manual Ins...
Caterpillar Cat D7R TRACK-TYPE TRACTOR (Prefix 3DN) Service Repair Manual Ins...Caterpillar Cat D7R TRACK-TYPE TRACTOR (Prefix 3DN) Service Repair Manual Ins...
Caterpillar Cat D7R TRACK-TYPE TRACTOR (Prefix 3DN) Service Repair Manual Ins...ze3xiandiao
 
Caterpillar Cat D7R II WATER FORDING TRACTOR (Prefix DJT) Service Repair Manu...
Caterpillar Cat D7R II WATER FORDING TRACTOR (Prefix DJT) Service Repair Manu...Caterpillar Cat D7R II WATER FORDING TRACTOR (Prefix DJT) Service Repair Manu...
Caterpillar Cat D7R II WATER FORDING TRACTOR (Prefix DJT) Service Repair Manu...ze3xiandiao
 
Caterpillar Cat D7R II TRACK-TYPE TRACTOR (Prefix AGN) Service Repair Manual ...
Caterpillar Cat D7R II TRACK-TYPE TRACTOR (Prefix AGN) Service Repair Manual ...Caterpillar Cat D7R II TRACK-TYPE TRACTOR (Prefix AGN) Service Repair Manual ...
Caterpillar Cat D7R II TRACK-TYPE TRACTOR (Prefix AGN) Service Repair Manual ...ze3xiandiao
 
Caterpillar Cat D7H TRACK-TYPE TRACTOR (Prefix 3XG) Service Repair Manual Ins...
Caterpillar Cat D7H TRACK-TYPE TRACTOR (Prefix 3XG) Service Repair Manual Ins...Caterpillar Cat D7H TRACK-TYPE TRACTOR (Prefix 3XG) Service Repair Manual Ins...
Caterpillar Cat D7H TRACK-TYPE TRACTOR (Prefix 3XG) Service Repair Manual Ins...ze3xiandiao
 
Caterpillar Cat D7H TRACK-TYPE TRACTOR (Prefix 2SB) Service Repair Manual Ins...
Caterpillar Cat D7H TRACK-TYPE TRACTOR (Prefix 2SB) Service Repair Manual Ins...Caterpillar Cat D7H TRACK-TYPE TRACTOR (Prefix 2SB) Service Repair Manual Ins...
Caterpillar Cat D7H TRACK-TYPE TRACTOR (Prefix 2SB) Service Repair Manual Ins...ze3xiandiao
 
Caterpillar Cat D7G TRACK-TYPE TRACTOR (Prefix 65V) Service Repair Manual Ins...
Caterpillar Cat D7G TRACK-TYPE TRACTOR (Prefix 65V) Service Repair Manual Ins...Caterpillar Cat D7G TRACK-TYPE TRACTOR (Prefix 65V) Service Repair Manual Ins...
Caterpillar Cat D7G TRACK-TYPE TRACTOR (Prefix 65V) Service Repair Manual Ins...ze3xiandiao
 
Caterpillar Cat D7G TRACK-TYPE TRACTOR (Prefix 64V) Service Repair Manual Ins...
Caterpillar Cat D7G TRACK-TYPE TRACTOR (Prefix 64V) Service Repair Manual Ins...Caterpillar Cat D7G TRACK-TYPE TRACTOR (Prefix 64V) Service Repair Manual Ins...
Caterpillar Cat D7G TRACK-TYPE TRACTOR (Prefix 64V) Service Repair Manual Ins...ze3xiandiao
 
Caterpillar Cat D7G TRACK-TYPE TRACTOR (Prefix 44W) Service Repair Manual Ins...
Caterpillar Cat D7G TRACK-TYPE TRACTOR (Prefix 44W) Service Repair Manual Ins...Caterpillar Cat D7G TRACK-TYPE TRACTOR (Prefix 44W) Service Repair Manual Ins...
Caterpillar Cat D7G TRACK-TYPE TRACTOR (Prefix 44W) Service Repair Manual Ins...ze3xiandiao
 
Caterpillar Cat D7G TRACK-TYPE TRACTOR (Prefix 35N) Service Repair Manual Ins...
Caterpillar Cat D7G TRACK-TYPE TRACTOR (Prefix 35N) Service Repair Manual Ins...Caterpillar Cat D7G TRACK-TYPE TRACTOR (Prefix 35N) Service Repair Manual Ins...
Caterpillar Cat D7G TRACK-TYPE TRACTOR (Prefix 35N) Service Repair Manual Ins...ze3xiandiao
 
Caterpillar Cat D7F TRACK-TYPE TRACTOR (Prefix 94N) Service Repair Manual Ins...
Caterpillar Cat D7F TRACK-TYPE TRACTOR (Prefix 94N) Service Repair Manual Ins...Caterpillar Cat D7F TRACK-TYPE TRACTOR (Prefix 94N) Service Repair Manual Ins...
Caterpillar Cat D7F TRACK-TYPE TRACTOR (Prefix 94N) Service Repair Manual Ins...ze3xiandiao
 
Caterpillar Cat D7F TRACK-TYPE TRACTOR (Prefix 93N) Service Repair Manual Ins...
Caterpillar Cat D7F TRACK-TYPE TRACTOR (Prefix 93N) Service Repair Manual Ins...Caterpillar Cat D7F TRACK-TYPE TRACTOR (Prefix 93N) Service Repair Manual Ins...
Caterpillar Cat D7F TRACK-TYPE TRACTOR (Prefix 93N) Service Repair Manual Ins...ze3xiandiao
 
Caterpillar Cat D7E TRACK-TYPE TRACTOR (Prefix TAN) Service Repair Manual Ins...
Caterpillar Cat D7E TRACK-TYPE TRACTOR (Prefix TAN) Service Repair Manual Ins...Caterpillar Cat D7E TRACK-TYPE TRACTOR (Prefix TAN) Service Repair Manual Ins...
Caterpillar Cat D7E TRACK-TYPE TRACTOR (Prefix TAN) Service Repair Manual Ins...ze3xiandiao
 

More from ze3xiandiao (20)

Lamborghini nitro 110 t4i vrt Tractor Service Repair Manual Instant Download.pdf
Lamborghini nitro 110 t4i vrt Tractor Service Repair Manual Instant Download.pdfLamborghini nitro 110 t4i vrt Tractor Service Repair Manual Instant Download.pdf
Lamborghini nitro 110 t4i vrt Tractor Service Repair Manual Instant Download.pdf
 
Caterpillar Cat M315D WHEELED Excavator (Prefix W5M) Service Repair Manual In...
Caterpillar Cat M315D WHEELED Excavator (Prefix W5M) Service Repair Manual In...Caterpillar Cat M315D WHEELED Excavator (Prefix W5M) Service Repair Manual In...
Caterpillar Cat M315D WHEELED Excavator (Prefix W5M) Service Repair Manual In...
 
Caterpillar Cat M315D WHEELED Excavator (Prefix K5E) Service Repair Manual In...
Caterpillar Cat M315D WHEELED Excavator (Prefix K5E) Service Repair Manual In...Caterpillar Cat M315D WHEELED Excavator (Prefix K5E) Service Repair Manual In...
Caterpillar Cat M315D WHEELED Excavator (Prefix K5E) Service Repair Manual In...
 
Caterpillar Cat M315D WHEELED Excavator (Prefix J5B) Service Repair Manual In...
Caterpillar Cat M315D WHEELED Excavator (Prefix J5B) Service Repair Manual In...Caterpillar Cat M315D WHEELED Excavator (Prefix J5B) Service Repair Manual In...
Caterpillar Cat M315D WHEELED Excavator (Prefix J5B) Service Repair Manual In...
 
Caterpillar Cat D10 TRACK-TYPE TRACTOR (Prefix 76X) Service Repair Manual Ins...
Caterpillar Cat D10 TRACK-TYPE TRACTOR (Prefix 76X) Service Repair Manual Ins...Caterpillar Cat D10 TRACK-TYPE TRACTOR (Prefix 76X) Service Repair Manual Ins...
Caterpillar Cat D10 TRACK-TYPE TRACTOR (Prefix 76X) Service Repair Manual Ins...
 
Caterpillar Cat D9R TRACK-TYPE TRACTOR (Prefix 7TL) Service Repair Manual Ins...
Caterpillar Cat D9R TRACK-TYPE TRACTOR (Prefix 7TL) Service Repair Manual Ins...Caterpillar Cat D9R TRACK-TYPE TRACTOR (Prefix 7TL) Service Repair Manual Ins...
Caterpillar Cat D9R TRACK-TYPE TRACTOR (Prefix 7TL) Service Repair Manual Ins...
 
Caterpillar Cat D7R TRACK-TYPE TRACTOR (Prefix 3ZR) Service Repair Manual Ins...
Caterpillar Cat D7R TRACK-TYPE TRACTOR (Prefix 3ZR) Service Repair Manual Ins...Caterpillar Cat D7R TRACK-TYPE TRACTOR (Prefix 3ZR) Service Repair Manual Ins...
Caterpillar Cat D7R TRACK-TYPE TRACTOR (Prefix 3ZR) Service Repair Manual Ins...
 
Caterpillar Cat D7R TRACK-TYPE TRACTOR (Prefix 3DN) Service Repair Manual Ins...
Caterpillar Cat D7R TRACK-TYPE TRACTOR (Prefix 3DN) Service Repair Manual Ins...Caterpillar Cat D7R TRACK-TYPE TRACTOR (Prefix 3DN) Service Repair Manual Ins...
Caterpillar Cat D7R TRACK-TYPE TRACTOR (Prefix 3DN) Service Repair Manual Ins...
 
Caterpillar Cat D7R II WATER FORDING TRACTOR (Prefix DJT) Service Repair Manu...
Caterpillar Cat D7R II WATER FORDING TRACTOR (Prefix DJT) Service Repair Manu...Caterpillar Cat D7R II WATER FORDING TRACTOR (Prefix DJT) Service Repair Manu...
Caterpillar Cat D7R II WATER FORDING TRACTOR (Prefix DJT) Service Repair Manu...
 
Caterpillar Cat D7R II TRACK-TYPE TRACTOR (Prefix AGN) Service Repair Manual ...
Caterpillar Cat D7R II TRACK-TYPE TRACTOR (Prefix AGN) Service Repair Manual ...Caterpillar Cat D7R II TRACK-TYPE TRACTOR (Prefix AGN) Service Repair Manual ...
Caterpillar Cat D7R II TRACK-TYPE TRACTOR (Prefix AGN) Service Repair Manual ...
 
Caterpillar Cat D7H TRACK-TYPE TRACTOR (Prefix 3XG) Service Repair Manual Ins...
Caterpillar Cat D7H TRACK-TYPE TRACTOR (Prefix 3XG) Service Repair Manual Ins...Caterpillar Cat D7H TRACK-TYPE TRACTOR (Prefix 3XG) Service Repair Manual Ins...
Caterpillar Cat D7H TRACK-TYPE TRACTOR (Prefix 3XG) Service Repair Manual Ins...
 
Caterpillar Cat D7H TRACK-TYPE TRACTOR (Prefix 2SB) Service Repair Manual Ins...
Caterpillar Cat D7H TRACK-TYPE TRACTOR (Prefix 2SB) Service Repair Manual Ins...Caterpillar Cat D7H TRACK-TYPE TRACTOR (Prefix 2SB) Service Repair Manual Ins...
Caterpillar Cat D7H TRACK-TYPE TRACTOR (Prefix 2SB) Service Repair Manual Ins...
 
Caterpillar Cat D7G TRACK-TYPE TRACTOR (Prefix 65V) Service Repair Manual Ins...
Caterpillar Cat D7G TRACK-TYPE TRACTOR (Prefix 65V) Service Repair Manual Ins...Caterpillar Cat D7G TRACK-TYPE TRACTOR (Prefix 65V) Service Repair Manual Ins...
Caterpillar Cat D7G TRACK-TYPE TRACTOR (Prefix 65V) Service Repair Manual Ins...
 
Caterpillar Cat D7G TRACK-TYPE TRACTOR (Prefix 64V) Service Repair Manual Ins...
Caterpillar Cat D7G TRACK-TYPE TRACTOR (Prefix 64V) Service Repair Manual Ins...Caterpillar Cat D7G TRACK-TYPE TRACTOR (Prefix 64V) Service Repair Manual Ins...
Caterpillar Cat D7G TRACK-TYPE TRACTOR (Prefix 64V) Service Repair Manual Ins...
 
Caterpillar Cat D7G TRACK-TYPE TRACTOR (Prefix 44W) Service Repair Manual Ins...
Caterpillar Cat D7G TRACK-TYPE TRACTOR (Prefix 44W) Service Repair Manual Ins...Caterpillar Cat D7G TRACK-TYPE TRACTOR (Prefix 44W) Service Repair Manual Ins...
Caterpillar Cat D7G TRACK-TYPE TRACTOR (Prefix 44W) Service Repair Manual Ins...
 
Caterpillar Cat D7G TRACK-TYPE TRACTOR (Prefix 35N) Service Repair Manual Ins...
Caterpillar Cat D7G TRACK-TYPE TRACTOR (Prefix 35N) Service Repair Manual Ins...Caterpillar Cat D7G TRACK-TYPE TRACTOR (Prefix 35N) Service Repair Manual Ins...
Caterpillar Cat D7G TRACK-TYPE TRACTOR (Prefix 35N) Service Repair Manual Ins...
 
Caterpillar Cat D7F TRACK-TYPE TRACTOR (Prefix 94N) Service Repair Manual Ins...
Caterpillar Cat D7F TRACK-TYPE TRACTOR (Prefix 94N) Service Repair Manual Ins...Caterpillar Cat D7F TRACK-TYPE TRACTOR (Prefix 94N) Service Repair Manual Ins...
Caterpillar Cat D7F TRACK-TYPE TRACTOR (Prefix 94N) Service Repair Manual Ins...
 
Caterpillar Cat D7F TRACK-TYPE TRACTOR (Prefix 94N) Service Repair Manual Ins...
Caterpillar Cat D7F TRACK-TYPE TRACTOR (Prefix 94N) Service Repair Manual Ins...Caterpillar Cat D7F TRACK-TYPE TRACTOR (Prefix 94N) Service Repair Manual Ins...
Caterpillar Cat D7F TRACK-TYPE TRACTOR (Prefix 94N) Service Repair Manual Ins...
 
Caterpillar Cat D7F TRACK-TYPE TRACTOR (Prefix 93N) Service Repair Manual Ins...
Caterpillar Cat D7F TRACK-TYPE TRACTOR (Prefix 93N) Service Repair Manual Ins...Caterpillar Cat D7F TRACK-TYPE TRACTOR (Prefix 93N) Service Repair Manual Ins...
Caterpillar Cat D7F TRACK-TYPE TRACTOR (Prefix 93N) Service Repair Manual Ins...
 
Caterpillar Cat D7E TRACK-TYPE TRACTOR (Prefix TAN) Service Repair Manual Ins...
Caterpillar Cat D7E TRACK-TYPE TRACTOR (Prefix TAN) Service Repair Manual Ins...Caterpillar Cat D7E TRACK-TYPE TRACTOR (Prefix TAN) Service Repair Manual Ins...
Caterpillar Cat D7E TRACK-TYPE TRACTOR (Prefix TAN) Service Repair Manual Ins...
 

Recently uploaded

John Deere 7430 7530 Tractors Diagnostic Service Manual W.pdf
John Deere 7430 7530 Tractors Diagnostic Service Manual W.pdfJohn Deere 7430 7530 Tractors Diagnostic Service Manual W.pdf
John Deere 7430 7530 Tractors Diagnostic Service Manual W.pdfExcavator
 
Majestic Call Girls: 🍓 7737669865 🍓 High Profile Model Escorts | Bangalore Es...
Majestic Call Girls: 🍓 7737669865 🍓 High Profile Model Escorts | Bangalore Es...Majestic Call Girls: 🍓 7737669865 🍓 High Profile Model Escorts | Bangalore Es...
Majestic Call Girls: 🍓 7737669865 🍓 High Profile Model Escorts | Bangalore Es...amitlee9823
 
如何办理麦考瑞大学毕业证(MQU毕业证书)成绩单原版一比一
如何办理麦考瑞大学毕业证(MQU毕业证书)成绩单原版一比一如何办理麦考瑞大学毕业证(MQU毕业证书)成绩单原版一比一
如何办理麦考瑞大学毕业证(MQU毕业证书)成绩单原版一比一ozave
 
What Causes BMW Chassis Stabilization Malfunction Warning To Appear
What Causes BMW Chassis Stabilization Malfunction Warning To AppearWhat Causes BMW Chassis Stabilization Malfunction Warning To Appear
What Causes BMW Chassis Stabilization Malfunction Warning To AppearJCL Automotive
 
John Deere Tractors 6130M 6140M Diagnostic Manual
John Deere Tractors  6130M 6140M Diagnostic ManualJohn Deere Tractors  6130M 6140M Diagnostic Manual
John Deere Tractors 6130M 6140M Diagnostic ManualExcavator
 
8377087607, Door Step Call Girls In Majnu Ka Tilla (Delhi) 24/7 Available
8377087607, Door Step Call Girls In Majnu Ka Tilla (Delhi) 24/7 Available8377087607, Door Step Call Girls In Majnu Ka Tilla (Delhi) 24/7 Available
8377087607, Door Step Call Girls In Majnu Ka Tilla (Delhi) 24/7 Availabledollysharma2066
 
Top Rated Call Girls Mumbai Central : 9920725232 We offer Beautiful and sexy ...
Top Rated Call Girls Mumbai Central : 9920725232 We offer Beautiful and sexy ...Top Rated Call Girls Mumbai Central : 9920725232 We offer Beautiful and sexy ...
Top Rated Call Girls Mumbai Central : 9920725232 We offer Beautiful and sexy ...amitlee9823
 
Call Girls Kanakapura Road Just Call 👗 7737669865 👗 Top Class Call Girl Servi...
Call Girls Kanakapura Road Just Call 👗 7737669865 👗 Top Class Call Girl Servi...Call Girls Kanakapura Road Just Call 👗 7737669865 👗 Top Class Call Girl Servi...
Call Girls Kanakapura Road Just Call 👗 7737669865 👗 Top Class Call Girl Servi...amitlee9823
 
Call Girls In Kotla Mubarakpur Delhi ❤️8448577510 ⊹Best Escorts Service In 24...
Call Girls In Kotla Mubarakpur Delhi ❤️8448577510 ⊹Best Escorts Service In 24...Call Girls In Kotla Mubarakpur Delhi ❤️8448577510 ⊹Best Escorts Service In 24...
Call Girls In Kotla Mubarakpur Delhi ❤️8448577510 ⊹Best Escorts Service In 24...lizamodels9
 
What Does The Engine Malfunction Reduced Power Message Mean For Your BMW X5
What Does The Engine Malfunction Reduced Power Message Mean For Your BMW X5What Does The Engine Malfunction Reduced Power Message Mean For Your BMW X5
What Does The Engine Malfunction Reduced Power Message Mean For Your BMW X5Bavarian Workshop
 
Dubai Call Girls R0yalty O525547819 Call Girls Dubai
Dubai Call Girls R0yalty O525547819 Call Girls DubaiDubai Call Girls R0yalty O525547819 Call Girls Dubai
Dubai Call Girls R0yalty O525547819 Call Girls Dubaikojalkojal131
 
83778-77756 ( HER.SELF ) Brings Call Girls In Laxmi Nagar
83778-77756 ( HER.SELF ) Brings Call Girls In Laxmi Nagar83778-77756 ( HER.SELF ) Brings Call Girls In Laxmi Nagar
83778-77756 ( HER.SELF ) Brings Call Girls In Laxmi Nagardollysharma2066
 
BOOK FARIDABAD CALL GIRL(VIP Sunny Leone) @8168257667 BOOK 24/7
BOOK FARIDABAD CALL GIRL(VIP Sunny Leone) @8168257667 BOOK  24/7BOOK FARIDABAD CALL GIRL(VIP Sunny Leone) @8168257667 BOOK  24/7
BOOK FARIDABAD CALL GIRL(VIP Sunny Leone) @8168257667 BOOK 24/7Hyderabad Escorts Agency
 
Madiwala Call Girls: 🍓 7737669865 🍓 High Profile Model Escorts | Bangalore Es...
Madiwala Call Girls: 🍓 7737669865 🍓 High Profile Model Escorts | Bangalore Es...Madiwala Call Girls: 🍓 7737669865 🍓 High Profile Model Escorts | Bangalore Es...
Madiwala Call Girls: 🍓 7737669865 🍓 High Profile Model Escorts | Bangalore Es...amitlee9823
 
一比一原版(PU学位证书)普渡大学毕业证学历认证加急办理
一比一原版(PU学位证书)普渡大学毕业证学历认证加急办理一比一原版(PU学位证书)普渡大学毕业证学历认证加急办理
一比一原版(PU学位证书)普渡大学毕业证学历认证加急办理ezgenuh
 
Vip Hot Call Girls 🫤 Mahipalpur ➡️ 9711199171 ➡️ Delhi 🫦 Whatsapp Number
Vip Hot Call Girls 🫤 Mahipalpur ➡️ 9711199171 ➡️ Delhi 🫦 Whatsapp NumberVip Hot Call Girls 🫤 Mahipalpur ➡️ 9711199171 ➡️ Delhi 🫦 Whatsapp Number
Vip Hot Call Girls 🫤 Mahipalpur ➡️ 9711199171 ➡️ Delhi 🫦 Whatsapp Numberkumarajju5765
 
ENJOY Call Girls In Okhla Vihar Delhi Call 9654467111
ENJOY Call Girls In Okhla Vihar Delhi Call 9654467111ENJOY Call Girls In Okhla Vihar Delhi Call 9654467111
ENJOY Call Girls In Okhla Vihar Delhi Call 9654467111Sapana Sha
 

Recently uploaded (20)

John Deere 7430 7530 Tractors Diagnostic Service Manual W.pdf
John Deere 7430 7530 Tractors Diagnostic Service Manual W.pdfJohn Deere 7430 7530 Tractors Diagnostic Service Manual W.pdf
John Deere 7430 7530 Tractors Diagnostic Service Manual W.pdf
 
Majestic Call Girls: 🍓 7737669865 🍓 High Profile Model Escorts | Bangalore Es...
Majestic Call Girls: 🍓 7737669865 🍓 High Profile Model Escorts | Bangalore Es...Majestic Call Girls: 🍓 7737669865 🍓 High Profile Model Escorts | Bangalore Es...
Majestic Call Girls: 🍓 7737669865 🍓 High Profile Model Escorts | Bangalore Es...
 
如何办理麦考瑞大学毕业证(MQU毕业证书)成绩单原版一比一
如何办理麦考瑞大学毕业证(MQU毕业证书)成绩单原版一比一如何办理麦考瑞大学毕业证(MQU毕业证书)成绩单原版一比一
如何办理麦考瑞大学毕业证(MQU毕业证书)成绩单原版一比一
 
What Causes BMW Chassis Stabilization Malfunction Warning To Appear
What Causes BMW Chassis Stabilization Malfunction Warning To AppearWhat Causes BMW Chassis Stabilization Malfunction Warning To Appear
What Causes BMW Chassis Stabilization Malfunction Warning To Appear
 
John Deere Tractors 6130M 6140M Diagnostic Manual
John Deere Tractors  6130M 6140M Diagnostic ManualJohn Deere Tractors  6130M 6140M Diagnostic Manual
John Deere Tractors 6130M 6140M Diagnostic Manual
 
8377087607, Door Step Call Girls In Majnu Ka Tilla (Delhi) 24/7 Available
8377087607, Door Step Call Girls In Majnu Ka Tilla (Delhi) 24/7 Available8377087607, Door Step Call Girls In Majnu Ka Tilla (Delhi) 24/7 Available
8377087607, Door Step Call Girls In Majnu Ka Tilla (Delhi) 24/7 Available
 
Top Rated Call Girls Mumbai Central : 9920725232 We offer Beautiful and sexy ...
Top Rated Call Girls Mumbai Central : 9920725232 We offer Beautiful and sexy ...Top Rated Call Girls Mumbai Central : 9920725232 We offer Beautiful and sexy ...
Top Rated Call Girls Mumbai Central : 9920725232 We offer Beautiful and sexy ...
 
Call Girls Kanakapura Road Just Call 👗 7737669865 👗 Top Class Call Girl Servi...
Call Girls Kanakapura Road Just Call 👗 7737669865 👗 Top Class Call Girl Servi...Call Girls Kanakapura Road Just Call 👗 7737669865 👗 Top Class Call Girl Servi...
Call Girls Kanakapura Road Just Call 👗 7737669865 👗 Top Class Call Girl Servi...
 
Call Girls In Kotla Mubarakpur Delhi ❤️8448577510 ⊹Best Escorts Service In 24...
Call Girls In Kotla Mubarakpur Delhi ❤️8448577510 ⊹Best Escorts Service In 24...Call Girls In Kotla Mubarakpur Delhi ❤️8448577510 ⊹Best Escorts Service In 24...
Call Girls In Kotla Mubarakpur Delhi ❤️8448577510 ⊹Best Escorts Service In 24...
 
What Does The Engine Malfunction Reduced Power Message Mean For Your BMW X5
What Does The Engine Malfunction Reduced Power Message Mean For Your BMW X5What Does The Engine Malfunction Reduced Power Message Mean For Your BMW X5
What Does The Engine Malfunction Reduced Power Message Mean For Your BMW X5
 
Dubai Call Girls R0yalty O525547819 Call Girls Dubai
Dubai Call Girls R0yalty O525547819 Call Girls DubaiDubai Call Girls R0yalty O525547819 Call Girls Dubai
Dubai Call Girls R0yalty O525547819 Call Girls Dubai
 
83778-77756 ( HER.SELF ) Brings Call Girls In Laxmi Nagar
83778-77756 ( HER.SELF ) Brings Call Girls In Laxmi Nagar83778-77756 ( HER.SELF ) Brings Call Girls In Laxmi Nagar
83778-77756 ( HER.SELF ) Brings Call Girls In Laxmi Nagar
 
BOOK FARIDABAD CALL GIRL(VIP Sunny Leone) @8168257667 BOOK 24/7
BOOK FARIDABAD CALL GIRL(VIP Sunny Leone) @8168257667 BOOK  24/7BOOK FARIDABAD CALL GIRL(VIP Sunny Leone) @8168257667 BOOK  24/7
BOOK FARIDABAD CALL GIRL(VIP Sunny Leone) @8168257667 BOOK 24/7
 
(ISHITA) Call Girls Service Jammu Call Now 8617697112 Jammu Escorts 24x7
(ISHITA) Call Girls Service Jammu Call Now 8617697112 Jammu Escorts 24x7(ISHITA) Call Girls Service Jammu Call Now 8617697112 Jammu Escorts 24x7
(ISHITA) Call Girls Service Jammu Call Now 8617697112 Jammu Escorts 24x7
 
Madiwala Call Girls: 🍓 7737669865 🍓 High Profile Model Escorts | Bangalore Es...
Madiwala Call Girls: 🍓 7737669865 🍓 High Profile Model Escorts | Bangalore Es...Madiwala Call Girls: 🍓 7737669865 🍓 High Profile Model Escorts | Bangalore Es...
Madiwala Call Girls: 🍓 7737669865 🍓 High Profile Model Escorts | Bangalore Es...
 
(INDIRA) Call Girl Surat Call Now 8250077686 Surat Escorts 24x7
(INDIRA) Call Girl Surat Call Now 8250077686 Surat Escorts 24x7(INDIRA) Call Girl Surat Call Now 8250077686 Surat Escorts 24x7
(INDIRA) Call Girl Surat Call Now 8250077686 Surat Escorts 24x7
 
一比一原版(PU学位证书)普渡大学毕业证学历认证加急办理
一比一原版(PU学位证书)普渡大学毕业证学历认证加急办理一比一原版(PU学位证书)普渡大学毕业证学历认证加急办理
一比一原版(PU学位证书)普渡大学毕业证学历认证加急办理
 
Vip Hot Call Girls 🫤 Mahipalpur ➡️ 9711199171 ➡️ Delhi 🫦 Whatsapp Number
Vip Hot Call Girls 🫤 Mahipalpur ➡️ 9711199171 ➡️ Delhi 🫦 Whatsapp NumberVip Hot Call Girls 🫤 Mahipalpur ➡️ 9711199171 ➡️ Delhi 🫦 Whatsapp Number
Vip Hot Call Girls 🫤 Mahipalpur ➡️ 9711199171 ➡️ Delhi 🫦 Whatsapp Number
 
ENJOY Call Girls In Okhla Vihar Delhi Call 9654467111
ENJOY Call Girls In Okhla Vihar Delhi Call 9654467111ENJOY Call Girls In Okhla Vihar Delhi Call 9654467111
ENJOY Call Girls In Okhla Vihar Delhi Call 9654467111
 
(INDIRA) Call Girl Nashik Call Now 8617697112 Nashik Escorts 24x7
(INDIRA) Call Girl Nashik Call Now 8617697112 Nashik Escorts 24x7(INDIRA) Call Girl Nashik Call Now 8617697112 Nashik Escorts 24x7
(INDIRA) Call Girl Nashik Call Now 8617697112 Nashik Escorts 24x7
 

Caterpillar Cat D9R TRACK-TYPE TRACTOR (Prefix 8BL) Service Repair Manual Instant Download 6.pdf

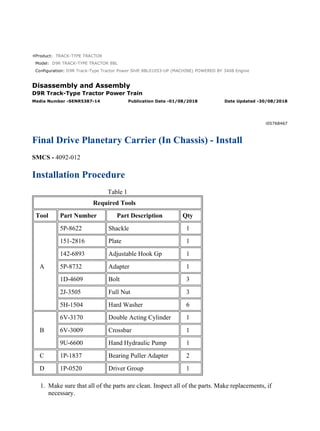
  • 1. Product: TRACK-TYPE TRACTOR Model: D9R TRACK-TYPE TRACTOR 8BL Configuration: D9R Track-Type Tractor Power Shift 8BL01053-UP (MACHINE) POWERED BY 3408 Engine Disassembly and Assembly D9R Track-Type Tractor Power Train Media Number -SENR5387-14 Publication Date -01/08/2018 Date Updated -30/08/2018 i05768467 Final Drive Planetary Carrier (In Chassis) - Install SMCS - 4092-012 Installation Procedure Table 1 Required Tools Tool Part Number Part Description Qty A 5P-8622 Shackle 1 151-2816 Plate 1 142-6893 Adjustable Hook Gp 1 5P-8732 Adapter 1 1D-4609 Bolt 3 2J-3505 Full Nut 3 5H-1504 Hard Washer 6 B 6V-3170 Double Acting Cylinder 1 6V-3009 Crossbar 1 9U-6600 Hand Hydraulic Pump 1 C 1P-1837 Bearing Puller Adapter 2 D 1P-0520 Driver Group 1 1. Make sure that all of the parts are clean. Inspect all of the parts. Make replacements, if necessary. 1/6 D9R Track-Type Tractor Power Shift 8BL01053-UP (MACHINE) POWERED BY 34... 2021/10/27 https://127.0.0.1/sisweb/sisweb/techdoc/techdoc_print_page.jsp?returnurl=/sis...
  • 2. Illustration 1 g00627127 Illustration 2 g00627126 2. Lower the temperature of the sleeve bearing if sleeve bearing (19) has been removed. Install the sleeve bearing with Tooling (D) . 3. Use Tooling (D) to install the lip seal in the hub. If Tooling (D) is not available, retainer (15) may be installed. Ring (6) and a soft hammer may be used to install lip seal (18) . 4. Put clean oil on the lip of the seal. 2/6 D9R Track-Type Tractor Power Shift 8BL01053-UP (MACHINE) POWERED BY 34... 2021/10/27 https://127.0.0.1/sisweb/sisweb/techdoc/techdoc_print_page.jsp?returnurl=/sis...
  • 3. Illustration 3 g01092639 5. Use Tooling (D) and a suitable press in order to install ring (16) in retainer (15) . Illustration 4 g00627125 6. Install pins (17) in the holes that are in the hub. Illustration 5 g00627123 3/6 D9R Track-Type Tractor Power Shift 8BL01053-UP (MACHINE) POWERED BY 34... 2021/10/27 https://127.0.0.1/sisweb/sisweb/techdoc/techdoc_print_page.jsp?returnurl=/sis...
  • 4. 7. Put retainer (15) in position on the hub. Install bolts (14) that hold the retainer in place. Tighten the bolts to a torque of 135 ± 15 N·m (100 ± 11 lb ft). Illustration 6 g00627129 8. Remove Tooling (B) and Tooling (C) from the final drive. Note: For assembly of the planetary carriers, see Disassembly and Assembly, "Final Drive - Assemble". Illustration 7 g00627120 9. Put sun gear (13) in position in the planetary carrier. 4/6 D9R Track-Type Tractor Power Shift 8BL01053-UP (MACHINE) POWERED BY 34... 2021/10/27 https://127.0.0.1/sisweb/sisweb/techdoc/techdoc_print_page.jsp?returnurl=/sis...
  • 5. Illustration 8 g00627130 10. Put Tooling (A) in position on the planetary carrier. Make sure that O-ring seal (19) is in position on the hub. 11. Make an alignment of the gears and slide planetary carrier (11) into the hub. Push the planetary carrier inward. The planetary carriers should be approximately 2.54 cm (1.000 inch) from the final drive hub. Illustration 9 g01092638 12. Install three bolts (10) that are 3/4 inch - 10 NC x 3.5 inch. The bolts should be installed at even distances from each other. Remove Tooling (A) . Install bolts (8) that hold the planetary carrier in position. Remove bolts (10) and install the other three bolts that hold the planetary carrier in position. Tighten bolts (8) to a torque of 430 ± 60 N·m (317 ± 44 lb ft). 5/6 D9R Track-Type Tractor Power Shift 8BL01053-UP (MACHINE) POWERED BY 34... 2021/10/27 https://127.0.0.1/sisweb/sisweb/techdoc/techdoc_print_page.jsp?returnurl=/sis...
  • 6. Illustration 10 g01092637 13. Remove three bolts (7) from the center of cover (6) . Remove three bolts (9) and cover (6) from the final drive. Illustration 11 g00627133 14. Remove spiral lockring (5) , ring (4) , and retainer (3) . End By: Install the axles. See Disassembly and Assembly, "Axle - Install". 6/6 D9R Track-Type Tractor Power Shift 8BL01053-UP (MACHINE) POWERED BY 34... 2021/10/27 https://127.0.0.1/sisweb/sisweb/techdoc/techdoc_print_page.jsp?returnurl=/sis...
  • 7. Product: TRACK-TYPE TRACTOR Model: D9R TRACK-TYPE TRACTOR 8BL Configuration: D9R Track-Type Tractor Power Shift 8BL01053-UP (MACHINE) POWERED BY 3408 Engine Disassembly and Assembly D9R Track-Type Tractor Power Train Media Number -SENR5387-14 Publication Date -01/08/2018 Date Updated -30/08/2018 i03477582 Final Drive - Disassemble SMCS - 4050-015 Disassembly Procedure Table 1 Required Tools Tool Part Number Part Description Qty A 138-7575 Link Bracket 3 B 8B-7548 Push-Puller Tool Group 1 8H-0684 Ratchet Wrench 1 8B-7554 Bearing Cup Puller 1 C 138-7573 Link Bracket 3 D 1P-0520 Driver Group 1 E 1P-0527 Plate 1 6V-3160 Hydraulic Cylinder Gp 1 5P-9695 Pressure Plate 1 2S-4680 Stud 3 5H-1504 Hard Washer 3 6B-6682 Full Nut 3 FT-1409 Spacer 6 9U-6600 Hand Hydraulic Pump 1 F 138-7574 Link Bracket 2 1/13 D9R Track-Type Tractor Power Shift 8BL01053-UP (MACHINE) POWERED BY 34... 2021/10/27 https://127.0.0.1/sisweb/sisweb/techdoc/techdoc_print_page.jsp?returnurl=/sis...
  • 8. Start By: a. Remove the final drive. See Disassembly and Assembly, "Final Drive - Remove". When you are using hydraulic cylinders and puller studs, always ensure that the rated capacity of the puller stud meets or exceeds the rated capacity of the hydraulic cylinder. If the puller stud does not meet or exceed the rated capacity of the hydraulic cylinder, a sudden failure of the puller stud could occur. The sudden failure of the puller stud could result in personal injury or death. NOTICE Do not use threaded rods that have not been hardened as tooling with hydraulic cylinders. The maximum rated tonnage should be stamped on one end of the puller studs. Do not use threaded rods that have not been stamped with the rated tonnage. 2/13 D9R Track-Type Tractor Power Shift 8BL01053-UP (MACHINE) POWERED BY 34... 2021/10/27 https://127.0.0.1/sisweb/sisweb/techdoc/techdoc_print_page.jsp?returnurl=/sis...
  • 9. Illustration 1 g01086838 1. Install Tooling (A) on the planetary carrier. Fasten a suitable lifting device to Tooling (A). 2. Remove bolts (1) that hold the planetary carrier to the hub. 3. Remove planetary carrier (2) from the hub. The weight is approximately 170 kg (375 lb). Illustration 2 g00627501 4. Remove bolts (3) and three plates (4). Remove the O-ring seals from the plates. 3/13 D9R Track-Type Tractor Power Shift 8BL01053-UP (MACHINE) POWERED BY 34... 2021/10/27 https://127.0.0.1/sisweb/sisweb/techdoc/techdoc_print_page.jsp?returnurl=/sis...
  • 10. Illustration 3 g00627502 5. Use a suitable press to remove shafts (5) from the planetary carrier. Illustration 4 g00627505 6. Remove gears (7) from the planetary carrier. 7. Remove bearing cones (6) from each side of gears (7). Illustration 5 g01086839 8. Remove bearing cups (8) from each side of gears (7) with Tooling (B). 4/13 D9R Track-Type Tractor Power Shift 8BL01053-UP (MACHINE) POWERED BY 34... 2021/10/27 https://127.0.0.1/sisweb/sisweb/techdoc/techdoc_print_page.jsp?returnurl=/sis...
  • 11. Illustration 6 g01086869 9. Install Tooling (C) on the planetary carrier, as shown. Fasten an appropriate lifting device to Tooling (C). Note: There is a sun gear in the middle of the planetary carrier. The sun gear is free to fall if the gear stays with the planetary carrier. 10. Remove sun gear (10) and planetary carrier (9) as an assembly from the hub. The weight is approximately 95 kg (210 lb). Illustration 7 g00627509 11. Remove spiral ring (11) from the sun gear. 5/13 D9R Track-Type Tractor Power Shift 8BL01053-UP (MACHINE) POWERED BY 34... 2021/10/27 https://127.0.0.1/sisweb/sisweb/techdoc/techdoc_print_page.jsp?returnurl=/sis...
  • 12. Illustration 8 g01086870 12. Fasten a suitable lifting device in order to remove planetary carrier (9) from sun gear (10). The weight of the planetary carrier is approximately 68 kg (150 lb). Illustration 9 g00627511 13. Remove bolts (12) and plates (13). 6/13 D9R Track-Type Tractor Power Shift 8BL01053-UP (MACHINE) POWERED BY 34... 2021/10/27 https://127.0.0.1/sisweb/sisweb/techdoc/techdoc_print_page.jsp?returnurl=/sis...
  • 13. Illustration 10 g01086871 14. Use a suitable press to remove shafts (14) from the planetary carrier. 15. Remove gears (15) from the planetary carrier. Illustration 11 g00627520 16. Remove bearing cone (16) from each side of gears (15). Illustration 12 g00627522 17. Remove bearing cup (17) from each side of gear (15). 7/13 D9R Track-Type Tractor Power Shift 8BL01053-UP (MACHINE) POWERED BY 34... 2021/10/27 https://127.0.0.1/sisweb/sisweb/techdoc/techdoc_print_page.jsp?returnurl=/sis...
  • 14. Illustration 13 g00627524 18. Remove lockring (18) from each of the gears. Illustration 14 g00627525 19. Remove sun gear (19). Illustration 15 g00627542 20. Remove bolts and retainer (20). Use Tooling (D) and a suitable press to remove ring (21) from retainer (20) if a replacement of either part is needed. 8/13 D9R Track-Type Tractor Power Shift 8BL01053-UP (MACHINE) POWERED BY 34... 2021/10/27 https://127.0.0.1/sisweb/sisweb/techdoc/techdoc_print_page.jsp?returnurl=/sis...
  • 15. Illustration 16 g00627543 21. Use a magnet to remove pins (22) from the hub. 22. Install Tooling (A) on the hub. Fasten an appropriate lifting device to Tooling (A). Remove the hub and ring gear (23) from hub (24). The weight of the hub and ring gear is approximately 136 kg (300 lb). Illustration 17 g01096464 23. Turn over the hub and the ring gear. Remove retainer ring (23) from the hub. 9/13 D9R Track-Type Tractor Power Shift 8BL01053-UP (MACHINE) POWERED BY 34... 2021/10/27 https://127.0.0.1/sisweb/sisweb/techdoc/techdoc_print_page.jsp?returnurl=/sis...
  • 16. Illustration 18 g01086875 24. Install Tooling (A) on hub (25). Fasten an appropriate lifting device to Tooling (A). Remove hub (25) from ring (24). The weight of the hub is approximately 41 kg (90 lb). Illustration 19 g01096496 25. Install Tooling (E). The rod end should be down. Make sure that the hydraulic cylinder is in the center of the 5P-9695 Pressure Plate. Make sure that the 1P-0527 Plate is between the hydraulic cylinder and the hub. 26. Loosen hub (26) from hub (28) with Tooling (E) until the bearing is free. It is possible that the bearing cone will need to be heated with a torch. 10/13 D9R Track-Type Tractor Power Shift 8BL01053-UP (MACHINE) POWERED BY ... 2021/10/27 https://127.0.0.1/sisweb/sisweb/techdoc/techdoc_print_page.jsp?returnurl=/sis...
  • 17. Illustration 20 g00627549 27. Remove Tooling (E). Remove bearing cone (27). Illustration 21 g01086876 28. Install Tooling (F) on hub (26). Fasten a suitable lifting device to Tooling (F). Remove hub (26) from hub (28). The weight of the hub is approximately 352 kg (775 lb). 11/13 D9R Track-Type Tractor Power Shift 8BL01053-UP (MACHINE) POWERED BY ... 2021/10/27 https://127.0.0.1/sisweb/sisweb/techdoc/techdoc_print_page.jsp?returnurl=/sis...
  • 18. Illustration 22 g00627551 29. Remove Duo-Cone seal (29) from the hub. Illustration 23 g00627552 30. Remove bearing cup (31) from the hub with a punch and a hammer. 31. Turn over the hub. Remove bearing cup (30) from the hub with a punch and a hammer. Illustration 24 g00627553 32. Remove Duo-Cone seal (32) from hub (28). Put identification on the seal for installation. 12/13 D9R Track-Type Tractor Power Shift 8BL01053-UP (MACHINE) POWERED BY ... 2021/10/27 https://127.0.0.1/sisweb/sisweb/techdoc/techdoc_print_page.jsp?returnurl=/sis...
  • 19. Illustration 25 g00627555 33. If necessary, remove bearing cone (33) from the hub. Securely support the hub. Heat the circumference of the cone evenly. Do not stop the torch and heat the cone in any one place. If the hub is heated excessively during bearing removal 150 °C (300 °F), the future service life may be reduced. If the bearing cone is heated in any one place to a temperature above 120 °C (248 °F), the heat treatment will be destroyed. A bearing failure is probable if the bearing is used again. Illustration 26 g00627556 34. Remove lip seal (34) from the hub. 35. Inspect sleeve bearing (35). If necessary, remove the sleeve bearing from the hub. 13/13 D9R Track-Type Tractor Power Shift 8BL01053-UP (MACHINE) POWERED BY ... 2021/10/27 https://127.0.0.1/sisweb/sisweb/techdoc/techdoc_print_page.jsp?returnurl=/sis...
  • 20. Product: TRACK-TYPE TRACTOR Model: D9R TRACK-TYPE TRACTOR 8BL Configuration: D9R Track-Type Tractor Power Shift 8BL01053-UP (MACHINE) POWERED BY 3408 Engine Disassembly and Assembly D9R Track-Type Tractor Power Train Media Number -SENR5387-14 Publication Date -01/08/2018 Date Updated -30/08/2018 i02140464 Final Drive - Assemble SMCS - 4050-016 Assembly Procedure Table 1 Required Tools Tool Part Number Part Description Qty A 138-7575 Link Bracket 3 C 138-7573 Link Bracket 3 D 1P-0520 Driver Group 1 F 138-7574 Link Bracket 2 G 1U-5934 Duo-Cone Seal Installer As 1 H 140-2286 Spacer 1 J 169-0503 Installation Kit 1 1/14 D9R Track-Type Tractor Power Shift 8BL01053-UP (MACHINE) POWERED BY 34... 2021/10/27 https://127.0.0.1/sisweb/sisweb/techdoc/techdoc_print_page.jsp?returnurl=/sis...
  • 21. Illustration 1 g00642301 Note: Lower the temperature of the sleeve bearing. Use Tooling (D) to install sleeve bearing (35). 1. Inspect all of the parts for damage. Make replacements, if necessary. Ensure that all of the parts are clean. Illustration 2 g01096508 2. Install lip seal (34) in the hub with Tooling (D). 2/14 D9R Track-Type Tractor Power Shift 8BL01053-UP (MACHINE) POWERED BY 34... 2021/10/27 https://127.0.0.1/sisweb/sisweb/techdoc/techdoc_print_page.jsp?returnurl=/sis...
  • 22. Illustration 3 g00627559 3. Raise bearing cone (33) to a maximum temperature of 135 °C (275 °F). Install bearing cone (33) on hub (28). Note: Before you install any of the Duo-Cone seals, see Installation of the Duo-Cone Floating Seals in this module. Use Tooling (J) for preparation of the seal. Illustration 4 g01096509 4. Use Tooling (G) to install Duo-Cone seal (32) on the hub, as shown. Illustration 5 g00627562 3/14 D9R Track-Type Tractor Power Shift 8BL01053-UP (MACHINE) POWERED BY 34... 2021/10/27 https://127.0.0.1/sisweb/sisweb/techdoc/techdoc_print_page.jsp?returnurl=/sis...
  • 23. 5. Lower the temperature of bearing cups (30) and (31). Install bearing cups (30) and (31) in hub (24). Check with a 0.038 mm (0.0015 inch) feeler gauge. Ensure that the bearing cup is seated against the bottom of the bore all the way around. Illustration 6 g01096510 6. Use Tooling (G) to install Duo-Cone seal (29) in hub (24). Illustration 7 g01086876 Note: Do not put hub (24) on the Duo-Cone seal when the hub is turned over. 4/14 D9R Track-Type Tractor Power Shift 8BL01053-UP (MACHINE) POWERED BY 34... 2021/10/27 https://127.0.0.1/sisweb/sisweb/techdoc/techdoc_print_page.jsp?returnurl=/sis...
  • 24. 7. Turn over hub (24). Install Tooling (F) in the hub and fasten a suitable lifting device to the Tooling. Put hub (24) in position on hub (28), as shown. Illustration 8 g00627566 8. Raise bearing cone (27) to a maximum temperature of 135 °C (275 °F). Install bearing cone (27) on the hub. Illustration 9 g01096511 9. Put Tooling (H) in position while the bearing cone is still hot. Install retainer (20). Turn the hub while the bolts that hold the retainer are tightened to a torque of 135 ± 15 N·m (100 ± 11 lb ft). Permit the bearing cone to return to room temperature before the retainer and Tooling (F) are removed. 5/14 D9R Track-Type Tractor Power Shift 8BL01053-UP (MACHINE) POWERED BY 34... 2021/10/27 https://127.0.0.1/sisweb/sisweb/techdoc/techdoc_print_page.jsp?returnurl=/sis...
  • 25. Illustration 10 g01086875 10. Install Tooling (A) on hub (25). Fasten an suitable lifting device to Tooling (A). Put hub (25) in position in ring gear (24). Illustration 11 g01096464 11. Install retainer ring (23) in the groove in ring gear (24). 6/14 D9R Track-Type Tractor Power Shift 8BL01053-UP (MACHINE) POWERED BY 34... 2021/10/27 https://127.0.0.1/sisweb/sisweb/techdoc/techdoc_print_page.jsp?returnurl=/sis...
  • 26. Illustration 12 g01087059 12. Turn over the hub and the gear. Install Tooling (A) onto hub (25). Fasten an suitable lifting device to Tooling (A). Install ring gear (24) and the hub as a unit. Illustration 13 g00627576 13. Put pins (22) in position in the hub. 7/14 D9R Track-Type Tractor Power Shift 8BL01053-UP (MACHINE) POWERED BY 34... 2021/10/27 https://127.0.0.1/sisweb/sisweb/techdoc/techdoc_print_page.jsp?returnurl=/sis...
  • 27. Illustration 14 g00627578 14. If a replacement is needed, use Tooling (A) and a suitable press to install ring (21) in retainer (20). 15. Put retainer (20) in position on the hub. Illustration 15 g00627580 16. Install bolts (35) that hold retainer (20) in position. Tighten the bolts to a torque of 135 ± 15 N·m (100 ± 11 lb ft). Illustration 16 g00627582 8/14 D9R Track-Type Tractor Power Shift 8BL01053-UP (MACHINE) POWERED BY 34... 2021/10/27 https://127.0.0.1/sisweb/sisweb/techdoc/techdoc_print_page.jsp?returnurl=/sis...
  • 28. 17. Use feeler gauge (36) to measure the distance between retainer (20) and pins (22). The clearance must be 0.08 ± 0.05 mm (0.003 ± 0.002 inch). Note: There must be metal to metal contact between hub (28) and retainer (20). If there is no gap, bearing cone (27) was not pressed correctly with Tooling (H). See step 9. A gap between pins (22) and retainer (20) allows metal to metal contact between retainer (20) and hub (28). Illustration 17 g00627583 18. Install lockring (18) in gears (15). Illustration 18 g00627522 19. Lower the temperature of bearing cups (17). Install bearing cups (17) in gears (15). 9/14 D9R Track-Type Tractor Power Shift 8BL01053-UP (MACHINE) POWERED BY 34... 2021/10/27 https://127.0.0.1/sisweb/sisweb/techdoc/techdoc_print_page.jsp?returnurl=/sis...
  • 29. Suggest: If the above button click is invalid. Please download this document first, and then click the above link to download the complete manual. Thank you so much for reading