SlideShare a Scribd company logo
1 of 29
Download to read offline
Shutdown SIS
Previous Screen
Product: EXCAVATOR
Model: 317B LN EXCAVATOR 6DZ
Configuration: 317B L & 317B LN Excavators 6DZ00001-UP (MACHINE) POWERED BY 3046 Engine
Disassembly and Assembly
3046 Engine For Caterpillar Built Machines
Media Number -SENR6458-05 Publication Date -01/04/2004 Date Updated -22/04/2004
i01032735
Cylinder Head - Remove
SMCS - 1100-011
Removal Procedure
Start By:
A. Remove the turbocharger. Refer to Disassembly and Assembly, "Turbocharger - Remove".
B. Remove the rocker shaft and pushrods. Refer to Disassembly and Assembly, "Rocker Shaft
and Pushrods - Remove".
C. Remove the fuel injection nozzles in order to protect from damage. Refer to Disassembly
and Assembly, "Fuel Injection Nozzles - Remove".
D. Remove the glow plugs in order to protect from damage. Refer to Disassembly and
Assembly, "Glow Plugs - Remove and Install".
NOTICE
Keep all parts clean from contaminants.
Contaminants may cause rapid wear and shortened component life.
NOTICE
Care must be taken to ensure that fluids are contained during
performance of inspection, maintenance, testing, adjusting and repair
of the machine. Be prepared to collect the fluid with suitable containers
before opening any compartment or disassembling any component
containing fluids.
1/3
317B L & 317B LN Excavators 6DZ00001-UP (MACHINE) POWERED BY 3046 En...
2020/12/9
https://127.0.0.1/sisweb/sisweb/techdoc/techdoc_print_page.jsp?returnurl=/sis...
Refer to Special Publication, NENG2500, "Caterpillar Tools and Shop
Products Guide", for tools and supplies suitable to collect and contain
fluids in Caterpillar machines.
Dispose of all fluids according to local regulations and mandates.
Illustration 1 g00562585
1. If necessary, remove bolt (2) and remove oil tube assembly (dipstick).
Illustration 2 g00531679
Cylinder Head Tightening Sequence
2. Gradually remove 25 cylinder head bolts (1) in reverse order of the tightening sequence.
2/3
317B L & 317B LN Excavators 6DZ00001-UP (MACHINE) POWERED BY 3046 En...
2020/12/9
https://127.0.0.1/sisweb/sisweb/techdoc/techdoc_print_page.jsp?returnurl=/sis...
Note: Do not use a pry bar to separate the cylinder head from the engine block.
Illustration 3 g00560287
3. Attach a hoist to the cylinder head lifting brackets and remove the cylinder head from the
cylinder block. The weight of the cylinder head assembly is 60 kg (132 lb).
Note: Place the cylinder head on a surface that will not damage the face of the cylinder
head.
Illustration 4 g00560297
4. Remove the cylinder head gasket (3) .
Copyright 1993 - 2020 Caterpillar Inc.
All Rights Reserved.
Private Network For SIS Licensees.
Wed Dec 9 22:58:32 UTC+0800 2020
3/3
317B L & 317B LN Excavators 6DZ00001-UP (MACHINE) POWERED BY 3046 En...
2020/12/9
https://127.0.0.1/sisweb/sisweb/techdoc/techdoc_print_page.jsp?returnurl=/sis...
Shutdown SIS
Previous Screen
Product: EXCAVATOR
Model: 317B LN EXCAVATOR 6DZ
Configuration: 317B L & 317B LN Excavators 6DZ00001-UP (MACHINE) POWERED BY 3046 Engine
Disassembly and Assembly
3046 Engine For Caterpillar Built Machines
Media Number -SENR6458-05 Publication Date -01/04/2004 Date Updated -22/04/2004
i02063403
Cylinder Head - Install
SMCS - 1100-012
Installation Procedure
Table 1
Required Tools
Tool Part Number Part Description Qty
A 9U-7995 Guide Pin 2
NOTICE
Keep all parts clean from contaminants.
Contaminants may cause rapid wear and shortened component life.
1/3
317B L & 317B LN Excavators 6DZ00001-UP (MACHINE) POWERED BY 3046 En...
2020/12/9
https://127.0.0.1/sisweb/sisweb/techdoc/techdoc_print_page.jsp?returnurl=/sis...
Illustration 1 g00560297
1. Clean the surfaces of the cylinder head and the cylinder block that are in contact with each
other. Ensure that the surfaces are clean and dry. Install a new, dry cylinder head gasket (3)
on the cylinder block.
Note: Do not use any sealant or gasket adhesive on the cylinder head gasket .
2. Install Tool (A) (not shown) on the cylinder block in order to install the cylinder head.
Illustration 2 g00560287
3. Attach a hoist to the cylinder head lifting brackets and install the cylinder head in position
on the cylinder block. The weight of the cylinder head assembly is 60 kg (132 lb).
4. Remove Tool (A) .
5. Apply 6V-4876 Lubricant to all of the threads and thrust faces of cylinder head bolts (1) .
Illustration 3 g00562585
2/3
317B L & 317B LN Excavators 6DZ00001-UP (MACHINE) POWERED BY 3046 En...
2020/12/9
https://127.0.0.1/sisweb/sisweb/techdoc/techdoc_print_page.jsp?returnurl=/sis...
Illustration 4 g00531679
Cylinder Head Tightening Sequence
6. Install cylinder head bolts (1) and tighten all of the bolts (1 through 25) in a numerical order
according to the cylinder head tightening sequence. Tighten cylinder head bolts (1) to a
torque of 118 ± 5 N·m (87 ± 4 lb ft).
7. If necessary, install oil tube assembly (dipstick) and install bolt (2) .
End By:
a. Install the fuel injector nozzles. Refer to Disassembly and Assembly, "Fuel Injection
Nozzles - Install".
b. Install the glow plugs. Refer to Disassembly and Assembly, "Glow Plugs - Remove and
Install".
c. Install the rocker shaft and pushrods. Refer to Disassembly and Assembly, "Rocker Shaft
and Pushrods - Install".
d. Install the turbocharger. Refer to Disassembly and Assembly, "Turbocharger - Install".
Copyright 1993 - 2020 Caterpillar Inc.
All Rights Reserved.
Private Network For SIS Licensees.
Wed Dec 9 22:59:28 UTC+0800 2020
3/3
317B L & 317B LN Excavators 6DZ00001-UP (MACHINE) POWERED BY 3046 En...
2020/12/9
https://127.0.0.1/sisweb/sisweb/techdoc/techdoc_print_page.jsp?returnurl=/sis...
Shutdown SIS
Previous Screen
Product: EXCAVATOR
Model: 317B LN EXCAVATOR 6DZ
Configuration: 317B L & 317B LN Excavators 6DZ00001-UP (MACHINE) POWERED BY 3046 Engine
Disassembly and Assembly
3046 Engine For Caterpillar Built Machines
Media Number -SENR6458-05 Publication Date -01/04/2004 Date Updated -22/04/2004
i01033379
Lifter Group - Remove and Install
SMCS - 1209-010
Removal Procedure
Start By:
A. Remove the camshaft. Refer to Disassembly and Assembly, "Camshaft - Remove and
Install".
NOTICE
Keep all parts clean from contaminants.
Contaminants may cause rapid wear and shortened component life.
Illustration 1 g00532246
1/3
317B L & 317B LN Excavators 6DZ00001-UP (MACHINE) POWERED BY 3046 En...
2020/12/9
https://127.0.0.1/sisweb/sisweb/techdoc/techdoc_print_page.jsp?returnurl=/sis...
Illustration 2 g00532061
1. Use a magnet to remove valve lifter (1), as shown. Put identification marks on the valve
lifters for installation purposes.
2. Repeat Step 1 for the remainder of the valve lifters.
Installation Procedure
NOTICE
Keep all parts clean from contaminants.
Contaminants may cause rapid wear and shortened component life.
Illustration 3 g00532061
1. Put 8T-2998 Lubricant on valve lifter (1) prior to installation. Install valve lifter (1) in the
original location in the cylinder block.
2/3
317B L & 317B LN Excavators 6DZ00001-UP (MACHINE) POWERED BY 3046 En...
2020/12/9
https://127.0.0.1/sisweb/sisweb/techdoc/techdoc_print_page.jsp?returnurl=/sis...
2. Repeat Step 1 for the remainder of the valve lifters.
End By: Install the camshaft. Refer to Disassembly and Assembly, "Camshaft - Remove and
Install".
Copyright 1993 - 2020 Caterpillar Inc.
All Rights Reserved.
Private Network For SIS Licensees.
Wed Dec 9 23:00:24 UTC+0800 2020
3/3
317B L & 317B LN Excavators 6DZ00001-UP (MACHINE) POWERED BY 3046 En...
2020/12/9
https://127.0.0.1/sisweb/sisweb/techdoc/techdoc_print_page.jsp?returnurl=/sis...
Shutdown SIS
Previous Screen
Product: EXCAVATOR
Model: 317B LN EXCAVATOR 6DZ
Configuration: 317B L & 317B LN Excavators 6DZ00001-UP (MACHINE) POWERED BY 3046 Engine
Disassembly and Assembly
3046 Engine For Caterpillar Built Machines
Media Number -SENR6458-05 Publication Date -01/04/2004 Date Updated -22/04/2004
i01597409
Camshaft - Remove and Install
SMCS - 1210-010
Removal Procedure 1
Table 1
Required Tools
Tool Part Number Part Description Qty
A 1P-2320 Combination Puller 1
C 1P-2321 Combination Puller 1
9S-9153 Puller Jaws 3
Start By:
A. Remove the timing gear cover. Refer to Disassembly and Assembly, "Housing (Front) -
Remove".
B. Remove the rocker shaft assembly and the pushrods. Refer to Disassembly and Assembly,
"Rocker Shaft and Pushrod - Remove".
C. Remove the oil pan. Refer to Disassembly and Assembly, "Engine Oil Pan - Remove and
Install".
Note: The engine oil pan is facing in the up direction in order to retain the lifters in position for
this procedure.
NOTICE
Keep all parts clean from contaminants.
Contaminants may cause rapid wear and shortened component life.
1/10
317B L & 317B LN Excavators 6DZ00001-UP (MACHINE) POWERED BY 3046 En...
2020/12/9
https://127.0.0.1/sisweb/sisweb/techdoc/techdoc_print_page.jsp?returnurl=/sis...
NOTICE
Care must be taken to ensure that fluids are contained during
performance of inspection, maintenance, testing, adjusting and repair
of the product. Be prepared to collect the fluid with suitable containers
before opening any compartment or disassembling any component
containing fluids.
Refer to Special Publication, NENG2500, "Caterpillar Tools and Shop
Products Guide" for tools and supplies suitable to collect and contain
fluids on Caterpillar products.
Dispose of all fluids according to local regulations and mandates.
Note: Ensure that the marks on the timing gears are in alignment. Align the fuel injection drive
gear with the "33" mark with the "3" mark on the idler gear. Make an alignment of the "2" mark
on the camshaft gear with the "22" mark on the idler gear. Align the "1" mark on the crankshaft
gear with the "11" mark on the idler gear. The No. 1 cylinder is at the top center position when
these marks are in alignment.
1. Rotate the engine at 180 degrees.
Illustration 1 g00532179
2. Use Tool (A) to remove bearing (1) from the front of camshaft gear (2) .
Note: This step is necessary only if the camshaft gear is equipped with a bearing.
2/10
317B L & 317B LN Excavators 6DZ00001-UP (MACHINE) POWERED BY 3046 En...
2020/12/9
https://127.0.0.1/sisweb/sisweb/techdoc/techdoc_print_page.jsp?returnurl=/sis...
Illustration 2 g00532382
NOTICE
Do not damage the lobes or the bearings when the camshaft is removed
or installed.
3. Position camshaft gear (2) so that the gear's slots align from the top to the bottom. Remove
two bolts (3) and the washers that hold thrust plate (4). Carefully remove the camshaft, the
thrust plate and the camshaft gear as an assembly.
4. Remove the 12 valve lifters. Refer to Disassembly and Assembly, "Lifter Group - Remove
and Install".
Illustration 3 g00532384
5. Use tool (C) to remove camshaft gear (2) from camshaft (5). Remove thrust plate (4) .
Installation Procedure 1
3/10
317B L & 317B LN Excavators 6DZ00001-UP (MACHINE) POWERED BY 3046 En...
2020/12/9
https://127.0.0.1/sisweb/sisweb/techdoc/techdoc_print_page.jsp?returnurl=/sis...
Note: In this installation procedure, the engine needs to remain in the upside-down position in
order to keep the lifters in position while the camshaft is installed.
NOTICE
Keep all parts clean from contaminants.
Contaminants may cause rapid wear and shortened component life.
Note: During installation, ensure that camshaft (4) is clean and lubricate all of the
components with clean engine oil.
Illustration 4 g00532385
1. Install thrust plate (4) onto camshaft (5) .
Always wear protective gloves when handling parts that have been
heated.
2. Heat camshaft gear (2) in an oven to a maximum temperature of 150 °C (302 °F) and install
camshaft gear (2) onto camshaft (5) .
3. Install the 12 valve lifters. Refer to Disassembly and Assembly, "Lifter Group - Remove
and Install".
Note: During installation, ensure that the marks on the timing gears are in alignment. Align
the fuel injection drive gear with the "33" mark with the "3" mark on the idler gear. Make an
alignment of the "2" mark on the camshaft gear with the "22" mark on the idler gear. Align
4/10
317B L & 317B LN Excavators 6DZ00001-UP (MACHINE) POWERED BY 3046 En...
2020/12/9
https://127.0.0.1/sisweb/sisweb/techdoc/techdoc_print_page.jsp?returnurl=/sis...
the "1" mark on the crankshaft gear with the "11" mark on the idler gear. The No. 1 cylinder
is at the top center position when these marks are in alignment.
4. Carefully install the camshaft assembly into the original location in the cylinder block.
Note: Caution must be used when the camshaft is installed in order to not damage the
camshaft lobe or the camshaft bearings.
Illustration 5 g00532382
5. Position camshaft gear (2) so that the gear's slots align from the top to the bottom. Install
two bolts (3) and the washers that hold thrust plate (4). Tighten bolts (3) to a torque of 10 to
13 N·m (7 to 10 lb ft).
6. If necessary, install the bearing onto the front of the camshaft gear.
End By:
a. Install the oil pan. Refer to Disassembly and Assembly, "Engine Oil Pan - Remove and
Install".
b. Install the rocker shaft assembly and the pushrods. Refer to Disassembly and Assembly,
"Rocker Shaft and Pushrod - Install".
c. Install the timing gear cover. Refer to Disassembly and Assembly, "Housing (Front) -
Install".
Removal Procedure 2
Table 2
Required Tools
Tool Part Number Part Description Qty
A 1P-2320 Combination Puller 1
B 1U-7638 Magnetic Holding Tools 12
C 1P-2321 Combination Puller 1
9S-9153 Puller Jaws 3
5/10
317B L & 317B LN Excavators 6DZ00001-UP (MACHINE) POWERED BY 3046 En...
2020/12/9
https://127.0.0.1/sisweb/sisweb/techdoc/techdoc_print_page.jsp?returnurl=/sis...
Start By:
A. Remove the timing gear cover. Refer to Disassembly and Assembly, " Housing (Front) -
Remove".
B. Remove the cylinder head. Refer to Disassembly and Assembly, "Cylinder Head -
Remove".
Note: This removal procedure is done with the engine in the upright position and the valve lifters
left in the cylinder block.
NOTICE
Keep all parts clean from contaminants.
Contaminants may cause rapid wear and shortened component life.
NOTICE
Care must be taken to ensure that fluids are contained during
performance of inspection, maintenance, testing, adjusting and repair
of the product. Be prepared to collect the fluid with suitable containers
before opening any compartment or disassembling any component
containing fluids.
Refer to Special Publication, NENG2500, "Caterpillar Tools and Shop
Products Guide" for tools and supplies suitable to collect and contain
fluids on Caterpillar products.
Dispose of all fluids according to local regulations and mandates.
6/10
317B L & 317B LN Excavators 6DZ00001-UP (MACHINE) POWERED BY 3046 En...
2020/12/9
https://127.0.0.1/sisweb/sisweb/techdoc/techdoc_print_page.jsp?returnurl=/sis...
Illustration 6 g00532179
The engine is rotated at 180 degrees.
1. Use Tool (A) to remove bearing (1) from the front of camshaft gear (2) .
Note: This step is necessary only if the camshaft gear is equipped with a bearing.
Illustration 7 g00534616
2. Install Tool (B) in order to hold the 12 valve lifters.
Note: Make sure that Tool (B) is holding the lifters as far up in cylinder block (6) as
possible.
Illustration 8 g00534473
Note: Be careful not to dislodge the valve lifters from Tools (B) during removal of the
camshaft.
NOTICE
7/10
317B L & 317B LN Excavators 6DZ00001-UP (MACHINE) POWERED BY 3046 En...
2020/12/9
https://127.0.0.1/sisweb/sisweb/techdoc/techdoc_print_page.jsp?returnurl=/sis...
Do not damage the lobes or the bearings when the camshaft is removed
or installed.
3. Position camshaft gear (2) so that the gear's slots align from the top to the bottom. Remove
two bolts (3) and the washers that hold thrust plate (4). Carefully remove the camshaft, the
thrust plate and the camshaft gear as an assembly from cylinder block (6) .
Illustration 9 g00532384
4. Use tool (C) to remove camshaft gear (2) from camshaft (5). Remove thrust plate (4) .
Installation Procedure 2
Table 3
Required Tools
Tool Part Number Part Description Qty
B 1U-7638 Magnetic Holding Tools 12
Note: This installation procedure is done with the engine in the upright position and the valve
lifters left in the cylinder block.
NOTICE
Keep all parts clean from contaminants.
Contaminants may cause rapid wear and shortened component life.
Note: During installation, ensure that camshaft (4) is clean and lubricate all of the
components with clean engine oil.
8/10
317B L & 317B LN Excavators 6DZ00001-UP (MACHINE) POWERED BY 3046 En...
2020/12/9
https://127.0.0.1/sisweb/sisweb/techdoc/techdoc_print_page.jsp?returnurl=/sis...
Illustration 10 g00532385
1. Install thrust plate (4) onto camshaft (5). Heat camshaft gear (2) to a maximum temperature
of 150 °C (302 °F) and install camshaft gear (2) onto camshaft (4) .
Note: During installation, ensure that the marks on the timing gears are in alignment. Align
the fuel injection drive gear with the "33" mark with the "3" mark on the idler gear. Make an
alignment of the "2" mark on the camshaft gear with the "22" mark on the idler gear. Align
the "1" mark on the crankshaft gear with the "11" mark on the idler gear. The No. 1 cylinder
is at the top center position when these marks are in alignment.
2. Carefully install the camshaft assembly into the original location in the cylinder block.
Note: Caution must be used when the camshaft is installed in order to not damage the
camshaft lobe or the camshaft bearings.
Illustration 11 g00534616
Note: Make sure that Tool (B ) is holding the lifters as far up in cylinder block (6) as
possible.
9/10
317B L & 317B LN Excavators 6DZ00001-UP (MACHINE) POWERED BY 3046 En...
2020/12/9
https://127.0.0.1/sisweb/sisweb/techdoc/techdoc_print_page.jsp?returnurl=/sis...
Illustration 12 g00534473
3. Position camshaft gear (2) so that the gear's slots align from the top to the bottom. Install
two bolts (3) and the washers that hold thrust plate (4). Tighten bolts (3) to a torque of 10 to
13 N·m (7 to 10 lb ft).
4. If necessary, install the bearing onto the front of the camshaft gear.
End By:
a. Install the cylinder head. Refer to Disassembly and Assembly, "Cylinder Head - Install".
b. Install the timing gear cover. Refer to Disassembly and Assembly, "Housing (Front) -
Install".
Copyright 1993 - 2020 Caterpillar Inc.
All Rights Reserved.
Private Network For SIS Licensees.
Wed Dec 9 23:01:20 UTC+0800 2020
10/10
317B L & 317B LN Excavators 6DZ00001-UP (MACHINE) POWERED BY 3046 ...
2020/12/9
https://127.0.0.1/sisweb/sisweb/techdoc/techdoc_print_page.jsp?returnurl=/sis...
Shutdown SIS
Previous Screen
Product: EXCAVATOR
Model: 317B LN EXCAVATOR 6DZ
Configuration: 317B L & 317B LN Excavators 6DZ00001-UP (MACHINE) POWERED BY 3046 Engine
Disassembly and Assembly
3046 Engine For Caterpillar Built Machines
Media Number -SENR6458-05 Publication Date -01/04/2004 Date Updated -22/04/2004
i04990496
Camshaft Bearings - Remove and Install
SMCS - 1211-010
Removal Procedure
Table 1
Required Tools
Tool Part Number Part Description Qty
A
8S-2241 Camshaft Bearing Tool Group 1
8H-0684 Ratchet Wrench 1
Start By:
A. Remove the flywheel housing. Refer to Disassembly and Assembly, "Flywheel Housing -
Remove and Install".
B. Remove the camshaft. Refer to Disassembly and Assembly, "Camshaft - Remove and
Install".
NOTICE
Keep all parts clean from contaminants.
Contaminants may cause rapid wear and shortened component life.
1/4
317B L & 317B LN Excavators 6DZ00001-UP (MACHINE) POWERED BY 3046 En...
2020/12/9
https://127.0.0.1/sisweb/sisweb/techdoc/techdoc_print_page.jsp?returnurl=/sis...
Illustration 1 g00533094
1. Remove plug (1) from the cylinder block.
Illustration 2 g00533095
Illustration 3 g00533096
2. Use Tool (A) in order to remove the camshaft bearings from the cylinder block.
2/4
317B L & 317B LN Excavators 6DZ00001-UP (MACHINE) POWERED BY 3046 En...
2020/12/9
https://127.0.0.1/sisweb/sisweb/techdoc/techdoc_print_page.jsp?returnurl=/sis...
Note: Refer to the instructions of the 8S-2241 Camshaft Bearing Tool Group for the proper
procedure.
Installation Procedure
Table 2
Required Tools
Tool Part Number Part Description Qty
A
8S-2241 Camshaft Bearing Tool Group 1
8H-0684 Ratchet Wrench 1
NOTICE
Keep all parts clean from contaminants.
Contaminants may cause rapid wear and shortened component life.
Illustration 4 g00533095
3/4
317B L & 317B LN Excavators 6DZ00001-UP (MACHINE) POWERED BY 3046 En...
2020/12/9
https://127.0.0.1/sisweb/sisweb/techdoc/techdoc_print_page.jsp?returnurl=/sis...
Illustration 5 g00533096
1. Use Tool (A) in order to install the camshaft bearings into the cylinder block. Ensure that
the oil hole of the camshaft bearings are in alignment with the oil ports in the engine block.
Note: Refer to the instructions of the 8S-2241 Camshaft Bearing Tool Group for the proper
procedure.
Illustration 6 g00533094
2. Install plug (1) into the cylinder block. Use Loctite 596 .
End By:
a. Install the camshaft. Refer to Disassembly and Assembly, "Camshaft - Remove and Install".
b. Install the flywheel housing. Refer to Disassembly and Assembly, "Flywheel Housing -
Remove and Install".
Copyright 1993 - 2020 Caterpillar Inc.
All Rights Reserved.
Private Network For SIS Licensees.
Wed Dec 9 23:02:15 UTC+0800 2020
4/4
317B L & 317B LN Excavators 6DZ00001-UP (MACHINE) POWERED BY 3046 En...
2020/12/9
https://127.0.0.1/sisweb/sisweb/techdoc/techdoc_print_page.jsp?returnurl=/sis...
Shutdown SIS
Previous Screen
Product: EXCAVATOR
Model: 317B LN EXCAVATOR 6DZ
Configuration: 317B L & 317B LN Excavators 6DZ00001-UP (MACHINE) POWERED BY 3046 Engine
Disassembly and Assembly
3046 Engine For Caterpillar Built Machines
Media Number -SENR6458-05 Publication Date -01/04/2004 Date Updated -22/04/2004
i05007631
Engine Oil Pan - Remove and Install
SMCS - 1302-010
Removal Procedure
NOTICE
Keep all parts clean from contaminants.
Contaminants may cause rapid wear and shortened component life.
NOTICE
Care must be taken to ensure that fluids are contained during
performance of inspection, maintenance, testing, adjusting, and repair
of the product. Be prepared to collect the fluid with suitable containers
before opening any compartment or disassembling any component
containing fluids.
Refer to Special Publication, NENG2500, "Dealer Service Tool
Catalog" for tools and supplies suitable to collect and contain fluids on
Cat products.
Dispose of all fluids according to local regulations and mandates.
1/5
317B L & 317B LN Excavators 6DZ00001-UP (MACHINE) POWERED BY 3046 En...
2020/12/9
https://127.0.0.1/sisweb/sisweb/techdoc/techdoc_print_page.jsp?returnurl=/sis...
Illustration 1 g00560680
1. Remove oil pan drain plug (3) and drain the engine oil from engine oil pan (2) .
2. Install oil pan drain plug (3) . Tighten the oil pan drain plug to a torque of 78 ± 5 N·m (57 ±
4 lb ft).
3. Remove oil tube assembly (5) .
4. Remove 30 bolts (1) and the washers from engine oil pan (2) . Remove engine oil pan (2)
and gasket (4) .
Note: A liquid gasket may be factory installed in place of an oil pan gasket.
Illustration 2 g00538955
5. Remove two bolts (7) from engine oil suction tube (6) . Remove engine oil suction tube (6) .
2/5
317B L & 317B LN Excavators 6DZ00001-UP (MACHINE) POWERED BY 3046 En...
2020/12/9
https://127.0.0.1/sisweb/sisweb/techdoc/techdoc_print_page.jsp?returnurl=/sis...
Illustration 3 g00538957
6. Check condition of O-ring seal (8) . If the O-ring seal is damaged, use a new part for
replacement.
Installation procedure
NOTICE
Keep all parts clean from contaminants.
Contaminants may cause rapid wear and shortened component life.
Illustration 4 g00538957
1. Install O-ring seal (8) on suction pipe (6) .
3/5
317B L & 317B LN Excavators 6DZ00001-UP (MACHINE) POWERED BY 3046 En...
2020/12/9
https://127.0.0.1/sisweb/sisweb/techdoc/techdoc_print_page.jsp?returnurl=/sis...
Suggest:
If the above button click is invalid.
Please download this document
first, and then click the above link
to download the complete manual.
Thank you so much for reading
Illustration 5 g00538955
2. Position engine oil suction tube (6) . Install two bolts (7) in order to secure the engine oil
suction tube .
Illustration 6 g00560680
3. Clean engine oil pan (2) .
Note: Ensure that the engine oil pan and all of the mating surfaces are free of oil and gasket
material.
4. Install gasket (4) , engine oil pan (2) , bolts (1) and the washers. Tighten the bolts to a
torque of 10 to 13 N·m (7 to 10 lb ft).
Note: Loctite 5127 may be used instead of gasket (4) . Both contact surfaces must be
completely free of oil. Apply gasket material on the cylinder block on the inside of the bolt
hole pattern in a continuous bead in order to help prevent an oil leak.
5. Install oil tube assembly (5) .
6. Fill the crankcase with engine oil to the correct level. Refer to the proper Operation and
Maintenance Manual for the correct engine oil and the correct filling procedure.
Wed Dec 9 23:03:11 UTC+0800 2020
4/5
317B L & 317B LN Excavators 6DZ00001-UP (MACHINE) POWERED BY 3046 En...
2020/12/9
https://127.0.0.1/sisweb/sisweb/techdoc/techdoc_print_page.jsp?returnurl=/sis...
Copyright 1993 - 2020 Caterpillar Inc.
All Rights Reserved.
Private Network For SIS Licensees.
5/5
317B L & 317B LN Excavators 6DZ00001-UP (MACHINE) POWERED BY 3046 En...
2020/12/9
https://127.0.0.1/sisweb/sisweb/techdoc/techdoc_print_page.jsp?returnurl=/sis...

More Related Content

More from zan2736ban

Caterpillar Cat 336D L Excavator (Prefix JRX) Service Repair Manual Instant D...
Caterpillar Cat 336D L Excavator (Prefix JRX) Service Repair Manual Instant D...Caterpillar Cat 336D L Excavator (Prefix JRX) Service Repair Manual Instant D...
Caterpillar Cat 336D L Excavator (Prefix JRX) Service Repair Manual Instant D...zan2736ban
 
Caterpillar Cat 336D L Excavator (Prefix JBF) Service Repair Manual Instant D...
Caterpillar Cat 336D L Excavator (Prefix JBF) Service Repair Manual Instant D...Caterpillar Cat 336D L Excavator (Prefix JBF) Service Repair Manual Instant D...
Caterpillar Cat 336D L Excavator (Prefix JBF) Service Repair Manual Instant D...zan2736ban
 
Caterpillar Cat 336D L Excavator (Prefix J6D) Service Repair Manual Instant D...
Caterpillar Cat 336D L Excavator (Prefix J6D) Service Repair Manual Instant D...Caterpillar Cat 336D L Excavator (Prefix J6D) Service Repair Manual Instant D...
Caterpillar Cat 336D L Excavator (Prefix J6D) Service Repair Manual Instant D...zan2736ban
 
Caterpillar Cat 336D L Excavator (Prefix J2F) Service Repair Manual Instant D...
Caterpillar Cat 336D L Excavator (Prefix J2F) Service Repair Manual Instant D...Caterpillar Cat 336D L Excavator (Prefix J2F) Service Repair Manual Instant D...
Caterpillar Cat 336D L Excavator (Prefix J2F) Service Repair Manual Instant D...zan2736ban
 
Caterpillar Cat 336D L Excavator (Prefix DTS) Service Repair Manual Instant D...
Caterpillar Cat 336D L Excavator (Prefix DTS) Service Repair Manual Instant D...Caterpillar Cat 336D L Excavator (Prefix DTS) Service Repair Manual Instant D...
Caterpillar Cat 336D L Excavator (Prefix DTS) Service Repair Manual Instant D...zan2736ban
 
Caterpillar Cat 336D and 336D L Excavator (Prefix MPL) Service Repair Manual ...
Caterpillar Cat 336D and 336D L Excavator (Prefix MPL) Service Repair Manual ...Caterpillar Cat 336D and 336D L Excavator (Prefix MPL) Service Repair Manual ...
Caterpillar Cat 336D and 336D L Excavator (Prefix MPL) Service Repair Manual ...zan2736ban
 
Caterpillar Cat 336D and 336D L Excavator (Prefix KKT) Service Repair Manual ...
Caterpillar Cat 336D and 336D L Excavator (Prefix KKT) Service Repair Manual ...Caterpillar Cat 336D and 336D L Excavator (Prefix KKT) Service Repair Manual ...
Caterpillar Cat 336D and 336D L Excavator (Prefix KKT) Service Repair Manual ...zan2736ban
 
Caterpillar Cat 336D and 336D L Excavator (Prefix JBT) Service Repair Manual ...
Caterpillar Cat 336D and 336D L Excavator (Prefix JBT) Service Repair Manual ...Caterpillar Cat 336D and 336D L Excavator (Prefix JBT) Service Repair Manual ...
Caterpillar Cat 336D and 336D L Excavator (Prefix JBT) Service Repair Manual ...zan2736ban
 
Caterpillar Cat 330F, 330F L and 330F LN Excavator (Prefix WBA) Service Repai...
Caterpillar Cat 330F, 330F L and 330F LN Excavator (Prefix WBA) Service Repai...Caterpillar Cat 330F, 330F L and 330F LN Excavator (Prefix WBA) Service Repai...
Caterpillar Cat 330F, 330F L and 330F LN Excavator (Prefix WBA) Service Repai...zan2736ban
 
Caterpillar Cat 330F, 330F L and 330F LN Excavator (Prefix JHF) Service Repai...
Caterpillar Cat 330F, 330F L and 330F LN Excavator (Prefix JHF) Service Repai...Caterpillar Cat 330F, 330F L and 330F LN Excavator (Prefix JHF) Service Repai...
Caterpillar Cat 330F, 330F L and 330F LN Excavator (Prefix JHF) Service Repai...zan2736ban
 
Caterpillar Cat 330F and 330F L Excavator (Prefix LCG) Service Repair Manual ...
Caterpillar Cat 330F and 330F L Excavator (Prefix LCG) Service Repair Manual ...Caterpillar Cat 330F and 330F L Excavator (Prefix LCG) Service Repair Manual ...
Caterpillar Cat 330F and 330F L Excavator (Prefix LCG) Service Repair Manual ...zan2736ban
 
Caterpillar Cat 330F and 330F L Excavator (Prefix HCK) Service Repair Manual ...
Caterpillar Cat 330F and 330F L Excavator (Prefix HCK) Service Repair Manual ...Caterpillar Cat 330F and 330F L Excavator (Prefix HCK) Service Repair Manual ...
Caterpillar Cat 330F and 330F L Excavator (Prefix HCK) Service Repair Manual ...zan2736ban
 
Caterpillar Cat 330F and 330F L Excavator (Prefix GHT) Service Repair Manual ...
Caterpillar Cat 330F and 330F L Excavator (Prefix GHT) Service Repair Manual ...Caterpillar Cat 330F and 330F L Excavator (Prefix GHT) Service Repair Manual ...
Caterpillar Cat 330F and 330F L Excavator (Prefix GHT) Service Repair Manual ...zan2736ban
 
Caterpillar Cat 330D2 L Excavator (Prefix ZBF) Service Repair Manual Instant ...
Caterpillar Cat 330D2 L Excavator (Prefix ZBF) Service Repair Manual Instant ...Caterpillar Cat 330D2 L Excavator (Prefix ZBF) Service Repair Manual Instant ...
Caterpillar Cat 330D2 L Excavator (Prefix ZBF) Service Repair Manual Instant ...zan2736ban
 
Caterpillar Cat 330D2 L Excavator (Prefix SZK) Service Repair Manual Instant ...
Caterpillar Cat 330D2 L Excavator (Prefix SZK) Service Repair Manual Instant ...Caterpillar Cat 330D2 L Excavator (Prefix SZK) Service Repair Manual Instant ...
Caterpillar Cat 330D2 L Excavator (Prefix SZK) Service Repair Manual Instant ...zan2736ban
 
Caterpillar Cat 330D2 L Excavator (Prefix PTE) Service Repair Manual Instant ...
Caterpillar Cat 330D2 L Excavator (Prefix PTE) Service Repair Manual Instant ...Caterpillar Cat 330D2 L Excavator (Prefix PTE) Service Repair Manual Instant ...
Caterpillar Cat 330D2 L Excavator (Prefix PTE) Service Repair Manual Instant ...zan2736ban
 
Caterpillar Cat 330D L Excavator (Prefix T2Y) Service Repair Manual Instant D...
Caterpillar Cat 330D L Excavator (Prefix T2Y) Service Repair Manual Instant D...Caterpillar Cat 330D L Excavator (Prefix T2Y) Service Repair Manual Instant D...
Caterpillar Cat 330D L Excavator (Prefix T2Y) Service Repair Manual Instant D...zan2736ban
 
Caterpillar Cat 330D L Excavator (Prefix B6H) Service Repair Manual Instant D...
Caterpillar Cat 330D L Excavator (Prefix B6H) Service Repair Manual Instant D...Caterpillar Cat 330D L Excavator (Prefix B6H) Service Repair Manual Instant D...
Caterpillar Cat 330D L Excavator (Prefix B6H) Service Repair Manual Instant D...zan2736ban
 
Caterpillar Cat 326D2 and 326D2 L Excavator (Prefix KER) Service Repair Manua...
Caterpillar Cat 326D2 and 326D2 L Excavator (Prefix KER) Service Repair Manua...Caterpillar Cat 326D2 and 326D2 L Excavator (Prefix KER) Service Repair Manua...
Caterpillar Cat 326D2 and 326D2 L Excavator (Prefix KER) Service Repair Manua...zan2736ban
 
Caterpillar Cat 325D MH EXCAVATOR (Prefix C4H) Service Repair Manual Instant ...
Caterpillar Cat 325D MH EXCAVATOR (Prefix C4H) Service Repair Manual Instant ...Caterpillar Cat 325D MH EXCAVATOR (Prefix C4H) Service Repair Manual Instant ...
Caterpillar Cat 325D MH EXCAVATOR (Prefix C4H) Service Repair Manual Instant ...zan2736ban
 

More from zan2736ban (20)

Caterpillar Cat 336D L Excavator (Prefix JRX) Service Repair Manual Instant D...
Caterpillar Cat 336D L Excavator (Prefix JRX) Service Repair Manual Instant D...Caterpillar Cat 336D L Excavator (Prefix JRX) Service Repair Manual Instant D...
Caterpillar Cat 336D L Excavator (Prefix JRX) Service Repair Manual Instant D...
 
Caterpillar Cat 336D L Excavator (Prefix JBF) Service Repair Manual Instant D...
Caterpillar Cat 336D L Excavator (Prefix JBF) Service Repair Manual Instant D...Caterpillar Cat 336D L Excavator (Prefix JBF) Service Repair Manual Instant D...
Caterpillar Cat 336D L Excavator (Prefix JBF) Service Repair Manual Instant D...
 
Caterpillar Cat 336D L Excavator (Prefix J6D) Service Repair Manual Instant D...
Caterpillar Cat 336D L Excavator (Prefix J6D) Service Repair Manual Instant D...Caterpillar Cat 336D L Excavator (Prefix J6D) Service Repair Manual Instant D...
Caterpillar Cat 336D L Excavator (Prefix J6D) Service Repair Manual Instant D...
 
Caterpillar Cat 336D L Excavator (Prefix J2F) Service Repair Manual Instant D...
Caterpillar Cat 336D L Excavator (Prefix J2F) Service Repair Manual Instant D...Caterpillar Cat 336D L Excavator (Prefix J2F) Service Repair Manual Instant D...
Caterpillar Cat 336D L Excavator (Prefix J2F) Service Repair Manual Instant D...
 
Caterpillar Cat 336D L Excavator (Prefix DTS) Service Repair Manual Instant D...
Caterpillar Cat 336D L Excavator (Prefix DTS) Service Repair Manual Instant D...Caterpillar Cat 336D L Excavator (Prefix DTS) Service Repair Manual Instant D...
Caterpillar Cat 336D L Excavator (Prefix DTS) Service Repair Manual Instant D...
 
Caterpillar Cat 336D and 336D L Excavator (Prefix MPL) Service Repair Manual ...
Caterpillar Cat 336D and 336D L Excavator (Prefix MPL) Service Repair Manual ...Caterpillar Cat 336D and 336D L Excavator (Prefix MPL) Service Repair Manual ...
Caterpillar Cat 336D and 336D L Excavator (Prefix MPL) Service Repair Manual ...
 
Caterpillar Cat 336D and 336D L Excavator (Prefix KKT) Service Repair Manual ...
Caterpillar Cat 336D and 336D L Excavator (Prefix KKT) Service Repair Manual ...Caterpillar Cat 336D and 336D L Excavator (Prefix KKT) Service Repair Manual ...
Caterpillar Cat 336D and 336D L Excavator (Prefix KKT) Service Repair Manual ...
 
Caterpillar Cat 336D and 336D L Excavator (Prefix JBT) Service Repair Manual ...
Caterpillar Cat 336D and 336D L Excavator (Prefix JBT) Service Repair Manual ...Caterpillar Cat 336D and 336D L Excavator (Prefix JBT) Service Repair Manual ...
Caterpillar Cat 336D and 336D L Excavator (Prefix JBT) Service Repair Manual ...
 
Caterpillar Cat 330F, 330F L and 330F LN Excavator (Prefix WBA) Service Repai...
Caterpillar Cat 330F, 330F L and 330F LN Excavator (Prefix WBA) Service Repai...Caterpillar Cat 330F, 330F L and 330F LN Excavator (Prefix WBA) Service Repai...
Caterpillar Cat 330F, 330F L and 330F LN Excavator (Prefix WBA) Service Repai...
 
Caterpillar Cat 330F, 330F L and 330F LN Excavator (Prefix JHF) Service Repai...
Caterpillar Cat 330F, 330F L and 330F LN Excavator (Prefix JHF) Service Repai...Caterpillar Cat 330F, 330F L and 330F LN Excavator (Prefix JHF) Service Repai...
Caterpillar Cat 330F, 330F L and 330F LN Excavator (Prefix JHF) Service Repai...
 
Caterpillar Cat 330F and 330F L Excavator (Prefix LCG) Service Repair Manual ...
Caterpillar Cat 330F and 330F L Excavator (Prefix LCG) Service Repair Manual ...Caterpillar Cat 330F and 330F L Excavator (Prefix LCG) Service Repair Manual ...
Caterpillar Cat 330F and 330F L Excavator (Prefix LCG) Service Repair Manual ...
 
Caterpillar Cat 330F and 330F L Excavator (Prefix HCK) Service Repair Manual ...
Caterpillar Cat 330F and 330F L Excavator (Prefix HCK) Service Repair Manual ...Caterpillar Cat 330F and 330F L Excavator (Prefix HCK) Service Repair Manual ...
Caterpillar Cat 330F and 330F L Excavator (Prefix HCK) Service Repair Manual ...
 
Caterpillar Cat 330F and 330F L Excavator (Prefix GHT) Service Repair Manual ...
Caterpillar Cat 330F and 330F L Excavator (Prefix GHT) Service Repair Manual ...Caterpillar Cat 330F and 330F L Excavator (Prefix GHT) Service Repair Manual ...
Caterpillar Cat 330F and 330F L Excavator (Prefix GHT) Service Repair Manual ...
 
Caterpillar Cat 330D2 L Excavator (Prefix ZBF) Service Repair Manual Instant ...
Caterpillar Cat 330D2 L Excavator (Prefix ZBF) Service Repair Manual Instant ...Caterpillar Cat 330D2 L Excavator (Prefix ZBF) Service Repair Manual Instant ...
Caterpillar Cat 330D2 L Excavator (Prefix ZBF) Service Repair Manual Instant ...
 
Caterpillar Cat 330D2 L Excavator (Prefix SZK) Service Repair Manual Instant ...
Caterpillar Cat 330D2 L Excavator (Prefix SZK) Service Repair Manual Instant ...Caterpillar Cat 330D2 L Excavator (Prefix SZK) Service Repair Manual Instant ...
Caterpillar Cat 330D2 L Excavator (Prefix SZK) Service Repair Manual Instant ...
 
Caterpillar Cat 330D2 L Excavator (Prefix PTE) Service Repair Manual Instant ...
Caterpillar Cat 330D2 L Excavator (Prefix PTE) Service Repair Manual Instant ...Caterpillar Cat 330D2 L Excavator (Prefix PTE) Service Repair Manual Instant ...
Caterpillar Cat 330D2 L Excavator (Prefix PTE) Service Repair Manual Instant ...
 
Caterpillar Cat 330D L Excavator (Prefix T2Y) Service Repair Manual Instant D...
Caterpillar Cat 330D L Excavator (Prefix T2Y) Service Repair Manual Instant D...Caterpillar Cat 330D L Excavator (Prefix T2Y) Service Repair Manual Instant D...
Caterpillar Cat 330D L Excavator (Prefix T2Y) Service Repair Manual Instant D...
 
Caterpillar Cat 330D L Excavator (Prefix B6H) Service Repair Manual Instant D...
Caterpillar Cat 330D L Excavator (Prefix B6H) Service Repair Manual Instant D...Caterpillar Cat 330D L Excavator (Prefix B6H) Service Repair Manual Instant D...
Caterpillar Cat 330D L Excavator (Prefix B6H) Service Repair Manual Instant D...
 
Caterpillar Cat 326D2 and 326D2 L Excavator (Prefix KER) Service Repair Manua...
Caterpillar Cat 326D2 and 326D2 L Excavator (Prefix KER) Service Repair Manua...Caterpillar Cat 326D2 and 326D2 L Excavator (Prefix KER) Service Repair Manua...
Caterpillar Cat 326D2 and 326D2 L Excavator (Prefix KER) Service Repair Manua...
 
Caterpillar Cat 325D MH EXCAVATOR (Prefix C4H) Service Repair Manual Instant ...
Caterpillar Cat 325D MH EXCAVATOR (Prefix C4H) Service Repair Manual Instant ...Caterpillar Cat 325D MH EXCAVATOR (Prefix C4H) Service Repair Manual Instant ...
Caterpillar Cat 325D MH EXCAVATOR (Prefix C4H) Service Repair Manual Instant ...
 

Recently uploaded

5 Signs Your VW Key Fob Battery Needs Replacement
5 Signs Your VW Key Fob Battery Needs Replacement5 Signs Your VW Key Fob Battery Needs Replacement
5 Signs Your VW Key Fob Battery Needs ReplacementSanta Barbara Autowerks
 
Catalogue Yamaha Nouvo 115 S / Nouvo .pdf
Catalogue Yamaha Nouvo 115 S / Nouvo .pdfCatalogue Yamaha Nouvo 115 S / Nouvo .pdf
Catalogue Yamaha Nouvo 115 S / Nouvo .pdfHafizLaziz
 
一比一原版英国哈珀亚当斯大学毕业证如何办理
一比一原版英国哈珀亚当斯大学毕业证如何办理一比一原版英国哈珀亚当斯大学毕业证如何办理
一比一原版英国哈珀亚当斯大学毕业证如何办理AS
 
Benefits of Load Planning in Fleet Management
Benefits of Load Planning in Fleet ManagementBenefits of Load Planning in Fleet Management
Benefits of Load Planning in Fleet Managementjennifermiller8137
 
一比一原版(CCA毕业证书)加利福尼亚艺术学院毕业证成绩单原件一模一样
一比一原版(CCA毕业证书)加利福尼亚艺术学院毕业证成绩单原件一模一样一比一原版(CCA毕业证书)加利福尼亚艺术学院毕业证成绩单原件一模一样
一比一原版(CCA毕业证书)加利福尼亚艺术学院毕业证成绩单原件一模一样zovambe
 
原版制作(NUA毕业证书)英国诺里奇艺术大学毕业证成绩单原件一模一样
原版制作(NUA毕业证书)英国诺里奇艺术大学毕业证成绩单原件一模一样原版制作(NUA毕业证书)英国诺里奇艺术大学毕业证成绩单原件一模一样
原版制作(NUA毕业证书)英国诺里奇艺术大学毕业证成绩单原件一模一样trthhgf
 
一比一原版(Auburn毕业证书)奥本大学毕业证原件一模一样
一比一原版(Auburn毕业证书)奥本大学毕业证原件一模一样一比一原版(Auburn毕业证书)奥本大学毕业证原件一模一样
一比一原版(Auburn毕业证书)奥本大学毕业证原件一模一样AS
 
一比一原版(Cumbria毕业证书)英国坎布里亚大学毕业证成绩单学位证书
一比一原版(Cumbria毕业证书)英国坎布里亚大学毕业证成绩单学位证书一比一原版(Cumbria毕业证书)英国坎布里亚大学毕业证成绩单学位证书
一比一原版(Cumbria毕业证书)英国坎布里亚大学毕业证成绩单学位证书AD
 
Battery Management System Functions (Flowchart of BMS Operations)
Battery Management System Functions (Flowchart of BMS Operations)Battery Management System Functions (Flowchart of BMS Operations)
Battery Management System Functions (Flowchart of BMS Operations)Electric Vehicle Geek
 
How to Reset BMW Brake Pad Warning Light A Step-by-Step Guide
How to Reset BMW Brake Pad Warning Light A Step-by-Step GuideHow to Reset BMW Brake Pad Warning Light A Step-by-Step Guide
How to Reset BMW Brake Pad Warning Light A Step-by-Step GuideUltimate Bimmer Service
 
一比一原版(Temple毕业证书)美国天普大学毕业证成绩单原件一模一样
一比一原版(Temple毕业证书)美国天普大学毕业证成绩单原件一模一样一比一原版(Temple毕业证书)美国天普大学毕业证成绩单原件一模一样
一比一原版(Temple毕业证书)美国天普大学毕业证成绩单原件一模一样fsdfdsgf
 
原版定制(UniSA毕业证书)澳大利亚南澳大学毕业证原件一模一样
原版定制(UniSA毕业证书)澳大利亚南澳大学毕业证原件一模一样原版定制(UniSA毕业证书)澳大利亚南澳大学毕业证原件一模一样
原版定制(UniSA毕业证书)澳大利亚南澳大学毕业证原件一模一样yuslkdal
 
原版制作加州理工学院毕业证成绩单原件一模一样
原版制作加州理工学院毕业证成绩单原件一模一样原版制作加州理工学院毕业证成绩单原件一模一样
原版制作加州理工学院毕业证成绩单原件一模一样hbgfewda
 
如何办理澳洲南澳大学毕业证(UniSA毕业证书)成绩单本科学位证原版一比一
如何办理澳洲南澳大学毕业证(UniSA毕业证书)成绩单本科学位证原版一比一如何办理澳洲南澳大学毕业证(UniSA毕业证书)成绩单本科学位证原版一比一
如何办理澳洲南澳大学毕业证(UniSA毕业证书)成绩单本科学位证原版一比一0uyfyq0q4
 
How Do I Know If My Volvo Has Throttle Position Sensor Problems
How Do I Know If My Volvo Has Throttle Position Sensor ProblemsHow Do I Know If My Volvo Has Throttle Position Sensor Problems
How Do I Know If My Volvo Has Throttle Position Sensor ProblemsHeynneman European
 
What Might Be Behind Your Mercedes' Inoperative Cruise Control
What Might Be Behind Your Mercedes' Inoperative Cruise ControlWhat Might Be Behind Your Mercedes' Inoperative Cruise Control
What Might Be Behind Your Mercedes' Inoperative Cruise ControlM Service Inc
 
一比一原版(UC毕业证书)加拿大卡尔加里大学毕业证成绩单原件一模一样
一比一原版(UC毕业证书)加拿大卡尔加里大学毕业证成绩单原件一模一样一比一原版(UC毕业证书)加拿大卡尔加里大学毕业证成绩单原件一模一样
一比一原版(UC毕业证书)加拿大卡尔加里大学毕业证成绩单原件一模一样rgthdgf
 
Vina Score and Vin Min for almost all the models 2024
Vina Score and Vin Min for almost all the models 2024Vina Score and Vin Min for almost all the models 2024
Vina Score and Vin Min for almost all the models 2024jipohal318
 
What Could Cause The Airbag Light To Stay On In Your Volvo XC90
What Could Cause The Airbag Light To Stay On In Your Volvo XC90What Could Cause The Airbag Light To Stay On In Your Volvo XC90
What Could Cause The Airbag Light To Stay On In Your Volvo XC90Master Mechanics
 

Recently uploaded (20)

5 Signs Your VW Key Fob Battery Needs Replacement
5 Signs Your VW Key Fob Battery Needs Replacement5 Signs Your VW Key Fob Battery Needs Replacement
5 Signs Your VW Key Fob Battery Needs Replacement
 
Catalogue Yamaha Nouvo 115 S / Nouvo .pdf
Catalogue Yamaha Nouvo 115 S / Nouvo .pdfCatalogue Yamaha Nouvo 115 S / Nouvo .pdf
Catalogue Yamaha Nouvo 115 S / Nouvo .pdf
 
一比一原版英国哈珀亚当斯大学毕业证如何办理
一比一原版英国哈珀亚当斯大学毕业证如何办理一比一原版英国哈珀亚当斯大学毕业证如何办理
一比一原版英国哈珀亚当斯大学毕业证如何办理
 
Benefits of Load Planning in Fleet Management
Benefits of Load Planning in Fleet ManagementBenefits of Load Planning in Fleet Management
Benefits of Load Planning in Fleet Management
 
一比一原版(CCA毕业证书)加利福尼亚艺术学院毕业证成绩单原件一模一样
一比一原版(CCA毕业证书)加利福尼亚艺术学院毕业证成绩单原件一模一样一比一原版(CCA毕业证书)加利福尼亚艺术学院毕业证成绩单原件一模一样
一比一原版(CCA毕业证书)加利福尼亚艺术学院毕业证成绩单原件一模一样
 
原版制作(NUA毕业证书)英国诺里奇艺术大学毕业证成绩单原件一模一样
原版制作(NUA毕业证书)英国诺里奇艺术大学毕业证成绩单原件一模一样原版制作(NUA毕业证书)英国诺里奇艺术大学毕业证成绩单原件一模一样
原版制作(NUA毕业证书)英国诺里奇艺术大学毕业证成绩单原件一模一样
 
一比一原版(Auburn毕业证书)奥本大学毕业证原件一模一样
一比一原版(Auburn毕业证书)奥本大学毕业证原件一模一样一比一原版(Auburn毕业证书)奥本大学毕业证原件一模一样
一比一原版(Auburn毕业证书)奥本大学毕业证原件一模一样
 
一比一原版(Cumbria毕业证书)英国坎布里亚大学毕业证成绩单学位证书
一比一原版(Cumbria毕业证书)英国坎布里亚大学毕业证成绩单学位证书一比一原版(Cumbria毕业证书)英国坎布里亚大学毕业证成绩单学位证书
一比一原版(Cumbria毕业证书)英国坎布里亚大学毕业证成绩单学位证书
 
Battery Management System Functions (Flowchart of BMS Operations)
Battery Management System Functions (Flowchart of BMS Operations)Battery Management System Functions (Flowchart of BMS Operations)
Battery Management System Functions (Flowchart of BMS Operations)
 
How to Reset BMW Brake Pad Warning Light A Step-by-Step Guide
How to Reset BMW Brake Pad Warning Light A Step-by-Step GuideHow to Reset BMW Brake Pad Warning Light A Step-by-Step Guide
How to Reset BMW Brake Pad Warning Light A Step-by-Step Guide
 
一比一原版(Temple毕业证书)美国天普大学毕业证成绩单原件一模一样
一比一原版(Temple毕业证书)美国天普大学毕业证成绩单原件一模一样一比一原版(Temple毕业证书)美国天普大学毕业证成绩单原件一模一样
一比一原版(Temple毕业证书)美国天普大学毕业证成绩单原件一模一样
 
原版定制(UniSA毕业证书)澳大利亚南澳大学毕业证原件一模一样
原版定制(UniSA毕业证书)澳大利亚南澳大学毕业证原件一模一样原版定制(UniSA毕业证书)澳大利亚南澳大学毕业证原件一模一样
原版定制(UniSA毕业证书)澳大利亚南澳大学毕业证原件一模一样
 
原版制作加州理工学院毕业证成绩单原件一模一样
原版制作加州理工学院毕业证成绩单原件一模一样原版制作加州理工学院毕业证成绩单原件一模一样
原版制作加州理工学院毕业证成绩单原件一模一样
 
如何办理澳洲南澳大学毕业证(UniSA毕业证书)成绩单本科学位证原版一比一
如何办理澳洲南澳大学毕业证(UniSA毕业证书)成绩单本科学位证原版一比一如何办理澳洲南澳大学毕业证(UniSA毕业证书)成绩单本科学位证原版一比一
如何办理澳洲南澳大学毕业证(UniSA毕业证书)成绩单本科学位证原版一比一
 
How Do I Know If My Volvo Has Throttle Position Sensor Problems
How Do I Know If My Volvo Has Throttle Position Sensor ProblemsHow Do I Know If My Volvo Has Throttle Position Sensor Problems
How Do I Know If My Volvo Has Throttle Position Sensor Problems
 
AI for Smart Vehicles - A quick overview
AI for Smart Vehicles - A quick overviewAI for Smart Vehicles - A quick overview
AI for Smart Vehicles - A quick overview
 
What Might Be Behind Your Mercedes' Inoperative Cruise Control
What Might Be Behind Your Mercedes' Inoperative Cruise ControlWhat Might Be Behind Your Mercedes' Inoperative Cruise Control
What Might Be Behind Your Mercedes' Inoperative Cruise Control
 
一比一原版(UC毕业证书)加拿大卡尔加里大学毕业证成绩单原件一模一样
一比一原版(UC毕业证书)加拿大卡尔加里大学毕业证成绩单原件一模一样一比一原版(UC毕业证书)加拿大卡尔加里大学毕业证成绩单原件一模一样
一比一原版(UC毕业证书)加拿大卡尔加里大学毕业证成绩单原件一模一样
 
Vina Score and Vin Min for almost all the models 2024
Vina Score and Vin Min for almost all the models 2024Vina Score and Vin Min for almost all the models 2024
Vina Score and Vin Min for almost all the models 2024
 
What Could Cause The Airbag Light To Stay On In Your Volvo XC90
What Could Cause The Airbag Light To Stay On In Your Volvo XC90What Could Cause The Airbag Light To Stay On In Your Volvo XC90
What Could Cause The Airbag Light To Stay On In Your Volvo XC90
 

Caterpillar Cat 317B L and 317B LN Excavator (Prefix 6DZ) Service Repair Manual Instant Download.pdf

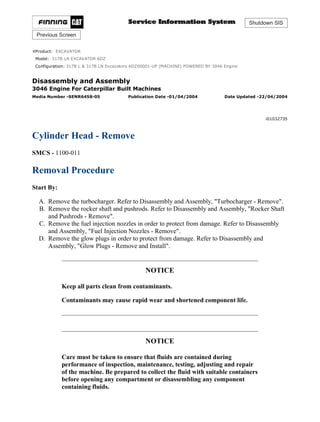
  • 1. Shutdown SIS Previous Screen Product: EXCAVATOR Model: 317B LN EXCAVATOR 6DZ Configuration: 317B L & 317B LN Excavators 6DZ00001-UP (MACHINE) POWERED BY 3046 Engine Disassembly and Assembly 3046 Engine For Caterpillar Built Machines Media Number -SENR6458-05 Publication Date -01/04/2004 Date Updated -22/04/2004 i01032735 Cylinder Head - Remove SMCS - 1100-011 Removal Procedure Start By: A. Remove the turbocharger. Refer to Disassembly and Assembly, "Turbocharger - Remove". B. Remove the rocker shaft and pushrods. Refer to Disassembly and Assembly, "Rocker Shaft and Pushrods - Remove". C. Remove the fuel injection nozzles in order to protect from damage. Refer to Disassembly and Assembly, "Fuel Injection Nozzles - Remove". D. Remove the glow plugs in order to protect from damage. Refer to Disassembly and Assembly, "Glow Plugs - Remove and Install". NOTICE Keep all parts clean from contaminants. Contaminants may cause rapid wear and shortened component life. NOTICE Care must be taken to ensure that fluids are contained during performance of inspection, maintenance, testing, adjusting and repair of the machine. Be prepared to collect the fluid with suitable containers before opening any compartment or disassembling any component containing fluids. 1/3 317B L & 317B LN Excavators 6DZ00001-UP (MACHINE) POWERED BY 3046 En... 2020/12/9 https://127.0.0.1/sisweb/sisweb/techdoc/techdoc_print_page.jsp?returnurl=/sis...
  • 2. Refer to Special Publication, NENG2500, "Caterpillar Tools and Shop Products Guide", for tools and supplies suitable to collect and contain fluids in Caterpillar machines. Dispose of all fluids according to local regulations and mandates. Illustration 1 g00562585 1. If necessary, remove bolt (2) and remove oil tube assembly (dipstick). Illustration 2 g00531679 Cylinder Head Tightening Sequence 2. Gradually remove 25 cylinder head bolts (1) in reverse order of the tightening sequence. 2/3 317B L & 317B LN Excavators 6DZ00001-UP (MACHINE) POWERED BY 3046 En... 2020/12/9 https://127.0.0.1/sisweb/sisweb/techdoc/techdoc_print_page.jsp?returnurl=/sis...
  • 3. Note: Do not use a pry bar to separate the cylinder head from the engine block. Illustration 3 g00560287 3. Attach a hoist to the cylinder head lifting brackets and remove the cylinder head from the cylinder block. The weight of the cylinder head assembly is 60 kg (132 lb). Note: Place the cylinder head on a surface that will not damage the face of the cylinder head. Illustration 4 g00560297 4. Remove the cylinder head gasket (3) . Copyright 1993 - 2020 Caterpillar Inc. All Rights Reserved. Private Network For SIS Licensees. Wed Dec 9 22:58:32 UTC+0800 2020 3/3 317B L & 317B LN Excavators 6DZ00001-UP (MACHINE) POWERED BY 3046 En... 2020/12/9 https://127.0.0.1/sisweb/sisweb/techdoc/techdoc_print_page.jsp?returnurl=/sis...
  • 4. Shutdown SIS Previous Screen Product: EXCAVATOR Model: 317B LN EXCAVATOR 6DZ Configuration: 317B L & 317B LN Excavators 6DZ00001-UP (MACHINE) POWERED BY 3046 Engine Disassembly and Assembly 3046 Engine For Caterpillar Built Machines Media Number -SENR6458-05 Publication Date -01/04/2004 Date Updated -22/04/2004 i02063403 Cylinder Head - Install SMCS - 1100-012 Installation Procedure Table 1 Required Tools Tool Part Number Part Description Qty A 9U-7995 Guide Pin 2 NOTICE Keep all parts clean from contaminants. Contaminants may cause rapid wear and shortened component life. 1/3 317B L & 317B LN Excavators 6DZ00001-UP (MACHINE) POWERED BY 3046 En... 2020/12/9 https://127.0.0.1/sisweb/sisweb/techdoc/techdoc_print_page.jsp?returnurl=/sis...
  • 5. Illustration 1 g00560297 1. Clean the surfaces of the cylinder head and the cylinder block that are in contact with each other. Ensure that the surfaces are clean and dry. Install a new, dry cylinder head gasket (3) on the cylinder block. Note: Do not use any sealant or gasket adhesive on the cylinder head gasket . 2. Install Tool (A) (not shown) on the cylinder block in order to install the cylinder head. Illustration 2 g00560287 3. Attach a hoist to the cylinder head lifting brackets and install the cylinder head in position on the cylinder block. The weight of the cylinder head assembly is 60 kg (132 lb). 4. Remove Tool (A) . 5. Apply 6V-4876 Lubricant to all of the threads and thrust faces of cylinder head bolts (1) . Illustration 3 g00562585 2/3 317B L & 317B LN Excavators 6DZ00001-UP (MACHINE) POWERED BY 3046 En... 2020/12/9 https://127.0.0.1/sisweb/sisweb/techdoc/techdoc_print_page.jsp?returnurl=/sis...
  • 6. Illustration 4 g00531679 Cylinder Head Tightening Sequence 6. Install cylinder head bolts (1) and tighten all of the bolts (1 through 25) in a numerical order according to the cylinder head tightening sequence. Tighten cylinder head bolts (1) to a torque of 118 ± 5 N·m (87 ± 4 lb ft). 7. If necessary, install oil tube assembly (dipstick) and install bolt (2) . End By: a. Install the fuel injector nozzles. Refer to Disassembly and Assembly, "Fuel Injection Nozzles - Install". b. Install the glow plugs. Refer to Disassembly and Assembly, "Glow Plugs - Remove and Install". c. Install the rocker shaft and pushrods. Refer to Disassembly and Assembly, "Rocker Shaft and Pushrods - Install". d. Install the turbocharger. Refer to Disassembly and Assembly, "Turbocharger - Install". Copyright 1993 - 2020 Caterpillar Inc. All Rights Reserved. Private Network For SIS Licensees. Wed Dec 9 22:59:28 UTC+0800 2020 3/3 317B L & 317B LN Excavators 6DZ00001-UP (MACHINE) POWERED BY 3046 En... 2020/12/9 https://127.0.0.1/sisweb/sisweb/techdoc/techdoc_print_page.jsp?returnurl=/sis...
  • 7. Shutdown SIS Previous Screen Product: EXCAVATOR Model: 317B LN EXCAVATOR 6DZ Configuration: 317B L & 317B LN Excavators 6DZ00001-UP (MACHINE) POWERED BY 3046 Engine Disassembly and Assembly 3046 Engine For Caterpillar Built Machines Media Number -SENR6458-05 Publication Date -01/04/2004 Date Updated -22/04/2004 i01033379 Lifter Group - Remove and Install SMCS - 1209-010 Removal Procedure Start By: A. Remove the camshaft. Refer to Disassembly and Assembly, "Camshaft - Remove and Install". NOTICE Keep all parts clean from contaminants. Contaminants may cause rapid wear and shortened component life. Illustration 1 g00532246 1/3 317B L & 317B LN Excavators 6DZ00001-UP (MACHINE) POWERED BY 3046 En... 2020/12/9 https://127.0.0.1/sisweb/sisweb/techdoc/techdoc_print_page.jsp?returnurl=/sis...
  • 8. Illustration 2 g00532061 1. Use a magnet to remove valve lifter (1), as shown. Put identification marks on the valve lifters for installation purposes. 2. Repeat Step 1 for the remainder of the valve lifters. Installation Procedure NOTICE Keep all parts clean from contaminants. Contaminants may cause rapid wear and shortened component life. Illustration 3 g00532061 1. Put 8T-2998 Lubricant on valve lifter (1) prior to installation. Install valve lifter (1) in the original location in the cylinder block. 2/3 317B L & 317B LN Excavators 6DZ00001-UP (MACHINE) POWERED BY 3046 En... 2020/12/9 https://127.0.0.1/sisweb/sisweb/techdoc/techdoc_print_page.jsp?returnurl=/sis...
  • 9. 2. Repeat Step 1 for the remainder of the valve lifters. End By: Install the camshaft. Refer to Disassembly and Assembly, "Camshaft - Remove and Install". Copyright 1993 - 2020 Caterpillar Inc. All Rights Reserved. Private Network For SIS Licensees. Wed Dec 9 23:00:24 UTC+0800 2020 3/3 317B L & 317B LN Excavators 6DZ00001-UP (MACHINE) POWERED BY 3046 En... 2020/12/9 https://127.0.0.1/sisweb/sisweb/techdoc/techdoc_print_page.jsp?returnurl=/sis...
  • 10. Shutdown SIS Previous Screen Product: EXCAVATOR Model: 317B LN EXCAVATOR 6DZ Configuration: 317B L & 317B LN Excavators 6DZ00001-UP (MACHINE) POWERED BY 3046 Engine Disassembly and Assembly 3046 Engine For Caterpillar Built Machines Media Number -SENR6458-05 Publication Date -01/04/2004 Date Updated -22/04/2004 i01597409 Camshaft - Remove and Install SMCS - 1210-010 Removal Procedure 1 Table 1 Required Tools Tool Part Number Part Description Qty A 1P-2320 Combination Puller 1 C 1P-2321 Combination Puller 1 9S-9153 Puller Jaws 3 Start By: A. Remove the timing gear cover. Refer to Disassembly and Assembly, "Housing (Front) - Remove". B. Remove the rocker shaft assembly and the pushrods. Refer to Disassembly and Assembly, "Rocker Shaft and Pushrod - Remove". C. Remove the oil pan. Refer to Disassembly and Assembly, "Engine Oil Pan - Remove and Install". Note: The engine oil pan is facing in the up direction in order to retain the lifters in position for this procedure. NOTICE Keep all parts clean from contaminants. Contaminants may cause rapid wear and shortened component life. 1/10 317B L & 317B LN Excavators 6DZ00001-UP (MACHINE) POWERED BY 3046 En... 2020/12/9 https://127.0.0.1/sisweb/sisweb/techdoc/techdoc_print_page.jsp?returnurl=/sis...
  • 11. NOTICE Care must be taken to ensure that fluids are contained during performance of inspection, maintenance, testing, adjusting and repair of the product. Be prepared to collect the fluid with suitable containers before opening any compartment or disassembling any component containing fluids. Refer to Special Publication, NENG2500, "Caterpillar Tools and Shop Products Guide" for tools and supplies suitable to collect and contain fluids on Caterpillar products. Dispose of all fluids according to local regulations and mandates. Note: Ensure that the marks on the timing gears are in alignment. Align the fuel injection drive gear with the "33" mark with the "3" mark on the idler gear. Make an alignment of the "2" mark on the camshaft gear with the "22" mark on the idler gear. Align the "1" mark on the crankshaft gear with the "11" mark on the idler gear. The No. 1 cylinder is at the top center position when these marks are in alignment. 1. Rotate the engine at 180 degrees. Illustration 1 g00532179 2. Use Tool (A) to remove bearing (1) from the front of camshaft gear (2) . Note: This step is necessary only if the camshaft gear is equipped with a bearing. 2/10 317B L & 317B LN Excavators 6DZ00001-UP (MACHINE) POWERED BY 3046 En... 2020/12/9 https://127.0.0.1/sisweb/sisweb/techdoc/techdoc_print_page.jsp?returnurl=/sis...
  • 12. Illustration 2 g00532382 NOTICE Do not damage the lobes or the bearings when the camshaft is removed or installed. 3. Position camshaft gear (2) so that the gear's slots align from the top to the bottom. Remove two bolts (3) and the washers that hold thrust plate (4). Carefully remove the camshaft, the thrust plate and the camshaft gear as an assembly. 4. Remove the 12 valve lifters. Refer to Disassembly and Assembly, "Lifter Group - Remove and Install". Illustration 3 g00532384 5. Use tool (C) to remove camshaft gear (2) from camshaft (5). Remove thrust plate (4) . Installation Procedure 1 3/10 317B L & 317B LN Excavators 6DZ00001-UP (MACHINE) POWERED BY 3046 En... 2020/12/9 https://127.0.0.1/sisweb/sisweb/techdoc/techdoc_print_page.jsp?returnurl=/sis...
  • 13. Note: In this installation procedure, the engine needs to remain in the upside-down position in order to keep the lifters in position while the camshaft is installed. NOTICE Keep all parts clean from contaminants. Contaminants may cause rapid wear and shortened component life. Note: During installation, ensure that camshaft (4) is clean and lubricate all of the components with clean engine oil. Illustration 4 g00532385 1. Install thrust plate (4) onto camshaft (5) . Always wear protective gloves when handling parts that have been heated. 2. Heat camshaft gear (2) in an oven to a maximum temperature of 150 °C (302 °F) and install camshaft gear (2) onto camshaft (5) . 3. Install the 12 valve lifters. Refer to Disassembly and Assembly, "Lifter Group - Remove and Install". Note: During installation, ensure that the marks on the timing gears are in alignment. Align the fuel injection drive gear with the "33" mark with the "3" mark on the idler gear. Make an alignment of the "2" mark on the camshaft gear with the "22" mark on the idler gear. Align 4/10 317B L & 317B LN Excavators 6DZ00001-UP (MACHINE) POWERED BY 3046 En... 2020/12/9 https://127.0.0.1/sisweb/sisweb/techdoc/techdoc_print_page.jsp?returnurl=/sis...
  • 14. the "1" mark on the crankshaft gear with the "11" mark on the idler gear. The No. 1 cylinder is at the top center position when these marks are in alignment. 4. Carefully install the camshaft assembly into the original location in the cylinder block. Note: Caution must be used when the camshaft is installed in order to not damage the camshaft lobe or the camshaft bearings. Illustration 5 g00532382 5. Position camshaft gear (2) so that the gear's slots align from the top to the bottom. Install two bolts (3) and the washers that hold thrust plate (4). Tighten bolts (3) to a torque of 10 to 13 N·m (7 to 10 lb ft). 6. If necessary, install the bearing onto the front of the camshaft gear. End By: a. Install the oil pan. Refer to Disassembly and Assembly, "Engine Oil Pan - Remove and Install". b. Install the rocker shaft assembly and the pushrods. Refer to Disassembly and Assembly, "Rocker Shaft and Pushrod - Install". c. Install the timing gear cover. Refer to Disassembly and Assembly, "Housing (Front) - Install". Removal Procedure 2 Table 2 Required Tools Tool Part Number Part Description Qty A 1P-2320 Combination Puller 1 B 1U-7638 Magnetic Holding Tools 12 C 1P-2321 Combination Puller 1 9S-9153 Puller Jaws 3 5/10 317B L & 317B LN Excavators 6DZ00001-UP (MACHINE) POWERED BY 3046 En... 2020/12/9 https://127.0.0.1/sisweb/sisweb/techdoc/techdoc_print_page.jsp?returnurl=/sis...
  • 15. Start By: A. Remove the timing gear cover. Refer to Disassembly and Assembly, " Housing (Front) - Remove". B. Remove the cylinder head. Refer to Disassembly and Assembly, "Cylinder Head - Remove". Note: This removal procedure is done with the engine in the upright position and the valve lifters left in the cylinder block. NOTICE Keep all parts clean from contaminants. Contaminants may cause rapid wear and shortened component life. NOTICE Care must be taken to ensure that fluids are contained during performance of inspection, maintenance, testing, adjusting and repair of the product. Be prepared to collect the fluid with suitable containers before opening any compartment or disassembling any component containing fluids. Refer to Special Publication, NENG2500, "Caterpillar Tools and Shop Products Guide" for tools and supplies suitable to collect and contain fluids on Caterpillar products. Dispose of all fluids according to local regulations and mandates. 6/10 317B L & 317B LN Excavators 6DZ00001-UP (MACHINE) POWERED BY 3046 En... 2020/12/9 https://127.0.0.1/sisweb/sisweb/techdoc/techdoc_print_page.jsp?returnurl=/sis...
  • 16. Illustration 6 g00532179 The engine is rotated at 180 degrees. 1. Use Tool (A) to remove bearing (1) from the front of camshaft gear (2) . Note: This step is necessary only if the camshaft gear is equipped with a bearing. Illustration 7 g00534616 2. Install Tool (B) in order to hold the 12 valve lifters. Note: Make sure that Tool (B) is holding the lifters as far up in cylinder block (6) as possible. Illustration 8 g00534473 Note: Be careful not to dislodge the valve lifters from Tools (B) during removal of the camshaft. NOTICE 7/10 317B L & 317B LN Excavators 6DZ00001-UP (MACHINE) POWERED BY 3046 En... 2020/12/9 https://127.0.0.1/sisweb/sisweb/techdoc/techdoc_print_page.jsp?returnurl=/sis...
  • 17. Do not damage the lobes or the bearings when the camshaft is removed or installed. 3. Position camshaft gear (2) so that the gear's slots align from the top to the bottom. Remove two bolts (3) and the washers that hold thrust plate (4). Carefully remove the camshaft, the thrust plate and the camshaft gear as an assembly from cylinder block (6) . Illustration 9 g00532384 4. Use tool (C) to remove camshaft gear (2) from camshaft (5). Remove thrust plate (4) . Installation Procedure 2 Table 3 Required Tools Tool Part Number Part Description Qty B 1U-7638 Magnetic Holding Tools 12 Note: This installation procedure is done with the engine in the upright position and the valve lifters left in the cylinder block. NOTICE Keep all parts clean from contaminants. Contaminants may cause rapid wear and shortened component life. Note: During installation, ensure that camshaft (4) is clean and lubricate all of the components with clean engine oil. 8/10 317B L & 317B LN Excavators 6DZ00001-UP (MACHINE) POWERED BY 3046 En... 2020/12/9 https://127.0.0.1/sisweb/sisweb/techdoc/techdoc_print_page.jsp?returnurl=/sis...
  • 18. Illustration 10 g00532385 1. Install thrust plate (4) onto camshaft (5). Heat camshaft gear (2) to a maximum temperature of 150 °C (302 °F) and install camshaft gear (2) onto camshaft (4) . Note: During installation, ensure that the marks on the timing gears are in alignment. Align the fuel injection drive gear with the "33" mark with the "3" mark on the idler gear. Make an alignment of the "2" mark on the camshaft gear with the "22" mark on the idler gear. Align the "1" mark on the crankshaft gear with the "11" mark on the idler gear. The No. 1 cylinder is at the top center position when these marks are in alignment. 2. Carefully install the camshaft assembly into the original location in the cylinder block. Note: Caution must be used when the camshaft is installed in order to not damage the camshaft lobe or the camshaft bearings. Illustration 11 g00534616 Note: Make sure that Tool (B ) is holding the lifters as far up in cylinder block (6) as possible. 9/10 317B L & 317B LN Excavators 6DZ00001-UP (MACHINE) POWERED BY 3046 En... 2020/12/9 https://127.0.0.1/sisweb/sisweb/techdoc/techdoc_print_page.jsp?returnurl=/sis...
  • 19. Illustration 12 g00534473 3. Position camshaft gear (2) so that the gear's slots align from the top to the bottom. Install two bolts (3) and the washers that hold thrust plate (4). Tighten bolts (3) to a torque of 10 to 13 N·m (7 to 10 lb ft). 4. If necessary, install the bearing onto the front of the camshaft gear. End By: a. Install the cylinder head. Refer to Disassembly and Assembly, "Cylinder Head - Install". b. Install the timing gear cover. Refer to Disassembly and Assembly, "Housing (Front) - Install". Copyright 1993 - 2020 Caterpillar Inc. All Rights Reserved. Private Network For SIS Licensees. Wed Dec 9 23:01:20 UTC+0800 2020 10/10 317B L & 317B LN Excavators 6DZ00001-UP (MACHINE) POWERED BY 3046 ... 2020/12/9 https://127.0.0.1/sisweb/sisweb/techdoc/techdoc_print_page.jsp?returnurl=/sis...
  • 20. Shutdown SIS Previous Screen Product: EXCAVATOR Model: 317B LN EXCAVATOR 6DZ Configuration: 317B L & 317B LN Excavators 6DZ00001-UP (MACHINE) POWERED BY 3046 Engine Disassembly and Assembly 3046 Engine For Caterpillar Built Machines Media Number -SENR6458-05 Publication Date -01/04/2004 Date Updated -22/04/2004 i04990496 Camshaft Bearings - Remove and Install SMCS - 1211-010 Removal Procedure Table 1 Required Tools Tool Part Number Part Description Qty A 8S-2241 Camshaft Bearing Tool Group 1 8H-0684 Ratchet Wrench 1 Start By: A. Remove the flywheel housing. Refer to Disassembly and Assembly, "Flywheel Housing - Remove and Install". B. Remove the camshaft. Refer to Disassembly and Assembly, "Camshaft - Remove and Install". NOTICE Keep all parts clean from contaminants. Contaminants may cause rapid wear and shortened component life. 1/4 317B L & 317B LN Excavators 6DZ00001-UP (MACHINE) POWERED BY 3046 En... 2020/12/9 https://127.0.0.1/sisweb/sisweb/techdoc/techdoc_print_page.jsp?returnurl=/sis...
  • 21. Illustration 1 g00533094 1. Remove plug (1) from the cylinder block. Illustration 2 g00533095 Illustration 3 g00533096 2. Use Tool (A) in order to remove the camshaft bearings from the cylinder block. 2/4 317B L & 317B LN Excavators 6DZ00001-UP (MACHINE) POWERED BY 3046 En... 2020/12/9 https://127.0.0.1/sisweb/sisweb/techdoc/techdoc_print_page.jsp?returnurl=/sis...
  • 22. Note: Refer to the instructions of the 8S-2241 Camshaft Bearing Tool Group for the proper procedure. Installation Procedure Table 2 Required Tools Tool Part Number Part Description Qty A 8S-2241 Camshaft Bearing Tool Group 1 8H-0684 Ratchet Wrench 1 NOTICE Keep all parts clean from contaminants. Contaminants may cause rapid wear and shortened component life. Illustration 4 g00533095 3/4 317B L & 317B LN Excavators 6DZ00001-UP (MACHINE) POWERED BY 3046 En... 2020/12/9 https://127.0.0.1/sisweb/sisweb/techdoc/techdoc_print_page.jsp?returnurl=/sis...
  • 23. Illustration 5 g00533096 1. Use Tool (A) in order to install the camshaft bearings into the cylinder block. Ensure that the oil hole of the camshaft bearings are in alignment with the oil ports in the engine block. Note: Refer to the instructions of the 8S-2241 Camshaft Bearing Tool Group for the proper procedure. Illustration 6 g00533094 2. Install plug (1) into the cylinder block. Use Loctite 596 . End By: a. Install the camshaft. Refer to Disassembly and Assembly, "Camshaft - Remove and Install". b. Install the flywheel housing. Refer to Disassembly and Assembly, "Flywheel Housing - Remove and Install". Copyright 1993 - 2020 Caterpillar Inc. All Rights Reserved. Private Network For SIS Licensees. Wed Dec 9 23:02:15 UTC+0800 2020 4/4 317B L & 317B LN Excavators 6DZ00001-UP (MACHINE) POWERED BY 3046 En... 2020/12/9 https://127.0.0.1/sisweb/sisweb/techdoc/techdoc_print_page.jsp?returnurl=/sis...
  • 24. Shutdown SIS Previous Screen Product: EXCAVATOR Model: 317B LN EXCAVATOR 6DZ Configuration: 317B L & 317B LN Excavators 6DZ00001-UP (MACHINE) POWERED BY 3046 Engine Disassembly and Assembly 3046 Engine For Caterpillar Built Machines Media Number -SENR6458-05 Publication Date -01/04/2004 Date Updated -22/04/2004 i05007631 Engine Oil Pan - Remove and Install SMCS - 1302-010 Removal Procedure NOTICE Keep all parts clean from contaminants. Contaminants may cause rapid wear and shortened component life. NOTICE Care must be taken to ensure that fluids are contained during performance of inspection, maintenance, testing, adjusting, and repair of the product. Be prepared to collect the fluid with suitable containers before opening any compartment or disassembling any component containing fluids. Refer to Special Publication, NENG2500, "Dealer Service Tool Catalog" for tools and supplies suitable to collect and contain fluids on Cat products. Dispose of all fluids according to local regulations and mandates. 1/5 317B L & 317B LN Excavators 6DZ00001-UP (MACHINE) POWERED BY 3046 En... 2020/12/9 https://127.0.0.1/sisweb/sisweb/techdoc/techdoc_print_page.jsp?returnurl=/sis...
  • 25. Illustration 1 g00560680 1. Remove oil pan drain plug (3) and drain the engine oil from engine oil pan (2) . 2. Install oil pan drain plug (3) . Tighten the oil pan drain plug to a torque of 78 ± 5 N·m (57 ± 4 lb ft). 3. Remove oil tube assembly (5) . 4. Remove 30 bolts (1) and the washers from engine oil pan (2) . Remove engine oil pan (2) and gasket (4) . Note: A liquid gasket may be factory installed in place of an oil pan gasket. Illustration 2 g00538955 5. Remove two bolts (7) from engine oil suction tube (6) . Remove engine oil suction tube (6) . 2/5 317B L & 317B LN Excavators 6DZ00001-UP (MACHINE) POWERED BY 3046 En... 2020/12/9 https://127.0.0.1/sisweb/sisweb/techdoc/techdoc_print_page.jsp?returnurl=/sis...
  • 26. Illustration 3 g00538957 6. Check condition of O-ring seal (8) . If the O-ring seal is damaged, use a new part for replacement. Installation procedure NOTICE Keep all parts clean from contaminants. Contaminants may cause rapid wear and shortened component life. Illustration 4 g00538957 1. Install O-ring seal (8) on suction pipe (6) . 3/5 317B L & 317B LN Excavators 6DZ00001-UP (MACHINE) POWERED BY 3046 En... 2020/12/9 https://127.0.0.1/sisweb/sisweb/techdoc/techdoc_print_page.jsp?returnurl=/sis...
  • 27. Suggest: If the above button click is invalid. Please download this document first, and then click the above link to download the complete manual. Thank you so much for reading
  • 28. Illustration 5 g00538955 2. Position engine oil suction tube (6) . Install two bolts (7) in order to secure the engine oil suction tube . Illustration 6 g00560680 3. Clean engine oil pan (2) . Note: Ensure that the engine oil pan and all of the mating surfaces are free of oil and gasket material. 4. Install gasket (4) , engine oil pan (2) , bolts (1) and the washers. Tighten the bolts to a torque of 10 to 13 N·m (7 to 10 lb ft). Note: Loctite 5127 may be used instead of gasket (4) . Both contact surfaces must be completely free of oil. Apply gasket material on the cylinder block on the inside of the bolt hole pattern in a continuous bead in order to help prevent an oil leak. 5. Install oil tube assembly (5) . 6. Fill the crankcase with engine oil to the correct level. Refer to the proper Operation and Maintenance Manual for the correct engine oil and the correct filling procedure. Wed Dec 9 23:03:11 UTC+0800 2020 4/5 317B L & 317B LN Excavators 6DZ00001-UP (MACHINE) POWERED BY 3046 En... 2020/12/9 https://127.0.0.1/sisweb/sisweb/techdoc/techdoc_print_page.jsp?returnurl=/sis...
  • 29. Copyright 1993 - 2020 Caterpillar Inc. All Rights Reserved. Private Network For SIS Licensees. 5/5 317B L & 317B LN Excavators 6DZ00001-UP (MACHINE) POWERED BY 3046 En... 2020/12/9 https://127.0.0.1/sisweb/sisweb/techdoc/techdoc_print_page.jsp?returnurl=/sis...