SlideShare a Scribd company logo
1 of 24
Download to read offline
Copyrighted Material
Intended for CLARK dealers only
Do not sell or distribute
Service
Manual
SM.649
CMP50/60/70
Revision 1. July, 1999
Copyrighted Material
Intended for CLARK dealers only
Do not sell or distribute
Arrangement and Use of this Manual
Clark arranges parts and service procedures by standard-
ized Groups. In this manual, Groups are similar to “chap-
ters.” Groups are listed in the table of contents on the next
page.
You can quickly locate a specific point in the manual by
using the headers and footers that appear on the pages. The
following illustration points out these areas.
Each Group begins with a table of contents that shows the
Sections contained within the Group. Lengthy Sections
also begin with a table of contents showing the topics
contained within the Section.
Each Group and Section has an identifying name and
number, or “ID.”
Each page also has a unique ID. The page ID consists of
three numbers separated by hyphens. The three numbers
represent the Group number, the Section number, and the
page number. For example, “00-1-2” on the lower comer
of the page indicates Group 00, Section 1. Page 2. This manual is intended for the use of trained service
personnel. Please read Group SA, “Safe Maintenance,”
and the Operator’s Manual before working on or operat-
ing the truck.
0 Copyright Clark Material Handling Company 1999 SM 649, July ‘99
Copyrighted Material
Intended for CLARK dealers only
Do not sell or distribute
CONTENTS
Contents
Contents are listed by Group number and name followed by Section number and name:
SA
PS
00
01
06
14
16
23
20
SAFE MAINTENANCE
1. Safety
2. Lifting, Jacking, and Blocking
3. Towing
PERIODIC SERVICE
1. Maintenance Schedules
2. Planned Maintenance
3. PM Inspection Form
PERKINS DIESEL ENGINE
COOLING SYSTEM
1. Specifications and Description
2. Troubleshooting
TRANSMISSION 34
ELECTRICAL
1. Circuit Diagram
2. Instrument Pod
WHEELS AND TIRES
1. Specifications and Description
2. Cushion Wheels and Tires
3. Pneumatic Wheels and Tires
38
BRAKE SYSTEM
1. Specifications
2. Service/Inching Brake
3. Parking Brake
DRIVE AXLE
1. Specifications and Description
2. Drive Axle Overhaul
40
25126 STEER SYSTEM
1. Specifications and Description
2. Troubleshooting
3. Steering System Removals & Installations
4. Steering System Pressure Check
5. Steering Unit Overhaul
6. Priority Valve Overhaul
7. Steer Cylinder Overhaul
29130 HYDRAULIC SYSTEM
1. Specifications and Description
2. Troubleshooting
3. Hydraulic Pump Overhaual
4. Control Valve Overhaul
UPRIGHTS
1. Specifications and Description
2. Upright Checks and Adjustments
3. Lift Chain Service
4. Removals and Replacements
5. Lift and Tilt Cylinder Overhaul
COUNTERWEIGHT
1. Specifications
2. Inspection
3. Removal and Replacement
SPECIFICATIONS
1. Specifications
SM 649, July ‘99 Contents-iii
Copyrighted Material
Intended for CLARK dealers only
Do not sell or distribute
GROUP SA
GROUP SA
SAFE MAINTENANCE
Safety ............................................................................... Section 1
Lifting, Jacking, and Blocking the Truck ..................... Section 2
Towing .............................................................................. Section 2
SM 649, July ‘99 Safe Maintenance
Copyrighted Material
Intended for CLARK dealers only
Do not sell or distribute
ElmK Group SA, Safe Maintenance
Section 1. Safety
Safety Signs and Messages Safe Maintenance Practices
Safety signs and messages in this manual and on the lift
truck provide instructions and identify specific areas where
potential hazards exist and special precautions should be
taken. Be sure you know and understand the meaning of
these instructions, signs, and messages. Damage to the
truck. death, or serious injury to you or other persons may
result if these messages are not followed.
NOTE
This message is used when special informa-
tion, instructions or identification is re-
quired relating to procedures, equipment,
tools, pressures, capacities, and other spe-
cial data.
The following instructions have been prepared from cur-
rent industry and government safety standards applicable
to industrial truck operation and maintenance. These rec-
ommended procedures specify conditions, methods, and
accepted practices that aid in the safe maintenance of in-
dustrial trucks. They are listed here for the reference and
safety of all workers during maintenance operations. Care-
fully read and understand these instructions and the spe-
cific maintenance procedures before attempting to do any
repair work.
When in doubt of any maintenance procedure, please con-
tact your local Clark dealer.
1.
IMPORTANT
Powered industrial trucks can become hazardous if
maintenance is neglected. Therefore, suitable mainte-
nance facilities, trained personnel, and procedures
must be provided.
This message is used when special precau-
tions should be taken to ensure a correct
action or to avoid damage to, or malfunc-
tion of, the truck or a component.
2. Maintenance and inspection of all powered industrial
trucks shall be done in conformance with the
manufacturer’s recommendations.
3.
A CAUTION
This message is used as a reminder of safety
hazards that can result in personal injury
if proper precautions are not taken.
A scheduled planned maintenance, lubrication, and
inspection program shall be followed.
4. Only trained and authorized personnel shall be permit-
ted to maintain, repair, adjust, and inspect industrial
trucks. Work should be performed in accordance with
the manufacturer’s specifications.
A WARNING
This message is used when a hazard exists
that can result in injury or death if proper
precautions are not taken.
5. Properly ventilate work area, vent exhaust fumes, and
keep shop clean and floor dry.
6.
A DANGER
This message is used when an extreme haz-
ard exists that can result in injury or death
or serious injury if proper precautions are
not taken.
Avoid fire hazards and have fire protection equipment
present in the work area. Do not use an open flame to
check for level or leakage of fuel, electrolyte, or
coolant. Do not use open pans of fuel or flammable
cleaning fluids for cleaning parts.
7. Before starting work on truck:
The above terms have been adopted by Clark Material
Handling Company. The same terms may be used in differ-
ent context in service literature supplied directly or indi-
rectly by vendors of truck components.
a. Raise drive wheels off of floor or disconnect
power source and use blocks or other positive
truck positioning devices.
b. Disconnect battery before working on the electri-
cal system.
8. Before working on engine fuel system of gasoline- or
diesel-powered trucks, be sure the fuel shut-off valve
is closed.
SM 649, July ‘99 Safety l SA-l-l
Copyrighted Material
Intended for CLARK dealers only
Do not sell or distribute
Group SA, Safe Maintenance ClRRK
9. Operation of the truck to check performance must be
conducted in an authorized, safe, clear area.
10. Before starting to drive truck:
a. Be in operating position.
b. Be sure parking brake is engaged.
c. Put direction control in neutral.
d. Start engine.
e. Check functioning of direction and speed con-
trols, steering, brakes, warning devices, and any
load handling attachments.
11.
12.
Before leaving truck
a. Stop truck.
b. Put directional control in neutral.
c. Apply the parking brake.
d. Stop the engine by turning off the ignition circuit.
e. Put blocks at the wheels if truck is on an incline.
Brakes. steering mechanisms, control mechanisms,
warning devices, lights, governors, guards, safety de-
vices, and frame members must be carefully and regu-
larly inspected and maintained in a safe operating
condition.
13. Special trucks or devices designed and approved for
hazardous area operation must receive special atten-
tion to ensure that maintenance preserves the original,
approved, safe-operating features.
14. Fuel systems must be checked for leaks and condition
of parts. Extra special consideration must be given in
the case of a leak in the fuel system. Action must be
taken to prevent the use of the truck until the leak has
been corrected.
15. The truck manufacturer’s capacity, operation, and
maintenance instruction plates, tags, or decals must be
maintained in legible condition.
16. Batteries, motors, controllers, limit switches, protec- General Industrial Standards, OSHA 2206: OSHA Safety
tive devices, electrical conductors, and connections and Health Standards (29 CFR 1910), Subpart N-Materials
must be inspected and maintained in conformance Handling and Storage, Section 1910.178 Powered Indus-
with good practice. Special attention must be paid to trial Trucks. For sale by: Superintendent of Documents,
the condition of electrical insulation. U.S. Government Printing Office, Washington, DC 20402.
17.
18.
To avoid injury to personnel or damage to the equip-
ment. consult the manufacturer’s procedures inreplac-
ing contacts on any battery connection.
Industrial trucks must be kept in a clean condition to
minimize fue hazards and help in the detection of loose
or defective parts.
19.
20.
21.
Modifications and additions that affect capacity and
safe truck operation must not be done without the
manufacturer’s prior written approval. Capacity, op-
eration and maintenance instruction plates, tags, or
decals must be changed accordingly. This is an OSHA
requirement.
Care must be taken to assure that all replacement parts,
including tires, are interchangeable with the original
parts and of a quality at least equal to that provided in
the original equipment. Parts, including tires, are to be
installed per the manufacturer’s procedures. Always
use genuine CLARK or CLARK-approved parts.
Use special care when removing heavy components
from the truck, such as counterweight, seat deck,
upright, etc. Be sure that lifting and handling equip-
ment is of the correct capacity and in good condition.
Also, this removal may upset the stability of the truck.
The frame must always be safely blocked for major
component removal.
NOTE
You should also be familiar with additional
operating and maintenance safety instruc-
tions contained in the following publica-
tions:
ANSI/ASME B56.1- 1988 Operator Control-Industrial Tow
Tractors (Safety Standard For Powered Industrial Trucks).
Published by: Society of Mechanical Engineers, United
Engineering Center, 345 E. 47th Street, New York, NY
10017.
NFPA 505-1982: Fire Safety Standard for Powered Indus-
trial Trucks: Type Designations, Areas of Use, Mainte-
nance and Operation. Available from: National Fire
Protection Assoc., Inc., Batterymarch Park, Quincy, MA
02269.
SA-1-2 l Safety SM 649, July ‘99
Copyrighted Material
Intended for CLARK dealers only
Do not sell or distribute
CUIRK Group SA, Safe Maintenance
Section 2.
Lifting, Jacking, and Blocking
Safe Parking ................................................................................................................................... 2
Lifting, Jacking, and Blocking Points .......................................................................................... 2
Raising Drive Wheels Off Floor ................................................................................................... 2
Raising Truck with A Hoist .......................................................................................................... 3
Blocking the Upright in Raised Position ...................................................................................... 4
Raising Rear of Truck ................................................................................................................... 4
Raising Entire Truck ...................................................................................~................................ 5
Shipping Tie-Down Instructions ...................................................................................................6
A WARNING
Lifting or jacking any large piece of equipment such as your fork truck presents
obvious hazards. It must be done with great care and forethought. Consult the
truck weight tabulations in Group 40, “Specifications” to ensure that your
lifting equipment is of adequate capacity.
SM 649, July ‘99 Lifting, Jacking, and Blocking . SA-2-l
Copyrighted Material
Intended for CLARK dealers only
Do not sell or distribute
Group SA, Safe Maintenance CWRK
Safe Parking Raising Drive Wheels Off Floor
Before working on truck:
1.
2.
3.
4.
Park truck on a hard, level, and solid surface, such as
a concrete floor with no gaps or breaks.
Put upright in vertical position and fully lower the
forks or attachment.
This procedure uses the upright as a lever to lift the drive
wheels off the floor and prevent accidents due to inadvert-
ent powering of the drive wheels.
Park truck safely as described in“Safe Parking.” Block
steer wheels.
Put all controls in neutral. Turn key switch OFF and
remove key.
Apply the parking brake and block the wheels.
1.
2.
3.
4.
Be sure upright tnmnion bolts are tight. Bolt torques
must be 75-80 Nom (55-59 ft-lb).
Start the engine. Tilt the upright fully back. Adjust
upright height as necessary to put blocking underneath
the lower end of the upright.
Put a solid 100 x 100 mm (4 x 4 in) hardwood block
under the front section of each upright rail. Put a 3-6
mm (.125-.250 in) steel plate on top of each block.
A WARNING
Defective equipment can cause accidents.
All tools and lifting equipment must be in
good condition, meet the load capacity re-
quirements and have OSHA labels when
required. Tools with defects can have fail-
ures causing severe injury or death.
Lifting, Blocking, and Jacking Points
Use the following illustration to locate general lifting, block-
ing, and jacking points on the truck. Read the procedures
for raising, blocking. or jacking specific components of the
truck to make sure you understand the correct, safe proce-
dures.
LUnder Steer L Under Frame
Axle Frame
Mount
-On Tie Bars
of Upright
Under Upright
A WARNING
Do not attempt to lift the truck by the over-
head guard or the counterweight. Severe
injury may result and the truck can be
damaged.
5. Tilt upright fully forward. This raises the drive wheels
off the floor. Release the tilt control lever and turn
engine OFF.
SA-2-2 l Lifting, Jacking, and Blocking SM 649, July ‘99
Copyrighted Material
Intended for CLARK dealers only
Do not sell or distribute
CIRRK Group SA, Safe Maintenance
6. Insert blocking under the frame behind the drive
wheels or slip wheel cradles under the drive wheels. If
using blocking, check for safe clearance between drive
wheels and floor and blocks.
7.
8.
NOTE
When forks are raised as in illustration
above, use shop rags, paper, or bright tape
on fork tips to signal the danger of trip-
ping.
Check for stable condition of the truck. Be sure that the
blocks are located securely under the truck frame
before operating the drive or working on truck.
Lower the drive wheels to the floor and remove the
blocks by reversing the above procedure.
Raising Truck with a Hoist
When suitable equipment is available. the front of the truck
may be raised by means of a hoist. with wheel cradles
placed under the wheels or blocking placed under the frame.
1.
2.
A CAUTION
When lifting the front of the truck watch
truck for signs of lateral instability. It may
tip sideways. You may have to support or
guide the side of the truck or overhead
guard to prevent tipping.
Park truck safely as described in “Safe Parking.” Block
rear steer wheels.
Check trunnion bolts to make sure they are tightened to
correct torque. Bolt torques must be 7580N*m (55-59
ft-lb).
3. To raise the front of the truck using the upright, spread
two chains on the outer rail tiebar of the upright.
4.
A WARNING
Chain and hoist used to lift truck should be
checked to make sure they are of safe lift-
ing capacity. See the truck data plate for
information.
Slowly lift truck and lower drive wheels onto the
cradles or place blocking under frame prop points.
5. When maintenance work is completed, lower the truck
to the floor by reversing the lifting procedure. Check to
be sure no tools or equipment are under the truck or
wheels.
SM 649, July ‘99 Lifting, Jacking, and Blocking l SA-2-3
Copyrighted Material
Intended for CLARK dealers only
Do not sell or distribute
Group SA, Safe Maintenance CWRK
Blocking the Upright In Raised Position
This procedure is used to safely provide clearance for
access from the front of truck to components on or near the
drive axle. Illustrations show upright with forks removed
however. fork removal is not necessary
1.
2.
3.
4.
5.
6.
Park truck safely as described in “Safe Parking.”
Put blocks in front of and behind drive wheels.
Put wooden support blocks conveniently near upright
rails before raising the upright. Use two 100x 100mm
(4x4 in) hardwood blocks or equal, of about 300 x 300
mm (12 in) and 600 x 600 mm (24 in) length.
NOTE
For standard uprights, block may need
length cut to suit. For triple stage uprights,
the carriage may be blocked up, as shown.
Start engine and raise the upright carriage.
Hold the taller block against inner rail and lower the
upright until carriage rests on block.
Outer
Rail
Hold the shorter block against the outer rail and lower
the upright until inner rail rests on the block.
Outer
Rail
Short
Block
7. Reverse the procedure to remove blocking.
Raising Rear of Truck
The truck may be raised at the rear by jacking and blocking
under the center of the frame member at either the front or
rear steer axle mounting, or under the center section of the
steer axle.
Refer to truck data plate for truck weights.
1.
A WARNING
An incorrectly installed counterweight can
move or fall unexpectedly. Never lift or
block a truck using the counterweight. Fail-
ure to follow procedures outlined in this
manual can result in injury or death.
Park truck safely as described in “Safe Parking.” Put
blocks at front and rear of drive wheels.
SA-2-4 l Lifting,Jacking, and Blocking SM 649, July ‘99
Copyrighted Material
Intended for CLARK dealers only
Do not sell or distribute
CIRRK Group SA, Safe Maintenance
2. Put a floor jack under the steer axle mounting frame
member, centered between the two wheels.
A WARNING
Never lift the truck by the counterweight.
3.
4.
NOTE
If there is insufficient clearance under
frame for your jack, the truck may first be
driven onto shims, such as 25 x 150 x 300
mm (1 x 6 x 12 in) pieces of board, to
increase the truck frame underclearance.
Raise the truck only ashigh as necessary to perform the
maintenance work.
Put blocks at both sides of the truck, fully under the
frame main side structure. Put the blocks in front of but
close to the counterweight and steer wheels for best
truck stability.
Put equal blocks under each side of the truck to provide
a level working position.
5. Lower the truck onto the blocks and remove the jack.
A CAUTION
Before performing any maintenance, check
the truck for stability on the blocks.
6. When maintenance work is completed, lower the rear
of truck to the floor by reversing the above procedure
and lowering each side of the truck 50 mm (2 in) at a
time:
l Put jack under frame and raise truck.
l Carefully remove blocks and lower truck.
l Remove jack and blocks from drive wheels.
Raising Entire Truck
Refer to truck data plate for truck weights.
1. Park truck safely as described in “Safe Parking.”
Lower upright fully.
2. If necessary, drive truck onto boards to increase
underclearance.
A WARNING
SIDE-TO-SIDE TIPOVER. When jacking
side of truck, be sure upright is lowered
fully and do’not raise one side of the truck
more than about 50 mm (2 in) higher than
the other, to avoid tipping truck over later-
ally.
END-TO-END TIPOVER. If the upright
and transaxle are removed while the truck
is blocked up, the truck will tip backwards
due to the heavy counterweight. Both up-
right and counterweight must be removed
before attempting to raise the truck for
transaxle removal. The back of the truck
must be supported by blocking under the
steer axle to prevent movement.
The reverse is also true. If the counter-
weight is removed while the truck is up on
blocks, the weight of the upright and
transaxle will cause the truck to tip on the
front blocks and fall forward.
SM 649, July ‘99 Lifting, Jacking, and Blocking l SA-2-5
Copyrighted Material
Intended for CLARK dealers only
Do not sell or distribute
Group SA, Safe Maintenance ClmK
3. Put the jack under side frame near the center of the
truck.
4.
5.
IMPORTANT
Be sure to put the jack squarely and fully
under the main side structure of the frame.
Do not put the jack under the outer covers
which enclose the fuel and hydraulic sump
tanks.
Carefully raise the truck one side at a time, only as high
as necessary to do the maintenance work and not more
than a maximum of 150 mm (6 in) total.
Put blocksunder the side frame, at each side ofthejack.
Spread the blocks close to the steer and drive wheels
for maximum stability.
6.
7.
If using one jack, lower the truck onto the blocks and
move the jack to the opposite side. Repeat the lifting
procedure.
Put the same size blocks under each side of the truck so
it will be level.
A CAUTION
Before performing any maintenance work,
check the truck for stable condition on the
blocking.
When maintenancework is completed, lower the en-
tire truck to the floor by reversing the lifting procedure.
Lower the truck one side at a time, while carefully
removing the blocks. Check to be sure no tools or
equipment are under the truck or wheels.
NOTE
Depending on jack height, shims under the
tires may be needed for clearance to allow
removal of jack.
Shipping Tie-Down Instructions
Front of Truck
a. With Upright and Carriage Installed
l Lower the carriage fully.
l Put a tie down (e.g., chain) between the carriage
fork bars.
b. Without an Upright and Carriage Installed
l Put a chain across the truck floor plate. Protect
truck from chain damage by using covered chain
or protective material under the chain at contact
points.
&. Rear of Truck
l Attach the tie down to pocket in bottom of coun-
terweight.
SA-2-6 l Lifting, Jacking, and Blocking SM 649, July ‘99
Copyrighted Material
Intended for CLARK dealers only
Do not sell or distribute
CIRRIC Group SA, Safe Maintenenance
Section 3.
Towing
If your truck is disabled but can be moved freely on its own
wheels without further damage. use the following proce-
dures to tow the truck safely to a repair area.
A WARNING
It is important for your safety and to the
care of your lift truck to use the proper
equipment and carefully follow these rec-
ommendations for safe towing.
Do not tow a lift truck if there is a problem
with the brakes or tires, or if the steering
cannot be operated.
Do not tow the disabled truck up or down
ramps or steep inclines.
Do not attempt to tow the disabled truck if
traction or weather conditions are poor.
Be sure to apply the parking brake or block the drive
wheels on the disabled truck while working around it.
When possible, raise the carriage (forks) on the dis-
abled truck 300 mm (12 in) from the floor or ground.
Secure the carriage on the upright with a chain.
Use a truck for towing that is of equal or larger capacity
than the disabled truck. Carry a partial load on the tow
truck for improved traction.
4.
5.
6.
Check that the counterweight bolts on both trucks are
in place and properly torqued to 340-380 Nom (250-
280 ft-lb). These bolts are madeof special, high-tensile
steel and are not commercially available. When neces-
sary, replace these bolts only with a genuine Clark
replacement part.
Use an approved, solid metal tow bar with towing
couplers that connect to the towing pins in the counter-
weights.
NOTE
DOT-approved towing equipment is avail-
able from your Clark dealer.
Release the parking brake on the towed vehicle. Place
directional control lever in neutral.
Tow the disabled truck backwards. An operator must
be on the disabled truck.
A CAUTION
The power steering will not operate on the
disabled truck when the engine is not run-
ning. The steering handwheel will be diffi-
cult to turn.
Tow the truck slowly. Careful towing is necessary to
prevent injury to personnel or damage to the disabled
truck. The truck should be towed at a speed of less than
8 kph (5 mph, or a moderate walking speed) with a
driver in place and steering the disabled truck.
Direction of towing for distances of
300 meters (325 yards) or less.
Disabled truck with Tow truck moving at 8 kilome-
driver in place to steer. ters-per-hour (5 mph) or less.
SM 649, July ‘99 Towing l SA-3-1
Copyrighted Material
Intended for CLARK dealers only
Do not sell or distribute
Group SA, Safe Maintenance ElmK
9.
IMPORTANT
Do not lift the disabled truck or any wheels
off the floor while the truck is being towed.
A WARNING
Always engage the parking brake when
parking a lift truck. The truck can roll and
Park the disabled truck in authorized areas only. Fully
lower the forks on the floor, leave the directional
control in neutral, turn the ignition switch to OFF, and
engage the parking brake. Remove the ignition key
and, when necessary, block the wheels to prevent the
truck from rolling.
cause injury or death to personnel near it.
LIFT TRUCK PARKING
SA-3-2 l Towing SM 649, July ‘99
Copyrighted Material
Intended for CLARK dealers only
Do not sell or distribute
GROUP PS
PERIODIC SERVICE
Maintenance Schedules .................................................. Section 1
The Planned Maintenance Program ............................. Section 2
The PM Inspection Form ............................................... Section 3
SM 649, July ‘99 Periodic Service
Copyrighted Material
Intended for CLARK dealers only
Do not sell or distribute
EUIRK Group PS, Periodic Service
Section 1.
Maintenance Schedules
“Periodic Service” and “Planned
Maintenance”
The term “periodic service” includes all maintenance tasks
that should be performed on a regularly scheduled basis.
The term “Planned Maintenance” indicates a formalized
program of basic inspections, adjustments, and lubrications
that the Clark service organization provides customers at a
prescribed interval, usually 50-250 hours. The recommended
basic “Planned Maintenance” procedure is given in Section
2 of this Group.
The current Section,“Maintenance Schedules,” specifies
all maintenance tasks-including Planned Maintenance
tasks-that should be performed periodically, and suggests
intervals at which they should be performed.
Determining Maintenance Intervals
Time intervals on the charts on the next four pages and
elsewhere in this manual relate to truck operating hours as
recorded on the hourmeter, and are based on experience
Clark has found to be convenient and suitable under nor-
mal operation. Standard operating condition classifications
are:
Normal Operation: Eight-hour material handling, mostly
in buildings or in clean, open air on clean, paved surfaces.
Severe Operation: Prolonged operating hours or constant
usage.
Extreme Operation:
In sandy or dusty locations, such as cement plants,
lumber mills, and coal dust or stone crushing sites.
High-temperature locations, such as steel mills and
foundries.
Sudden temperature changes, such as constant trips
from buildings into the open air, or in refrigeration
plants.
If the lift truck is used in Severe or extreme operating
conditions, the maintenance intervals should be shortened
accordingly.
IMPORTANT
MAINTENANCE INTERVALS. If the lift
truck is used in severe or extreme operat-
ing conditions, the maintenance intervals
should be shortened accordingly.
Since the operating environments of lift
trucks vary widely, the above descriptions
are highly generalized and should be ap-
plied as actual conditions dictate.
SM 649, July ‘99 Maintenance Schedules l PS-l-l
Copyrighted Material
Intended for CLARK dealers only
Do not sell or distribute
Group PS, Periodic Service CIRRK
Service Chart/Lubrication Points
A decal, similar to the illustration below, is located on the
underside of the truck’s engine cover. This decal is a basic
guide to periodic maintenance intervals and tasks. A more
detailed chart is supplied on the next page.
0 Lubricant
0 Replace
cl Check
0
GGrease
0
EO
Engine oil
0
TO Transmission oil
0
CO Antifreeze
0
HO
Hydraulic oil
0
FO
Fuel
0
B0Brake fluid/oil
Transmission oil
Fuel
 EverylOhoursordaily ._
    Every2OOhoursormonthiy
‘ransmissionoil fitter
Mast mounting
RH, LHQpoints)
Tilt cylinder end
RH, LH(2points)
- Hydraulic oil
- Hydraulic oil filter
- Air cleaner
- Hydraulic breather
Wheel bearing
RH, LH(2points)
Every 500 hours or every
Every 1000 hours or every
Every 2000 hours or yearly
PS-1-2 . Maintenance Schedules SM 649, July ‘99
Copyrighted Material
Intended for CLARK dealers only
Do not sell or distribute
CIRRK Group PS, Periodic Service
Recommended Periodic Service Schedule
This chart lists maintenance tasks that should be done
periodically and the suggested time intervals. Refer to
Operator’s Manual for Daily Checks.
Period First Every Every Every Every
No. month 1 month 3 months 6 months 12 months
Items
First Every Every Every Every
200 hours 200 hours 600 hours 1000 hours 2000 hours
Engine system
1. lnspaction and adjustment (or replacement)
1) Intake/Exhaust valve clearance
2) Belt tension
Irl) Engine oil
*2) Engine oil filter
0 0
0 0
*3) Coolant 0
lr4) Fuel strainer (Filter) element 0
*4) Air cleaner element n
*4) Water separator
-.
I I I I /
0 I
zs If you operate the fork lift in a dusty environment, ,jl” marked items must be checked more
NOTE: Oil change interval may be determined by laboratory analysis
SM 649, July ‘99 Maintenance Schedules l PS-1-3
Copyrighted Material
Intended for CLARK dealers only
Do not sell or distribute
Group PS, Periodic Service ElmK
No.
Chassis and Attachment
First Every Every Every Every
month 1 month 3 months 6 months 12 months
First Every Every Every Every
200 hours 200 hours 500 hours 1000 hours 2000 hwrs
11. inspection and adjustment(or re
Brake pedal and inching pedal
clearance
Parking brake lever and
operation
PI
I
Lii chain tension
Carnage bearing
Mast bearing
Mast operation
Tilt and lift cylinder fitting
Tilt and lift cylinder operation
Hydraulic pump operation
Transmission oil
Gear oil (diierential and axle end:
0 0
0 0
0 0
0 0
0 I I 0 I
1
0 I.
I I I
0
12. Lubrication
*l) Lift chain 0 0
3) Mast mounting bushing and pin 0
4) Joints 0
5) Tilt cylinder mounting pin and
bearing 0
6) Side roller (Carriage) 0 0
7) Steering axle bearing and arm 0 0
3. Clsanlng
!
1
i
-I
1
1) Torque converter intake filter
2) Hydraulic oil tank interior
4. Replacement
*l) 1Transmission oil
0
0
z
I I 0
I
*2) 1Transmission oil filter
I I ! I I
0 1
*3) Hydraulic oil
1*4) [ Hydraulic oil filter
I 5) 1Hydraulic oil strainer
I 6) 1Brake fluid
I 0 I I 0 I
I * I
I 0 I
7) Wheel bearing grease
6) Gear oil (differential and axle end)
x If you operate the fork lift in a dusty environment, ‘W marked items must be checked more
frequently.
l Change oil and filter after the first 50 hours and again after 100 operating hours when the
transaxle is new or rebuilt.
PS-1-4 l Maintenance Schedules SM 649, July ‘99
Copyrighted Material
Intended for CLARK dealers only
Do not sell or distribute
EIRRK Group PS, Periodic Service
Section 2.
The Planned Maintenance Program
This Section defines a set of basic service procedures, known as the “Planned
Maintenance Program,” and describes a systematic approach for performing them.
Introduction to Planned Maintenance ......................................................................................... 2
PM Intervals ..................................................................................................................................... 2
The PM Form ................................................................................................................................... 2
The Basic PM Procedures ............................................................................................................. 2
Visual Inspection ............................................................................................................................. 3
Decals, Fasteners, and Leaks .................................................................................................... 3
Overhead Guard ........................................................................................................................ 3
Carriage, Load Backrest, and Upright ...................................................................................... 3
Forks ......................................................................................................................................... 3
Brake and Inching Pedal Freeplay ........................................................................................... .4
Wheels and Tires ...................................................................................................................... 4
Functional Tests ............................................................................................................................... 4
Starting System ......................................................................................................................... 4
Engine Shut Down Mode .......................................................................................................... 4
Parking Brake Interlock ............................................................................................................ 4
Accelerator, Brake/Inching System, Direction Control, and Parking Brake ........................... .5
Steering System ........................................................................................................................ 5
Lift Mechanisms and Controls .................................................................................................. 6
Auxiliary Controls .................................................................................................................... 6
Air Cleaning the Truck .................................................................................................................... 6
Truck Chassis Inspection and Lubrication ....................................................................................... 7
Lift Chain Lubrication .................................................................................................................... .7
Upright and Tilt Cylinder Lubrication ............................................................................................. 7
Under-the-Hood Inspection ............................................................................................................. 7
General Checks ......................................................................................................................... 7
Engine Air Cleaner ................................................................................................................... 7
Fluid Checks .................................................................................................................................... 7
Battery ....................................................................................................................................... 7
Engine Cooling System ............................................................................................................ 8
Engine Oil ................................................................................................................................. 8
Hydraulic Fluid Level ............................................................................................................... 8
Critical Fastener Torque Checks ...................................................................................................... 8
Transaxle Fluid Level ............................................................................................................... 8
Stall Test .......................................................................................................................................... 8
Cranking Voltage Test ..................................................................................................................... 8
SM 649, July ‘99 Planned Maintenance l PS-2-1
Thank you very much for
your reading. Please Click
Here. Then Get COMPLETE
MANUAL. NO WAITING
NOTE:
If there is no response to
click on the link above,
please download the PDF
document first and then
click on it.
Copyrighted Material
Intended for CLARK dealers only
Do not sell or distribute
Group PS, Periodic Service ElmI6
Introduction to Planned Maintenance The Basic PM Procedures
A program of regular, routine inspections, lubrication, and
other service tasks is important for the long life and trouble-
free operation of the lift truck.
The Clark service organization offers customers a formal-
ized program--called Planned Maintenance, or PM-for
performing these tasks.
The following procedures outline a systematic approach to
performing the PM tasks. These procedures consist of:
External visual checks you make as you walk around
the truck with it turned off.
Operational checks you make while operating the
truck.
PM Intervals
The PM inspections, adjustments, and lubrications are typi-
cally performed on each covered truck at 50-250 hour
intervals. (See Section 1, in this Group about defining
service intervals.)
Tests, adjustments, and lubrication you perform
with the covers removed.
The PM Form
A CAUTION
l Do not make repairs or adjustments un-
As an aid to service technicians performing and document-
ing PM inspections, Clark has prepared a “Gas, LPG or
Diesel Planned Maintenance Report” form. A black-and-
white copy of this form is inserted in Section 3 of this
Group.
We recommend that you use this form as a checklist and to
make a record of your inspection and truck condition. This
record can be used to inform the owner of needed repairs
and help establish the optimal PM intervals.
When you have finished the PM inspections, be sure to give
a copy of the report to the person responsible for lift truck
maintenance.
less authorized to do so.
Disconnect the battery ground cable (-)
from the engine or frame before work-
ing on electrical components.
Always wear safety glasses.
Wear a safety (hard) hat in industrial
plants and in special areas where protec-
tion is necessary or required.
Remove all jewelry (watch, rings, brace-
lets, etc.) before working on the truck.
PS-2-2 . Planned Maintenance SM 649, July ‘99
Copyrighted Material
Intended for CLARK dealers only
Do not sell or distribute
Glmu Group PS, Periodic Service
Visual Inspection Carriage, Load Backrest, and Upright
First. perform a visual inspection of the lift truck and its
components. Walk around the truck and take note of any
obvious damage and maintenance problems.
(See Group 34 for detailed inspection procedure.)
Inspect the welds on the carriage, load backrest, and up-
right for cracks. Be sure that the mounting fasteners are in
place and tight.
Decals, Fasteners, and Leaks
Check for loose fasteners and fittings.
Check to be sure all capacity, safety, and warning plates
and decals are attached and legible.
NOTICE
Inspect the upright assembly: rails, carriage rollers, car-
riage fork bars, lift chains, and lift and tilt cylinders. Look
for obvious wear and maintenance problems and damaged
or missing parts. Check for any loose parts or fittings.
Check for leaks, any damaged or loose rollers and rail wear
(metal flaking). Carefully check the lift chains for wear.
rust and corrosion, cracked or broken links, stretching, etc.
Check that the lift and carriage chains are correctly ad-
justed to have equal tension. Check that the lift chain
anchor fasteners and locking means are in place and tight.
Be sure all safety guards and chain retainers are in place
and not damaged. Inspect the carriage stops and cylinder
retainer bolts. Check all welded connections.
Do not operate a lift truck with damaged
or missing decals and nameplates. Replace
them immediately. They contain important
information. See Group 40 for decal loca-
tions.
Inspect all lift line hydraulic connections for leaks. Check
the lift cylinder rods for wear marks, grooves and scratches.
Check the cylinder seals for leaks.
Inspect the truck before and after starting engine for any
signs of external leakage: fuel, engine oil or coolant, trans-
mission fluid, etc.
Check for hydraulic oil leaks and loose fittings. DO NOT
USE BARE HANDS TO CHECK.
A CAUTION
HYDRAULIC FLUID PRESSURE. Do not
use your hands to check for hydraulic leak-
age. Oil may be hot or under pressure.
Fluid under pressure can penetrate your
skin and cause serious injury.
Overhead Guard
Be sure that the overhead guard and any other safety de-
vices are in place, undamaged, and attached securely. In-
spect welds and structural members for cracks or other
damage. Also check for loose or missing fasteners.
Forks
Inspect the load forks for cracks, breaks, bending and wear
as described in Group 34.
A WARNING
HEEL WEAR. If the fork blade at the heel
is worn down by more than 10 percent, the
load capacity is reduced and the fork must
be replaced. See Group 34 for inspection
procedures.
SM 649, July ‘99 Planned Maintenance l PS-2-3
Copyrighted Material
Intended for CLARK dealers only
Do not sell or distribute
Group PS, Periodic Service C1RRK
Inspect the fork latches to ensure that they are in good
condition, operate freely, and lock correctly.
Wheels and Tires
Check the condition of the drive and steer wheels and tires.
Remove objects that are embedded in the tread. Inspect the
tires for excessive wear or breaks or “chunking out.”
Check all wheel lug nuts or bolts to be sure none are loose
or missing. Have missing bolts or lug nuts replaced and
tightened to correct torque as explained in Group 22.
A WARNING
Check tire pressure from a position facing the
tread of the tire, not the side. Use a long-
handled gauge to keep your body away. If
tires are low, the tire may require removal
and repair. Incorrect (low) tire pressure can
reduce truck stability. See “Specifications” in
Group 22 for proper inflation pressure.
Brake and Inching Pedal Freeplay
There should be 4-6 mm (0.157-0.236 in) of pedal freeplay.
Both pedals should be 155 mm (6.1 in) in height.. Adjust as
described in Group 23.
Functional Tests
Be sure that:
l Parking brake is applied
l Directional control is in “N” (neutral).
Test the horn, lights, and all other safety equipment. Be
sure they are properly mounted and working correctly. Test
all controls to ensure that they operate freely and return to
neutral properly.
Now prepare to start the truck and test its operation.
Starting System
A 3-position starter switch is standard equipment.
Check the neutral start function by placing the direction
control lever in forward or reverse and turning key switch
to “start” position. The starter must not engage until the
direction control lever is moved to “neutral” position.
As you start the engine, check the instrument display. All
indicator lights should come on for a 2-second lamp check.
The seat belt prompt light should remain on for 4 seconds,
accompanied by a buzzer sound. The parking brake light
should remain on if the brake is set. If the truck has a diesel
“ii,
I. engine, the glow plug preheat light
.~.,, I.,
’t .,, ‘,,,
‘.,.;‘5
,,,;,$:
:<,,, : ?
,,,., ” ;; ‘;
@
should remain on for 6 seconds. If
the lights do not operate as described,
.,” :<
i _-__- _J?
! ____ 2; ,;. refer to Group 13 to diagnose the
_
__._
__ 5,,.$’
problem.
Engine Shut Down Mode
If the truck’s fault protection system detects low engine oil
pressure, excessive transmission oil temperature, or exces-
sive engine coolant temperature, the truck will go into
“shutdown mode”-a buzzer will sound for 30 seconds,
after which the truck will shut itself off. The truck may be
restarted, but if the fault condition still exists, the engine
will again shutdown in 30 seconds.
Parking Brake Interlock
The transmission should disengage when the parking brake
is on and reengage when the parking brake is released.
1.
2.
3.
4.
5.
Apply the parking brake.
Start the engine, if it is not already running.
Place the direction control in forward or reverse. Make
sure the path is clear in the chosen direction.
Accelerate briefly. The truck should not move or put any
strain on the parking brake if theinterlock system is OK.
Release the parking brake (and service brake). Truck
should move slowly in selected direction. (On hydro-
static truck, depress accelerator pedal slightly.)
PS-2-4 l Planned Maintenance SM 649, July ‘99

More Related Content

More from wedsrffcdgdv

Caterpillar cat 725 articulated truck (prefix afx) service repair manual (afx...
Caterpillar cat 725 articulated truck (prefix afx) service repair manual (afx...Caterpillar cat 725 articulated truck (prefix afx) service repair manual (afx...
Caterpillar cat 725 articulated truck (prefix afx) service repair manual (afx...wedsrffcdgdv
 
Caterpillar cat 336 f l excavator (prefix yfd) service repair manual (yfd0000...
Caterpillar cat 336 f l excavator (prefix yfd) service repair manual (yfd0000...Caterpillar cat 336 f l excavator (prefix yfd) service repair manual (yfd0000...
Caterpillar cat 336 f l excavator (prefix yfd) service repair manual (yfd0000...wedsrffcdgdv
 
Caterpillar cat 336 f l excavator (prefix nbl) service repair manual (nbl0000...
Caterpillar cat 336 f l excavator (prefix nbl) service repair manual (nbl0000...Caterpillar cat 336 f l excavator (prefix nbl) service repair manual (nbl0000...
Caterpillar cat 336 f l excavator (prefix nbl) service repair manual (nbl0000...wedsrffcdgdv
 
Caterpillar cat 336 f l excavator (prefix lcl) service repair manual (lcl0000...
Caterpillar cat 336 f l excavator (prefix lcl) service repair manual (lcl0000...Caterpillar cat 336 f l excavator (prefix lcl) service repair manual (lcl0000...
Caterpillar cat 336 f l excavator (prefix lcl) service repair manual (lcl0000...wedsrffcdgdv
 
Caterpillar cat 336 f l excavator (prefix dsw) service repair manual (dsw0000...
Caterpillar cat 336 f l excavator (prefix dsw) service repair manual (dsw0000...Caterpillar cat 336 f l excavator (prefix dsw) service repair manual (dsw0000...
Caterpillar cat 336 f l excavator (prefix dsw) service repair manual (dsw0000...wedsrffcdgdv
 
Caterpillar cat 336 f excavator (prefix yfd) service repair manual (yfd00001 ...
Caterpillar cat 336 f excavator (prefix yfd) service repair manual (yfd00001 ...Caterpillar cat 336 f excavator (prefix yfd) service repair manual (yfd00001 ...
Caterpillar cat 336 f excavator (prefix yfd) service repair manual (yfd00001 ...wedsrffcdgdv
 
Caterpillar cat 336 f excavator (prefix nbl) service repair manual (nbl00001 ...
Caterpillar cat 336 f excavator (prefix nbl) service repair manual (nbl00001 ...Caterpillar cat 336 f excavator (prefix nbl) service repair manual (nbl00001 ...
Caterpillar cat 336 f excavator (prefix nbl) service repair manual (nbl00001 ...wedsrffcdgdv
 
Caterpillar cat 336 f excavator (prefix lcl) service repair manual (lcl00001 ...
Caterpillar cat 336 f excavator (prefix lcl) service repair manual (lcl00001 ...Caterpillar cat 336 f excavator (prefix lcl) service repair manual (lcl00001 ...
Caterpillar cat 336 f excavator (prefix lcl) service repair manual (lcl00001 ...wedsrffcdgdv
 
Bomag bw 177 single drum rollers service repair manual
Bomag bw 177 single drum rollers service repair manualBomag bw 177 single drum rollers service repair manual
Bomag bw 177 single drum rollers service repair manualwedsrffcdgdv
 
Clark esm 12 25 forklift service repair manual
Clark esm 12 25 forklift service repair manualClark esm 12 25 forklift service repair manual
Clark esm 12 25 forklift service repair manualwedsrffcdgdv
 
Clark cq202530 l forklift service repair manual
Clark cq202530 l forklift service repair manualClark cq202530 l forklift service repair manual
Clark cq202530 l forklift service repair manualwedsrffcdgdv
 
Clark cq202530 d forklift service repair manual
Clark cq202530 d forklift service repair manualClark cq202530 d forklift service repair manual
Clark cq202530 d forklift service repair manualwedsrffcdgdv
 
Clark cmp 70 forklift service repair manual
Clark cmp 70 forklift service repair manualClark cmp 70 forklift service repair manual
Clark cmp 70 forklift service repair manualwedsrffcdgdv
 
Clark cmp 60 forklift service repair manual
Clark cmp 60 forklift service repair manualClark cmp 60 forklift service repair manual
Clark cmp 60 forklift service repair manualwedsrffcdgdv
 
Caterpillar cat d550 b articulated dump truck (prefix 5nd) service repair man...
Caterpillar cat d550 b articulated dump truck (prefix 5nd) service repair man...Caterpillar cat d550 b articulated dump truck (prefix 5nd) service repair man...
Caterpillar cat d550 b articulated dump truck (prefix 5nd) service repair man...wedsrffcdgdv
 
Caterpillar cat d400 e ii ejector truck (prefix apf) service repair manual (a...
Caterpillar cat d400 e ii ejector truck (prefix apf) service repair manual (a...Caterpillar cat d400 e ii ejector truck (prefix apf) service repair manual (a...
Caterpillar cat d400 e ii ejector truck (prefix apf) service repair manual (a...wedsrffcdgdv
 
Caterpillar cat d400 e ii articulated truck (prefix 8ps) service repair manua...
Caterpillar cat d400 e ii articulated truck (prefix 8ps) service repair manua...Caterpillar cat d400 e ii articulated truck (prefix 8ps) service repair manua...
Caterpillar cat d400 e ii articulated truck (prefix 8ps) service repair manua...wedsrffcdgdv
 
Caterpillar cat d400 e articulated truck (prefix 2yr) service repair manual (...
Caterpillar cat d400 e articulated truck (prefix 2yr) service repair manual (...Caterpillar cat d400 e articulated truck (prefix 2yr) service repair manual (...
Caterpillar cat d400 e articulated truck (prefix 2yr) service repair manual (...wedsrffcdgdv
 
Caterpillar cat d400 d articulated truck (prefix 8tf) service repair manual (...
Caterpillar cat d400 d articulated truck (prefix 8tf) service repair manual (...Caterpillar cat d400 d articulated truck (prefix 8tf) service repair manual (...
Caterpillar cat d400 d articulated truck (prefix 8tf) service repair manual (...wedsrffcdgdv
 
Caterpillar cat d400 d articulated truck (prefix 2jj) service repair manual (...
Caterpillar cat d400 d articulated truck (prefix 2jj) service repair manual (...Caterpillar cat d400 d articulated truck (prefix 2jj) service repair manual (...
Caterpillar cat d400 d articulated truck (prefix 2jj) service repair manual (...wedsrffcdgdv
 

More from wedsrffcdgdv (20)

Caterpillar cat 725 articulated truck (prefix afx) service repair manual (afx...
Caterpillar cat 725 articulated truck (prefix afx) service repair manual (afx...Caterpillar cat 725 articulated truck (prefix afx) service repair manual (afx...
Caterpillar cat 725 articulated truck (prefix afx) service repair manual (afx...
 
Caterpillar cat 336 f l excavator (prefix yfd) service repair manual (yfd0000...
Caterpillar cat 336 f l excavator (prefix yfd) service repair manual (yfd0000...Caterpillar cat 336 f l excavator (prefix yfd) service repair manual (yfd0000...
Caterpillar cat 336 f l excavator (prefix yfd) service repair manual (yfd0000...
 
Caterpillar cat 336 f l excavator (prefix nbl) service repair manual (nbl0000...
Caterpillar cat 336 f l excavator (prefix nbl) service repair manual (nbl0000...Caterpillar cat 336 f l excavator (prefix nbl) service repair manual (nbl0000...
Caterpillar cat 336 f l excavator (prefix nbl) service repair manual (nbl0000...
 
Caterpillar cat 336 f l excavator (prefix lcl) service repair manual (lcl0000...
Caterpillar cat 336 f l excavator (prefix lcl) service repair manual (lcl0000...Caterpillar cat 336 f l excavator (prefix lcl) service repair manual (lcl0000...
Caterpillar cat 336 f l excavator (prefix lcl) service repair manual (lcl0000...
 
Caterpillar cat 336 f l excavator (prefix dsw) service repair manual (dsw0000...
Caterpillar cat 336 f l excavator (prefix dsw) service repair manual (dsw0000...Caterpillar cat 336 f l excavator (prefix dsw) service repair manual (dsw0000...
Caterpillar cat 336 f l excavator (prefix dsw) service repair manual (dsw0000...
 
Caterpillar cat 336 f excavator (prefix yfd) service repair manual (yfd00001 ...
Caterpillar cat 336 f excavator (prefix yfd) service repair manual (yfd00001 ...Caterpillar cat 336 f excavator (prefix yfd) service repair manual (yfd00001 ...
Caterpillar cat 336 f excavator (prefix yfd) service repair manual (yfd00001 ...
 
Caterpillar cat 336 f excavator (prefix nbl) service repair manual (nbl00001 ...
Caterpillar cat 336 f excavator (prefix nbl) service repair manual (nbl00001 ...Caterpillar cat 336 f excavator (prefix nbl) service repair manual (nbl00001 ...
Caterpillar cat 336 f excavator (prefix nbl) service repair manual (nbl00001 ...
 
Caterpillar cat 336 f excavator (prefix lcl) service repair manual (lcl00001 ...
Caterpillar cat 336 f excavator (prefix lcl) service repair manual (lcl00001 ...Caterpillar cat 336 f excavator (prefix lcl) service repair manual (lcl00001 ...
Caterpillar cat 336 f excavator (prefix lcl) service repair manual (lcl00001 ...
 
Bomag bw 177 single drum rollers service repair manual
Bomag bw 177 single drum rollers service repair manualBomag bw 177 single drum rollers service repair manual
Bomag bw 177 single drum rollers service repair manual
 
Clark esm 12 25 forklift service repair manual
Clark esm 12 25 forklift service repair manualClark esm 12 25 forklift service repair manual
Clark esm 12 25 forklift service repair manual
 
Clark cq202530 l forklift service repair manual
Clark cq202530 l forklift service repair manualClark cq202530 l forklift service repair manual
Clark cq202530 l forklift service repair manual
 
Clark cq202530 d forklift service repair manual
Clark cq202530 d forklift service repair manualClark cq202530 d forklift service repair manual
Clark cq202530 d forklift service repair manual
 
Clark cmp 70 forklift service repair manual
Clark cmp 70 forklift service repair manualClark cmp 70 forklift service repair manual
Clark cmp 70 forklift service repair manual
 
Clark cmp 60 forklift service repair manual
Clark cmp 60 forklift service repair manualClark cmp 60 forklift service repair manual
Clark cmp 60 forklift service repair manual
 
Caterpillar cat d550 b articulated dump truck (prefix 5nd) service repair man...
Caterpillar cat d550 b articulated dump truck (prefix 5nd) service repair man...Caterpillar cat d550 b articulated dump truck (prefix 5nd) service repair man...
Caterpillar cat d550 b articulated dump truck (prefix 5nd) service repair man...
 
Caterpillar cat d400 e ii ejector truck (prefix apf) service repair manual (a...
Caterpillar cat d400 e ii ejector truck (prefix apf) service repair manual (a...Caterpillar cat d400 e ii ejector truck (prefix apf) service repair manual (a...
Caterpillar cat d400 e ii ejector truck (prefix apf) service repair manual (a...
 
Caterpillar cat d400 e ii articulated truck (prefix 8ps) service repair manua...
Caterpillar cat d400 e ii articulated truck (prefix 8ps) service repair manua...Caterpillar cat d400 e ii articulated truck (prefix 8ps) service repair manua...
Caterpillar cat d400 e ii articulated truck (prefix 8ps) service repair manua...
 
Caterpillar cat d400 e articulated truck (prefix 2yr) service repair manual (...
Caterpillar cat d400 e articulated truck (prefix 2yr) service repair manual (...Caterpillar cat d400 e articulated truck (prefix 2yr) service repair manual (...
Caterpillar cat d400 e articulated truck (prefix 2yr) service repair manual (...
 
Caterpillar cat d400 d articulated truck (prefix 8tf) service repair manual (...
Caterpillar cat d400 d articulated truck (prefix 8tf) service repair manual (...Caterpillar cat d400 d articulated truck (prefix 8tf) service repair manual (...
Caterpillar cat d400 d articulated truck (prefix 8tf) service repair manual (...
 
Caterpillar cat d400 d articulated truck (prefix 2jj) service repair manual (...
Caterpillar cat d400 d articulated truck (prefix 2jj) service repair manual (...Caterpillar cat d400 d articulated truck (prefix 2jj) service repair manual (...
Caterpillar cat d400 d articulated truck (prefix 2jj) service repair manual (...
 

Recently uploaded

Alina 7042364481 Call Girls Service Pochanpur Colony - independent Pochanpur ...
Alina 7042364481 Call Girls Service Pochanpur Colony - independent Pochanpur ...Alina 7042364481 Call Girls Service Pochanpur Colony - independent Pochanpur ...
Alina 7042364481 Call Girls Service Pochanpur Colony - independent Pochanpur ...Hot Call Girls In Sector 58 (Noida)
 
Innovating Manufacturing with CNC Technology
Innovating Manufacturing with CNC TechnologyInnovating Manufacturing with CNC Technology
Innovating Manufacturing with CNC Technologyquickpartslimitlessm
 
Vip Mumbai Call Girls Mumbai Call On 9920725232 With Body to body massage wit...
Vip Mumbai Call Girls Mumbai Call On 9920725232 With Body to body massage wit...Vip Mumbai Call Girls Mumbai Call On 9920725232 With Body to body massage wit...
Vip Mumbai Call Girls Mumbai Call On 9920725232 With Body to body massage wit...amitlee9823
 
如何办理美国西雅图大学毕业证(Seattle毕业证书)成绩单(学位证)原版一比一
如何办理美国西雅图大学毕业证(Seattle毕业证书)成绩单(学位证)原版一比一如何办理美国西雅图大学毕业证(Seattle毕业证书)成绩单(学位证)原版一比一
如何办理美国西雅图大学毕业证(Seattle毕业证书)成绩单(学位证)原版一比一meq5nzfnk
 
Hot Modals Call Girls (Delhi) Dwarka9711199171✔️ High Class Service 100% Saf...
Hot Modals Call Girls (Delhi) Dwarka9711199171✔️ High Class  Service 100% Saf...Hot Modals Call Girls (Delhi) Dwarka9711199171✔️ High Class  Service 100% Saf...
Hot Modals Call Girls (Delhi) Dwarka9711199171✔️ High Class Service 100% Saf...shivangimorya083
 
John deere 425 445 455 Maitenance Manual
John deere 425 445 455 Maitenance ManualJohn deere 425 445 455 Maitenance Manual
John deere 425 445 455 Maitenance ManualExcavator
 
Russian Call Girls Delhi Indirapuram {9711199171} Aarvi Gupta ✌️Independent ...
Russian  Call Girls Delhi Indirapuram {9711199171} Aarvi Gupta ✌️Independent ...Russian  Call Girls Delhi Indirapuram {9711199171} Aarvi Gupta ✌️Independent ...
Russian Call Girls Delhi Indirapuram {9711199171} Aarvi Gupta ✌️Independent ...shivangimorya083
 
Production documentary.ppt. x
Production documentary.ppt.               xProduction documentary.ppt.               x
Production documentary.ppt. x21005760
 
꧁ ୨ Call Girls In Radisson Blu Plaza Delhi Airport, New Delhi ❀7042364481❀ Es...
꧁ ୨ Call Girls In Radisson Blu Plaza Delhi Airport, New Delhi ❀7042364481❀ Es...꧁ ୨ Call Girls In Radisson Blu Plaza Delhi Airport, New Delhi ❀7042364481❀ Es...
꧁ ୨ Call Girls In Radisson Blu Plaza Delhi Airport, New Delhi ❀7042364481❀ Es...Hot Call Girls In Sector 58 (Noida)
 
Delhi Call Girls Saket 9711199171 ☎✔👌✔ Whatsapp Hard And Sexy Vip Call
Delhi Call Girls Saket 9711199171 ☎✔👌✔ Whatsapp Hard And Sexy Vip CallDelhi Call Girls Saket 9711199171 ☎✔👌✔ Whatsapp Hard And Sexy Vip Call
Delhi Call Girls Saket 9711199171 ☎✔👌✔ Whatsapp Hard And Sexy Vip Callshivangimorya083
 
John Deere 7430 7530 Tractors Diagnostic Service Manual W.pdf
John Deere 7430 7530 Tractors Diagnostic Service Manual W.pdfJohn Deere 7430 7530 Tractors Diagnostic Service Manual W.pdf
John Deere 7430 7530 Tractors Diagnostic Service Manual W.pdfExcavator
 
Delhi Call Girls Mayur Vihar 9711199171 ☎✔👌✔ Whatsapp Hard And Sexy Vip Call
Delhi Call Girls Mayur Vihar 9711199171 ☎✔👌✔ Whatsapp Hard And Sexy Vip CallDelhi Call Girls Mayur Vihar 9711199171 ☎✔👌✔ Whatsapp Hard And Sexy Vip Call
Delhi Call Girls Mayur Vihar 9711199171 ☎✔👌✔ Whatsapp Hard And Sexy Vip Callshivangimorya083
 
꧁ ୨⎯Call Girls In Ashok Vihar, New Delhi **✿❀7042364481❀✿**Escorts ServiCes C...
꧁ ୨⎯Call Girls In Ashok Vihar, New Delhi **✿❀7042364481❀✿**Escorts ServiCes C...꧁ ୨⎯Call Girls In Ashok Vihar, New Delhi **✿❀7042364481❀✿**Escorts ServiCes C...
꧁ ୨⎯Call Girls In Ashok Vihar, New Delhi **✿❀7042364481❀✿**Escorts ServiCes C...Hot Call Girls In Sector 58 (Noida)
 
Hauz Khas Call Girls ☎ 7042364481 independent Escorts Service in delhi
Hauz Khas Call Girls ☎ 7042364481 independent Escorts Service in delhiHauz Khas Call Girls ☎ 7042364481 independent Escorts Service in delhi
Hauz Khas Call Girls ☎ 7042364481 independent Escorts Service in delhiHot Call Girls In Sector 58 (Noida)
 
Call me @ 9892124323 Call Girl in Andheri East With Free Home Delivery
Call me @ 9892124323 Call Girl in Andheri East With Free Home DeliveryCall me @ 9892124323 Call Girl in Andheri East With Free Home Delivery
Call me @ 9892124323 Call Girl in Andheri East With Free Home DeliveryPooja Nehwal
 
Why Won't Your Subaru Key Come Out Of The Ignition Find Out Here!
Why Won't Your Subaru Key Come Out Of The Ignition Find Out Here!Why Won't Your Subaru Key Come Out Of The Ignition Find Out Here!
Why Won't Your Subaru Key Come Out Of The Ignition Find Out Here!AutoScandia
 
Delhi Call Girls Vikaspuri 9711199171 ☎✔👌✔ Whatsapp Hard And Sexy Vip Call
Delhi Call Girls Vikaspuri 9711199171 ☎✔👌✔ Whatsapp Hard And Sexy Vip CallDelhi Call Girls Vikaspuri 9711199171 ☎✔👌✔ Whatsapp Hard And Sexy Vip Call
Delhi Call Girls Vikaspuri 9711199171 ☎✔👌✔ Whatsapp Hard And Sexy Vip Callshivangimorya083
 
Chapter-1.3-Four-Basic-Computer-periods.pptx
Chapter-1.3-Four-Basic-Computer-periods.pptxChapter-1.3-Four-Basic-Computer-periods.pptx
Chapter-1.3-Four-Basic-Computer-periods.pptxAnjieVillarba1
 

Recently uploaded (20)

Alina 7042364481 Call Girls Service Pochanpur Colony - independent Pochanpur ...
Alina 7042364481 Call Girls Service Pochanpur Colony - independent Pochanpur ...Alina 7042364481 Call Girls Service Pochanpur Colony - independent Pochanpur ...
Alina 7042364481 Call Girls Service Pochanpur Colony - independent Pochanpur ...
 
Innovating Manufacturing with CNC Technology
Innovating Manufacturing with CNC TechnologyInnovating Manufacturing with CNC Technology
Innovating Manufacturing with CNC Technology
 
Vip Mumbai Call Girls Mumbai Call On 9920725232 With Body to body massage wit...
Vip Mumbai Call Girls Mumbai Call On 9920725232 With Body to body massage wit...Vip Mumbai Call Girls Mumbai Call On 9920725232 With Body to body massage wit...
Vip Mumbai Call Girls Mumbai Call On 9920725232 With Body to body massage wit...
 
如何办理美国西雅图大学毕业证(Seattle毕业证书)成绩单(学位证)原版一比一
如何办理美国西雅图大学毕业证(Seattle毕业证书)成绩单(学位证)原版一比一如何办理美国西雅图大学毕业证(Seattle毕业证书)成绩单(学位证)原版一比一
如何办理美国西雅图大学毕业证(Seattle毕业证书)成绩单(学位证)原版一比一
 
Hot Modals Call Girls (Delhi) Dwarka9711199171✔️ High Class Service 100% Saf...
Hot Modals Call Girls (Delhi) Dwarka9711199171✔️ High Class  Service 100% Saf...Hot Modals Call Girls (Delhi) Dwarka9711199171✔️ High Class  Service 100% Saf...
Hot Modals Call Girls (Delhi) Dwarka9711199171✔️ High Class Service 100% Saf...
 
John deere 425 445 455 Maitenance Manual
John deere 425 445 455 Maitenance ManualJohn deere 425 445 455 Maitenance Manual
John deere 425 445 455 Maitenance Manual
 
Russian Call Girls Delhi Indirapuram {9711199171} Aarvi Gupta ✌️Independent ...
Russian  Call Girls Delhi Indirapuram {9711199171} Aarvi Gupta ✌️Independent ...Russian  Call Girls Delhi Indirapuram {9711199171} Aarvi Gupta ✌️Independent ...
Russian Call Girls Delhi Indirapuram {9711199171} Aarvi Gupta ✌️Independent ...
 
Production documentary.ppt. x
Production documentary.ppt.               xProduction documentary.ppt.               x
Production documentary.ppt. x
 
꧁ ୨ Call Girls In Radisson Blu Plaza Delhi Airport, New Delhi ❀7042364481❀ Es...
꧁ ୨ Call Girls In Radisson Blu Plaza Delhi Airport, New Delhi ❀7042364481❀ Es...꧁ ୨ Call Girls In Radisson Blu Plaza Delhi Airport, New Delhi ❀7042364481❀ Es...
꧁ ୨ Call Girls In Radisson Blu Plaza Delhi Airport, New Delhi ❀7042364481❀ Es...
 
Delhi Call Girls Saket 9711199171 ☎✔👌✔ Whatsapp Hard And Sexy Vip Call
Delhi Call Girls Saket 9711199171 ☎✔👌✔ Whatsapp Hard And Sexy Vip CallDelhi Call Girls Saket 9711199171 ☎✔👌✔ Whatsapp Hard And Sexy Vip Call
Delhi Call Girls Saket 9711199171 ☎✔👌✔ Whatsapp Hard And Sexy Vip Call
 
John Deere 7430 7530 Tractors Diagnostic Service Manual W.pdf
John Deere 7430 7530 Tractors Diagnostic Service Manual W.pdfJohn Deere 7430 7530 Tractors Diagnostic Service Manual W.pdf
John Deere 7430 7530 Tractors Diagnostic Service Manual W.pdf
 
Delhi Call Girls Mayur Vihar 9711199171 ☎✔👌✔ Whatsapp Hard And Sexy Vip Call
Delhi Call Girls Mayur Vihar 9711199171 ☎✔👌✔ Whatsapp Hard And Sexy Vip CallDelhi Call Girls Mayur Vihar 9711199171 ☎✔👌✔ Whatsapp Hard And Sexy Vip Call
Delhi Call Girls Mayur Vihar 9711199171 ☎✔👌✔ Whatsapp Hard And Sexy Vip Call
 
Call Girls In Kirti Nagar 7042364481 Escort Service 24x7 Delhi
Call Girls In Kirti Nagar 7042364481 Escort Service 24x7 DelhiCall Girls In Kirti Nagar 7042364481 Escort Service 24x7 Delhi
Call Girls In Kirti Nagar 7042364481 Escort Service 24x7 Delhi
 
꧁ ୨⎯Call Girls In Ashok Vihar, New Delhi **✿❀7042364481❀✿**Escorts ServiCes C...
꧁ ୨⎯Call Girls In Ashok Vihar, New Delhi **✿❀7042364481❀✿**Escorts ServiCes C...꧁ ୨⎯Call Girls In Ashok Vihar, New Delhi **✿❀7042364481❀✿**Escorts ServiCes C...
꧁ ୨⎯Call Girls In Ashok Vihar, New Delhi **✿❀7042364481❀✿**Escorts ServiCes C...
 
Hauz Khas Call Girls ☎ 7042364481 independent Escorts Service in delhi
Hauz Khas Call Girls ☎ 7042364481 independent Escorts Service in delhiHauz Khas Call Girls ☎ 7042364481 independent Escorts Service in delhi
Hauz Khas Call Girls ☎ 7042364481 independent Escorts Service in delhi
 
Stay Cool and Compliant: Know Your Window Tint Laws Before You Tint
Stay Cool and Compliant: Know Your Window Tint Laws Before You TintStay Cool and Compliant: Know Your Window Tint Laws Before You Tint
Stay Cool and Compliant: Know Your Window Tint Laws Before You Tint
 
Call me @ 9892124323 Call Girl in Andheri East With Free Home Delivery
Call me @ 9892124323 Call Girl in Andheri East With Free Home DeliveryCall me @ 9892124323 Call Girl in Andheri East With Free Home Delivery
Call me @ 9892124323 Call Girl in Andheri East With Free Home Delivery
 
Why Won't Your Subaru Key Come Out Of The Ignition Find Out Here!
Why Won't Your Subaru Key Come Out Of The Ignition Find Out Here!Why Won't Your Subaru Key Come Out Of The Ignition Find Out Here!
Why Won't Your Subaru Key Come Out Of The Ignition Find Out Here!
 
Delhi Call Girls Vikaspuri 9711199171 ☎✔👌✔ Whatsapp Hard And Sexy Vip Call
Delhi Call Girls Vikaspuri 9711199171 ☎✔👌✔ Whatsapp Hard And Sexy Vip CallDelhi Call Girls Vikaspuri 9711199171 ☎✔👌✔ Whatsapp Hard And Sexy Vip Call
Delhi Call Girls Vikaspuri 9711199171 ☎✔👌✔ Whatsapp Hard And Sexy Vip Call
 
Chapter-1.3-Four-Basic-Computer-periods.pptx
Chapter-1.3-Four-Basic-Computer-periods.pptxChapter-1.3-Four-Basic-Computer-periods.pptx
Chapter-1.3-Four-Basic-Computer-periods.pptx
 

Clark CMP50/60/70 Service Manual Section Overview

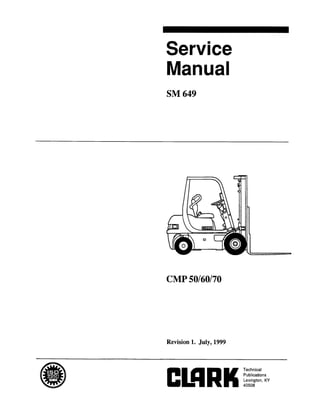
  • 1. Copyrighted Material Intended for CLARK dealers only Do not sell or distribute Service Manual SM.649 CMP50/60/70 Revision 1. July, 1999
  • 2. Copyrighted Material Intended for CLARK dealers only Do not sell or distribute Arrangement and Use of this Manual Clark arranges parts and service procedures by standard- ized Groups. In this manual, Groups are similar to “chap- ters.” Groups are listed in the table of contents on the next page. You can quickly locate a specific point in the manual by using the headers and footers that appear on the pages. The following illustration points out these areas. Each Group begins with a table of contents that shows the Sections contained within the Group. Lengthy Sections also begin with a table of contents showing the topics contained within the Section. Each Group and Section has an identifying name and number, or “ID.” Each page also has a unique ID. The page ID consists of three numbers separated by hyphens. The three numbers represent the Group number, the Section number, and the page number. For example, “00-1-2” on the lower comer of the page indicates Group 00, Section 1. Page 2. This manual is intended for the use of trained service personnel. Please read Group SA, “Safe Maintenance,” and the Operator’s Manual before working on or operat- ing the truck. 0 Copyright Clark Material Handling Company 1999 SM 649, July ‘99
  • 3. Copyrighted Material Intended for CLARK dealers only Do not sell or distribute CONTENTS Contents Contents are listed by Group number and name followed by Section number and name: SA PS 00 01 06 14 16 23 20 SAFE MAINTENANCE 1. Safety 2. Lifting, Jacking, and Blocking 3. Towing PERIODIC SERVICE 1. Maintenance Schedules 2. Planned Maintenance 3. PM Inspection Form PERKINS DIESEL ENGINE COOLING SYSTEM 1. Specifications and Description 2. Troubleshooting TRANSMISSION 34 ELECTRICAL 1. Circuit Diagram 2. Instrument Pod WHEELS AND TIRES 1. Specifications and Description 2. Cushion Wheels and Tires 3. Pneumatic Wheels and Tires 38 BRAKE SYSTEM 1. Specifications 2. Service/Inching Brake 3. Parking Brake DRIVE AXLE 1. Specifications and Description 2. Drive Axle Overhaul 40 25126 STEER SYSTEM 1. Specifications and Description 2. Troubleshooting 3. Steering System Removals & Installations 4. Steering System Pressure Check 5. Steering Unit Overhaul 6. Priority Valve Overhaul 7. Steer Cylinder Overhaul 29130 HYDRAULIC SYSTEM 1. Specifications and Description 2. Troubleshooting 3. Hydraulic Pump Overhaual 4. Control Valve Overhaul UPRIGHTS 1. Specifications and Description 2. Upright Checks and Adjustments 3. Lift Chain Service 4. Removals and Replacements 5. Lift and Tilt Cylinder Overhaul COUNTERWEIGHT 1. Specifications 2. Inspection 3. Removal and Replacement SPECIFICATIONS 1. Specifications SM 649, July ‘99 Contents-iii
  • 4. Copyrighted Material Intended for CLARK dealers only Do not sell or distribute GROUP SA GROUP SA SAFE MAINTENANCE Safety ............................................................................... Section 1 Lifting, Jacking, and Blocking the Truck ..................... Section 2 Towing .............................................................................. Section 2 SM 649, July ‘99 Safe Maintenance
  • 5. Copyrighted Material Intended for CLARK dealers only Do not sell or distribute ElmK Group SA, Safe Maintenance Section 1. Safety Safety Signs and Messages Safe Maintenance Practices Safety signs and messages in this manual and on the lift truck provide instructions and identify specific areas where potential hazards exist and special precautions should be taken. Be sure you know and understand the meaning of these instructions, signs, and messages. Damage to the truck. death, or serious injury to you or other persons may result if these messages are not followed. NOTE This message is used when special informa- tion, instructions or identification is re- quired relating to procedures, equipment, tools, pressures, capacities, and other spe- cial data. The following instructions have been prepared from cur- rent industry and government safety standards applicable to industrial truck operation and maintenance. These rec- ommended procedures specify conditions, methods, and accepted practices that aid in the safe maintenance of in- dustrial trucks. They are listed here for the reference and safety of all workers during maintenance operations. Care- fully read and understand these instructions and the spe- cific maintenance procedures before attempting to do any repair work. When in doubt of any maintenance procedure, please con- tact your local Clark dealer. 1. IMPORTANT Powered industrial trucks can become hazardous if maintenance is neglected. Therefore, suitable mainte- nance facilities, trained personnel, and procedures must be provided. This message is used when special precau- tions should be taken to ensure a correct action or to avoid damage to, or malfunc- tion of, the truck or a component. 2. Maintenance and inspection of all powered industrial trucks shall be done in conformance with the manufacturer’s recommendations. 3. A CAUTION This message is used as a reminder of safety hazards that can result in personal injury if proper precautions are not taken. A scheduled planned maintenance, lubrication, and inspection program shall be followed. 4. Only trained and authorized personnel shall be permit- ted to maintain, repair, adjust, and inspect industrial trucks. Work should be performed in accordance with the manufacturer’s specifications. A WARNING This message is used when a hazard exists that can result in injury or death if proper precautions are not taken. 5. Properly ventilate work area, vent exhaust fumes, and keep shop clean and floor dry. 6. A DANGER This message is used when an extreme haz- ard exists that can result in injury or death or serious injury if proper precautions are not taken. Avoid fire hazards and have fire protection equipment present in the work area. Do not use an open flame to check for level or leakage of fuel, electrolyte, or coolant. Do not use open pans of fuel or flammable cleaning fluids for cleaning parts. 7. Before starting work on truck: The above terms have been adopted by Clark Material Handling Company. The same terms may be used in differ- ent context in service literature supplied directly or indi- rectly by vendors of truck components. a. Raise drive wheels off of floor or disconnect power source and use blocks or other positive truck positioning devices. b. Disconnect battery before working on the electri- cal system. 8. Before working on engine fuel system of gasoline- or diesel-powered trucks, be sure the fuel shut-off valve is closed. SM 649, July ‘99 Safety l SA-l-l
  • 6. Copyrighted Material Intended for CLARK dealers only Do not sell or distribute Group SA, Safe Maintenance ClRRK 9. Operation of the truck to check performance must be conducted in an authorized, safe, clear area. 10. Before starting to drive truck: a. Be in operating position. b. Be sure parking brake is engaged. c. Put direction control in neutral. d. Start engine. e. Check functioning of direction and speed con- trols, steering, brakes, warning devices, and any load handling attachments. 11. 12. Before leaving truck a. Stop truck. b. Put directional control in neutral. c. Apply the parking brake. d. Stop the engine by turning off the ignition circuit. e. Put blocks at the wheels if truck is on an incline. Brakes. steering mechanisms, control mechanisms, warning devices, lights, governors, guards, safety de- vices, and frame members must be carefully and regu- larly inspected and maintained in a safe operating condition. 13. Special trucks or devices designed and approved for hazardous area operation must receive special atten- tion to ensure that maintenance preserves the original, approved, safe-operating features. 14. Fuel systems must be checked for leaks and condition of parts. Extra special consideration must be given in the case of a leak in the fuel system. Action must be taken to prevent the use of the truck until the leak has been corrected. 15. The truck manufacturer’s capacity, operation, and maintenance instruction plates, tags, or decals must be maintained in legible condition. 16. Batteries, motors, controllers, limit switches, protec- General Industrial Standards, OSHA 2206: OSHA Safety tive devices, electrical conductors, and connections and Health Standards (29 CFR 1910), Subpart N-Materials must be inspected and maintained in conformance Handling and Storage, Section 1910.178 Powered Indus- with good practice. Special attention must be paid to trial Trucks. For sale by: Superintendent of Documents, the condition of electrical insulation. U.S. Government Printing Office, Washington, DC 20402. 17. 18. To avoid injury to personnel or damage to the equip- ment. consult the manufacturer’s procedures inreplac- ing contacts on any battery connection. Industrial trucks must be kept in a clean condition to minimize fue hazards and help in the detection of loose or defective parts. 19. 20. 21. Modifications and additions that affect capacity and safe truck operation must not be done without the manufacturer’s prior written approval. Capacity, op- eration and maintenance instruction plates, tags, or decals must be changed accordingly. This is an OSHA requirement. Care must be taken to assure that all replacement parts, including tires, are interchangeable with the original parts and of a quality at least equal to that provided in the original equipment. Parts, including tires, are to be installed per the manufacturer’s procedures. Always use genuine CLARK or CLARK-approved parts. Use special care when removing heavy components from the truck, such as counterweight, seat deck, upright, etc. Be sure that lifting and handling equip- ment is of the correct capacity and in good condition. Also, this removal may upset the stability of the truck. The frame must always be safely blocked for major component removal. NOTE You should also be familiar with additional operating and maintenance safety instruc- tions contained in the following publica- tions: ANSI/ASME B56.1- 1988 Operator Control-Industrial Tow Tractors (Safety Standard For Powered Industrial Trucks). Published by: Society of Mechanical Engineers, United Engineering Center, 345 E. 47th Street, New York, NY 10017. NFPA 505-1982: Fire Safety Standard for Powered Indus- trial Trucks: Type Designations, Areas of Use, Mainte- nance and Operation. Available from: National Fire Protection Assoc., Inc., Batterymarch Park, Quincy, MA 02269. SA-1-2 l Safety SM 649, July ‘99
  • 7. Copyrighted Material Intended for CLARK dealers only Do not sell or distribute CUIRK Group SA, Safe Maintenance Section 2. Lifting, Jacking, and Blocking Safe Parking ................................................................................................................................... 2 Lifting, Jacking, and Blocking Points .......................................................................................... 2 Raising Drive Wheels Off Floor ................................................................................................... 2 Raising Truck with A Hoist .......................................................................................................... 3 Blocking the Upright in Raised Position ...................................................................................... 4 Raising Rear of Truck ................................................................................................................... 4 Raising Entire Truck ...................................................................................~................................ 5 Shipping Tie-Down Instructions ...................................................................................................6 A WARNING Lifting or jacking any large piece of equipment such as your fork truck presents obvious hazards. It must be done with great care and forethought. Consult the truck weight tabulations in Group 40, “Specifications” to ensure that your lifting equipment is of adequate capacity. SM 649, July ‘99 Lifting, Jacking, and Blocking . SA-2-l
  • 8. Copyrighted Material Intended for CLARK dealers only Do not sell or distribute Group SA, Safe Maintenance CWRK Safe Parking Raising Drive Wheels Off Floor Before working on truck: 1. 2. 3. 4. Park truck on a hard, level, and solid surface, such as a concrete floor with no gaps or breaks. Put upright in vertical position and fully lower the forks or attachment. This procedure uses the upright as a lever to lift the drive wheels off the floor and prevent accidents due to inadvert- ent powering of the drive wheels. Park truck safely as described in“Safe Parking.” Block steer wheels. Put all controls in neutral. Turn key switch OFF and remove key. Apply the parking brake and block the wheels. 1. 2. 3. 4. Be sure upright tnmnion bolts are tight. Bolt torques must be 75-80 Nom (55-59 ft-lb). Start the engine. Tilt the upright fully back. Adjust upright height as necessary to put blocking underneath the lower end of the upright. Put a solid 100 x 100 mm (4 x 4 in) hardwood block under the front section of each upright rail. Put a 3-6 mm (.125-.250 in) steel plate on top of each block. A WARNING Defective equipment can cause accidents. All tools and lifting equipment must be in good condition, meet the load capacity re- quirements and have OSHA labels when required. Tools with defects can have fail- ures causing severe injury or death. Lifting, Blocking, and Jacking Points Use the following illustration to locate general lifting, block- ing, and jacking points on the truck. Read the procedures for raising, blocking. or jacking specific components of the truck to make sure you understand the correct, safe proce- dures. LUnder Steer L Under Frame Axle Frame Mount -On Tie Bars of Upright Under Upright A WARNING Do not attempt to lift the truck by the over- head guard or the counterweight. Severe injury may result and the truck can be damaged. 5. Tilt upright fully forward. This raises the drive wheels off the floor. Release the tilt control lever and turn engine OFF. SA-2-2 l Lifting, Jacking, and Blocking SM 649, July ‘99
  • 9. Copyrighted Material Intended for CLARK dealers only Do not sell or distribute CIRRK Group SA, Safe Maintenance 6. Insert blocking under the frame behind the drive wheels or slip wheel cradles under the drive wheels. If using blocking, check for safe clearance between drive wheels and floor and blocks. 7. 8. NOTE When forks are raised as in illustration above, use shop rags, paper, or bright tape on fork tips to signal the danger of trip- ping. Check for stable condition of the truck. Be sure that the blocks are located securely under the truck frame before operating the drive or working on truck. Lower the drive wheels to the floor and remove the blocks by reversing the above procedure. Raising Truck with a Hoist When suitable equipment is available. the front of the truck may be raised by means of a hoist. with wheel cradles placed under the wheels or blocking placed under the frame. 1. 2. A CAUTION When lifting the front of the truck watch truck for signs of lateral instability. It may tip sideways. You may have to support or guide the side of the truck or overhead guard to prevent tipping. Park truck safely as described in “Safe Parking.” Block rear steer wheels. Check trunnion bolts to make sure they are tightened to correct torque. Bolt torques must be 7580N*m (55-59 ft-lb). 3. To raise the front of the truck using the upright, spread two chains on the outer rail tiebar of the upright. 4. A WARNING Chain and hoist used to lift truck should be checked to make sure they are of safe lift- ing capacity. See the truck data plate for information. Slowly lift truck and lower drive wheels onto the cradles or place blocking under frame prop points. 5. When maintenance work is completed, lower the truck to the floor by reversing the lifting procedure. Check to be sure no tools or equipment are under the truck or wheels. SM 649, July ‘99 Lifting, Jacking, and Blocking l SA-2-3
  • 10. Copyrighted Material Intended for CLARK dealers only Do not sell or distribute Group SA, Safe Maintenance CWRK Blocking the Upright In Raised Position This procedure is used to safely provide clearance for access from the front of truck to components on or near the drive axle. Illustrations show upright with forks removed however. fork removal is not necessary 1. 2. 3. 4. 5. 6. Park truck safely as described in “Safe Parking.” Put blocks in front of and behind drive wheels. Put wooden support blocks conveniently near upright rails before raising the upright. Use two 100x 100mm (4x4 in) hardwood blocks or equal, of about 300 x 300 mm (12 in) and 600 x 600 mm (24 in) length. NOTE For standard uprights, block may need length cut to suit. For triple stage uprights, the carriage may be blocked up, as shown. Start engine and raise the upright carriage. Hold the taller block against inner rail and lower the upright until carriage rests on block. Outer Rail Hold the shorter block against the outer rail and lower the upright until inner rail rests on the block. Outer Rail Short Block 7. Reverse the procedure to remove blocking. Raising Rear of Truck The truck may be raised at the rear by jacking and blocking under the center of the frame member at either the front or rear steer axle mounting, or under the center section of the steer axle. Refer to truck data plate for truck weights. 1. A WARNING An incorrectly installed counterweight can move or fall unexpectedly. Never lift or block a truck using the counterweight. Fail- ure to follow procedures outlined in this manual can result in injury or death. Park truck safely as described in “Safe Parking.” Put blocks at front and rear of drive wheels. SA-2-4 l Lifting,Jacking, and Blocking SM 649, July ‘99
  • 11. Copyrighted Material Intended for CLARK dealers only Do not sell or distribute CIRRK Group SA, Safe Maintenance 2. Put a floor jack under the steer axle mounting frame member, centered between the two wheels. A WARNING Never lift the truck by the counterweight. 3. 4. NOTE If there is insufficient clearance under frame for your jack, the truck may first be driven onto shims, such as 25 x 150 x 300 mm (1 x 6 x 12 in) pieces of board, to increase the truck frame underclearance. Raise the truck only ashigh as necessary to perform the maintenance work. Put blocks at both sides of the truck, fully under the frame main side structure. Put the blocks in front of but close to the counterweight and steer wheels for best truck stability. Put equal blocks under each side of the truck to provide a level working position. 5. Lower the truck onto the blocks and remove the jack. A CAUTION Before performing any maintenance, check the truck for stability on the blocks. 6. When maintenance work is completed, lower the rear of truck to the floor by reversing the above procedure and lowering each side of the truck 50 mm (2 in) at a time: l Put jack under frame and raise truck. l Carefully remove blocks and lower truck. l Remove jack and blocks from drive wheels. Raising Entire Truck Refer to truck data plate for truck weights. 1. Park truck safely as described in “Safe Parking.” Lower upright fully. 2. If necessary, drive truck onto boards to increase underclearance. A WARNING SIDE-TO-SIDE TIPOVER. When jacking side of truck, be sure upright is lowered fully and do’not raise one side of the truck more than about 50 mm (2 in) higher than the other, to avoid tipping truck over later- ally. END-TO-END TIPOVER. If the upright and transaxle are removed while the truck is blocked up, the truck will tip backwards due to the heavy counterweight. Both up- right and counterweight must be removed before attempting to raise the truck for transaxle removal. The back of the truck must be supported by blocking under the steer axle to prevent movement. The reverse is also true. If the counter- weight is removed while the truck is up on blocks, the weight of the upright and transaxle will cause the truck to tip on the front blocks and fall forward. SM 649, July ‘99 Lifting, Jacking, and Blocking l SA-2-5
  • 12. Copyrighted Material Intended for CLARK dealers only Do not sell or distribute Group SA, Safe Maintenance ClmK 3. Put the jack under side frame near the center of the truck. 4. 5. IMPORTANT Be sure to put the jack squarely and fully under the main side structure of the frame. Do not put the jack under the outer covers which enclose the fuel and hydraulic sump tanks. Carefully raise the truck one side at a time, only as high as necessary to do the maintenance work and not more than a maximum of 150 mm (6 in) total. Put blocksunder the side frame, at each side ofthejack. Spread the blocks close to the steer and drive wheels for maximum stability. 6. 7. If using one jack, lower the truck onto the blocks and move the jack to the opposite side. Repeat the lifting procedure. Put the same size blocks under each side of the truck so it will be level. A CAUTION Before performing any maintenance work, check the truck for stable condition on the blocking. When maintenancework is completed, lower the en- tire truck to the floor by reversing the lifting procedure. Lower the truck one side at a time, while carefully removing the blocks. Check to be sure no tools or equipment are under the truck or wheels. NOTE Depending on jack height, shims under the tires may be needed for clearance to allow removal of jack. Shipping Tie-Down Instructions Front of Truck a. With Upright and Carriage Installed l Lower the carriage fully. l Put a tie down (e.g., chain) between the carriage fork bars. b. Without an Upright and Carriage Installed l Put a chain across the truck floor plate. Protect truck from chain damage by using covered chain or protective material under the chain at contact points. &. Rear of Truck l Attach the tie down to pocket in bottom of coun- terweight. SA-2-6 l Lifting, Jacking, and Blocking SM 649, July ‘99
  • 13. Copyrighted Material Intended for CLARK dealers only Do not sell or distribute CIRRIC Group SA, Safe Maintenenance Section 3. Towing If your truck is disabled but can be moved freely on its own wheels without further damage. use the following proce- dures to tow the truck safely to a repair area. A WARNING It is important for your safety and to the care of your lift truck to use the proper equipment and carefully follow these rec- ommendations for safe towing. Do not tow a lift truck if there is a problem with the brakes or tires, or if the steering cannot be operated. Do not tow the disabled truck up or down ramps or steep inclines. Do not attempt to tow the disabled truck if traction or weather conditions are poor. Be sure to apply the parking brake or block the drive wheels on the disabled truck while working around it. When possible, raise the carriage (forks) on the dis- abled truck 300 mm (12 in) from the floor or ground. Secure the carriage on the upright with a chain. Use a truck for towing that is of equal or larger capacity than the disabled truck. Carry a partial load on the tow truck for improved traction. 4. 5. 6. Check that the counterweight bolts on both trucks are in place and properly torqued to 340-380 Nom (250- 280 ft-lb). These bolts are madeof special, high-tensile steel and are not commercially available. When neces- sary, replace these bolts only with a genuine Clark replacement part. Use an approved, solid metal tow bar with towing couplers that connect to the towing pins in the counter- weights. NOTE DOT-approved towing equipment is avail- able from your Clark dealer. Release the parking brake on the towed vehicle. Place directional control lever in neutral. Tow the disabled truck backwards. An operator must be on the disabled truck. A CAUTION The power steering will not operate on the disabled truck when the engine is not run- ning. The steering handwheel will be diffi- cult to turn. Tow the truck slowly. Careful towing is necessary to prevent injury to personnel or damage to the disabled truck. The truck should be towed at a speed of less than 8 kph (5 mph, or a moderate walking speed) with a driver in place and steering the disabled truck. Direction of towing for distances of 300 meters (325 yards) or less. Disabled truck with Tow truck moving at 8 kilome- driver in place to steer. ters-per-hour (5 mph) or less. SM 649, July ‘99 Towing l SA-3-1
  • 14. Copyrighted Material Intended for CLARK dealers only Do not sell or distribute Group SA, Safe Maintenance ElmK 9. IMPORTANT Do not lift the disabled truck or any wheels off the floor while the truck is being towed. A WARNING Always engage the parking brake when parking a lift truck. The truck can roll and Park the disabled truck in authorized areas only. Fully lower the forks on the floor, leave the directional control in neutral, turn the ignition switch to OFF, and engage the parking brake. Remove the ignition key and, when necessary, block the wheels to prevent the truck from rolling. cause injury or death to personnel near it. LIFT TRUCK PARKING SA-3-2 l Towing SM 649, July ‘99
  • 15. Copyrighted Material Intended for CLARK dealers only Do not sell or distribute GROUP PS PERIODIC SERVICE Maintenance Schedules .................................................. Section 1 The Planned Maintenance Program ............................. Section 2 The PM Inspection Form ............................................... Section 3 SM 649, July ‘99 Periodic Service
  • 16. Copyrighted Material Intended for CLARK dealers only Do not sell or distribute EUIRK Group PS, Periodic Service Section 1. Maintenance Schedules “Periodic Service” and “Planned Maintenance” The term “periodic service” includes all maintenance tasks that should be performed on a regularly scheduled basis. The term “Planned Maintenance” indicates a formalized program of basic inspections, adjustments, and lubrications that the Clark service organization provides customers at a prescribed interval, usually 50-250 hours. The recommended basic “Planned Maintenance” procedure is given in Section 2 of this Group. The current Section,“Maintenance Schedules,” specifies all maintenance tasks-including Planned Maintenance tasks-that should be performed periodically, and suggests intervals at which they should be performed. Determining Maintenance Intervals Time intervals on the charts on the next four pages and elsewhere in this manual relate to truck operating hours as recorded on the hourmeter, and are based on experience Clark has found to be convenient and suitable under nor- mal operation. Standard operating condition classifications are: Normal Operation: Eight-hour material handling, mostly in buildings or in clean, open air on clean, paved surfaces. Severe Operation: Prolonged operating hours or constant usage. Extreme Operation: In sandy or dusty locations, such as cement plants, lumber mills, and coal dust or stone crushing sites. High-temperature locations, such as steel mills and foundries. Sudden temperature changes, such as constant trips from buildings into the open air, or in refrigeration plants. If the lift truck is used in Severe or extreme operating conditions, the maintenance intervals should be shortened accordingly. IMPORTANT MAINTENANCE INTERVALS. If the lift truck is used in severe or extreme operat- ing conditions, the maintenance intervals should be shortened accordingly. Since the operating environments of lift trucks vary widely, the above descriptions are highly generalized and should be ap- plied as actual conditions dictate. SM 649, July ‘99 Maintenance Schedules l PS-l-l
  • 17. Copyrighted Material Intended for CLARK dealers only Do not sell or distribute Group PS, Periodic Service CIRRK Service Chart/Lubrication Points A decal, similar to the illustration below, is located on the underside of the truck’s engine cover. This decal is a basic guide to periodic maintenance intervals and tasks. A more detailed chart is supplied on the next page. 0 Lubricant 0 Replace cl Check 0 GGrease 0 EO Engine oil 0 TO Transmission oil 0 CO Antifreeze 0 HO Hydraulic oil 0 FO Fuel 0 B0Brake fluid/oil Transmission oil Fuel EverylOhoursordaily ._ Every2OOhoursormonthiy ‘ransmissionoil fitter Mast mounting RH, LHQpoints) Tilt cylinder end RH, LH(2points) - Hydraulic oil - Hydraulic oil filter - Air cleaner - Hydraulic breather Wheel bearing RH, LH(2points) Every 500 hours or every Every 1000 hours or every Every 2000 hours or yearly PS-1-2 . Maintenance Schedules SM 649, July ‘99
  • 18. Copyrighted Material Intended for CLARK dealers only Do not sell or distribute CIRRK Group PS, Periodic Service Recommended Periodic Service Schedule This chart lists maintenance tasks that should be done periodically and the suggested time intervals. Refer to Operator’s Manual for Daily Checks. Period First Every Every Every Every No. month 1 month 3 months 6 months 12 months Items First Every Every Every Every 200 hours 200 hours 600 hours 1000 hours 2000 hours Engine system 1. lnspaction and adjustment (or replacement) 1) Intake/Exhaust valve clearance 2) Belt tension Irl) Engine oil *2) Engine oil filter 0 0 0 0 *3) Coolant 0 lr4) Fuel strainer (Filter) element 0 *4) Air cleaner element n *4) Water separator -. I I I I / 0 I zs If you operate the fork lift in a dusty environment, ,jl” marked items must be checked more NOTE: Oil change interval may be determined by laboratory analysis SM 649, July ‘99 Maintenance Schedules l PS-1-3
  • 19. Copyrighted Material Intended for CLARK dealers only Do not sell or distribute Group PS, Periodic Service ElmK No. Chassis and Attachment First Every Every Every Every month 1 month 3 months 6 months 12 months First Every Every Every Every 200 hours 200 hours 500 hours 1000 hours 2000 hwrs 11. inspection and adjustment(or re Brake pedal and inching pedal clearance Parking brake lever and operation PI I Lii chain tension Carnage bearing Mast bearing Mast operation Tilt and lift cylinder fitting Tilt and lift cylinder operation Hydraulic pump operation Transmission oil Gear oil (diierential and axle end: 0 0 0 0 0 0 0 0 0 I I 0 I 1 0 I. I I I 0 12. Lubrication *l) Lift chain 0 0 3) Mast mounting bushing and pin 0 4) Joints 0 5) Tilt cylinder mounting pin and bearing 0 6) Side roller (Carriage) 0 0 7) Steering axle bearing and arm 0 0 3. Clsanlng ! 1 i -I 1 1) Torque converter intake filter 2) Hydraulic oil tank interior 4. Replacement *l) 1Transmission oil 0 0 z I I 0 I *2) 1Transmission oil filter I I ! I I 0 1 *3) Hydraulic oil 1*4) [ Hydraulic oil filter I 5) 1Hydraulic oil strainer I 6) 1Brake fluid I 0 I I 0 I I * I I 0 I 7) Wheel bearing grease 6) Gear oil (differential and axle end) x If you operate the fork lift in a dusty environment, ‘W marked items must be checked more frequently. l Change oil and filter after the first 50 hours and again after 100 operating hours when the transaxle is new or rebuilt. PS-1-4 l Maintenance Schedules SM 649, July ‘99
  • 20. Copyrighted Material Intended for CLARK dealers only Do not sell or distribute EIRRK Group PS, Periodic Service Section 2. The Planned Maintenance Program This Section defines a set of basic service procedures, known as the “Planned Maintenance Program,” and describes a systematic approach for performing them. Introduction to Planned Maintenance ......................................................................................... 2 PM Intervals ..................................................................................................................................... 2 The PM Form ................................................................................................................................... 2 The Basic PM Procedures ............................................................................................................. 2 Visual Inspection ............................................................................................................................. 3 Decals, Fasteners, and Leaks .................................................................................................... 3 Overhead Guard ........................................................................................................................ 3 Carriage, Load Backrest, and Upright ...................................................................................... 3 Forks ......................................................................................................................................... 3 Brake and Inching Pedal Freeplay ........................................................................................... .4 Wheels and Tires ...................................................................................................................... 4 Functional Tests ............................................................................................................................... 4 Starting System ......................................................................................................................... 4 Engine Shut Down Mode .......................................................................................................... 4 Parking Brake Interlock ............................................................................................................ 4 Accelerator, Brake/Inching System, Direction Control, and Parking Brake ........................... .5 Steering System ........................................................................................................................ 5 Lift Mechanisms and Controls .................................................................................................. 6 Auxiliary Controls .................................................................................................................... 6 Air Cleaning the Truck .................................................................................................................... 6 Truck Chassis Inspection and Lubrication ....................................................................................... 7 Lift Chain Lubrication .................................................................................................................... .7 Upright and Tilt Cylinder Lubrication ............................................................................................. 7 Under-the-Hood Inspection ............................................................................................................. 7 General Checks ......................................................................................................................... 7 Engine Air Cleaner ................................................................................................................... 7 Fluid Checks .................................................................................................................................... 7 Battery ....................................................................................................................................... 7 Engine Cooling System ............................................................................................................ 8 Engine Oil ................................................................................................................................. 8 Hydraulic Fluid Level ............................................................................................................... 8 Critical Fastener Torque Checks ...................................................................................................... 8 Transaxle Fluid Level ............................................................................................................... 8 Stall Test .......................................................................................................................................... 8 Cranking Voltage Test ..................................................................................................................... 8 SM 649, July ‘99 Planned Maintenance l PS-2-1
  • 21. Thank you very much for your reading. Please Click Here. Then Get COMPLETE MANUAL. NO WAITING NOTE: If there is no response to click on the link above, please download the PDF document first and then click on it.
  • 22. Copyrighted Material Intended for CLARK dealers only Do not sell or distribute Group PS, Periodic Service ElmI6 Introduction to Planned Maintenance The Basic PM Procedures A program of regular, routine inspections, lubrication, and other service tasks is important for the long life and trouble- free operation of the lift truck. The Clark service organization offers customers a formal- ized program--called Planned Maintenance, or PM-for performing these tasks. The following procedures outline a systematic approach to performing the PM tasks. These procedures consist of: External visual checks you make as you walk around the truck with it turned off. Operational checks you make while operating the truck. PM Intervals The PM inspections, adjustments, and lubrications are typi- cally performed on each covered truck at 50-250 hour intervals. (See Section 1, in this Group about defining service intervals.) Tests, adjustments, and lubrication you perform with the covers removed. The PM Form A CAUTION l Do not make repairs or adjustments un- As an aid to service technicians performing and document- ing PM inspections, Clark has prepared a “Gas, LPG or Diesel Planned Maintenance Report” form. A black-and- white copy of this form is inserted in Section 3 of this Group. We recommend that you use this form as a checklist and to make a record of your inspection and truck condition. This record can be used to inform the owner of needed repairs and help establish the optimal PM intervals. When you have finished the PM inspections, be sure to give a copy of the report to the person responsible for lift truck maintenance. less authorized to do so. Disconnect the battery ground cable (-) from the engine or frame before work- ing on electrical components. Always wear safety glasses. Wear a safety (hard) hat in industrial plants and in special areas where protec- tion is necessary or required. Remove all jewelry (watch, rings, brace- lets, etc.) before working on the truck. PS-2-2 . Planned Maintenance SM 649, July ‘99
  • 23. Copyrighted Material Intended for CLARK dealers only Do not sell or distribute Glmu Group PS, Periodic Service Visual Inspection Carriage, Load Backrest, and Upright First. perform a visual inspection of the lift truck and its components. Walk around the truck and take note of any obvious damage and maintenance problems. (See Group 34 for detailed inspection procedure.) Inspect the welds on the carriage, load backrest, and up- right for cracks. Be sure that the mounting fasteners are in place and tight. Decals, Fasteners, and Leaks Check for loose fasteners and fittings. Check to be sure all capacity, safety, and warning plates and decals are attached and legible. NOTICE Inspect the upright assembly: rails, carriage rollers, car- riage fork bars, lift chains, and lift and tilt cylinders. Look for obvious wear and maintenance problems and damaged or missing parts. Check for any loose parts or fittings. Check for leaks, any damaged or loose rollers and rail wear (metal flaking). Carefully check the lift chains for wear. rust and corrosion, cracked or broken links, stretching, etc. Check that the lift and carriage chains are correctly ad- justed to have equal tension. Check that the lift chain anchor fasteners and locking means are in place and tight. Be sure all safety guards and chain retainers are in place and not damaged. Inspect the carriage stops and cylinder retainer bolts. Check all welded connections. Do not operate a lift truck with damaged or missing decals and nameplates. Replace them immediately. They contain important information. See Group 40 for decal loca- tions. Inspect all lift line hydraulic connections for leaks. Check the lift cylinder rods for wear marks, grooves and scratches. Check the cylinder seals for leaks. Inspect the truck before and after starting engine for any signs of external leakage: fuel, engine oil or coolant, trans- mission fluid, etc. Check for hydraulic oil leaks and loose fittings. DO NOT USE BARE HANDS TO CHECK. A CAUTION HYDRAULIC FLUID PRESSURE. Do not use your hands to check for hydraulic leak- age. Oil may be hot or under pressure. Fluid under pressure can penetrate your skin and cause serious injury. Overhead Guard Be sure that the overhead guard and any other safety de- vices are in place, undamaged, and attached securely. In- spect welds and structural members for cracks or other damage. Also check for loose or missing fasteners. Forks Inspect the load forks for cracks, breaks, bending and wear as described in Group 34. A WARNING HEEL WEAR. If the fork blade at the heel is worn down by more than 10 percent, the load capacity is reduced and the fork must be replaced. See Group 34 for inspection procedures. SM 649, July ‘99 Planned Maintenance l PS-2-3
  • 24. Copyrighted Material Intended for CLARK dealers only Do not sell or distribute Group PS, Periodic Service C1RRK Inspect the fork latches to ensure that they are in good condition, operate freely, and lock correctly. Wheels and Tires Check the condition of the drive and steer wheels and tires. Remove objects that are embedded in the tread. Inspect the tires for excessive wear or breaks or “chunking out.” Check all wheel lug nuts or bolts to be sure none are loose or missing. Have missing bolts or lug nuts replaced and tightened to correct torque as explained in Group 22. A WARNING Check tire pressure from a position facing the tread of the tire, not the side. Use a long- handled gauge to keep your body away. If tires are low, the tire may require removal and repair. Incorrect (low) tire pressure can reduce truck stability. See “Specifications” in Group 22 for proper inflation pressure. Brake and Inching Pedal Freeplay There should be 4-6 mm (0.157-0.236 in) of pedal freeplay. Both pedals should be 155 mm (6.1 in) in height.. Adjust as described in Group 23. Functional Tests Be sure that: l Parking brake is applied l Directional control is in “N” (neutral). Test the horn, lights, and all other safety equipment. Be sure they are properly mounted and working correctly. Test all controls to ensure that they operate freely and return to neutral properly. Now prepare to start the truck and test its operation. Starting System A 3-position starter switch is standard equipment. Check the neutral start function by placing the direction control lever in forward or reverse and turning key switch to “start” position. The starter must not engage until the direction control lever is moved to “neutral” position. As you start the engine, check the instrument display. All indicator lights should come on for a 2-second lamp check. The seat belt prompt light should remain on for 4 seconds, accompanied by a buzzer sound. The parking brake light should remain on if the brake is set. If the truck has a diesel “ii, I. engine, the glow plug preheat light .~.,, I., ’t .,, ‘,,, ‘.,.;‘5 ,,,;,$: :<,,, : ? ,,,., ” ;; ‘; @ should remain on for 6 seconds. If the lights do not operate as described, .,” :< i _-__- _J? ! ____ 2; ,;. refer to Group 13 to diagnose the _ __._ __ 5,,.$’ problem. Engine Shut Down Mode If the truck’s fault protection system detects low engine oil pressure, excessive transmission oil temperature, or exces- sive engine coolant temperature, the truck will go into “shutdown mode”-a buzzer will sound for 30 seconds, after which the truck will shut itself off. The truck may be restarted, but if the fault condition still exists, the engine will again shutdown in 30 seconds. Parking Brake Interlock The transmission should disengage when the parking brake is on and reengage when the parking brake is released. 1. 2. 3. 4. 5. Apply the parking brake. Start the engine, if it is not already running. Place the direction control in forward or reverse. Make sure the path is clear in the chosen direction. Accelerate briefly. The truck should not move or put any strain on the parking brake if theinterlock system is OK. Release the parking brake (and service brake). Truck should move slowly in selected direction. (On hydro- static truck, depress accelerator pedal slightly.) PS-2-4 l Planned Maintenance SM 649, July ‘99