Install Hyper-V Windows Server 2012 R2
•
0 likes•274 views

For a thorough introduction of Installing hyper v on windows server 2012 refer to this document

Recommended
Recommended
More Related Content
What's hot
What's hot (10)
Viewers also liked
Viewers also liked (12)
Similar to Install Hyper-V Windows Server 2012 R2
Similar to Install Hyper-V Windows Server 2012 R2 (20)
Recently uploaded
Recently uploaded (20)
Install Hyper-V Windows Server 2012 R2
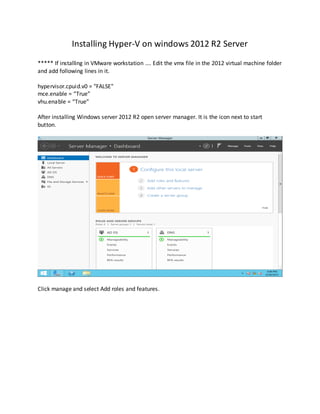
- 1. Installing Hyper-V on windows 2012 R2 Server ***** If installing in VMware workstation …. Edit the vmx file in the 2012 virtual machine folder and add following lines in it. hypervisor.cpuid.v0 = "FALSE" mce.enable = “True” vhu.enable = “True” After installing Windows server 2012 R2 open server manager. It is the icon next to start button. Click manage and select Add roles and features.
- 2. Click Next On the next screen make sure Role based or feature based installation is selected and click Next.
- 3. Click Next on the above screen. On the following screen select the Hyper-V role check box.
- 4. Click Add Features on the following window. Click Next on the below window without selecting anything.
- 5. Click Next on the following screen.
- 6. On the following screen select the check box to create a network. Click Next on the following screen.
- 7. Click next to select the default values. Click Install on the following screen to install Hyper-V role.
- 8. It will take time to install. Once installation is finished, click close on the following screen. Restart the system.
- 9. Once the system restarts log in as administrator. Start Server manager. Click tools and select hyper-v manager.
- 10. Once the Hyper-v manager opens, double click Hyper-V manager to expand. The server name is displayed. Right click on it and create a new virtual machine by selecting New option.