2009 POLARIS RANGER 4X4 500 EFI Service Repair Manualjksemd jksemm
This is the Highly Detailed factory service repair manual for the2009 POLARIS RANGER 4X4 500 EFI, this Service Manual has detailed illustrations as well as step by step instructions,It is 100 percents complete and intact. they are specifically written for the do-it-yourself-er as well as the experienced mechanic.2009 POLARIS RANGER 4X4 500 EFI Service Repair Workshop Manual provides step-by-step instructions based on the complete dis-assembly of the machine. It is this level of detail, along with hundreds of photos and illustrations, that guide the reader through each service and repair procedure. Complete download comes in pdf format which can work under all PC based windows operating system and Mac also, All pages are printable. Using this repair manual is an inexpensive way to keep your vehicle working properly.
Service Repair Manual Covers:
General Information
Maintenance
Engine
Electronic Fuel Injection
Body / Steering / Suspension
Clutching
Final Drive
Transmission
Brakes
Electrical
Wire Diagram
File Format: PDF
Compatible: All Versions of Windows & Mac
Language: English
Requirements: Adobe PDF Reader
NO waiting, Buy from responsible seller and get INSTANT DOWNLOAD, Without wasting your hard-owned money on uncertainty or surprise! All pages are is great to have2009 POLARIS RANGER 4X4 500 EFI Service Repair Workshop Manual.
Looking for some other Service Repair Manual,please check:
https://www.aservicemanualpdf.com/
Thanks for visiting!
YAMAHA F50AET OUTBOARD Service Repair Manual X: 700700-jkksejkdm
This is the Highly Detailed factory service repair manual for theYAMAHA F50AET OUTBOARD, this Service Manual has detailed illustrations as well as step by step instructions,It is 100 percents complete and intact. they are specifically written for the do-it-yourself-er as well as the experienced mechanic.YAMAHA F50AET OUTBOARD Service Repair Workshop Manual provides step-by-step instructions based on the complete dis-assembly of the machine. It is this level of detail, along with hundreds of photos and illustrations, that guide the reader through each service and repair procedure. Complete download comes in pdf format which can work under all PC based windows operating system and Mac also, All pages are printable. Using this repair manual is an inexpensive way to keep your vehicle working properly.
Service Repair Manual Covers:
General information
Specifications
Periodic checks and adjustment
Fuel system
Power unit
Lower unit
Bracket unit
Electrical systems
Index
File Format: PDF
Compatible: All Versions of Windows & Mac
Language: English
Requirements: Adobe PDF Reader
NO waiting, Buy from responsible seller and get INSTANT DOWNLOAD, Without wasting your hard-owned money on uncertainty or surprise! All pages are is great to haveYAMAHA F50AET OUTBOARD Service Repair Workshop Manual.
Looking for some other Service Repair Manual,please check:
https://www.aservicemanualpdf.com/
Thanks for visiting!
8
1989 Yamaha Exciter 570 Snowmobile Service Repair Manualyehnmdm jnkmem
This is the Highly Detailed factory service repair manual for the1989 YAMAHA EXCITER 570 SNOWMOBILE, this Service Manual has detailed illustrations as well as step by step instructions,It is 100 percents complete and intact. they are specifically written for the do-it-yourself-er as well as the experienced mechanic.1989 YAMAHA EXCITER 570 SNOWMOBILE Service Repair Workshop Manual provides step-by-step instructions based on the complete dis-assembly of the machine. It is this level of detail, along with hundreds of photos and illustrations, that guide the reader through each service and repair procedure. Complete download comes in pdf format which can work under all PC based windows operating system and Mac also, All pages are printable. Using this repair manual is an inexpensive way to keep your vehicle working properly.
Service Repair Manual Covers:
General Information
Periodic Inspections and Adjustments
Engine Overhaul
Cooling System
Carburetion
Power Train
Chassis
Electrical
Appendices
File Format: PDF
Compatible: All Versions of Windows & Mac
Language: English
Requirements: Adobe PDF Reader
NO waiting, Buy from responsible seller and get INSTANT DOWNLOAD, Without wasting your hard-owned money on uncertainty or surprise! All pages are is great to have1989 YAMAHA EXCITER 570 SNOWMOBILE Service Repair Workshop Manual.
Looking for some other Service Repair Manual,please check:
https://www.aservicemanualpdf.com/
Thanks for visiting!
8
YAMAHA OUTBOARD F50FET Service Repair Manual SN1000001宇 陈
This is the Highly Detailed factory service repair manual for theYAMAHA OUTBOARD F50FET, this Service Manual has detailed illustrations as well as step by step instructions,It is 100 percents complete and intact. they are specifically written for the do-it-yourself-er as well as the experienced mechanic.YAMAHA OUTBOARD F50FET Service Repair Workshop Manual provides step-by-step instructions based on the complete dis-assembly of the machine. It is this level of detail, along with hundreds of photos and illustrations, that guide the reader through each service and repair procedure. Complete download comes in pdf format which can work under all PC based windows operating system and Mac also, All pages are printable. Using this repair manual is an inexpensive way to keep your vehicle working properly.
Service Repair Manual Covers:
General information
Specifications
Periodic checks and adjustment
Fuel system
Power unit
Lower unit
Bracket unit
Electrical systems
Troubleshooting
Index
File Format: PDF
Compatible: All Versions of Windows & Mac
Language: English
Requirements: Adobe PDF Reader
NO waiting, Buy from responsible seller and get INSTANT DOWNLOAD, Without wasting your hard-owned money on uncertainty or surprise! All pages are is great to haveYAMAHA OUTBOARD F50FET Service Repair Workshop Manual.
Looking for some other Service Repair Manual,please check:
https://www.aservicemanualpdf.com/
Thanks for visiting!
YAMAHA FL225AET OUTBOARD Service Repair Manual X: 000101-jkksejkdm
This is the Highly Detailed factory service repair manual for theYAMAHA FL225AET OUTBOARD, this Service Manual has detailed illustrations as well as step by step instructions,It is 100 percents complete and intact. they are specifically written for the do-it-yourself-er as well as the experienced mechanic.YAMAHA FL225AET OUTBOARD Service Repair Workshop Manual provides step-by-step instructions based on the complete dis-assembly of the machine. It is this level of detail, along with hundreds of photos and illustrations, that guide the reader through each service and repair procedure. Complete download comes in pdf format which can work under all PC based windows operating system and Mac also, All pages are printable. Using this repair manual is an inexpensive way to keep your vehicle working properly.
Service Repair Manual Covers:
General information
Specifications
Periodic checks and adjustments
Fuel system
Power unit
Lower unit
Bracket unit
Electrical systems
Troubleshooting
Index
File Format: PDF
Compatible: All Versions of Windows & Mac
Language: English
Requirements: Adobe PDF Reader
NO waiting, Buy from responsible seller and get INSTANT DOWNLOAD, Without wasting your hard-owned money on uncertainty or surprise! All pages are is great to haveYAMAHA FL225AET OUTBOARD Service Repair Workshop Manual.
Looking for some other Service Repair Manual,please check:
https://www.aservicemanualpdf.com/
Thanks for visiting!
8
5 Warning Signs Your BMW's Intelligent Battery Sensor Needs AttentionBertini's German Motors
IBS monitors and manages your BMW’s battery performance. If it malfunctions, you will have to deal with an array of electrical issues in your vehicle. Recognize warning signs like dimming headlights, frequent battery replacements, and electrical malfunctions to address potential IBS issues promptly.
Things to remember while upgrading the brakes of your carjennifermiller8137
Upgrading the brakes of your car? Keep these things in mind before doing so. Additionally, start using an OBD 2 GPS tracker so that you never miss a vehicle maintenance appointment. On top of this, a car GPS tracker will also let you master good driving habits that will let you increase the operational life of your car’s brakes.
𝘼𝙣𝙩𝙞𝙦𝙪𝙚 𝙋𝙡𝙖𝙨𝙩𝙞𝙘 𝙏𝙧𝙖𝙙𝙚𝙧𝙨 𝙞𝙨 𝙫𝙚𝙧𝙮 𝙛𝙖𝙢𝙤𝙪𝙨 𝙛𝙤𝙧 𝙢𝙖𝙣𝙪𝙛𝙖𝙘𝙩𝙪𝙧𝙞𝙣𝙜 𝙩𝙝𝙚𝙞𝙧 𝙥𝙧𝙤𝙙𝙪𝙘𝙩𝙨. 𝙒𝙚 𝙝𝙖𝙫𝙚 𝙖𝙡𝙡 𝙩𝙝𝙚 𝙥𝙡𝙖𝙨𝙩𝙞𝙘 𝙜𝙧𝙖𝙣𝙪𝙡𝙚𝙨 𝙪𝙨𝙚𝙙 𝙞𝙣 𝙖𝙪𝙩𝙤𝙢𝙤𝙩𝙞𝙫𝙚 𝙖𝙣𝙙 𝙖𝙪𝙩𝙤 𝙥𝙖𝙧𝙩𝙨 𝙖𝙣𝙙 𝙖𝙡𝙡 𝙩𝙝𝙚 𝙛𝙖𝙢𝙤𝙪𝙨 𝙘𝙤𝙢𝙥𝙖𝙣𝙞𝙚𝙨 𝙗𝙪𝙮 𝙩𝙝𝙚 𝙜𝙧𝙖𝙣𝙪𝙡𝙚𝙨 𝙛𝙧𝙤𝙢 𝙪𝙨.
Over the 10 years, we have gained a strong foothold in the market due to our range's high quality, competitive prices, and time-lined delivery schedules.
Symptoms like intermittent starting and key recognition errors signal potential problems with your Mercedes’ EIS. Use diagnostic steps like error code checks and spare key tests. Professional diagnosis and solutions like EIS replacement ensure safe driving. Consult a qualified technician for accurate diagnosis and repair.
Core technology of Hyundai Motor Group's EV platform 'E-GMP'Hyundai Motor Group
What’s the force behind Hyundai Motor Group's EV performance and quality?
Maximized driving performance and quick charging time through high-density battery pack and fast charging technology and applicable to various vehicle types!
Discover more about Hyundai Motor Group’s EV platform ‘E-GMP’!
What Exactly Is The Common Rail Direct Injection System & How Does It WorkMotor Cars International
Learn about Common Rail Direct Injection (CRDi) - the revolutionary technology that has made diesel engines more efficient. Explore its workings, advantages like enhanced fuel efficiency and increased power output, along with drawbacks such as complexity and higher initial cost. Compare CRDi with traditional diesel engines and discover why it's the preferred choice for modern engines.
Comprehensive program for Agricultural Finance, the Automotive Sector, and Empowerment . We will define the full scope and provide a detailed two-week plan for identifying strategic partners in each area within Limpopo, including target areas.:
1. Agricultural : Supporting Primary and Secondary Agriculture
• Scope: Provide support solutions to enhance agricultural productivity and sustainability.
• Target Areas: Polokwane, Tzaneen, Thohoyandou, Makhado, and Giyani.
2. Automotive Sector: Partnerships with Mechanics and Panel Beater Shops
• Scope: Develop collaborations with automotive service providers to improve service quality and business operations.
• Target Areas: Polokwane, Lephalale, Mokopane, Phalaborwa, and Bela-Bela.
3. Empowerment : Focusing on Women Empowerment
• Scope: Provide business support support and training to women-owned businesses, promoting economic inclusion.
• Target Areas: Polokwane, Thohoyandou, Musina, Burgersfort, and Louis Trichardt.
We will also prioritize Industrial Economic Zone areas and their priorities.
Sign up on https://profilesmes.online/welcome/
To be eligible:
1. You must have a registered business and operate in Limpopo
2. Generate revenue
3. Sectors : Agriculture ( primary and secondary) and Automative
Women and Youth are encouraged to apply even if you don't fall in those sectors.
What Does the PARKTRONIC Inoperative, See Owner's Manual Message Mean for You...Autohaus Service and Sales
Learn what "PARKTRONIC Inoperative, See Owner's Manual" means for your Mercedes-Benz. This message indicates a malfunction in the parking assistance system, potentially due to sensor issues or electrical faults. Prompt attention is crucial to ensure safety and functionality. Follow steps outlined for diagnosis and repair in the owner's manual.
Why Is Your BMW X3 Hood Not Responding To Release CommandsDart Auto
Experiencing difficulty opening your BMW X3's hood? This guide explores potential issues like mechanical obstruction, hood release mechanism failure, electrical problems, and emergency release malfunctions. Troubleshooting tips include basic checks, clearing obstructions, applying pressure, and using the emergency release.
"Trans Failsafe Prog" on your BMW X5 indicates potential transmission issues requiring immediate action. This safety feature activates in response to abnormalities like low fluid levels, leaks, faulty sensors, electrical or mechanical failures, and overheating.
In this presentation, we have discussed a very important feature of BMW X5 cars… the Comfort Access. Things that can significantly limit its functionality. And things that you can try to restore the functionality of such a convenient feature of your vehicle.
What Does the Active Steering Malfunction Warning Mean for Your BMWTanner Motors
Discover the reasons why your BMW’s Active Steering malfunction warning might come on. From electrical glitches to mechanical failures and software anomalies, addressing these promptly with professional inspection and maintenance ensures continued safety and performance on the road, maintaining the integrity of your driving experience.
What Does the Active Steering Malfunction Warning Mean for Your BMW
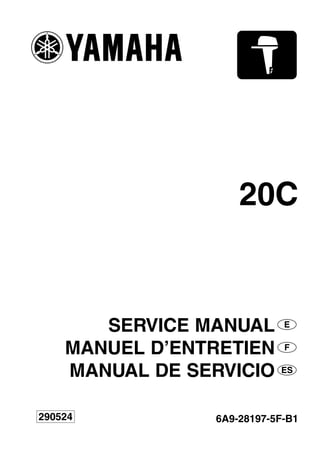
Yamaha 20 c outboard service repair manual
1. 20C
SERVICE MANUAL
MANUEL D’ENTRETIEN
MANUAL DE SERVICIO
6A9-28197-5F-B1
290524
YAMAHA MOTOR CO., LTD.
Printed in Japan
July. 2003 – 1.1 × 1 !
(E, F, S) Printed on recycled paper
E
F
ES
20C
6A9-7-5F-B1-Cover 6/27/03 2:27 PM Page 1
4. E
CONTENTS
CHAPTER 1
GENERAL INFORMATION
HOW TO USE THIS MANUAL...................................................................................1-1
MANUAL FORMAT...............................................................................................1-1
THE ILLUSTRATIONS..........................................................................................1-1
REFERENCES .....................................................................................................1-2
SPECIFICATIONS ................................................................................................1-2
WARNINGS, CAUTIONS AND NOTES................................................................1-3
SYMBOLS.............................................................................................................1-4
IDENTIFICATION........................................................................................................1-5
SERIAL NUMBER.................................................................................................1-5
ENGINE SERIAL NUMBER..................................................................................1-5
STARTING SERIAL NUMBERS ...........................................................................1-5
SAFETY WHILE WORKING ......................................................................................1-6
FIRE PREVENTION .............................................................................................1-6
VENTILATION.......................................................................................................1-6
SELF-PROTECTION ............................................................................................1-7
OILS, GREASES AND SEALING FLUIDS ...........................................................1-7
GOOD WORKING PRACTICES...........................................................................1-8
DISASSEMBLY AND ASSEMBLY ........................................................................1-8
SPECIAL TOOLS .....................................................................................................1-10
SPECIAL TOOLS FOR TUNE-UP......................................................................1-10
SPECIAL TOOLS FOR ENGINE SERVICE .......................................................1-10
SPECIAL TOOLS FOR CRANK JIG ASSY <P/N : 90890-02421> ....................1-10
SPECIAL TOOLS FOR LOWER UNIT SERVICE...............................................1-11
SEALING AGENTS AND LUBRICANTS ............................................................1-11
CHAPTER 2
SPECIFICATIONS
GENERAL SPECIFICATIONS ...................................................................................2-1
MAINTENANCE SPECIFICATIONS ..........................................................................2-3
POWER UNIT.......................................................................................................2-3
LOWER UNIT .......................................................................................................2-4
ELCTRICAL ..........................................................................................................2-5
DIMENSIONS .......................................................................................................2-6
5. F ES
CONTENU
CHAPITRE 1
INFORMATIONS
GENERALES
MODE D’UTILISATION DU
MANUEL.........................................1-1
PRESENTATION DU
MANUEL ....................................1-1
ILLUSTRATIONS.......................1-1
REFERENCES ............................1-2
SPECIFICATIONS......................1-2
AVERTISSEMENT, ATTENTION,
N.B...............................................1-3
SYMBOLES................................1-4
IDENTIFICATION.........................1-5
NUMERO DE SERIE..................1-5
NUMERO DE SERIE DU
MOTEUR.....................................1-5
NUMERO DEBUTANT LA
SERIE ..........................................1-5
MESURES DE SECURITE...........1-6
MESURES DE SECURITE
CONTRE LES INCENDIES.......1-6
AERATION .................................1-6
PROTECTION.............................1-7
HUILES, GRAISSES ET
LIQUIDES D’ETANCHEITE .....1-7
NOTES CONCERNANT L’OU-
TILLAGE ET LES PIECES........1-8
DEMONTAGE ET
ASSEMBLAGE...........................1-8
OUTILLAGE SPECIAL..............1-10
OUTILAGE SPECIAL – MISE AU
POINT........................................1-10
OUTILLAGE SPECIAL –
ENTRETIEN DU MOTEUR.....1-10
OUTILAG SPECIAL –
ENSEMBLE DE GABARIT DE
MANIVELLIE
<P/N. 90890-02421> .................1-10
OUTILLAGE SPECIAL –
ENTRETIEN DU BLOC
INFERIEUR ..............................1-11
LIQUIDES D’ETANCHEITE ET
LUBRIFIANTS .........................1-11
CONTENIDO
CAPITULO 1
INFORMACION
GENERAL
COMO UTILIZAR ESTE
MANUAL.........................................1-1
FORMATO DEL MANUAL.......1-1
LAS ILUSTRACIONES .............1-1
REFERENCIAS ..........................1-2
ESPECIFICACIONES.................1-2
ATENCIONES, PRECAUCIONES
Y NOTAS ....................................1-3
SIMBOLOS.................................1-4
IDENTIFICACION........................1-5
NUMERO DE SERIE .................1-5
NUMERO DE SERIE DEL
MOTOR.......................................1-5
NUMEROS DE SERIE DE
COMIENZO ................................1-5
MEDIDAS DE SEGURIDAD........1-6
PREVENCION CONTRA
INCENDIOS................................1-6
VENTILACION ..........................1-6
PROTECCION ............................1-7
ACEITES, GRASAS Y LIQUIDOS
PARA JUNTAS ...........................1-7
ALGUNOS CONSEJOS .............1-8
DESMONTAJE Y MONTAJE ....1-8
HERRAMIENTAS
ESPECIALES ...............................1-10
HERRAMIENTAS ESPECIALES
PARA LA PUESTA A
PUNTO......................................1-10
HERRAMIENTAS ESPECIALES
PARA EL MANTENIMIENTO
DEL MOTOR ............................1-10
HERRAMIENTAS ESPECIALES
PARA EL CONJUNTO DE
PLANTILLA DEL CIGUENAL
<P/N. 90890-02421>.................1-10
HERRAMIENTAS ESPECIALES
PARA EL MANTENIMIENTO DE
LA UNIDAD INFERIOR..........1-11
PASTAS PARA JUNTAS Y
LUBRICANTES........................1-11
CHAPITRE 2
SPECIFICATIONS
SPECIFICATIONS
GENERALES..................................2-1
SPECIFICATIONS
D’ENTRETIEN...............................2-3
BLOC DE PROPULSION ET
D’ALIMENTATION....................2-3
EMBASE .....................................2-4
ELECTRIQUES...........................2-5
DIMENSIONS.............................2-6
CAPITULO 2
ESPECIFICACIONES
ESPECIFICACIONES
GENERALES..................................2-1
ESPECIFICACIONES DE
MANTENIMIENTO ......................2-3
MOTOR.......................................2-3
COLA ..........................................2-4
SISTEMA ELECTRICO.............2-5
DIMENSIONES ..........................2-6
6. E
TIGHTENING TORQUE .............................................................................................2-8
GENERAL TORQUES................................................................................................2-8
CHAPTER 3
GENERAL SERVICE
PREDELIVERY SERVICE..........................................................................................3-1
CONTENTS ..........................................................................................................3-1
PACKING LISTS...................................................................................................3-1
ELECTRIC WIRING..............................................................................................3-2
FUEL LINE............................................................................................................3-3
GEAR OIL LEVEL.................................................................................................3-4
OPERATION OF CONTROLS AND MOVING PARTS.........................................3-4
FUEL LEAKAGE...................................................................................................3-5
WATER LEAKAGE ...............................................................................................3-5
EXHAUST LEAKAGE ...........................................................................................3-5
ENGINE AND LOWER UNIT NOISE....................................................................3-5
IDLE-SPEED.........................................................................................................3-5
IGNITION TIMING ................................................................................................3-5
MOTOR EXTERIOR .............................................................................................3-5
INSTRUCTING THE NEW OWNER.....................................................................3-5
PERIODIC SERVICE..................................................................................................3-6
MAINTENANCE SCHEDULE...............................................................................3-6
ANODE .................................................................................................................3-6
CARBURETTOR...................................................................................................3-7
CYLINDER HEAD BOLTS, ENGINE MOUNTING BOLTS AND
FLYWHEEL NUT ..................................................................................................3-7
FUEL FILTER........................................................................................................3-7
FUEL TANK AND FUEL LINE...............................................................................3-8
GEAR OIL.............................................................................................................3-8
IDLE-SPEED.........................................................................................................3-8
IGNITION TIMING ADJUSTMENT .......................................................................3-9
CARBURETTOR CONTROL LINK ADJUSTMENT............................................3-13
PROPELLER ......................................................................................................3-13
SPARK PLUG .....................................................................................................3-14
START-IN-GEAR PROTECTION ADJUSTMENT...............................................3-14
THROTTLE CONTROL LINK ADJUSTMENT ....................................................3-14
7. F ES
COUPLES DE SERRAGE.............2-8
COUPLES GENERAUX................2-8
CHAPITRE 3
SERVICE GENERAL
SERVICE AVANT LIVRAISON ...3-1
CONTENU ..................................3-1
LISTE DE COLISAGE ...............3-1
CIRCUIT ELECTRIQUE............3-2
TUYAU D’ALIMENTATION .....3-3
NIVEAU DE L’HUILE DE
TRANSMISSION........................3-4
FONCTIONNEMENT DES
COMMANDES ET DES PARTIES
MOBILES....................................3-4
FUITE DE CARBURANT..........3-5
FUITE D’EAU.............................3-5
FUITE D’ECHAPPEMENT........3-5
BRUIT DU MOTEUR ET DU
BOITIER D’HELICE..................3-5
RALENTI ....................................3-5
REGLAGE DE L’ALLUMAGE..3-5
ASPECT EXTERIEUR DU
MOTEUR.....................................3-5
INSTRUCTIONS A
L’UTILISATEUR ........................3-5
ENTRETIEN PERIODIQUE........3-6
PERIODICITE
D’ENTRETIEN ...........................3-6
ANODE .......................................3-6
CARBURATEUR........................3-7
BOULONS DE LA CULASSE,
BOULONS DE FIXATION DU
MOTEUR ET ECROU DU
VOLANT.....................................3-7
FILTRE A CARBURANT...........3-7
RESERVOIR ET TUYAU
D’ALIMENTATION....................3-8
HUILE DE TRANSMISSION ....3-8
RALENTI ....................................3-8
CALAGE DE L’ALLUMAGE....3-9
REGLAGE DE LA BIELLETTE
DE COMMANDE DU
CARBURATEUR......................3-13
HELICE .....................................3-13
BOUGIE ...................................3-14
REGLAGE DU DISPOSITIF DE
PROTECTION CONTRE LE
DEMARRAGE EN VITESSE...3-14
REGLAGE DE LA TIGE
D’ACCELERATEUR ................3-14
PARES DE APRIETE ....................2-8
TORSIONES GENERALE ...........2-8
CAPITULO 3
MANTENIMIENTO
GENERAL
MANTENIMIENTO PREVIO A LA
ENTREGA.......................................3-1
CONTENIDO..............................3-1
LISTA DE EMBALAJE..............3-1
CABLEADO ELECTRICO ........3-2
TUBO DE LLEGADA DEL
COMBUSTIBLE.........................3-3
NIVEL DE ACEITE DE LA CAJA
DE CAMBIOS.............................3-4
FUNCIONAMIENTO DE LOS
MANDOS Y LAS PIEZAS
MOVILES....................................3-4
FUGAS DE COMBUSTIBLE ....3-5
FUGAS DE AGUA......................3-5
FUGAS DE ESCAPE..................3-5
RUIDOS DEL MOTOR Y LA
UNIDAD INFERIOR..................3-5
VELOCIDAD DE RALENTI .....3-5
PUESTA A PUNTO DEL
ENCENDIDO..............................3-5
EXTERIOR DEL MOTOR .........3-5
INSTRUCCIONES PARA EL
NUEVO PROPIETARIO.............3-5
MANTENIMIENTO
PERIODICO ...................................3-6
GUIDA DE
MANTENIMIENTO ...................3-6
ANODO.......................................3-6
CABURADOR ............................3-7
PERNOS DE LA CULATA,
PERNOS DE SUJECION DEL
MOTOR Y TUERCA DEL
VOLANTE...................................3-7
FILTRO DE COMBUSTIBLE....3-7
DEPOSITO DE COMBUSTIBLE
Y TUBO DE LLEGADA DEL
COMBUSTIBLE.........................3-8
ACEITE DE LA CAJA DE
CAMBIOS...................................3-8
VELOCIDAD DE RALENTI .....3-8
AJUSTE DEL REGLAJE DE
ENCENDIDO..............................3-9
AJUSTE DE LA ARTICULACION
DE CONTROL DEL
CARBURADOR........................3-13
HELICE.....................................3-13
BUJIA........................................3-14
AJUSTE DE LA PROTECCION
CONTRA ARRANQUE CON
MARCHA PUESTA..................3-14
AJUSTE DE LA ARTICULACION
DE CONTROL DEL
ACELERADOR.........................3-14
8. E
CHAPTER 4
FUEL SYSTEM
FUEL SYSTEM...........................................................................................................4-1
EXPLODED DIAGRAM ........................................................................................4-1
CLEANING AND INSPECTION............................................................................4-3
INSTALLATION.....................................................................................................4-5
CARBURETTOR ........................................................................................................4-6
EXPLODED DIAGRAM ........................................................................................4-6
REMOVAL AND DISASSEMBLY..........................................................................4-7
INSPECTION........................................................................................................4-8
ASSEMBLY...........................................................................................................4-9
INSTALLATION...................................................................................................4-10
CHAPTER 5
POWER UNIT
EXPLODED DIAGRAM..............................................................................................5-1
PREPARATION FOR THE OVERHAUL ....................................................................5-2
REMOVAL ..................................................................................................................5-2
DISASSEMBLY ..........................................................................................................5-3
CHECKING THE CRANKSHAFT .......................................................................5-14
INSPECTION............................................................................................................5-15
CYLINDER HEAD...............................................................................................5-15
CYLINDER BLOCK ............................................................................................5-16
PISTON...............................................................................................................5-17
PISTON RING ....................................................................................................5-19
PISTON PIN AND SMALL END BEARING ........................................................5-20
CRANKSHAFT....................................................................................................5-20
REED VALVE......................................................................................................5-21
THERMOSTAT....................................................................................................5-22
BALL BEARING..................................................................................................5-22
ASSEMBLY AND ADJUSTMENT ............................................................................5-23
BEARING, OILSEAL AND O-RING ....................................................................5-23
PISTON...............................................................................................................5-23
SMALL END BEARINGS AND PISTON ASSEMBLY.........................................5-24
CRANK CYLINDER ASSEMBLY........................................................................5-25
CYLINDER HEAD AND EXHAUST COVER ......................................................5-25
INTAKE MANIFOLD ...........................................................................................5-26
9. F ES
CHAPITRE 4
SYSTEME
D’ALIMENTATION
SYSTEME D’ALIMENTATION ..4-1
VUE ECLATEE...........................4-1
NETTOYAGE ET
VERIFICATION..........................4-3
INSTALLATION.........................4-5
CARBURATEUR............................4-6
VUE ECLATEE...........................4-6
DEPOSE ET DEMONTAGE ......4-7
VERIFICATION..........................4-8
ASSEMBLAGE...........................4-9
INSTALLATION.......................4-10
CHAPITRE 5
MOTEUR
VUE ECLATEE ..............................5-1
AVANT LA REVISION..................5-2
DEPOSE ..........................................5-2
DEMONTAGE ................................5-3
VERIFICATION DU
VILEBREQUIN.........................5-14
VERIFICATION...........................5-15
CULASSE..................................5-15
BLOC-CYLINDRE ...................5-16
PISTON .....................................5-17
SEGMENTS DE PISTON.........5-19
AXE DE PISTON ET BAGUE DE
PIED DE BIELLE .....................5-20
VILEBREQUIN.........................5-20
CLAPETS..................................5-21
THERMOSTAT .........................5-22
ROULEMENTS A BILLES ......5-22
ASSEMBLAGE ET REGLAGE..5-23
ROULEMENT, JOINT D’HUILE
ET JOINT TORIQUE................5-23
PISTON .....................................5-23
ROULEMENT DE PIED DE
BIELLE ET PISTON.................5-24
EMBIELLAGE DU
BLOC-CYLINDRE ...................5-25
CULASSE ET COUVERCLE
D’ECHAPPEMENT..................5-25
COLLECTEUR
D’ADMISSION.........................5-26
CAPITULO 4
SISTEMA DE
ALIMENTACION DE
COMBUSTIBLE
SISTEMA DE ALIMENTACION
DE COMBUSTIBLE......................4-1
DIAGRAMA DETALLADO ......4-1
LIMPIEZA E INSPECCION ......4-3
INSTALACION...........................4-5
CARBURADOR .............................4-6
DIAGRAMA DETALLADO ......4-6
EXTRACCION Y
DESMONTAJE ...........................4-7
INSPECCION..............................4-8
MONTAJE...................................4-9
INSTALACION.........................4-10
CAPITULO 5
MOTOR
DIAGRAMA DETALLADO..........5-1
PREPARACION PARA SU
REVISION.......................................5-2
EXTRACCION ...............................5-2
DESMONTAJE...............................5-3
COMPROBACIÓN DEL
CIGÜEÑAL...............................5-14
INSPECCION ...............................5-15
CULATA....................................5-15
BLOQUE MOTOR....................5-16
PISTON .....................................5-17
SEGMENTOS ...........................5-19
EJE DE PISTON Y COJINETE
DEL PIE DE BIELA.................5-20
CIGÜEÑAL...............................5-20
VALVULA DE LENGÜETAS ..5-21
TERMOSTATO .........................5-22
RODAMIENTO DE BOLAS ....5-22
MONTAJE Y AJUSTE.................5-23
COJINETE, RETEN DE ACEITE,
JUNTA TORICA Y ENGRANAJE
IMPULSOR DE LA BOMBA DE
ACEITE .....................................5-23
PISTON .....................................5-23
COJINETES DEL PIE DE BIELA
Y PISTON .................................5-24
COJINETES DEL CILINDRO DEL
CIGÜEÑAL...............................5-25
CULATA Y CUBIERTA DEL
ESCAPE ....................................5-25
COLECTOR DE ADMISION...5-26
10. E
FUEL SYSTEM AND ELECTRICAL SYSTEM ...................................................5-26
INSTALLATION ........................................................................................................5-26
RECOIL STARTER...................................................................................................5-27
REMOVAL AND DISASSEMBLY........................................................................5-28
INSPECTION......................................................................................................5-29
ASSEMBLY.........................................................................................................5-30
INSTALLATION...................................................................................................5-32
CHAPTER 6
LOWER UNIT
EXPLODED DIAGRAM..............................................................................................6-1
REMOVAL ..................................................................................................................6-2
DISASSEMBLY ..........................................................................................................6-2
INSPECTION ..............................................................................................................6-6
GEAR CASE.........................................................................................................6-6
BEARING HOUSING............................................................................................6-6
RING-NUT ............................................................................................................6-6
WATER PUMP HOUSING....................................................................................6-6
IMPELLER ............................................................................................................6-7
OIL-SEAL COVER................................................................................................6-7
GEARS .................................................................................................................6-7
BEARINGS ...........................................................................................................6-7
CLUTCH DOG AND COMPONENTS...................................................................6-7
DRIVE AND PROPELLER SHAFTS ....................................................................6-8
DRIVE SHAFT SLEEVE.......................................................................................6-8
SHIFT-PLUNGER, SHIFT-SHAFT, AND BOOT ...................................................6-8
PROPELLER AND ANODE ..................................................................................6-8
ASSEMBLY AND ADJUSTMENT ..............................................................................6-9
SHIM SELECTION ...............................................................................................6-9
BACKLASH.........................................................................................................6-12
ASSEMBLY.........................................................................................................6-15
WATER PUMP INSTALLATION..........................................................................6-18
LOWER UNIT LEAKAGE CHECK......................................................................6-19
INSTALLATION ........................................................................................................6-19
11. F ES
CIRCUIT D’ALIMENTATION
ET EQUIPEMENT
ELECTRIQUE...........................5-26
INSTALLATION ..........................5-26
LANCEUR.....................................5-27
DEPOSE ET DEMONTAGE ....5-28
VERIFICATION........................5-29
ASSEMBLAGE.........................5-30
INSTALLATION.......................5-32
CHAPITRE 6
BOITIER D’HELICE
VUE ECLATEE ..............................6-1
DEPOSE ..........................................6-2
DEMONTAGE ................................6-2
VERIFICATION.............................6-6
BOITIER D’HELICE..................6-6
BOITIER DE ROULEMENT......6-6
ECROU A BAGUE......................6-6
BOITIER DE LA POMPE A
EAU .............................................6-6
ROTOR ........................................6-7
COUVERCLE DU JOINT A
HUILE .........................................6-7
ENGRENAGE .............................6-7
ROULEMENTS...........................6-7
CRABOT D’EMBRAYAGE........6-7
ARBRES DE TRANSMISSION
ET D’HELICE.............................6-8
MANCHON DE L’ARBRE DE
TRANSMISSION........................6-8
PLONGEUR D’INVERSEUR,
TRINGLE D’INVERSEUR ET
SOUFFLET..................................6-8
HELICE ET ANODE ..................6-8
ASSEMBLAGE ET REGLAGE....6-9
SELECTION DES CALES
D’EPAISSEUR ............................6-9
JEU ............................................6-12
ASSEMBLAGE.........................6-15
INSTALLATION DE LA POMPE
A EAU .......................................6-18
CONTROLE D’ETANCHEITE
DU BLOC INFERIEUR............6-19
INSTALLATION ..........................6-19
SISTEMA DE ALIMENTACION
DE COMBUSTIBLE Y SISTEMA
ELECTRICO .............................5-26
INSTALACION.............................5-26
MOTOR DE ARRANQUE DE
RETROCESO ...............................5-27
EXTRACCION
DESMONTAJE .........................5-28
INSPECCION............................5-29
MONTAJE.................................5-30
INSTALACION.........................5-32
CAPITULO 6
UNIDAD INFERIOR
DIAGRAMA DETALLADO..........6-1
EXTRACCION ...............................6-2
DESMONTAJE...............................6-2
INSPECCION .................................6-6
CAJA DE ENGRANAJES ..........6-6
CAJA DE RODAMIENTOS .......6-6
TUERCA DE ANILLO...............6-6
CAJA DE LA BOMBA DE
AGUA..........................................6-6
ROTOR........................................6-7
CUBIERTA DE LA JUNTA DE
ACEITE .......................................6-7
ENGRANAJES............................6-7
COJINETES ................................6-7
EMBRAGUE DE DIENTES Y
COMPONENTES........................6-7
EJE MOTOR Y EJE DE LA
HELICE.......................................6-8
CAMISA DEL EJE MOTOR......6-8
EMBOLO DE CAMBIO, EJE DE
CAMBIOS Y FUELLE DE LA
VARILLA DE CAMBIO.............6-8
HELICE Y ANODO....................6-8
MONTAJE Y AJUSTE...................6-9
SELECCION DE LAMINILLAS
DE AJUSTE.................................6-9
CONTRAPRESION ..................6-12
MONTAJE.................................6-15
INSTALACION DE LA BOMBA
DE AGUA..................................6-18
COMPROBACION DE FUGAS
EN LA UNIDAD INFERIOR ...6-19
INSTALACION.............................6-19
12. E
CHAPTER 7
BRACKET UNIT
EXPLODED DIAGRAM..............................................................................................7-1
REMOVAL ..................................................................................................................7-2
DISASSEMBLY ..........................................................................................................7-3
INSPECTION ..............................................................................................................7-4
MOUNTING-BOLT................................................................................................7-4
RUBBER MOUNTS ..............................................................................................7-4
COLLAR................................................................................................................7-4
TILT LOCK PLATES .............................................................................................7-4
LEVERS................................................................................................................7-4
ASSEMBLY ................................................................................................................7-5
INSTALLATION ..........................................................................................................7-5
CHAPTER 8
ELECTRICAL SYSTEM
ELECTRICAL COMPONENTS ..................................................................................8-1
WIRING DIAGRAM ....................................................................................................8-2
REMOVAL ..................................................................................................................8-3
MAGNETO BASE .................................................................................................8-3
CLEANING, INSPECTION AND REPAIR..................................................................8-5
SPARK-PLUG.......................................................................................................8-5
PULSER COIL......................................................................................................8-5
CHARGE COIL.....................................................................................................8-5
LIGHTING COIL (OPTION) ..................................................................................8-5
IGNITION COIL ....................................................................................................8-6
REPLACEMENT OF SPARK-PLUG CAP ............................................................8-6
CDI UNIT ..............................................................................................................8-7
RECTIFIER...........................................................................................................8-8
ENGINE STOP LANYARD SWITCH ....................................................................8-8
INSTALLATION ..........................................................................................................8-9
FLYWHEEL MAGNETO........................................................................................8-9
13. F ES
CHAPITRE 7
SUPPORT
VUE ECLATEE ..............................7-1
DEPOSE ..........................................7-2
DEMONTAGE ................................7-3
VERIFICATION.............................7-4
VIS DE MONTAGE....................7-4
SUPPORTS ELASTIQUES.........7-4
MANCHETTES ..........................7-4
ETRIERS DE VERROUILLAGE
D’INCLINAISON........................7-4
LEVIERS.....................................7-4
ASSEMBLAGE...............................7-5
INSTALLATION ............................7-5
CHAPITRE 8
EQUIPEMENT
ELECTRIQUE
EQUIPEMENT ELECTRIQUE ...8-1
SCHEMA DE
RACCORDEMENT........................8-2
DEPOSE ..........................................8-3
MAGNETO..................................8-3
NETTOYAGE, VERIFICATION ET
REPARATION ................................8-5
BOUGIE ......................................8-5
BOBINES D’IMPULSIONS.......8-5
BOBINE DE CHARGE...............8-5
BOBINE D’ECLAIRAGE
(Option)........................................8-5
BOBINE DE ALLUMAGE.........8-6
REMPLACEMENT DU
CAPUCHON DE LA BOUGIE ..8-6
BLOC CDI...................................8-7
REDRESSEUR............................8-8
CORDON/COUPE-CONTACT
DE SECURITE............................8-8
INSTALLATION ............................8-9
VOLANT MAGNETIQUE ........8-9
CAPITULO 7
UNIDAD SOPORTE
DIAGRAMA DETALLADO..........7-1
EXTRACCION ...............................7-2
DESMONTAJE...............................7-3
INSPECCION .................................7-4
PERNOS DE SUJECION............7-4
SOPORTES DE GOMA..............7-4
COLLARES.................................7-4
PLACAS DE TOPE DE
INCLINACION ...........................7-4
PALANCAS.................................7-4
MONTAJE.......................................7-5
INSTALACION...............................7-5
CAPITULO 8
SISTEMA
ELECTRICO
COMPONENTES
ELECTRICOS................................8-1
DIAGRAMA DE CABLEADO .....8-2
EXTRACCION ...............................8-3
BASE DE LA MAGNETO .........8-3
LIMPIEZA, INSPECCION Y
REPARACION................................8-5
BUJIA..........................................8-5
BOBINAS PULSADORAS.........8-5
BOBINA DE CARGA.................8-5
BOBINA DE ILUMINACION
(Opción).......................................8-5
BOBINA DE ENCENDIDO .......8-6
CAMBIO DEL CASQUILLO DE
LA BUJIA....................................8-6
UNIDAD CDI..............................8-7
RECTIFICADOR ........................8-8
INTERRUPTOR DEL
ACOLLADOR DE PARADA
DEL MOTOR ..............................8-8
INSTALACION...............................8-9
MAGNETO DEL VOLANTE.....8-9
14. Thank you very much for
your reading. Please Click
Here. Then Get COMPLETE
MANUAL. NO WAITING
NOTE:
If there is no response to
click on the link above,
please download the PDF
document first and then
click on it.
15. E
CHAPTER 9
TROUBLE-SHOOTING
TROUBLE-SHOOTING DIAGRAM............................................................................9-1
HOW TO TROUBLE-SHOOT ...............................................................................9-1
ENGINE IS HARD TO START OR WILL NOT START..............................................9-2
ROUGH IDLING .........................................................................................................9-6
ENGINE STALLS .......................................................................................................9-7
ENGINE WILL NOT STOP.........................................................................................9-8
GEAR SHIFTING IS IMPOSSIBLE OR HARD..........................................................9-9
16. F ES
CHAPITRE 9
DEPANNAGE
TABLEAU DE DEPANNAGE .......9-1
QUE FAIRE ENCAS DE
PANNE?.......................................9-1
LE MOTEUR A DU MAL A
DEMARRER OU REFUSE DE
DEMARRER...................................9-2
LE RALENTI EST
DEFECTUEX..................................9-6
LE MOTEUR CALE......................9-7
LE MOTEUR NE S’ARRETE
PAS ...................................................9-8
LE PASSAGE MARCHE
AV/MARCHE AR EST
IMPOSSIBLE OU DIFFICILE.....9-9
CAPITULO 9
LOCALIZATION Y
REPARACION DE
AVERIAS
DIAGRAMA DE LOCALIZACION
Y REPARACION DE AVERIAS...9-1
COMO LOCALIZAR Y
REPARAR AVERIAS..................9-1
RESULTA DIFICIL ARRANCAR
EL MOTOR, O NO ARRANCA ...9-2
VELOCIDAD DE RALENTI
DESIGUAL......................................9-6
EL MOTOR SE PARA...................9-7
EL MOTOR NO SE PARA............9-8
CAMBIO DE MARCHAS
IMPOSIBLE O DIFICIL...............9-9
17. E
GEN
INFO
CHAPTER 1
GENERAL INFORMATION
HOW TO USE THIS MANUAL...................................................................................1-1
MANUAL FORMAT...............................................................................................1-1
THE ILLUSTRATIONS..........................................................................................1-1
REFERENCES .....................................................................................................1-2
SPECIFICATIONS ................................................................................................1-2
WARNINGS, CAUTIONS AND NOTES................................................................1-3
SYMBOLS.............................................................................................................1-4
IDENTIFICATION........................................................................................................1-5
SERIAL NUMBER.................................................................................................1-5
ENGINE SERIAL NUMBER..................................................................................1-5
STARTING SERIAL NUMBERS ...........................................................................1-5
SAFETY WHILE WORKING ......................................................................................1-6
FIRE PREVENTION .............................................................................................1-6
VENTILATION.......................................................................................................1-6
SELF-PROTECTION ............................................................................................1-7
OILS, GREASES AND SEALING FLUIDS ...........................................................1-7
GOOD WORKING PRACTICES...........................................................................1-8
DISASSEMBLY AND ASSEMBLY ........................................................................1-8
SPECIAL TOOLS .....................................................................................................1-10
SPECIAL TOOLS FOR TUNE-UP......................................................................1-10
SPECIAL TOOLS FOR ENGINE SERVICE .......................................................1-10
SPECIAL TOOLS FOR CRANK JIG ASSY <P/N : 90890-02421> ....................1-10
SPECIAL TOOLS FOR LOWER UNIT SERVICE...............................................1-11
SEALING AGENTS AND LUBRICANTS ............................................................1-11