CSE-312
Web Design andProgramming Lab-I
Lab-4: HTML-II
Md. Rafsan Jani
Assistant Professor
Department of Computer Science and Engineering
Jahangirnagar University
Introduction to HTML
HTML, or HyperText Markup Language is designed
to specify the logical organization of a document,
with important hypertext extensions.
–hypertext refers to the fact thatWeb pages can contain
multimedia, provide links for jumping within & without
–markup refers to the fact that it works by augmenting
text with special symbols (tags) that identify structure
and content type
HTML allows you to mark selections of text as titles
or paragraphs, and then leaves the interpretation of
these marked elements up to the browser.
–For example one browser may indent the beginning of a
paragraph, while another may only leave a blank line.
3
4.
Introduction to HTML
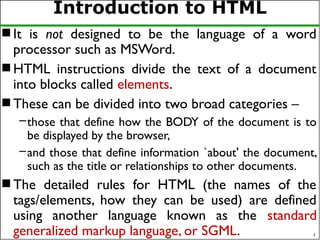
It is not designed to be the language of a word
processor such as MSWord.
HTML instructions divide the text of a document
into blocks called elements.
These can be divided into two broad categories –
–those that define how the BODY of the document is to
be displayed by the browser,
–and those that define information `about' the document,
such as the title or relationships to other documents.
The detailed rules for HTML (the names of the
tags/elements, how they can be used) are defined
using another language known as the standard
generalized markup language, or SGML. 4
5.
Introduction to HTML
SGML is wickedly difficult, and was designed for
massive document collections.
Fortunately, HTML is much simpler! However, SGML
has useful features that HTML lacks.
For this reason, markup language and software
experts have developed a new language, called XML
(the eXtensible markup language) which has most of
the useful features of HTML and SGML.
5
6.
History of HTML
HTML 1.0 was originally developed by Tim Berners-
Lee while at CERN, and popularized by the Mosaic
browser developed at National Center for
Supercomputing Applications (NCSA) in 1989.
During the course of the 1990s it has blossomed
with the explosive growth of the Web and has been
extended in a number of ways.
The Web depends on Web page authors and
vendors sharing the same conventions for HTML.
HTML 2.0 was developed under the aegis of the
Internet Engineering Task Force (IETF) to codify
common practice in late 1994.
6
7.
History of HTML
In late 1994, Tim Berners-Lee, who developed the
initial version of HTML, started the World Wide
Web Consortium (W3C), whose primary purpose
was to develop and distribute standards for Web
technologies, starting with HTML.
HTML 3.2 (1996) W3C proposed much richer
versions.
–Achieving interoperability lowers costs to content
providers since they must develop only one version of a
document.
–If the effort is not made, there is much greater risk that
the Web will devolve into a proprietary world of
incompatible formats, ultimately reducing the Web's
commercial potential for all participants. 7
8.
History of HTML
The HTML 4.0 was published in late 1997 by W3C
The 4.01 version of HTML was approved by W3C in
late 1999
HTML5 can be said for as an extended version of
HTML 4.01 which is the latest version, published in
the year 2014.
Each version of HTML has attempted to reflect
greater consensus among industry players so that
the investment made by content providers will not
be wasted and that their documents will not
become unreadable in a short period of time
8
9.
HTML Vision
HTMLhas been developed with the vision that all
manner of devices should be able to use information
on theWeb:
–PCs with graphics displays of varying resolution and
color depth,
–cellular telephones,
–hand held devices,
–devices for speech for output and input,
–computers with high or low bandwidth, and so on.
9
10.
Advantages
1. First advantageit is widely used.
2. Every browser supports HTML language.
3. Easy to learn and use.
4. It is by default in every operating system so you
don't need to purchase extra software.
10
11.
Disadvantages
1. It cancreate only static and plain pages so if we
need dynamic pages then HTML is not useful.
2. Lots of code for making simple webpage.
3. Security features are not good in HTML.
4. Long code produces some complexity.
11
HTML Tags
HTMLtags can be considered as hidden keywords
or commands incorporated in HTML which holds
the capability to define how your browser will
display the content and format of the web page.
Most tags of HTML have two sections, an opening,
and a closing part, and any text written within that
has its effect based on the category of the tag.
The most common example is the <html> tag which
has both starting tag and ending tag.
HTML tag which is usually written as <html>….
</html> or <HTML>…. </HTML> is the only tag
which is a must for writing HTML pages
13
14.
HTML Tags
HTMLtag has both a opening <html> and a closing
tag </html>.
The closing of tags is done by a forward slash (/) at
the very start of the tag name.
These types of tags having both opening and closing
tags are called container tags.
Those who only have an opening tag and no closing
tag are called empty tags.
14
15.
HTML Elements
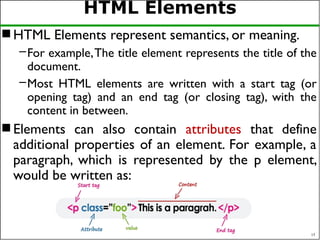
HTMLElements represent semantics, or meaning.
–For example,The title element represents the title of the
document.
–Most HTML elements are written with a start tag (or
opening tag) and an end tag (or closing tag), with the
content in between.
Elements can also contain attributes that define
additional properties of an element. For example, a
paragraph, which is represented by the p element,
would be written as:
15
16.
HTML Tags VsElements
Technically, an HTML element is the collection of
start tag, its attributes, an end tag and everything in
between.
On the other hand an HTML tag either opening or
closing is used to mark the start or end of an
element.
However, in common usage the terms HTML
element and HTML tag are interchangeable i.e. a tag
is an element and element is a tag.
16
17.
HTML Elements Types
Block-Level Elements: Block-level elements start on a
new line and take up the full width available, stretching out to
the left and right as far as they can.These elements typically
contain other block-level elements or inline elements.
Examples:
– <div>:A generic container for content.
– <p>: Defines a paragraph.
– <h1> to <h6>: Define headings, where <h1> is the highest level
and <h6> is the lowest.
– <ul>: Defines an unordered list.
– <ol>: Defines an ordered list.
– <article>: Represents a self-contained composition in a document.
– <section>: Defines a section in a document.
17
18.
HTML Elements Types
Inline Elements: Inline elements do not start on a new
line and only take up as much width as necessary. They
usually contain only data or other inline elements.
Examples:
– <span>:A generic inline container for phrasing content.
– <a>: Defines a hyperlink.
– <img>: Embeds an image in the document.
– <strong>: Indicates strong emphasis, typically rendered in bold.
– <em>: Represents emphasized text, typically rendered in
italics.
– <label>: Defines a label for an <input> element.
– <br>: Inserts a line break.
18
19.
HTML Elements Types
Empty (Void) Elements: Empty or void elements
are HTML elements that do not have any content or
closing tag.
Examples:
–<img>: Embeds an image in the document.
–<br>: Inserts a line break.
–<hr>: Represents a thematic break or horizontal rule.
–<input>: Represents an input control.
–<meta>: Provides metadata about the HTML document.
–<link>: Defines the relationship between a document and
an external resource, typically used to link to stylesheets.
19
20.
HTML Elements Types
Form Elements: These elements are used within
forms to collect user input.
Examples:
–<form>: Defines an HTML form for user input.
–<input>: Represents an input field.
–<textarea>: Defines a multi-line text input control.
–<select>: Creates a drop-down list.
–<button>: Represents a clickable button.
–<label>: Defines a label for an <input> element.
20
21.
HTML Elements Types
Semantic Elements: Semantic elements clearly
describe their meaning in a human- and machine-
readable way.
Examples:
–<header>: Represents the header section of a document
or section.
–<nav>: Defines a navigation section.
–<main>: Specifies the main content of the document.
–<footer>: Defines the footer for a section or document.
–<aside>: Represents a section of content that is
tangentially related to the content around it.
21
22.
HTML Elements Types
Interactive Elements: Elements that are
specifically used to interact with the user.
Examples:
–<button>: Represents a clickable button.
–<details>: Defines additional details that the user can
view or hide.
–<summary>: Provides a summary, caption, or legend for
the content of a <details> element.
–<a>: Defines a hyperlink, which users can click to
navigate to another document or resource.
22
23.
HTML Elements Types
Metadata Elements: These elements provide
meta-information about the HTML document.
Examples:
–<title>: Defines the title of the document.
–<meta>: Provides metadata about the document, such as
character set, description, keywords, etc.
–<link>: Defines relationships between the current
document and external resources (e.g., stylesheets).
–<style>: Contains internal CSS.
–<base>: Specifies the base URL for all relative URLs in
the document.
23
24.
HTML Elements Types
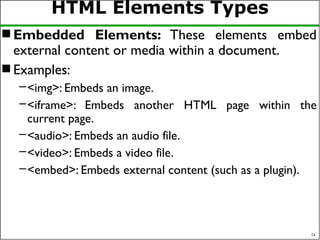
Embedded Elements: These elements embed
external content or media within a document.
Examples:
–<img>: Embeds an image.
–<iframe>: Embeds another HTML page within the
current page.
–<audio>: Embeds an audio file.
–<video>: Embeds a video file.
–<embed>: Embeds external content (such as a plugin).
24
25.
HTML Attribute
Attributeis the characteristics of any HTML tag that needs
to be placed within the opening tag.
Attributes are case insensitive.
HTML attributes consist of two parts:
– a name and
– a value
For an attribute, the name defines the property to be
implemented.
– For example, BODY Tag, <body> carries many attributes such as
bgcolor, background using that you can give a specific image or
background texture to your page.
The value defines the value which you want to assign to the
property and is set within quotations.
25
26.
HTML Attribute
Thereare four essential attributes which you can
implement on almost all HTML elements:
–id
–title
–class
–style
26
27.
id Attribute
Thisattribute can be implemented for providing
unique identification to any element.
There are two primary reasons that you might want
to use an id attribute on an element.
–The id attribute provides a unique identifier which
eventually makes possible in identifying the HTML
element.
–When you are containing two elements having the same
name within the same script, id attribute helps to
distinguish the two same elements via the unique ID.
<p id = "para1"> Paragraph 1 in your HTML document.</p>
<p id = "para2"> Paragraph 2 in your HTML document.</p>
27
28.
title Attribute
Thetitle attribute gives a recommended title for
your element.
Its behavior depends on the element upon which it's
implemented, even though this is often implemented
to display a tooltip if the cursor hovers (comes
over) the element.
<h3 title="Welcome to my Journal">Please visit</h3>
28
29.
class Attribute
Thisattribute is implemented by combining an
element through a stylesheet (CSS), and identify the
element's class.
For more about class attribute, you can follow the
Cascading Style Sheet (CSS).
Here's an example of class attribute:
<p class = "classname1">
This is a sample paragraph text.
</p>
29
30.
style Attribute
Thisattribute gives you a chance for specifying the
rules for Cascading Style Sheet (CSS) in your
element.
Here's an example of style attribute:
<p style = "font-family:arial;">An example of style attribute.</p>
30
Example Anatomy
The<!DOCTYPE html> declaration defines this
document to be HTML5
The <html> element is the root element of an
HTML page
The <head> element contains meta information
about the document
The <title> element specifies a title for the
document
The <body> element contains the visible page
content
The <h1> element defines a large heading
The <p> element defines a paragraph 32
33.
<!DOCTYPE> Tag
The<!DOCTYPE> declaration represents the
document type, and helps browsers to display web
pages correctly.
It must only appear once, at the top of the page
(before any HTML tags).
The <!DOCTYPE> declaration is not case sensitive.
The <!DOCTYPE> declaration for HTML5 is:
<!DOCTYPE html>
33
34.
HEAD Tag
TheHEAD tag is another important tag used to add
the header in HTML.
It is used to give various additional information
about the page along with description and title to
your page; which gets displayed in the title bar or
acts as an indicator of what information to use or
on which page you are currently in.
HTML metadata is data about the HTML document.
Metadata is not displayed. Metadata typically define
the document title, character set, styles, links,
scripts, and other meta information.
The following tags describe metadata: <title>,
<style>, <meta>, <link>, <script>, and <base>. 34
35.
<title>Element
The <title>element defines the title of the
document, and is required in all HTML/XHTML
documents.
The <title> element:
–defines a title in the browser tab
–provides a title for the page when it is added to favorites
–displays a title for the page in search engine results
35
36.
Body Element
Thistag is used to give the body, i.e., the visible
section of the HTML document.
All formatting and writing of content are done in
the opening <body> and the closing </body> tag.
If your HTML code does not have a body tag
associated with it, the HTML code will still run as
written in the above example (only show the title in
the title bar).
It is to be noted that, together these three
necessary tags, <html>, <head> and <body> makes
up the skeleton of an HTML document and these
are the only foundation tags upon which all web
pages are created or developed. 36
37.
<hn>Element
Any contentor article starts having a nice heading,
provides the headline or the topic name of any
document.
Similarly, in HTML code also, different sizes of
heading can be given on your web page.
HTML allows six sizes for heading that uses
elements name in the format of <hn>, where n
starts from 1 till 6; like this:
<h1>, <h2>, <h3>, <h4>, <h5>, and <h6>
37
38.
Aligning Text
TheALIGN attribute can be inserted in the <p>
and <hn> tags to right justify, center, or left justify
the text
For example,
<h1 ALIGN=CENTER> The NewYork Times </h1>
would create a centered heading of the largest size
39.
HTML Formatting
Formattingis one of the crucial sections of every
development.
For making any project or article or content looks
attractive, readable and user-intractable, formatting
plays a very important role.
Formatting can be defined as the appearance of your
documentation or presentation of your HTML code
in a meaningful and nicer way.
Formatting is mainly done for making the layout
attractable.
39
40.
HTML Formatting Cont…
TagMeanings
<u> For making text underlined.
<b> For making the text Bold.
<strong> Used in those texts which are important and
needs to highlight.
<i> For making the text italics.
<em> For emphasizing the texts.
<mark> To make the texts marked or highlighted.
<small> For making texts small in size than the regular
texts surrounded.
<big> For making texts bigger or larger than the rest
of the texts surrounded.
40
41.
HTML Formatting Cont…
41
TagMeanings
<del> To show texts that have been deleted or removed or
replaced.
<ins> To show texts that have been inserted or added
<sub> To give a subscript effect to any text.
<sup> To give a superscript effect to any text.
<strike> For displaying any text as strikethrough.
<tt> For displaying any font as a mono-spaced font.
This tag is abbreviated as typewriter type font tag.
42.
HTML Comments
42
Commentsare an essential part of HTML; it helps
to provide the details of what is written in the
HTML source code.
HTML comment tags are completely ignored to
display by the browsers. It's used to insert
comments into the source code.
–When more than one developers work on the same
application or web page, HTML comments can help to
understand the source code.
–Comment can be used anywhere to add information
about HTML, which will be helpful for developers to
understand the existing code in the future easily.
43.
HTML Comments
43
Forwriting comments in HTML, they begin with
the <! -- (starting comment tag) and ends with the
close comment tag, i.e. -->.
Comments in HTML can be visible if and only if
anyone tries to view the source code of the page,
but anything is written within <!-- …. --> does not
get rendered when you will render your HTML
based web page through your browser.
<!-- This is a commented code -->
44.
HTML IMG Tag
44
For inserting pictures into our web page, we can
use the <img> tag.
The <img> tag is an empty tag which mean it has
no ending tag (i.e. no </img>) associated with it.
The syntax of using <img> tag is:
<img src = "path or URL" alt = "alternate_text">
45.
HTML IMG Tag
45
SRC attribute of IMGTag:
–This attribute helps in specifying the image's source,
which means this, instruct your web browser from
which location it must fetch the particular picture (in
other words specify the path). SRC attribute takes path
or URL as its value in quotes.
–The source's image may exist locally on your computer
(need a path to specify) or may reside somewhere in
the web server (need URL to specify).
–For images in your local PC, either you have to set the
entire path or bring that particular image's copy in a
particular folder in which your .html file (in which you
want to add image) is also residing
<img src="http://xyz.com/wallpaper.jpg" alt="Wallpaper">
46.
HTML IMG Tag
46
The alt attribute of IMGTag:
–This attribute of Image Tag or <img> tag allows you in
defining an alternative text in case your browser
becomes unsuccessful in loading the image.
–There may be situations when your browser might not
be able to display that particular image either because
of slow connection or server error or any other
reason.
–Moreover, search engines take up those alternate texts
given to images and help to find articles or content
related to that text.
<img src= “ju.jpg" alt =“Jahangirnagar University">
47.
HTML IMG Tag
47
The border attribute of IMGTag:
–The default value of border is assigned as "0px" to
every image.
–For displaying the borders all around the image, you
have to implement the border attribute of the IMG tag.
–Here's the example of how it needs to be applied:
<img src="guitar.jpg" height="30px" width="30px"
border="6">
48.
HTML IMG Tag
48
The hspace attribute
–Hspace attribute is used for providing horizontal
spacing all around your image. It takes value in the form:
20 or 20%.
The vspace attribute
–Vspace attribute is used for providing vertical spacing all
around your image. It also takes value in the form: 20 or
20%.
Both these attributes are used in situations where
you want to maintain some gapping between your
image and text.
49.
HTML IMG Tag
49
The height and width attribute
–In case you need a specific size of the image for fitting it
into your web page, you can use the height and width
attribute of the IMG tag.
–Here's an example:
<img src="guitar.jpg" height="40px" width="80px">
<br/>
<img src="guitar.jpg" title="Forest" height="25%"
width="30%">
You can use both px (pixels) and % (percent) as a relative
unit for specifying size (here height and width) of the
image.
50.
HTML Anchor Tag
50
You might know that hyperlink which is a powerful
means of browsing from web pages and websites.
It is developed for sending the readers or those
who will perform surfing from one web page to
another without opening a new tab or window.
This is in general term said to as link and is given a
reference to jump to another page or document or
from one part of the same page to another using a
hypertext.
The Anchor tag in HTML can be defined as a
means to create a hyperlink.
51.
HTML Anchor Tag
51
Anchor can link your current page on which the
text is being converted to hypertext via <a>
(anchor tag) to another page.
This anchoring from one page to another is made
possible by the attribute "href", which can be
abbreviated as (hypertext reference).
Example:
<a href = "URL">Text Here</a>
If the present url is www.xyz.com then clicking the
Text Here will link to www.xyz.com/URL
52.
Anchor an Image
52
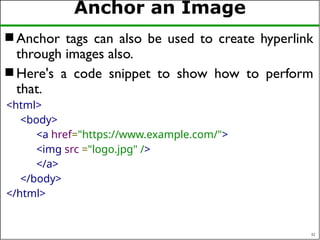
Anchor tags can also be used to create hyperlink
through images also.
Here's a code snippet to show how to perform
that.
<html>
<body>
<a href="https://www.example.com/">
<img src ="logo.jpg" />
</a>
</body>
</html>
53.
Link to Emailand Telephone
To create a link to an email address, type
<a href="mailto:email_address"> Label</a>
–For example, to create a link to send email to myself, I
would type:
<a href="mailto:xya@juniv.edu">email Md. Rafsan</a>
To create a link to a telephone number, type
<a href="tel:tel_number"> Label</a>
–For example, to create a telephone number, I would
type:
<a href="tel:+880-2-7791045">+880-2-7791045</a>
54.
Anchors inside thepage
Anchors enable a user to jump to a specific place
on a Web site
Two steps are necessary to create an anchor.
–First you must create the anchor itself.
–Then you must create a link to the anchor from another
point in the document.
To create the anchor itself, type
–<a name=“anchor_name” ></a>
To create the link, type
–<a href=“#anchor_name”>label</a>
at the point in the text where you want the link to
appear
HTML Links -The target Attribute
The target attribute specifies where to open the
linked document.
The target attribute can have one of the
following values:
_blank - Opens the linked document in a new tab
_self - Opens the linked document in the same window/tab
as it was clicked (this is default)
_parent - Opens the linked document in the parent frame
_top - Opens the linked document in the full body of the
window
framename - Opens the linked document in a named frame
57.
Ordered Lists
Orderedlists are a list of numbered items.
To create an ordered list, type:
<OL>
<LI> This is step one. </LI>
<LI> This is step two. </LI>
<LI> This is step three. </LI>
</OL>
Here’s how it would look on
theWeb:
58.
More Ordered Lists….
The type=x attribute allows you to change the kind
of symbol that appears in the list.
–A is for capital letters
–a is for lowercase letters
–I is for capital roman numerals
–i is for lowercase roman numerals
start=number, Specifies the start value of an
ordered list
reversed=reversed, Specifies that the list order
should be reversed (9,8,7...)
59.
Unordered Lists
Anunordered list is a list
of bulleted items
To create an unordered
list, type:
<UL>
<LI> First item in list </LI>
<LI> Second item in list </LI>
<LI> Third item in list </LI>
</UL>
Here’s how it would look on the Web:
60.
More Unordered Lists...
The type=shape attribute allows you to change the
type of bullet that appears
–circle corresponds to an empty round bullet
–square corresponds to a square bullet
–disc corresponds to a solid round bullet; this is the
default value
61.
Description Lists
HTMLalso supports description lists.
A description list is a list of terms, with a
description of each term.
–<dl> tag defines the description list,
–<dt> tag defines the term (name), and
–<dd> tag describes each term
<dl>
<dt>Coffee</dt>
<dd>- black hot drink</dd>
<dt>Milk</dt>
<dd>- white cold drink</dd>
</dl>
Coffee
- black hot drink
Milk
- white cold drink
HTML Semantic Elements
What are Semantic Elements?
–A semantic element clearly describes its meaning to
both the browser and the developer.
–Examples of non-semantic elements: <div> and <span>
-Tells nothing about its content.
–Examples of semantic elements: <form>, <table>, and
<article> - Clearly defines its content.
64.
HTML Semantic Elements
Semantic Elements in HTML
–Many web sites contain HTML code like: <div id="nav">
<div class="header"> <div id="footer"> to indicate
navigation, header, and footer.
–In HTML there are some semantic elements that can be
used to define different parts of a web page:
• <article>
• <aside>
• <details>
• <figcaption>
• <figure>
• <footer>
• <header>
65.
Forms
What areforms?
–An HTML form is an area of the document that allows
users to enter information into fields.
–A form may be used to collect personal information,
opinions in polls, user preferences and other kinds of
information.
There are two basic components of a Web form:
–the shell, the part that the user fills out, and
– the script which processes the information
HTML tags are used to create the form shell. Using
HTML you can create text boxes, radio buttons,
checkboxes, drop-down menus, and more...
The Form Shell
A form shell has three important parts:
– the <FORM> tag, which includes the address of the
script which will process the form
–the form elements, like text boxes and radio buttons
–the submit button which triggers the script to send the
entered information to the server
68.
Creating the Shell
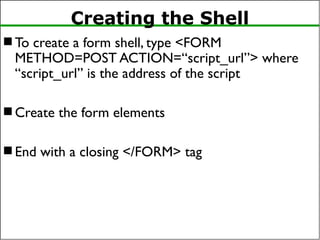
To create a form shell, type <FORM
METHOD=POST ACTION=“script_url”> where
“script_url” is the address of the script
Create the form elements
End with a closing </FORM> tag
69.
Creating Text Boxes
To create a text box, type
<INPUT TYPE=“text” NAME=“name” VALUE=“value”
SIZE=n MAXLENGTH=n>
The NAME,VALUE, SIZE, and MAXLENGTH
attributes are optional
70.
Text Box Attributes
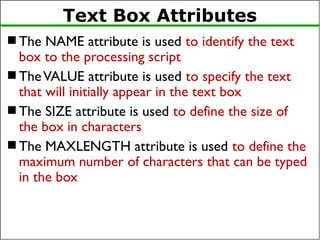
The NAME attribute is used to identify the text
box to the processing script
TheVALUE attribute is used to specify the text
that will initially appear in the text box
The SIZE attribute is used to define the size of
the box in characters
The MAXLENGTH attribute is used to define the
maximum number of characters that can be typed
in the box
71.
Example: Text Box
FirstName: <INPUTTYPE="text" NAME="FirstName"VALUE="First Name"
SIZE=20>
<BR><BR>
Last Name: <INPUT TYPE="text" NAME="LastName"VALUE="Last Name"
SIZE=20>
<BR><BR>
Here’s how it would look on the Web:
72.
Creating Larger TextAreas
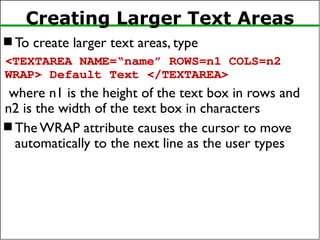
To create larger text areas, type
<TEXTAREA NAME=“name” ROWS=n1 COLS=n2
WRAP> Default Text </TEXTAREA>
where n1 is the height of the text box in rows and
n2 is the width of the text box in characters
The WRAP attribute causes the cursor to move
automatically to the next line as the user types
Creating Radio Buttons
To create a radio button, type
<INPUT TYPE=“radio” NAME=“name”VALUE=“data”> Label
where “data” is the text that will be sent to the
server if the button is checked and “Label” is the
text that identifies the button to the user
75.
Example: Radio Buttons
<B>Size: </B>
<INPUT TYPE="radio" NAME="Size"VALUE="Large"> Large
<INPUT TYPE="radio" NAME="Size"VALUE="Medium">Medium
<INPUT TYPE="radio" NAME="Size"VALUE="Small">Small
76.
Creating Checkboxes
Tocreate a checkbox, type
<INPUT TYPE=“checkbox” NAME=“name”VALUE=“value”>Label
If you give a group of radio buttons the same name,
the user will only be able to select one button at a
time
Example:
<B> Color: </B>
<INPUT TYPE="checkbox" NAME="Color1“VALUE="Red">Red
<INPUT TYPE="checkbox" NAME="Color2"VALUE="Navy">Navy
<INPUT TYPE="checkbox" NAME="Color3" VALUE="Black">Black
77.
Creating Drop-down Menus
To create a drop-down menu, type
<SELECT NAME=“name” SIZE=n MULTIPLE>
Then type
<OPTIONVALUE= “value”>Label
In this case the SIZE attribute specifies the height of
the menu in lines and MULTIPLE allows users to
select more than one menu option
Creating a SubmitButton
To create a submit button, type
<INPUT TYPE=“submit”>
If you would like the button to say something other
than submit, use theVALUE attribute
For example,
<INPUTTYPE=“submit”VALUE=“Buy Now!”>
would create a button that says “Buy Now!”
80.
Creating a ResetButton
To create a reset button, type
<INPUT TYPE=“reset”>
TheVALUE attribute can be used in the same way
to change the text that appears on the button
81.
81
Tables
tables arecommon tools for arranging
complex layout on a Web page
–a table divides contents into rows and columns
–by default, column entries are left-justified, so
provide for alignment
<html>
<!-- Dave Reed page11.html -->
<head>
<title>Tables</title>
</head>
<body>
<table>
<tr>
<td>foo</td> <td>bar</td>
</tr>
<tr>
<td>bizbaz</td> <td>booboo</td>
</tr>
</table>
</body>
</html>
<table>…</table> specify a table
element
<tr>…</tr> specify a row in the table
<td>…</td> specify table data (i.e.,
each column entry in the table)
82.
82
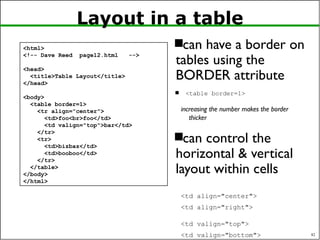
Layout in atable
can have a border on
tables using the
BORDER attribute
<table border=1>
increasing the number makes the border
thicker
can control the
horizontal & vertical
layout within cells
<td align="center">
<td align="right">
<td valign="top">
<td valign="bottom">
<html>
<!-- Dave Reed page12.html -->
<head>
<title>Table Layout</title>
</head>
<body>
<table border=1>
<tr align="center">
<td>foo<br>foo</td>
<td valign="top">bar</td>
</tr>
<tr>
<td>bizbaz</td>
<td>booboo</td>
</tr>
</table>
</body>
</html>
83.
83
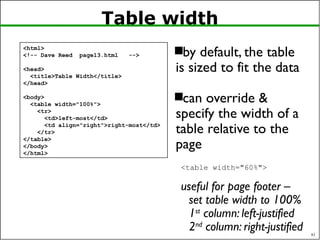
Table width
by default,the table
is sized to fit the data
can override &
specify the width of a
table relative to the
page
<table width="60%">
useful for page footer –
set table width to 100%
1st
column: left-justified
2nd
column: right-justified
<html>
<!-- Dave Reed page13.html -->
<head>
<title>Table Width</title>
</head>
<body>
<table width="100%">
<tr>
<td>left-most</td>
<td align="right">right-most</td>
</tr>
</table>
</body>
</html>
84.
84
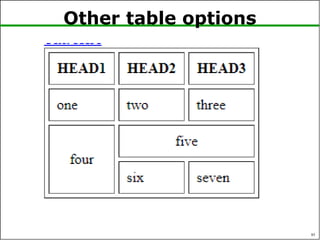
Other table options
cancontrol the space
between cells & margins
within cells
<table cellspacing=5>
<table cellpadding=5>
can add headings
<th> is similar to <td> but
displays heading centered in bold
can have data that spans
more than one column
<td colspan=2>
similarly, can span more than
one row
<td rowspan=2>
<html>
<!-- Dave Reed page14.html 1/16/04 -->
<head>
<title>Table Formatting</title>
</head>
<body>
<table border=1 cellspacing=4 cellpadding=8>
<tr>
<th>HEAD1</th> <th>HEAD2</th> <th>HEAD3</th>
</tr>
<tr>
<td>one</td> <td>two</td> <td>three</td>
</tr>
<tr>
<td rowspan=2 align="center"> four </td>
<td colspan=2 align="center"> five </td>
</tr>
<tr>
<td> six </td>
<td> seven </td>
</tr>
</table>
</body>
</html>