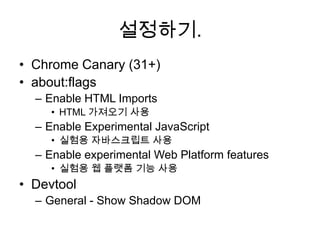
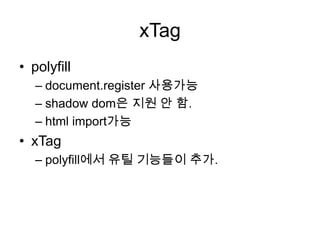
설정하기.
• Chrome Canary(31+)
• about:flags
– Enable HTML Imports
• HTML 가져오기 사용
– Enable Experimental JavaScript
• 실험용 자바스크립트 사용
– Enable experimental Web Platform features
• 실험용 웹 플랫폼 기능 사용
• Devtool
– General - Show Shadow DOM
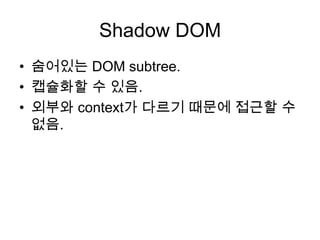
Shadow DOM
• 숨어있는DOM subtree.
• 캡슐화할 수 있음.
• 외부와 context가 다르기 때문에 접근할 수
없음.
6.
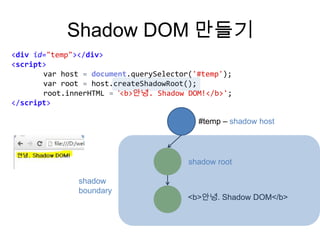
Shadow DOM 만들기
<divid="temp"></div>
<script>
var host = document.querySelector('#temp');
var root = host.createShadowRoot();
root.innerHTML = ‘<b>안녕. Shadow DOM!</b>';
</script>
#temp – shadow host
shadow root
shadow
boundary
<b>안녕. Shadow DOM</b>
7.
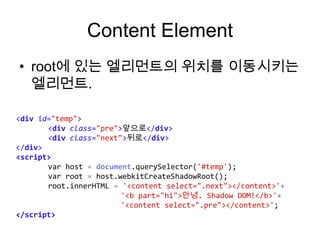
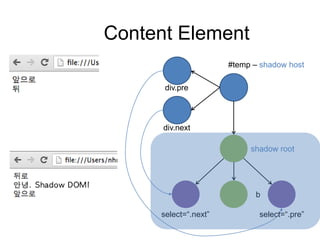
Content Element
• root에있는 엘리먼트의 위치를 이동시키는
엘리먼트.
<div id="temp">
<div class="pre">앞으로</div>
<div class="next">뒤로</div>
</div>
<script>
var host = document.querySelector('#temp');
var root = host.webkitCreateShadowRoot();
root.innerHTML = '<content select=".next"></content>'+
'<b part="hi">안녕. Shadow DOM!</b>'+
'<content select=".pre"></content>';
</script>
8.
Content Element
#temp –shadow host
div.pre
div.next
shadow root
b
select=“.next”
select=“.pre”
9.
Styling #1
• applyAuthorStyles,resetStyleInheritance
– 외부에서 정의한 스타일이 적용 유무(false)
– 상속되는 스타일의 적용 유무(true)
• Part Pseudo Selector
– 외부에서 Shadow DOM의 스타일을 변경할 수
있게 해주는 가상 선택자.
(구. pseudo)
10.
Styling #2
• CSSVariable
– 변수를 이용하여 Shadow DOM을 스타일링 가
능. (위젯 같은 데서 사용하기 좋음)
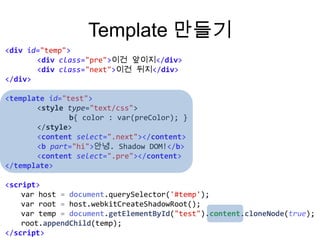
Template 만들기
<div id="temp">
<divclass="pre">이건 앞이지</div>
<div class="next">이건 뒤지</div>
</div>
<template id="test">
<style type="text/css">
b{ color : var(preColor); }
</style>
<content select=".next"></content>
<b part="hi">안녕. Shadow DOM!</b>
<content select=".pre"></content>
</template>
<script>
var host = document.querySelector('#temp');
var root = host.webkitCreateShadowRoot();
var temp = document.getElementById("test").content.cloneNode(true);
root.appendChild(temp);
</script>
13.
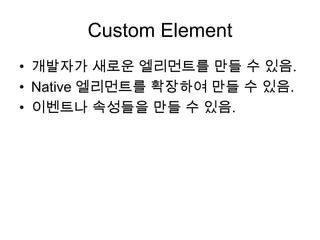
Custom Element
• 개발자가새로운 엘리먼트를 만들 수 있음.
• Native 엘리먼트를 확장하여 만들 수 있음.
• 이벤트나 속성들을 만들 수 있음.
14.
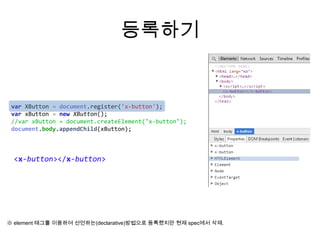
등록하기
var XButton =document.register('x-button');
var xButton = new XButton();
//var xButton = document.createElement("x-button");
document.body.appendChild(xButton);
<x-button></x-button>
※ element 태그를 이용하여 선언하는(declarative)방법으로 등록했지만 현재 spec에서 삭제.
15.
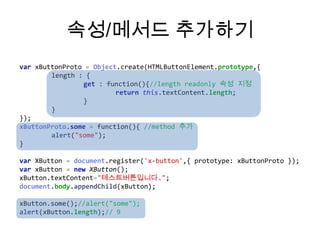
속성/메서드 추가하기
var xButtonProto= Object.create(HTMLButtonElement.prototype,{
length : {
get : function(){//length readonly 속성 지정
return this.textContent.length;
}
}
});
xButtonProto.some = function(){ //method 추가
alert("some");
}
var XButton = document.register('x-button',{ prototype: xButtonProto });
var xButton = new XButton();
xButton.textContent="테스트버튼입니다.";
document.body.appendChild(xButton);
xButton.some();//alert("some");
alert(xButton.length);// 9
16.
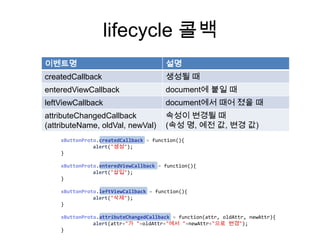
lifecycle 콜백
이벤트명
설명
createdCallback
생성될 때
enteredViewCallback
document에붙일 때
leftViewCallback
document에서 때어 졌을 때
attributeChangedCallback
(attributeName, oldVal, newVal)
속성이 변경될 때
(속성 명, 예전 값, 변경 값)
xButtonProto.createdCallback = function(){
alert("생성");
}
xButtonProto.enteredViewCallback = function(){
alert("삽입");
}
xButtonProto.leftViewCallback = function(){
alert("삭제");
}
xButtonProto.attributeChangedCallback = function(attr, oldAttr, newAttr){
alert(attr+"가 "+oldAttr+"에서 "+newAttr+"으로 변경");
}
17.
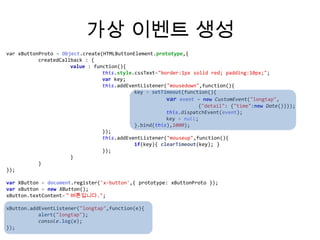
가상 이벤트 생성
varxButtonProto = Object.create(HTMLButtonElement.prototype,{
createdCallback : {
value : function(){
this.style.cssText="border:1px solid red; padding:10px;";
var key;
this.addEventListener("mousedown",function(){
key = setTimeout(function(){
var event = new CustomEvent("longtap",
{"detail": {"time":new Date()}});
this.dispatchEvent(event);
key = null;
}.bind(this),1000);
});
this.addEventListener("mouseup",function(){
if(key){ clearTimeout(key); }
});
}
}
});
var XButton = document.register('x-button',{ prototype: xButtonProto });
var xButton = new XButton();
xButton.textContent="버튼입니다.";
xButton.addEventListener("longtap",function(e){
alert("longtap");
console.log(e);
});
18.
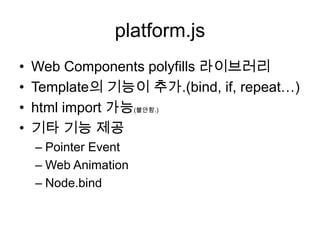
HTML Import
• WebComponents을 적용하기 위한 방법
– import된 html은 표현되지 않음
– Cross-Origin Resource Sharing
– 같은 document가 아님.
<link rel="import" href="/path/to/some/import.html">
var link = document.querySelector('link[rel=import]');
var import = link.import;
var templateButton= import.querySelector('template.button');
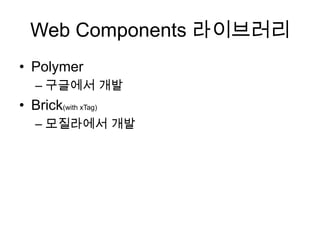
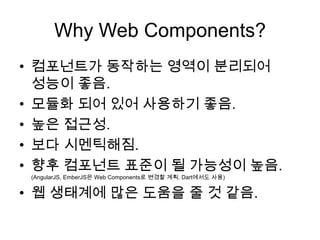
Why Web Components?
•컴포넌트가 동작하는 영역이 분리되어
성능이 좋음.
• 모듈화 되어 있어 사용하기 좋음.
• 높은 접근성.
• 보다 시멘틱해짐.
• 향후 컴포넌트 표준이 될 가능성이 높음.
(AngularJS, EmberJS은 Web Components로 변경할 계획. Dart에서도 사용)
• 웹 생태계에 많은 도움을 줄 것 같음.


![HTML Import
• Web Components을 적용하기 위한 방법
– import된 html은 표현되지 않음
– Cross-Origin Resource Sharing
– 같은 document가 아님.
<link rel="import" href="/path/to/some/import.html">
var link = document.querySelector('link[rel=import]');
var import = link.import;
var templateButton= import.querySelector('template.button');](https://image.slidesharecdn.com/webcomponentlibrary-131030235619-phpapp02/85/Web-Components-101-polymer-brick-18-320.jpg)


![[D2 오픈세미나]5.robolectric 안드로이드 테스팅](https://cdn.slidesharecdn.com/ss_thumbnails/5-140804011233-phpapp02-thumbnail.jpg?width=640&height=640&fit=bounds)


![[하코사세미나] 한 시간 만에 배우는 Jquery](https://cdn.slidesharecdn.com/ss_thumbnails/jquery-151208015421-lva1-app6891-thumbnail.jpg?width=640&height=640&fit=bounds)


![[WEB UI BASIC] JavaScript 3탄](https://cdn.slidesharecdn.com/ss_thumbnails/javascript3-150515062808-lva1-app6892-thumbnail.jpg?width=640&height=640&fit=bounds)

![[별천지 세미나] HTML5 is Ready: Fastbook 기술적 분석](https://cdn.slidesharecdn.com/ss_thumbnails/fastbook-130512231314-phpapp02-thumbnail.jpg?width=640&height=640&fit=bounds)


![조은 - AMP PWA 101 [WSConf.Seoul.2017. Vol.2]](https://cdn.slidesharecdn.com/ss_thumbnails/amppwa101-170719064722-thumbnail.jpg?width=640&height=640&fit=bounds)