Download to read offline
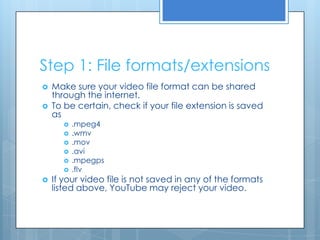
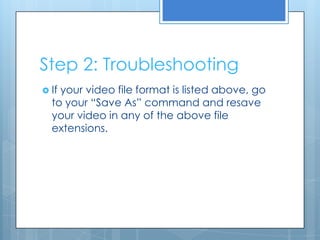
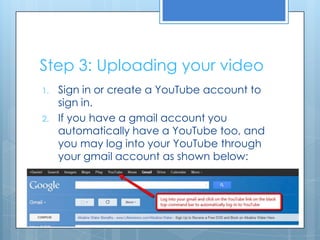
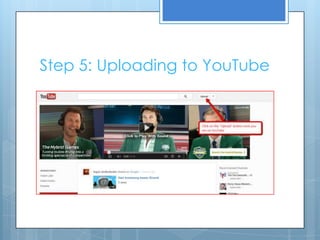

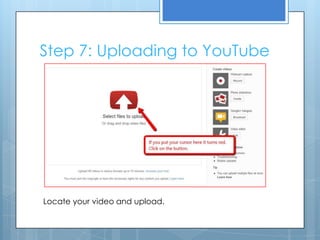


To upload a video to YouTube, first ensure the video file format is compatible by checking its file extension is one of .mpeg4, .wmv, .mov, .avi, .mpegps, or .flv. If not compatible, resave the video in a compatible format. Then sign into your YouTube account, locate the video file, and upload it. Finally, the video will be uploaded to YouTube.
![Uploading word documents_and_ppt_to_your_blog[1]](https://cdn.slidesharecdn.com/ss_thumbnails/uploadingworddocumentsandppttoyourblog1-110427185838-phpapp01-thumbnail.jpg?width=640&height=640&fit=bounds)


