This owner's manual document provides overview information and instructions for many features of the Model S, including:
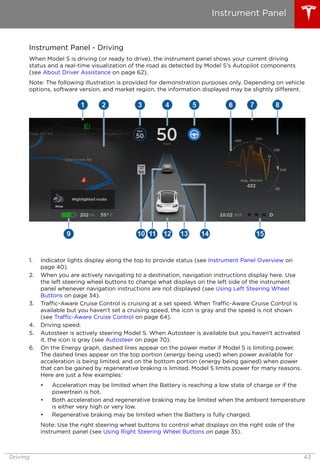
- Opening and closing doors, windows, trunks, and glove box using keyless locking/unlocking, door handles, and interior releases
- Adjusting seats and using seat belts, airbags, and child safety seats
- Starting and powering off the vehicle, shifting gears, using lights, wipers, brakes and other controls
- Using driver profiles, steering wheel buttons, mirrors, and the touchscreen to control vehicle features
- Driving modes like cruise control, autosteer, auto lane change, autopark, and summon
- Getting information from instrument displays and using maps