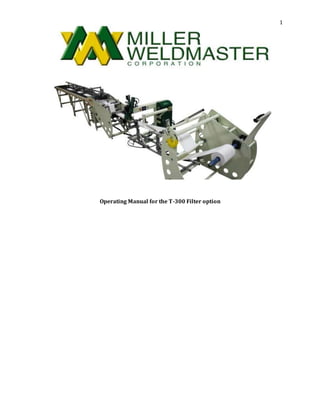
SlideShare a Scribd company logo
1 of 32
1
Operating Manual for the T-300 Filter option
2
Table of contents
Electrical and air requirements 3
Safety notes 3
Unwind stand 4
Airing the shaft 5
Center laser line 6
Drop roller 7
Pre forming guides 8
Main forming guide 9
Encoder 10
Accumulator 11
Cut to length photo eye sensor 12
Sweeping system 13-14
Guillotine cutter 15
Conveyor puller roller 16
Out board puller 17
Conveyer 18
Rope pull 19
Puller pressure regulator 20
Cutter pressure regulator 21
Sweep pressure regulator 22
Dancer pressure 23
Screen shots 24-32
3
TheT-300Filteroptionpowerandairsourcesareran throughthe T-300. Pleasereferto the
T-300operatingmanual forthecorrectpowerand airrequirements.
Safety notes
Do not adjust the material while the material is being welded. Keep hands, long hair, loose
clothing, and articles such as neckties away from the rollers have pinch points rollers to avoid
entanglement and entrapment that can trap body parts or clothing and cause serious injury.
Provide enough space around machine to ensure the safe and effective operation. The machine
must be motionless and moving parts blocked before any cleaning, oiling, adjusting, repairing or
maintaining work is done on any repairing or maintaining work is done on any part of the
machine. Always wear Personal protective equipment. (PPE) refers to protective clothing,
helmets, goggles, or other garment designed to protect the wearer's body from injury.
4
Unwind stand
Unwindstand The unwind stand will hold the
roll of material. The machine runs off of tension.
The unwind stand will keep the tension while the
machine is running. The tension is controlled by
the tension roller connectedto the load cells.
5
Airing the shaft.
Airing the shaft The shaft must have air in it to hold the
roll of material in place. The above picture shows where
you air the shaft and release the air. Place the air nozzle
in the shafts air valve to inflate. To deflate the air shaft
hold in the valve till all the air is released.
6
Center laser line
Thelaserline The laser line willallow the
operator to quickly line up new rolls. The laser
line is the center line of the machine that all
measurements are made from.
7
Drop Roller
DropRoller Thedrop roller will start the folding
process of the tube. The drop roller is adjustable for
different widths. The drop roller will adjust for the
tubes lay flat
Drop roller rotation
adjustment
Droprollerrotationadjustment By loosening the
lower handle youwill be able to rotate the drop roller up
or down to achieve the proper lay flat for different
material widths and thickness.
8
Pre forming Guides
Pre formingguide Afterthe drop roller, these
guides will keep the edges of the material up
and start the folding process before the
material reaches the main tube guide.
Pre forming guide
9
Main forming guide
Mainformingguide Willform the tube forthe correctwelding
width. The guide is adjustable fortube sizes from4 inches to
10 inches. The guide forming plates will hold the material to
the correct size during the welding process. Toadjust the size
loosen the guide forming locking knobs and adjust the size
accordingly.To adjust the overlap, loosen the adjustable
overlap locking knob. Youmay have to adjust the overlap when
changing material and sizes to make sure the overlap is in the
center of the T-300.While adjusting forthe overlap you may
have to adjust the forming plates to achievethe correctoverlap
welding width.
Guide forming
locking knobs
Adjustable
overlap locking
knobs
Forming plates
10
Encoder
EncoderTheencoder willonly be used for lengths
shorter than 2 feet and lengths longer than 15 feet.
The settings forthe encoder willbe found on the
machines HMI.
11
Accumulator
Accumulator Theaccumulator is used fora continuous
process. As the material is being cut, the accumulator will
take up any slack whilethe machine is being cut so that
the machine doesn’t stop the welding process.
12
Cut to Length Photo Eye Sensor
Cut to length photo eye sensor. This will
measure the length of material and trigger the
cutter to cut to length. By pushing the blue or
yellow arrow adjust your sensitivity. To change
lengths you must move the sensor bracket left to
right depending on size.
13
Sweeping system
SweepingsystemThe sweeping system will
push the material off the conveyer.The sweeping
system is controlled by the cut. After the cut there
is an adjustable timer that will trigger the
sweeping systems. Eachsweep can moveleft to
right to accommodateand length of material.
Eachsweep can individually be turned on and off.
14
Sweep slide
lock
Sweepslidelock By loosening the slide locks you
are able to move the system left and right.
Sweeping system
on/off toggle switch
Sweepingsystemon/offtoggleswitch Willturn on
and off each individual sweeping system.
15
Guillotine Cutter.
GuillotineCutter willcutthe material at
desired length triggered by the Cut to Length
PhotoEyeSensor.
Note: Never operate cutting unit withoutguards
in place. Alwaysdisconnect electric and air to the
machine prior to servicing.
16
Conveyor puller roller
Conveyorpuller roller Thepuller
roller will pull from the accumulator.
The speed of the puller roller is
determined by the position of the
accumulator. The open/ close button is
located on the HMI screen.
17
Out board puller
Out boardpuller Willpull the material after the welding on
the T-300. The speed controlis located on the T-300 HMI. To
open the puller, liftthe top puller roller.
Out board
puller roller
open/close
handle
18
Conveyer
Conveyer Will Move the Material To
cut length. And feed out the end for
finished product.
19
Rope pull
Rope pull e stop Will shut off power to any moving part of
the machine. Once the rope pull has been pulled you must
reset by turning the blue button back to the forward arrow.
20
Puller pressure regulator
Pullerpressueregulator Willincrease
and decrease the pressure of the puller. To
increase the pressure turn the knob clock
wise and to decrease the pressure turn the
knob counter clockwise. When decreasing
the pressure it is recommended to turn the
pressure to zerothen increase to the
correctpressure.
21
Cutter pressure regulator
Cutter pressureregulator Will
increase and decrease the pressure of
the cutter. To increase the pressure turn
the knob clockwise and to decrease the
pressure turn the knob counterclock
wise. When decreasing the pressure it is
recommended to turn the pressure to
zero then increase to the correct
pressure.
22
Sweep pressure regulator
Sweeppressureregulator Will
increase and decrease the pressure of
the sweep system. To increase the
pressure turn the knob clockwiseand
to decrease the pressure turn the knob
counter clockwise. When decreasing
the pressure it is recommended to turn
the pressure to zero then increase to
the correct. .pressure.
23
Dancer pressure
Dancerpressureregulator Willincrease
and decrease the pressure of the sweep
system. Toincrease the pressure turn the
knob clockwise and to decrease the
pressure turn the knob counterclockwise.
When decreasing the pressure it is
recommended to turn the pressure to zero
then increase to the correct.
24
Screen shots
Manual cut pb Will manually trigger the cutter.
PullercloseWillmanually trigger the cutter.
Manual ejectpb Willmanually trigger the sweeps.
FWD jogpb Will jog the conveyerpuller forward
Piececount Displays how many pieces you ran.
Set pointIs the number of pieces that you wish to
make.
Reset Willreset both actual and set point numbers
to zero.
Note: any buttonin orangewill takeyouto that
specificscreen.Anybutton inyellowisableto
havethe valuechanged.Thebuttonsin redare
formaintenancescreensonly.
25
Manual cut pb Will manually trigger the cutter.
Pullerclose Willmanually trigger the cutter.
Manual ejectpb Willmanually trigger the
sweeps.
Fwd jogpb Will jog the conveyerpuller forward
Actual Displays how many pieces have been ran.
Set point Is the number of pieces that youwish
to make.
Piececount Displays how many pieces youran.
Set point Is the number of pieces that youwish
to make.
Reset Will reset both actual and set point
numbers to zero.
26
Cutter Will enable the cutter.
SweepsWillenable the sweeps.
CounterWillenable the counter.
Photo EyeWill enable the photo eye.
Movetime to part eject Is the amount of time after
the cut that the sweeps are activated.
27
Pleasecontact Millerweldmasterbeforemaking
any changesto this screen! 330-833-6739.
28
Pleasecontact Millerweldmasterbefore
makingany changesto this screen! 330-
833-6739.
29
Cutter Downtime Is the amount of time the
cutter will stay downafter the cut.
Ejectpart extend time Is the amount of time after
the cut that the sweeps willtrigger.
Timetotalizer Displays the amount of time the
machine has been running.
Youmust log into the maintenance screen to get to
this screen.
Note: any buttonin orangewill takeyouto that
specificscreen.Anybutton inyellowisableto
havethe valuechanged.Thebuttonsin redare
formaintenancescreensonly.
30
Footagecounterscaling Will increase or
decrease the length of the material. It is
recommended to contactMiller Weldmaster
before making any adjustments to the scaling
factor.
Reset Will reset the length of the material.
31
Alarm Screen. Displays any alarm that may have
occurred. The button tells the machine that you
recognized the problem and the proper adjustments
have been made. You must push the ack. button to
continue to run.
32
Alarm History Will display all alarms that
have occurred.

More Related Content

Viewers also liked (7)

Ex1
Ex1Ex1
Ex1
 
All you need to know about Tuberculosis (TB)
All you need to know about Tuberculosis (TB)All you need to know about Tuberculosis (TB)
All you need to know about Tuberculosis (TB)
 
Sentinella Mini‐Symposium Moderators: Alessandro Testori and Sergi Vidal‐Sica...
Sentinella Mini‐Symposium Moderators: Alessandro Testori and Sergi Vidal‐Sica...Sentinella Mini‐Symposium Moderators: Alessandro Testori and Sergi Vidal‐Sica...
Sentinella Mini‐Symposium Moderators: Alessandro Testori and Sergi Vidal‐Sica...
 
01: Lymphology Then and Now
01: Lymphology Then and Now01: Lymphology Then and Now
01: Lymphology Then and Now
 
Sentinella Mini‐Symposium Moderators: Alessandro Testori and Sergi Vidal‐Sica...
Sentinella Mini‐Symposium Moderators: Alessandro Testori and Sergi Vidal‐Sica...Sentinella Mini‐Symposium Moderators: Alessandro Testori and Sergi Vidal‐Sica...
Sentinella Mini‐Symposium Moderators: Alessandro Testori and Sergi Vidal‐Sica...
 
Yarns used in technical texiles
Yarns used in technical texilesYarns used in technical texiles
Yarns used in technical texiles
 
Session 5.5 bridging the research practice gap presentation
Session 5.5 bridging the research practice gap presentationSession 5.5 bridging the research practice gap presentation
Session 5.5 bridging the research practice gap presentation
 

Similar to T300 Filter Option English

MAHABIR - Double Side Planner Manual
MAHABIR - Double Side Planner ManualMAHABIR - Double Side Planner Manual
MAHABIR - Double Side Planner ManualMahabirIndustries1
 
bnt68 introduction
bnt68 introductionbnt68 introduction
bnt68 introductionMona Lisa
 
P3 semi auto printer manual
P3 semi auto printer manualP3 semi auto printer manual
P3 semi auto printer manualMark Tung
 
P6 semi auto printer manual
P6 semi auto printer manualP6 semi auto printer manual
P6 semi auto printer manualMark Tung
 
Presentation on stenter machine
Presentation on stenter machinePresentation on stenter machine
Presentation on stenter machineEmran Ali
 
D:\Baring\Presentation
D:\Baring\PresentationD:\Baring\Presentation
D:\Baring\Presentationguest37e177d
 
D:\Baring\Presentation
D:\Baring\PresentationD:\Baring\Presentation
D:\Baring\Presentationguest37e177d
 
D:\Baring\Presentation
D:\Baring\PresentationD:\Baring\Presentation
D:\Baring\Presentationguest37e177d
 
D:\Baring\Presentation
D:\Baring\PresentationD:\Baring\Presentation
D:\Baring\Presentationguest37e177d
 
D:\Baring\Presentation
D:\Baring\PresentationD:\Baring\Presentation
D:\Baring\Presentationguest37e177d
 
D:\Baring\Presentation
D:\Baring\PresentationD:\Baring\Presentation
D:\Baring\Presentationguest37e177d
 
D:\Baring\Presentation
D:\Baring\PresentationD:\Baring\Presentation
D:\Baring\Presentationguest37e177d
 
D:\Baring\Presentation
D:\Baring\PresentationD:\Baring\Presentation
D:\Baring\Presentationguest37e177d
 
Sensors used in sewing machine EOT
Sensors used in sewing machine EOTSensors used in sewing machine EOT
Sensors used in sewing machine EOTVaibhavRaj6780
 
Delphi noida training report
Delphi noida training reportDelphi noida training report
Delphi noida training reportManoj Sharma
 
E 022 co2 fractional laser machine user manual
E 022 co2 fractional laser machine user manualE 022 co2 fractional laser machine user manual
E 022 co2 fractional laser machine user manualE-beauty
 

Similar to T300 Filter Option English (20)

MAHABIR - Double Side Planner Manual
MAHABIR - Double Side Planner ManualMAHABIR - Double Side Planner Manual
MAHABIR - Double Side Planner Manual
 
Single needle lock stitch machine
Single needle lock stitch machineSingle needle lock stitch machine
Single needle lock stitch machine
 
Cutting threads
Cutting threadsCutting threads
Cutting threads
 
bnt68 introduction
bnt68 introductionbnt68 introduction
bnt68 introduction
 
P3 semi auto printer manual
P3 semi auto printer manualP3 semi auto printer manual
P3 semi auto printer manual
 
P6 semi auto printer manual
P6 semi auto printer manualP6 semi auto printer manual
P6 semi auto printer manual
 
Presentation on stenter machine
Presentation on stenter machinePresentation on stenter machine
Presentation on stenter machine
 
D:\Baring\Presentation
D:\Baring\PresentationD:\Baring\Presentation
D:\Baring\Presentation
 
D:\Baring\Presentation
D:\Baring\PresentationD:\Baring\Presentation
D:\Baring\Presentation
 
D:\Baring\Presentation
D:\Baring\PresentationD:\Baring\Presentation
D:\Baring\Presentation
 
D:\Baring\Presentation
D:\Baring\PresentationD:\Baring\Presentation
D:\Baring\Presentation
 
D:\Baring\Presentation
D:\Baring\PresentationD:\Baring\Presentation
D:\Baring\Presentation
 
D:\Baring\Presentation
D:\Baring\PresentationD:\Baring\Presentation
D:\Baring\Presentation
 
D:\Baring\Presentation
D:\Baring\PresentationD:\Baring\Presentation
D:\Baring\Presentation
 
D:\Baring\Presentation
D:\Baring\PresentationD:\Baring\Presentation
D:\Baring\Presentation
 
Rt 40-rev-2
Rt 40-rev-2Rt 40-rev-2
Rt 40-rev-2
 
Sensors used in sewing machine EOT
Sensors used in sewing machine EOTSensors used in sewing machine EOT
Sensors used in sewing machine EOT
 
Snb 3 viscometer manual
Snb 3  viscometer manualSnb 3  viscometer manual
Snb 3 viscometer manual
 
Delphi noida training report
Delphi noida training reportDelphi noida training report
Delphi noida training report
 
E 022 co2 fractional laser machine user manual
E 022 co2 fractional laser machine user manualE 022 co2 fractional laser machine user manual
E 022 co2 fractional laser machine user manual
 

More from Francesco Binda

Vendita Effettuata Vitha SPA in Famiglia 001
Vendita Effettuata Vitha SPA in Famiglia 001Vendita Effettuata Vitha SPA in Famiglia 001
Vendita Effettuata Vitha SPA in Famiglia 001Francesco Binda
 
Tirocinio Crescere in Digitale Approvazioni Firmate Abitare Agenzia Immobilia...
Tirocinio Crescere in Digitale Approvazioni Firmate Abitare Agenzia Immobilia...Tirocinio Crescere in Digitale Approvazioni Firmate Abitare Agenzia Immobilia...
Tirocinio Crescere in Digitale Approvazioni Firmate Abitare Agenzia Immobilia...Francesco Binda
 
Ossatura Programmatica per Microsoft - F.B.
Ossatura Programmatica per Microsoft - F.B.Ossatura Programmatica per Microsoft - F.B.
Ossatura Programmatica per Microsoft - F.B.Francesco Binda
 
Odesk Template - Francesco's Presentation Letter
Odesk Template - Francesco's Presentation Letter Odesk Template - Francesco's Presentation Letter
Odesk Template - Francesco's Presentation Letter Francesco Binda
 
demo to translation clothing articles
demo to translation clothing articlesdemo to translation clothing articles
demo to translation clothing articlesFrancesco Binda
 
certificate Digitalizer 89_100
certificate Digitalizer 89_100certificate Digitalizer 89_100
certificate Digitalizer 89_100Francesco Binda
 

More from Francesco Binda (7)

Vendita Effettuata Vitha SPA in Famiglia 001
Vendita Effettuata Vitha SPA in Famiglia 001Vendita Effettuata Vitha SPA in Famiglia 001
Vendita Effettuata Vitha SPA in Famiglia 001
 
venanzi performance
venanzi performancevenanzi performance
venanzi performance
 
Tirocinio Crescere in Digitale Approvazioni Firmate Abitare Agenzia Immobilia...
Tirocinio Crescere in Digitale Approvazioni Firmate Abitare Agenzia Immobilia...Tirocinio Crescere in Digitale Approvazioni Firmate Abitare Agenzia Immobilia...
Tirocinio Crescere in Digitale Approvazioni Firmate Abitare Agenzia Immobilia...
 
Ossatura Programmatica per Microsoft - F.B.
Ossatura Programmatica per Microsoft - F.B.Ossatura Programmatica per Microsoft - F.B.
Ossatura Programmatica per Microsoft - F.B.
 
Odesk Template - Francesco's Presentation Letter
Odesk Template - Francesco's Presentation Letter Odesk Template - Francesco's Presentation Letter
Odesk Template - Francesco's Presentation Letter
 
demo to translation clothing articles
demo to translation clothing articlesdemo to translation clothing articles
demo to translation clothing articles
 
certificate Digitalizer 89_100
certificate Digitalizer 89_100certificate Digitalizer 89_100
certificate Digitalizer 89_100
 

T300 Filter Option English

  • 1. 1 Operating Manual for the T-300 Filter option
  • 2. 2 Table of contents Electrical and air requirements 3 Safety notes 3 Unwind stand 4 Airing the shaft 5 Center laser line 6 Drop roller 7 Pre forming guides 8 Main forming guide 9 Encoder 10 Accumulator 11 Cut to length photo eye sensor 12 Sweeping system 13-14 Guillotine cutter 15 Conveyor puller roller 16 Out board puller 17 Conveyer 18 Rope pull 19 Puller pressure regulator 20 Cutter pressure regulator 21 Sweep pressure regulator 22 Dancer pressure 23 Screen shots 24-32
  • 3. 3 TheT-300Filteroptionpowerandairsourcesareran throughthe T-300. Pleasereferto the T-300operatingmanual forthecorrectpowerand airrequirements. Safety notes Do not adjust the material while the material is being welded. Keep hands, long hair, loose clothing, and articles such as neckties away from the rollers have pinch points rollers to avoid entanglement and entrapment that can trap body parts or clothing and cause serious injury. Provide enough space around machine to ensure the safe and effective operation. The machine must be motionless and moving parts blocked before any cleaning, oiling, adjusting, repairing or maintaining work is done on any repairing or maintaining work is done on any part of the machine. Always wear Personal protective equipment. (PPE) refers to protective clothing, helmets, goggles, or other garment designed to protect the wearer's body from injury.
  • 4. 4 Unwind stand Unwindstand The unwind stand will hold the roll of material. The machine runs off of tension. The unwind stand will keep the tension while the machine is running. The tension is controlled by the tension roller connectedto the load cells.
  • 5. 5 Airing the shaft. Airing the shaft The shaft must have air in it to hold the roll of material in place. The above picture shows where you air the shaft and release the air. Place the air nozzle in the shafts air valve to inflate. To deflate the air shaft hold in the valve till all the air is released.
  • 6. 6 Center laser line Thelaserline The laser line willallow the operator to quickly line up new rolls. The laser line is the center line of the machine that all measurements are made from.
  • 7. 7 Drop Roller DropRoller Thedrop roller will start the folding process of the tube. The drop roller is adjustable for different widths. The drop roller will adjust for the tubes lay flat Drop roller rotation adjustment Droprollerrotationadjustment By loosening the lower handle youwill be able to rotate the drop roller up or down to achieve the proper lay flat for different material widths and thickness.
  • 8. 8 Pre forming Guides Pre formingguide Afterthe drop roller, these guides will keep the edges of the material up and start the folding process before the material reaches the main tube guide. Pre forming guide
  • 9. 9 Main forming guide Mainformingguide Willform the tube forthe correctwelding width. The guide is adjustable fortube sizes from4 inches to 10 inches. The guide forming plates will hold the material to the correct size during the welding process. Toadjust the size loosen the guide forming locking knobs and adjust the size accordingly.To adjust the overlap, loosen the adjustable overlap locking knob. Youmay have to adjust the overlap when changing material and sizes to make sure the overlap is in the center of the T-300.While adjusting forthe overlap you may have to adjust the forming plates to achievethe correctoverlap welding width. Guide forming locking knobs Adjustable overlap locking knobs Forming plates
  • 10. 10 Encoder EncoderTheencoder willonly be used for lengths shorter than 2 feet and lengths longer than 15 feet. The settings forthe encoder willbe found on the machines HMI.
  • 11. 11 Accumulator Accumulator Theaccumulator is used fora continuous process. As the material is being cut, the accumulator will take up any slack whilethe machine is being cut so that the machine doesn’t stop the welding process.
  • 12. 12 Cut to Length Photo Eye Sensor Cut to length photo eye sensor. This will measure the length of material and trigger the cutter to cut to length. By pushing the blue or yellow arrow adjust your sensitivity. To change lengths you must move the sensor bracket left to right depending on size.
  • 13. 13 Sweeping system SweepingsystemThe sweeping system will push the material off the conveyer.The sweeping system is controlled by the cut. After the cut there is an adjustable timer that will trigger the sweeping systems. Eachsweep can moveleft to right to accommodateand length of material. Eachsweep can individually be turned on and off.
  • 14. 14 Sweep slide lock Sweepslidelock By loosening the slide locks you are able to move the system left and right. Sweeping system on/off toggle switch Sweepingsystemon/offtoggleswitch Willturn on and off each individual sweeping system.
  • 15. 15 Guillotine Cutter. GuillotineCutter willcutthe material at desired length triggered by the Cut to Length PhotoEyeSensor. Note: Never operate cutting unit withoutguards in place. Alwaysdisconnect electric and air to the machine prior to servicing.
  • 16. 16 Conveyor puller roller Conveyorpuller roller Thepuller roller will pull from the accumulator. The speed of the puller roller is determined by the position of the accumulator. The open/ close button is located on the HMI screen.
  • 17. 17 Out board puller Out boardpuller Willpull the material after the welding on the T-300. The speed controlis located on the T-300 HMI. To open the puller, liftthe top puller roller. Out board puller roller open/close handle
  • 18. 18 Conveyer Conveyer Will Move the Material To cut length. And feed out the end for finished product.
  • 19. 19 Rope pull Rope pull e stop Will shut off power to any moving part of the machine. Once the rope pull has been pulled you must reset by turning the blue button back to the forward arrow.
  • 20. 20 Puller pressure regulator Pullerpressueregulator Willincrease and decrease the pressure of the puller. To increase the pressure turn the knob clock wise and to decrease the pressure turn the knob counter clockwise. When decreasing the pressure it is recommended to turn the pressure to zerothen increase to the correctpressure.
  • 21. 21 Cutter pressure regulator Cutter pressureregulator Will increase and decrease the pressure of the cutter. To increase the pressure turn the knob clockwise and to decrease the pressure turn the knob counterclock wise. When decreasing the pressure it is recommended to turn the pressure to zero then increase to the correct pressure.
  • 22. 22 Sweep pressure regulator Sweeppressureregulator Will increase and decrease the pressure of the sweep system. To increase the pressure turn the knob clockwiseand to decrease the pressure turn the knob counter clockwise. When decreasing the pressure it is recommended to turn the pressure to zero then increase to the correct. .pressure.
  • 23. 23 Dancer pressure Dancerpressureregulator Willincrease and decrease the pressure of the sweep system. Toincrease the pressure turn the knob clockwise and to decrease the pressure turn the knob counterclockwise. When decreasing the pressure it is recommended to turn the pressure to zero then increase to the correct.
  • 24. 24 Screen shots Manual cut pb Will manually trigger the cutter. PullercloseWillmanually trigger the cutter. Manual ejectpb Willmanually trigger the sweeps. FWD jogpb Will jog the conveyerpuller forward Piececount Displays how many pieces you ran. Set pointIs the number of pieces that you wish to make. Reset Willreset both actual and set point numbers to zero. Note: any buttonin orangewill takeyouto that specificscreen.Anybutton inyellowisableto havethe valuechanged.Thebuttonsin redare formaintenancescreensonly.
  • 25. 25 Manual cut pb Will manually trigger the cutter. Pullerclose Willmanually trigger the cutter. Manual ejectpb Willmanually trigger the sweeps. Fwd jogpb Will jog the conveyerpuller forward Actual Displays how many pieces have been ran. Set point Is the number of pieces that youwish to make. Piececount Displays how many pieces youran. Set point Is the number of pieces that youwish to make. Reset Will reset both actual and set point numbers to zero.
  • 26. 26 Cutter Will enable the cutter. SweepsWillenable the sweeps. CounterWillenable the counter. Photo EyeWill enable the photo eye. Movetime to part eject Is the amount of time after the cut that the sweeps are activated.
  • 29. 29 Cutter Downtime Is the amount of time the cutter will stay downafter the cut. Ejectpart extend time Is the amount of time after the cut that the sweeps willtrigger. Timetotalizer Displays the amount of time the machine has been running. Youmust log into the maintenance screen to get to this screen. Note: any buttonin orangewill takeyouto that specificscreen.Anybutton inyellowisableto havethe valuechanged.Thebuttonsin redare formaintenancescreensonly.
  • 30. 30 Footagecounterscaling Will increase or decrease the length of the material. It is recommended to contactMiller Weldmaster before making any adjustments to the scaling factor. Reset Will reset the length of the material.
  • 31. 31 Alarm Screen. Displays any alarm that may have occurred. The button tells the machine that you recognized the problem and the proper adjustments have been made. You must push the ack. button to continue to run.
  • 32. 32 Alarm History Will display all alarms that have occurred.