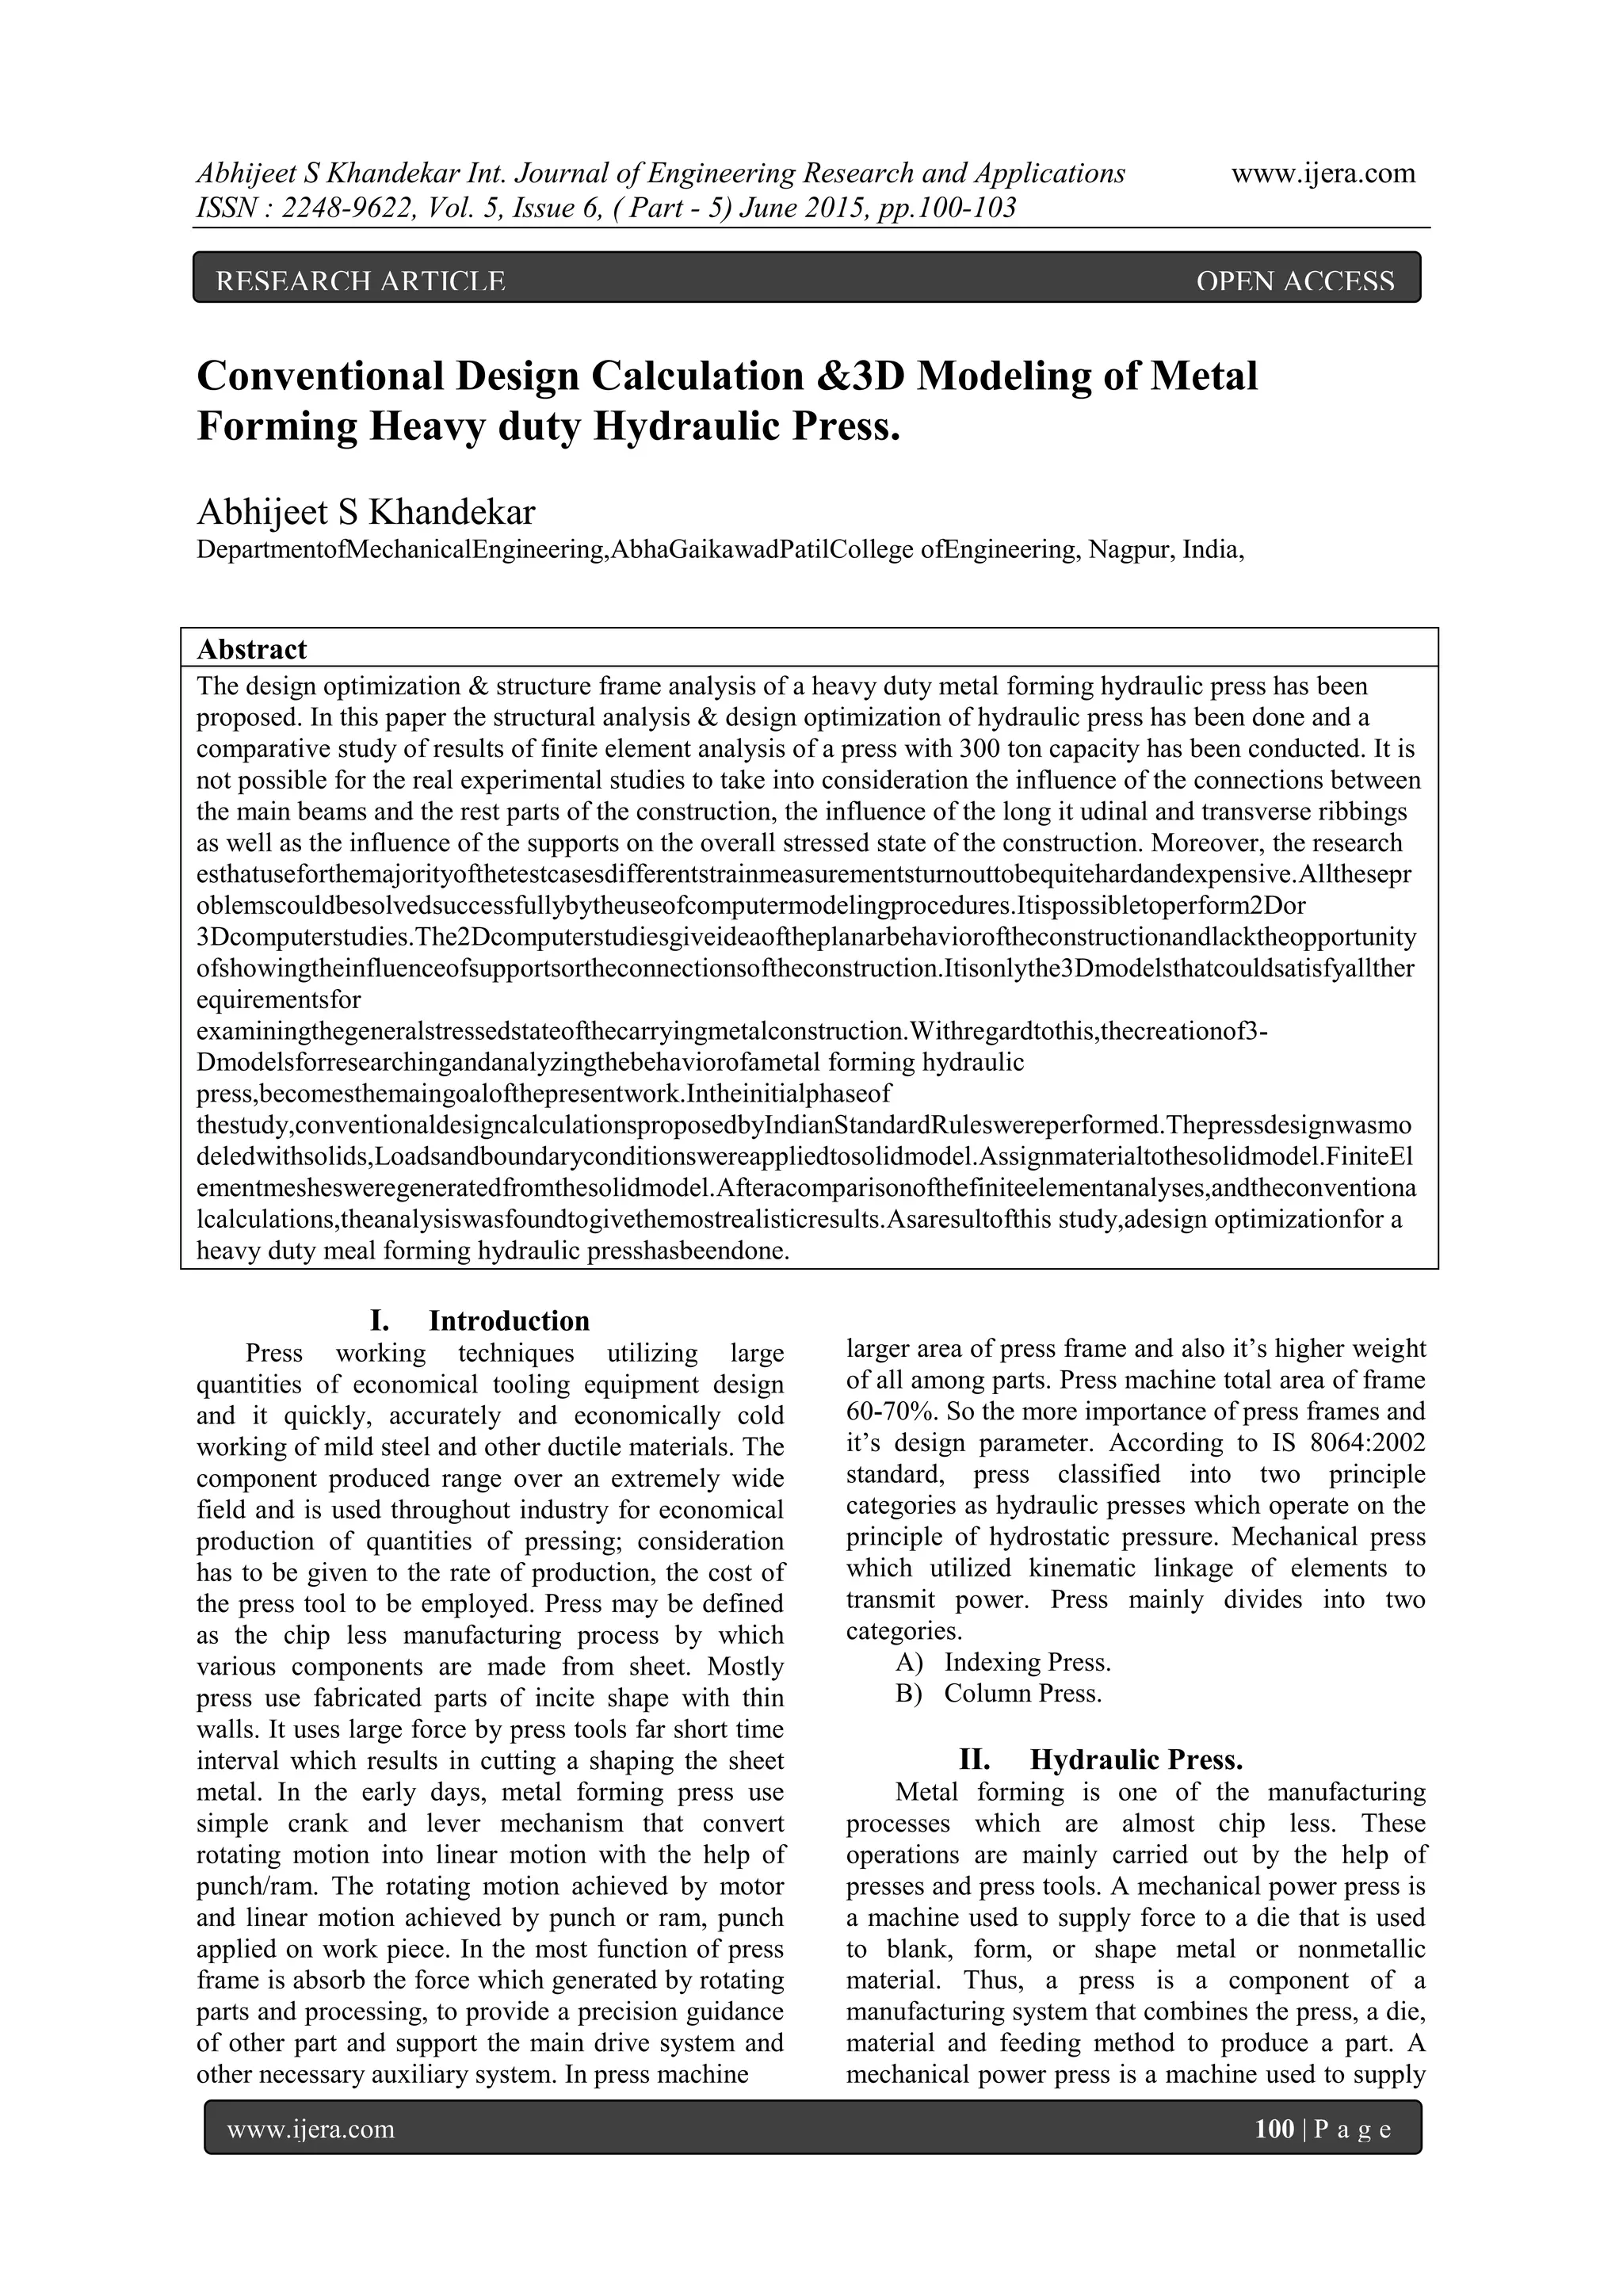
Abhijeet S Khandekar Int. Journal of Engineering Research and Applications www.ijera.com
ISSN : 2248-9622, Vol. 5, Issue 6, ( Part - 5) June 2015, pp.100-103
www.ijera.com 100 | P a g e
Conventional Design Calculation &3D Modeling of Metal
Forming Heavy duty Hydraulic Press.
Abhijeet S Khandekar
DepartmentofMechanicalEngineering,AbhaGaikawadPatilCollege ofEngineering, Nagpur, India,
Abstract
The design optimization & structure frame analysis of a heavy duty metal forming hydraulic press has been
proposed. In this paper the structural analysis & design optimization of hydraulic press has been done and a
comparative study of results of finite element analysis of a press with 300 ton capacity has been conducted. It is
not possible for the real experimental studies to take into consideration the influence of the connections between
the main beams and the rest parts of the construction, the influence of the long it udinal and transverse ribbings
as well as the influence of the supports on the overall stressed state of the construction. Moreover, the research
esthatuseforthemajorityofthetestcasesdifferentstrainmeasurementsturnouttobequitehardandexpensive.Allthesepr
oblemscouldbesolvedsuccessfullybytheuseofcomputermodelingprocedures.Itispossibletoperform2Dor
3Dcomputerstudies.The2Dcomputerstudiesgiveideaoftheplanarbehavioroftheconstructionandlacktheopportunity
ofshowingtheinfluenceofsupportsortheconnectionsoftheconstruction.Itisonlythe3Dmodelsthatcouldsatisfyallther
equirementsfor
examiningthegeneralstressedstateofthecarryingmetalconstruction.Withregardtothis,thecreationof3-
Dmodelsforresearchingandanalyzingthebehaviorofametal forming hydraulic
press,becomesthemaingoalofthepresentwork.Intheinitialphaseof
thestudy,conventionaldesigncalculationsproposedbyIndianStandardRuleswereperformed.Thepressdesignwasmo
deledwithsolids,Loadsandboundaryconditionswereappliedtosolidmodel.Assignmaterialtothesolidmodel.FiniteEl
ementmeshesweregeneratedfromthesolidmodel.Afteracomparisonofthefiniteelementanalyses,andtheconventiona
lcalculations,theanalysiswasfoundtogivethemostrealisticresults.Asaresultofthis study,adesign optimizationfor a
heavy duty meal forming hydraulic presshasbeendone.
I. Introduction
Press working techniques utilizing large
quantities of economical tooling equipment design
and it quickly, accurately and economically cold
working of mild steel and other ductile materials. The
component produced range over an extremely wide
field and is used throughout industry for economical
production of quantities of pressing; consideration
has to be given to the rate of production, the cost of
the press tool to be employed. Press may be defined
as the chip less manufacturing process by which
various components are made from sheet. Mostly
press use fabricated parts of incite shape with thin
walls. It uses large force by press tools far short time
interval which results in cutting a shaping the sheet
metal. In the early days, metal forming press use
simple crank and lever mechanism that convert
rotating motion into linear motion with the help of
punch/ram. The rotating motion achieved by motor
and linear motion achieved by punch or ram, punch
applied on work piece. In the most function of press
frame is absorb the force which generated by rotating
parts and processing, to provide a precision guidance
of other part and support the main drive system and
other necessary auxiliary system. In press machine
larger area of press frame and also it‟s higher weight
of all among parts. Press machine total area of frame
60-70%. So the more importance of press frames and
it‟s design parameter. According to IS 8064:2002
standard, press classified into two principle
categories as hydraulic presses which operate on the
principle of hydrostatic pressure. Mechanical press
which utilized kinematic linkage of elements to
transmit power. Press mainly divides into two
categories.
A) Indexing Press.
B) Column Press.
II. Hydraulic Press.
Metal forming is one of the manufacturing
processes which are almost chip less. These
operations are mainly carried out by the help of
presses and press tools. A mechanical power press is
a machine used to supply force to a die that is used
to blank, form, or shape metal or nonmetallic
material. Thus, a press is a component of a
manufacturing system that combines the press, a die,
material and feeding method to produce a part. A
mechanical power press is a machine used to supply
RESEARCH ARTICLE OPEN ACCESS
Abhijeet S Khandekar Int. Journal of Engineering Research and Applications www.ijera.com
ISSN : 2248-9622, Vol. 5, Issue 6, ( Part - 5) June 2015, pp.100-103
www.ijera.com 101 | P a g e
force to a die that is used to blank, form, or shape
metal or nonmetallic material. Thus, a press is a
component of a manufacturing system that combines
the press, a die, material and feeding method to
produce a part. Economy of construction and
unhindered access to the die area. Inclinable models
and those with moveable beds or tables also offer a
great deal of versatility, making them particularly
useful for short run production or job shop
applications. The drawback of the open frame design
is the fact that such presses are generally limited in
practice to the use of single dies. This is a result of
several factors including the lack of stiffness and the
typically small force capacity and die area of open
frame presses.
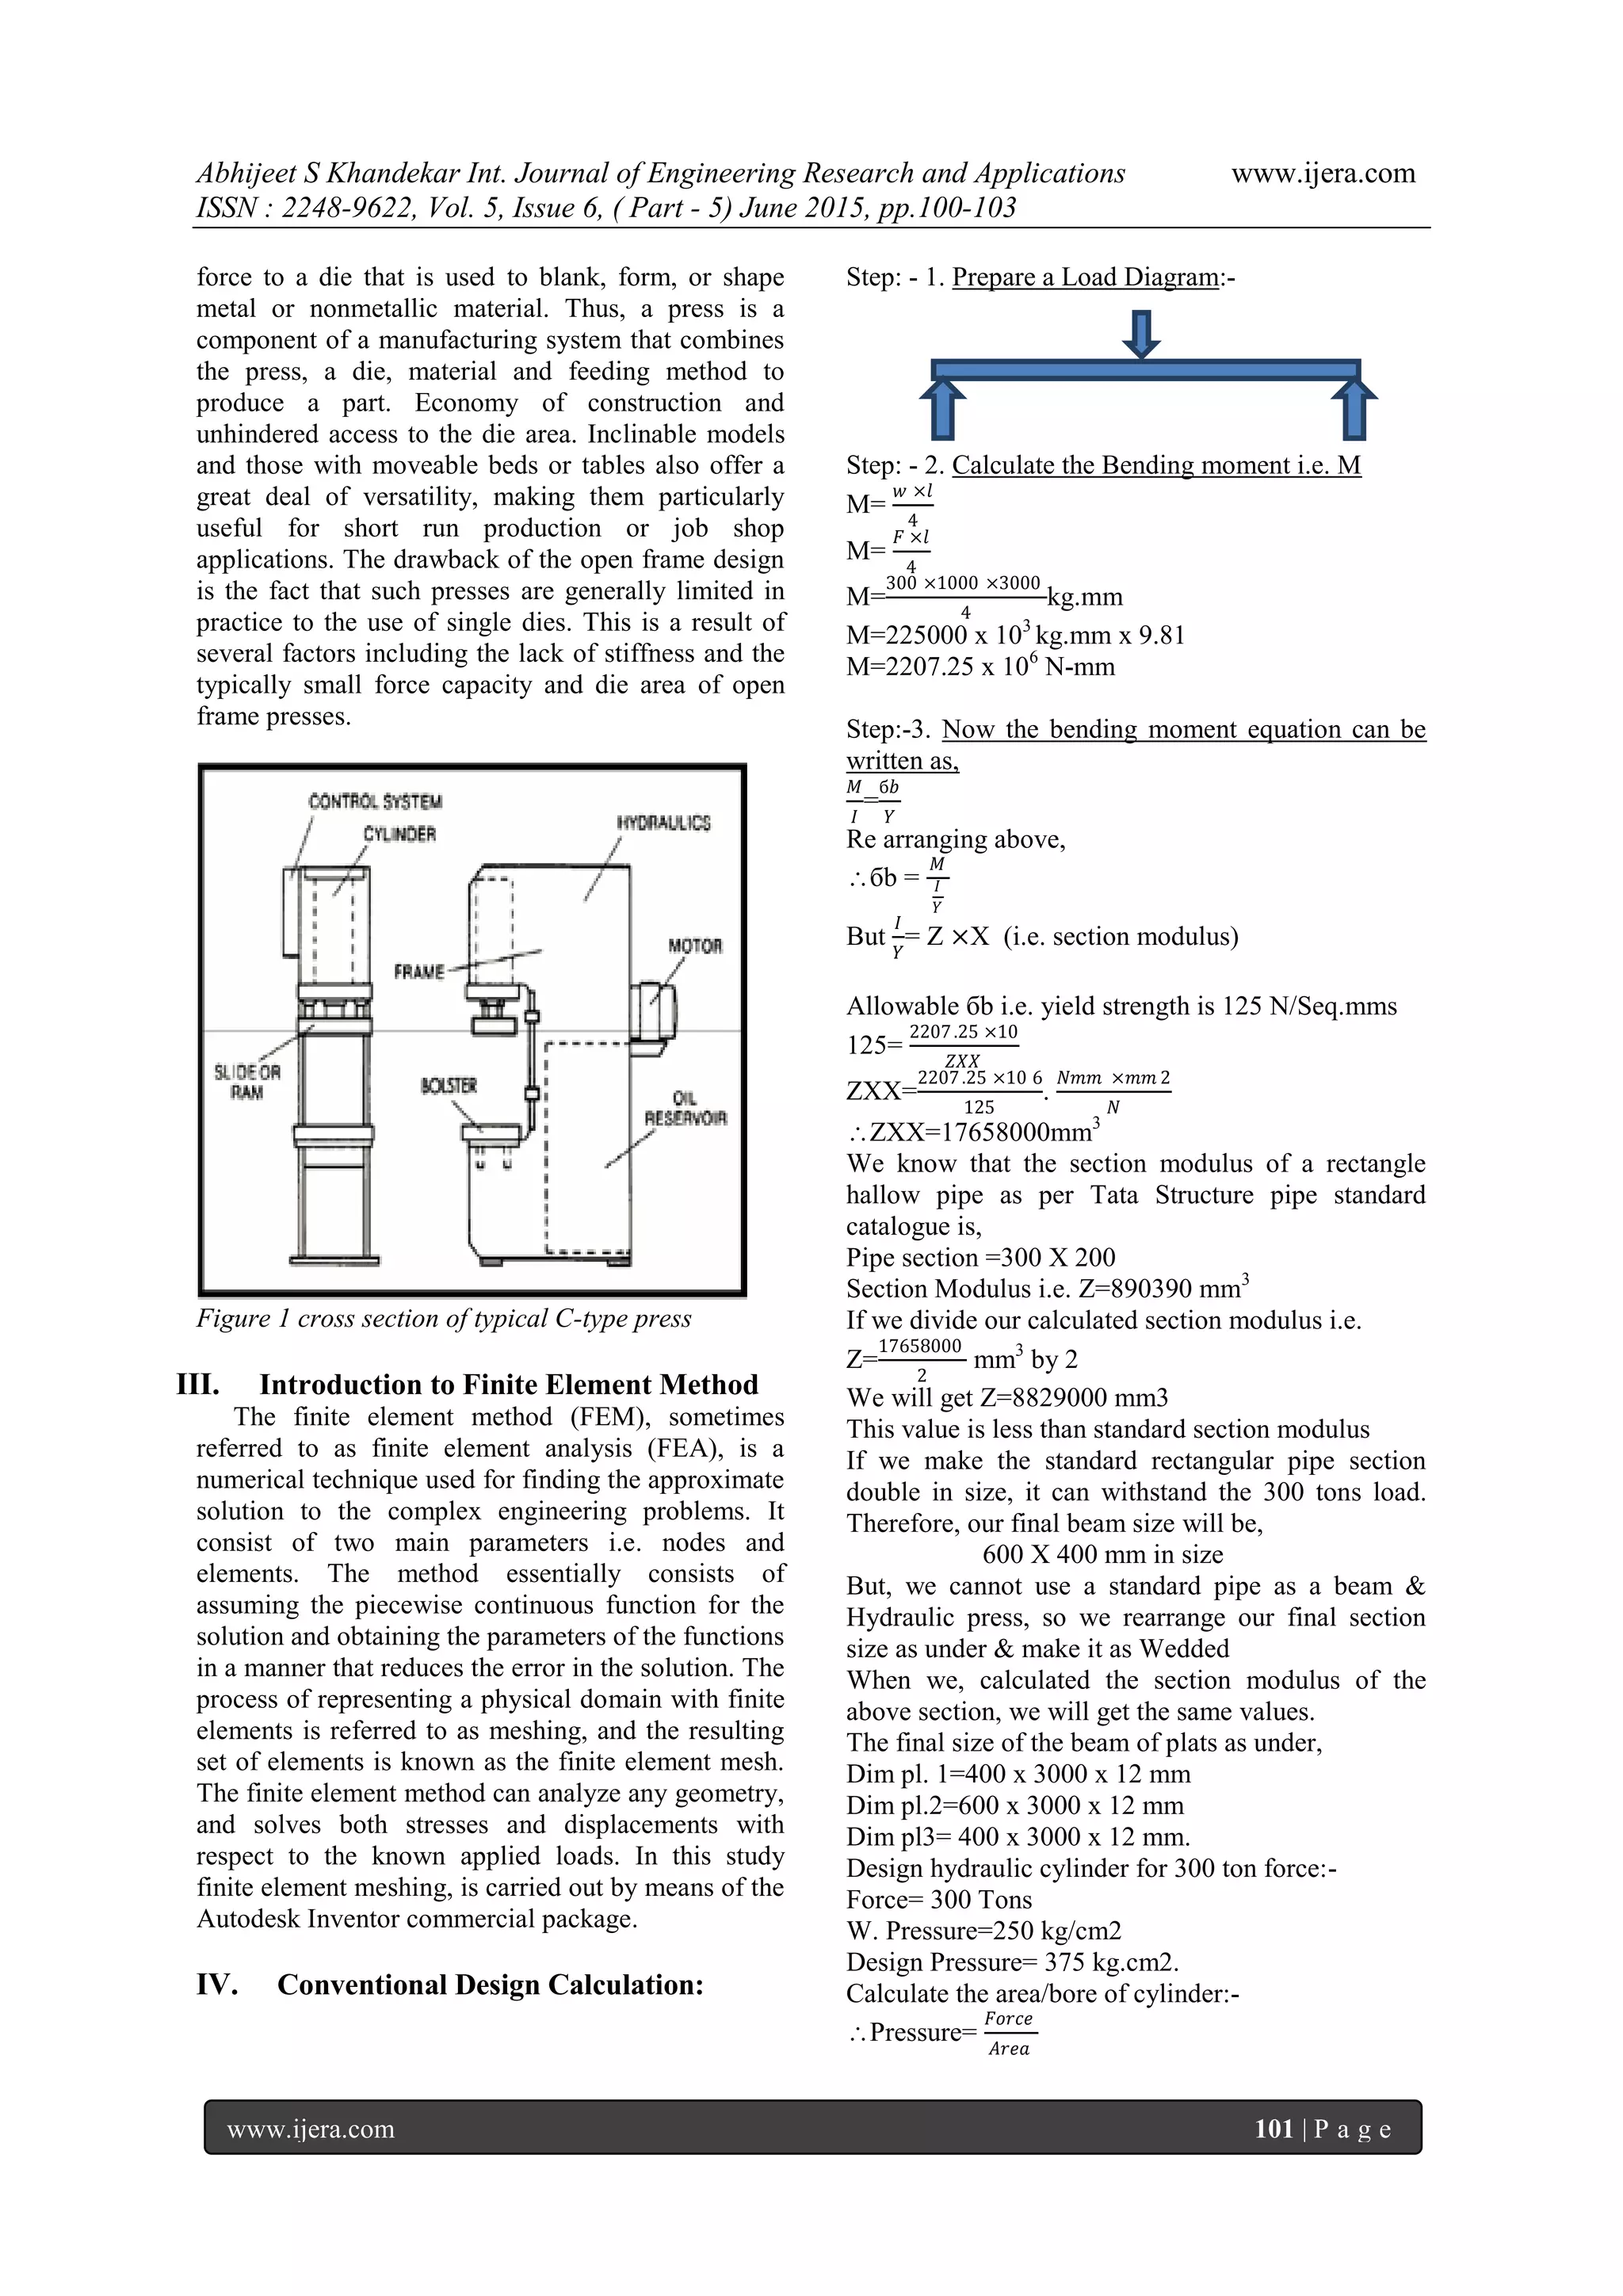
Figure 1 cross section of typical C-type press
III. Introduction to Finite Element Method
The finite element method (FEM), sometimes
referred to as finite element analysis (FEA), is a
numerical technique used for finding the approximate
solution to the complex engineering problems. It
consist of two main parameters i.e. nodes and
elements. The method essentially consists of
assuming the piecewise continuous function for the
solution and obtaining the parameters of the functions
in a manner that reduces the error in the solution. The
process of representing a physical domain with finite
elements is referred to as meshing, and the resulting
set of elements is known as the finite element mesh.
The finite element method can analyze any geometry,
and solves both stresses and displacements with
respect to the known applied loads. In this study
finite element meshing, is carried out by means of the
Autodesk Inventor commercial package.
IV. Conventional Design Calculation:
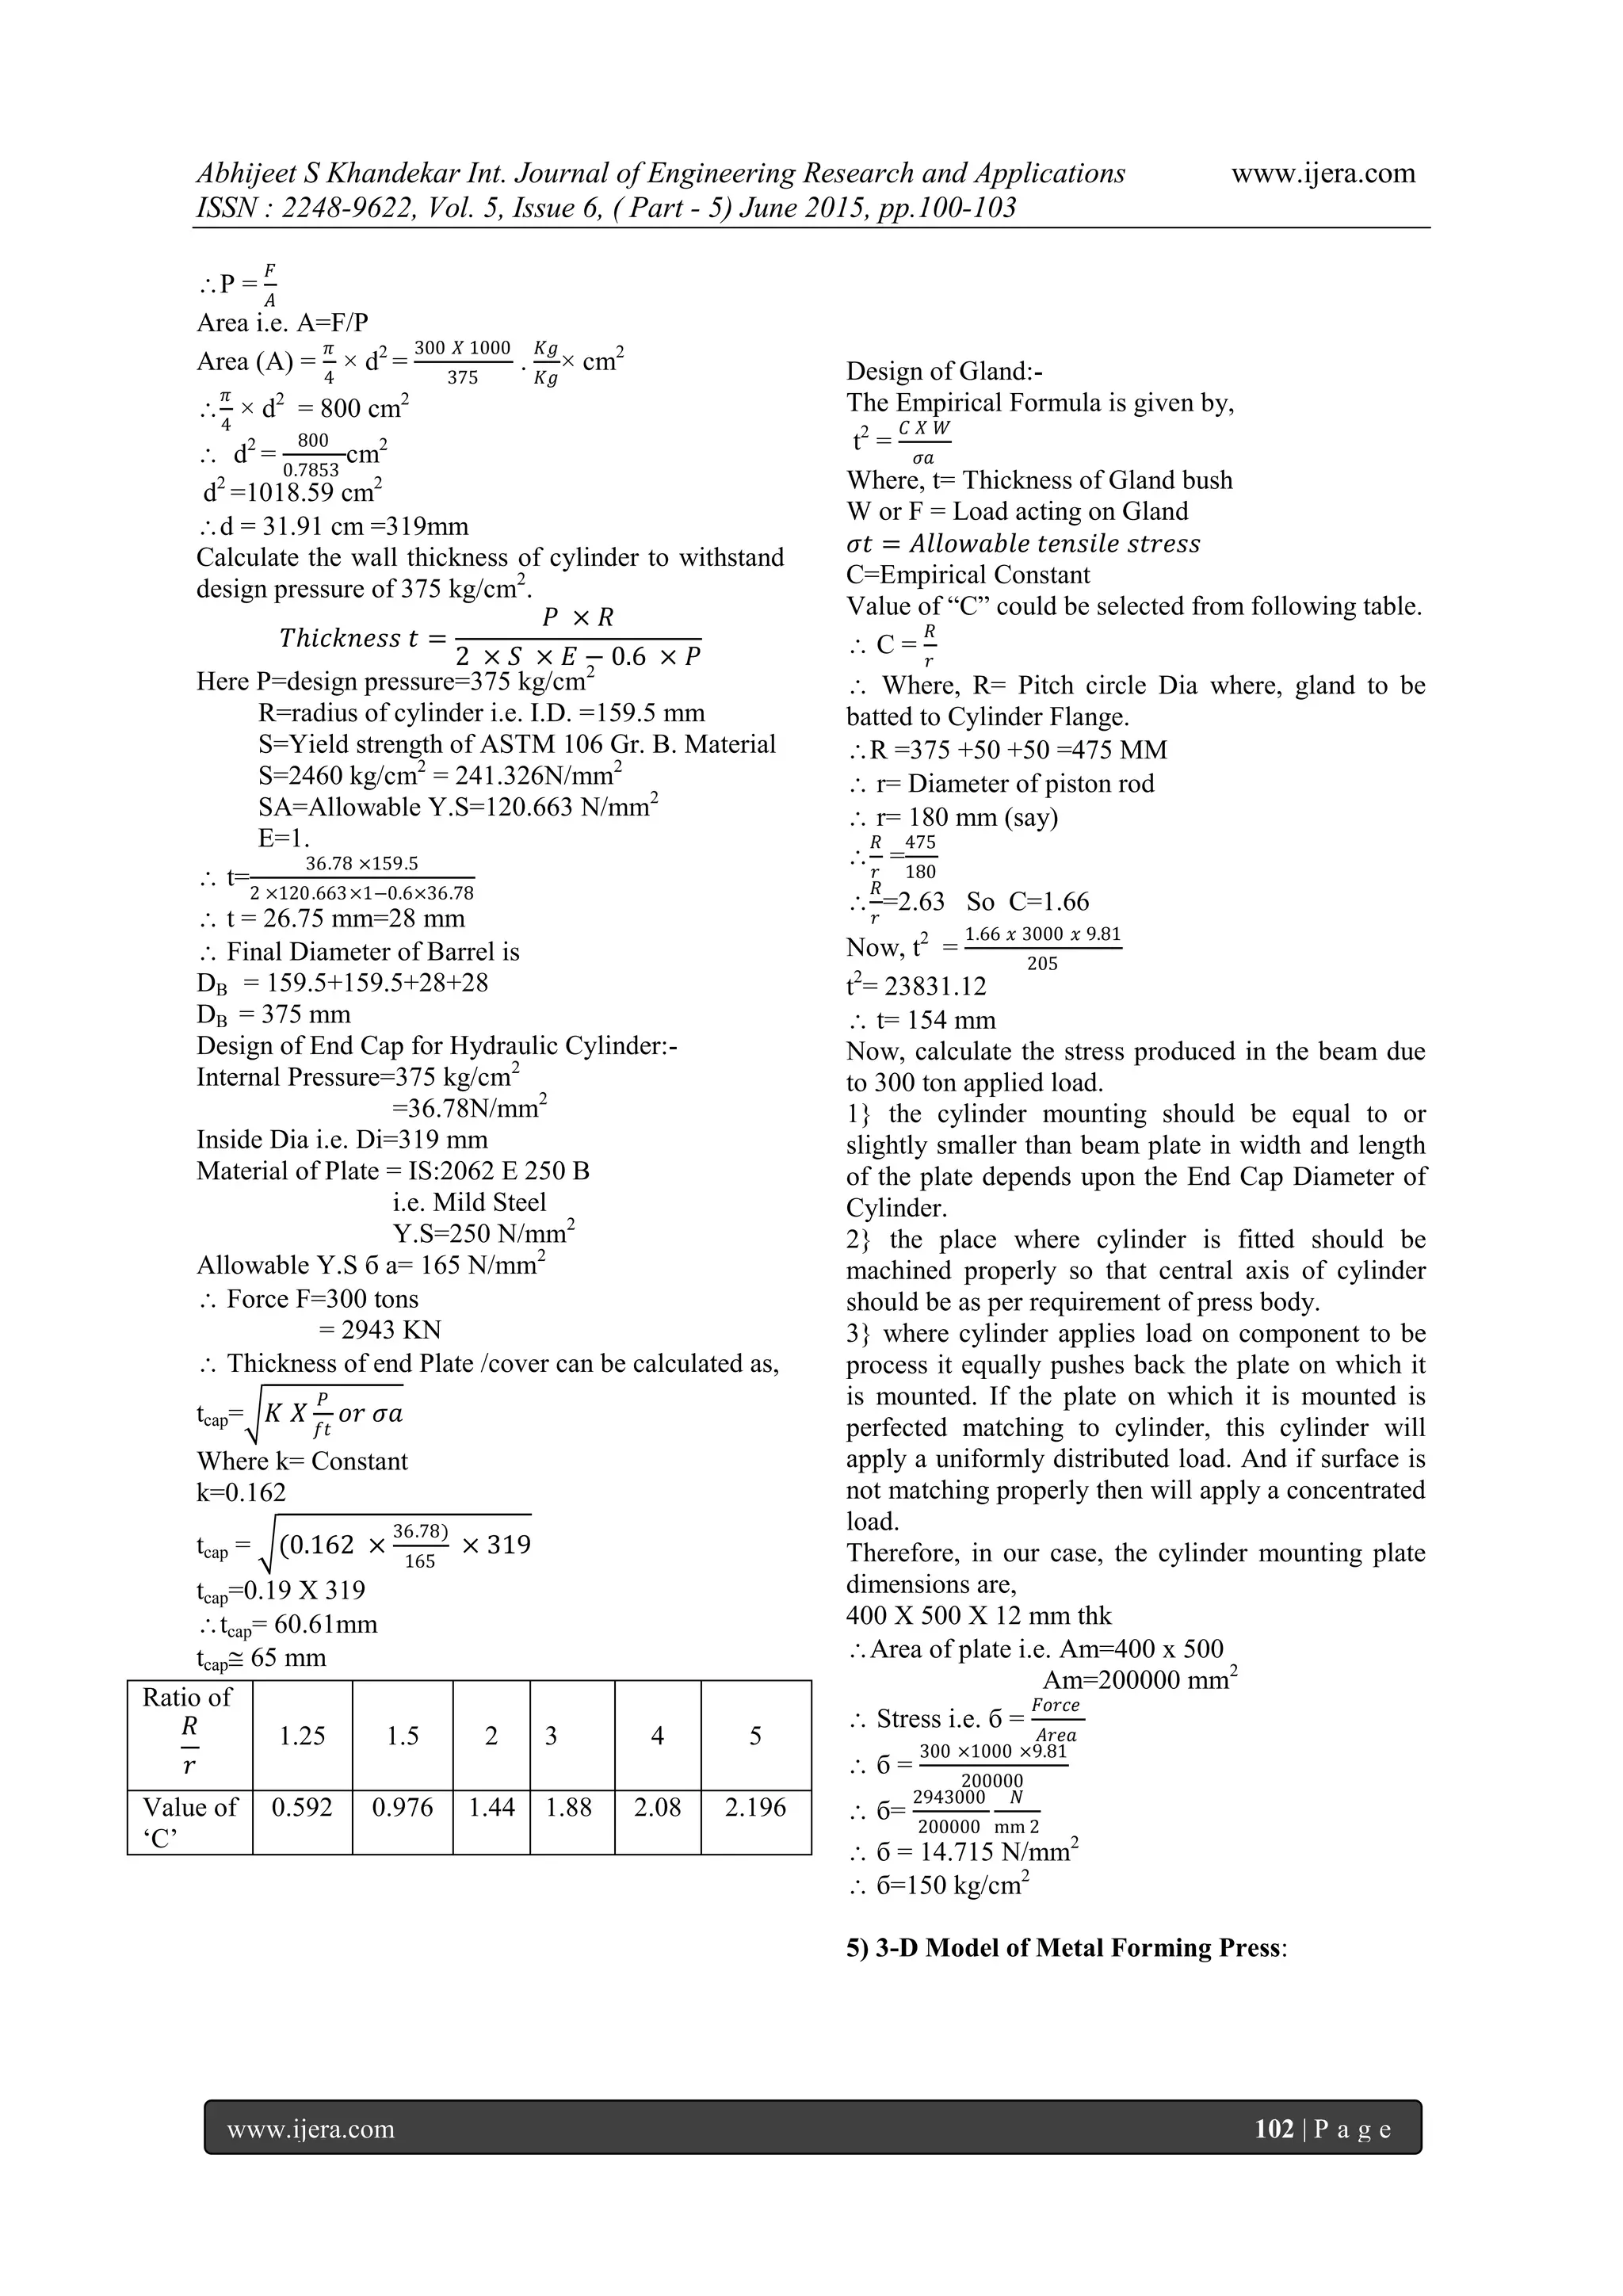
Step: - 1. Prepare a Load Diagram:-
Step: - 2. Calculate the Bending moment i.e. M
M=
𝑤 ×𝑙
4
M=
𝐹 ×𝑙
4
M=
300 ×1000 ×3000
4
kg.mm
M=225000 x 103
kg.mm x 9.81
M=2207.25 x 106
N-mm
Step:-3. Now the bending moment equation can be
written as,
𝑀
𝐼
=
б𝑏
𝑌
Re arranging above,
бb =
𝑀
𝐼
𝑌
But
𝐼
𝑌
= Z ×X (i.e. section modulus)
Allowable бb i.e. yield strength is 125 N/Seq.mms
125=
2207.25 ×10
𝑍𝑋𝑋
ZXX=
2207.25 ×10 6
125
.
𝑁𝑚𝑚 ×𝑚𝑚 2
𝑁
ZXX=17658000mm3
We know that the section modulus of a rectangle
hallow pipe as per Tata Structure pipe standard
catalogue is,
Pipe section =300 X 200
Section Modulus i.e. Z=890390 mm3
If we divide our calculated section modulus i.e.
Z=
17658000
2
mm3
by 2
We will get Z=8829000 mm3
This value is less than standard section modulus
If we make the standard rectangular pipe section
double in size, it can withstand the 300 tons load.
Therefore, our final beam size will be,
600 X 400 mm in size
But, we cannot use a standard pipe as a beam &
Hydraulic press, so we rearrange our final section
size as under & make it as Wedded
When we, calculated the section modulus of the
above section, we will get the same values.
The final size of the beam of plats as under,
Dim pl. 1=400 x 3000 x 12 mm
Dim pl.2=600 x 3000 x 12 mm
Dim pl3= 400 x 3000 x 12 mm.
Design hydraulic cylinder for 300 ton force:-
Force= 300 Tons
W. Pressure=250 kg/cm2
Design Pressure= 375 kg.cm2.
Calculate the area/bore of cylinder:-
Pressure=
𝐹𝑜𝑟𝑐𝑒
𝐴𝑟𝑒𝑎
Abhijeet S Khandekar Int. Journal of Engineering Research and Applications www.ijera.com
ISSN : 2248-9622, Vol. 5, Issue 6, ( Part - 5) June 2015, pp.100-103
www.ijera.com 102 | P a g e
P =
𝐹
𝐴
Area i.e. A=F/P
Area (A) =
𝜋
4
× d2
=
300 𝑋 1000
375
.
𝐾𝑔
𝐾𝑔
× cm2

𝜋
4
× d2
= 800 cm2
 d2
=
800
0.7853
cm2
d2
=1018.59 cm2
d = 31.91 cm =319mm
Calculate the wall thickness of cylinder to withstand
design pressure of 375 kg/cm2
.
𝑇𝑕𝑖𝑐𝑘𝑛𝑒𝑠𝑠 𝑡 =
𝑃 × 𝑅
2 × 𝑆 × 𝐸 − 0.6 × 𝑃
Here P=design pressure=375 kg/cm2
R=radius of cylinder i.e. I.D. =159.5 mm
S=Yield strength of ASTM 106 Gr. B. Material
S=2460 kg/cm2
= 241.326N/mm2
SA=Allowable Y.S=120.663 N/mm2
E=1.
 t=
36.78 ×159.5
2 ×120.663×1−0.6×36.78
 t = 26.75 mm=28 mm
 Final Diameter of Barrel is
DB = 159.5+159.5+28+28
DB = 375 mm
Design of End Cap for Hydraulic Cylinder:-
Internal Pressure=375 kg/cm2
=36.78N/mm2
Inside Dia i.e. Di=319 mm
Material of Plate = IS:2062 E 250 B
i.e. Mild Steel
Y.S=250 N/mm2
Allowable Y.S б a= 165 N/mm2
 Force F=300 tons
= 2943 KN
 Thickness of end Plate /cover can be calculated as,
tcap= 𝐾 𝑋
𝑃
𝑓𝑡
𝑜𝑟 𝜎𝑎
Where k= Constant
k=0.162
tcap = (0.162 ×
36.78)
165
× 319
tcap=0.19 X 319
tcap= 60.61mm
tcap 65 mm
Design of Gland:-
The Empirical Formula is given by,
t2
=
𝐶 𝑋 𝑊
𝜎𝑎
Where, t= Thickness of Gland bush
W or F = Load acting on Gland
𝜎𝑡 = 𝐴𝑙𝑙𝑜𝑤𝑎𝑏𝑙𝑒 𝑡𝑒𝑛𝑠𝑖𝑙𝑒 𝑠𝑡𝑟𝑒𝑠𝑠
C=Empirical Constant
Value of “C” could be selected from following table.
 C =
𝑅
𝑟
 Where, R= Pitch circle Dia where, gland to be
batted to Cylinder Flange.
R =375 +50 +50 =475 MM
 r= Diameter of piston rod
 r= 180 mm (say)

𝑅
𝑟
=
475
180

𝑅
𝑟
=2.63 So C=1.66
Now, t2
=
1.66 𝑥 3000 𝑥 9.81
205
t2
= 23831.12
 t= 154 mm
Now, calculate the stress produced in the beam due
to 300 ton applied load.
1} the cylinder mounting should be equal to or
slightly smaller than beam plate in width and length
of the plate depends upon the End Cap Diameter of
Cylinder.
2} the place where cylinder is fitted should be
machined properly so that central axis of cylinder
should be as per requirement of press body.
3} where cylinder applies load on component to be
process it equally pushes back the plate on which it
is mounted. If the plate on which it is mounted is
perfected matching to cylinder, this cylinder will
apply a uniformly distributed load. And if surface is
not matching properly then will apply a concentrated
load.
Therefore, in our case, the cylinder mounting plate
dimensions are,
400 X 500 X 12 mm thk
Area of plate i.e. Am=400 x 500
Am=200000 mm2
 Stress i.e. б =
𝐹𝑜𝑟𝑐𝑒
𝐴𝑟𝑒𝑎
 б =
300 ×1000 ×9.81
200000
 б=
2943000
200000
𝑁
mm 2
 б = 14.715 N/mm2
 б=150 kg/cm2
5) 3-D Model of Metal Forming Press:
𝑅
𝑟
Ratio of
1.25 1.5 2 3 4 5
Value of
„C‟
0.592 0.976 1.44 1.88 2.08 2.196
Abhijeet S Khandekar Int. Journal of Engineering Research and Applications www.ijera.com
ISSN : 2248-9622, Vol. 5, Issue 6, ( Part - 5) June 2015, pp.100-103
www.ijera.com 103 | P a g e
V. Conclusion.
In this paper, conventional design calculation of
Metal Forming Heavy duty Hydraulic Presshas been
defined& 3D modeling of the press has been done.
Stress obtained by conventional design calculation is
б=150 kg/cm2
Further Finite element method will be
used to calculate design for the optimization.
References / Bibliography:
[1] IS 8064:2002, “Method of Designation of
Mechanical & Hydraulic Presses” published
by Bureau of Indian Standards, New Delhi,
April 2002.
[2] Muni Prabaharan and V.Amarnath, “Structural
Optimization of 5Ton Hydraulic Press and
Scrap Baling Press for Cost Reduction by
Topology”, International Journal of Modelling
and Optimization, Vol. 1, No. 3, August 2011.
[3] Zhicheng Huang, Nanxing Wu, Xingguo
Wang, “Contact Analysis on the Whole Frame
of 32.8MN PRESS”, TELKOMNIKA, Vol.
11, July 2013.
[4] H. N. Chauhan, M.P. Bambhani “Design &
Analysis of Frame of 63 Ton Power press
Machine by using Finite Element Method”,
Indian Journal of Applied Research,
Engineering, Volume-3, July 2013.
[5] B.N. Khicadia, D. M.Chauhan “A review on
Design & Analysis of Mechanical Press
Frame” -International Journal of Advance
Engineering and Research Development,
Volume 1, June 2014.

Conventional Design Calculation &3D Modeling of Metal Forming Heavy duty Hydraulic Press

  • 1.
    Abhijeet S KhandekarInt. Journal of Engineering Research and Applications www.ijera.com ISSN : 2248-9622, Vol. 5, Issue 6, ( Part - 5) June 2015, pp.100-103 www.ijera.com 100 | P a g e Conventional Design Calculation &3D Modeling of Metal Forming Heavy duty Hydraulic Press. Abhijeet S Khandekar DepartmentofMechanicalEngineering,AbhaGaikawadPatilCollege ofEngineering, Nagpur, India, Abstract The design optimization & structure frame analysis of a heavy duty metal forming hydraulic press has been proposed. In this paper the structural analysis & design optimization of hydraulic press has been done and a comparative study of results of finite element analysis of a press with 300 ton capacity has been conducted. It is not possible for the real experimental studies to take into consideration the influence of the connections between the main beams and the rest parts of the construction, the influence of the long it udinal and transverse ribbings as well as the influence of the supports on the overall stressed state of the construction. Moreover, the research esthatuseforthemajorityofthetestcasesdifferentstrainmeasurementsturnouttobequitehardandexpensive.Allthesepr oblemscouldbesolvedsuccessfullybytheuseofcomputermodelingprocedures.Itispossibletoperform2Dor 3Dcomputerstudies.The2Dcomputerstudiesgiveideaoftheplanarbehavioroftheconstructionandlacktheopportunity ofshowingtheinfluenceofsupportsortheconnectionsoftheconstruction.Itisonlythe3Dmodelsthatcouldsatisfyallther equirementsfor examiningthegeneralstressedstateofthecarryingmetalconstruction.Withregardtothis,thecreationof3- Dmodelsforresearchingandanalyzingthebehaviorofametal forming hydraulic press,becomesthemaingoalofthepresentwork.Intheinitialphaseof thestudy,conventionaldesigncalculationsproposedbyIndianStandardRuleswereperformed.Thepressdesignwasmo deledwithsolids,Loadsandboundaryconditionswereappliedtosolidmodel.Assignmaterialtothesolidmodel.FiniteEl ementmeshesweregeneratedfromthesolidmodel.Afteracomparisonofthefiniteelementanalyses,andtheconventiona lcalculations,theanalysiswasfoundtogivethemostrealisticresults.Asaresultofthis study,adesign optimizationfor a heavy duty meal forming hydraulic presshasbeendone. I. Introduction Press working techniques utilizing large quantities of economical tooling equipment design and it quickly, accurately and economically cold working of mild steel and other ductile materials. The component produced range over an extremely wide field and is used throughout industry for economical production of quantities of pressing; consideration has to be given to the rate of production, the cost of the press tool to be employed. Press may be defined as the chip less manufacturing process by which various components are made from sheet. Mostly press use fabricated parts of incite shape with thin walls. It uses large force by press tools far short time interval which results in cutting a shaping the sheet metal. In the early days, metal forming press use simple crank and lever mechanism that convert rotating motion into linear motion with the help of punch/ram. The rotating motion achieved by motor and linear motion achieved by punch or ram, punch applied on work piece. In the most function of press frame is absorb the force which generated by rotating parts and processing, to provide a precision guidance of other part and support the main drive system and other necessary auxiliary system. In press machine larger area of press frame and also it‟s higher weight of all among parts. Press machine total area of frame 60-70%. So the more importance of press frames and it‟s design parameter. According to IS 8064:2002 standard, press classified into two principle categories as hydraulic presses which operate on the principle of hydrostatic pressure. Mechanical press which utilized kinematic linkage of elements to transmit power. Press mainly divides into two categories. A) Indexing Press. B) Column Press. II. Hydraulic Press. Metal forming is one of the manufacturing processes which are almost chip less. These operations are mainly carried out by the help of presses and press tools. A mechanical power press is a machine used to supply force to a die that is used to blank, form, or shape metal or nonmetallic material. Thus, a press is a component of a manufacturing system that combines the press, a die, material and feeding method to produce a part. A mechanical power press is a machine used to supply RESEARCH ARTICLE OPEN ACCESS
  • 2.
    Abhijeet S KhandekarInt. Journal of Engineering Research and Applications www.ijera.com ISSN : 2248-9622, Vol. 5, Issue 6, ( Part - 5) June 2015, pp.100-103 www.ijera.com 101 | P a g e force to a die that is used to blank, form, or shape metal or nonmetallic material. Thus, a press is a component of a manufacturing system that combines the press, a die, material and feeding method to produce a part. Economy of construction and unhindered access to the die area. Inclinable models and those with moveable beds or tables also offer a great deal of versatility, making them particularly useful for short run production or job shop applications. The drawback of the open frame design is the fact that such presses are generally limited in practice to the use of single dies. This is a result of several factors including the lack of stiffness and the typically small force capacity and die area of open frame presses. Figure 1 cross section of typical C-type press III. Introduction to Finite Element Method The finite element method (FEM), sometimes referred to as finite element analysis (FEA), is a numerical technique used for finding the approximate solution to the complex engineering problems. It consist of two main parameters i.e. nodes and elements. The method essentially consists of assuming the piecewise continuous function for the solution and obtaining the parameters of the functions in a manner that reduces the error in the solution. The process of representing a physical domain with finite elements is referred to as meshing, and the resulting set of elements is known as the finite element mesh. The finite element method can analyze any geometry, and solves both stresses and displacements with respect to the known applied loads. In this study finite element meshing, is carried out by means of the Autodesk Inventor commercial package. IV. Conventional Design Calculation: Step: - 1. Prepare a Load Diagram:- Step: - 2. Calculate the Bending moment i.e. M M= 𝑤 ×𝑙 4 M= 𝐹 ×𝑙 4 M= 300 ×1000 ×3000 4 kg.mm M=225000 x 103 kg.mm x 9.81 M=2207.25 x 106 N-mm Step:-3. Now the bending moment equation can be written as, 𝑀 𝐼 = б𝑏 𝑌 Re arranging above, бb = 𝑀 𝐼 𝑌 But 𝐼 𝑌 = Z ×X (i.e. section modulus) Allowable бb i.e. yield strength is 125 N/Seq.mms 125= 2207.25 ×10 𝑍𝑋𝑋 ZXX= 2207.25 ×10 6 125 . 𝑁𝑚𝑚 ×𝑚𝑚 2 𝑁 ZXX=17658000mm3 We know that the section modulus of a rectangle hallow pipe as per Tata Structure pipe standard catalogue is, Pipe section =300 X 200 Section Modulus i.e. Z=890390 mm3 If we divide our calculated section modulus i.e. Z= 17658000 2 mm3 by 2 We will get Z=8829000 mm3 This value is less than standard section modulus If we make the standard rectangular pipe section double in size, it can withstand the 300 tons load. Therefore, our final beam size will be, 600 X 400 mm in size But, we cannot use a standard pipe as a beam & Hydraulic press, so we rearrange our final section size as under & make it as Wedded When we, calculated the section modulus of the above section, we will get the same values. The final size of the beam of plats as under, Dim pl. 1=400 x 3000 x 12 mm Dim pl.2=600 x 3000 x 12 mm Dim pl3= 400 x 3000 x 12 mm. Design hydraulic cylinder for 300 ton force:- Force= 300 Tons W. Pressure=250 kg/cm2 Design Pressure= 375 kg.cm2. Calculate the area/bore of cylinder:- Pressure= 𝐹𝑜𝑟𝑐𝑒 𝐴𝑟𝑒𝑎
  • 3.
    Abhijeet S KhandekarInt. Journal of Engineering Research and Applications www.ijera.com ISSN : 2248-9622, Vol. 5, Issue 6, ( Part - 5) June 2015, pp.100-103 www.ijera.com 102 | P a g e P = 𝐹 𝐴 Area i.e. A=F/P Area (A) = 𝜋 4 × d2 = 300 𝑋 1000 375 . 𝐾𝑔 𝐾𝑔 × cm2  𝜋 4 × d2 = 800 cm2  d2 = 800 0.7853 cm2 d2 =1018.59 cm2 d = 31.91 cm =319mm Calculate the wall thickness of cylinder to withstand design pressure of 375 kg/cm2 . 𝑇𝑕𝑖𝑐𝑘𝑛𝑒𝑠𝑠 𝑡 = 𝑃 × 𝑅 2 × 𝑆 × 𝐸 − 0.6 × 𝑃 Here P=design pressure=375 kg/cm2 R=radius of cylinder i.e. I.D. =159.5 mm S=Yield strength of ASTM 106 Gr. B. Material S=2460 kg/cm2 = 241.326N/mm2 SA=Allowable Y.S=120.663 N/mm2 E=1.  t= 36.78 ×159.5 2 ×120.663×1−0.6×36.78  t = 26.75 mm=28 mm  Final Diameter of Barrel is DB = 159.5+159.5+28+28 DB = 375 mm Design of End Cap for Hydraulic Cylinder:- Internal Pressure=375 kg/cm2 =36.78N/mm2 Inside Dia i.e. Di=319 mm Material of Plate = IS:2062 E 250 B i.e. Mild Steel Y.S=250 N/mm2 Allowable Y.S б a= 165 N/mm2  Force F=300 tons = 2943 KN  Thickness of end Plate /cover can be calculated as, tcap= 𝐾 𝑋 𝑃 𝑓𝑡 𝑜𝑟 𝜎𝑎 Where k= Constant k=0.162 tcap = (0.162 × 36.78) 165 × 319 tcap=0.19 X 319 tcap= 60.61mm tcap 65 mm Design of Gland:- The Empirical Formula is given by, t2 = 𝐶 𝑋 𝑊 𝜎𝑎 Where, t= Thickness of Gland bush W or F = Load acting on Gland 𝜎𝑡 = 𝐴𝑙𝑙𝑜𝑤𝑎𝑏𝑙𝑒 𝑡𝑒𝑛𝑠𝑖𝑙𝑒 𝑠𝑡𝑟𝑒𝑠𝑠 C=Empirical Constant Value of “C” could be selected from following table.  C = 𝑅 𝑟  Where, R= Pitch circle Dia where, gland to be batted to Cylinder Flange. R =375 +50 +50 =475 MM  r= Diameter of piston rod  r= 180 mm (say)  𝑅 𝑟 = 475 180  𝑅 𝑟 =2.63 So C=1.66 Now, t2 = 1.66 𝑥 3000 𝑥 9.81 205 t2 = 23831.12  t= 154 mm Now, calculate the stress produced in the beam due to 300 ton applied load. 1} the cylinder mounting should be equal to or slightly smaller than beam plate in width and length of the plate depends upon the End Cap Diameter of Cylinder. 2} the place where cylinder is fitted should be machined properly so that central axis of cylinder should be as per requirement of press body. 3} where cylinder applies load on component to be process it equally pushes back the plate on which it is mounted. If the plate on which it is mounted is perfected matching to cylinder, this cylinder will apply a uniformly distributed load. And if surface is not matching properly then will apply a concentrated load. Therefore, in our case, the cylinder mounting plate dimensions are, 400 X 500 X 12 mm thk Area of plate i.e. Am=400 x 500 Am=200000 mm2  Stress i.e. б = 𝐹𝑜𝑟𝑐𝑒 𝐴𝑟𝑒𝑎  б = 300 ×1000 ×9.81 200000  б= 2943000 200000 𝑁 mm 2  б = 14.715 N/mm2  б=150 kg/cm2 5) 3-D Model of Metal Forming Press: 𝑅 𝑟 Ratio of 1.25 1.5 2 3 4 5 Value of „C‟ 0.592 0.976 1.44 1.88 2.08 2.196
  • 4.
    Abhijeet S KhandekarInt. Journal of Engineering Research and Applications www.ijera.com ISSN : 2248-9622, Vol. 5, Issue 6, ( Part - 5) June 2015, pp.100-103 www.ijera.com 103 | P a g e V. Conclusion. In this paper, conventional design calculation of Metal Forming Heavy duty Hydraulic Presshas been defined& 3D modeling of the press has been done. Stress obtained by conventional design calculation is б=150 kg/cm2 Further Finite element method will be used to calculate design for the optimization. References / Bibliography: [1] IS 8064:2002, “Method of Designation of Mechanical & Hydraulic Presses” published by Bureau of Indian Standards, New Delhi, April 2002. [2] Muni Prabaharan and V.Amarnath, “Structural Optimization of 5Ton Hydraulic Press and Scrap Baling Press for Cost Reduction by Topology”, International Journal of Modelling and Optimization, Vol. 1, No. 3, August 2011. [3] Zhicheng Huang, Nanxing Wu, Xingguo Wang, “Contact Analysis on the Whole Frame of 32.8MN PRESS”, TELKOMNIKA, Vol. 11, July 2013. [4] H. N. Chauhan, M.P. Bambhani “Design & Analysis of Frame of 63 Ton Power press Machine by using Finite Element Method”, Indian Journal of Applied Research, Engineering, Volume-3, July 2013. [5] B.N. Khicadia, D. M.Chauhan “A review on Design & Analysis of Mechanical Press Frame” -International Journal of Advance Engineering and Research Development, Volume 1, June 2014.