
Recommended
More Related Content
Recently uploaded
Recently uploaded (20)
Featured
Featured (20)
Operations Scheduling Presentation 22 jun11
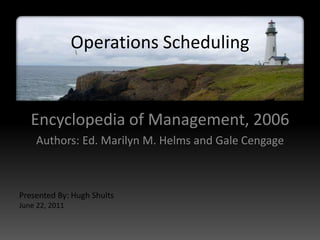
- 1. Operations Scheduling Encyclopedia of Management, 2006 Authors: Ed. Marilyn M. Helms and Gale Cengage Presented By: Hugh Shults June 22, 2011
- 2. Agenda JAN FEB MAR APR MAY JUN • Overview • Loading • Sequencing • Gantt Chart • Service Operations • Conclusions and Insight • Questions and Answers
- 3. JAN FEB MAR APR MAY JUN Project title Scheduled dates Team members Project title Scheduled dates Team members
- 4. JAN FEB MAR APR MAY JUN Project title Scheduled dates Team members Project title Scheduled dates Team members
- 5. JAN FEB MAR APR MAY JUN Project title Scheduled dates Team members Project title Scheduled dates Team members
Editor's Notes
- Timeline graphic with pictures(Intermediate)To reproduce the picture effects on this slide, do the following:On the Home tab, in theSlides group, click Layout, and then click Blank.On the Insert tab, in the Images group, click Picture. In the Insert Picture dialog box, select a picture and then click Insert. Select the picture. Under Picture Tools, on the Format tab, in the Size group, click the Size and Position dialog box launcher.In the Format Picture dialog box, in the Crop tab, in the Crop position section, crop the picture to the following values:Width: 9”Height: 2.65”Left: .5”Top: .5”Adjust the values in the Picture position section to properly position the picture within the cropped image.Under Picture Tools, in the Format tab, in the Size group, click Crop, click Crop to Shape, and then under Rectangles click Round Same Side Corner Rectangle (eighth option from the left).Drag the top yellow diamond adjustment handle slightly to the right to decrease the amount of rounding on the corners. Under Picture Tools, in the Format tab, in the Picture Styles group, click Picture Effects, point to Shadow, and then under Inner click Inside Center (second row, second option from the left).To reproduce the timeline effects on this slide, do the following:On the Home tab, in the Drawing group, click Rectangle.On the slide, drag to draw a rectangle.In the bottom right corner of the Drawing group, click the Format Shape dialog box launcher.In the Format Shape dialog box, do the following:In the Size tab, set the Width of the rectangle to 9”, and then set the Height to .73”In the Line Color tab, select No line.In the Fill tab, select Solid fill, and then set the following values:Color: Black, Text 1, Lighter 35%Transparency: 20%In the Shadow tab, click the button next to Presets, and then under Inner click Inside Center (second row, second option from the left). Drag the rectangle onto the bottom of the picture. Press and hold SHIFT and select the rectangle and the picture. Under Drawing Tools, on the Format tab, in the Arrange group, and then do the following: Click Align and then click Align Selected Objects. Click Align and then click Align Center.Click Align and then click Align Bottom.Click Align and then click Align to Slide.Click Align and then click Align Center. To reproduce the month labels for the timeline, do the following:On the Insert tab, in the Text group, click Text Box, and then on the slide, drag to draw the text box.Type the text you want to appear in the text box (this example uses months of the year, so you might type “JAN”), and then select the text. Format the text in the textbox using the following steps:On the Home tab, in the Font group, choose the Gill Sans MT Condensedfont and a font size of18.Click the arrow next to Font Color, and then under Theme Colors click White, Background 1, Darker 35% (fifth row, first option from the left).In the Paragraph group, click Center.Select the text box. On the Home tab, in the Clipboard group, click the arrow under Copy, and then click Duplicate. Repeat the process until there is a total of six text boxes. On the slide, drag the text boxes onto the rectangle to form a row. Press and hold CTRL and select all six text boxes and the rectangle.Under Drawing Tools, on the Format tab, in the Arrange group, do the following:Click Align, and then click Align Selected Objects.Click Align, and then click Align Middle. Press and hold CTRL and cancel the selection of the rectangle, keeping the text boxes selected. Under Drawing Tools, on the Format tab, in the Arrange group, do the following:Click Align, and then click Align to Slide.Click Align, and then click Distribute Horizontally. To change the text in the duplicate text boxes, click in each text box and edit the text (this example uses months of the year).To change the color of a text box, select the text in the text box, and then on the Home tab, in the Font group, click the arrow next to Font Color, and then under Theme Colors click White, Background 1 (first row, first option from the left). To reproduce the vertical line with text effects on this slide, do the following:On the Home tab, in the Drawing group, click Line, and then, in the slide, draw a line.On the Home tab, in the drawing group, click the Format Shape dialog box launcher.In the Format Shape dialog box, in the Size tab, under Size and rotate, set the following values:Height: 1.2”Width: 0”Rotation: 0˚Also in the Format Shape dialog box, in the Line Style tab, set the Width to .75 pt and then, under Arrow settings, set the following values:Begin type: Oval Arrow (second row, third option from the left).Begin size: Arrow L Size 1 (first row, first option from the left).End type: Oval Arrow (second row, third option from the left).End size: Arrow R Size 1 (first row, first option from the left).Also in the Format Shape dialog box, in the Line Color tab, select Solid line, and then set the Color option to White, Background 1, Darker 25% (fourth row, first option from the left).Close the Format Shape dialog box.On the Home tab, in the Clipboard group, click the arrow under Copy, and then click Duplicate. Select the duplicate line. Under Drawing Tools, on the Format tab, in the Size group, in the Shape Height box, enter 2.6”.Press and hold SHIFT and select both lines. On the Format tab, in the Arrange group, do the following:Click Align, and then click Align Selected Objects.Click Align, and then click Align Center.Click Align, and then click Align Top.Drag both lines together on the slide to position them under one of the timeline month labels. Press and hold SHIFT and select both lines and the text box they are under. On the Format tab, in the Arrange group, do the following:Click Align, and then click Align Selected Objects.Click Align, and then click Align Center.Create the subtext boxes:On the Insert tab, in the Text group, click Text Box, and then on the slide, drag to draw the text box.Type the text you want to appear in the text box, and then select the text. Format the text in the textbox using the following steps:On the Home tab, in the Font group, choose the Gill Sans MT font and a font size of 20.Click the arrow next to Font Color, and then under Theme Colors click White, Background 1 (first row, first option from the left).In the Paragraph group, click Align Text Left.On the Home tab, in the Paragraph group, click Align Text Left to align the text left in the text box.On the slide, drag the text box to position it to the right of the vertical line. To reproduce the background on this slide, do the following:Right-click the slide background area, and then clickFormat Background.In the Format Background dialog box, click Fill in the left pane, select Gradient fill in the Fill pane, and then set the following values:Type:LinearDirection:Linear Down (first row, second option from the left).Angle: 90˚Under Gradient stops, click Add or Remove until two stops appear on the slider.Also under Gradient stops, customize the gradient stops that you added as follows:Select the first stop, and then set the following values:Position: 50%Color: Black, Text 1(first row, second option from the left).Select the second stop, and then set the following values:Position: 99%.Color:Black, Text 1, Lighter 35% (third row, second option from the left).
- Timeline graphic with pictures(Intermediate)To reproduce the picture effects on this slide, do the following:On the Home tab, in theSlides group, click Layout, and then click Blank.On the Insert tab, in the Images group, click Picture. In the Insert Picture dialog box, select a picture and then click Insert. Select the picture. Under Picture Tools, on the Format tab, in the Size group, click the Size and Position dialog box launcher.In the Format Picture dialog box, in the Crop tab, in the Crop position section, crop the picture to the following values:Width: 9”Height: 2.65”Left: .5”Top: .5”Adjust the values in the Picture position section to properly position the picture within the cropped image.Under Picture Tools, in the Format tab, in the Size group, click Crop, click Crop to Shape, and then under Rectangles click Round Same Side Corner Rectangle (eighth option from the left).Drag the top yellow diamond adjustment handle slightly to the right to decrease the amount of rounding on the corners. Under Picture Tools, in the Format tab, in the Picture Styles group, click Picture Effects, point to Shadow, and then under Inner click Inside Center (second row, second option from the left).To reproduce the timeline effects on this slide, do the following:On the Home tab, in the Drawing group, click Rectangle.On the slide, drag to draw a rectangle.In the bottom right corner of the Drawing group, click the Format Shape dialog box launcher.In the Format Shape dialog box, do the following:In the Size tab, set the Width of the rectangle to 9”, and then set the Height to .73”In the Line Color tab, select No line.In the Fill tab, select Solid fill, and then set the following values:Color: Black, Text 1, Lighter 35%Transparency: 20%In the Shadow tab, click the button next to Presets, and then under Inner click Inside Center (second row, second option from the left). Drag the rectangle onto the bottom of the picture. Press and hold SHIFT and select the rectangle and the picture. Under Drawing Tools, on the Format tab, in the Arrange group, and then do the following: Click Align and then click Align Selected Objects. Click Align and then click Align Center.Click Align and then click Align Bottom.Click Align and then click Align to Slide.Click Align and then click Align Center. To reproduce the month labels for the timeline, do the following:On the Insert tab, in the Text group, click Text Box, and then on the slide, drag to draw the text box.Type the text you want to appear in the text box (this example uses months of the year, so you might type “JAN”), and then select the text. Format the text in the textbox using the following steps:On the Home tab, in the Font group, choose the Gill Sans MT Condensedfont and a font size of18.Click the arrow next to Font Color, and then under Theme Colors click White, Background 1, Darker 35% (fifth row, first option from the left).In the Paragraph group, click Center.Select the text box. On the Home tab, in the Clipboard group, click the arrow under Copy, and then click Duplicate. Repeat the process until there is a total of six text boxes. On the slide, drag the text boxes onto the rectangle to form a row. Press and hold CTRL and select all six text boxes and the rectangle.Under Drawing Tools, on the Format tab, in the Arrange group, do the following:Click Align, and then click Align Selected Objects.Click Align, and then click Align Middle. Press and hold CTRL and cancel the selection of the rectangle, keeping the text boxes selected. Under Drawing Tools, on the Format tab, in the Arrange group, do the following:Click Align, and then click Align to Slide.Click Align, and then click Distribute Horizontally. To change the text in the duplicate text boxes, click in each text box and edit the text (this example uses months of the year).To change the color of a text box, select the text in the text box, and then on the Home tab, in the Font group, click the arrow next to Font Color, and then under Theme Colors click White, Background 1 (first row, first option from the left). To reproduce the vertical line with text effects on this slide, do the following:On the Home tab, in the Drawing group, click Line, and then, in the slide, draw a line.On the Home tab, in the drawing group, click the Format Shape dialog box launcher.In the Format Shape dialog box, in the Size tab, under Size and rotate, set the following values:Height: 1.2”Width: 0”Rotation: 0˚Also in the Format Shape dialog box, in the Line Style tab, set the Width to .75 pt and then, under Arrow settings, set the following values:Begin type: Oval Arrow (second row, third option from the left).Begin size: Arrow L Size 1 (first row, first option from the left).End type: Oval Arrow (second row, third option from the left).End size: Arrow R Size 1 (first row, first option from the left).Also in the Format Shape dialog box, in the Line Color tab, select Solid line, and then set the Color option to White, Background 1, Darker 25% (fourth row, first option from the left).Close the Format Shape dialog box.On the Home tab, in the Clipboard group, click the arrow under Copy, and then click Duplicate. Select the duplicate line. Under Drawing Tools, on the Format tab, in the Size group, in the Shape Height box, enter 2.6”.Press and hold SHIFT and select both lines. On the Format tab, in the Arrange group, do the following:Click Align, and then click Align Selected Objects.Click Align, and then click Align Center.Click Align, and then click Align Top.Drag both lines together on the slide to position them under one of the timeline month labels. Press and hold SHIFT and select both lines and the text box they are under. On the Format tab, in the Arrange group, do the following:Click Align, and then click Align Selected Objects.Click Align, and then click Align Center.Create the subtext boxes:On the Insert tab, in the Text group, click Text Box, and then on the slide, drag to draw the text box.Type the text you want to appear in the text box, and then select the text. Format the text in the textbox using the following steps:On the Home tab, in the Font group, choose the Gill Sans MT font and a font size of 20.Click the arrow next to Font Color, and then under Theme Colors click White, Background 1 (first row, first option from the left).In the Paragraph group, click Align Text Left.On the Home tab, in the Paragraph group, click Align Text Left to align the text left in the text box.On the slide, drag the text box to position it to the right of the vertical line. To reproduce the background on this slide, do the following:Right-click the slide background area, and then clickFormat Background.In the Format Background dialog box, click Fill in the left pane, select Gradient fill in the Fill pane, and then set the following values:Type:LinearDirection:Linear Down (first row, second option from the left).Angle: 90˚Under Gradient stops, click Add or Remove until two stops appear on the slider.Also under Gradient stops, customize the gradient stops that you added as follows:Select the first stop, and then set the following values:Position: 50%Color: Black, Text 1(first row, second option from the left).Select the second stop, and then set the following values:Position: 99%.Color:Black, Text 1, Lighter 35% (third row, second option from the left).
- Timeline graphic with pictures(Intermediate)To reproduce the picture effects on this slide, do the following:On the Home tab, in theSlides group, click Layout, and then click Blank.On the Insert tab, in the Images group, click Picture. In the Insert Picture dialog box, select a picture and then click Insert. Select the picture. Under Picture Tools, on the Format tab, in the Size group, click the Size and Position dialog box launcher.In the Format Picture dialog box, in the Crop tab, in the Crop position section, crop the picture to the following values:Width: 9”Height: 2.65”Left: .5”Top: .5”Adjust the values in the Picture position section to properly position the picture within the cropped image.Under Picture Tools, in the Format tab, in the Size group, click Crop, click Crop to Shape, and then under Rectangles click Round Same Side Corner Rectangle (eighth option from the left).Drag the top yellow diamond adjustment handle slightly to the right to decrease the amount of rounding on the corners. Under Picture Tools, in the Format tab, in the Picture Styles group, click Picture Effects, point to Shadow, and then under Inner click Inside Center (second row, second option from the left).To reproduce the timeline effects on this slide, do the following:On the Home tab, in the Drawing group, click Rectangle.On the slide, drag to draw a rectangle.In the bottom right corner of the Drawing group, click the Format Shape dialog box launcher.In the Format Shape dialog box, do the following:In the Size tab, set the Width of the rectangle to 9”, and then set the Height to .73”In the Line Color tab, select No line.In the Fill tab, select Solid fill, and then set the following values:Color: Black, Text 1, Lighter 35%Transparency: 20%In the Shadow tab, click the button next to Presets, and then under Inner click Inside Center (second row, second option from the left). Drag the rectangle onto the bottom of the picture. Press and hold SHIFT and select the rectangle and the picture. Under Drawing Tools, on the Format tab, in the Arrange group, and then do the following: Click Align and then click Align Selected Objects. Click Align and then click Align Center.Click Align and then click Align Bottom.Click Align and then click Align to Slide.Click Align and then click Align Center. To reproduce the month labels for the timeline, do the following:On the Insert tab, in the Text group, click Text Box, and then on the slide, drag to draw the text box.Type the text you want to appear in the text box (this example uses months of the year, so you might type “JAN”), and then select the text. Format the text in the textbox using the following steps:On the Home tab, in the Font group, choose the Gill Sans MT Condensedfont and a font size of18.Click the arrow next to Font Color, and then under Theme Colors click White, Background 1, Darker 35% (fifth row, first option from the left).In the Paragraph group, click Center.Select the text box. On the Home tab, in the Clipboard group, click the arrow under Copy, and then click Duplicate. Repeat the process until there is a total of six text boxes. On the slide, drag the text boxes onto the rectangle to form a row. Press and hold CTRL and select all six text boxes and the rectangle.Under Drawing Tools, on the Format tab, in the Arrange group, do the following:Click Align, and then click Align Selected Objects.Click Align, and then click Align Middle. Press and hold CTRL and cancel the selection of the rectangle, keeping the text boxes selected. Under Drawing Tools, on the Format tab, in the Arrange group, do the following:Click Align, and then click Align to Slide.Click Align, and then click Distribute Horizontally. To change the text in the duplicate text boxes, click in each text box and edit the text (this example uses months of the year).To change the color of a text box, select the text in the text box, and then on the Home tab, in the Font group, click the arrow next to Font Color, and then under Theme Colors click White, Background 1 (first row, first option from the left). To reproduce the vertical line with text effects on this slide, do the following:On the Home tab, in the Drawing group, click Line, and then, in the slide, draw a line.On the Home tab, in the drawing group, click the Format Shape dialog box launcher.In the Format Shape dialog box, in the Size tab, under Size and rotate, set the following values:Height: 1.2”Width: 0”Rotation: 0˚Also in the Format Shape dialog box, in the Line Style tab, set the Width to .75 pt and then, under Arrow settings, set the following values:Begin type: Oval Arrow (second row, third option from the left).Begin size: Arrow L Size 1 (first row, first option from the left).End type: Oval Arrow (second row, third option from the left).End size: Arrow R Size 1 (first row, first option from the left).Also in the Format Shape dialog box, in the Line Color tab, select Solid line, and then set the Color option to White, Background 1, Darker 25% (fourth row, first option from the left).Close the Format Shape dialog box.On the Home tab, in the Clipboard group, click the arrow under Copy, and then click Duplicate. Select the duplicate line. Under Drawing Tools, on the Format tab, in the Size group, in the Shape Height box, enter 2.6”.Press and hold SHIFT and select both lines. On the Format tab, in the Arrange group, do the following:Click Align, and then click Align Selected Objects.Click Align, and then click Align Center.Click Align, and then click Align Top.Drag both lines together on the slide to position them under one of the timeline month labels. Press and hold SHIFT and select both lines and the text box they are under. On the Format tab, in the Arrange group, do the following:Click Align, and then click Align Selected Objects.Click Align, and then click Align Center.Create the subtext boxes:On the Insert tab, in the Text group, click Text Box, and then on the slide, drag to draw the text box.Type the text you want to appear in the text box, and then select the text. Format the text in the textbox using the following steps:On the Home tab, in the Font group, choose the Gill Sans MT font and a font size of 20.Click the arrow next to Font Color, and then under Theme Colors click White, Background 1 (first row, first option from the left).In the Paragraph group, click Align Text Left.On the Home tab, in the Paragraph group, click Align Text Left to align the text left in the text box.On the slide, drag the text box to position it to the right of the vertical line. To reproduce the background on this slide, do the following:Right-click the slide background area, and then clickFormat Background.In the Format Background dialog box, click Fill in the left pane, select Gradient fill in the Fill pane, and then set the following values:Type:LinearDirection:Linear Down (first row, second option from the left).Angle: 90˚Under Gradient stops, click Add or Remove until two stops appear on the slider.Also under Gradient stops, customize the gradient stops that you added as follows:Select the first stop, and then set the following values:Position: 50%Color: Black, Text 1(first row, second option from the left).Select the second stop, and then set the following values:Position: 99%.Color:Black, Text 1, Lighter 35% (third row, second option from the left).
- Timeline graphic with pictures(Intermediate)To reproduce the picture effects on this slide, do the following:On the Home tab, in theSlides group, click Layout, and then click Blank.On the Insert tab, in the Images group, click Picture. In the Insert Picture dialog box, select a picture and then click Insert. Select the picture. Under Picture Tools, on the Format tab, in the Size group, click the Size and Position dialog box launcher.In the Format Picture dialog box, in the Crop tab, in the Crop position section, crop the picture to the following values:Width: 9”Height: 2.65”Left: .5”Top: .5”Adjust the values in the Picture position section to properly position the picture within the cropped image.Under Picture Tools, in the Format tab, in the Size group, click Crop, click Crop to Shape, and then under Rectangles click Round Same Side Corner Rectangle (eighth option from the left).Drag the top yellow diamond adjustment handle slightly to the right to decrease the amount of rounding on the corners. Under Picture Tools, in the Format tab, in the Picture Styles group, click Picture Effects, point to Shadow, and then under Inner click Inside Center (second row, second option from the left).To reproduce the timeline effects on this slide, do the following:On the Home tab, in the Drawing group, click Rectangle.On the slide, drag to draw a rectangle.In the bottom right corner of the Drawing group, click the Format Shape dialog box launcher.In the Format Shape dialog box, do the following:In the Size tab, set the Width of the rectangle to 9”, and then set the Height to .73”In the Line Color tab, select No line.In the Fill tab, select Solid fill, and then set the following values:Color: Black, Text 1, Lighter 35%Transparency: 20%In the Shadow tab, click the button next to Presets, and then under Inner click Inside Center (second row, second option from the left). Drag the rectangle onto the bottom of the picture. Press and hold SHIFT and select the rectangle and the picture. Under Drawing Tools, on the Format tab, in the Arrange group, and then do the following: Click Align and then click Align Selected Objects. Click Align and then click Align Center.Click Align and then click Align Bottom.Click Align and then click Align to Slide.Click Align and then click Align Center. To reproduce the month labels for the timeline, do the following:On the Insert tab, in the Text group, click Text Box, and then on the slide, drag to draw the text box.Type the text you want to appear in the text box (this example uses months of the year, so you might type “JAN”), and then select the text. Format the text in the textbox using the following steps:On the Home tab, in the Font group, choose the Gill Sans MT Condensedfont and a font size of18.Click the arrow next to Font Color, and then under Theme Colors click White, Background 1, Darker 35% (fifth row, first option from the left).In the Paragraph group, click Center.Select the text box. On the Home tab, in the Clipboard group, click the arrow under Copy, and then click Duplicate. Repeat the process until there is a total of six text boxes. On the slide, drag the text boxes onto the rectangle to form a row. Press and hold CTRL and select all six text boxes and the rectangle.Under Drawing Tools, on the Format tab, in the Arrange group, do the following:Click Align, and then click Align Selected Objects.Click Align, and then click Align Middle. Press and hold CTRL and cancel the selection of the rectangle, keeping the text boxes selected. Under Drawing Tools, on the Format tab, in the Arrange group, do the following:Click Align, and then click Align to Slide.Click Align, and then click Distribute Horizontally. To change the text in the duplicate text boxes, click in each text box and edit the text (this example uses months of the year).To change the color of a text box, select the text in the text box, and then on the Home tab, in the Font group, click the arrow next to Font Color, and then under Theme Colors click White, Background 1 (first row, first option from the left). To reproduce the vertical line with text effects on this slide, do the following:On the Home tab, in the Drawing group, click Line, and then, in the slide, draw a line.On the Home tab, in the drawing group, click the Format Shape dialog box launcher.In the Format Shape dialog box, in the Size tab, under Size and rotate, set the following values:Height: 1.2”Width: 0”Rotation: 0˚Also in the Format Shape dialog box, in the Line Style tab, set the Width to .75 pt and then, under Arrow settings, set the following values:Begin type: Oval Arrow (second row, third option from the left).Begin size: Arrow L Size 1 (first row, first option from the left).End type: Oval Arrow (second row, third option from the left).End size: Arrow R Size 1 (first row, first option from the left).Also in the Format Shape dialog box, in the Line Color tab, select Solid line, and then set the Color option to White, Background 1, Darker 25% (fourth row, first option from the left).Close the Format Shape dialog box.On the Home tab, in the Clipboard group, click the arrow under Copy, and then click Duplicate. Select the duplicate line. Under Drawing Tools, on the Format tab, in the Size group, in the Shape Height box, enter 2.6”.Press and hold SHIFT and select both lines. On the Format tab, in the Arrange group, do the following:Click Align, and then click Align Selected Objects.Click Align, and then click Align Center.Click Align, and then click Align Top.Drag both lines together on the slide to position them under one of the timeline month labels. Press and hold SHIFT and select both lines and the text box they are under. On the Format tab, in the Arrange group, do the following:Click Align, and then click Align Selected Objects.Click Align, and then click Align Center.Create the subtext boxes:On the Insert tab, in the Text group, click Text Box, and then on the slide, drag to draw the text box.Type the text you want to appear in the text box, and then select the text. Format the text in the textbox using the following steps:On the Home tab, in the Font group, choose the Gill Sans MT font and a font size of 20.Click the arrow next to Font Color, and then under Theme Colors click White, Background 1 (first row, first option from the left).In the Paragraph group, click Align Text Left.On the Home tab, in the Paragraph group, click Align Text Left to align the text left in the text box.On the slide, drag the text box to position it to the right of the vertical line. To reproduce the background on this slide, do the following:Right-click the slide background area, and then clickFormat Background.In the Format Background dialog box, click Fill in the left pane, select Gradient fill in the Fill pane, and then set the following values:Type:LinearDirection:Linear Down (first row, second option from the left).Angle: 90˚Under Gradient stops, click Add or Remove until two stops appear on the slider.Also under Gradient stops, customize the gradient stops that you added as follows:Select the first stop, and then set the following values:Position: 50%Color: Black, Text 1(first row, second option from the left).Select the second stop, and then set the following values:Position: 99%.Color:Black, Text 1, Lighter 35% (third row, second option from the left).
- Timeline graphic with pictures(Intermediate)To reproduce the picture effects on this slide, do the following:On the Home tab, in theSlides group, click Layout, and then click Blank.On the Insert tab, in the Images group, click Picture. In the Insert Picture dialog box, select a picture and then click Insert. Select the picture. Under Picture Tools, on the Format tab, in the Size group, click the Size and Position dialog box launcher.In the Format Picture dialog box, in the Crop tab, in the Crop position section, crop the picture to the following values:Width: 9”Height: 2.65”Left: .5”Top: .5”Adjust the values in the Picture position section to properly position the picture within the cropped image.Under Picture Tools, in the Format tab, in the Size group, click Crop, click Crop to Shape, and then under Rectangles click Round Same Side Corner Rectangle (eighth option from the left).Drag the top yellow diamond adjustment handle slightly to the right to decrease the amount of rounding on the corners. Under Picture Tools, in the Format tab, in the Picture Styles group, click Picture Effects, point to Shadow, and then under Inner click Inside Center (second row, second option from the left).To reproduce the timeline effects on this slide, do the following:On the Home tab, in the Drawing group, click Rectangle.On the slide, drag to draw a rectangle.In the bottom right corner of the Drawing group, click the Format Shape dialog box launcher.In the Format Shape dialog box, do the following:In the Size tab, set the Width of the rectangle to 9”, and then set the Height to .73”In the Line Color tab, select No line.In the Fill tab, select Solid fill, and then set the following values:Color: Black, Text 1, Lighter 35%Transparency: 20%In the Shadow tab, click the button next to Presets, and then under Inner click Inside Center (second row, second option from the left). Drag the rectangle onto the bottom of the picture. Press and hold SHIFT and select the rectangle and the picture. Under Drawing Tools, on the Format tab, in the Arrange group, and then do the following: Click Align and then click Align Selected Objects. Click Align and then click Align Center.Click Align and then click Align Bottom.Click Align and then click Align to Slide.Click Align and then click Align Center. To reproduce the month labels for the timeline, do the following:On the Insert tab, in the Text group, click Text Box, and then on the slide, drag to draw the text box.Type the text you want to appear in the text box (this example uses months of the year, so you might type “JAN”), and then select the text. Format the text in the textbox using the following steps:On the Home tab, in the Font group, choose the Gill Sans MT Condensedfont and a font size of18.Click the arrow next to Font Color, and then under Theme Colors click White, Background 1, Darker 35% (fifth row, first option from the left).In the Paragraph group, click Center.Select the text box. On the Home tab, in the Clipboard group, click the arrow under Copy, and then click Duplicate. Repeat the process until there is a total of six text boxes. On the slide, drag the text boxes onto the rectangle to form a row. Press and hold CTRL and select all six text boxes and the rectangle.Under Drawing Tools, on the Format tab, in the Arrange group, do the following:Click Align, and then click Align Selected Objects.Click Align, and then click Align Middle. Press and hold CTRL and cancel the selection of the rectangle, keeping the text boxes selected. Under Drawing Tools, on the Format tab, in the Arrange group, do the following:Click Align, and then click Align to Slide.Click Align, and then click Distribute Horizontally. To change the text in the duplicate text boxes, click in each text box and edit the text (this example uses months of the year).To change the color of a text box, select the text in the text box, and then on the Home tab, in the Font group, click the arrow next to Font Color, and then under Theme Colors click White, Background 1 (first row, first option from the left). To reproduce the vertical line with text effects on this slide, do the following:On the Home tab, in the Drawing group, click Line, and then, in the slide, draw a line.On the Home tab, in the drawing group, click the Format Shape dialog box launcher.In the Format Shape dialog box, in the Size tab, under Size and rotate, set the following values:Height: 1.2”Width: 0”Rotation: 0˚Also in the Format Shape dialog box, in the Line Style tab, set the Width to .75 pt and then, under Arrow settings, set the following values:Begin type: Oval Arrow (second row, third option from the left).Begin size: Arrow L Size 1 (first row, first option from the left).End type: Oval Arrow (second row, third option from the left).End size: Arrow R Size 1 (first row, first option from the left).Also in the Format Shape dialog box, in the Line Color tab, select Solid line, and then set the Color option to White, Background 1, Darker 25% (fourth row, first option from the left).Close the Format Shape dialog box.On the Home tab, in the Clipboard group, click the arrow under Copy, and then click Duplicate. Select the duplicate line. Under Drawing Tools, on the Format tab, in the Size group, in the Shape Height box, enter 2.6”.Press and hold SHIFT and select both lines. On the Format tab, in the Arrange group, do the following:Click Align, and then click Align Selected Objects.Click Align, and then click Align Center.Click Align, and then click Align Top.Drag both lines together on the slide to position them under one of the timeline month labels. Press and hold SHIFT and select both lines and the text box they are under. On the Format tab, in the Arrange group, do the following:Click Align, and then click Align Selected Objects.Click Align, and then click Align Center.Create the subtext boxes:On the Insert tab, in the Text group, click Text Box, and then on the slide, drag to draw the text box.Type the text you want to appear in the text box, and then select the text. Format the text in the textbox using the following steps:On the Home tab, in the Font group, choose the Gill Sans MT font and a font size of 20.Click the arrow next to Font Color, and then under Theme Colors click White, Background 1 (first row, first option from the left).In the Paragraph group, click Align Text Left.On the Home tab, in the Paragraph group, click Align Text Left to align the text left in the text box.On the slide, drag the text box to position it to the right of the vertical line. To reproduce the background on this slide, do the following:Right-click the slide background area, and then clickFormat Background.In the Format Background dialog box, click Fill in the left pane, select Gradient fill in the Fill pane, and then set the following values:Type:LinearDirection:Linear Down (first row, second option from the left).Angle: 90˚Under Gradient stops, click Add or Remove until two stops appear on the slider.Also under Gradient stops, customize the gradient stops that you added as follows:Select the first stop, and then set the following values:Position: 50%Color: Black, Text 1(first row, second option from the left).Select the second stop, and then set the following values:Position: 99%.Color:Black, Text 1, Lighter 35% (third row, second option from the left).