SlideShare a Scribd company logo
1 of 8
Fitting Procedure for post 1998 Vauxhall Omega Headlight adjusters.


Introduction:
The headlight pictured above, made by Hella, has internal adjusters (used to fine tune the
headlight aim) which are made of a material called PBT (Polybutylene terephthalate).

PBT, although strong, is very brittle, especially when it has absorbed moisture. This
component can break under normal operation (usually during adjustment). Once broken the
headlight bulb assembly can ‘bounce’ due to the motion of driving, or the headlights can end
up pointing at the ground very close to the front of the vehicle.

The internal adjusters are not available as spares from either GM or Hella. These parts have
now been manufactured in aluminium and although they are a slightly different shape to the
originals they perform exactly the same function. The shape has been modified to ease
machining and remove any potential weak points.

The rest of this document details the procedure for disassembly of the headlight unit once
removed from the vehicle for installation of new adjusters.

The tools you need:
Procedure:
The main moulding of the headlight (part number 143 145-00 LI for left and 143 146-00 RE for
right) has a clear lens which is bonded to it with a sealant similar to tar. To ease the lens
separation the sealant needs to be heated. The heating softens the sealant and reduces the
amount of ‘grip’ it has on the lens. The heat is applied to the sealant by putting the complete
unit in the oven at a temperature of 100°C for approximately 10 minutes. Before the unit is
heated many parts can be removed to reduce the chance of the heat causing them any
damage.


Firstly, the rubber strip (part number 145 217 – 00 LI or 145 218 -00 RE) needs to be
removed, this is a very simple task although care should be taken as some of the lens sealant
may have attached this part to the main body of the unit.


Next, the bulb covers (parts 150216 and 143688), the bulbs they cover and the indicator
assembly (143287) need to be removed. The indicator assembly is removed by rotating it
anti-clockwise, the fitting is similar to that of a bayonet light bulb.


The electric motor for the light tilt adjustment is next to be removed (part number GM 90 492
832), this is located in the casing in a similar way to the indicator assembly and is released by
twisting clockwise for a left hand unit and anticlockwise for a right hand unit. The motor will
still be attached to the light assembly at this point, this can be seen through the hole in the
back of the unit as pictured below.


                                                                         Location of tilt
                                                                         motor and light
                                                                         assembly
The location between the parts is in the form of a ball on the end of the motor rod located in a
slot on the light assembly. To release this location simply pull the motor unit backwards, away
from the light and slide it towards the indicator, this will slide the ball from the slot in the light
assembly.


The location between tilt motor and light assembly is pictured below with both units removed
from the main body for clarity.


When the parts below have been removed the unit is ready to be heated to soften the sealant
Once all these parts are removed its time to heat the unit in the oven to soften the sealant,
this can also be achieved using a hair drier, but I have always found using the oven simpler.


Place the complete unit in a pre-heated oven at 100°C for about 10 minutes.


When the unit is heated the lens needs to be slowly and carefully pulled from the main body
of the light. The tabs on the lens need to be lifted over the locating pieces on the main body of
the unit and then the lens pulled off. It is important to do this step slowly and methodically as
damage can occur the either the lens or light body. Working around the unit using a screw
driver with a large flat blade or a putty knife or similar item separate the 2 components. I
worked around the unit 2 or 3 times to fully separate the 2 parts. If you find the sealant starts
to stiffen up replace the unit in the oven for a further 10 minutes or so in order to soften it
again. Although this was not necessary on the unit I had, the lens separated very easily once
heated.


Once the lens is released the hard part is done.
Silver trim


The silver outer trim piece can then be removed.


Lift the two white tabs on the outer edges of the adjuster (pictured) and the main light
assembly can be lifted out of the main body.


                                         White
                                         Tabs
You now need to remove the broken ‘ball end’ of the adjuster from the white ‘socket’.


I did this by breaking the rest of the black ball end until what was left was a smaller diameter
than the size of the hole in the white socket. I then rested the whole assembly on a 3/8”
socket and hammered a screw through the hole in the white socket to release the black ball.
To remove the rest of the broken adjuster use a 4mm Allen key in the front of the unit and turn
clockwise, as if you were doing it up. This will rotate the adjuster screw and wind the rest of
the component off it.


                                                                     Remainder of
                                                                     broken adjuster
The new adjuster can now be fitted and the unit reassembled. The only points to note are that
the new adjusters should have the white sockets fitted to them with a small amount of grease
before they are fitted to the main light assembly. If the sockets are fitted to the light assembly
and then pushed onto the adjusters the location is much more difficult as the socket needs to
expand when the ball end of the adjuster is inserted into it. If this is done with the socket
already mounted it is much more difficult as the expansion is limited by the main assembly.

Also, be careful not to wind the adjuster to the limit of its travel as this can cause damage to
many of the components in the assembly, this is especially important if you are using an
electric screw driver or drill to wind the screw.


As all good manuals say, refitting is the reverse sequence to removal!

More Related Content

Similar to Vauxhall Omega 1998-Fitting Procedure for Headlight Adjusters

Vnx.su бронко 2-ф-серия_часть2
Vnx.su бронко 2-ф-серия_часть2Vnx.su бронко 2-ф-серия_часть2
Vnx.su бронко 2-ф-серия_часть27gsxr
 
Husqvarna 345 fxt brushcutter trimmer service repair manual
Husqvarna 345 fxt brushcutter trimmer service repair manualHusqvarna 345 fxt brushcutter trimmer service repair manual
Husqvarna 345 fxt brushcutter trimmer service repair manualdidkkskddm
 
Husqvarna 343 r brushcutter trimmer service repair manual
Husqvarna 343 r brushcutter trimmer service repair manualHusqvarna 343 r brushcutter trimmer service repair manual
Husqvarna 343 r brushcutter trimmer service repair manualdidkkskddm
 
Husqvarna 345 rx brushcutter trimmer service repair manual
Husqvarna 345 rx brushcutter trimmer service repair manualHusqvarna 345 rx brushcutter trimmer service repair manual
Husqvarna 345 rx brushcutter trimmer service repair manualfjskedsxmmem
 
Husqvarna 345 rx brushcutter trimmer service repair manual
Husqvarna 345 rx brushcutter trimmer service repair manualHusqvarna 345 rx brushcutter trimmer service repair manual
Husqvarna 345 rx brushcutter trimmer service repair manualdidkkskddm
 
Husqvarna 345 fx brushcutter trimmer service repair manual
Husqvarna 345 fx brushcutter trimmer service repair manualHusqvarna 345 fx brushcutter trimmer service repair manual
Husqvarna 345 fx brushcutter trimmer service repair manualfjskedsxmmem
 
Husqvarna 345 fx brushcutter trimmer service repair manual
Husqvarna 345 fx brushcutter trimmer service repair manualHusqvarna 345 fx brushcutter trimmer service repair manual
Husqvarna 345 fx brushcutter trimmer service repair manualfhsjekkdkem
 
Husqvarna 343 f brushcutter trimmer service repair manual
Husqvarna 343 f brushcutter trimmer service repair manualHusqvarna 343 f brushcutter trimmer service repair manual
Husqvarna 343 f brushcutter trimmer service repair manualfjskedsxmmem
 
Husqvarna 345 fxt brushcutter trimmer service repair manual
Husqvarna 345 fxt brushcutter trimmer service repair manualHusqvarna 345 fxt brushcutter trimmer service repair manual
Husqvarna 345 fxt brushcutter trimmer service repair manualfjskedsxmmem
 
Husqvarna 343 f brushcutter trimmer service repair manual
Husqvarna 343 f brushcutter trimmer service repair manualHusqvarna 343 f brushcutter trimmer service repair manual
Husqvarna 343 f brushcutter trimmer service repair manualfhsjekkdkem
 
Husqvarna 343 r brushcutter trimmer service repair manual
Husqvarna 343 r brushcutter trimmer service repair manualHusqvarna 343 r brushcutter trimmer service repair manual
Husqvarna 343 r brushcutter trimmer service repair manualfhsjekkdkem
 
Husqvarna 345 fx brushcutter trimmer service repair manual
Husqvarna 345 fx brushcutter trimmer service repair manualHusqvarna 345 fx brushcutter trimmer service repair manual
Husqvarna 345 fx brushcutter trimmer service repair manualdidkkskddm
 
Husqvarna 345 fxt brushcutter trimmer service repair manual
Husqvarna 345 fxt brushcutter trimmer service repair manualHusqvarna 345 fxt brushcutter trimmer service repair manual
Husqvarna 345 fxt brushcutter trimmer service repair manualfhsjekkdkem
 
Husqvarna 343 f brushcutter trimmer service repair manual
Husqvarna 343 f brushcutter trimmer service repair manualHusqvarna 343 f brushcutter trimmer service repair manual
Husqvarna 343 f brushcutter trimmer service repair manualdidkkskddm
 
Husqvarna 343 r brushcutter trimmer service repair manual
Husqvarna 343 r brushcutter trimmer service repair manualHusqvarna 343 r brushcutter trimmer service repair manual
Husqvarna 343 r brushcutter trimmer service repair manualfjskedsxmmem
 
Husqvarna 345 rx brushcutter trimmer service repair manual
Husqvarna 345 rx brushcutter trimmer service repair manualHusqvarna 345 rx brushcutter trimmer service repair manual
Husqvarna 345 rx brushcutter trimmer service repair manualfhsjekkdkem
 
Jcb 5 cx backhoe loader service repair manual sn from 2509500 and up
Jcb 5 cx backhoe loader service repair manual sn from 2509500 and upJcb 5 cx backhoe loader service repair manual sn from 2509500 and up
Jcb 5 cx backhoe loader service repair manual sn from 2509500 and upkmf8sueddkk
 
Jcb 5 cx backhoe loader service repair manual sn from 2509500 and up
Jcb 5 cx backhoe loader service repair manual sn from 2509500 and upJcb 5 cx backhoe loader service repair manual sn from 2509500 and up
Jcb 5 cx backhoe loader service repair manual sn from 2509500 and upcdfvvv
 
Jcb 3 cx backhoe loader service repair manual sn from 2509500 and up
Jcb 3 cx backhoe loader service repair manual sn from 2509500 and upJcb 3 cx backhoe loader service repair manual sn from 2509500 and up
Jcb 3 cx backhoe loader service repair manual sn from 2509500 and upkmf8sueddkk
 

Similar to Vauxhall Omega 1998-Fitting Procedure for Headlight Adjusters (20)

Vnx.su бронко 2-ф-серия_часть2
Vnx.su бронко 2-ф-серия_часть2Vnx.su бронко 2-ф-серия_часть2
Vnx.su бронко 2-ф-серия_часть2
 
Husqvarna 345 fxt brushcutter trimmer service repair manual
Husqvarna 345 fxt brushcutter trimmer service repair manualHusqvarna 345 fxt brushcutter trimmer service repair manual
Husqvarna 345 fxt brushcutter trimmer service repair manual
 
Husqvarna 343 r brushcutter trimmer service repair manual
Husqvarna 343 r brushcutter trimmer service repair manualHusqvarna 343 r brushcutter trimmer service repair manual
Husqvarna 343 r brushcutter trimmer service repair manual
 
Husqvarna 345 rx brushcutter trimmer service repair manual
Husqvarna 345 rx brushcutter trimmer service repair manualHusqvarna 345 rx brushcutter trimmer service repair manual
Husqvarna 345 rx brushcutter trimmer service repair manual
 
Husqvarna 345 rx brushcutter trimmer service repair manual
Husqvarna 345 rx brushcutter trimmer service repair manualHusqvarna 345 rx brushcutter trimmer service repair manual
Husqvarna 345 rx brushcutter trimmer service repair manual
 
Husqvarna 345 fx brushcutter trimmer service repair manual
Husqvarna 345 fx brushcutter trimmer service repair manualHusqvarna 345 fx brushcutter trimmer service repair manual
Husqvarna 345 fx brushcutter trimmer service repair manual
 
Husqvarna 345 fx brushcutter trimmer service repair manual
Husqvarna 345 fx brushcutter trimmer service repair manualHusqvarna 345 fx brushcutter trimmer service repair manual
Husqvarna 345 fx brushcutter trimmer service repair manual
 
Husqvarna 343 f brushcutter trimmer service repair manual
Husqvarna 343 f brushcutter trimmer service repair manualHusqvarna 343 f brushcutter trimmer service repair manual
Husqvarna 343 f brushcutter trimmer service repair manual
 
Husqvarna 345 fxt brushcutter trimmer service repair manual
Husqvarna 345 fxt brushcutter trimmer service repair manualHusqvarna 345 fxt brushcutter trimmer service repair manual
Husqvarna 345 fxt brushcutter trimmer service repair manual
 
Husqvarna 343 f brushcutter trimmer service repair manual
Husqvarna 343 f brushcutter trimmer service repair manualHusqvarna 343 f brushcutter trimmer service repair manual
Husqvarna 343 f brushcutter trimmer service repair manual
 
Husqvarna 343 r brushcutter trimmer service repair manual
Husqvarna 343 r brushcutter trimmer service repair manualHusqvarna 343 r brushcutter trimmer service repair manual
Husqvarna 343 r brushcutter trimmer service repair manual
 
Husqvarna 345 fx brushcutter trimmer service repair manual
Husqvarna 345 fx brushcutter trimmer service repair manualHusqvarna 345 fx brushcutter trimmer service repair manual
Husqvarna 345 fx brushcutter trimmer service repair manual
 
Husqvarna 345 fxt brushcutter trimmer service repair manual
Husqvarna 345 fxt brushcutter trimmer service repair manualHusqvarna 345 fxt brushcutter trimmer service repair manual
Husqvarna 345 fxt brushcutter trimmer service repair manual
 
Husqvarna 343 f brushcutter trimmer service repair manual
Husqvarna 343 f brushcutter trimmer service repair manualHusqvarna 343 f brushcutter trimmer service repair manual
Husqvarna 343 f brushcutter trimmer service repair manual
 
Husqvarna 343 r brushcutter trimmer service repair manual
Husqvarna 343 r brushcutter trimmer service repair manualHusqvarna 343 r brushcutter trimmer service repair manual
Husqvarna 343 r brushcutter trimmer service repair manual
 
Husqvarna 345 rx brushcutter trimmer service repair manual
Husqvarna 345 rx brushcutter trimmer service repair manualHusqvarna 345 rx brushcutter trimmer service repair manual
Husqvarna 345 rx brushcutter trimmer service repair manual
 
Fmintlfs instructions
Fmintlfs instructionsFmintlfs instructions
Fmintlfs instructions
 
Jcb 5 cx backhoe loader service repair manual sn from 2509500 and up
Jcb 5 cx backhoe loader service repair manual sn from 2509500 and upJcb 5 cx backhoe loader service repair manual sn from 2509500 and up
Jcb 5 cx backhoe loader service repair manual sn from 2509500 and up
 
Jcb 5 cx backhoe loader service repair manual sn from 2509500 and up
Jcb 5 cx backhoe loader service repair manual sn from 2509500 and upJcb 5 cx backhoe loader service repair manual sn from 2509500 and up
Jcb 5 cx backhoe loader service repair manual sn from 2509500 and up
 
Jcb 3 cx backhoe loader service repair manual sn from 2509500 and up
Jcb 3 cx backhoe loader service repair manual sn from 2509500 and upJcb 3 cx backhoe loader service repair manual sn from 2509500 and up
Jcb 3 cx backhoe loader service repair manual sn from 2509500 and up
 

Recently uploaded

FULL ENJOY - 9953040155 Call Girls in Sector 61 | Noida
FULL ENJOY - 9953040155 Call Girls in Sector 61 | NoidaFULL ENJOY - 9953040155 Call Girls in Sector 61 | Noida
FULL ENJOY - 9953040155 Call Girls in Sector 61 | NoidaMalviyaNagarCallGirl
 
Beautiful Vip Call Girls Punjabi Bagh 9711199012 Call /Whatsapps
Beautiful Vip  Call Girls Punjabi Bagh 9711199012 Call /WhatsappsBeautiful Vip  Call Girls Punjabi Bagh 9711199012 Call /Whatsapps
Beautiful Vip Call Girls Punjabi Bagh 9711199012 Call /Whatsappssapnasaifi408
 
UNOSAFE ELEVATOR PRIVATE LTD BANGALORE BROUCHER
UNOSAFE ELEVATOR PRIVATE LTD BANGALORE BROUCHERUNOSAFE ELEVATOR PRIVATE LTD BANGALORE BROUCHER
UNOSAFE ELEVATOR PRIVATE LTD BANGALORE BROUCHERunosafeads
 
Electronic Vehicle (EV) Industry Challenges
Electronic Vehicle (EV) Industry ChallengesElectronic Vehicle (EV) Industry Challenges
Electronic Vehicle (EV) Industry Challengesmarketingmangosemi
 
UNIT-V-ELECTRIC AND HYBRID VEHICLES.pptx
UNIT-V-ELECTRIC AND HYBRID VEHICLES.pptxUNIT-V-ELECTRIC AND HYBRID VEHICLES.pptx
UNIT-V-ELECTRIC AND HYBRID VEHICLES.pptxDineshKumar4165
 
The 10th anniversary, Hyundai World Rally Team's amazing journey
The 10th anniversary, Hyundai World Rally Team's amazing journeyThe 10th anniversary, Hyundai World Rally Team's amazing journey
The 10th anniversary, Hyundai World Rally Team's amazing journeyHyundai Motor Group
 
Vip Hot🥵 Call Girls Delhi Delhi {9711199012} Avni Thakur 🧡😘 High Profile Girls
Vip Hot🥵 Call Girls Delhi Delhi {9711199012} Avni Thakur 🧡😘 High Profile GirlsVip Hot🥵 Call Girls Delhi Delhi {9711199012} Avni Thakur 🧡😘 High Profile Girls
Vip Hot🥵 Call Girls Delhi Delhi {9711199012} Avni Thakur 🧡😘 High Profile Girlsshivangimorya083
 
John Deere 200lc Excavator Operation And Tests Repair Manual.pdf
John Deere 200lc Excavator Operation And Tests Repair Manual.pdfJohn Deere 200lc Excavator Operation And Tests Repair Manual.pdf
John Deere 200lc Excavator Operation And Tests Repair Manual.pdfExcavator
 
VIP Mumbai Call Girls Thakur village Just Call 9920874524 with A/C Room Cash ...
VIP Mumbai Call Girls Thakur village Just Call 9920874524 with A/C Room Cash ...VIP Mumbai Call Girls Thakur village Just Call 9920874524 with A/C Room Cash ...
VIP Mumbai Call Girls Thakur village Just Call 9920874524 with A/C Room Cash ...Garima Khatri
 
UNIT-IV-STEERING, BRAKES AND SUSPENSION SYSTEMS.pptx
UNIT-IV-STEERING, BRAKES AND SUSPENSION SYSTEMS.pptxUNIT-IV-STEERING, BRAKES AND SUSPENSION SYSTEMS.pptx
UNIT-IV-STEERING, BRAKES AND SUSPENSION SYSTEMS.pptxDineshKumar4165
 
Vip Hot Call Girls 🫤 Mahipalpur ➡️ 9711199171 ➡️ Delhi 🫦 Whatsapp Number
Vip Hot Call Girls 🫤 Mahipalpur ➡️ 9711199171 ➡️ Delhi 🫦 Whatsapp NumberVip Hot Call Girls 🫤 Mahipalpur ➡️ 9711199171 ➡️ Delhi 🫦 Whatsapp Number
Vip Hot Call Girls 🫤 Mahipalpur ➡️ 9711199171 ➡️ Delhi 🫦 Whatsapp Numberkumarajju5765
 
Alina 7042364481 Call Girls Service Pochanpur Colony - independent Pochanpur ...
Alina 7042364481 Call Girls Service Pochanpur Colony - independent Pochanpur ...Alina 7042364481 Call Girls Service Pochanpur Colony - independent Pochanpur ...
Alina 7042364481 Call Girls Service Pochanpur Colony - independent Pochanpur ...Hot Call Girls In Sector 58 (Noida)
 
Russian Call Girls Delhi Indirapuram {9711199171} Aarvi Gupta ✌️Independent ...
Russian  Call Girls Delhi Indirapuram {9711199171} Aarvi Gupta ✌️Independent ...Russian  Call Girls Delhi Indirapuram {9711199171} Aarvi Gupta ✌️Independent ...
Russian Call Girls Delhi Indirapuram {9711199171} Aarvi Gupta ✌️Independent ...shivangimorya083
 
GREEN VEHICLES the kids picture show 2024
GREEN VEHICLES the kids picture show 2024GREEN VEHICLES the kids picture show 2024
GREEN VEHICLES the kids picture show 2024AHOhOops1
 
Delhi Call Girls Saket 9711199171 ☎✔👌✔ Full night Service for more than 1 person
Delhi Call Girls Saket 9711199171 ☎✔👌✔ Full night Service for more than 1 personDelhi Call Girls Saket 9711199171 ☎✔👌✔ Full night Service for more than 1 person
Delhi Call Girls Saket 9711199171 ☎✔👌✔ Full night Service for more than 1 personshivangimorya083
 
꧁༒☬ 7042364481 (Call Girl) In Dwarka Delhi Escort Service In Delhi Ncr☬༒꧂
꧁༒☬ 7042364481 (Call Girl) In Dwarka Delhi Escort Service In Delhi Ncr☬༒꧂꧁༒☬ 7042364481 (Call Girl) In Dwarka Delhi Escort Service In Delhi Ncr☬༒꧂
꧁༒☬ 7042364481 (Call Girl) In Dwarka Delhi Escort Service In Delhi Ncr☬༒꧂Hot Call Girls In Sector 58 (Noida)
 
Delhi Call Girls Mayur Vihar 9711199171 ☎✔👌✔ Whatsapp Hard And Sexy Vip Call
Delhi Call Girls Mayur Vihar 9711199171 ☎✔👌✔ Whatsapp Hard And Sexy Vip CallDelhi Call Girls Mayur Vihar 9711199171 ☎✔👌✔ Whatsapp Hard And Sexy Vip Call
Delhi Call Girls Mayur Vihar 9711199171 ☎✔👌✔ Whatsapp Hard And Sexy Vip Callshivangimorya083
 

Recently uploaded (20)

FULL ENJOY - 9953040155 Call Girls in Sector 61 | Noida
FULL ENJOY - 9953040155 Call Girls in Sector 61 | NoidaFULL ENJOY - 9953040155 Call Girls in Sector 61 | Noida
FULL ENJOY - 9953040155 Call Girls in Sector 61 | Noida
 
Beautiful Vip Call Girls Punjabi Bagh 9711199012 Call /Whatsapps
Beautiful Vip  Call Girls Punjabi Bagh 9711199012 Call /WhatsappsBeautiful Vip  Call Girls Punjabi Bagh 9711199012 Call /Whatsapps
Beautiful Vip Call Girls Punjabi Bagh 9711199012 Call /Whatsapps
 
Indian Downtown Call Girls # 00971528903066 # Indian Call Girls In Downtown D...
Indian Downtown Call Girls # 00971528903066 # Indian Call Girls In Downtown D...Indian Downtown Call Girls # 00971528903066 # Indian Call Girls In Downtown D...
Indian Downtown Call Girls # 00971528903066 # Indian Call Girls In Downtown D...
 
UNOSAFE ELEVATOR PRIVATE LTD BANGALORE BROUCHER
UNOSAFE ELEVATOR PRIVATE LTD BANGALORE BROUCHERUNOSAFE ELEVATOR PRIVATE LTD BANGALORE BROUCHER
UNOSAFE ELEVATOR PRIVATE LTD BANGALORE BROUCHER
 
Electronic Vehicle (EV) Industry Challenges
Electronic Vehicle (EV) Industry ChallengesElectronic Vehicle (EV) Industry Challenges
Electronic Vehicle (EV) Industry Challenges
 
UNIT-V-ELECTRIC AND HYBRID VEHICLES.pptx
UNIT-V-ELECTRIC AND HYBRID VEHICLES.pptxUNIT-V-ELECTRIC AND HYBRID VEHICLES.pptx
UNIT-V-ELECTRIC AND HYBRID VEHICLES.pptx
 
The 10th anniversary, Hyundai World Rally Team's amazing journey
The 10th anniversary, Hyundai World Rally Team's amazing journeyThe 10th anniversary, Hyundai World Rally Team's amazing journey
The 10th anniversary, Hyundai World Rally Team's amazing journey
 
Vip Hot🥵 Call Girls Delhi Delhi {9711199012} Avni Thakur 🧡😘 High Profile Girls
Vip Hot🥵 Call Girls Delhi Delhi {9711199012} Avni Thakur 🧡😘 High Profile GirlsVip Hot🥵 Call Girls Delhi Delhi {9711199012} Avni Thakur 🧡😘 High Profile Girls
Vip Hot🥵 Call Girls Delhi Delhi {9711199012} Avni Thakur 🧡😘 High Profile Girls
 
John Deere 200lc Excavator Operation And Tests Repair Manual.pdf
John Deere 200lc Excavator Operation And Tests Repair Manual.pdfJohn Deere 200lc Excavator Operation And Tests Repair Manual.pdf
John Deere 200lc Excavator Operation And Tests Repair Manual.pdf
 
VIP Mumbai Call Girls Thakur village Just Call 9920874524 with A/C Room Cash ...
VIP Mumbai Call Girls Thakur village Just Call 9920874524 with A/C Room Cash ...VIP Mumbai Call Girls Thakur village Just Call 9920874524 with A/C Room Cash ...
VIP Mumbai Call Girls Thakur village Just Call 9920874524 with A/C Room Cash ...
 
UNIT-IV-STEERING, BRAKES AND SUSPENSION SYSTEMS.pptx
UNIT-IV-STEERING, BRAKES AND SUSPENSION SYSTEMS.pptxUNIT-IV-STEERING, BRAKES AND SUSPENSION SYSTEMS.pptx
UNIT-IV-STEERING, BRAKES AND SUSPENSION SYSTEMS.pptx
 
Vip Hot Call Girls 🫤 Mahipalpur ➡️ 9711199171 ➡️ Delhi 🫦 Whatsapp Number
Vip Hot Call Girls 🫤 Mahipalpur ➡️ 9711199171 ➡️ Delhi 🫦 Whatsapp NumberVip Hot Call Girls 🫤 Mahipalpur ➡️ 9711199171 ➡️ Delhi 🫦 Whatsapp Number
Vip Hot Call Girls 🫤 Mahipalpur ➡️ 9711199171 ➡️ Delhi 🫦 Whatsapp Number
 
Alina 7042364481 Call Girls Service Pochanpur Colony - independent Pochanpur ...
Alina 7042364481 Call Girls Service Pochanpur Colony - independent Pochanpur ...Alina 7042364481 Call Girls Service Pochanpur Colony - independent Pochanpur ...
Alina 7042364481 Call Girls Service Pochanpur Colony - independent Pochanpur ...
 
Russian Call Girls Delhi Indirapuram {9711199171} Aarvi Gupta ✌️Independent ...
Russian  Call Girls Delhi Indirapuram {9711199171} Aarvi Gupta ✌️Independent ...Russian  Call Girls Delhi Indirapuram {9711199171} Aarvi Gupta ✌️Independent ...
Russian Call Girls Delhi Indirapuram {9711199171} Aarvi Gupta ✌️Independent ...
 
GREEN VEHICLES the kids picture show 2024
GREEN VEHICLES the kids picture show 2024GREEN VEHICLES the kids picture show 2024
GREEN VEHICLES the kids picture show 2024
 
Call Girls in Shri Niwas Puri Delhi 💯Call Us 🔝9953056974🔝
Call Girls in  Shri Niwas Puri  Delhi 💯Call Us 🔝9953056974🔝Call Girls in  Shri Niwas Puri  Delhi 💯Call Us 🔝9953056974🔝
Call Girls in Shri Niwas Puri Delhi 💯Call Us 🔝9953056974🔝
 
Delhi Call Girls Saket 9711199171 ☎✔👌✔ Full night Service for more than 1 person
Delhi Call Girls Saket 9711199171 ☎✔👌✔ Full night Service for more than 1 personDelhi Call Girls Saket 9711199171 ☎✔👌✔ Full night Service for more than 1 person
Delhi Call Girls Saket 9711199171 ☎✔👌✔ Full night Service for more than 1 person
 
Hotel Escorts Sushant Golf City - 9548273370 Call Girls Service in Lucknow, c...
Hotel Escorts Sushant Golf City - 9548273370 Call Girls Service in Lucknow, c...Hotel Escorts Sushant Golf City - 9548273370 Call Girls Service in Lucknow, c...
Hotel Escorts Sushant Golf City - 9548273370 Call Girls Service in Lucknow, c...
 
꧁༒☬ 7042364481 (Call Girl) In Dwarka Delhi Escort Service In Delhi Ncr☬༒꧂
꧁༒☬ 7042364481 (Call Girl) In Dwarka Delhi Escort Service In Delhi Ncr☬༒꧂꧁༒☬ 7042364481 (Call Girl) In Dwarka Delhi Escort Service In Delhi Ncr☬༒꧂
꧁༒☬ 7042364481 (Call Girl) In Dwarka Delhi Escort Service In Delhi Ncr☬༒꧂
 
Delhi Call Girls Mayur Vihar 9711199171 ☎✔👌✔ Whatsapp Hard And Sexy Vip Call
Delhi Call Girls Mayur Vihar 9711199171 ☎✔👌✔ Whatsapp Hard And Sexy Vip CallDelhi Call Girls Mayur Vihar 9711199171 ☎✔👌✔ Whatsapp Hard And Sexy Vip Call
Delhi Call Girls Mayur Vihar 9711199171 ☎✔👌✔ Whatsapp Hard And Sexy Vip Call
 

Vauxhall Omega 1998-Fitting Procedure for Headlight Adjusters

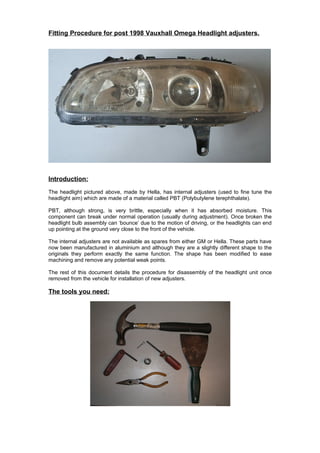
  • 1. Fitting Procedure for post 1998 Vauxhall Omega Headlight adjusters. Introduction: The headlight pictured above, made by Hella, has internal adjusters (used to fine tune the headlight aim) which are made of a material called PBT (Polybutylene terephthalate). PBT, although strong, is very brittle, especially when it has absorbed moisture. This component can break under normal operation (usually during adjustment). Once broken the headlight bulb assembly can ‘bounce’ due to the motion of driving, or the headlights can end up pointing at the ground very close to the front of the vehicle. The internal adjusters are not available as spares from either GM or Hella. These parts have now been manufactured in aluminium and although they are a slightly different shape to the originals they perform exactly the same function. The shape has been modified to ease machining and remove any potential weak points. The rest of this document details the procedure for disassembly of the headlight unit once removed from the vehicle for installation of new adjusters. The tools you need:
  • 2. Procedure: The main moulding of the headlight (part number 143 145-00 LI for left and 143 146-00 RE for right) has a clear lens which is bonded to it with a sealant similar to tar. To ease the lens separation the sealant needs to be heated. The heating softens the sealant and reduces the amount of ‘grip’ it has on the lens. The heat is applied to the sealant by putting the complete unit in the oven at a temperature of 100°C for approximately 10 minutes. Before the unit is heated many parts can be removed to reduce the chance of the heat causing them any damage. Firstly, the rubber strip (part number 145 217 – 00 LI or 145 218 -00 RE) needs to be removed, this is a very simple task although care should be taken as some of the lens sealant may have attached this part to the main body of the unit. Next, the bulb covers (parts 150216 and 143688), the bulbs they cover and the indicator assembly (143287) need to be removed. The indicator assembly is removed by rotating it anti-clockwise, the fitting is similar to that of a bayonet light bulb. The electric motor for the light tilt adjustment is next to be removed (part number GM 90 492 832), this is located in the casing in a similar way to the indicator assembly and is released by twisting clockwise for a left hand unit and anticlockwise for a right hand unit. The motor will still be attached to the light assembly at this point, this can be seen through the hole in the back of the unit as pictured below. Location of tilt motor and light assembly
  • 3. The location between the parts is in the form of a ball on the end of the motor rod located in a slot on the light assembly. To release this location simply pull the motor unit backwards, away from the light and slide it towards the indicator, this will slide the ball from the slot in the light assembly. The location between tilt motor and light assembly is pictured below with both units removed from the main body for clarity. When the parts below have been removed the unit is ready to be heated to soften the sealant
  • 4. Once all these parts are removed its time to heat the unit in the oven to soften the sealant, this can also be achieved using a hair drier, but I have always found using the oven simpler. Place the complete unit in a pre-heated oven at 100°C for about 10 minutes. When the unit is heated the lens needs to be slowly and carefully pulled from the main body of the light. The tabs on the lens need to be lifted over the locating pieces on the main body of the unit and then the lens pulled off. It is important to do this step slowly and methodically as damage can occur the either the lens or light body. Working around the unit using a screw driver with a large flat blade or a putty knife or similar item separate the 2 components. I worked around the unit 2 or 3 times to fully separate the 2 parts. If you find the sealant starts to stiffen up replace the unit in the oven for a further 10 minutes or so in order to soften it again. Although this was not necessary on the unit I had, the lens separated very easily once heated. Once the lens is released the hard part is done.
  • 5. Silver trim The silver outer trim piece can then be removed. Lift the two white tabs on the outer edges of the adjuster (pictured) and the main light assembly can be lifted out of the main body. White Tabs
  • 6. You now need to remove the broken ‘ball end’ of the adjuster from the white ‘socket’. I did this by breaking the rest of the black ball end until what was left was a smaller diameter than the size of the hole in the white socket. I then rested the whole assembly on a 3/8” socket and hammered a screw through the hole in the white socket to release the black ball.
  • 7. To remove the rest of the broken adjuster use a 4mm Allen key in the front of the unit and turn clockwise, as if you were doing it up. This will rotate the adjuster screw and wind the rest of the component off it. Remainder of broken adjuster
  • 8. The new adjuster can now be fitted and the unit reassembled. The only points to note are that the new adjusters should have the white sockets fitted to them with a small amount of grease before they are fitted to the main light assembly. If the sockets are fitted to the light assembly and then pushed onto the adjusters the location is much more difficult as the socket needs to expand when the ball end of the adjuster is inserted into it. If this is done with the socket already mounted it is much more difficult as the expansion is limited by the main assembly. Also, be careful not to wind the adjuster to the limit of its travel as this can cause damage to many of the components in the assembly, this is especially important if you are using an electric screw driver or drill to wind the screw. As all good manuals say, refitting is the reverse sequence to removal!