Marketing Management 11th Edition Peter Solutions Manual
1.
Download the fullversion and explore a variety of test banks
or solution manuals at https://testbankdeal.com
Marketing Management 11th Edition Peter Solutions
Manual
_____ Follow the link below to get your download now _____
https://testbankdeal.com/product/marketing-management-11th-
edition-peter-solutions-manual/
Access testbankdeal.com now to download high-quality
test banks or solution manuals
2.
Here are somerecommended products for you. Click the link to
download, or explore more at testbankdeal.com
Marketing Management 11th Edition Peter Test Bank
https://testbankdeal.com/product/marketing-management-11th-edition-
peter-test-bank/
Preface to Marketing Management 13th Edition Peter
Solutions Manual
https://testbankdeal.com/product/preface-to-marketing-management-13th-
edition-peter-solutions-manual/
Preface to Marketing Management 14th Edition Peter
Solutions Manual
https://testbankdeal.com/product/preface-to-marketing-management-14th-
edition-peter-solutions-manual/
Managerial Accounting 10th Edition Crosson Solutions
Manual
https://testbankdeal.com/product/managerial-accounting-10th-edition-
crosson-solutions-manual/
3.
Applied CALC 2ndEdition Frank Wilson Solutions Manual
https://testbankdeal.com/product/applied-calc-2nd-edition-frank-
wilson-solutions-manual/
Business Driven Technology 6th Edition Baltzan Test Bank
https://testbankdeal.com/product/business-driven-technology-6th-
edition-baltzan-test-bank/
Educational Psychology 12th Edition Woolfolk Test Bank
https://testbankdeal.com/product/educational-psychology-12th-edition-
woolfolk-test-bank/
Launching New Ventures An Entrepreneurial Approach 7th
Edition Allen Solutions Manual
https://testbankdeal.com/product/launching-new-ventures-an-
entrepreneurial-approach-7th-edition-allen-solutions-manual/
Principles of Accounting 11th Edition Needles Solutions
Manual
https://testbankdeal.com/product/principles-of-accounting-11th-
edition-needles-solutions-manual/
4.
Human Relations Strategiesfor Success 5th Edition
Lamberton Test Bank
https://testbankdeal.com/product/human-relations-strategies-for-
success-5th-edition-lamberton-test-bank/
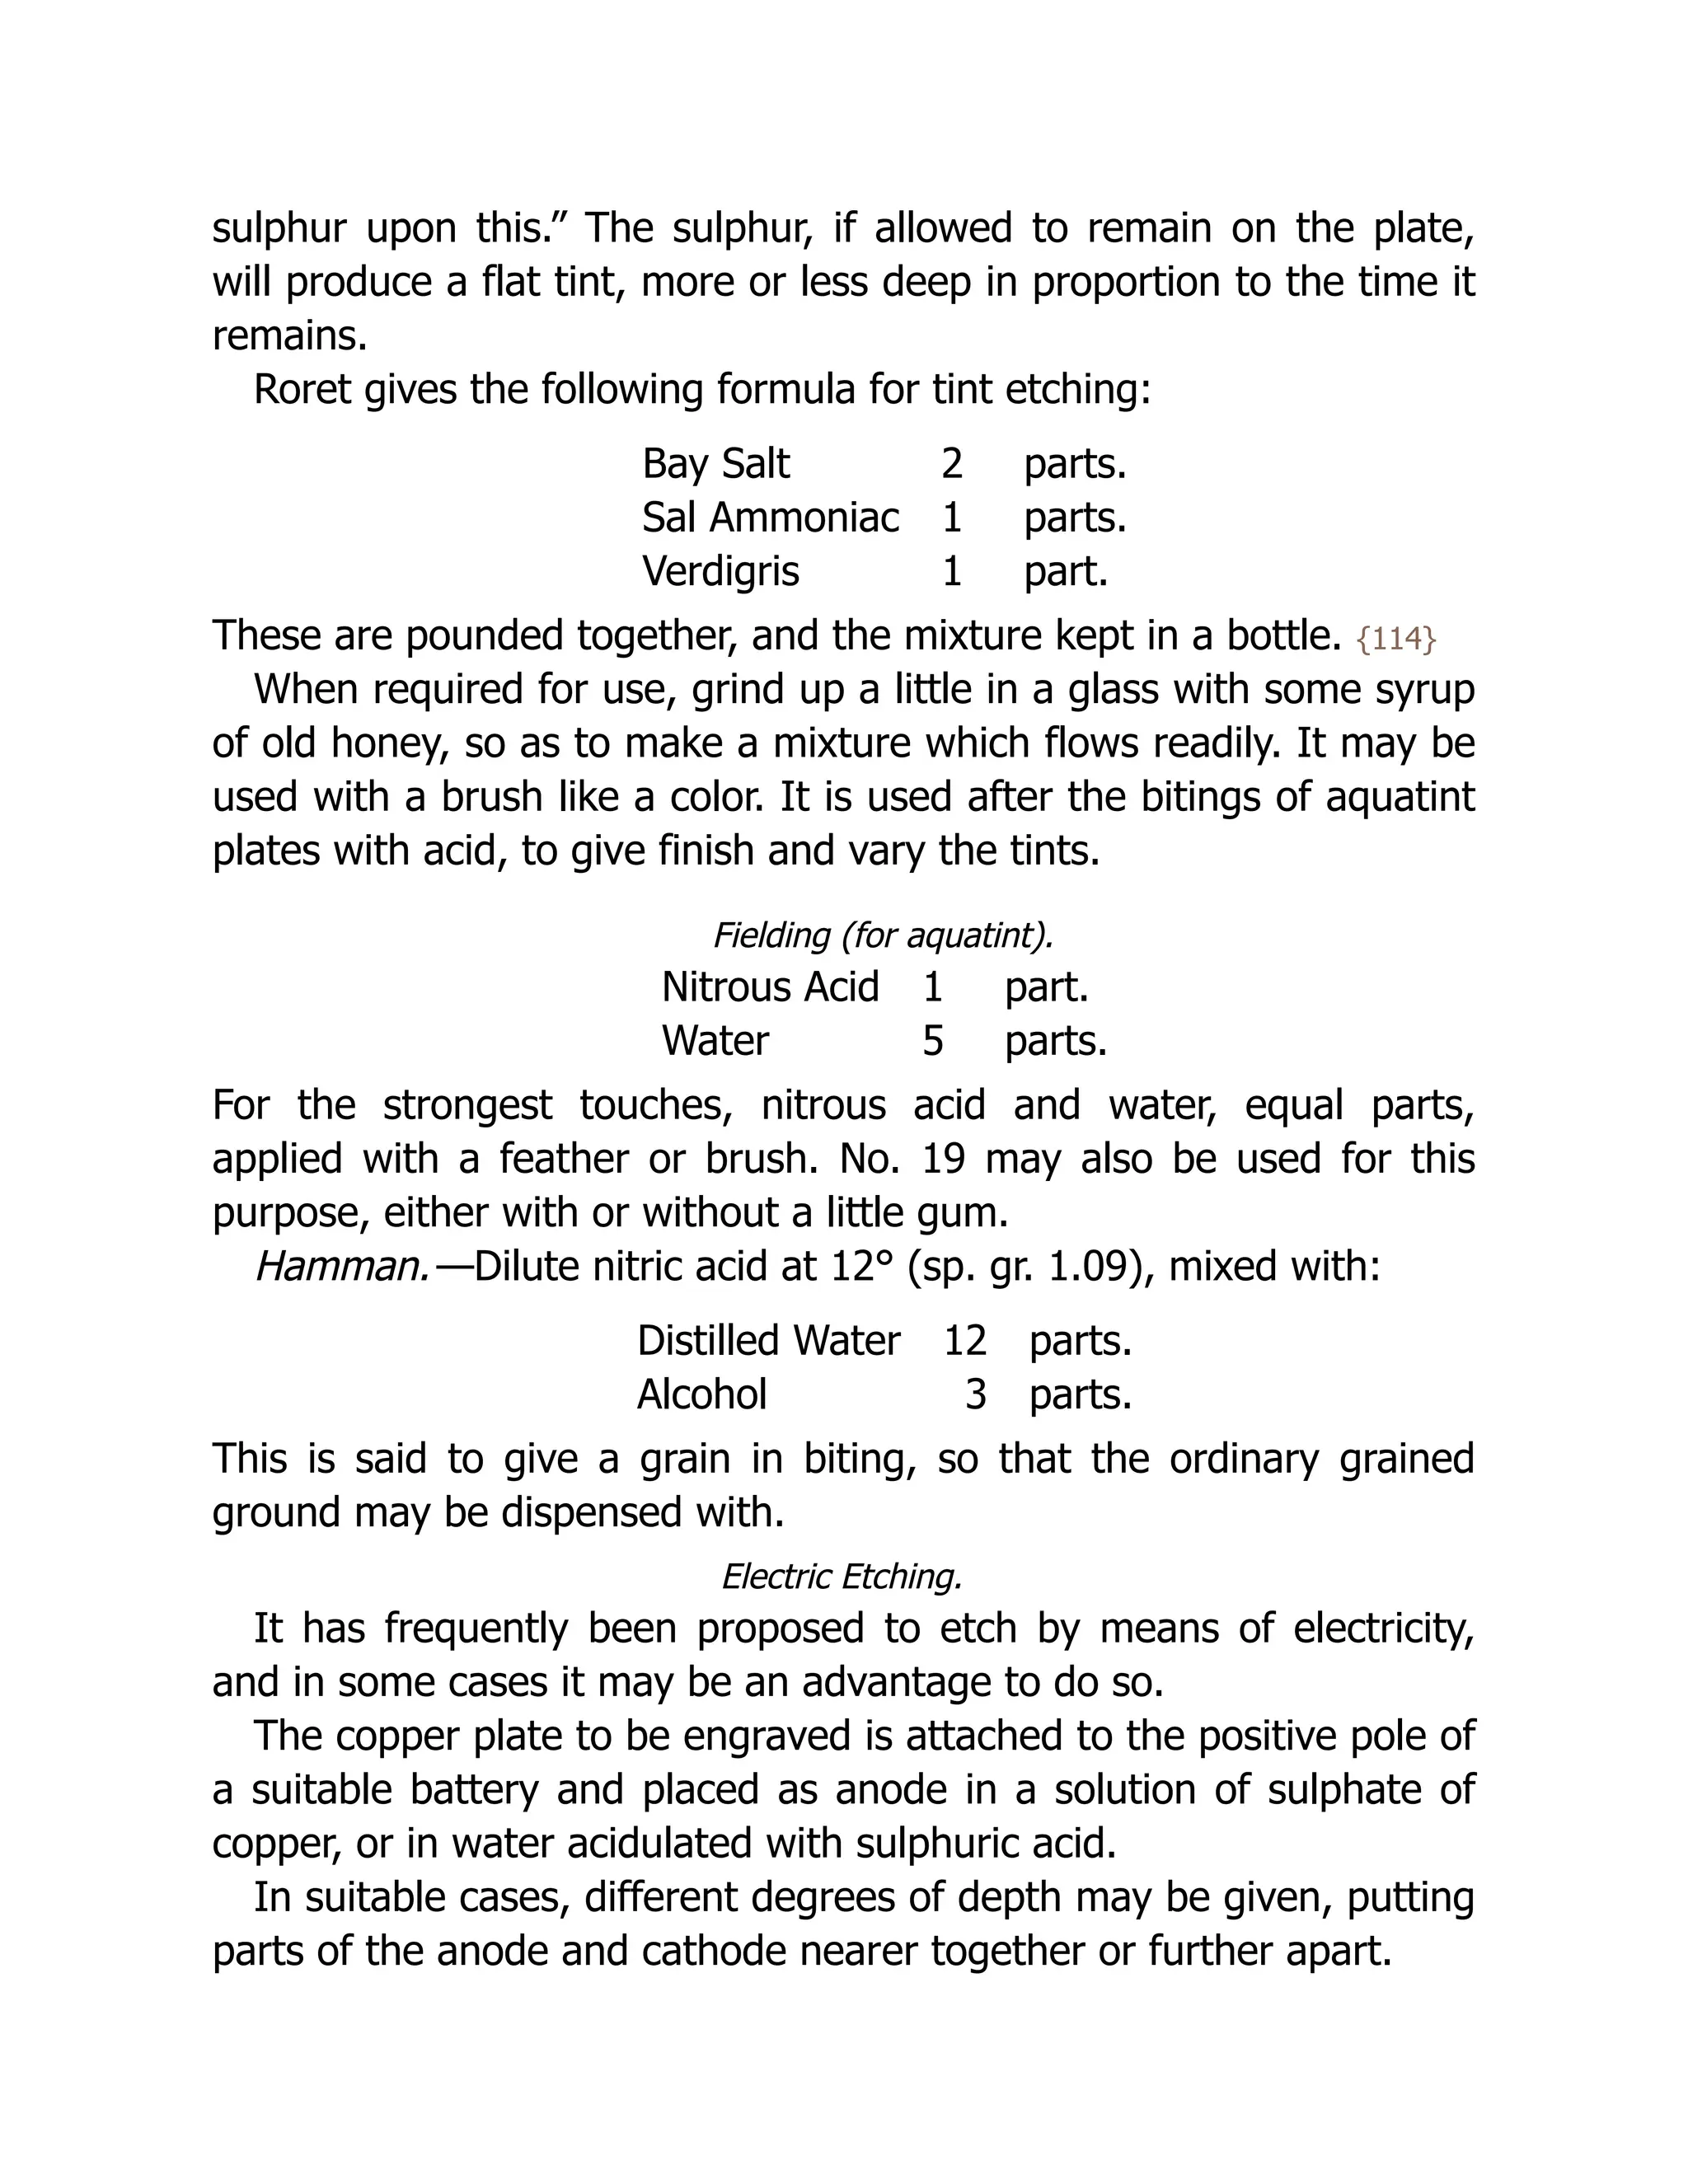
sulphur upon this.”The sulphur, if allowed to remain on the plate,
will produce a flat tint, more or less deep in proportion to the time it
remains.
Roret gives the following formula for tint etching:
Bay Salt 2 parts.
Sal Ammoniac 1 parts.
Verdigris 1 part.
These are pounded together, and the mixture kept in a bottle. {114}
When required for use, grind up a little in a glass with some syrup
of old honey, so as to make a mixture which flows readily. It may be
used with a brush like a color. It is used after the bitings of aquatint
plates with acid, to give finish and vary the tints.
Fielding (for aquatint).
Nitrous Acid 1 part.
Water 5 parts.
For the strongest touches, nitrous acid and water, equal parts,
applied with a feather or brush. No. 19 may also be used for this
purpose, either with or without a little gum.
Hamman.—Dilute nitric acid at 12° (sp. gr. 1.09), mixed with:
Distilled Water 12 parts.
Alcohol 3 parts.
This is said to give a grain in biting, so that the ordinary grained
ground may be dispensed with.
Electric Etching.
It has frequently been proposed to etch by means of electricity,
and in some cases it may be an advantage to do so.
The copper plate to be engraved is attached to the positive pole of
a suitable battery and placed as anode in a solution of sulphate of
copper, or in water acidulated with sulphuric acid.
In suitable cases, different degrees of depth may be given, putting
parts of the anode and cathode nearer together or further apart.
20.
Grove etched daguerrotypeplates with a single pair of Grove or
Bunsen cells, by inserting the plate to be etched, and a platinum
plate of the same size, in a wooden frame having two grooves a
quarter of an inch apart.
The daguerrotype having been attached to the battery as anode,
and the platinum plates as cathode, the frame is immersed in a
suitable vessel filled with
Hydrochloric Acid 2 parts.
Distilled Water 1 part.
Contact is made for about half a minute, after which the plate is
removed from the acid, washed thoroughly with distilled water, then
placed in a solution of hyposulphite of soda or ammonia, and the
deposit removed from the surface {115} with gentle rubbing with
cotton. It is again rinsed with distilled water and dried.
MORDANTS FOR ZINC.
The comparative cheapness of zinc would give it an advantage
over copper or steel for engraving or etching with the graver or
point, but it does not seem to be recommended for these purposes.
It is hard to cut with the graver, and, though it bites easily, it is not
suitable for fine work. Another defect is that it will not stand a long
impression; but this may be overcome by surfacing the plate with
copper. The principal uses of this metal for printing purposes are for
surface printing or zincography in the same manner as lithography,
and for the process of biting in relief, and zinco-typography or
Gillotage, now so largely employed as a substitute for wood blocks.
It can also be engraved very delicately in the same style as
engraving is done on stone, through a coating of gum.
The etching fluids for zinc are of two entirely different kinds: first,
mixtures of gum and weak acids used for preparing plates for
zincographic printing in the lithographic press, or for preliminary
inking preparatory to being bitten in relief by the Gillotage process;
21.
and secondly, mineralacid, more or less dilute, used for biting in
relief and ordinary etching.
Zincographic Etching.
This kind of etching is more of a preparation of the plate for
printing than engraving or biting, the object being merely to fill up
the pores of the metal with gum, and prevent it receiving printers’
ink from the roller elsewhere than on the lines of the drawing.
The solution most commonly employed for this purpose is a
mixture of gum and decoction of nut-galls, in use at the Ordnance
Survey Office, Southampton, and given by Sir Henry James in his
work on Photo-zincography. It is prepared as follows: Four ounces
of Aleppo galls are bruised and steeped in three quarts of cold water
for twenty-four hours; the water and galls are then boiled up
together, and the decoction strained. The gum-water should be
about the consistency of cream. One quart of the decoction of galls
is added to three quarts of the gum-water and to the mixture are
added about three ounces of phosphoric acid, which is prepared by
placing sticks of phosphorus in a loosely corked bottle of water, so
that the ends of the sticks may be uncovered. The oxidation of the
phosphorus produces phosphoric acid, which dissolves as fast as it is
formed. {116}
The etching solution should only just mark a piece of plain zinc.
In Richmond’s Grammar of Lithography the following
modifications of this formula are given:
Decoction of Nutgalls 3
⁄
4 pint.
Gum Water as thick as Cream 1
⁄
4 pint.
Phosphoric Acid Solution 3 drachms.
Boil one and a quarter ounces of bruised nutgalls in one and a
quarter pounds of water till reduced to one-third, strain, and add
two drachms of nitric acid and four drops of acetic acid.
Richmond recommends, however, the use of a simple decoction of
galls without acid, and gumming in after etching.
22.
Scamoni has thefollowing, by Garnier: Boil about one and a half
ounces of bruised gall-nuts in a pint of water till reduced to one-
third, filter, and add two drops of nitric acid, and three or four drops
of muriatic acid. For very fine work this may be weakened with
water. It is applied for about a minute, then washed off, and the
plate gummed.
Zinco-typographic Etching.
In biting zinc plates in relief, the acid generally used is nitric of
different degrees of strength, according to the nature and state of
the work.
After the transfer is made, the plate is etched with one of the
foregoing preparations, then inked in and dusted with finely
powdered resin, which adheres only to the lines. This procedure is
followed after every biting, the plate being warmed to melt the resin
and inky coating, so that it may run down between the lines and
protect them from the undercutting action of the acid.
Kruger, in his Die Zinkogravure, recommends for the first relief
etching, nitric acid 30 to 40 drops to 100 grammes of water, applied
for five minutes. For each subsequent etching, 8 to 10 drops of acid
are added for each 100 grammes of water, and the time is increased,
from five to fifteen minutes. For the final etching of the broad lights
he uses:
Muriatic Acid 4 parts.
Nitric acid 1 part.
Water 16 parts.
To soften down the ridges between the lines the plate is inked and
dusted as before, and etched with dilute nitric acid at five per cent.,
applied for a {117} minute, and the inking, dusting, and etching
repeated as often as may be necessary.
23.
THE DIFFERENCE.
Finally, inthis department, only the novice will require an
explanation of the varied productions possible by means of the
processes already given. As actual examples, reference may be had
to the illustrations in this work. Figures 1, 2, and 3 are specimens of
line work, zinc etchings made from pen and ink drawings. The
figures in the following chapter were made in the same way.
Fig. 13.
Figures 4, 5, 6, and 7, as well as some others, are zinc etchings
reproduced from Mr. Mörch’s work. With them more effort has been
made to secure half-tone by a variety and quantity, or filling, in of
lines. The example below was made by using the objects (ferns)
themselves as the negative, without any interposition from
photography, and shows one of the possible applications of zinc
etching. It is delicate work and is very beautiful when carefully done.
An example of true half-tone, obtained in the manner described in
Part II., is the one which follows. It was made by Mr. F. E. Ives, the
earliest inventor of a half-tone process, several years ago. The larger
examples of half-tone work which appear in this book are made after
the most modern fashion and formulæ, as described in Part II., and
24.
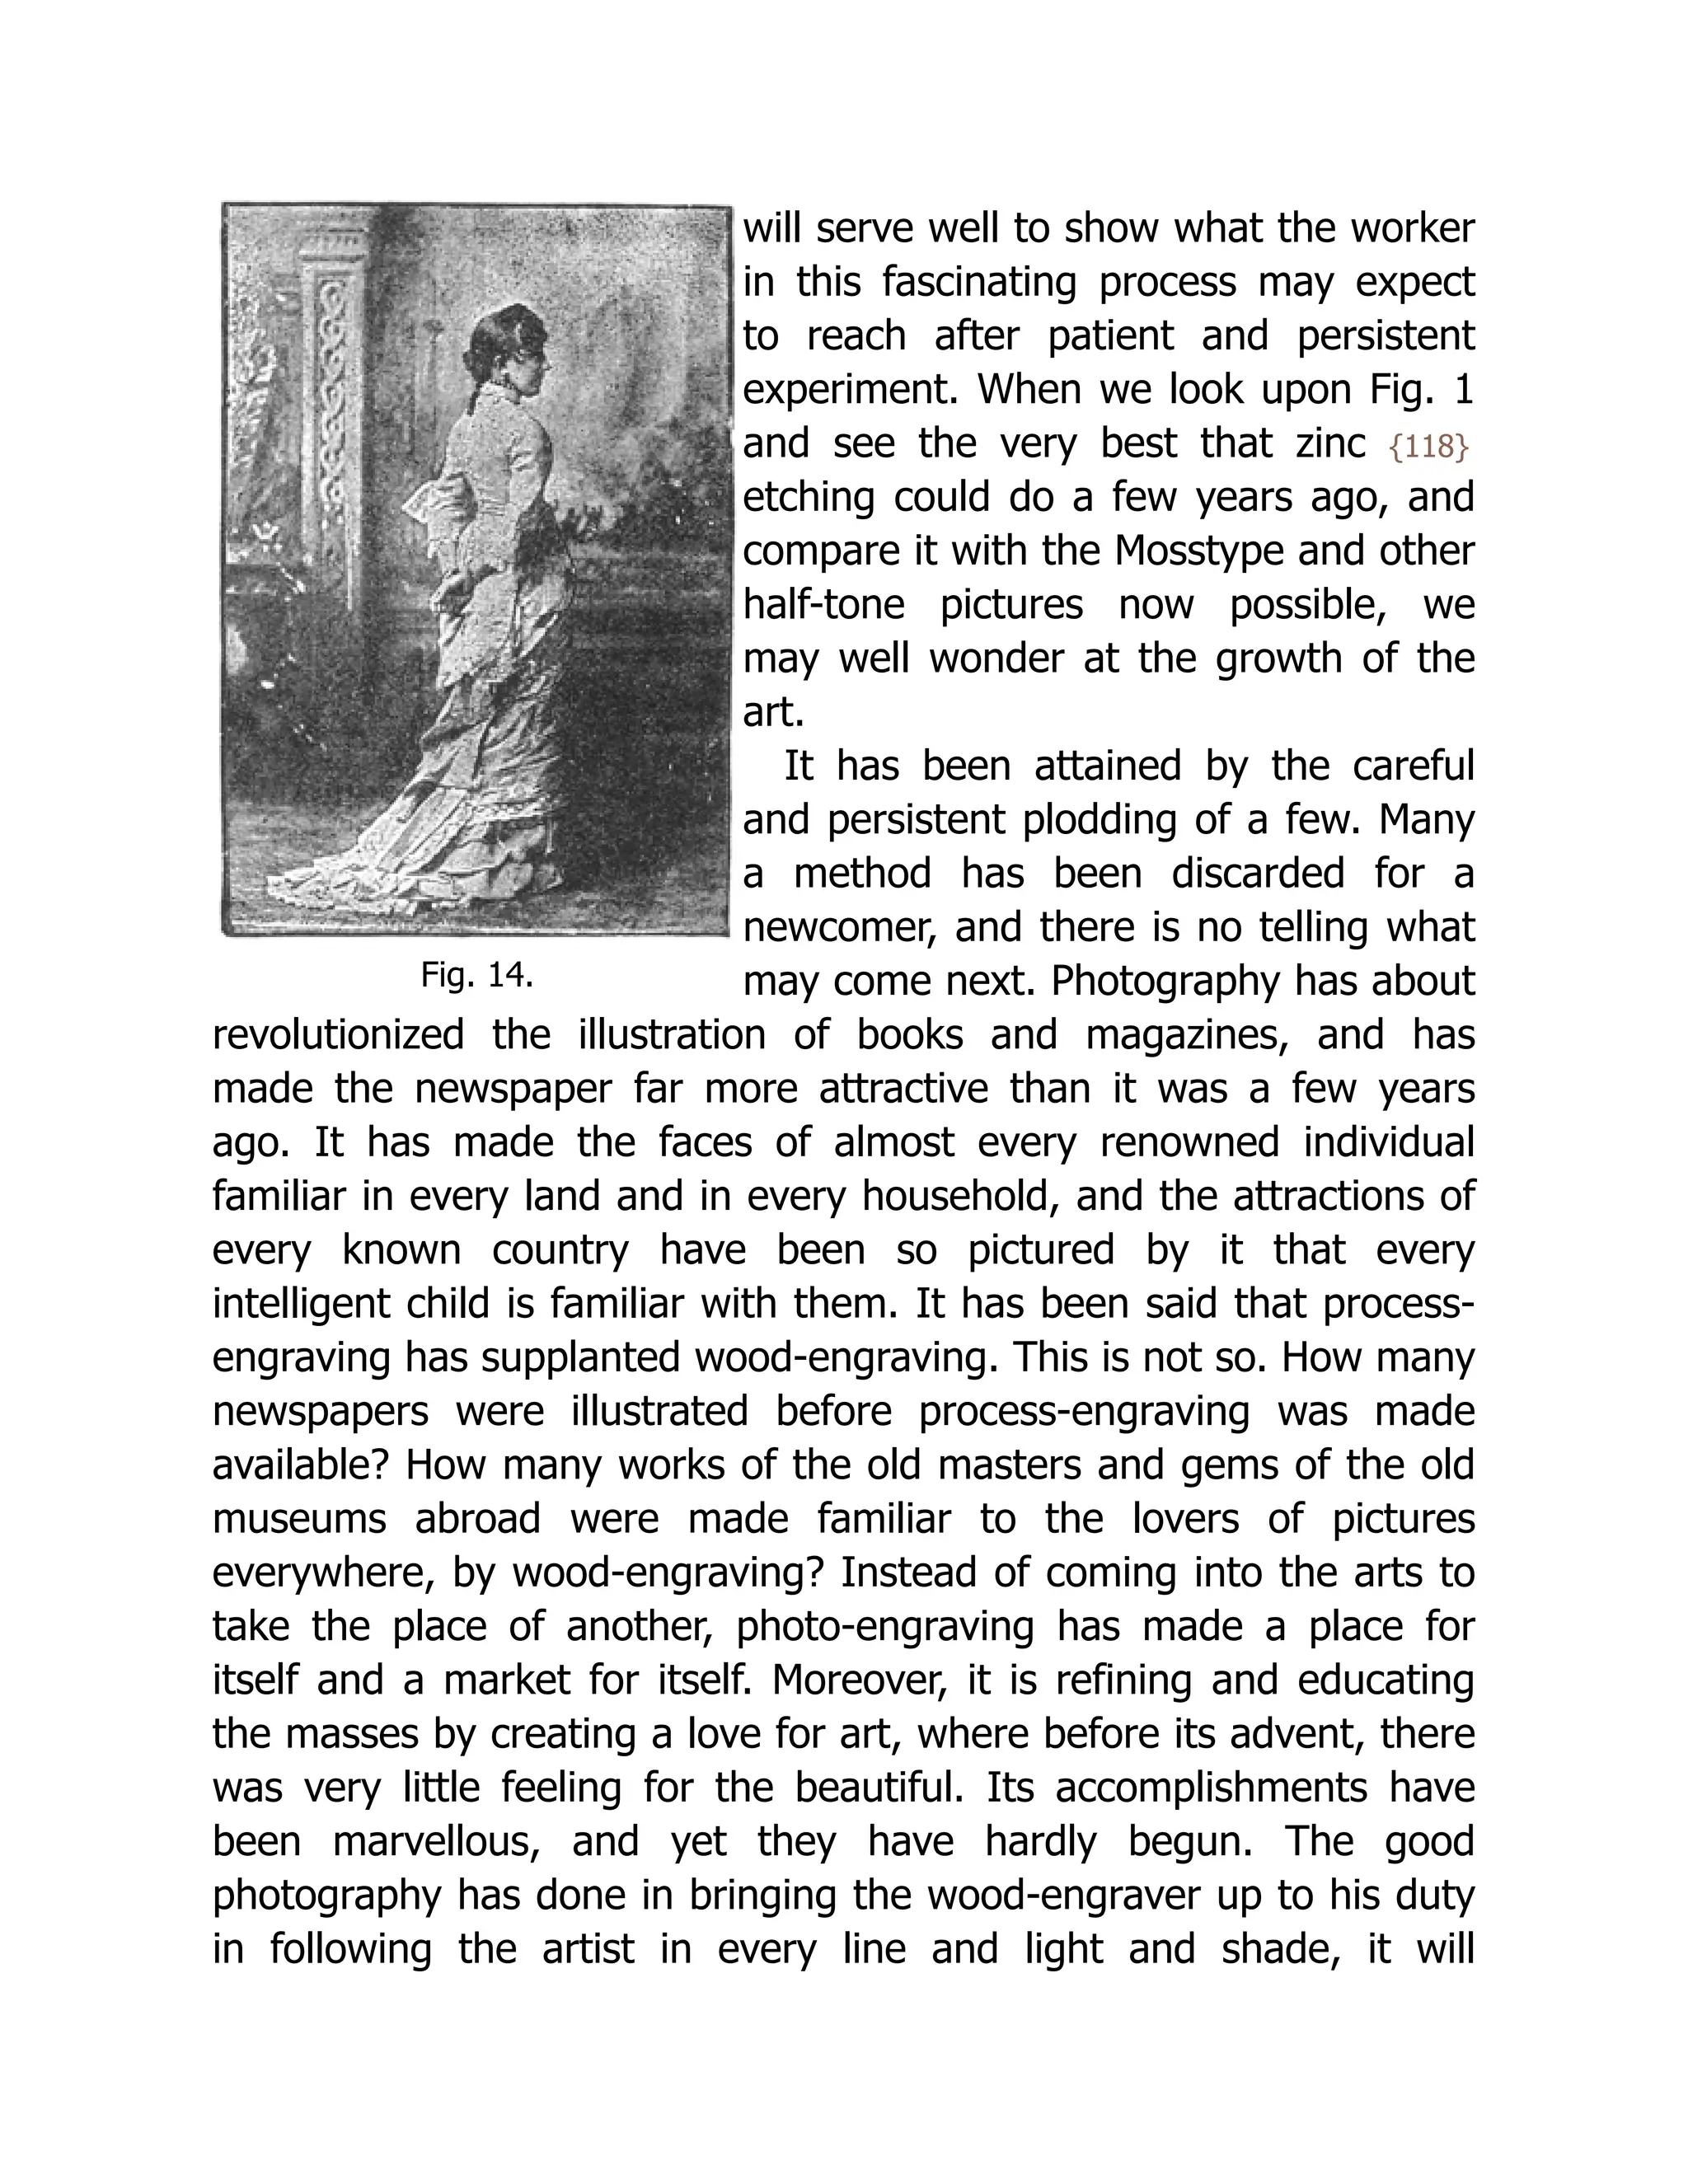
Fig. 14.
will servewell to show what the worker
in this fascinating process may expect
to reach after patient and persistent
experiment. When we look upon Fig. 1
and see the very best that zinc {118}
etching could do a few years ago, and
compare it with the Mosstype and other
half-tone pictures now possible, we
may well wonder at the growth of the
art.
It has been attained by the careful
and persistent plodding of a few. Many
a method has been discarded for a
newcomer, and there is no telling what
may come next. Photography has about
revolutionized the illustration of books and magazines, and has
made the newspaper far more attractive than it was a few years
ago. It has made the faces of almost every renowned individual
familiar in every land and in every household, and the attractions of
every known country have been so pictured by it that every
intelligent child is familiar with them. It has been said that process-
engraving has supplanted wood-engraving. This is not so. How many
newspapers were illustrated before process-engraving was made
available? How many works of the old masters and gems of the old
museums abroad were made familiar to the lovers of pictures
everywhere, by wood-engraving? Instead of coming into the arts to
take the place of another, photo-engraving has made a place for
itself and a market for itself. Moreover, it is refining and educating
the masses by creating a love for art, where before its advent, there
was very little feeling for the beautiful. Its accomplishments have
been marvellous, and yet they have hardly begun. The good
photography has done in bringing the wood-engraver up to his duty
in following the artist in every line and light and shade, it will
25.
augment by teachinghim how to secure the loveliest effects of
nature. It will make way for more wood-engraving as well as for
more process-pictures if you choose to call them such.
26.
PART III.
PHOTO-ENGRAVING ONCOPPER.
CHAPTER I.
SUBJECTS IN LINE.
In printing from copper plates, the ink, instead of being spread on
the surface of the plate by means of a flexible roller as in ordinary
type printing, is smeared over the previously warmed plate and
thereby forced into the deep parts of the plate. Then, after the
surface is polished, the paper picks out the ink from these cavities
and so forms the picture. Therefore, instead of using a negative for
producing the resist, a transparency is required; and for the
production of subjects in line, the transparency must fulfil all the
conditions laid down as required in a negative for the production of
prints for zinc etching and for photo-litho. transfers, and must be
from a subject in line or in stipple.
The negative is made the exact size required, by the wet collodion
process (the lens being used without the reversing mirror). This
negative is intensified by immersion in the bichloride of mercury
solution, and after well washing is blackened by the application of
ammonia, as directed in Part I. of this book, under the head of
photographic manipulation.
The negative must be varnished, and the margin outside the
actual subject required to be shown in the copper plate, must be
masked by means of strips of tin-foil cut perfectly straight and laid in
27.
position squarely andsymmetrically. The object is to make this
margin appear in the transparency as perfectly clear glass.
The masked negative is next placed in the carrier of the dark slide,
film up; then a couple of thicknesses of blotting paper about the
eighth of an inch square are laid on the extreme corners of the
negative. Upon these pieces of blotting paper a sensitive wet
collodion plate is placed face down. The little squares of blotting
paper serve to prevent the sensitive plate from touching the
negative. {120}
The camera, with the lens out of focus, should be pointed to a
large sheet of white paper; insert the dark slide, draw the shutter,
uncap the lens, and the light reflected from the white sheet through
the lens, through the negative upon the sensitive plate, will result,
after development, in a transparent positive of the negative.
The time of exposure will, of course, vary and can only be found
by experiment. The operations of development, etc., are carried on
as for a negative.
This method of making transparencies in the camera yields the
best possible results, as the rays of light are projected by the lens
perfectly parallel, and the resulting picture is far crisper than it is
possible to obtain by exposing in the ordinary manner.
If the negative to be reproduced is already made, and is larger
than required, mask the margin by means of the tin-foil, place it in
the holder of an enlarging camera, film towards the lens if the
negative was made without a mirror; but if the mirror was used and
the negative is a reversed one, the film must be placed away from
the lens.
The camera is now adjusted so as to get the image the size
required, then a sensitive wet collodion plate is used to receive that
image and produce the transparency.
The transparency for printing upon a copper plate must, when laid
upon a piece of white paper, allow every detail, however minute, to
28.
be perfectly distinctby reflected light. If this is not so it will be
impossible to get a good engraving on the copper plate.
The transparency being secured, a plate of highly polished copper
is cleaned with a little fine whiting and alcohol, then flooded with
water. Take care that all grease has been removed (which will be
detected by the water running in streaks); next wipe the plate
carefully with a clean, soft cloth, and place it in the jaws of the
whirler mentioned in the chapter on the apparatus for zinc printing.
In the dark-room coat the copper plate with prepared bitumen (see
chapter on engraving on zinc in half-tone), and set the whirler in
motion. When the film of bitumen is dry, place it in contact with the
transparency in a printing frame, and expose it to the light (sunlight,
if possible).
The time of exposure will depend very greatly upon the time of
year and day, but, in direct sunlight, ten to fifteen minutes will be
about the time.
After exposure, the copper plate is removed from the frame, and
placed in a dish containing turpentine. Keep it rocking until the
image is developed by the unaltered bitumen being washed away,
then remove the plate from the dish, {121} and wash it well under
the tap. When quite dry, coat the back and edges of the copper with
ordinary black varnish laid on with a camel’s-hair brush, so as to
prevent the mordant to be used from attacking the back.
Alterations and additions may now be made by means of transfer
ink thinned with turpentine, applied by a sable brush, or by means
of an etching needle or scraper, remembering that the etching
needle or scraper will make a black line and the transfer ink will
cause a white mark, or exactly the reverse of a type block. The plate
is now ready for etching in a
Saturated solution of Perchloride of Iron 2 ounces.
Water 10 ounces.
29.
Use a porcelaindish for the solution. Immerse the plate, and keep it
rocking for about ten or fifteen minutes, then remove it, and wash it
under the tap, rubbing it gently with cotton-wool. After drying it,
warm it slightly, then roll up with a glazed leather roller, or a smooth
India-rubber roller charged with the hard ink used during the
clearing-up of the zinc block, viz.:
Beeswax 1
⁄
2 ounce.
Resin 1 ounce.
Shoemaker’s Wax 1 ounce.
Litho-printing Ink, black 2 ounces.
Melt together. When cool, mix with turpentine to the consistency of
soft soap.
The roller is charged with this ink, and the plate warmed and
rolled up, so as to close up the high lights and half tones, leaving
only the deepest portions bare. Immerse in the etching fluid again
for about three minutes, rocking during the immersion, and finally
wash the plate.
Next remove the resist of bitumen, by means of turpentine, and
take proofs in the press. If deeper etching is required, proceed as
before.
The following is equally satisfactory, and a little quicker:
Fuming Muriatic Acid (sp. gr. 1.190) 10 parts.
Water 70 parts.
To this is added a boiling solution of
Chlorate of Potash 2 parts.
Water 20 parts.
This is diluted for use by adding 1 part to from 100 to 400 parts of
water.
The time of immersion in either of these mordants is ruled by the
temperature of the room and of the liquids used. One or two careful
trials will soon give the desired information.
30.
CHAPTER II.
HALF-TONE INTAGLIOS.
Wenow come to quite a different class of work, namely, the
production of half-tone intaglio plates. They may be produced in
many ways, each way giving results quite unlike the others.
The first process is based on the half-tone method given for
typographic blocks, modified to suit intaglio.
In this, as in fact with ALL methods, we must first of all produce a
satisfactory transparency. That is best done by reproducing in an
enlarging camera.
Place the negative, with the subject masked with tin-foil, in the
window, then focus upon the ground-glass screen of the camera the
requisite size; then prepare a wet collodion plate, and, having fixed a
grained screen* in front of the carrier, put the plate in its place, then
expose to the light and develop as directed for wet collodion
pictures; the result, however, will be a positive and not a negative,
and instead of the grain being interspersed through the high lights,
the shadows will be grained.
* The grained screen is a copy from a proof from a fine
ruled copper plate. See Chapter on “Half-tone Blocks
on Zinc.”
The transparency must be made in this manner—i. e., from an
ordinary negative with a screen in front of the sensitive plate, so
that the shadows and half tones are grained or broken up. This
would not be the case if the transparency was made from a negative
grained for the production of a type block, as in such a negative the
blacks are represented solid and the lights and half-tones grained
should be made on large sized plates.
31.
The transparency mademust fulfil all the conditions necessary for
the production of type blocks—i. e., the film must be perfectly free
from veil or fog; it may be varnished or not.
The mark put upon the negative from which the transparency is
made, will cause the edges of the transparency to be quite clear.
Coat a clean piece of polished copper with the bitumen solution,
using the whirler as before; then {123} place the transparency in the
printing frame, film up, and place the bitumen coated copper plate in
position, so that the image is quite in the centre of the plate: fasten
the printing frame and expose to the light.
The exposure will, of course, vary according to the strength of the
light, and should always, if possible, be made either in direct
sunlight or by electric arc light.
The development is effected by immersion in turpentine, and with
the washing and drying, has already been described.
The image on the copper plate being satisfactory, it may be
retouched, if necessary, then immersed in either of the etching fluids
described in the last chapter.
Rebiting, if necessary, may be done after rolling up with the resist
ink there given, but care must be taken in this rebiting to guard
against interfering with the grain of the plate.
32.
Fig. 15.
CHAPTER III.
HALF-TONEINTAGLIOS—(Continued ).
The next process under consideration is that in which the grain is
given to the copper plate by dusting it with fine powder of resin
(colophony) or of asphalt. To do this a dusting box is required, which
may be an ordinary aqua-tint box hung on centres for the purpose of
revolving it when desired to cover large plates with the powder. The
following figure will illustrate a box suitable for small work.
The box should be eighteen inches
high, twelve inches wide, and eight
inches deep; it may be made of
cardboard with the inside quite smooth.
It should be closed all around except at
A, where there is a small door four
inches high; the bottom of the box is
either studded with small nails or some
coarse wire netting is stretched across,
upon which the copper plates can rest,
as near level as possible. To use this
box, four ounces of resin or asphalt are
powdered in a mortar until quite fine. The powder is placed inside
the box, and the door closed; the box is now vigorously shaken,
then placed on the table, the door opened, and a copper plate
(previously cleaned and polished) is at once placed face up on the
nails or wire netting. By the time the door is opened and the copper
plate or plates are in position, the coarser particles of the resin will
have subsided, leaving only the fine dust floating in the interior of
the box; now close the door, and leave the copper plate within until
33.
it is judgedthat it is powdered sufficiently, which, of course, will be a
matter for the operator to find out by practice.
When the plate has been sufficiently powdered, it is carefully
withdrawn and placed upon a hot iron plate and allowed to remain
there until the resinous {125} powder is just sufficiently melted to
adhere to the copper plate, preserving as much as possible the
separate existence of each atom of dust. Take care to stop the
action of the heat before the resin is melted completely and made to
run together and form a smooth surface.
The heat having acted long enough, carefully withdraw the
prepared copper from the hot plate and allow it to cool. Any desired
quantity of these plates may be prepared and stored away for future
use. When they are required the grain may be selected to suit each
picture, as the operator can prepare at will (after practice) either a
coarse or a fine grained ground.
Instead of using a hot plate the resin may be melted over a gas
flame, but the hot plate will be found the best.
There is another method of laying this aquatint ground that is
simple and novel, viz., by using the air brush. Those who are in
possession of this instrument need no further instructions than to be
reminded that ordinary bitumen dissolved in benzole, or a resinous-
spirit varnish, is placed in the color reservoir, and then the brush will
coat the clean copper plate with an aquatint as fine or as coarse as
required, according to the distance between the plate and the
“brush.” Another advantage with this method of laying the ground is,
the ground need not be even, as in the dusting method, but the
artist may lay the ground coarse in some places and fine in others,
verb sap.
The next step in this process will be to get a transparency of the
subject. This may be made by any known process (at last, some one
says we are getting away from the wet collodion) so long as it is
clean, vigorous, and free from fog.
34.
The transparency beingat hand, that portion of it required to be
transferred to the copper plate is carefully surrounded by a mask of
tinfoil, or of non-actinic paper, which will serve as a safe edge to the
carbon tissue to be used in making the negative resist, as well as to
keep the margin of the plate free from extraneous picture.
This done, a piece of sensitive carbon tissue, a little smaller than
the copper plate, which has been previously sensitized with
bichromate of potash and dried, is placed upon the masked
transparency and exposed to light until sufficiently printed; the
tissue is then removed from the printing frame and placed in a dish
of clean cold water; then one of the copper plates with aquatinted
ground is also placed in the water, and the face of the tissue and the
copper plate are brought in contact. After adjusting the tissue on the
copper {126} plate, the two are withdrawn from the water, laid upon
a bench, and a squeegee passed over the back of the tissue. Thus
the driving away of the water from between the two surfaces will
cause the tissue to adhere to the copper plate.
Now let the plate stand a few minutes, then immerse it in a dish
of warm water at about 90° F. As soon as the tissue compound is
melted, lift away the paper backing and throw it aside, then gently
lave the copper plate with the warm water until all the soluble
pigmented gelatine is dissolved; after that wash it under the tap,
and place it in a strong solution of alum for fifteen minutes, and
again wash and allow to dry.
When the gelatine image on the copper plate is quite dry, the
margin outside the picture is coated with bitumen or spirit varnish,
then the plate is placed in the etching bath of perchloride of iron
(see page 121), in which it is allowed to remain until the high lights
under the thickest portions of the gelatine image just change color;
then remove it and wash it under the tap; next clean off the resist
image, and after drying and cleaning up, try a proof. If necessary,
ink up as directed in Chapter I., page 121, and rebite.
35.
To succeed withthis process it is only requisite to have a well-laid
ground, a good, vigorous transparency, and the carbon tissue in
good working order.
N. B.—In order not to confuse the above directions by
interpolating the working details of carbon printing, these will be
given in a chapter further on, together with formulæ for making
suitable tissue.
36.
CHAPTER IV.
HALF-TONE INTAGLIOS.ELECTROTYPING METHODS.
The preceding methods of obtaining intaglio plates have been by
the etching process. We now try another method whereby the
printing plate is obtained by depositing a film of copper upon the
photograph, and from this copper electrotype the prints are to be
made.
There are many ways of proceeding to make these copper
intaglios, the grain being obtained in many ways, but the foundation
is the same in all, and consists of incorporating bichromated gelatine
with grit of such a nature as to cause the image to be rough instead
of smooth, or else the roughness is given to an ordinary or modified
so-called carbon image developed upon a silvered copper plate.
The silvered copper plates upon which the gelatine images are to
be developed are prepared by dipping clean polished plates in a
solution of cyanide of silver, made by adding cyanide of potassium
solution to a solution of nitrate of silver until there is a slight
permanent precipitate. The copper plate remains in this for three or
four minutes; it is then removed, washed under the tap, and dried.
The gelatine tissue compound is had by first of all making a jelly
of
Gelatine (soft) 8 ounces.
Sugar 5 ounces.
Water 25 ounces.
Soak the gelatine until soft, then melt it at as low a temperature
as possible, add the sugar and churn all for fifteen minutes; then
add to one-half of the jelly one ounce of finely powdered graphite,
37.
and to theother half one ounce of a coarser powdered graphite.
Churn these well together.
Paper is coated with the above mixtures, floating it first upon that
containing the coarser graphite, then after drying, coat again by
floating the paper upon the gelatine containing the fine graphite,
and again drying.
The paper is then sensitized by being immersed in a three per
cent. solution of bichromate of potash. Dry it in the dark. After
exposure to light under {128} a negative, it is developed upon the
silvered copper plate, after which the electro is made.
Another plan is to expose a piece of ordinary carbon tissue under
a negative in the usual manner, then develop it upon the silvered
copper plate, and sift over the wet gelatine image some finely
powdered glass, sand, or emery which has been previously soaked
in paraffine. The gelatine is then allowed to dry, when the grit is
brushed away, leaving the gelatine image all marked and pitted. This
pitted image is then black-leaded, and the electrotype is taken from
it.
Another method is to place the newly developed carbon print on
the copper plate, inside the aqua-tint box, Chapter III. (having
previously shaken up the powder); when it is well dusted over, allow
it to dry, and then remove the powder by dissolving it out with either
alcohol, turpentine, or benzole, after which the electrotype is made.
38.
PART IV.
PHOTO-LITHOGRAPHY INLINE.
CHAPTER I.
This process is for making photographic reproductions of a subject
in black lines on a white ground, half-tones and shadings being
indicated by hatching, or stipple, but no washes of color are
permissible. The object sought for from such a subject is to produce
a transfer which can be laid down upon stone or zinc, and proofs
printed therefrom in the ordinary lithographic press or machine.
To gain this end there are three methods: the first, by printing
upon paper prepared with bichromated gelatine, the lines of which,
after exposure to light under a direct negative (i.e., a negative taken
without a mirror behind the lens), will retain ink, whilst the gelatine
protected from light absorbs water, and rejects the ink. The result is
a replica of the original in fatty ink, and may be transferred to stone
or zinc, and printed from by the usual lithographic method.
In the second method, a print is made upon zinc from a reversed
negative (in the same manner as directed in Chapter V., Part I.) in
bichromated albumen, which is rolled up in transfer ink, and from
that a transfer is pulled on Scotch transfer paper, which may then be
transferred to stone or zinc, and printed from at a litho. press or
machine.
In the third, and by far the best method, the print is made from a
reversed negative on zinc, in bitumen, as directed in Chapter V., Part
I., then rolled up in transfer ink, the transfer pulled on Scotch
39.
transfer paper, thentransferred to stone or zinc, and printed from at
a litho. press or machine.
The defects inherent to the first method are, first of all, in the
preparation of the gelatine paper; this is tedious and messy. Then
there is always danger of breaking the lines in transferring, and also
the difficulty of working exactly to scale. {130}
The second method is quick, easy, and simple, the only drawback
being a tendency of the lines to thicken. With this and the third
method there is no difficulty in getting absolute scale.
The third method is perfect, and presents no drawbacks.
The two latter methods having been amply explained in Part I., it
will not be necessary to redescribe them, except to explain that
when the print is made on the zinc in albumen, it is gummed in,
fanned dry, then damped off with a wet sponge, followed by a damp
cloth, rolled up with transfer ink, and the transfer pulled upon good
Scotch transfer paper.
The same remarks apply to bitumen prints.
For a transfer printed in bitumen, the image is developed in
turpentine, and when this is completed, wash the plate thoroughly
under the tap, then immerse it in the graining bath (Part I., Chapter
I., page 24), and keep the tray rocking for a few minutes; the effect
of this will be to destroy the polished surface of the metal,
substituting a pearly matt surface, which will show up the picture
properly, and allow the operator to judge whether any of the fine
details are wanting; if there are, it will be necessary, if the details
are dissolved out, to repolish the zinc, first with pumice-stone, then
with snake-stone, then with pumice powder, finishing with fine
rouge; then coat with bitumen, whirl, and again expose to light,
giving this time, longer exposure under the negative.
But if the fine details are buried in undissolved bitumen, a further
immersion in the turpentine bath will soon clear them; then again
wash under the tap, immerse in the graining bath, again wash, then,
with a sheet of clean blotting paper, remove the surplus water, and
40.
allow the surfaceto dry in a cold current; but beware of using heat,
as it has a tendency to make the bitumen image refuse ink in rolling
up.
The zinc being dry, it is gummed in, fanned dry, then the gum is
washed off, and the image rolled up with a leather roller charged
with transfer ink. As soon as the bitumen has taken the transfer ink
all over, a transfer is pulled upon Scotch transfer paper, which in turn
is transferred to stone for printing from.
In rolling up these prints upon zinc, care must be taken to keep
the surface (whether the image is in albumen or bitumen) properly
damp.
The preparation of paper transfers will be treated upon in the next
chapter.
The negative from which these transfers are made, must have all
the characteristics of a good negative for printing on zinc for etched
blocks, viz., the lines {131} must be represented by clear glass, and
those portions of the negative representing the whites of the
original, must be as near opaque as possible.
The subjects to which photo-lithography is applicable, are those
that are strictly in line, or stipple, or dots, or cross hatched, or chalk
drawings; in fact, any subject that may be done by lithography, or in
black and white; but no shading by color washes is permissible.
Transferring to stone or zinc is done as follows:
First of all, the transfer is trimmed to proper size; it is then placed
in a damping book, made by placing wet sheets of brown or good
printing paper alternately with dry sheets, then placing all under a
weight for a few hours, until the whole of the book is evenly damp;
the trimmed transfer is allowed to remain here until limp; it is then
sponged on the back with a very little of oxalic acid (half an ounce),
water eighty ounces; now lay the transfer carefully down on a
perfectly clean and polished stone, backing the transfer with a piece
of smooth paper. Having adjusted the pressure of the scraper on the
stone, pull through twice, then reverse the stone in the press, and
41.
pull through twicemore. Then remove the backing and lift the
transfer from the stone, when the whole of the ink should be upon
the stone, leaving the paper quite clean. Now, if the picture is quite
satisfactory, wipe the stone first with a wet sponge, then with a
damp cloth, then gum in and allow to dry, and, if possible, to stand
with the gum on all night.
42.
Welcome to ourwebsite – the perfect destination for book lovers and
knowledge seekers. We believe that every book holds a new world,
offering opportunities for learning, discovery, and personal growth.
That’s why we are dedicated to bringing you a diverse collection of
books, ranging from classic literature and specialized publications to
self-development guides and children's books.
More than just a book-buying platform, we strive to be a bridge
connecting you with timeless cultural and intellectual values. With an
elegant, user-friendly interface and a smart search system, you can
quickly find the books that best suit your interests. Additionally,
our special promotions and home delivery services help you save time
and fully enjoy the joy of reading.
Join us on a journey of knowledge exploration, passion nurturing, and
personal growth every day!
testbankdeal.com