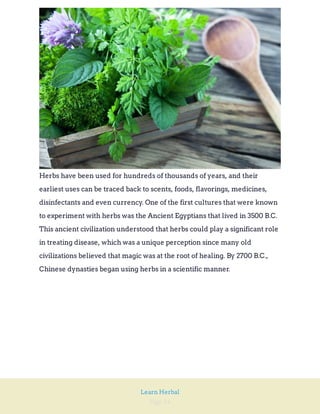
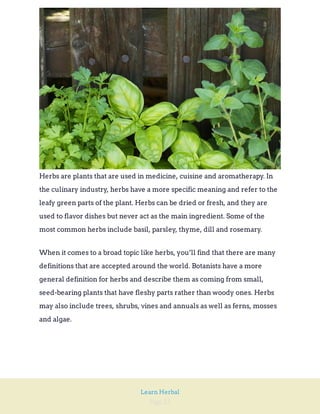
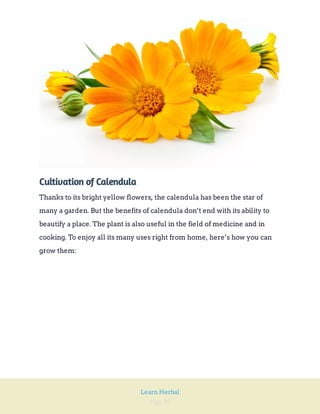
Learn Herbs DIY
young
stayin'
D r . J o h n C h e n
Page 1
Learn Herbal
Page 2
Learn Herbal
DISCLAIMER AND/OR LEGAL NOTICES
The Publisher does not accept responsibility for the accuracy or
completeness of any material contained herein. Please note that none of
the information, techniques, skills and concepts contained herein is in any
way recommended in place of professional or medical help. It is in no way
the intent or purpose of this document to overwrite any such professional
help.
Furthermore, the Publisher expressly disclaims all liability to any person
in respect of anything, and of the consequences of anything, done or
omitted to be done by any such person in reliance, whether wholly or
partially, upon any information presented in this document.
I thank you God for this most amazing day, for the leaping greenly spirits of
trees, and for the blue dream of sky and for everything which is natural,
which is infinite, which is yes. - E.E Cummings.
For Your Information 7
A Brief History of Herbs: Their Emergence in Western Culture 8
What is an Herb Anyway? 13
The Common Active Components of Herbs 16
The Safety and Quality of Herbs 21
The Benefits of Growing Your Own Herbs 25
Page 3
Learn Herbal
Soil and Space: How to Get Quality Soil and Design Your Garden Space 29
Harvesting and Storing Herbs 32
How To Dry Herbs 36
Setting Up Your Kitchen Herbal Pharmacy 41
How To Buy Dried Herbs and Detect Good Quality Practices While
Purchasing 44
What are Essential Oils? 47
How To Check For Quality Essential Oils 51
Amazing Herbs To Get Started With – Tips On How To Grow Them, Their
Medicinal Properties, and Recipes You'll Love 55
ALOE VERA 56
Cultivation Of Aloe Vera 56
Tips On Growing Aloe Vera 57
Medicinal Uses Of Aloe Vera 57
DIY Homemade Aloe Vera Solutions 58
BURDOCK 62
Cultivation Of Burdock 62
Page 4
Learn Herbal
Tips On Growing Burdock 63
Medicinal Uses Of Burdock 63
DIY Homemade Burdock Solutions 64
CALENDULA 68
Cultivation Of Calendula 68
Tips On Growing Calendula 69
Medicinal Uses Of Calendula 69
DIY Homemade Calendula Solutions 70
CHAMOMILE 74
Cultivation Of Chamomile 74
Tips On Growing Chamomile 75
Medicinal Uses Of Chamomile 75
DIY Homemade Chamomile Solutions 76
CHICKWEED 80
Cultivation Of Chickweed 80
Tips On Growing Chickweed 81
Page 5
Learn Herbal
Medicinal Uses Of Chickweed 81
DIY Homemade Chickweed Solutions 82
DANDELION 86
Cultivation Of Dandelion 86
Tips On Growing Dandelion 87
Medicinal Uses Of Dandelion 87
DIY Homemade Dandelion Solutions 88
ECHINACEA 91
Cultivation Of Echinacea 91
Tips On Growing Echinacea 92
Medicinal Uses Of Echinacea 92
DIY Homemade Echinacea Solutions 93
ELDER 96
Cultivation Of Elder 96
Tips On Growing Elder 97
Medicinal Uses Of Elder 97
Page 6
Learn Herbal
DIY Homemade Elder Solutions 98
GINGER 101
Cultivation Of Ginger 101
Tips On Growing Ginger 102
Medicinal Uses Of Ginger 102
DIY Homemade Ginger Solutions 103
HAWTHORN 107
Cultivation Of Hawthorn 108
Tips On Growing Hawthorn 108
Medicinal Uses Of Hawthorn 109
DIY Homemade Hawthorn Solutions 110
BASIL 112
Cultivation Of Basil 112
Tips On Growing Basil 113
Medicinal Uses Of Basil 113
DIY Homemade Basil Remedies & Solutions 114
Page 7
Learn Herbal
CAYENNE PEPPER 117
Cultivation Of Cayenne Pepper 117
Tips On Growing Cayenne Pepper 118
Medicinal Uses Of Cayenne Pepper 118
Homemade Cayenne Pepper Remedies and Solutions 119
CINNAMON 122
Buying and Keeping Cinnamon 122
Medicinal Uses Of Cinnamon 123
DIY Homemade Cinnamon Remedies and Solutions 124
GARLIC 127
Cultivation of Garlic 127
Tips On Growing Garlic 128
Medicinal Uses of Garlic 128
DIY Homemade Garlic Remedies and Solutions 129
LAVENDER 132
Cultivation of Lavender 132
Page 8
Learn Herbal
Tips On Growing Lavender 133
Medicinal Uses of Lavender 133
DIY Homemade Lavender Solutions 134
LEMON BALM 137
Cultivation of Lemon Balm 137
Tips On Growing Lemon Balm 138
Medicinal Uses of Lemon Balm 138
DIY Homemade Lemon Balm Solutions 139
LIQUORICE 142
Cultivation of Liquorice 143
Tips On Growing Liquorice 143
Medicinal Uses Of Liquorice 143
DIY Homemade Liquorice Solutions 144
MARSHMALLOW 147
Cultivation of Marshmallow 148
Tips On Growing Marshmallow 148
Page 9
Learn Herbal
Medical Uses Of Marshmallow 148
DIY Homemade Marshmallow Solutions 149
NETTLE 152
Cultivation of Nettle 152
Tips On Growing Stinging Nettles 153
Medicinal Uses Of Nettle 153
DIY Homemade Nettle Solutions 154
PEPPERMINT 157
Cultivation of Peppermint 157
Tips On Growing Peppermint 158
Medicinal Uses of Peppermint 158
DIY Homemade Peppermint Solutions 159
PLANTAIN 162
Cultivation of Plantain 163
Tips On Growing Plantain 163
Medicinal Uses Of Plantain 163
Page 10
Learn Herbal
DIY Homemade Plantain Solutions 164
RED CLOVER 168
Cultivation of Red Clover 169
Tips On Growing Red Clover 169
Medicinal Uses Of Red Clover 169
DIY Homemade Red Clover Solutions 170
ROSEMARY 173
Cultivation of Rosemary 173
Tips On Growing Rosemary 174
Medicinal Uses of Rosemary 174
DIY Homemade Rosemary Solutions 175
SAGE 178
Cultivation of Sage 179
Tips On Growing Sage 179
Medicinal Uses Of Sage 179
DIY Homemade Sage Solutions 180
Page 11
Learn Herbal
SPEARMINT 183
Cultivation of Spearmint 183
Tips On Growing Spearmint 184
Medicinal Uses of Spearmint 184
DIY Homemade Spearmint Solutions 185
ST JOHN’S WORT 188
Cultivation of St John’s Wort 188
Tips On Growing St. John’s Wort 189
Medicinal Uses of St John’s Wort 189
DIY Homemade St. John’s Wort Solutions 190
THYME 192
Cultivation Of Thyme 192
Tips On Growing Thyme 193
Medicinal Uses of Thyme 193
DIY Homemade Thyme Solutions 194
TURMERIC 198
Page 12
Learn Herbal
Cultivation Of Thyme 198
Tips On Growing Turmeric 199
Medicinal Uses of Turmeric 199
DIY Homemade Turmeric Solutions 200
VALERIAN 204
Cultivation Of Valerian 204
Tips On Growing Valerian 205
Medicinal Uses of Valerian 205
DIY Homemade Valerian Solutions 206
YARROW 209
Cultivation Of Yarrow 209
Tips On Growing Yarrow 210
Medicinal Uses Of Yarrow 210
DIY Homemade Yarrow Solutions 211
For Your Information
Page 13
Learn Herbal
Gas Mark Fahrenheit Celsius Description
1/4 225 110 Very Cool/ Very Slow
1/2 250 130 —
1 275 140 Cool
2 300 150 —
3 325 170 Very Moderate
4 350 180 Moderate
5 375 190 —-
6 400 200 Moderately Hot
7 425 220 Hot
8 450 230 —-
9 475 240 —-
A Brief History of Herbs: Their
Emergence in Western Culture
Page 14
Learn Herbal
Herbs have been used for hundreds of thousands of years, and their
earliest uses can be traced back to scents, foods, flavorings, medicines,
disinfectants and even currency. One of the first cultures that were known
to experiment with herbs was the Ancient Egyptians that lived in 3500 B.C.
This ancient civilization understood that herbs could play a significant role
in treating disease, which was a unique perception since many old
civilizations believed that magic was at the root of healing. By 2700 B.C.,
Chinese dynasties began using herbs in a scientific manner.
Page 15
Learn Herbal
In 460 B.C., our friend Hippocrates borrowed the beliefs from earlier
cultures and developed a system for diagnosing various illnesses using
herbs. At this time, it was believed that sickness was not a supernatural
event but a natural one that required the help of herbs instead of magic.
Although much progress was made in terms of science and medicine,
much was lost with the fall of the Roman Empire. The Middle Ages
retracted to many of the original beliefs that earlier cultures had: sickness
and disease were supernatural, and herbs should be used in mystic rituals.
During the Renaissance period, trade with other civilizations became more
abundant, and with this practice, knowledge surrounding herbs grew. In
fact, the New World was discovered as a result of searching for herbs and
spices that would provide medicinal purposes. In the 16th and 17th
centuries, universities taught botany and herbalism, and psychic gardens
were planted on their premises. There was a firmer understanding for the
nature of herbs but also much confusion. A single plant may have had
many names, and a single name may have been given to many plants.
Also, there was a conflict between herbs and doctors. In 1652, Nicholas
Culpeper published a book on natural remedies and how people should
rely on these herbs to recover from illness rather than the advice of
doctors. Naturally, doctors did not agree with his works. As society moved
into the 18th and 19th centuries, people began relying on medicinal cures
instead. In some parts of the Western world, herbalism was outlawed
unless practiced by a qualified doctor.
Herbs in Other Cultures: A Global Commodity
Page 16
Learn Herbal
Herbs get a lot of recognition in Western culture, but they have been
prominent in numerous civilizations across the globe. The Chinese have
been using herbs for some of the longest periods of time, and they still rely
heavily on certain herbal blends to aid in the prevention and treatment of
various medical conditions. Native Americans have also used herbs for
many centuries and lived longer, healthier lives than the Europeans did
before Christopher Columbus arrived. People often believe that Europeans
had the edge in terms of health, technology and education, but this wasn’t
always the case, and many primitive cultures surpassed the Europeans
during the 12th and 18th centuries.
Growing Herbs: An Apothecary for American Pioneers
During the 1800s, it was commonplace for American homes to have their
own gardens, equipped with an apothecary section that included a variety
of herbs. These herbs were designed to treat a variety of illnesses or
unpleasant symptoms as well as to flavor foods, preserve meats, fragrance
the home, keep linens fresh and disinfect floors and surfaces. Having
these herbs in the garden was a practical choice and an essential feature of
pioneer homes.
Herb gardens were generally placed in a corner near the home so that the
herbs were readily available as needed. If you’ve ever had your own
garden planted near the home, you understand how convenient it is to go
outdoors and pick a fresh herb or ripe tomato to use in your cooking. What
made this particular time in history especially conducive to growing herbs
is that there were many settlers coming to America. They were bringing a
variety of herbs with them that were native to their country, and this
resulted in the exchange of different plants.
Page 17
Learn Herbal
Some of the most abundant herbs during this time included watercress,
liverwort, lavender, wild leeks, sorrel, anise and pennyroyal. Today, there
are many types of herbs that can be planted in the modern-day garden, but
the classification of them differs. You may find that one book mentions 50-
something herbs while another lists 70-something. Herbs are broken
down into various categories, including the following:
- Culinary Herbs
- Aromatic Herbs
- Ornamental Herbs
- Medicinal Herbs
- Annuals
- Biennials
- Perennials
The 21st Century Shift to Simplicity
Page 18
Learn Herbal
During the late 1800s and 1900s, people started relying more on chemical
ingredients and less on herbal ones to treat and cure illness. And,
rightfully so. In many contexts, chemical ingredients were more effective.
Penicillin was used to treat infection, anesthesia was given to surgery
patients and an emphasis was placed on sterile environments. With more
research in the early 1900s, people were beginning to understand the link
between germs and sickness. Improvements in public health and nutrition
were being made to reduce the number of lethal outbreaks, and it was
working.
Today, we rely on conventional medications to help with just about
everything, but this mentality has taken a turn for the worse. Although
medicine is a vital part of our lives that allows us to prevent and treat
disease, there is a price to pay for our dependence on these drugs.
Mounting Problems from Conventional Medications
Just think about how many articles have been written, television shows
made and songs sung about how dependent we are as a nation on
medication. We’ve been referred to as Pill Nation, Pill Poppers or
Operation Pill Nation. We’ve become so accustomed to treating the
symptom, we’re afraid to feel anything. When we only treat the symptom,
we don’t uncover the root of the symptom. For instance, you could be
living with thyroid disease without knowing because the symptoms of
fatigue, constipation and weight gain would be treated with caffeine,
laxatives and diet pills.
Page 19
Learn Herbal
Emergency rooms have seen a significant spike in the number of patients
being brought in for drug interactions. Poison control centers receive
numerous calls from people who have overdosed on their medication.
Then there are the terrible allergic reactions that children and adults have
suffered from conventional medication. The medical community also
worries about the growing resistance to antibiotics.
What about America’s drug problem that revolves around pain
medications, muscle relaxers and mood enhancers? Many of our youth
have spiraled into heroin addictions because of an earlier addiction to pain
medication. Why are pain medications such a popular drug for teens?
They can be found in the medicine cabinets of parents and grandparents.
Finally, allergies, attention disorders, chronic fatigue and mental illness
are conditions that have exploded into modern culture. As the medical
experts look for new diagnoses and medications to treat these ailments,
the unforeseen nature of these conditions has left us yearning for
something simple and natural instead.
While traditional medication is valuable and necessary to our existence,
our reliance on it is not.
Modern Life, Modern Problems
Page 20
Learn Herbal
Even in the wake of new problems, we can still expect something good to
come from them. This is exactly what is happening as we speak. As we hear
another story or come face-to-face with a personal experience, we see that
conventional medication has its complications, especially when not used
correctly. This new way of thinking has led many people to start
questioning what other types of prevention and treatment is available. Do
you need antibiotics for every sinus infection? Can walking and exercise
do more good for the mind than an antidepressant? What herbs are
available to treat allergies, fatigue or muscle weakness?
As a result of modern-day problems, there has been a strong preference
for using organic and natural products. People have suffered allergic
reactions and skin conditions from the chemicals used in body and hair
products. We’ve witnessed an obesity problem emerge from poor eating
habits from processed and fast foods as well as a sedentary lifestyle
complicated by emerging technology. As a result of increased allergies,
attention disorders, early puberty in children and certain cancers, people
have started to question every product they pick up.
At one time, organic or natural products were not the norm. They were
almost unheard of. Yet now, these are the products that consumers are
demanding. Even in the midst of a recession, consumers are still willing to
spend more on a natural product compared to one stuffed with chemicals.
Manufacturers are completely aware of this trend, and more are starting
to redesign their labels and rethink their ingredients to fit the more
accepted and approved organic profile.
Page 21
Learn Herbal
Basically, people want to get back to the basics and depend on natural
products before chemically enhanced ones. From makeup to hair products
to the foods we eat, everyone is starting to ask, ā€œWhat’s in this product?
Where did it come from? How will it benefit my family?ā€ It’s this
mentality that has led us back to our ancestors and their use for herbs.
Herbs in the 21st Century: Do They Have a Place?
Herbs are natural, and while it’s important to know their effects since they
too can have negative reactions, they are about as natural as you can get.
There are more products being offered to consumers that are herb-based,
including soaps,skin products and supplements. Instead of flavoring foods
with salt and butter, people are turning to natural herbs like chives, mint
and oregano. Herbal teas have also been known to alleviate symptoms like
sore throats, stuffy noses and headache. Even the simple sniff of a lemon
balm leaf can do wonders for the soul.
We still have a long way to go, but we are headed in the right direction.
While herbs certainly won’t cure or prevent everything, they should be
used in conjunction with conventional medication. If you consider the
benefits to a natural ingredient before jumping to medicine, you can avoid
some of the long-term consequences of prolonged chemical exposure.
The bottom line is that the more you understand and appreciate the
simplicity and efficacy of herbs, the better you can meet the unique needs
of your family while protecting their precious health and wellbeing.
What is an Herb Anyway?
Page 22
Learn Herbal
Herbs are plants that are used in medicine, cuisine and aromatherapy. In
the culinary industry, herbs have a more specific meaning and refer to the
leafy green parts of the plant. Herbs can be dried or fresh, and they are
used to flavor dishes but never act as the main ingredient. Some of the
most common herbs include basil, parsley, thyme, dill and rosemary.
When it comes to a broad topic like herbs, you’ll find that there are many
definitions that are accepted around the world. Botanists have a more
general definition for herbs and describe them as coming from small,
seed-bearing plants that have fleshy parts rather than woody ones. Herbs
may also include trees, shrubs, vines and annuals as well as ferns, mosses
and algae.
Page 23
Learn Herbal
It may be easy to tell an herb apart from something like a vegetable. Take
spinach for instance. Spinach is green and part of a plant, but you can
prepare this food on its own and use it as the main ingredient in a dish. It’s
the same case with lettuce; the plant is green and found in the ground, but
it acts as the main ingredient. Therefore, both spinach and lettuce are
vegetables, not herbs.
Vegetables and herbs have a clear difference, but the lines become
blurred when making the distinction between herbs and spices. Since
herbs are the green parts of the plants that are used for flavoring dishes,
spices are pretty much everything else. Things like roots, berries, twigs
and dried bark are all examples of spices. Some of the most common
spices include allspice (dried berries), cinnamon (bark) and cloves (dried
flower buds).
What are the Uses for Herbs?
Herbs are found all around the world, and some are native to the area
while others have been introduced. For people who study herbs, they
understand the dynamic nature of these small but intriguing plants. For
instance, did you know that there are over 90 varieties of rosemary?
With so many different varieties of herbs, you can imagine that they have
many uses in traditional living. Herbs are valued for their flavor, fragrance,
medicinal purposes, pesticidal properties, dyes and health qualities. Let’s
delve deeper into the various contexts where herbs are used.
Culinary Herbs
Page 24
Learn Herbal
One of the most common uses for herbs is to add flavor to dishes. Every
American home has some type of dried herbs in their spice cabinet, and
they may even have a fresh herb garden in their backyard. Most culinary
herbs are perennials or biennials such as thyme, rosemary, basil and
parsley.
Culinary herbs have been used for centuries, and they were especially
popular during the pioneer days when immigrants were traveling to
America and bringing native herbs with them. While herbs have remained
a large part of the culinary world, processed, frozen and fast foods have
become popular staples for American families because of their
convenience. These foods rely on preservatives and sodium to bring flavor,
but they also carry little nutrients or health value.
Thankfully, this trend is starting to reverse itself, and there is more
appreciation for flavoring fine cuisine with a blend of herbs and spices
rather than salt and butter. As we learn more about how these ingredients
can contribute to health problems, there is a drive to get back to the basics
and start cooking with natural ingredients. Herbs also have many health
benefits, so adding them to foods delivers both flavor and a natural health
boost.
Medicinal Herbs
Page 25
Learn Herbal
Since plants have photochemicals in them, they have the potential to cause
various effects on the body. The same goes for herbs; when ingesting them
into the body, they have certain effects, many of which are beneficial to the
functioning of our bodies. The medicinal purposes for herbs are no secret,
and our ancestors used them regularly to treat certain health conditions.
The problem was that the information surrounding medicinal herbs was a
bit confusing, and quantities, dosages and the types of herbs could be
easily confused.
For instance, St. John’s Wart extract in a low, controlled dose can help with
depression and stress. Yet if you take the extract in large quantities, it can
lead to toxic overload that can result in serious complications for the body.
Still,herbs can be a powerful tool in alternative medicine. When used
appropriately, herbs can provide the body with antioxidants, aid in
digestion, calm upset stomach and anxiety and deliver anti-inflammatory
properties. Some of the most common medicinal herbs include
chamomile, ginger, milk thistle, peppermint and ginkgo biloba.
Sacred Herbs
Another use for herbs is in a sacred manner. Interestingly, some of our
earliest uses for herbs were in sacred rituals, as sickness was often tied to a
supernatural occurrence. In countries other than America, herbs are
actually quite popular to be used in rites of passage, religious ceremonies
and spiritual cleansings. Yet there are many people across our own
country who choose to use herbs in their practice of magic to aid in
spiritual enhancement, protection and healing.
Page 26
Learn Herbal
Before now, you probably didn’t think much about what an herb really was
and the many ways it could be used. Herbs are very interesting, and their
numerous uses have given them a solid role in our world. Before
processed foods and commercial products, our ancestors depended on
what the world around them could produce – water, plants, herbs and wild
game for example. Today, we are starting to appreciate this simplicity and
recognize that sometimes things in their most basic form are the best for
our health and survival.
The Common Active Components of
Herbs
Have you ever wondered what the active ingredients in herbs are?
Page 27
Learn Herbal
When we start to turn to more natural lifestyle solutions, herbs pop up in
just about all areas. They can be used in cleaning products, hair and skin
products and supplements. They can be used to flavor foods, aid in
relaxation during massage or aromatherapy and be prescribed as an
alternative medicine. Before we turn to these products to replace
conventional, chemical-based ones, we can’t help but wonder, what are the
components that make up an herb?
Herbs are similar to foods in that they contain a variety of ingredients,
including vitamins and minerals. Below are the active components found
in plant-producing herbs that modern medicine and science has
discovered thus far.
Flavonoids
Flavonoids are compounds that are found naturally in certain foods and
beverages. They are most commonly linked to foods like wine, berries,
tea, chocolate, fruits and vegetables. They are also responsible for creating
the yellow and orange colors in herbs. Flavonoids have many benefits for
the body, including antiseptic and anti-inflammatory properties. They can
also act as diuretics, lowering blood pressure and healing the blood
vessels.
Volatile Oils
Page 28
Learn Herbal
Volatile oils, or essential oils, are made up of various chemical compounds
that create their flavorful aromas. Volatile oils are most commonly used in
massage therapy or aromatherapy thanks to their relaxing effects on the
mind and body. Science has yet to prove that volatile oils can be beneficial
from a medical perspective, but many people firmly believe that essential
oils can treat and prevent certain health conditions, and because of their
complex chemical structures,there is no reason to believe why they can’t.
Volatile oils are taken from the plant through a process called distillation.
The oils are a mix of hydrocarbons and oxygenated compounds. The
oxygenated state is what determines the taste and smell of the mixture
since it’s this form that is soluble in water and alcohol. Monoterpenes are
the largest group of volatile oils and include camphor and menthol.
Essential oils are used in settings beyond aromatherapy and massage
therapy thanks to their antiseptic and fungicidal properties. Volatile oils
have anti-inflammatory and anti-parasitic effects, allowing them to be used
for conditions like ringworm, hair loss, colitis and irritable bowel disease.
They enhance the body’s ability to fight off certain infections, and they can
be used as expectorants or diuretics. Some of the most common volatile
oils used for these purposes include thyme, rosemary, chamomile and
parsley.
Volatile oils can be absorbed through the skin, inhaled or taken in foods,
drinks and herbal medicines.
Phenols
Page 29
Learn Herbal
Phenols are found in the tissues of the plant, and their chemical structures
are varied, leaving them to exhibit their own unique characteristics and
traits. Thymol, eugenol and salicylic acid are examples of simple herb
phenols. Although phenols have many different chemical structures, they
are often used for their antibacterial and antiseptic qualities. In some
instances, phenols can be used for anesthetic purposes as well.
Tannins
Tannins are polyphenols that are found in tree bark, wood and the leaves
and roots of a plant. What’s interesting about tannin is that it is found in
almost all plants across the world. Some plants have a lesser quantity of
tannins, such as algae and fungi, but most plants will have some level of
these polyphenols. Tannins can be divided into two groups: hydrolysable
tannins and condensed tannins.
In plants, tannins are meant to protect them from microorganisms, but
tannins also have many uses in our everyday world. For instance, tannins
can be used to dye leather or cloth. It has strong antiseptic properties, so it
can also be used as a medicinal astringent. Since tannin is designed to
protect plants, it also has unique properties that may help with gingivitis
and provide anti-bacterial, anti-inflammatory and anti-parasitic benefits.
Page 30
Learn Herbal
Tea and coffee also contain tannins; the slightly bitter aftertaste and brown
color can be attributed to tannins. Who knew? Wine is another drink that
has tannins from the grape plants. Too much tannin is not ideal since it can
lead to calcium deficiencies, but you would need to drink a lot of coffee or
tea for this to happen. Still, it’s a factor to keep in mind if you consume a lot
of these beverages, as it may be best to switch to a white or green tea.
Polysaccharides
You may remember from science class that polysaccharides are the long
chains of sugar that store carbohydrates for plants and animals. For
humans, polysaccharides are one of the three types of carbohydrates.
Examples of polysaccharides include starch, pectin and cellulose. Foods
with these simple sugars are beneficial to the body since they provide it
with energy, help maintain healthy digestion and allow the body to feel
fuller for longer.
Since the majority of foods with polysaccharides are starchy ones –
potatoes, beans and grains – they can lead to weight gain if you eat too
much of them. This happens because polysaccharides are insoluble in
water and are able to store glucose without affecting other cells until the
glucose is needed. When you consume a lot of carbohydrates, you can
gain weight. While a human may not appreciate this fact, for plants and
animals that don’t have readily available food like we do, the ability to
store energy is crucial.
Alkaloids
Page 31
Learn Herbal
Alkaloids are plant-derived organic compounds that are composed of
oxygen, hydrogen, carbon and nitrogen. Some alkaloids are toxic, but
many others are used for medicinal purposes. All alkaloids have
physiological effects on the body.
Many of the plant components we’ve discussed today may be foreign to
you, but you’ll be surprised to learn that substances like cocaine and
caffeine are alkaloids. Alkaloids are generally found in herbs that are used
by herbalists and doctors,and they tend to have potent effects, so they
must be used carefully. The good news is that as long as the dose is
controlled, the effects are generally safe. The most common alkaloids
include morphine (opium poppy), nicotine (tobacco),atropine (deadly
nightshade) and theobromide (coffee, black tea and cocoa leaves).
Glucosinolates
Glucosinolates are organic compounds that contain both sulfur and
nitrogen and are found in plants from the Brassica genus. When humans
eat vegetables such as broccoli, cauliflower and Brussels sprouts, they
consume glucosinolates in their normal diet, which is beneficial to the
functioning of our bodies. Glucosinolates detoxify the human body from
harmful carcinogens, and they contain antioxidants and enzymes that help
the body fight off certain cancers, including breast, lung and colon
cancers.
Page 32
Learn Herbal
Moreover, glucosinolates work in conjunction with other components such
as flavonoids, folate and Vitamin C to cleanse the body and remove toxins
and free radicals. It’s important that we eat a diet that is rich in
glucosinolates, about five cups a week of vegetables like kale, cabbage and
spinach. Other good picks for glucosinolate-rich foods include bok choy,
turnips, mustard greens and arugula.
Vitamins and Minerals
Herbs are packed with vitamins and minerals that are essential for the
healthy functioning of our bodies. With dozens of herbs such as
fenugreek, kelp, saffron, watercress and parsley, it’s possible to get a
healthy boost just by adding more herbs to your diet. Below are some of
the most common vitamins found in herbs.
Page 33
Learn Herbal
Vitamin A is found in herbs such as dandelion, okra pods and parsley.
It’s good for the eyes and the functioning of the mucous membranes
and skin cells.
Vitamin B1 and B2 are good for growth and development and are part
of a healthy diet. These vitamins are found in herbs such as
fenugreek, dulse and bladderwrack.
Vitamin B12 helps the development of red blood cells and can help
maintain weight in young children. It’s found in kelp and alfalfa.
Vitamin C is needed daily since it cannot be stored in the body, but it
keeps our immunities boosted and our teeth and gums strong. This
nutrient can be found in elder berries, marigold and paprika, among
others.
Vitamin D is essential for building strong bones and teeth, and it is
contained in herbs like watercress and wheat germ.
Vitamin E is known for its healthy bone building qualities as well as
contributing to healthy eyes and skin. Herbs like wheat germ,
watercress and dandelion leaves contain plenty.
In addition to the above vitamins, herbs contain Vitamin G, K and B as well
as niacin. All of these vitamins and minerals help the body function
properly, boost immunity and keep the skin, bones and teeth healthy and
strong. By eating plant-based foods or using herbs to flavor dishes, you can
nourish the body with more of these wholesome ingredients that are
naturally good to the body, unlike fatty oils, dressings and butters.
The Safety and Quality of Herbs
Page 34
Learn Herbal
Over the past two decades, the use of herbs in the United States has greatly
increased as a result of more people shifting to simpler, all-natural
methods to manage, prevent and treat various health conditions. Herbs
can be used for therapeutic and medicinal purposes, but they must be used
correctly. Many people are under the impression that because herbs are
natural, they are safe. Unfortunately, this isn’t necessarily true.
Let’s review the reasons why we need to exercise caution when using
herbs, preferably under the care of a medical professional.
Misleading Information Online
Page 35
Learn Herbal
When taking an herbal supplement, you can easily educate yourself
online. If you notice, much of the information is positive and written by
herb enthusiasts, so it can add to the image that herbs are always safe. You
need to be especially aware of exaggerated accounts of herbal
supplements that are used for marketing purposes. There are companies
out there that are merely interested in profits and sales, so they will write
anything to make their product look better.
There are also many websites that have no marketing motive, but they still
write about herbs positively and recommend them for treating certain
conditions, even if they have no authority to make the claims. They may be
sharing their own experience or belief, but this doesn't mean that taking
the herb will have the same outcome for you.
Why is there so much misleading information online?
The biggest reason is because there is so little evidence supporting
Medicinal Uses of herbs. Scientific studies show that conventional
medications are best for treating health conditions, and the effects of herbs
are not supported. This contradicts with what many people believe, and
science hasn’t exactly ruled out the fact that herbs can’t help. With their
complex chemical structures and clear benefits in relaxing the mind and
body with their fruitful aromas, there may be certain ingredients in herbs
that can be used medically; we just haven’t been able to prove this yet.
Page 36
Learn Herbal
It’s important to be aware that when reading information online, you
determine where the information is coming from (an individual, a
company or a respected organization), if they have any motive for posting
positive testimonials and if their claims are well supported. Just by being
aware that not everything you read about herbs is accurate or factual, you
can make better decisions for your health and your wellbeing.
Lack of Quality Control
Another reason why we must be careful about the safety of herbs is that
this industry is largely unregulated. With conventional medications,
decades are spent researching the drug, experimenting with various
chemicals and studying their effects. These drugs are heavily regulated by
the FDA, and all information regarding them must be relayed to the
general public. If you’ve ever taken a prescription, you know the lengthy
packet that is included with the medication, explaining in detail all of the
side effects, drug interactions and complications.
This same information is not included with herbal products, and in fact,
you won’t see much information besides a label printed on the bottle. The
FDA does not regulate this industry, leaving companies to have free reign
over how they want to market their products. While there are many
reputable, honest companies, there are others that don’t hold the same
standards. Without regulations to follow, herbal supplements can be
mislabeled, making these products confusing, ineffective or risky.
Page 37
Learn Herbal
Also, there is a big difference between the quality and purity in herbal
supplements, and with no clear distinctions, consumers may pay more for
an inferior product. You may have a hard time making the distinction when
looking at the bottle,but just imagine trying to determine the quality of
what’s tucked inside. Facilities where herbs are grown and used for
commercial purposes are not regulated either, so there are varying
measures of how the herbs are grown, dried and stored.
Herbs are very sensitive, and if they are not handled correctly, the purity
and integrity of the product is jeopardized. The way the herbs are handled
is integral to how pure, potent and effective the product actually is, so look
for companies that are happy to walk you through their method for
growing and storing herbs.
Shortage of Research
A final barrier in determining herbal safety is that there is a shortage of
research on many of these natural ingredients. While the United States
may be familiar with the popular Western herbs, there are plants from
countries like Asia, Africa and South America that we know little about.
Some of these herbs are coming into the U.S. from these countries, but we
have yet to research the effects, safety, efficacy and purity of the plants.
Additionally, many herbs, including Western-based ones, have yet to be
tested in various contexts. A healthy person with no allergies may react
fine to a particular herb, but if they have a chronic health condition or are
pregnant, there may be serious side effects. When it comes to the special
populations, such as children, elders and pregnant women, it’s especially
important that herbs are only taken under the supervision of a doctor.
Page 38
Learn Herbal
We must also recognize that many people who opt for herbal drugs take
other types of medications, and we know little about how herbs interact
with these chemically-based drugs. While the FDA studies how various
drugs interact with each other,we don’t have the same information for
herbs and traditional medication.
Our intention is not to scare you away from using herbs but to educate you
on making the best decisions. Until there is more control over this
industry, it’s up to people to do the research, talk to their doctor and select
a reputable company to purchase herbal products from. When we know
that we can’t take everything we read online for granted, we can be more
cautious about the companies we trust with our sales and our health.
How Do I Ensure Quality?
If you’re ready to try a few herbs, you may be wondering how you can go
about the process safely. Your first step is to talk to your doctor. It’s
important that you get the green light on taking any herbs, since your
doctor should be aware of any medications you are on as well as any
factors that may affect your ability to take herbs, such as a chronic illness
or allergy. When you get the doctor’s approval, you can begin your search.
If possible, get a recommendation from your doctor or a friend who has
been using herbs. They can refer you to a dependable, reputable company
that delivers an ideal product. You can also read online testimonials and
reviews, but remember that many of these are doctored up by the
company itself for marketing purposes. Still, you can learn a lot about a
company and its products just by doing a bit of research online.
Page 39
Learn Herbal
While it’s not a guarantee, look for products that offer a lot of information.
You’ll find that many lower quality herbs will be sold in bottles with
printed labels and won’t have any additional information other than what’s
on the label. Reputable companies tend to have details about their
company and their process for growing and storing herbs. They know
where the herbs are coming from and what the true identity of the product
is. Contact information should be printed boldly on the website as well.
Your goal is to find a brand that you like and trust. Once you do, you can
count on the company for all of your needs. Before you find ā€œthe one,ā€
stick to products that are sold in the stores or recommended to you. Mail
orders and online companies should be avoided, at least until you’ve found
a trusted company to work with.
If you want the very best herbs, the solution is to grow your own. When
you grow an herb garden, you can choose the herbs you want to add to
your diet and control their purity and integrity. You never have to second
guess what you’re putting into your body, and you can take charge of your
health in a whole new way.
The Benefits of Growing Your Own
Herbs
Page 40
Learn Herbal
Learning that the herbal industry is largely unregulated by the FDA, or
any government source for that matter, can be unsettling for the people
who trust their herbal products to someone else. Not that there aren't
many notorious products out there that are regulated by the FDA and yet
are still questionable in their safety. There’s no doubt that herbs have some
wonderful benefits for the human body, and at a minimum, they can be
used to flavor foods and boost the health content of what we eat. If you’re
keen on taking herbs as part of your diet, the best solution may be growing
your own plants.
Page 41
Learn Herbal
Many people around the United States have their own herb gardens that
can be planted either indoors or outdoors. These small gardens have a host
of herbs such as parsley, oregano and thyme. For the most part, gardeners
stick to the basic herbs since these are the ones we know the most about,
and they can be easily added to dishes like pasta, soups and meats. Having
an herb garden gives you endless possibilities, so you can spread your
wings and experiment with a variety of herbal ingredients. Basil won’t just
be basil anymore.
Let’s discuss the many benefits to growing an herb garden. These perks
may be just the motivation you need to get started with your own hobby.
Fresh Herbs are Always Available
Tired of running to the supermarket every time you need a few groceries?
Or maybe you’re simply leaving out key ingredients because you don’t
have those ā€œextrasā€ that are added to popular dishes, such as bay leaves,
fresh parsley or a sprinkle of dill. When you have an herb garden, you can
count on fresh ingredients every day of the week. Your dishes will taste
better and have added health content and fresh flavors that can’t be
replicated from dried spices.
Emerging Hobby
Page 42
Learn Herbal
Many of us envy the neighbor who has a green thumb, but we don’t take
the initiative to start our own garden. Often times, we’re just worried that
we will put in the time and have nothing to show for it, but this couldn’t be
farther from the truth. Starting an herb garden is starting a new hobby. It
may take time and practice to get things right, but that’s the fun in
learning. You can uncover unique uses for the herbs and expand your
culinary palette. For instance, did you know that there are over 30
different types of basil?
Gardening is a healthy hobby that links us to nature, and you will finally
have something in common with that neighbor of yours. Also take the
opportunity to show your children or grandchildren the importance of
gardening, spending time outdoors and eating healthy. Gardening is a
teachable moment for young children, and they never mind digging in
some dirt!
Physical Exercise
If you plant an herb garden outdoors, there’s no doubt that you’ll work in
some physical exercise. All that bending, digging, planting and watering
takes physical energy, and while you won’t be dropping pounds like at the
gym, you will be toning your muscles and working your body. The added
time in the sun is also refreshing, so you can also enjoy a glowing tone as
well.
Improved Connection with Nature
Page 43
Learn Herbal
Some of the best therapy takes place outdoors, and having an herb garden
will promote this relationship. Planting herbs outdoors will improve your
connection with nature because you’ll be outside, listening to the birds and
taking in the sights and smells of the season. Yet even planting an herb
garden indoors keeps you connected since you’ll be learning about plants
that are naturally grown in nature. People are often surprised to see just
how much they appreciate Mother Nature when they have the opportunity
to work alongside her. Having this greater relationship with the world we
live in is rewarding in itself.
Saves Money
If you’re not running to the store for ingredients every other day, you save
money right off the bat. Plus, buying herbs is very expensive as you may
have already noticed. You can plant an entire herb plant for pennies that
produces an abundance of herbs all season long. Also remember that what
you’re growing is essentially organic herbs, so you’re able to feed your
family fresh products at a mere fraction of the cost of what you would find
in a store.
Endless Health Benefits
Of course, we can’t discuss the benefits to growing your own herbs and not
talk about how healthy they are. With your own garden, you know exactly
where the herbs are coming from. You can be confident that they haven’t
been treated with pesticides or harmful chemicals. They offer many health
benefits because of their flavonoids, antioxidants, polyphenols, vitamins
and minerals.
Page 44
Learn Herbal
It's possible that herbs may help with diabetes, cancer and heart disease, so
if these conditions run in your family, you can do more for your health by
adding these ingredients to your dishes. Some of the best herbs from a
health standpoint include thyme, rosemary, basil, garlic, oregano,
cinnamon and turmeric. What's wonderful is that you can bring so much
flavor to meals without adding calories.
Curb Appeal
Having an herb garden can bring your outdoor space much-needed curb
appeal. Many of our gardens are lacking, but we’re not sure what they
need. Herbs can add another element to the garden, especially because
they have vibrant green colors,and some flower during the spring or
summer. If you don’t have room for a separate herb garden, you may plant
these shrubs in between other plants and flowers; they will blend in
beautifully. For instance, Valerian and yarrow are hardy flowering herbs
that can add color and character to your space while providing you with
healthy herbs.
Rest assured that herbs are hardy plants that are easy to work with. Once
they are planted, they need minimum care, and most will produce an
abundance of herbs. If the plants are producing more herbs than you can
handle, clip off the leaves and store them for soups and stews during the
winter months.
You may not consider yourself to have a green thumb, but you’ll be quite
pleased with how easy herb plants are to grow and nurture.
Page 45
Learn Herbal
Soil and Space: How to Get Quality Soil
and Design Your Garden Space
Getting started with an herb garden doesn’t require much effort,
especially if you’ve already had some practice with gardening. In the long
run, you will need good quality soil to keep your herbs growing strong.
The healthier your soil is,the more productive and hardy your herb
garden will be.
How do you get good soil? We’ll show you how.
First, know that good soil needs a mix of clay (to retain water), sand (to
drain water) and organic material (to provide nutrients). Additionally,
there needs to be the right balance of these ingredients to have healthy
soil, as too much sand or clay can cause problems with drainage, growth
and resiliency.
Identify the Quality of Your Soil
Page 46
Learn Herbal
Your first step is to determine the type of soil you have in your own
community. What is it made from mostly? If it has more clay, add some
sand. If it has more sand, add clay. Almost all soils need organic matter
added to bring necessary nutrients to the plants. When you have the
proper balance of soil in your garden, you will need to start adding organic
materials such as rinds from fruits and vegetables. The best time to do this
is in the fall after the plants have been harvested.
Why Compost is Essential
By adding organic green materials to the soil, you’re essentially making
your own compost. Compost is an ideal component in soil because it
delivers nutrients that are adequately balanced. Many people are quick to
jump on fertilizer, but fertilizer can act quickly and cause damage to young
plants. Compost slowly releases vitamins so that the plants are always
being nourished. Compost also protects plants from pests and diseases,
and it helps keep the soil healthy by retaining moisture and loosening up
clay.
Making Your Own Compost Rich Soil
Now, let's get back to making your own great soil. Many people think they
need a compost bin to make compost, but this isn’t necessary. Compost
bins are convenient, especially if you’ll be using the compost in various
areas, but you can do the same for your herb garden by throwing down the
right stuff.
Page 47
Learn Herbal
Compost requires a blend of brown and green materials. Brown materials
include dried leaves, dead flowers, paper and straw. Green materials are
nitrogen-rich and include grass clippings and kitchen waste, such as fruit
rinds and cores. You should be able to find most of these items in your own
home or backyard, but if you need additional sources, ask your neighbors
for their dried leaves or grass clippings. They surely won't mind!
Ideally, your space should be about 3 feet wide by 3 feet long. When you
have the compost materials laid down, cover it with newspaper. The
newspaper will hold in the heat from the plants that are decomposing and
turn this into rich soil. Once you establish this healthy soil, you will need to
maintain its integrity. Fortunately, this is easy to do and only involves
turning the soil at the end of the growing season and adding organic
materials regularly.
You will also need to check the composition of the soil each year to ensure
it has the right balance of clay, sand and organic material. Remember, you
don’t have to spend money to get high-quality soil. Simple and natural
works best in this context.
Designing Your Garden Space
Page 48
Learn Herbal
With nourishing soil for your garden, it’s time to start planting herbs.
Designing how your space will look is a crucial element for an herb
garden. This is where you will be spending time digging, planting and
watering, so you want the layout to be conducive to these movements. You
also want to meet the needs of the herbs, such as by providing them with
sunlight or partial shade. It’s helpful to know what you’re planting so that
you can determine where each plant will go. No matter how you choose to
design your garden, remember this tip: keep it simple.
The wonderful thing about nature is that everything is down-to-earth and
uncomplicated. If you think that your garden needs expensive lawn
decorations, solar lighting and a stone trim, you’re allowing our need for
modern-day luxuries to get in the way of what should be a minimal hobby.
If you take a look around your garage or shed, you may find that you
already have what you need to create the perfect herb space.
For instance, a piece of wood garden gating can work well, providing it has
large enough squares to plant the herbs in. Simply lie this down in the soil
and begin planting your herbs. You may also build your own spaces using
pieces of treated wood that can be purchased from a home improvement
store. A wagon wheel can also be useful and create a real visual treat in
your outdoor space.
Container Gardening and Raised Beds: Great for Urban Dwellers
Page 49
Learn Herbal
If you live in an urban area, have poor soil quality or don’t have a yard
where you can plant a garden, plant your herbs in a separate planter. You
can still make your own compost and add the soil mixture to each
container. Some gardeners choose long wooden planters while others opt
for the small, individual herb planters. You can also build your own stand
that will hold all of the planters in one convenient spot. Container
gardening is smart and practical for everyone,and it may be a nice change
of pace for the winter months when you want to keep a few of the most
essential herbs on hand.
Raised beds can also work wonders if there is poor soil in your area. These
beds give the same feeling as an herb garden, except for the fact that the
garden beds are raised off the ground. They can be built using pieces of
wood and basic hardware for a minimal cost. Some gardeners make
elaborate designs with these beds, and you can go that extra mile by
adding a wire fence around the garden or installing pavers in between the
beds.
The bottom line is that creating an herb garden is effortless when you put
your mind to it. You don’t need much money to get started, and you may
even be able to find everything you need in your home already. Once the
herbs begin to fill out,your garden will look absolutely stunning, and you
can take a step back and be proud of your accomplishment.
Harvesting and Storing Herbs
Page 50
Learn Herbal
Harvesting refers to the process of removing parts of a plant to be used for
consumption. You can’t harvest a plant at any particular time; you must
wait until it’s ready to eat, which is when the oils responsible for creating
aroma and flavor are at their climax. Timing is delicate since it depends on
what part of the plant you want to harvest as well as what you intend to use
the plant for.
Below we discuss the various parts of herb plants that can be harvested and
how to successfully complete the collection process.
How to Harvest Buds and Flowers
Page 51
Learn Herbal
If you are growing herbs such as borage, chamomile or lavender, you will
want to harvest the flowers rather than the leaves. You can harvest the bud
or the flower at any point when they grow in, but you’ll want to do it before
they completely flower. The volatile oils that are in the herb plant are at
their peak right before the buds start to open, making this the best time to
harvest them.
Another critical component is the time of the day that you harvest the
flowers. It’s important that the plant is completely dry, so opt for the early
morning, just after the dew has dissolved and before the sun is hot. If your
area has gotten rain, also be sure to wipe off any raindrops that have settled
on the plant.
To begin, check your herb plant for flower buds that have grown in but
haven’t flowered just yet. However, if the buds have opened into flowers,
that doesn’t mean you’ve missed your opportunity. While the volatile oils
may not be as strong,you ultimately want to collect the flowers before
they have become withered and dry.
There are two ways to cut the flowers. The first method is to cut the entire
flower bud off the stem, just under the head of the flower. The second way
is to cut both the stem and the flower off as if you were pruning the plant.
Both ways are acceptable, and there are advantages to each.
Page 52
Learn Herbal
If you cut just below the head of the flower bud, the plant will have the
chance to grow back quickly, and you can keep harvesting the plant. With
the quick turnaround of this method, you’ll want to have a drying screen
on hand. If you decide to cut the flower bud and the stem, two new stems
will grow, and the herb plant will get bigger. Also, you can conveniently
hang the flowers by the stems to dry, so you won’t need to purchase a
drying screen. The drawback to this method is that it will take time for the
new stems to grow.
If it’s early in the season and you don’t want to over-harvest the plant,
cutting off the flower at the stem and above the leaves is best since it will
allow your plant to grow bigger. If you need a lot of flowers in a short
amount of time,cutting the buds off at the head is best.
How to Harvest Leaves and Stems
If you choose to harvest the leaves or stems of your herb plant, you’ll
follow many of the same precautions as when you harvest the flower buds.
First, the plant should be completely dry, so opting to harvest the leaves in
the morning when the dew has dried and the sun is still cool is a good idea.
Plus, you can enjoy a more comfortable environment that is conducive to
gardening. Some of the most basic herbs that can be harvested include
basil, dill, oregano, sage, parsley and thyme.
Keep in mind that you want your plant to grow large and mature, so never
harvest all of the leaves at one time. Aim for about 30 percent, leaving big,
healthy leaves to continue the growing process. Also, clip the leaves before
the plant flowers. You already know that this is the time when the volatile
oils are their strongest and will produce the best flavor and aroma.
Page 53
Learn Herbal
Additionally, if you don’t want or need the flower buds, there’s no reason
to let the plant expend its energy on producing flowers. Once this happens,
the stems and leaves form a bitter taste, so pinch off the flower buds and
encourage healthy stem growth. You’ll be surprised at just how quickly a
healthy plant will create new buds, so be sure to check for these each day.
Now, let’s get down to harvesting our leaves and stems. Never pull the
leaves off your plant, even though it may seem like the simplest thing to
do. If you want the leaves, cut the stem off and then gently pull the leaves
from the stem. This avoids you from putting pressure on the plant itself. If
you want the stem, proceed with the same method, except you don’t have
to pull the leaves off.
What’s interesting is that once you pull off a leaf from a plant, another one
will never grow back in that spot. There are some cases where it is okay to
pull off the leaves directly from the plant, such as if there are plenty of
larger leaves that are blocking the plant’s ability to absorb sunlight, or if
the plant is so massively huge, it just won’t matter. Yet early on, it’s best to
cut the stem first, and then pull the leaves.
How to Harvest Roots
Page 54
Learn Herbal
Harvesting the roots of an herb plant is a bit different than harvesting the
flowers or leaves. The ideal time to do this is in the fall since this is when
the roots are their strongest. If you happen to miss this period, you can also
harvest the roots in the springtime before new growth starts, but it can be
more difficult to find the plant. Another obstacle is that the roots tend to be
wetter during the springtime, so you’ll need to wait a longer period of time
for the roots to dry. The only stipulation for fall root harvesting is to wait
until the foliage has died off.
Harvesting roots requires patience and a little digging. Most plants aren’t
ready to be harvested in their first year, so you will have to wait until their
second birthday before you can begin harvesting them. One plant you can
harvest earlier is chicory; one plant you can harvest later (in the third year)
is marshmallow. Most other herb roots, including barberry, bayberry,
garlic, ginger, stone root and valerian root are best harvested in the second
year, in the fall or early spring.
To collect the roots, start with a spading fork and make sure the ground is
slightly moist but not saturated. Dig deep using the spade and cut off the
plant tops. Most gardeners opt to dig up the entire plant, but if you plan on
having the herb come back next year, make sure to replant a hefty part of
the root so that it can grow back. When the roots are gathered up, they will
need a good washing. You can rinse off the roots, but if they still aren’t
clean, use a brush to remove the built-up dirt.
Once clean, hang the roots to dry. Some herbs have thick roots, such as
Liquorice and burdock, so you may have to cut them vertically in order to
speed up the drying process. People are quite surprised to see just how
long this process can take; some roots take weeks to thoroughly dry.
Page 55
Learn Herbal
Storing Herbs
All herbs should be stored in an airtight jar or container once they have
been completely dried. If there is any moisture left, the herbs can grow
mold. If the entire stem was dried, take off the leaves and crumble them
just before placing them in the container. Keep the jars away from sunlight
and heat, as this will ruin the quality of the herbs. Ceramic, glass or metal
containers are best, and they darker the color, the better.
You may use the herbs as needed, just be sure that they have airtight lids
so that they stay fresh. It’s time to discard the herb contents when they
have mold on them or have become dark and fragile. With proper storage
techniques, most herbs can be stored for up to one year.
A second option is to freeze herbs, as they will retain their freshness until
they are thawed out. The process is a little different if you choose to freeze
them. Start by washing them, and then blanch them in boiling water for 1-2
minutes. Once drained and cooled, they can be placed in individual
packages and used as needed. Herbs like parsley, basil and oregano can be
thawed out and added to pasta sauce, soups and purees.
Harvesting and storing herbs is not difficult. Once you get familiar with
harvesting the different parts of the plant, you will find uses for herbs like
you never thought before!
How to Dry Herbs
Page 56
Learn Herbal
What you do with the herbs you have collected is just as important as the
harvest itself. When the herbs have been gathered, inspect them to ensure
that there are no insects or debris. If the herbs are clean, do not wet them.
If they are dirty, gently rinse the herbs, shake off the excess water and lay
them on a paper towel to dry. Also remove dead or damaged foliage. When
the herbs have dried, you may proceed with the complete drying process.
There are a variety of methods for drying herbs, yet most gardeners prefer
natural air drying because of its simplicity and efficacy.
Method #1: Natural Air Drying
Page 57
Learn Herbal
When drying herbs naturally, you will need an ideal location to do so. The
best place to dry herbs is in a large, empty room, such as a closet, attic or
pantry. In fact, many people like to hang herbs in a pantry or kitchen for
added flair. Herbs should be kept away from direct sunlight, moisture and
frost, as these conditions can severely compromise the quality and
integrity of the herbs. Make sure you select a spot that has plenty of airflow
so that the air circulates around the herbs and helps them to dry faster.
The simplest way to air dry herbs is to tie the herbs into small bunches
with string or twine and hang them upside down. Small, loose bundles are
ideal since they allow the air to circulate the best. This method is also nice
if you plan on using the herbs for decorative purposes. Gardeners
sometimes worry that the herbs will collect dust by hanging out in the
open, so if this is a concern, you may loosely tie a brown paper bag around
the bundles.
The herbs should be checked every day or two, and you should notice that
the leaves and stems dry out a little more each time. If you are using
brown paper bags and notice that the herbs are not drying out fast enough,
poke holes in the bag or trim them down further so that the herbs receive
improved air circulation. The herbs are ready to be stored when they are
dry, brittle and break into pieces.
Another natural air drying method is to set the herbs on a drying screen.
Choose the same type of dark, empty room with good airflow and no direct
sunlight. Position the drying screens in the room and lay the herbs on the
screens. Turn them over as needed to ensure thorough drying. This is a
simple way to dry out your herbs and about as low-tech as you can get.
Page 58
Learn Herbal
On average, it takes about one week for herbs to dry, and you’ll notice that
they become brittle and crispy. The length of time depends on the airflow
and temperature of the room, so it could take a little bit more time. The
bundles should be taken down immediately when they are dry, otherwise
they will start to collect dust and may even mold.
Collecting the dried herbs is easy; simply roll the bundles through your
hands and let the dried leaves collect in a bowl. Or, cover a work area with
newspaper and remove the leaves by running your hand down the stem.
The dried leaves may then be stored in labeled jars in a cupboard, away
from light. Most herbs can be stored for a year or more.
Method #2: Oven Drying
Air drying is the best way to dry herbs, but it also takes time. If you don’t
have weeks to wait and you want to dry out the leaves as quickly as
possible, then you can enlist the oven for some help. You may also have no
choice but to use the oven if there is a lot of humidity in the air that is
interfering with the herbs’ natural ability to dry out on their own. The good
news is that you can finish drying the herbs using the oven, giving you the
opportunity to dry them naturally for much of the duration.
To use the oven method, place the herbs on a cookie sheet and remove
some of the stems so they are not as bulky. Don’t overcrowd them either.
Place the cookie sheet in the oven on the lowest setting possible, which
should be no more than 180 degrees. There is a balance here, as you
shouldn’t smell the herbs cooking. This means that the temperature is too
high.
Page 59
Learn Herbal
If you’re drying out leaves that have been freshly harvested, cooking them
for about 2 to 4 hours on a setting of 180 degrees or less. If you’re
completing the drying process, aim for a temperature of 150 degrees. The
herbs are dried when the leaves are crispy and the stems feel brittle. You
may proceed in the same way to collect the leaves by running the stems
through your fingers and gathering the dried leaves over a bowl.
Method #3: Microwave Drying
Microwave drying is a fast and easy method, especially if you’re only
looking to dry a small amount of herbs. Take the clean herbs and lay them
on a paper towel, then place them in the microwave for 1 to 2 minutes.
Even though microwaving herbs is quick and simple, it’s very easy to
overheat the herbs. Drying times vary based on the type of herb, the
moisture content and the wattage on the microwave.
Check the herbs and heat them in 30 second intervals if they haven’t been
fully dried within 1 to 2 minutes. If you smell the herbs burning at any
point, remove them from the microwave immediately. Like oven drying,
you may have no choice but to use the microwave to finish the drying
process if the weather conditions are humid. Also keep in mind that some
herbs are thick and will need to be dried out naturally before being placed
in the microwave. Thankfully, because herbs have such low moisture
content, they can be successfully dried in a microwave or oven.
Fresh vs. Dried Herbs: Is There a Better Pick?
Page 60
Learn Herbal
When you have an herb garden, you’ll find that there are many ways to
use the herbs. For instance, you can harvest the seeds, the roots, the
flowers, the leaves and the stems. You can also clip fresh leaves to use in
dishes like pastas, soups and sauces. We’ve often been taught that fresh is
best, so many gardeners are left wondering what the difference between
fresh and dried herbs is and if there is a better pick.
When it comes to herbs, the fresh vs. dried debate depends on the type of
herb that you are using. Herbs like parsley, cilantro, dill and basil are often
best in their fresh form. You can clip a few of the leaves off of the herb
plant and add them to your favorite dishes for flavor and aroma. Herbs
such as sage, lavender and oregano are best in their dried form. However,
many herbs can be used in both their fresh and dried form, so really, it’s a
matter of preference.
Although fresh herbs are ideal in many cases, when they are dried, the
drying process creates a different flavor in the herb. Fresh and dried herbs
taste very different from each other, so your dish may taste better with one
over the other. You’ll also find that ethnic dishes have their own
preferences, as Middle Eastern cooking prefers fresh herbs like ginger
and mint while Indian cooking prefers dried herbs that are mixed together.
Dried herbs have a stronger flavor, and they can be added to raw meats or
partially cooked foods to bring out extra taste and aroma. Dried herbs are
also easier to work with since you can add them at any point in the meal
and they don’t go bad nearly as quick. Most people store them for a year or
more and use them as needed.
Page 61
Learn Herbal
Fresh herbs have more limitations. They cannot be cooked on high heats
for long periods of times, so it’s recommended that they are finely
chopped and added at the end of the meal. Also, fresh herbs have a shorter
shelf life, so they need to be used much faster. Fresh herbs can be hard to
find at grocery stores, so most home chefs prefer dried herbs instead.
However, if you have your own herb garden, you can enjoy fresh at your
convenience.
How to Freeze Herbs
If you want the benefits of fresh herbs but want to give them a longer
lifespan, you can opt for freezing the herbs. You will start in the same way
as if you were going to dry them out, by rinsing the herbs if they are dirty
and setting them out to dry. There are a variety of methods to freeze the
leaves, so it’s about finding what works for you.
The first and simplest method is to simply lay the herbs on a small tray or
cookie sheet and place them in the freezer until frozen. When the leaves
are frozen solid, place them in an airtight container and stick them back in
the freezer. When you freeze the herbs individually, they will not stick
together. You can use the herbs as needed and toss them directly into
stews, pasta sauces and casserole dishes.
Page 62
Learn Herbal
Another convenient method is to freeze the herbs in ice cube trays. Wash
and dry the herbs as usual, and then chop them up into small pieces, even
the stems are okay. Stuff the herbs into the ice cube sections and fill each
one halfway with water. You’ll notice that the herbs will float a bit, and this
is okay. Stick the ice cube tray in the freezer and when the ice has formed,
you may fill up the tray with the rest of the water. When the ice cubes are
frozen solid, remove each cube from the tray and place them in Ziploc
bags. Store them in the freezer and drop them into your favorite dishes as
needed.
As you can see, drying herbs is a wonderful way to preserve your favorite
plants and have an entire herb garden to choose from when cooking your
favorite meals. Since some types of herbs taste better fresh, you may also
freeze some herbs to expand your cooking palette. One thing is for certain:
whether fresh or frozen, herbs are a healthy, no-calorie way to add flavor,
aroma and zest to your dishes while reaping dozens of heart-healthy
benefits!
Setting Up Your Kitchen Herbal
Pharmacy
As you build your kitchen herbal pharmacy, you’ll need supplies to keep
the herbs safe from damage and infestation. Herbs are natural plant
materials, so they are sensitive to air, light, humidity and temperature.
With the right supplies,you can prevent the herbs from deteriorating in
their scent, flavor and color. With the time and effort you put forth in your
garden, correctly storing herbs is the best gift you can give yourself.
Page 63
Learn Herbal
What Supplies Do I Need to Start an Herbal Kitchen Pharmacy?
The advantage to starting an herb garden is that it’s very inexpensive. You
can use things from around your own home to start planting your garden,
such as a square garden gate and metal herb containers. When you
harvest and dry the herbs,you can hang them upside down in individual
bundles or place them on a drying screen. Up until this point, everything
you need is minimal. When storing the herbs however, you will need a few
basic supplies.
Herbs are best stored in glass jars, preferably colored ones. Glass is ideal
because it provides an airtight seal while also allowing the herbs to
breathe. The dark colored glass is best since it blocks sunlight, but as long
as the herbs aren’t in any contact with direct sun, clear glass jars will be
suitable. Glass containers also have the advantage that you can see into
them, which is nice when you want to know what herb is inside the jar.
Page 64
Learn Herbal
Plastic containers have their advantages because they are convenient,
inexpensive and easy to find. The downside is that the plastic material
doesn’t provide good airflow, so it won’t keep the herbs fresh for nearly as
long. Additionally,plastic can affect the smell and taste of the herbs. If you
do choose to use plastic, use it for a short time only. It’s not a long-term
solution if you want to properly store herbs for an extended period.
In addition to airtight glass containers, you will also need labels to stick
onto the jars. This small but effective step will help keep track of what’s
inside the jars. Write the name of the herb on the label as well as the date,
and stick the label on the outside of the jar or on the lid, wherever you will
see it best. As your herbal kitchen pharmacy grows, you will know exactly
what herbs you have and how old they are.
How Do I Store Herb Infused Medicinal Oils?
Dried herbs aren’t the only things that can be stored in jars. As you learn
about the various herbal mixtures you can make, you will need to store
these too. Herb infused oils can sound intimidating to make, but they’re
actually quite easy and an effective way to widen your herbal kitchen.
Dried herbs are always best when making medicinal oils and will provide
the mixture with a longer shelf life. Using glass jars, you can combine the
dried herbs with an oil of your choice,such as olive oil, coconut oil or
apricot oil.
Page 65
Learn Herbal
The mixture can then be stored in a glass container with an airtight seal,
the same ones you would store herbs in. You’ll also use labels with these
oils, except take it one step further by adding the ingredients that are in
the jar. For instance,if you’ve combined dried herbs with grapeseed oil,
write all of this information down on the label. Some people choose to add
a preservative such as Vitamin E or grapefruit seed extract, and this should
also be noted on the label.
You should also write down how to use the medicinal oil so that you know
exactly what the use is for. Imagine scrounging for something natural in
the middle of the night to treat an upset stomach or a stuffy nose. If you
choose the wrong jar,you could make the symptoms worse or create a
negative reaction. Keep everything simple and easy to read, but be sure to
provide enough information so that you know what you’re working with.
Getting My Herbal Kitchen Pharmacy Set Up
Glass Mason jars are ideal because they come in a wide variety of sizes, are
made of sturdy glass and have tight-fitting lids. It’s easy to add labels to
them, and if you buy the jars in a bulk case, labels will be included. Keep in
mind that most Mason jars are clear, so if you opt for these, keep them in a
dark space. You can also find colored jars that are used for jams and jellies
and will help block out sunlight.
Page 66
Learn Herbal
Essential oils can be stored in amber colored bottles that include droppers,
or you may simply store the medicinal mixtures in the same glass Mason
jars. Depending on the type of oil that you’ve made, it can be stored in the
refrigerator or in a dark room, out of the way of direct sunlight. All of these
supplies can be purchased online or from certain grocery or craft stores.
You’ll save money if you buy in bulk, so consider shopping online for a
case of glass jars that include airtight lids.
Many gardeners find that printing labels off of their computer is cheap and
effective since they can type up the name of the herb, the date and the
ingredients, if applicable. The final piece to the puzzle is finding a prime
location for your herbal kitchen pharmacy. Ideally, you want a space that is
dark, empty and has good airflow. Large closets or pantries are a great
start, but not everyone has these places. You may have to expand your
boundaries and consider a basement, unused corner in the home or a
shed.
As you grow your pharmacy, it’s important that you have consistency and
organization. The ideal herbal pharmacy includes shelves so that the herbs
can be neatly placed in jars with labels clearly printed on the outside. You
can easily build the shelves using pieces of wood or by creating a simple
bookcase-style unit. Metal kitchen racks or wire shelves also work well.
Building an herbal pharmacy takes time, but it will be your ultimate craft.
When you have natural herb infused oils, dried herbs and essential oils to
treat a variety of symptoms and boost the health content of your food, you
will learn to trust the natural solutions that can enrich our lives both
mentally and physically.
Page 67
Learn Herbal
How to Buy Dried Herbs and Detect
Good Quality Practices While Purchasing
One of the greatest benefits to growing your own herb garden is that you
know exactly where the finished product is coming from. You control the
growing conditions, when the herbs are picked and how they are dried and
stored. Buying herbs is a different story because you don’t know all of
these fine yet pertinent details.
An added disadvantage is that because herb-based products are not
regulated by the FDA, companies can make claims about their herbs that
are untrue. Even though there are many mediocre companies out there,
many high-quality companies exist as well. By doing a bit of research and
knowing what to look for, you can find good quality herbs to use for
physical, mental and health purposes.
Page 68
Learn Herbal
Ask for Recommendations from Trusted Sources
The easiest and most effective way to find dried herbs is to get a
recommendation from a friend, family member or doctor. If they’ve used
the products firsthand, they will be very familiar with the quality of the
herbs and how the business operates. If you don’t know of anyone off the
top of your head that uses fresh or dried herbs, send out a quick post on
Twitter or Facebook asking for recommendations. You’ll be surprised to
learn who uses herbs on a regular basis.
Evaluate the Company's Website
It’s still important to do your own research even with a recommendation.
View the website of the company and get a good feel for the nature of their
business. A trustworthy company should have experience in the industry,
sustainable farming practices and a commitment to quality. They should be
able to tell you exactly where the herbs are coming from and in what
conditions they are grown, dried and stored. Dependable companies will
also have their contact information posted on the top of the page.
What Storing Practices Does the Company Use?
When you have found what appears to be a reputable company, take a look
at their storage practices. While we all wish that the herbs would be
freshly picked just for us, it doesn’t work this way. In fact, the herbs you’re
about to buy may have been sitting in a jar for months or years, making it
less potent. Since you want to get the quality you’re paying for, there are a
few things to look for.
Page 69
Learn Herbal
First, how are the herbs stored? Ideally, the herbs should be stored in a
dark colored glass jar, although some companies store them in foil bags,
which is also acceptable. Clear jars are not ideal since they let in light, and
the light will cause the herbs to lose color and flavor.
This process occurs because of oxidation, which is an interaction between
oxygen molecules and the various substances they come into contact with
along the way. If dried herbs are sitting in a clear glass jar, light will pass
through the glass and come into contact with the herbs, thus diminishing
their quality. They will fade in color, taste and aroma and be far less potent.
Where are the Herbs Stored?
In addition to the herbs being stored in dark glass jars, they should also be
kept in a dark room with good air circulation. Most herb companies will
have a large storage room where they stock the herbs on shelves. What
you hope is that this room is an ideal arrangement with no direct sunlight
and good airflow. Knowing that light can affect the quality of herbs, always
inspect the product and ensure that it is of good quality. If the color of the
herb is faded and the smell is not strong, chances are the herb was either
not stored properly or is old.
Are the Herbs Clean and in Good Condition?
Page 70
Learn Herbal
If you are buying bulk herbs such as ginger root or dried flowers, be sure
to inspect the condition of the herb. Dried herbs may be cleaned up
already, but other raw materials may have grass or other debris still stuck
to them. When these herbs are picked, they may not be cleaned all the
way, so it’s a good idea to assess their condition for insects or other debris
that can affect the purity of the herb. Thankfully, most herbs are well
cleaned and dried before being sent out to the customer.
Signs of a Good Quality Herb
Old herbs are far less potent, so they won’t have nearly as good as an effect
as one would hope for. If you’re adding dried herbs to oil for instance, you
won’t get much aroma from the herbs. A good quality herb that is new and
has been stored properly will have a vibrant color and a strong smell, so
don’t be afraid to use your senses to inspect what you are getting.
If you are making a purchase online, it’s difficult to assess the quality of the
herb, so make a small initial purchase. If possible, stick to herbalist stores
where you can look at the herbs, or shop with a company that has good
recommendations. Once you know you can trust the supplier, you can buy
online or through a mail order.
Growing your own herb garden gives you the best quality products, but
chances are, you’ll need to buy herbs from a company at some point.
Whether it’s to try an herb that you haven’t grown or to buy an herb-
infused product such as an essential oil, medicinal oil or supplement, it’s
important that you have a company that you trust. There are many great
retailers out there who are committed to the environment and produce
high-quality herbal products at a fair price.
Page 71
Learn Herbal
What are Essential Oils?
Essential oils are concentrated liquids from plants that contain volatile
aroma compounds. They are most commonly used in aromatherapy and
consist entirely of botanical matter. Essential oils may also be referred to as
volatile oils or ethereal oils. Similar to herbs, essential oils have many uses
that include aromatherapy, pharmacology, food flavoring and perfumery.
Botanical oils should always be used with caution since they do carry
potential dangers. Natural products are often healthy, but they must still be
adequately dosed. Too much can be toxic to our delicate bodies. When
experimenting with a new oil or trying essential oils for the first time, it’s
important to carefully follow the directions.
How are Essential Oils Made?
Page 72
Learn Herbal
Essential oils are extracted from the plant by a process called distillation.
The plant is cooked with steam so that it breaks down and releases the oils.
The steam is cooled and then the water and oil are separated from each
other. The oil is also filtered through to ensure its purity.
Distillation is the most popular use for extracting oils since it’s easy and
effective, but there are other methods that can be used as well.
Sometimes, essential oils can be extracted just by pressing on the plant.
For instance, grapes, oranges and lemons have strong smelling juices that
can be extracted by pressing on the fruits.
Uses for Essential Oils
Botanical oils have many uses because of their fresh and abundant aromas.
They are most commonly used in perfumes, cosmetics, cleaning products
and soaps. They may also be added to foods and drinks thanks to their
flavoring properties. We’ve learned from historic textbooks that essential
oils were used for medicinal purposes, primarily to treat skin conditions
and certain diseases. In modern times, chemically based medicines have
proven to be effective in treating these conditions,and evidence-based
research shows no proof that essential oils are effective from a medical
standpoint.
Page 73
Learn Herbal
Still, essential oils have been drawing in more attention for their ability to
act as an alternative medicine. While we recognize that an essential oil
wouldn’t be effective at treating an infection or curing cancer, botanical
oils may manage symptoms like anxiety and stress, lowering the risk of
certain health conditions. Additionally, essential oils used in massage and
aromatherapy can have curative effects on the total health and wellbeing
of our bodies.
Even though there may be some uncertainty regarding the healing effects
of botanical oils, we can be certain that these oils are much better for our
bodies than chemically based products. Using oil-based products may
prevent certain cancers and health conditions, so in a way, they can be part
of a preventative lifestyle.
For instance, traditional cleaning products contain harsh chemicals that
have been linked to various health conditions and especially dangerous for
those with allergies and asthma. Thymol is an essential oil that is contained
in all-natural cleaning products, and this ingredient is safe yet provides the
same disinfectant properties as harsher ingredients. What would you
choose for your own home?
The bottom line is this: while we have yet to uncover all there is to know
about essential oils, choosing products that are oil based rather than
chemically based are better for the environment, our health and our
wellbeing.
Essential Oils and Aromatherapy
Page 74
Learn Herbal
Aromatherapy deserves its own spotlight since essential oils are the core
of this alternative therapy. Aromatherapy uses volatile plant materials to
alter the person’s mind, mood and health. It’s true that there is limited
research that supports essential oils from a medical standpoint, but
research does show that these oils may have benefits in a therapeutic
setting.
For those that truly believe in the power of these oils, great things can
follow an aromatherapy session, especially when coupled with a massage.
People have stated that botanical oils reduce anxiety, enhance energy and
aid in short-term memory. Others have attested to essential oils’ ability to
help with skin conditions, hair loss prevention and relaxation.
To the many people who are comforted, relaxed and perhaps even
relieved of various symptoms, scientific research doesn’t matter at this
point. What matters is that something simple and natural can lead to
improved health and cognitive functioning.
Still, we must wonder what it is about essential oils that give them their
healing effects, even if these effects can’t be measured in scientific
analyses.
Why Essential Oils May Have Curative Effects
Page 75
Learn Herbal
When looking at the structure of botanical oils, we can understand how
these substances can aid in natural healing. First, the aromas that are
released from the oils go through the olfactory system and work on the
limbic system. The limbic system is responsible for controlling our
emotional responses; therefore, the soothing, calming scents produced by
the oils have the same effects on the brain.
When the brain is more relaxed, it means that we have a better state of
mind. Obviously, with more relaxation comes less stress, anxiety and
depression. We may approach an old problem in a new way, register pain
differently or develop an improved sleep pattern, all of which alleviate
depression and anxiety. Second, there may indeed be pharmacological
effects of essential oils, even though our understanding of the connection
between the body and aromatic oils has yet to be measured by
conventional science and medicine.
Buying Essential Oils
If you decide that botanical oils may help improve your health and
wellbeing, your next step will be purchasing the oils. Essential oils are sold
in small bottles that are 5ml, 10ml or 15ml in size. When purchasing an
essential oil, it should be used in the first few months since the solution
will start to oxidize is six months or so. When oxidization occurs, the oil
starts to lose its aroma and healing effects. There are some oils that
contradict this in fact, as botanical oils like patchouli and sandalwood
actually mature with age.
Page 76
Learn Herbal
It’s best that all oils are stored in amber or cobalt blue bottles, as these
dark bottles help filter out sunlight that can break down the structure of
the oil. Glass is always the best material for the bottle, but essential oils can
also be sold in aluminum-lined bottles. Plastic bottles are not ideal since
the oils will eat away at the plastic.
You may purchase essential oils in one kind or as a blend depending on
what you plan to use the oils for. Blends can be a good option since you save
yourself money from having to buy several separate oils. However, with oil
blends, you have no control over how much of which oils are placed into
the concoction.
The price of essential oils varies greatly because of the quality of the oil.
Factors that affect the quality of aromatic oils include the country of origin,
the climate and growing conditions, the quality standards of the distiller
and how much oil was produced. As with other products, it’s best to find a
brand that you like and trust for your essential oil purchases.
How to Use Essential Oils
Essential oils are used in a variety of ways, but not all can be used in the
same manner. For instance, oils are very popular in massage and
aromatherapy, but only some can be applied directly to the skin. Lavender
and tea tree oil are often safe to put directly on the skin while other oils
will need ā€˜carrier oils’ to dilute them. Reading labels is important in this
context, and it’s always best to try the oils on a small area on the skin to
ensure it doesn’t cause an allergic reaction.
Page 77
Learn Herbal
Another way that aromatic oils can be used is through inhalation. Done
carefully, the oils can provide therapeutic benefits as the oil molecules
enter the lungs and are absorbed into the bloodstream. There are also
certain oils that can be taken in a pill form, but this should only be done
under the supervision of a medical professional. These pills can be taken
orally or as a suppository, but like all medications, they do have side effects
and should never be taken without the consent of a doctor.
Essential oils are intriguing; they have been around for a very long time yet
we still know so little about them. When used appropriately, botanical oils
have natural effects on the body that can boost energy, reduce anxiety and
combat fatigue without having to put any additional chemicals into the
body.
How to Check For Quality Essential Oils
When you begin to use essential oils for therapeutic or aromatherapy
purposes, you’ll enjoy the endless natural benefits that can be brought to
your lifestyle. The trouble is that not all essential oils are the same, and if
you don’t do your homework and be a smart buyer, you may end up
purchasing oils that have very little potency to them. Since this industry is
not regulated by the FDA, it’s easy for suppliers to make claims about their
products that aren’t true. To protect your health and ensure that your
money is going in the right place, it pays to be a savvy shopper.
Page 78
Learn Herbal
Ask for a Recommendation
The best way to find a reputable supplier of essential oils is to ask for a
recommendation from a trusted friend, family member or coworker. You
may also ask your doctor for a suggestion. If someone offers you a name,
ask if they have used the products before. Sometimes, people see the
names of companies and use them as a suggestion, but that doesn’t mean
that they have tried the product firsthand. You may also ask for
suggestions on Facebook or Twitter; this opens you up to more responses
from those in your cyber world.
Do Your Own Research
Page 79
Learn Herbal
Let the recommendations you receive from others serve as a base of
where to start. It’s still important to do your own research. Read online
reviews or testimonials and assess the quality and professionalism of the
website. Is there contact information clearly posted on the site? Does the
supplier know the origin of the herbs? Do they share their storage
practices? Do they have inside knowledge on the industry that can help
you make the right selections?
While not a guarantee, most reputable vendors are honest and upfront
about their products and well-versed in the industry. They may have
sustainable growing practices, a strict grading system or be able to share
inside knowledge on how to distill and store essential oils. Don’t be afraid
to ask questions, too. If you get a good response from the company, you can
assume that they know their stuff.
Know the Storage Practices
There are many companies out there that are respectable and love what
they do, but that doesn’t mean they practice the best techniques. Essential
oils, like herbs, are very delicate. They need to be stored properly and
handled delicately in order to ensure their potency. Oils should be stored
in dark-colored vials so that light does not pass through. Light will destroy
the integrity of the product and cause it lose its aroma and potency.
Page 80
Learn Herbal
Some suppliers sell their oils in aluminum bottles, and this is acceptable as
long as the inside of the container is lined. Plastic is a definite no since the
oils can leech into the plastic material. Although having a rubber
eyedropper included with the bottle is convenient, it’s better to steer clear
of these vials. The eyedropper bulb can soak up some of the oil and cause it
to be contaminated. Finally, the essential oils should be kept in a dark
room with no direct sunlight and proper airflow.
It can be hard to buy essential oils from local vendors, especially if you
don’t live near a large city. If you have no choice but to buy online, seek out
vendors that test out their essential oils and are willing to supply samples.
Again,don’t be afraid to ask questions (even if you know the answer) to test
the supplier for their knowledge on essential oils. Reputable suppliers will
often have the Latin names of the herbs, the country of origin and the
extraction method.
Be Label Smart
A big issue to watch for is the purity of the essential oil. You may find a
great website with strong reviews and solid information, but that doesn’t
mean that what they’re selling is of the highest quality. The oil may be
acceptable quality,especially for those who are unfamiliar with the herb
world, but it may not be the quality you are looking for. For instance, for an
oil to be labeled an "essential oil," it only has to be 51 percent oil. Chances
are, you want 100 percent,right?
Page 81
Learn Herbal
Additionally, terms like ā€œfragrance oil,ā€ ā€œnature identical oilā€ and
ā€œperfume oilā€ should be avoided. These terms indicate that what you’re
about to buy is not a pure essential oil. Instead, it’s most likely a
combination of oils and other chemicals that are mixed together. Also,
terms like ā€œaromatherapy gradeā€ or ā€œtherapeutic gradeā€ are loosely used,
and since the FDA doesn’t regulate this market, there is no minimum
requirement to meet this ā€œgrade.ā€
Your best bet is to ask the vendor exactly what they mean by their grading
system. Some suppliers use therapeutic or aromatherapy grade while
others have chosen the more professional-sounding ā€œclinical grade.ā€
Remember, since there are no requirements, anything is up for grabs.
You need to be careful with organic and certified organic labels as well
since organic does not automatically mean quality. Some oils may have
organic ingredients but still be distilled under high pressure. Again, ask
questions, do your research and find out why the product you’re about to
buy is labeled as such.
Knowing all of this, many people assume that they will just stick to
products labeled ā€œpure essential oils.ā€ After all, what else could be in
there? But even this is an overused term that doesn’t guarantee anything.
Don’t get carried away and put automatic trust in the product just because
it says pure, natural, organic or the like. It could be old, the oils could have
been distilled from poor quality crops or the product may have been
mishandled. Again, look for 100 percent pure on the label as well as proper
storage techniques, such as the oils being sold in dark-colored vials that
are 4 ounces in size and do not contain eyedropper bulbs.
Page 82
Learn Herbal
You Pay for What You Get
A final point to consider is the price. We all have to watch our money, so
it’s not surprising that you’ll be apt to go after an economically priced
essential oil, especially if the label says good things like ā€œorganicā€ or
ā€œtherapeutic grade.ā€ Yet price is a big indicator in the quality of the
product. Reputable vendors spend a lot of time and money locating high-
quality oils, paying fees to test the oils and providing free or low-cost
samples upon request. They have to pay more for the product to begin with
because of the harvest and distillation techniques, and all of these costs
will be passed down to the consumer.
Also, be cautious about suppliers that charge the same amount of money
for all of their essential oils. Basic citrus oils are the least expensive, and
high-quality patchouli will cost more than eucalyptus. It’s also best to work
with companies that sell essential oils for aromatherapy and therapeutic
uses only. Vendors that work with the perfumery or food and beverage
industries often re-distill their products. Always ask about the distillation
methods that the company uses if you choose to buy from a vendor in this
industry.
There are many high-quality essential oils on the market that are pure and
will offer endless therapeutic benefits. If possible, get a solid
recommendation, but also be sure to do your own research to be a smart
buyer. It can be difficult to separate high-quality essential oils from poor-
quality ones, but the signs are usually right there in front of us.
Page 83
Learn Herbal
Just remember that in most cases, you get what you pay for. Opting for an
inexpensive oil probably means that it has poor distillation practices and is
combined with other oils or chemicals. A truly pure product will cost
more, but it will offer you the potency you’re looking for.
Amazing Herbs to Get Started With –
Tips on How to Grow Them, Their
Medicinal Properties, and Recipes You'll
Love
ALOE VERA
Native Americans called it the Wand of Heaven. Ancient Egyptians called
it the Plant of Immortality. Today, aloe vera (Aloe barbadensis) is probably
most recognized for its role in hair and skin care products. Fair enough,
but there really is so much more to this incredible plant.
Page 84
Learn Herbal
The healing and soothing properties of aloe vera have made it a popular
herbal and alternative medicine, as well as a highly sought ingredient in
the cosmetic and food industries. Aloe vera is thought to have come from
somewhere in northern Africa, but it is now cultivated all over the world
for its diverse uses. The aloe vera plant is a beautiful succulent with thick
leaves bordered by tiny white ā€œteethā€. Products made from aloe vera
include aloe vera gel (for eating and as a component of creams and
lotions), aloe vera juice, and aloe vera capsules.
Cultivation of Aloe Vera
The aloe vera plant is perfect for those without much gardening
experience. It can grow both indoors and outdoors, and it doesn’t require a
lot of TLC.
There are more than 500 known aloe species. The varieties that grow well
indoors include lace aloe (Aloe aristata), the common aloe (Aloe
barbadensis), and the partridge breast aloe (Aloe variegata).
Aloe vera thrives in full sun and warm temperatures. If you are keeping
them indoors, make sure you give them bright artificial light or place them
near a window. If you are keeping them outside, place them where they
can get sunlight all day long. However, if you live in the tropics, keep them
in pots so that you can control their exposure to sunlight. Although they
love the sun, too much can burn them.
Page 85
Learn Herbal
Aloe vera will grow best in dry, gritty, well-drained soil that has been
moderately fertilized. The plant can be a bit sensitive to over- and under-
watering. Because the aloe vera plant is 95% water, avoid watering during
the cold months. Always check the soil before watering. If it is completely
dry, then you can give it two cups of water. During the summer, you have to
soak the soil completely and let it dry before watering again.
While your plant grows, it develops ā€œpupsā€ or baby aloe plants on its sides.
Remove these ā€œpupsā€ and replant them in another pot.
Tips on Growing Aloe Vera
If you don’t have soil suited for the needs of the plant, you can
purchase a packaged cacti and succulent soil mix.
If you wish to fertilize, use the bloom type (10-40-10) and do so only
during spring.
If the leaves of your aloe vera plant aren’t growing upwards (as they
should), it isn’t getting enough light.
If the leaves are turning brown, the plant is getting too much light.
If the leaves aren’t fleshy and plump, the plant isn’t getting enough
water.
Medicinal Uses of Aloe Vera
The aloe vera plant offers a wide variety of medicinal and cosmetic uses.
For thousands of years, we have been using aloe vera for a plethora of
therapeutic uses, from soothing sunburn to improving cardiovascular
health. Even Cleopatra knew about the miraculous benefits of the plant!
Legend has it that applying aloe vera gel was part of her daily beauty
regimen, and that it was the reason for her youthful appearance. Below are
just some of the many uses of aloe vera.
Page 86
Learn Herbal
Use aloe leaves as an impromptu moisturizing body
scrub. Just cut off a leaf from the plant, slice it lengthwise, and scrub your
body with the inner sides. You can also scoop the gel out with a spoon and
use it as a liquid soap or body wash, or use it as a shampoo. Aloe vera helps
hasten hair growth and reduce dandruff. Use it as a leave-on conditioner
for smoother, more manageable hair.
Great shower buddy -
Aloe vera is your skin’s best friend. Use it to
treat sunburn, psoriasis, eczema, rashes, itching, insect bites, blisters,
acne, skin irritations, allergic skin reactions, and burns. Use it as an all-
natural moisturizer for dry skin. Use it the way Cleopatra did and get rid of
wrinkles and blemishes. Use it to exfoliate, reduce the appearance of scars,
and brighten your complexion.
A quick fix for skin issues -
Use inhalation therapy to relieve the symptoms of
asthma. Boil some aloe vera leaves in a pot of water and breathe in the
vapors. The anti-inflammatory properties of the plant will help you breathe
easier.
Relief from asthma -
Aloe vera juice has a laxative effect.
It is also an adaptogen, which means that it is effective in relieving diarrhea
and constipation. Aloe vera also aids in improving digestion, and in treating
acid reflux and irritable bowel syndrome.
Loose Bowel Movement? No problem -
Page 87
Learn Herbal
Aloe vera helps lower cholesterol, prevents the
development of kidney stones, enhances the body’s cardiovascular
performance, cures candida infections, treats Crohn’s disease and ulcers,
and provides glyconutrients,vitamins A, C and E, and minerals like
magnesium and calcium. It helps stop the growth of tumors, detoxifies and
alkalizes the body, and boosts the immune system.
And many more -
DIY Homemade Aloe Vera Solutions
It is said that Alexander the Great seized Socotra in the Indian Ocean
explicitly for the aloe vera which grew plentiful on the island. He wanted
the plants for his many injured men. Such was the value of aloe vera as a
medicinal plant that a war was waged for it. Today, you don’t have to go far
or risk your neck to reap the benefits of aloe vera. These three simple
products can be made right in the comforts of your own home.
Aloe Vera Gel
The clear, colorless secretion that pours out of the aloe vera leaf when it is
cut is a highly valued ingredient in many industries. It is used in the
production of lotion, facial tissues, moisturizer, yogurt, desserts, soaps,
shampoos, and countless other products. Aloe vera gel contains 200
different phytonutrients, 20 minerals, 18 amino acids, and 12 vitamins.
What you will need:
Page 88
Learn Herbal
Aloe vera leaves
Grapefruit seed extract, coconut oil, vitamin E oil or any essential oil
A blender, hand mixer, or mortar and pestle
A strainer
A glass jar
A knife
Instructions for Making Your Aloe Vera Gel:
1. Pick some leaves from your aloe vera plant. Choose those that are in
the middle and closer to the ground. Once cut, hold the leaves
upright for 15 minutes until the dark resin flows out. This might cause
irritation, so make sure that all of the dark stuff comes out. Don’t skip
this step.
2. Wash the leaves thoroughly with clean water.
3. Cut the large leaves into smaller pieces to make it easier to peel off
the skin. Once the leaves are peeled, you should be left with the gel.
4. Blend the aloe with a few drops of any of the following: grapefruit
seed extract, coconut oil, vitamin E oil, or any other essential oil. You
can also use a hand mixer or a mortar and pestle for this.
5. After blending, use a strainer or a sieve and strain the mixture into a
glass jar. This will help separate the small fibers from your aloe gel.
Cover the jar. Keep it in the fridge to extend the shelf life.
Aloe Vera Shampoo
Page 89
Learn Herbal
Take a walk down the personal care aisle in your local supermarket and
you’ll find aloe vera listed as an ingredient in many of the soaps and
shampoos. Aloe vera is indeed moisturizing, revitalizing, soothing,
brightening, enhancing, and clarifying. But to get the maximum
beautifying effect from aloe vera, use aloe gel straight from the plant. This
way, you can be assured that the aloe you’re using is pure and that there
are no harmful chemicals in your shampoo/soap.
What you will need:
1/4 cup of homemade aloe gel
2 tablespoons of honey
2 tablespoons of apple cider vinegar
A blender
Essential oils (optional)
Instructions for Making Your Aloe Vera Shampoo:
1. Make your own aloe vera gel with the recipe above.
2. Combine ¼ cup of your homemade aloe gel with 2 tablespoons of
honey and 2 tablespoons of apple cider vinegar. Puree the mixture in a
blender. If you don’t have a blender, you can mix the ingredients with
a hand mixer or with a spoon and a little effort.
The resulting mixture will have a not-so-pleasant smell. You can use it on
your hair as is and just rinse immediately or you can add a few drops of
aromatic essential oils to it to make it smell better.
Page 90
Learn Herbal
Make just the amount of natural aloe shampoo that you will need every
day. Honey tends to spoil when mixed with other ingredients, so it is best to
make the shampoo right before your bath.
Aloe Vera Face Pack
All-natural face packs can be used to reduce the appearance of
pigmentation and blemishes, remove a tan, get glowing skin, and get rid of
pimples. This aloe vera face pack can do all of the above.
What you will need:
Aloe vera
Ground turmeric
A teaspoon of honey
A teaspoon of milk
Rose water
A small bowl
A blender
Instructions for Making and Using Your Aloe Vera Face Pack:
1. In a small bowl, combine a pinch of ground turmeric, a teaspoon of
milk, a teaspoon of honey, and a couple of drops of rose water. Mix
everything with a spoon until a paste is formed.
2. Add aloe vera gel into the paste and mix well. You can use a blender
to get a smoother paste.
3. Pour the face pack into a glass container.
4. To use, just dab some of the aloe vera face pack onto your face and
spread evenly. Let it sit for 20 minutes and then wash it off with warm
water.
Page 91
Learn Herbal
Keep a pot or two of aloe vera on your kitchen windowsill so you can break
off a leaf any time you need one. Use it to moisturize your hands after
washing and as first aid for burns and cuts. Keep it in the bathroom and
other parts of the house as well. This useful little succulent is not just
edible and medicinal; it is an attractive house plant too.
BURDOCK
Burdock, or the genus Arctium, is a biennial plant once popular in Europe
as an ingredient in making beer before hops stole the show. Today,
burdock continues to thrive as part of the Japanese pilaf and other dishes,
and the herb remains a popular ingredient in Asian cuisine. A native of
Europe and Northern Asia, burdock has also found its purpose as a soft
drink ingredient in the United Kingdom.
Even if you think you are not familiar with the plant, chances are that
you’ve encountered them before. Or, you may have seen the burrs of the
burdock. Remember those tiny balls that cling to your pants after a walk
out in the tall grass? Those are burrs, and they were the inspiration for
Velcro.
Cultivation of Burdock
Burdock is a fairly easy plant to grow. Here’s how:
Page 92
Learn Herbal
1. Burdock is grown from seeds. Prepare some for propagation by
soaking them in water overnight. This will enhance their germination
rate.
2. Find an area large enough to grow burdock which can reach up to 6
feet in height and 3 feet in width. It is also better if the spot receives
full sun, though burdock can grow in partial shade as well.
3. Burdock prefers rich and well-draining soil. If the soil doesn’t seem
rich enough, you can add some compost. You can also till the soil and
get rid of stones and rocks that may hinder the growth of the roots.
Since the plant may grow very high, tilling the soil up to two feet will
help the roots grow longer and help stabilize the plant.
4. Plant the seeds ¼ of an inch deep and at intervals of up to 3 inches.
Each row of seeds should be separated by at least a foot. Cover them
with seed starting soil up to ¾ inch thick.
5. Though burdock can grow on its own, you can help them out by giving
them water regularly.
6. In one or two weeks, you will notice some seedlings. Make sure you
weed frequently but carefully to prevent accidentally pulling them
out. You also need to thin them out so that there is around 3 to 4
inches of space between the plants. Remove the ones with weak root
systems.
7. As the plant grows, remove the young shoots that develop by simply
pulling them out. These can already be eaten, though harvesting is
typically done at 10 weeks. You also need to prune the young leaves
with clippers and prevent the flowers from setting seed by removing
them.
Tips on Growing Burdock
Page 93
Learn Herbal
You can use high-nitrogen fertilizer to promote the plant’s growth.
Burdock roots normally grow up to 4 feet long, but there are some
varieties that grow up to 9 feet.
Wear a mask or any type of covering for your face to avoid inhaling
the seeds’ microscopic hairs, which can trigger allergic reactions.
Burdock is a biennial plant, so you can only enjoy its benefits for a
couple of years. Roots are harvested during the first year while the
seeds are gathered on the second year.
Medicinal Uses of Burdock
Burdock has been used throughout history as an herbal medicine to treat
many ailments. It is popular among herbalists as a natural blood cleaner,
diaphoretic, and diuretic.
Burdock is a good source of
inulin, which stimulates the appetite and the action of the stomach. It also
helps the digestive system and treats stomach and digestive problems.
Burdock also aids in cleansing the liver.
Works wonder for digestion and elimination -
Burdock is one of the best-known blood-purifying
herbs, and has been used for thousands of years to flush waste and toxins
out of the bloodstream.
Purifies the blood -
Through its blood-cleansing ability,
burdock also effectively flushes out the toxins that cause skin diseases like
acne, psoriasis, and eczema.
Say goodbye to skin problems -
Page 94
Learn Herbal
Scientific studies have shown that burdock, as main
ingredient of some herbal formulas, can help stop the growth of tumors.
Aside from stopping the development and shrinking the size of cancer
growths, these herbal formulas also help relieve pain and enhance the
body’s immunity which cancer patients badly need.
Fights cancer -
DIY Homemade Burdock Solutions
To experience burdock’s curative and beneficial effects, you can purchase
it in powder, decoction, tincture, pill, and extract form. Or you can try
making any of these burdock products right from home.
Burdock Leave-on Conditioner
Burdock has medicinal qualities that are perfect for hair care. It helps
strengthen the hair shaft and keeps hair strands moisturized. Burdock has
also been found effective against hair loss. It contains mucilage, a
gelatinous substance that has polysaccharides and protein, which accounts
for its ability to strengthen and condition hair and prevent hair tangles.
Mucilage also has other medicinal benefits for the body including
lowering cholesterol, preventing constipation, and inhibiting pathogenic
bacteria from causing intestinal decomposition.
What you will need:
Page 95
Learn Herbal
20 dried hibiscus flowers
3 tablespoons of dried burdock root
3 tablespoons of dried marshmallow root
Water
A pot
Plastic wrap
A strainer
A squeeze bottle
A funnel
Instructions for making burdock leave-on conditioner:
1. Pour some water in a pot and place it over medium heat.
2. When the water starts to simmer or is on low boil, lower the heat and
then add the dried hibiscus flowers. Let the flowers simmer for about
5 minutes. Avoid letting the water boil.
3. Remove the pot from the heat and pick out the flowers.
4. Add the dried marshmallow root followed by the dried burdock root.
Stir.
5. With a plastic wrap, cover the pot and allow the herbs to infuse. Let it
stand for about 15 minutes.
6. Use a strainer to separate the liquid from the remains of the burdock
and marshmallow roots. Pour it directly into a plastic squeeze bottle
or use a funnel if available.
You can use your natural burdock conditioner after shampooing. Just
squeeze some into your hand and massage onto your hair. Use a comb to
spread the conditioner. Leave it on and let your hair dry naturally.
Burdock Root Oil
Page 96
Learn Herbal
Having some homemade burdock root oil at hand is good for your health.
Some have attested to the effectiveness of this root oil against skin
conditions like acne. Others use it on their hair to treat itchy scalp. Some
people add their burdock root oil into things such as face packs, shampoos,
and conditioners. Others prefer to dab the oil directly on areas that need it.
If you want some burdock root oil at your disposal, below is a simple guide
on how to make some.
What you will need:
1 to 2 stalks of burdock root
Extra virgin olive oil or any other vegetable oil
A knife
A mortar and pestle
A vacuum-sealed glass jar
Instruction for making your burdock root oil:
Page 97
Learn Herbal
1. Wash the roots in hot water.
2. You can either peel and slice them into small pieces with a knife or
pound the cut pieces with a mortar and pestle until the flesh comes
out.
3. If you smash the roots with the mortar and pestle, give it a day to dry
out. Drying the roots allows the nutrients to stay within the root. After
drying, place the root pieces in a clean glass jar.
4. Fill the glass jar with extra virgin olive oil and then seal tightly.
5. Set the glass jar aside, preferably in a dark room, for 4 to 6 weeks.
This will allow the root to infuse. Check it at least once a week to see if
there are little bubbles present. These signify gas buildup. Just open
the lid to let the gas out before resealing tightly.
Burdock Root Tea
In Japan and in other Asian countries, burdock is not only a key ingredient
in dishes but also a popular tea. Burdock tea may be a bit strong in taste and
aroma as compared to other more common herbal teas.
What you will need:
Fresh burdock root or 1 tablespoon dried burdock root
3 cups of water
A knife
A stainless steel pot with a lid
Instructions for making burdock root tea:
Page 98
Learn Herbal
1. Chop the root and place about 2 tablespoons of it in a stainless steel
pot.
2. Fill the pot with 3 cups of water and then bring to a boil.
3. Lower the heat and let it simmer for about 30 minutes.
4. Remove the pot from the heat and let it steep for 20 more minutes.
An alternative way of preparing your burdock root tea is by using a peeler
to slice off pieces of the root instead of chopping them with a knife.
Also, you can dry them under the sun for up to 6 hours. You’ll need to turn
the pieces over every now and then while drying them. For a different
flavor, you can roast the dried burdock slices in a frying pan without any
oil.
Wait until they become golden brown, which may take around 10 minutes.
The next step is to let them cool before storing the dried and roasted
burdock root in an airtight glass jar. Burdock tea is made by steeping an
ample amount of the stored root pieces in hot water. You can also boil the
burdock roots along with the water.
CALENDULA
Pot marigold, goldbloom, mary bud, Calendula officinalis… these are just
a few of the many names that calendula goes by. Whatever you call it,
calendula is one of the most popular and most versatile plants there is.
Calendula is not only a great-looking plant for your garden, it also has its
uses in the kitchen and in medicine, and is even an important part of some
rituals and traditional ceremonies.
Page 99
Learn Herbal
Cultivation of Calendula
Thanks to its bright yellow flowers, the calendula has been the star of
many a garden. But the benefits of calendula don’t end with its ability to
beautify a place. The plant is also useful in the field of medicine and in
cooking. To enjoy all its many uses right from home, here’s how you can
grow them:
Page 100
Learn Herbal
1. Look for an area in your backyard that receives full sun. Calendula
loves sunlight.
2. As long as the soil is rich enough to grow other plants, then you can
grow your calendula there as well.
3. Calendula is grown from seeds. Till the soil a little and then plant the
seeds about half an inch deep and at least four inches from each other.
Cover them with garden soil about a fourth of an inch thick. Plant
calendula during the spring.
4. Right after planting the seeds, give them just enough water to moisten
the soil. Water the soil regularly for two weeks or until the seeds start
to germinate. Don’t let the bed soak. Just give them enough to stay
moist.
5. Thin the plants when the seedlings reach around 3 inches. You need
them to be at least 8 inches apart.
6. You may opt not to use chemical fertilizer and go the natural route.
Add a thin layer of compost during midsummer. This will give the
plants enough nutrients until they reach full bloom.
Some blossoms will inevitably fade. You may remove them to encourage
the plant to produce more blossoms and retain its beauty.
Tips on Growing Calendula
Calendula attracts pests like aphids and is prone to mildew. Use
natural pesticides to get rid of them.
You can enjoy your calendula for years as they can reseed on their
own.
Medicinal Uses of Calendula
Page 101
Learn Herbal
Calendula has antiviral, anti-inflammatory, anti-spasmodic, and anti-
genotoxic properties. It can be used as a tincture, infusion, oil, salve, tea,
and in various other forms.
Calendula contains powerful antioxidants in its petals.
These antioxidants help heal wounds and treat burns on your skin.
Heal your wounds -
Most diaper creams use calendula as
one of its main ingredients. The herb is also used in making lotions and
creams for treating minor skin conditions.
Keep you and your baby rash-free -
Dab calendula tincture or calendula suspension on
acne. It will dry up pimples, control bleeding, reduce swelling and
redness, and heal damaged skin.
Get pimple-free skin -
An impressive amount of flavonoids is
found in calendula, making it a good weapon against free radicals that
damage the cells and sometimes lead to serious diseases.
Protect yourself from free radicals -
Aside from protecting the cells from free
radicals, calendula also helps enhance protein and collagen metabolism,
which is important in cell re-growth or the production of new cells.
Great for cell re-growth -
Calendula is the only thing in this world that
contains calendic acid. It is an omega-6 fatty acid that works as an
antiseptic, though there is a possibility that it can also help treat cancer,
specifically colon cancer.
Contains calendic acid -
Page 102
Learn Herbal
Calendula can be used in treating insect bites, bee
stings, athlete’s foot, swelling, sore eyes, fever, stomach ache, small pox,
measles, gum disease, and indigestion.
Lots of other uses -
DIY Homemade Calendula Solutions
Calendula Tea
Drink calendula tea to cure an upset stomach, reduce skin inflammations,
and combat infections. It is a great post-meal drink that helps with
indigestion and, when taken regularly, helps cleanse the body and
improve overall health.
What you will need:
2 teaspoons of calendula petals
A cup of water
A pot
A strainer
A cup
Lemon (optional)
Honey (optional)
Instructions for making your calendula tea:
1. Put the calendula petals in a pot.
2. Pour boiling water over the petals.
3. Let the tea steep for about 15 minutes.
4. Strain the tea into cups.
5. Add honey and lemon to your liking.
Calendula Salve
Page 103
Learn Herbal
A salve is a must-have in any home. It is an ointment that can treat various
minor medical conditions including bites, stings, cuts, scratches, burns,
rashes, and swelling. Some salves can also be used to treat boils, sebaceous
cysts, hemorrhoids,and stretch marks. A salve with calendula as its main
ingredient is effective in treating these conditions, along with muscle pain,
menstrual and stomach cramps, eczema, topical thrush, warts, athlete’s
foot, sunburn, and many other ailments.
Making your own natural salve provides you with all the benefits of the
plant but without the worry of chemical substances like petroleum
products that most over-the-counter ointments contain. Also, your DIY
calendula salve will help you save money. To make your salve even more
potent, you can add other herbs.
What you will need:
2 cups of calendula petals
1 to 2 cups of olive oil or hemp oil
½ cup of beeswax
5 to 10 drops of lavender essential oil
5 drops of tea tree oil
A stainless steel pot
A strainer/cheesecloth/tea filter
Jars with covers
Instructions for making your calendula salve:
Page 104
Learn Herbal
1. Make calendula-infused oil by filling a pot with your olive oil or hemp
oil and calendula petals.
2. Place the pot over low heat. Stir occasionally, making sure the oil
doesn’t get too hot. One way to determine the temperature is to look
for tiny bubbles. If you reach this stage, maintain it for two hours.
Anything hotter than that is bad for your infusion.
3. When your calendula oil is at the tail end of its infusion, you can
begin melting your beeswax. Just place it over low heat, preferably
from a double boiler. You also need to control its temperature. Your
calendula oil and melted beeswax should be of the same temperature
when you mix them later.
4. Separate the petals from the oil infusion using a strainer. Get as much
of the oil as you can.
5. While the beeswax is still in the double boiler, pour the calendula oil
slowly into it. Slowly stir them together.
6. Add 5 to 10 drops of your lavender essential oil and stir to combine.
7. Add 5 drops of tea tree oil and stir.
8. While still warm, pour your end-product into your jars or containers
and let them sit. Once they cool down and solidify, you can put the jar
lids on. Keep them in a cool place.
Calendula Soap
Making soap using calendula is another way of benefiting from the plant.
By making your own soap, you enjoy an all-natural and skin-sensitive soap
that anyone in your family, even your baby, can use.
What you will need:
Page 105
Learn Herbal
4 ounces of calendula-infused oil
24 ounces of olive oil
12 ounces of lye
24 ounces of coconut oil
38 ounces of vegetable shortening
32 ounces of distilled water
Dried botanical herbs (optional)
A plastic container with cover for molding
A stainless steel pot
A thermometer
Wooden spoons
Glass containers
Rubber gloves
Eye protection
Instructions for making your calendula soap:
Page 106
Learn Herbal
1. Start by making your calendula oil. Gather some petals and add them
to a pot with olive oil. Place them over low heat and stir occasionally.
After 2 hours, strain the petals and pour the infusion in a jar.
2. Use some of your vegetable shortening to grease your soap mold. Put
some on the sides and bottom. Set the mold aside.
3. Use a wooden spoon to dissolve the lye with cold water in a glass
container. Set aside.
4. Melt the rest of your vegetable shortening and coconut oil in a pot.
Place over low heat and stir continuously with a different wooden
spoon.
5. After the shortening and coconut oil have melted, remove the pot
from the heat and add the olive oil.
6. You should now have two mixtures. Continue stirring both mixtures
with their respective wooden spoons. Check the temperatures. They
should be somewhere between 95° and 98°F. If they are too hot, you
can place the container in a cold bath. You can also use a hot bath if
they aren’t warm enough.
7. Once you achieve the desired warmth, pour the lye mixture into the
oil mixture in a gradual steady stream. Stir continuously as you pour.
8. The mixture should become creamy and thick after 10 minutes of
continuous stirring. Once it has reached this consistency, you can add
all your dried herbs. Scoop around 2 cups of your soap mixture and
pour it into another container and then add your herbs and other
ingredients. Stir them in quickly. Pour this new mixture back into
your soap mixture and stir once more.
9. It’s time to make your bar of soap. Pour the mixture into your mold,
cover it and place in a warm area with blankets over it. Leave it for 18
hours.
Page 107
Learn Herbal
10. The soap mixture should now have solidified. Remove the lid and let
it sit for at least 8 more hours. Take the soap out and slice into smaller
pieces.
11. Calendula is a gardener’s favorite, not only because it produces such
lovely, vibrant, mood-boosting blooms, but because it is such an
effective natural remedy for many ailments.
Plant some calendula and perk up your garden and your health!
CHAMOMILE
The word chamomile is derived from the Greek ā€œchamaimelonā€, meaning
ā€œearth appleā€, and is the name used to refer to a number of herbs from the
Asteraceae family. The chamomile plant is a delicate-looking shrub with a
sweet scent and flowers similar to daisies. It is popular worldwide as an
herbal tea, sleep aid, and aromatherapy oil.
Cultivation of Chamomile
Page 108
Learn Herbal
The two most commonly used chamomile species are the German
chamomile (Matricaria recutita) and the Roman chamomile
(Chamaemelum nobile). The German chamomile grows up to 3 feet while
the Roman chamomile only grows about a foot and is best for ground
cover. The former is an annual plant while the latter is a perennial. Choose
which chamomile species will suit your needs and cultivate them from
seeds.
Here’s how:
1. Prepare the soil for planting. Chamomile needs sandy, slightly acidic
soil that drains well but also retains moisture. Add a moderate
amount of compost or fertilizer.
2. Scatter the seeds onto moistened soil. Do not cover them. You can do
this outdoors in the ground or indoors in a pot or tray.
3. Let the seeds germinate for a couple of weeks.
4. Once seedlings have grown, thin the plants to 18 inches (for
ornamental purposes) or to 6 inches (for ground cover).
5. Though chamomile plants are resistant to drought, watering them
regularly will keep their stems sturdy and upright.
6. Add fertilizer or rotted compost regularly for optimum growth.
7. Harvest the chamomile once the flowers have opened fully. Use them
fresh or dry them for future use.
Tips on Growing Chamomile
Page 109
Learn Herbal
Because you will be leaving the seeds exposed as they germinate,
start planting after the last frost.
Chamomile needs full sun to thrive. However, if you live in an area
with extremely hot temperatures, place the plants where they can get
some shade in the afternoon.
Chamomile plants naturally repel insects, but are vulnerable to
aphids and thrips. If you plan on using your chamomile for culinary or
medicinal purposes, use an organic treatment to get rid of pests.
Remove dead flowers regularly to keep new ones growing.
Medicinal Uses of Chamomile
Chamomile is one of those herbs that old country folk are always talking
about, and if you have a grandparent with an herbal garden, then you’ve
probably come across the plant. This wonderful herb has been used for
thousands of years as an herbal remedy for a wide range of ailments; even
the ancient Egyptians revered chamomile and dedicated it to their gods.
The entire plant is of value, but the medicinal quality is centered in the
blossoms. The disk and the florets that make up the blossoms are used to
make tonics, infusions, oils, extracts, teas, compresses, and decoctions for
various medicinal purposes. These are just some of the curative effects and
health benefits of this wonderful plant:
Grind some dried chamomile, mix it with a bit of
water to form a paste, and apply it to the aching tooth for instant relief!
Relieves tooth pain -
Page 110
Learn Herbal
Chamomile is exceptionally effective in treating
indigestion, heartburn, flatulence, loss of appetite, and related ailments.
Chamomile infusion taken an hour before meals helps relieve most of
these problems.
Settles an upset stomach -
Chamomile extract and chamomile pills made from
chamomile blossoms have long been used to treat summer diarrhea in
children. The plant has anti-spasmodic, antibacterial, and antiviral
qualities.
Stops diarrhea -
Chamomile is probably best known as a calming agent.
Taken as a tea before bedtime, chamomile helps soothe stressed minds
and bodies and aids in sleep. It is also used to fight bouts of anxiety and
panic attacks.
It’s a sedative -
Chamomile is an antibiotic, an antiseptic, a bactericide, and a
disinfectant. Chamomile essential oil has been found effective against the
herpes simplex virus type 2 and chamomile compresses have been proven
just as effective as 1% hydrocortisone ointment in treating skin lesions.
Kills germs -
DIY Homemade Chamomile Solutions
Chamomile steeped in hot water makes a soothing tea and a great tonic for
cosmetic uses. It reduces skin inflammation, fights breakouts, and is an
effective hair lightener. Chamomile is, in fact, one of the most commonly-
used herbal supplements in the production of commercial soaps,
shampoos, and conditioners.
Make your own chamomile products at home with these recipes:
Chamomile Tea
Page 111
Learn Herbal
Chamomile tea is famous for its ability to calm nerves, banish stomach
pains, and aid in sleep. Do you remember how Mrs. Rabbit sent Peter off to
bed with a dose of chamomile tea after his run-in with Mr. McGregor? It
was just what he needed after a particularly harrowing ordeal.
This comforting drink has a sedative effect when served hot and a
refreshing effect when served cold. Combine it with other herbal teas and
flowers for a unique tea blend or add it to a fruity summer punch.
Chamomile tea is best made with flowers straight from the garden. This
way, you’ll be certain that the flowers you’re putting in your cup don’t have
traces of insecticide and other harmful chemicals.
What you will need:
Freshly-picked OR dried chamomile blossoms (2-3 teaspoons to a cup
of water)
Water
Tea pot
Tea ball or strainer
Honey, stevia, or any other sweetener (optional)
Lemon (optional)
Instructions for making your chamomile tea:
Page 112
Learn Herbal
1. Put the chamomile flowers into a pot.
2. Boil the water and pour it in with the chamomile.
3. Let the tea infuse for 3 minutes.
4. Pour the tea through a strainer into cups. Alternatively, place the
chamomile blossoms in a tea ball and submerge the ball into hot
water.
5. Add honey and/or lemon to your liking.
The safety of consuming herbal teas during pregnancy is still a hot topic of
debate. According to some, chamomile tea in excessive amounts can act as
an abortion drug. If you are pregnant or suspect that you are pregnant, play
it safe and don’t drink chamomile tea. Because chamomile is a relative of
the ragweed, those who are allergic to ragweed should also refrain from
drinking chamomile tea.
Chamomile Lightening Hair Rinse
Attention, blondes! If your hair has gone dull because of winter or if you
simply want to lighten and brighten your locks, try this all-natural and oh-
so-easy-to-make hair lightening treatment. It works almost the same way
as lemon juice, but it smells better and leaves your hair softer and thicker
too! This natural chamomile hair rinse works better than commercial
chamomile hair lighteners, and are safer and cheaper. Why pay for it at the
drugstore when you can make some at home?
What you will need:
Page 113
Learn Herbal
A tablespoon or two of freshly-picked or dried chamomile blossoms
A cup of water
A few drops of lavender oil
Pot
Strainer
Cup or bowl
Instructions for making and using your chamomile lightening hair rinse:
1. Bring the water to a boil in a pot.
2. Add the chamomile blossoms to the water.
3. Lower the heat to a simmer.
4. Let the infusion simmer for at least 15 minutes.
5. Turn off the heat and let the infusion cool down.
6. Strain it into a cup or bowl.
7. Add a few drops of lavender oil.
8. Mix well.
9. To use your chamomile lightening hair rinse, shampoo and condition
your hair as you usually do.
10. Rinse with warm water and squeeze off excess water.
11. Stand over the tub or sink and pour the chamomile rinse all over your
hair, making sure that every strand is coated.
12. Repeat the process until you’ve used up all the hair rinse.
13. Wrap your saturated hair with a towel for 10 minutes.
14. Let your hair dry naturally. If possible, allow it to dry in the sun to
really make your highlights bright and golden.
If you don’t have fresh or dried chamomile blooms, you can use 3 to 4
organic chamomile tea bags to make this hair rinse.
Page 114
Learn Herbal
Chamomile Shampoo
You can also get the lightening effect of chamomile from chamomile
shampoo. Make your own chamomile shampoo and use it to make your
highlights stand out, your scalp healthier, and your hair smell terrific. This
chamomile shampoo recipe is a great way to use old chamomile blossoms
from last season. Use a bar of pure soap for the soap flakes and get glycerin
from the pharmacy. Keep the shampoo in your fridge to make it last longer.
Take out just the amount you need every time you shower.
What you will need:
½ cup of dried chamomile blossoms
2 ½ cups of soap flakes
2 ½ cups of boiling water
2 tablespoons of glycerin
Sieve or strainer
Heat-proof bowls
A wooden spoon
A clean glass jar with a lid
Whisk
Instructions for making your chamomile shampoo:
Page 115
Learn Herbal
1. Put the dried chamomile blossoms in one of the heat-proof bowls or
in a pot.
2. Add the boiling water to the chamomile.
3. Let the tea infuse for 15 minutes.
4. Strain it into the other heat-proof bowl.
5. Clean and dry the first bowl.
6. Put the soap flakes in the first bowl. To make soap flakes, get a bar of
all-natural soap and shred it with a grater or a knife.
7. Add the chamomile infusion to the soap flakes.
8. Let the hot infusion melt the soap. This will take about 5 minutes.
9. Use a whisk to beat in the glycerin until fully incorporated.
10. When the shampoo is cool enough, pour it into a glass jar.
11. Keep the shampoo in a cool place, away from direct sunlight.
Because it has so many uses and is so simple to prepare, chamomile is a
wonderful herb to have at hand. Include it in your herb or flower garden
and let the fragrant beauty work its spell on your yard and on your health.
CHICKWEED
Page 116
Learn Herbal
Chickweed, as its name implies, is a favorite of the poultry species.
Chickens love eating the plant, particularly its seeds. But chickweed isn’t
just for chickens; the plant also has culinary uses and is a valued herbal
medicine. It is actually quite a shame that most people only know it as a
weed and an invasive plant.
Chickweed has a distinct fresh taste that goes well with soups and green
salads. It is chockfull of nutrients and, as an herbal medicine, chickweed is
known to help prevent and treat a number of ailments.
Cultivation of Chickweed
Page 117
Learn Herbal
If you want to grow your own chickweed to enjoy at home, there are two
ways to do so. One is to find a chickweed plant and transplant it to your
own garden or in a pot. Two, grow them from seeds. Here’s how:
1. Chickweed can grow even if it’s completely under shade, so you can
choose practically any spot in your backyard. Prepare the soil by
tilling and adding some compost.
2. If you wish to control the growth of your plant, you have to surround
your cultivated soil with uncultivated land. Since chickweed only
likes cultivated soil, it will not spread any farther than the boundary
you create.
3. Use a garden hoe to make furrows. Water the furrows, but don’t soak
them.
4. After the water has drained, plant 3 chickweed seeds for every inch,
and then cover with topsoil.
5. You can expect the seeds to sprout in a week. When the seedlings
reach 2 to 4 inches, you can start thinning them so that there will be 4
to 6 inches of space between the chickweed plants.
Tips on Growing Chickweed
It is best to start growing chickweed during early spring when the
ground has thawed.
Chickweed thrives on its own. You can leave it undisturbed right after
planting the seeds until thinning is needed.
Medicinal Uses of Chickweed
Though some people, mostly farmers and gardeners, would rather get rid
of this plant, it actually deserves a place in the kitchen and in the medicine
cabinet. These are just some of its medicinal uses:
Page 118
Learn Herbal
Chickweed, in tea form, is a diuretic and an appetite
suppressant. It allows the body to flush out contaminants through
urination, which helps lessen water retention and bloating. And because it
suppresses the appetite, it helps you avoid food binges and helps keep your
waistline in check.
It’s a weight-loss tool -
Because of chickweed’s anti-inflammatory property, body
pains caused by arthritis, menstruation, rheumatism and other culprits are
lessened. Chickweed tea may be applied directly on affected areas to help
reduce swelling and pain.
Bye-bye, pain -
- Our forefathers knew about the
beneficial effects of chickweed and used it to flush out toxins from the
kidney and the liver.
Cleanses the kidney and the liver
Having problem with digestion and
constipation? Can’t stand stomach pains any longer? Drink some
chickweed tea for instant relief.
Improves digestive functions -
- Chickweed is one of the most
nutritious plants known to man and it is quite ironic that man considers it a
pest. Some of the nutrients and other beneficial substances that chickweed
contains are calcium, magnesium, potassium, zinc, selenium, vitamin C,
ascorbic acid, beta-carotene, riboflavin, niacin, rutin, carboxylic acids,
coumarins and hydroxycoumarins, genistein, gamma-linolenic-acid,
hentriacontanol, oleic-acid, triterpenoids, thiamin, saponin glycosides, and
flavonoids.
A hodgepodge of vitamins and minerals
DIY Homemade Chickweed Solutions
Page 119
Learn Herbal
There are more ways of enjoying chickweed other than adding them to
your salad and other dishes. Here are some you can do at home:
Chickweed Tea
Drinking herbal teas is one of the most beneficial and healthy practices
one can do. Chickweed tea, for one, is rich in essential nutrients that the
body needs to function better. In fact, aside from eating chickweed as is,
making a tea infusion out of it is the next best way to benefit from its
nutrients. Having at least one cup a day helps your body cope with
numerous medical issues ranging from simple upset stomachs to minor
skin conditions and even to weight loss, as mentioned earlier. If you are the
tea-drinking type, plant some chickweed and start making chickweed tea.
What you will need:
2 to 3 tablespoons of dried or finely chopped fresh chickweed
A cup of cold water
A small pot or teapot
A knife
A chopping board
A strainer or cheesecloth
Instructions for making your chickweed tea:
Page 120
Learn Herbal
1. If you have fresh chickweed, wash the leaves thoroughly with clean
water before drying them. Once dry, chop the chickweed leaves finely
on a clean chopping board. Put the chopped chickweed leaves into
your teacup and set aside.
2. Boil the cold water in a teapot or a small pot.
3. Pour the boiling water into the cup containing the chopped
chickweed. If you are using dried chickweed, pour the boiling water
into the cup first before adding the dried herb.
4. Wait for 15 to 20 minutes while the chickweed is steeping. Strain
afterwards. You can use a piece of cheesecloth with a sieve if you don’t
have a strainer.
5. Dried chickweed steeps a little faster. Wait at least 5 minutes before
straining.
Enjoy your tea!
Chickweed Salve
A homemade chickweed salve has so many uses! It is a great first aid
treatment for minor skin ailments such as acne, burns, rashes, wounds,
scratches, and itchiness. It may also be used for boils, psoriasis and
eczema. Since you are making a salve out of natural ingredients, it is safe to
say that you can use your chickweed salve as often as needed. Here’s how
to make one:
What you will need:
Page 121
Learn Herbal
Fresh chickweed
Olive oil
1/8 cup of beeswax
½ tablespoon of Vitamin E (per one cup of herbal oil)
Small tins and jars
A strainer or cheesecloth
A wooden spoon
A saucepan
Lavender essential oil (optional)
Instructions for making your chickweed salve:
Page 122
Learn Herbal
1. You will need to make chickweed oil first. Gather some fresh
chickweed then wash and dry them.
2. Place the dried chickweed into a small jar and then fill it with olive oil.
Make sure that there are no air bubbles to avoid spoilage. Cover the
jar tightly and let it sit for two weeks.
3. Shake your jar of oil at least once a day.
4. After two weeks, use a strainer or cheesecloth to separate the oil from
the chickweed. Pour the oil into a saucepan.
5. You can use a wooden spoon to squeeze out as much of the oil as you
can.
6. Once your chickweed oil is ready, you can start making your salve by
adding the beeswax and Vitamin E to the oil. You can also add a few
drops of lavender oil. This will give your salve a refreshing scent and
help prevent it from spoiling.
7. Place the saucepan containing the oil mixture over low heat. You can
check your salve’s thickness by pouring some of the oil on a spoon
and placing it in the freezer. Once the oil hardens, you can feel its
texture and hardness. You can adjust the thickness by adding more
beeswax to the oil mixture. If it’s too thick for your liking, add more
olive oil instead.
8. Once you get your desired consistency, pour the oil mixture into
small tins or jars.
9. Let them sit until the oil hardens and turns into a salve.
Chickweed Tincture
Tincture-making is a fairly easy process. All you need are some herbs and
a bottle of alcohol. Any medicinal herb will make a good tincture.
Tinctures are characterized by their long shelf lives. Make your own
chickweed tincture by following this recipe:
Page 123
Learn Herbal
What you will need:
Fresh chickweed
Pure grain alcohol
A knife
A small jar
A strainer or cheese/muslin cloth
A large bowl
wooden spoon
Instructions for making your chickweed tincture:
Page 124
Learn Herbal
1. Gather some fresh chickweed. Make sure you don’t mix other weeds
with your harvest as they are sometimes hard to differentiate.
2. Using a sharp knife, chop the leaves into little pieces.
3. Place the chopped chickweed in a small glass jar. It is better if you fill
the glass jar with the herbs. Don’t use containers made from plastic or
metallic materials as these may undergo adverse reactions with
alcohol. Sterilize the glass jars before use.
4. Pour alcohol into your jar. Any 80- to 100-proof alcoholic beverage
may be used. Vodka is a good choice since it has little flavor and no
color, though rum and brandy may also be used. Another alternative
is to use apple cider vinegar, especially if you have reservations with
alcohol.
5. Remove any air bubbles that may form.
6. Cover the jar tightly and then label it. Include the date. Place in a cool
area that cannot be accessed by kids and pets.
7. Let the tincture steep for at least 8 days up to one month.
8. After steeping, use a strainer or a muslin cloth to strain the liquid into
a bowl. Squeeze out more liquid from the chickweed using a wooden
spoon.
9. Pour the resulting liquid into small jars, cover, and label. Your
chickweed tincture is now ready for use.
There are so many uses for plants that we often think of as mere weeds.
Chickweed is just one example. Nettle, mallow, and sow thistle are others.
The next time you come across a plant you’re unfamiliar with, try to find
out more about it. You may be in for a surprise.
DANDELION
Page 125
Learn Herbal
The dandelion is one amazing herb that is regularly used for medicinal
and taste- improvement purposes. Aging back to around thirty million
years, it is one of the oldest surviving plants in the world - and yet, a lot of
people try to, unsuccessfully, remove all the dandelion from their garden.
The dandelion (Taraxacum officinale) leaves were used as medicines in
many popular traditions in Chinese and Native American culture. From
boils to diabetes, this herb has been associated with amazing healing
properties. Dandelion flowers can be used to make wine and the leaves are
often added in salads to add flavor. Not to mention that it is full of vitamins
and minerals and are terrific cures for a low appetite.
Page 126
Learn Herbal
Cultivation of Dandelion
Dandelions are perennial, which means that they are capable of
reproduction for two years before they require re-planting. You should not
have much trouble in obtaining dandelion seeds. Early spring is the ideal
time to plant dandelions.
Page 127
Learn Herbal
1. Moist and rich soil would be an excellent place to plant, but it can
grow in almost any soil. Well-drained and fertile soil is
recommended.
2. Choose a spot where full sun is available most of the time, but partial
shade works for it too.
3. Plant seeds directly in the garden. ¼ inches deep should be perfect. A
single row or wide rows will be beneficial, and the seeds must be at
least 8 inches apart. A fully grown dandelion can reach the height of
12 inches without trouble.
4. There is no need to water too much. Being a hardy plant in nature,
dandelion are able to collect plenty of water for themselves.
Tips on Growing Dandelion
Within 95 days of planting, an average dandelion reaches full maturity.
Medicinal Uses of Dandelion
is a great medicinal herb. It is known to store a versatile array of
disease cures. The root, the leaves and the flower, every part of the
dandelion is very useful.
Dandelion
– Researches have found that dandelion proves to be a relief for
urine problems. Liver and bladder problems are relieved by releasing
body fluids with dandelions.
Diuretic
– Dandelion has long been used as a way of helping
people to get their appetite back. If you've had a long bout of sickness
where you were put off eating for a while, a regular drink of dandelion
coffee is something lots of people swear by to help them get their appetite
back.
Get back your appetite
Page 128
Learn Herbal
- Dandelion tea is a great thing for someone who has been
suffering from constipation or a stomach problem. Dandelion tea cleans up
the entire digestive system and provides you a way to end the discomfort.
Digestion
- If you are suffering from a sting from a bee or any other lightly
poisoned insect, the sap of dandelion is really great for it.
Stings
- If you are not a fan of your acne, dandelion is just the thing
for you. Warts and calluses are cured by dandelion too.
Goodbye acne
- It cannot yet be confirmed it dandelions are a beneficial for
diabetics, but it is under research and many species have positive results
on their blood sugar level.
Diabetes
- The sap found in the stem of the dandelion, while not very
edible, is very effective against common skin problems like rashes and
sunburn.
Skin care
DIY Homemade Dandelion Solutions
Dandelion Coffee
Because of the harmful effects of too much caffeine, dandelion coffee is
absolutely perfect. It gives you the effect of regular coffee without having
to worry about the excessive caffeine consumption. Besides, there is the
additional benefit of the extra vitamins and minerals that keep you healthy.
Here is how you make dandelion coffee:
What you will need:
Page 129
Learn Herbal
A lot of dandelion roots
Instructions:
1. Wash the roots of dandelion as thoroughly as possible.
2. Chop the roots in to short stick-like pieces.
3. Allow them to dry for an hour. A dehydrator tray would work well.
4. Chop the roots into small pieces.
5. Roast the pieces in the oven at Gas-mark 6 or half an hour.
6. Grind the dry pieces to fine powder and then roast for a second time.
7. Now store the powder in an airtight box. Your dandelion coffee
powder is ready to be served.
Dandelion Wine
Dandelion wine is quite popular and pretty easy to make. It even happens
to share the name with a popular novel by Ray Bradbury. Make sure that
the flowers are fresh.
So let’s take a look at how to make this concoction.
What you will need:
Page 130
Learn Herbal
1-1/2 teaspoons dried brewing yeast
6 cups of sugar
1/4 cup of warm water
2 quarts of whole dandelion flowers
4 cups of water
1 cup of orange juice
3 tablespoons of lemon juice
3 tablespoons of lime juice
1/2 teaspoon of powdered ginger
3 tablespoons of chopped orange zest
1 tablespoon of chopped lemon zest
Instructions:
1. Wash the blossoms properly and let it soak for 48 hours.
2. Put the blossoms with the water and add up the lemon, orange and
lime juices.
3. Now add the ginger, the peels of the fruits, sugar and cloves.
4. Stir and boil the mixture.
5. Strain over coffee filter papers.
6. Add yeast in the infusion that will be formed and stir again whole it is
still moderately warm.
7. Place a lid or a cover and let it rest for the night.
8. Put it in a bottle with holes on the top.
9. Let it ferment for three weeks.
10. You will find a layer of sediment at the bottom of the container. Put
the wine in another container to leave the sediment alone.
11. Store for a few months or a year for excellent taste. As they say, the
older the wine, the better it is.
Page 131
Learn Herbal
You should probably know that fermentation can take up more than three
weeks if your area happens to have a low temperature. So if you live in a
cold place, give the fermentation more time.
Dandelion Pumpkin Seed Pesto
This is a recipe for a healthy pesto that will not displease your taste buds
either. You are going to need a food processor for this particular menu.
What you need:
¾ cup of green pumpkin seeds
3 cloves of minced garlic
¼ cup of parmesan cheese, freshly grated
2 cups of dandelion greens
½ tablespoon of lemon juice
½ cup pure virgin olive oil
½ teaspoon kosher salt
Black pepper
Instruction:
Page 132
Learn Herbal
1. Preheat the oven up to gas mark 4 (350F)
2. Roast the pumpkin seeds in a baking sheet for 5 minutes, until it’s just
fragrant.
3. Let it cool down.
4. Put the garlic and seeds in a food processor and pulse until they are
chopped finely.
5. Add the cheese, the dandelions and the juice.
6. Process together until they are properly mixed.
7. The pesto should be very thick by now. Add olive oil until it is smooth.
8. Sprinkle salt and pepper according to your taste.
So there you go. That was just barely scratching the surface of the
immense possibilities dandelion stores in it. From kidney problems,
diarrhea, rashes and (just as an edible and tasty herb) a dandelion is a great
herb and the best part of it is that it's available just about everywhere. It is
unfortunate that people often try to get rid of such a cool gift from nature.
ECHINACEA
One of the most popular herbs in America, echinacea is an effective and
widely used remedy for common cold and flu. The name ā€œEchinaceaā€ was
derived from the resemblance of the spikes on the central disc of the
flower with ā€œechinosā€, the Greek for hedgehog.
Page 133
Learn Herbal
Native Americans used echinacea as a general medicine for all diseases
and infected wounds. Records say that it was used against snake bites,
diphtheria, anthrax, scarlet fever and as a general pain reliever. Nowadays,
it is used for the cure of sore throat and other symptoms of cold, and
research shows promises to cure ear infections, athlete’s foot and sinusitis
and even act as a suppressor of the herpes simplex virus. The plant has 9
discovered species so far and they are commonly known as coneflowers.
Cultivation of Echinacea
Echinacea is perennial and are easy to grow from seeds. It is a very hardy
plant, and can survive quite a cold winter. It grows well in the garden and
the flowers are beautiful, giving your garden an aesthetic quality. Early
spring is a good time for cultivation.
Page 134
Learn Herbal
1. Echinacea prefers rich soil, so adding compost to your soil might be a
smart idea. Also, make sure water does not flood your soil. A good
drainage system is required and an elevated soil bed is a way to solve
that problem.
2. Seeds should be sown when the soil is around 60°F. Sowing on the
surface of the soil, 2 inches apart, will do.
3. When germination begins, push the seeds or add soil so that there is
1/8 inch soil over them.
4. Thin out the plants so that they are around 20 inches apart. Once
germinated, echinacea will grow fairly fast.
Tips on Growing Echinacea
Rabbits and hedgehogs are fond of echinacea shoots, so make sure
you have your garden protected well.
See that they are watered as seeds but, after they grow, echinacea is
capable of keeping itself watered from the moisture of the rain. So
unless you live in a very dry region, there is no need to water the
plant.
Echinacea is not a very good competition for weeds, so if your garden
has weeds, clear them up before echinacea suffers from lack of
moisture.
Medicinal Uses of Echinacea
Echinacea has a large variety of medicinal uses - a fact that contributed
heavily to its common and frequent use as a general, all-purpose medicine
in the past. Extensive research of the plant is being conducted in Germany
and even now scientists have found plenty of uses for this wonderful herb.
Page 135
Learn Herbal
- Echinacea is known to be a good immunity boost. Though
there are some debates about it, it can heavily improve our immune
system and fight infections.
Immunity
This is probably the most common medicinal use of echinacea. It is
not yet confirmed if it works as a good cure or prevention, but the fact is, it
has been shown by many to be very effective at giving your immune
system a boost during cold and flu periods. Sore throats and other
symptoms are not much of a challenge for echinacea.
Cold -
It is good for infections in the upper respiratory system.
Traction or inflammation of these organs can be helped by echinacea.
Infections -
If used early enough, echinacea is often effective and helping
the healing of wounds.
Wounds -
Boils, acne and skin infections are often treated with echinacea.
Skin -
It is also used for urinary tract infections, vaginal yeast
infection, flu, gum disease, tonsillitis, genital herpes and more.
Miscellaneous -
DIY Homemade Echinacea Solutions
Echinacea Tincture
This tincture is an excellent cure for colds and can cure it in a very short
time. It is easy to prepare and is very effective. So let’s go straight to the
making of it.
What you will need:
Page 136
Learn Herbal
1 1-pint glass jar
¼ cup dried Echinacea
1 pint vodka
Instructions:
1. Dry the echinacea and put it in the pint jar.
2. Pour the vodka on the jar, but keep a little room at the top.
3. Shut the lid tightly.
4. Now you have the menstruum which you have to leave in normal
temperature for one to one and a half month.
5. Shake the jar every few days.
6. After the allotted time, place a filter cloth on the mouth of the jar
instead of the lid
7. Take a bowl and pour the vodka out to it through the filter cloth. The
herbs will stay as residue.
8. Take the cloth of herbs and squeeze it to get all the liquids.
9. You have your echinacea tincture.
Hot Ginger Echinacea Lemon Tea
Tea is a popular drink but a cup of echinacea tea is more helpful than your
normal tea. It is great for colds and sore throats. So here’s the recipe.
What you will need:
2 cups of boiling water
A teaspoon of dried echinacea flowers
A teaspoon of ginger, finely chopped and fresh
Squeezed juice of 1 lemon
A teaspoon of honey
Page 137
Learn Herbal
Instruction:
1. In a teapot, place the ginger and echinacea.
2. Pour boiling water in it.
3. Add honey and lemon juice.
4. Stir to mix.
5. Enjoy and stay cold-free.
Elderberry-Echinacea Syrup
This syrup is marvelous for colds, flu, and fever and even helps a little with
blood pressure. The ingredients are all medically useful and are very
effective. So here’s how you make it:
What you will need:
1/2 cup dried elderberries
2 tablespoon of dried echinacea
1 tablespoon of dried ginger root
1-2 cinnamon sticks, broken in half
3 cup distilled water
3/4 cup raw honey
Instructions:
Page 138
Learn Herbal
1. Pour all ingredient except for the honey in a small bowl.
2. Add distilled water and let it boil, turn the burner to medium.
3. When you see a simmer, turn the burner to the lowest you can
without switching it off.
4. Leave it like that for 45 minutes.
5. Stir occasionally and crush the elderberries to release their juices.
6. Now strain the mixture until you have just the liquid.
7. Wait for around 10 minutes.
8. Now add the honey.
9. Stir thoroughly.
10. Once done, keep it tightly shut with the lid and store in the
refrigerator.
11. Use when you think you require them.
Now as a fair warning, echinacea is not a harmful, but it is not best for all
situations. Echinacea does not mix well with medications for immunity, so
if you are on one of them, it is better to avoid echinacea. It is also advisable
for diabetes, AIDS, multiple sclerosis, leukemia and any autoimmune
disease patients to stay clear of echinacea. If you are allergic, echinacea
can cause from mild rashes to life threatening reaction of throat
tightening.
Asthma allergic people are also considered unsafe from echinacea.
Page 139
Learn Herbal
Echinacea is one of the most popular herbs over the globe. It is easy to find,
incredibly useful and gives a touch of pretty brightness to your garden.
From hundreds of years ago, people used this beautiful flower to cure
their wounds and diseases. Even in present, it is used as an effective
medicine and still, scientists are conducting researches to find out more
use from this wonderful herb.
ELDER
Elder, and its fruit elderberry, has been used as a medicine for flu for a
long time and it has gained its reputation as a tasty fruit too. Both the flower
and the berries are used for medicinal purposes, though it is strongly
advised to cook the berries before using them, as raw berries have
properties similar to cyanide poison.
Elder is generally found in Europe, Africa, parts of Asia and even North
America. Of its many species, Sambucus nigra, the European Elder, is the
most commonly used type for medical purposes. The plant can grow up to
30 feet tall in dry or moist soil. The wood of the tree is white and easy to
cut, and hence, is quite popular for making small objects. And the flowers
are pretty enough to find a spot in a fancy garden!
Page 140
Learn Herbal
Cultivation of Elder
The ideal soil to grow Elder is one with pH 5.5 to 6.5 and also moist, fertile
and well drained, but it does not mind having other values of acidity,
fertility or texture. If you have heard the rumor that elder prefers
swamped spots, you should be aware that it is totally wrong. Elder is
intolerant of bad drainage.
So here is the method for planting elder.
1. Plant seeds in the spring.
2. It is suggested to plant them as soon as they are available, in the
nursery. Waiting long will kill the seeds.
3. Elder is really fond of fertilizers, so add compost to the soil before
sowing.
4. Plant the seeds 6 to 10 feet apart. Remember to leave about ¼ inch soil
over the seeds.
5. You have to annually add fertilizer at early spring. One pound of
ammonium nitrate for each plant is a good amount.
Tips on Growing Elder
Elder have shallow roots, so in the first season, you have to keep them
well-watered. Also, as mentioned earlier, a good drainage system is a
must.
They should be weeded regularly, or there is the threat of elder
plants taking up all the garden.
Through the roots, elder will grow more plants. You can dig them up
and replace to another spot or just mow them if you do not require
more.
Page 141
Learn Herbal
Medicinal Uses of Elder
Elder is known to be one of the most useful medicinal herbs around and
true to its reputation, it acts as a cure to many illness. It is an antioxidant,
laxative, diaphoretic and anti-inflammatory properties among others have
contributed to its fame in the medical world. It has been used in medicine
in North America, Europe, Western Asia, and North Africa in the past.
For the common cold, elderberries are very effective. Elderberry
tea is an effective method to counter coughs and sore throats.
Cold -
Flu is not much of a challenge for this wonderful herb. Elder is
thought to dampen the virus’ ability to affect the cells.
Flu -
Elder can fight bacterial and viral infections quite effectively.
Infections -
It helps to boost your immune system and improve your vision
considerably if consumed regularly.
Immunity -
Elder is great when it comes to reducing cholesterol. Its antioxidant
property comes really helpful in here and keeps the heart strong and
cholesterol-free.
Heart -
Studies show that elder might be effective against
inflammation of the bladder and the urinary tract, bronchitis, HIV and
cancer.
Under research -
DIY Homemade Elder Solutions
Elderberry Blossom Tea
Page 142
Learn Herbal
Elderberry tea is very effective for cold and sore throats, and the flavor is
not bad either.
This is how you make it:
What you will need:
1 and 1/2 tablespoon of dried elderberry blossom.
A cup of boiling water.
A thin slice of lemon.
Sugar for taste.
Instructions:
1. Place the dried elderberry in a teapot.
2. Now add the boiling water.
3. Let it steep for a few minutes.
4. Strain with a cheesecloth.
5. Add the lemon and sugar.
6. Enjoy while it is warm.
Elderberry Pie
This is a delicious pie that can be enjoyed together in a Sunday evening or
any other day. Apart from the mouth-watering taste, the pie contains a lot
of vitamins and minerals that would keep you healthy and at the same
time satisfy your taste buds. And it is a good idea to bake with a foil at the
bottom.
What you will need:
Page 143
Learn Herbal
A normal recipe pastry for a double crust, 9 inch pie.
4 cups of elderberries
3 tablespoon of corn-starch
1 cup of white sugar
1 tablespoon of lemon juice
Instructions:
1. Preheat the oven to 375 degrees F.
2. Mix the cornstarch in a small amount of water and then add the sugar
and the berries.
3. Cook it, stirring until you get the thickness you desire. You can add
extra cornstarch if you need to thicken it more.
4. Add the lemon juice.
5. Pour the mixture to the bottom layer.
6. Dot it with butter.
7. Now put on the top crust.
8. Bake for around 40 minutes until it becomes brown.
Elderberry Wine
Elderberry wine is just as tasty and effective as any other wine (blackberry,
plums, etc.) which, in fact, can be prepared using the same recipe.
So here it goes.
What you will need:
Page 144
Learn Herbal
Around 11lbs of elderberry without stem.
10 quarts of water.
4.5 lbs sugar.
Tartaric acid.
1.5 teaspoon of pectic enzyme.
3 teaspoon of yeast nutrient.
Wine yeast.
Instructions:
1. Break the berries by crushing them by hand, or pulse in a food
processor in batches. Do not squeeze and make them liquid.
2. Pour the crushed berries into a large pot with 10 quarts of water. Add
the sugar. Turn off the heat when it is shimmering.
3. Pour the juice in a large bucket and let it cool down to room
temperature. Taste the juice for sugar and acid.
4. Add another kilogram of sugar and maybe also some tartaric acid if
the acidity and sugar is low. There should be about 1.5 teaspoons of
acid in per liter of juice.
5. Add the enzyme, and cool to below 50°F in the fridge or with ice
packs. Lay a sheet of plastic wrap on the juice to keep out air.
6. Keep the juice covered and maintain this temperature for up to 3 days.
The longer you cold soak, the more flavor you get.
7. On the last day, bring the juice back up to normal temperature.
8. Now add half of the yeast nutrient while the juice warms up.
9. Once it is in room temperature, let your yeast hydrate and add in the
juice.
10. Now let it ferment.
Page 145
Learn Herbal
The elder plant is not just another plant in your garden, but it is one of the
most useful herbs that is available to us. It does not restrict its greatness to
just the field of tasty berries, but also has a great impact on the medical
field.
It has been, for centuries, used as a common cure for an awful lot of
disease, illness, cuts and bruises and colds. The natives in the woods
preferred elderberry for their medicine and, though shunned by the
introduction of modern medicine at one point, the elderberry, along with
other herbs, are regaining popularity and are proving to a gift from mother
nature. It is being extensively researched and the results we had so far are
promising that this herb has yet many potentials that will benefit mankind
for a very long time.
GINGER
In China, India, and other parts of Asia, ginger has a long and storied
history as a highly prized food item and herbal medicine. Most people only
know ginger (Zingiber officinale) for its role in stir fries and in ginger ale,
but it is actually an ancient herb that has been cultivated in the East for
thousands of years.
Page 146
Learn Herbal
Cultivation of Ginger
Though it is most prominent in Chinese and Southeast Asian cooking and
medicine, ginger is also cultivated in North America, South America,
Australia, and other parts of the world. Because it can be expensive in the
West, those who consume ginger regularly choose to grow their own. The
ginger plant requires little attention and can be easily grown in a pot
indoors.
To sprout ginger from root stock:
Page 147
Learn Herbal
1. Get some fresh ginger rhizomes. Choose ones that already have
growth buds. These are tiny protrusions that look like little horns at
the end of each piece or ā€œfingerā€.
2. If you got your ginger from a store, it is best to soak them overnight,
as they have likely been treated with a growth retardant.
3. You can either plant the ginger in a shallow tub or pot with some good
potting soil or directly into the ground. Cut the ginger into pieces and
plant each piece 2 to 5 inches into the soil, about 6 to 8 inches apart.
4. Cover the ginger pieces lightly with soil.
5. Water your ginger plants regularly but don’t over soak them.
6. At the end of the season, the leaves of your ginger plants will start to
fade. You can then harvest the ginger for culinary use and for
replanting.
Tips on Growing Ginger
Ginger is a tropical plant. It loves sunlight, humidity, and rich, moist soils. If
you’re keeping your ginger plant indoors, put it in a sunny spot where it
will receive plenty of sun in the morning and dappled sunlight in the
afternoon.
Ginger is not suited to frost, strong winds, and dry or waterlogged
soil.
Mix compost with your potting soil.
If there is not enough humidity where you live, mist your ginger
plants regularly.
Medicinal Uses of Ginger
Ginger is widely known as an herbal remedy for an astounding number of
ailments.
Page 148
Learn Herbal
- Studies have shown that ginger is an effective anti-vomiting
remedy. Taking raw ginger, ginger powder, or an infusion of ginger helps
prevent and relieve motion sickness and pregnancy-related dizziness and
nausea. Ginger also helps reduce nausea in chemotherapy and post-
surgery patients.
Fight nausea
- Ginger has beneficial enzymes that heal and
protect the gut. It stops the formation of ulcers, neutralizes excess acids in
the stomach, and eliminates diarrhea-causing bacteria such as E. coli.
Keep your tummy healthy
– Ginger’s extraordinary ability to fight
inflammation is extremely helpful to the heart, where inflammation can
become chronic and lead to serious diseases. It also stimulates blood
circulation and lowers cholesterol levels.
Take ginger for good heart health
- A natural immune booster, ginger has
antibacterial and antiviral properties that protect you from airborne
diseases such as the flu and the common cold.
Dodge the common cold
A ginger a day makes the blues go
away! Some studies report that taking ginger on a regular basis can help
reduce the symptoms of depression and anxiety.
Take ginger and boost your mood -
Ginger has a ā€œwarmingā€ effect that will help
you sweat out a fever. It can also reduce pain and fight infections.
Sweat out a fever with ginger -
Page 149
Learn Herbal
Scientists have found that there are chemicals in ginger
that fight cancer cells in test tubes. More tests need to be done to see if
they will have the same effect on humans but, for sure, ginger has
anticancer properties.
Prevent the big C -
…and a host of other serious diseases!
Is there anything ginger can’t cure? This powerful herb has also been
found effective in treating or reducing the pain caused by osteoarthritis,
fibromyalgia, alcoholism, toothaches, frostbite, liver disease, flatulence,
dysmenorrhea, colic,indigestion, and hypertension.
DIY Homemade Ginger Solutions
It’s easy to reap the health benefits of ginger. These three amazing ginger
products can be made at home and are inexpensive too!
Ginger Tea
Ginger tea tastes great and has a soothing aroma perfect for post-spa
sessions and after-dinner relaxation. A cup of hot ginger tea relieves the
pain and discomfort from sore throats and clogged noses, and is a
comforting drink to have when ill, stressed, or just feeling out of sorts. A
recommended part of Ayurvedic morning cleansing routines, ginger tea is
thought to flush out toxins and restore warmth to the body.
It is also supposed to reduce your craving for sweet and salty foods. Some
health practitioners suggest drinking a cup of ginger tea before every meal
and eating the ginger in the tea to prevent post-meal digestive problems.
Page 150
Learn Herbal
What you will need:
4 to 6 slices of fresh ginger
1 to 2 cups of water
Honey, stevia, or some other sweetener (optional)
Lemon (optional)
Instructions for making your ginger tea:
1. First, make sure that your ginger is fresh and plump, not tough and
shriveled. If the peel is too dry and wrinkled, the ginger has been in
storage for too long. The inside will be woody and will be lacking in
flavor.
2. If your ginger is very fresh, you can opt not to peel it. Simply grate an
inch or two off your ginger into a tea cup.
3. You can also peel the ginger with a spoon or a paring knife and then
chop it thinly until you have about three ounces of sliced ginger.
4. Pour boiling water over the ginger.
5. Let the tea steep for 2 to 3 minutes.
6. Strain the ginger pieces out or let them settle at the bottom of the cup.
7. Add honey, stevia, or agave nectar to your liking. Squeeze in some
fresh lemon. Stir.
8. Enjoy your cup of tea!
Ginger Oil
Page 151
Learn Herbal
Ginger oil has so many uses! As a massage oil, it leaves a gently warming
sensation perfect for aching joints, sore muscles, upset stomachs, and
menstrual cramps. It can also be used by breastfeeding moms suffering
from blocked ducts – just don’t get any on your nipple; your baby might
not like the taste!
Ginger oil can also be used as a salve and moisturizer. Add it to some very
hot water and inhale the steam to unclog your nose and relieve flu
symptoms. Add it to your bath water for a relaxing soak. If you use a high-
quality edible oil, you can even add it to your salad!
There are different ways to make ginger oil. One is to combine the ginger
and a carrier oil and cook the mixture in the oven for a few hours.
However, because fresh ginger contains a lot of moisture, cooking it in a
crock pot can be a more effective technique. Remember, the more
moisture in your ginger oil, the more likely it is that mold will grow.
Letting the ginger oil cook over a couple of days gives all the moisture in
your ginger enough time to completely evaporate – and your house will
smell divine!
What you will need:
Page 152
Learn Herbal
2 cups of fresh ginger
3 cups of oil (olive, sesame, jojoba, coconut, or palm)
An oven-safe bowl or crock pot
Muslin or cheesecloth and rubber bands
Strainer
Another bowl
A clean jar with a tight lid or a vial
A clean funnel
Instructions for making your ginger oil:
1. If you’re using the oven technique, combine the oil and the ginger in
an oven-safe bowl and let it cook on low heat for a couple of hours.
2. After, cover the top of a clean bowl with cheesecloth or muslin. Strain
the ginger-oil mixture through the cloth. Try to squeeze all the oil out
with your hands.
3. Transfer the ginger oil into a vial, put the lid on tightly, and label the
vial with the date. The ginger oil should keep for around six months if
kept in a cool, dark place.
4. If you’re using the crock pot technique, put the oil and the ginger in
your crock pot and leave it on the lowest heat setting for a couple of
days. Don’t let the mixture burn or boil. Keep the lid slightly ajar to let
the moisture evaporate.
5. Strain the oil mixture into a bowl. Let it sit for a day.
6. Transfer the ginger oil into vials or mason jars and label them.
Ginger-Infused Scrub
Page 153
Learn Herbal
The anti-inflammatory properties of ginger make it extra useful for the
skin. Ginger helps get rid of redness and puffiness, diminishes the
appearance of scars and blemishes, and helps reduce wrinkles. The oil
used in this recipe moisturizes the skin and helps keep acne away. Because
the skin (our largest organ!) so quickly absorbs anything and everything
we put on it, try to use all-natural products to make this scrub.
What you will need:
Coconut oil
Turbinado sugar
Coarsely chopped ginger
Cold-pressed oil
Kosher salt
Essential oil
Instructions for making your ginger-infused scrub:
1. Infuse the coconut oil with ginger by cooking both over low heat for 10
to 15 minutes. Remove the mixture from the heat and strain it through
a sieve or cheesecloth into a bowl.
2. Working quickly so the oil doesn’t cool and solidify, add the cold-
pressed oil and stir until the whole thing cools down to room
temperature.
3. Add the sugar and the salt. Stir some more.
4. If desired, add a drop or two of essential oil.
5. Put the scrub in a glass jar and cover it tightly.
Page 154
Learn Herbal
Ginger is a miracle herb that imparts its magic when eaten, drank, inhaled,
or slathered onto the skin. This humble-looking and often overlooked
plant is so easy to cultivate and is so worth keeping in the house or in the
garden. So what are you waiting for? Grow your own ginger plant now!
HAWTHORN
Page 155
Learn Herbal
Hawthorn is a bush that is a member of the Crataegus species. This bush
yields beautiful clusters of red (often black) berries, and it is a perfect
example of the powerful, potent abilities of nature to heal health
complaints and maladies. The use of the hawthorn bush, and its berry
often known as the ā€œhaw,ā€ dates as far back as the 1st century AD.
The particular strong point of the hawthorn is that it can cure many
different cardio vascular conditions. Many clinical trials have proven its
effectiveness quite conclusively. The official prescription of hawthorn
berries has a reputed lineage too, with American doctors having
prescribed it since the 19th century! The powerful nature of the herb is
evident in its use – it can even treat mild heart failure. Apart from that, it
can also lower blood pressure, help maintain good artery health, and
cleanse the blood with its potent anti-oxidant power – thus keeping you fit,
healthy, and on your feet.
Cultivation of Hawthorn
Hawthorn shrubs yields the completely edible hawthorn berries, which
are quite popular. As a result, many gardens grow this delightful shrub.
The delicate flowers of the hawthorn berry arrive around May, and the
very useful berries are not far behind. This shrub is quite easy to grow, and
aside from regular cutting and trimming, not much needs to be done.
Page 156
Learn Herbal
1. The garden bed should be well tilled first. Remove any stones or
other materials, and loosen the soil with a hoe.
2. Check the nutrient content of your soil. As hawthorn will give fruit, it
needs some excess minerals, such as calcium and potassium for
complete and good growth. If your soil is lacking of these ingredients,
you should use fertilizers to get them up to range. In that case, dig a
deep trench, and place the fertilizers there. Then cover up the
fertilizer with a good few inches of unfertilized soil, and plant your
hawthorn on top of this layer.
3. You can either grow hawthorns from cuttings, or from saplings or
from seeds. For best results purchase saplings of the shrub from a
nearby nursery
4. Plant the hawthorn shrubs about 1 to 2 feet apart. If you wish to build a
wall, plant them closer together.
Tips on Growing Hawthorn
You don’t have to buy a large number of saplings to start your hawthorn
garden. Just buy one. As it grows, you can take cuttings from this hawthorn
shrub to get more shrubs. This is cost effective, and does not harm the
plant in any way.
Hawthorns are thorny bushes that can easily deter large wildlife, such as
deer. You can easily use hawthorn to make an impenetrable outer wall for
your garden. Plant your hawthorn cuttings around the perimeter of your
garden and slowly build up this amazing fencing option.
Page 157
Learn Herbal
Hawthorn berries are a prized edible of many birds, such as blackbirds and
humming birds. These are very entertaining to watch, and you can
consider having a water bath and sand bath installed in your garden for
their pleasure.
If, on the other hand, you want a large quantity of berries for yourself, you
might have to net the plants while they are growing berries to keep the
birds away. One solution is to have a few hawthorn shrubs, and to net some
for yourself, and keep some open for the birds to enjoy.
You have to keep the plants well-trimmed in order to ensure maximum
berry output. Remember to trim well before they flower. Hawthorn berries
flower around May.
Medicinal Uses of Hawthorn
Hawthorn is a potent berry that has some very practical medical
applications. It has been shown to be great for the heart in both animal and
human studies. Additionally, it has been prescribed for centuries for heart
conditions. It also has some anti-inflammatory action that is great for
treating wounds, sores and boils.
Heart failure is a serious issue and you
must never attempt to self-diagnose or treat your heart failure. Consult a
doctor before use. However, studies have shown hawthorn berries to be
greatly effective in preventing and treating heart failure. You should ask
your doctor about the proper dosage, however.
As a cure for mild heart failure -
Page 158
Learn Herbal
Hawthorn berries and their powerful anti-
oxidant action greatly improve artery health. Hawthorn users have been
shown to have avoided atherosclerosis (ā€˜hardened arteriesā€) – they have
flexible, healthy arteries, that are a key to good cardiovascular health.
To improve artery health -
Hawthorn can effectively get rid of the bad LDL
cholesterol that is clogging up your arteries. Lowering cholesterol levels is
quite a challenge, and hawthorn can make it easier.
Bust your cholesterol -
Hawthorn dilates blood vessels, and this can
significantly lower blood pressure. Hawthorn can help maintain a regular,
healthy blood pressure level.
Lowers your blood pressure -
Tapeworms and other intestinal complaints can
be treated effectively with hawthorn berries.
Bust intestinal infections -
DIY Homemade Hawthorn Solutions
Hawthorn Jam
Hawthorn has traditionally been used in jams for a very long time.
Hawthorn jams are perky, tasty, and full of all the goodness of hawthorn.
You can enjoy hawthorn jams with bread, cakes or as just a standalone
treat. Easy to make and rich in the power of hawthorn, you should
definitely add this sweet treat to your diet.
What you need:
2 1/4 lb of fresh hawthorn berries
3 ¾ cups of crystalline sugar
Lemon juice (from one small lemon)
Page 159
Learn Herbal
Instructions:
1. Mash the hawthorn in a saucepan. Combine sugar and the lemon
juice and mash well
2. Add a few cups of water and bring to boil
3. Stir thoroughly, and skim the foam that forms on top of the mixture
4. Keep stirring until the mixture reaches 430F (to check the
temperature, take the saucepan off the fire, and use a candy
thermometer)
5. Test the jam by taking a small portion in a plate and transferring to a
freezer. The jam is ready if it can gel in the cold. Otherwise more heat
and stirring Is necessary until the jam reaches appropriate texture.
6. When the jam has been prepared, allow it to cool, and ladle it into
sterilized glass jam jars. Keep the jam refrigerated, as it contains no
preservatives, and will easily go bad at room temperature.
Hawthorn Leaf & Berry Salad
Hawthorn leaves are in fact completely edible. They are crunchy, tasty,
and a great addition to a salad. Combined with the sour flavor of slightly
ripe hawthorns and a few olives, a simple salad of fresh young hawthorn
leaves should leave a lingering, amazing taste in your mouth. Here is how
you make a hawthorn salad to impress.
What you need:
Page 160
Learn Herbal
Half a bowl of young hawthorn leaves (fresh picked in spring are the
best)
One and a half cup of unripe hawthorns (a slightly sour taste is
optimal)
A few olives
Apple cider vinegar or lemon juice
One onion, chopped into rings
Grated parmesan cheese
Instructions:
1. Wash the hawthorn leaves thoroughly with cold water. Make sure
they are fresh, young and not populated by unwanted caterpillars
2. Wash the hawthorn berries with cold water
3. Combine the hawthorn berries, leaves and onions in a salad bowl
4. Add a liberal dash of olive oil. Toss to mix properly
5. Add in some olives for decoration
6. Add a dash of vinegar or lemon juice for further sour flavor
7. Sprinkle with parmesan cheese and serve
The Hawthorn berry is truly an amazing gift of nature. All gardens should
come with one of these delightful shrubs – for the birds and for the
continued health benefit of the owners. Hawthorn is indeed a powerful
herb when it comes to improving heart health, and you should exploit this
generous gift of nature for your wellbeing.
BASIL
Page 161
Learn Herbal
If you love Italian food, you’ll be very familiar with the taste and scent of
basil, but there’s much more to this pungent herb than pasta sauces and
pesto. In medieval times, basil was considered quite a dangerous herb to
handle, being related to scorpions and the legendary basilisk; one
herbalist of the time reported that ā€œbeing laid to rot in horse dung, it will
breed venomous beasts,ā€ while the famous botanist Nicholas Culpepper
glossed over its qualities in his herbal works and concluded ā€œI dare write
no more of it.ā€ Today, we appreciate basil for its anti-inflammatory
properties, its poison combating abilities and its antibiotic qualities.
Cultivation of Basil
Basil is usually grown from seed, which requires some patience as it’s a
slow growing herb, but the resulting plants are well worth the effort
whether you want to use basil in your cooking or for your health.
Page 162
Learn Herbal
1. Sow in pots indoors all year round, or in a greenhouse in the summer.
2. When you have several seedlings in the same pot, transfer them
together to a warm, sunny spot outside, in well-drained soil.
3. Water sparingly.
4. When flower buds appear at the tips of the shoot, nip them off in
order to encourage further leaf growth – basil flowers are generally
bitter tasting and do not have as many uses as the green leaves.
Tips on Growing Basil
Basil prefers humus rich soil, and is harmed by over-watering.
Pick little and often as soon as the leaves are big enough to use.
Sow new plants every month or two to maintain a healthy supply of
basil.
The most commonly grown variety is ā€œGenoveseā€, but you can also
try ā€œBush Basilā€, ā€œAraratā€, ā€œKemangieā€ (also known as lemon basil)
and ā€œPurple Rufflesā€, which as the name suggests has ruffled, purple
leaves.
Medicinal Uses of Basil
In common with many herbs, basil has a wide variety of medicinal and
healing uses as well as its obvious and well known culinary uses.
- Tests have shown that inhaling basil essential oil
increases the brain’s production of beta waves, which are the brainwaves
produced when you are thinking clearly, analyzing or solving a problem. It
seems that basil can help bring clarity of thought when you need it most.
Clear your mind
Page 163
Learn Herbal
- Basil contains compounds which can help with healing
many skin conditions. Try putting a fresh basil leaf over a wart and holding
it in place with waterproof tape. Over the course of a week or so you should
notice a significant improvement (and you’ll smell ā€œinterestingā€ too)!
Get rid of that wart
- Crushed basil leaves can help relieve the pain and
swelling caused by bee stings, wasp stings, insect bites and minor snake
bites, helping to draw the venom out of the wound.
Anti-venom magic
- Chewing fresh basil leaves seems to help to
relieve stress and induce a state of calm – simply chew 8-10 leaves up to
twice a day to see basil’s stress reducing properties in action.
Stay calm under pressure
Sipping water in which basil leaves
have been boiled can help soothe many minor stomach complaints,
including indigestion; as an added bonus, this will also relieve a sore throat
and help to bring down a fever in colds or flu.
Soothe indigestion and stomach ache -
DIY Homemade Basil Remedies & Solutions
Basil Poultice
Try this easy to make basil poultice on insect bites and stings, minor skin
wounds, grazes or acne. Leave the poultice in place for a few hours, and re-
apply daily for up to a week to see significant improvement and reduction
in swelling and itching.
You will need:
Page 164
Learn Herbal
A handful of fresh, green basil leaves
Rolling pin
Clean cotton or lint free cloth
Cling film or similar wrap
How to make a basil poultice:
1. Cut the cotton or lint free cloth to a size which is big enough to wrap
around or cover the affected area.
2. Trim away any excess large pieces of basil stalk.
3. Crush the leaves and small stalks with a rolling pin to release the
juices.
4. Apply the mush directly to the skin, providing a good coverage of the
area in question.
5. Cover with cotton or lint free cloth.
6. Wrap cling film over and around the poultice package where
possible, to secure it to the body.
You can also make a poultice with dried basil, although its effects won’t be
as potent:
1. Grind or crush the dried herbs into a powder with a pestle and mortar
or a rolling pin, and transfer them to a small bowl.
2. Add just enough water, a little at a time, to make a thick paste,
sufficient to cover the area of skin affected.
3. Spread this paste onto your piece of cloth, and bind to the body as
before. Use hot water if you’d prefer a warm poultice, or use a hot
water bottle to provide extra heat to the area while the poultice is in
use.
Basil Insect Repellent
Page 165
Learn Herbal
Basil is well known for its insect repellent properties, and it’s very easy to
harness these qualities into a homemade spray. Shop-bought insect
repellents can be expensive and some irritate sensitive skin – with this
homemade basil version,you can keep insects at bay without worrying
about cost or adverse side effects.
You will need:
Fresh basil leaves or basil essential oil
Water, if using fresh leaves
Vodka or rubbing alcohol or witch hazel
A spray bottle
How to make basil insect repellent using fresh basil leaves:
1. Steep 4 ounces of fresh basil leaves in 4 fluid ounces of boiling water
for several hours.
2. Strain the cooled liquid into a spray bottle.
3. Add 4 fluid ounces of either vodka, rubbing alcohol or witch hazel to
the spray bottle.
4. Shake gently to mix.
5. Spray directly onto your skin or clothes, but avoid your eyes.
How to make basil insect repellent using basil essential oil:
1. Add one part basil essential oil to ten parts vodka, rubbing alcohol or
witch hazel.
2. Decant into spray bottle and shake gently to mix.
3. Spray directly onto your skin or clothes, but avoid your eyes.
Basil Facial Steam
Page 166
Learn Herbal
Facial steams are very helpful for both health and beauty – if you have a
headache, a blocked nose or a sore throat, the steam helps to restore lost
moisture and speeds up healing and pain relief. In terms of beauty, steam
opens your pores and acts as a deep cleanser. Basil has antibacterial
properties which make it especially suitable for facial steams, so this is an
excellent and cost effective way to promote healthy skin as well as to keep
your sinuses and throat clear.
You will need:
Handful of fresh basil leaves
Water
Bowl
Large towel
Hair band, if you have long hair
How to make a basil facial steam:
1. Add a handful of fresh basil leaves to a saucepan of water and heat.
2. While the water is heating, tie back your hair and ensure you have
somewhere to sit and somewhere safe and sturdy to put the bowl of
steaming water.
3. When the water is steaming, pour it into a strong bowl.
4. Sit over the bowl and use the towel over your head to create a ā€œtentā€.
5. Relax, and inhale the basil infused steam for 3-5 minutes. You can
leave your eyes open or closed, as you prefer.
6. When time is up, dispose of the hot water safely, and then splash your
face with cold water to close the pores again and to refresh yourself.
Page 167
Learn Herbal
We’ve come a long way since medieval concerns that basil was a
dangerous herb. It’s now one of our best loved herbs in the kitchen and in
the household, and its many medicinal and health properties are only just
beginning to be explored. By growing your own basil plants at home, you
can enjoy the full range of this amazing plant’s properties – and you’ll
never be short of ingredients for a pasta sauce either!
CAYENNE PEPPER
Cayenne peppers are part of the capsicum family and are closely related to
other kinds of hot chili pepper. Since ancient times, it has been observed
that hot and spicy foods increase the body’s metabolism and that heat, in
this sense, generates heat. During the Spanish conquest of Latin America,
it is said that priests were horrified by the widespread popularity of
cayenne pepper and other peppers, considering them aphrodisiacs which
were ā€œas hot as hell’s brimstone.ā€ Today,however, cayenne pepper has a
wide range of medicinal uses, and can be both taken internally and used
externally to treat many ailments and conditions.
Cultivation of Cayenne Pepper
Page 168
Learn Herbal
The native climate for these chili peppers is hot and dry – this makes
cayenne peppers a challenge to grow in colder climates, but it also means
that they thrive under conditions of ā€œbenign neglectā€ and won’t suffer
from a lack of watering. To grow cayenne pepper from seed, plan to sow
the seeds about six weeks before planting outdoors. If you’re not blessed
with lots of warmth where you live, consider planting cayenne pepper in
pots which can be brought indoors or taken outdoors depending on the
weather.
1. Sow indoors and allow seeds to sprout in a sunny spot or in a
greenhouse.
2. Transfer seedlings to individual pots, but keep indoors for at least a
further month to give the young plants a good start.
3. When there is no danger of frost, transfer to the plants to the garden,
or to larger movable pots. Keep your plants at least 18 inches apart,
with plenty of sun.
4. Cayenne pepper is ready for harvesting when the peppers are bright
red and detach easily from the plant – typically around 70 days from
outdoor planting.
Tips on Growing Cayenne Pepper
1. Cayenne peppers prefer well fertilized, moist soil, without too much
nitrogen.
2. Don’t plant too many – one plant can produce well over 50 peppers, so
if you plant lots, you’ll end up with a lot of surplus peppers.
3. Cutting the peppers off the plant when you harvest causes less
damage than twisting them off, but either way, support the fragile
plant as you harvest.
Page 169
Learn Herbal
Medicinal Uses of Cayenne Pepper
In common with many herbs, basil has a wide variety of medicinal and
healing uses as well as its obvious and well known culinary uses.
Eating food flavored with cayenne pepper will help to
thin the mucus in your lungs when you have bronchitis or a chesty cough –
this helps you to cough more productively and to clear your chest and
your airways faster.
Get mucus moving -
Think of it as fighting fire with fire – when you eat
cayenne pepper and you have a fever, the fiery ingredient capsaicin will
help to make you sweat. How does getting hot help reduce a fever? Well,
although you’ll feel hotter, cayenne does not actually increase
temperature; the burning sensation is a false message to your brain. It
interprets this message and makes you sweat to cool down – thereby
reducing your internal body temperature and helping to reduce fever.
Reduce a fever -
Add a tiny amount of water to some cayenne pepper
powder to make a paste, and then use a small piece of cotton dipped in this
paste on a tooth which is causing you pain. This is one for the brave only, as
if the pad slips off your tooth you’ll get the full blast of cayenne pepper
flavor, but it’s surprisingly effective at reducing or at least disguising tooth
pain.
Soothe toothache -
A traditional folk remedy for cold feet is to add
chopped or powdered cayenne peppers to your socks! The fiery ingredient
of cayenne does draw blood to any area it contacts, to this does have a basis
in fact – indeed, cayenne pepper has even been used to treat frostbite!
Warm up those feet -
Page 170
Learn Herbal
Homemade Cayenne Pepper Remedies and Solutions
Cayenne Pepper Cough Mixture
If you have a wet, productive, mucus-y cough, a cough syrup made with
cayenne pepper could help. Capsaicin will boost blood circulation, helping
to speed the healing process, as well as making it easier for you to cough
up the mucus. However,too much cayenne pepper can irritate the
stomach, and has also been shown to reduce the effects of aspirin and ACE
inhibitors, so don’t try this without asking your doctor first if you’re taking
these kinds of medication.
You will need:
Cayenne pepper
Lemon juice
Honey
Water
How to make cayenne pepper cough mixture:
1. Boil a cup of water and allow to cool sufficiently for you to drink it.
2. Add one tablespoon of honey to the water, plus two tablespoons of
lemon juice.
3. Mix thoroughly.
4. Add a pinch of cayenne pepper, and mix thoroughly again.
5. Drink immediately, and repeat as required.
Page 171
Learn Herbal
This mixture should help to ease your cough and will also soothe the
soreness in your throat caused by the coughing. Honey is a natural soother
and will coat your throat, while lemon helps to reduce inflammation –
combined with the cayenne pepper, this honey and lemon concoction is a
strong ally in your fight against a cough.
Cayenne Pepper Nasal Irrigation Solution
Nasal irrigation is well known to be beneficial in keeping your nasal
cavities clear and in reducing harmful mucus build-up. Adding a tiny
amount of cayenne pepper to a nasal irrigation solution can be of benefit to
those who suffer with sinusitis,but as with all cayenne pepper uses, be
cautious in how much you use – too much and you will experience burning
discomfort. Start with adding the cayenne to the solution for just a few
seconds, and work up to a longer time/stronger solution gradually if you
feel you can tolerate it.
You will need:
A neti or other nasal irrigation pot
Boiled water cooled to tepid
½ teaspoon crushed cayenne pepper
½ teaspoon baking soda
1 teaspoon salt
An infuser or small muslin cloth
How to make cayenne pepper nasal irrigation solution:
Page 172
Learn Herbal
1. Place the crushed cayenne pepper into the tea infuser or muslin bag
and shake well to ensure that no pepper comes out loose.
2. Dissolve the baking soda and salt into two cups of tepid water, and
shake well.
3. Add the infuser or muslin bag to the tepid water for five seconds and
remove.
4. Shake again; the water should now have a pale pink tinge.
5. Use this solution according to the instructions with your nasal
irrigator.
Cayenne Pepper Tincture for Relief of Joint Pain
Capsaicin acts on nerve endings, causing them to release a particular
chemical known as substance P; substance P’s job is to transmit pain
signals the brain. When cayenne pepper is applied to the skin, it effectively
ā€œfoolsā€ the nerves into releasing a rush of substance P
, which you
experience as a feeling of heat. Once the nerves have used up their
substance P in this way, they will not transmit any more pain signals for a
while – this is why cayenne pepper can be an effective pain relief treatment
for chronic joint pain, including arthritis.
You will need:
1 tablespoon crushed cayenne pepper
1 pint cider vinegar
Bottle with a tight fitting lid
How to make cayenne pepper tincture for relief of joint pain:
Page 173
Learn Herbal
1. Gently boil the cayenne pepper in the cider vinegar.
2. Bottle without straining, while still hot.
3. Apply regularly, directly to the affected joints.
With so many healing and health-promoting properties, it’s no wonder
that cayenne pepper is so widely used in home remedies. Whether you
enjoy the taste of this red hot spice or not, putting it to use in your home is
an excellent way of enjoying its anti-inflammatory, metabolism boosting,
pain relieving properties. It’s even said that regularly eating cayenne
pepper can help with weight loss – what a wonder-spice it truly is!
CINNAMON
Page 174
Learn Herbal
Cinnamon is a spice with a rich and fascinating history. From the ancient
Egyptians, who used it during the embalming process which produced
mummies, to the ancient Chinese, who valued it more than gold, this
sweet smelling spice has been traded, fought over and used for myriad
purposes for thousands of years. It was among the most valuable of the
spices which fueled the spice trade of the 17th century, and many myths
were told by traders to hide and protect its true origins.
Buying and Keeping Cinnamon
Cinnamon is the inner bark of one of several trees in the Cinnamomum
genus; as such it is extremely difficult to cultivate at home, and most of us
must buy the cinnamon we use. Nearly 80% of the world’s cinnamon now
comes from Sri Lanka.
Ceylon cinnamon, sometimes also called ā€œtrue cinnamonā€ is usually only
available from specialty stores. This type of cinnamon is more expensive
than others, and has a milder taste with a citrus-y tang. The most
commonly available type of cinnamon is cassia cinnamon, from cassia
trees. Cassia cinnamon varies enormously in quality, so if you want the best
you need to ensure that you’re buying premium quality spice. A good way
to check is to look for a volatile oil content of at least 2%.
Whether you buy cinnamon quills or ground cinnamon depends on your
preferred uses of the spice, but you might want to buy some of each.
Ground cinnamon will keep well for about six months in a cool, dark
cupboard. Store cinnamon quills in an airtight jar away from direct
sunlight, or even in the fridge – quills will stay fresh for around a year
under the right conditions, although some preserved quills are hundreds
of years old!
Page 175
Learn Herbal
Medicinal Uses of Cinnamon
Cinnamon’s many medicinal uses elevate it into the realm of a
ā€œsuperfoodā€, but it’s important to note that pregnant women should not
consume too much cinnamon. The normal amount of cinnamon
consumed when used as a food is fine, but cinnamon supplements or extra
usage of any kind during pregnancy should be avoided in case the spice
stimulates contractions.
Research and medical studies have
shown that cinnamon can play a positive role in stabilizing and lowering
blood sugar levels, because it slows down the rate at which the stomach
empties. Eating cinnamon can therefore help people suffering from
diabetes, when combined with medical treatment.
Keep your blood sugar under control -
Cinnamon smells lovely, so it’s quite rational that we
might use it to mask bad odors. It also has antibacterial properties, so it’s
the perfect spice to use to help combat halitosis.
Get rid of bad breath -
Those same antibacterial properties can be a great
help against fungal infections, including candida, ringworm and athlete’s
foot. Hang some crushed cinnamon in a muslin bag and run your bath
water through it – you’ll not only smell great, but you’ll feel better too.
Fight fungal infections -
- Cinnamon tea is a popular ayurvedic
medicine for heartburn. Simply add a teaspoon of crushed or powdered
cinnamon to a cup of hot water, leave to steep for a few moments, strain
and drink.
Douse the flames of heartburn
Page 176
Learn Herbal
Having trouble sleeping? Cinnamon has mild
sedative properties, so adding some to a glass of warm milk before
bedtime can help relax you and combat insomnia, particularly during
times of stress.
Sweeten your bedtime -
DIY Homemade Cinnamon Remedies and Solutions
Cinnamon Antibacterial Spray
This sweet-smelling spray is perfect as a mouthwash spritzer, or to spray
on your feet to prevent foot odor and help combat fungal infections. Use as
required. If you make several batches, you can decant some into a
different, larger bottle and use it as a homemade antibacterial surface
cleaner too – perfect for quick spray clean ups in the kitchen or bathroom.
You will need:
8 cinnamon sticks
4 cups water
A small spray bottle or similar container
How to make cinnamon antibacterial spray:
1. Break up the cinnamon sticks and add to a saucepan.
2. Add the water, and bring to the boil.
3. Simmer for around five minutes.
4. Take off the heat and leave to steep for 45 minutes.
5. Strain, and decant into bottles as required.
Page 177
Learn Herbal
For vaginal thrush infections, this solution can be used lukewarm as a daily
douche until the infection is cleared, but do not use for more than one
week and stop immediately if you are in discomfort or if the symptoms get
worse.
Easy Cinnamon Tea
This delicious cinnamon tea is very easy to make, and can be enjoyed just
for the taste - but it’s also a useful sleep tonic and could help keep blood
sugar levels under control.
You will need:
Two cups of water
One or two cinnamon sticks
A regular tea bag
Brown sugar or honey to taste
Milk to taste
How to Make Cinnamon Tea:
1. Add one or two cinnamon sticks to two cups of water in a saucepan.
2. Bring to the boil and simmer gently for about 20 minutes.
3. Add the regular tea bag and steep for a few minutes.
4. Remove the cinnamon sticks and stir in a teaspoon or two of honey or
brown sugar – as much as you would normally add to your regular tea
or coffee.
5. Pour into your cup and add milk to taste.
Page 178
Learn Herbal
This is for one person; if you’re making cinnamon tea for your family or for
more people, allow two extra cups of water per person and one cinnamon
stick per person. If you don’t like regular tea, you can omit the tea bag – it’s
a matter of taste and preference. Children tend to love this tea as it’s sweet
and satisfying, and quite creamy too depending on the milk you choose to
use.
Cinnamon Hair Refresher
Hair easily becomes clogged with the chemical residues of gel, shampoos
and conditioners, losing its tone and shine. Cinnamon, with its natural
cleansing properties, can be an effective way of removing build up and
allowing your hair to breathe.
You will need:
1 tablespoon ground cinnamon
1 tablespoon bicarbonate of soda
How to make cinnamon hair refresher:
1. Mix the ground cinnamon and the bicarbonate of soda together in a
small dish or bowl.
2. Pick up the powder in pinches while you’re shampooing your hair as
normal, and massage into your scalp.
3. Rinse thoroughly.
As well as washing away chemicals from your hair, the powder will help to
remove impurities. Cinnamon has hair lightening qualities, so you may
notice a very slight change in your hair tone after use. Repeat the hair
refreshing treatment once a week for best results.
Page 179
Learn Herbal
Ancient people were clearly onto something good when they realized the
many and varied uses of cinnamon. For many of us, the smell of cinnamon
conjures up memories of comfort baking, and particularly of Christmas,
but careful use of this versatile spice can enhance our lives throughout the
year. From cooking to cleaning and from hair care to skin care to infection
fighting power, cinnamon has so much more to offer us than its delightful
taste and aroma.
GARLIC
Page 180
Learn Herbal
Where would we be without garlic? From keeping vampires at bay to
keeping over-eager suitors at bay, garlic has long been prized for its
pungent aroma, unique taste and huge variety of medicinal and health-
giving properties. Hippocrates wrote of garlic that it could be used against
parasites, to regulate the digestion, to combat respiratory problems and to
boost low energy – these days, we can add to that list, with claims that
garlic can help prevent heart disease, lower blood pressure and even
prevent cancer. More than 10,000 pharmacological studies have been
carried out into the properties of garlic, and the results seem to indicate
that it’s among the most versatile, powerful and useful of all kitchen-
garden remedies.
Cultivation of Garlic
Garlic as we commonly know it is a species in the onion genus, closely
related to onions, shallots, leeks and chives. It’s a hardy plant, and
relatively easy to grow in any garden.
1. Plant whole cloves, ideally in late autumn.
2. When planting, push the cloves into the soil until the tip is about an
inch below the surface, and space the cloves around 6 inches apart.
3. Water regularly.
4. From early summer, the plants can be harvested as ā€œwet garlicā€ – this
is when the plants are still leafy but there are reasonable sized heads
underground.
5. Harvest the rest when the foliage starts to dry out in late summer.
When it has dried out, dig up the bulbs and allow them to dry on the
ground in the sun.
Tips on Growing Garlic
Page 181
Learn Herbal
A 5ft row of planted cloves will yield around 10 bulbs of garlic.
If affected with rust disease (red spots on the foliage), destroy the
affected plants and don’t grow onions or garlic in that spot again for
several years, to give the nitrogen levels a chance to even out.
Dry harvested garlic bulbs well and store indoors rather than in a
shed – storing in a colder temperature may kick start the growing
process.
Treat ā€œwet garlicā€ like a fresh vegetable and use immediately.
Medicinal Uses of Garlic
Note that garlic allergies, although rare, do exist – if you are not certain
whether or not you are allergic, you should always do a skin test patch
before using garlic in direct application to the skin.
Tests have shown that eating garlic daily can
reduce your cholesterol level by between 9 and 12 percent. One or two raw
or lightly cooked cloves a day are sufficient to reap the benefits; if you
don’t want bad breath after eating garlic, chew some parsley leaves to help
get rid of the odor.
Lower your cholesterol -
Raw, crushed garlic is a highly
effective antibiotic and antiseptic – so much so, in fact, that battlefield
medics used it during both world wars to help prevent infections at the
front line. Applying raw garlic to a cut may sting for a short while, but in an
emergency can make the difference between an infection developing or
not.
Treat wounds, cuts, grazes and scrapes -
Page 182
Learn Herbal
Some breastfeeding mums like to avoid garlic, as it
does pass into breast milk and can affect the flavor – however, some
studies have shown that babies prefer the garlicky taste and will stay at the
breast for longer if their mothers have recently eaten garlic, thereby
helping with fussy feeders.
Breastfeeding support -
Hold a raw garlic clove in your mouth and breathe
the fumes into your throat and lungs. Garlic’s active compounds include
allicin and allin, which have been shown in test tube studies to kill a wide
variety of nasties. Alternatively, chop a clove into tiny pieces and swallow
quickly with a glass of water.
Nip a cold in the bud -
Eat lots of garlic before you go on a camping trip.
The odor is known to come through in sweat, and insects are repelled by it.
Keep biting insects away -
DIY Homemade Garlic Remedies and Solutions
Antibacterial Garlic Ear Drops
Earaches can be excruciating, but garlic can help to soothe an ear infection
before it takes hold. Try these easy to make garlic ear drops, and attack the
problem from the inside too by eating plenty of garlic in your meals.
You will need:
A clove of garlic
A few teaspoons of olive oil
A small glass
An ear dropper
Cotton wool
Page 183
Learn Herbal
How to make antibacterial garlic ear drops:
1. Squeeze a clove of garlic to extract the juice.
2. Put the olive oil into the glass and gently warm with your hands for a
few moments.
3. Add the garlic juice to the olive oil and mix well.
4. Using the ear dropper, drop a few drops of the mixture into your ear,
with your ear facing upwards.
5. Keep your head tilted for a couple of minutes, then straighten your
head again and let the oil drain into the cotton wool.
6. Repeat daily until symptoms ease, but if symptoms do not improve or
get worse, consult your doctor.
Garlic Acne-Busting Face Mask
Garlic’s antibacterial, anti-inflammatory and antiseptic qualities make it
the perfect ingredient for an acne fighting face mask. This easy to make
mask smells delicious and will do wonders to help clear up troublesome
skin, reaching right down into the pores. For best results, use every other
day to clear an acne breakout, and weekly thereafter to help keep skin in
great condition.
You will need:
2 cloves of garlic
1 teaspoon honey
4 drops tea tree essential oil
1 teaspoon cornmeal
How to make garlic acne-busting face mask:
Page 184
Learn Herbal
1. Chop the cloves of garlic into tiny pieces.
2. Put the garlic, honey and tea tree oil into a blender and blend
thoroughly.
3. Stir the blended mixture into the cornmeal.
4. Apply evenly onto the face and leave for 15 minutes.
5. Rinse off.
6. Splash your skin with cold water to close the pores.
Garlic Tea
As you can imagine, garlic tea can be an acquired taste! However, this easy
to make tea is useful for a whole host of conditions and ailments, from
coughs, colds and flu to digestion problems, stress and all round fatigue.
You will need:
6 cloves of garlic
A lemon
1 teaspoon grated raw ginger
5 cups boiled water
How to make garlic tea:
Page 185
Learn Herbal
1. Boil the water.
2. While the water is heating, crush the garlic clove and grate the
ginger.
3. Squeeze the lemon, extracting as much juice as possible.
4. Remove the water from the heat, and all the garlic, lemon juice and
grated ginger.
5. Leave the tea to steep for half an hour.
6. Strain the tea, reserving only the liquid.
7. Drink all five cups within 24 hours for maximum effect – either drink
it cold (it’s surprisingly good chilled) or reheat gently for a few
moments.
As we’ve seen, garlic can be a tremendously useful addition to your
medicine chest, whether you eat it, brew it, mash it up and apply it or work
any other kind of garlicky magic with it. It should be noted, though, that
garlic has been shown to interact with warfarin and antiplatelet
medication, so if you are taking this kind of medication, do not exceed the
normal culinary amount of garlic without taking medical advice first.
LAVENDER
Page 186
Learn Herbal
Lavender engulfs one’s senses with delight and pleasure – beautiful
flowers in purple, lilac, white, pink or mauve shades featuring a sweet and
soothing herbaceous aroma. Lavender plants are definitely a lovely sight to
behold and a relaxing scent to smell after a stressful day! Lavender
(Lavandula), is a flowering plant cultivated for its use as a flavoring herb,
medicinal herb, ornamental plant for landscaping and gardening and for
the extraction of oils used widely in bath soaps, perfumes, cosmetics, body
lotions, salves, and topical ointments.
Cultivation of Lavender
With its relevance in both health and aesthetics, lavenders are widely
cultivated. Lavenders can be propagated from cuttings and seeds although
many gardeners prefer cuttings.
Page 187
Learn Herbal
1. Take lavender cuttings by snipping off 7.5-10 cm. (3-4 inches) stem
from healthy but non-flowering lavender shoots. Remove around two-
thirds of the leaves and dip the tip in a rooting solution. Plant the
cuttings 2 inches deep in a pot filled with damp sand.
2. Place the pot indoors in a sunny spot and water it to keep the roots
slightly damp. Reduce watering upon observing growth of some
leaves and roots.
3. You can now place the pot outdoors after one month when it already
have enough roots to easily survive outside.
Tips on Growing Lavender
Lavender thrives well in sandy or gravelly well-drained soils.
Lavenders love dry conditions and thus it is best to put them in a
sunny spot. Do not overwater the plants to avoid root rotting.
Prune the lavender plants during late summer.
Harvest lavender when the flowers are just opening because it is
during this stage that they are at their peak in aroma and colors.
Medicinal Uses of Lavender
Lavender is recognized not just because of its beauty but also with its
healing properties.
Got some big eye bags because of
sleeplessness? Combat insomnia by drinking lavender tea! Lavender is
known to be a tonic which can help in getting a better and more refreshing
sleep.
Sleep better with lavender -
Page 188
Learn Herbal
- After a long stressful and exhausting day, lavender
can help you feel calmer and more relaxed through its soothing effect
helping you combat anxiety, agitation and stress.
Relax and take it easy
- Suffering from wounds, sores or cuts?
Lavender can help heal these and additionally avoid infections through its
anti-inflammatory and antiseptic properties.
Lavender: A Miracle Wash
- Are you in pain? Lavender can help relieve
headaches/migraines, joint and nerve pains, toothaches and sprains.
Pain, pain – Go away
- Get a healthier and dandruff-free hair
with lavender! Lavender used as a hair rinse can help reduce hair loss and
get rid of nasty dandruff.
Lavender for your crowning glory
DIY Homemade Lavender Solutions
Here are some easy lavender solutions which you could do yourself in the
comfort of your home. Through these, you’ll be able to save some money
while increasing your knowledge and skills!
Lavender Tea
For an upset stomach or for soothing away your worries, irritation, stress
or exhaustion, making lavender tea is as easy as 1-2-3! Relax your day away
with these easy steps in making your very own lavender tea!
What you will need:
Page 189
Learn Herbal
1 ½ tbsp. of dried lavender blossoms or 3 tbsp. of fresh lavender
flowers
Hot water
Honey and lemon (optional)
Strainer
Tea pot
Tea cups
Instructions in making your lavender tea:
1. Put hot water to the tea pot and add your lavender blossoms.
2. Let it boil and then remove tea pot from heat.
3. Steep for 3-5 minutes.
4. Strain the flower buds if necessary.
5. Serve tea with honey and sliced lemon if preferred.
** Lavender tea can be served hot or iced. Just add some ice cubes and voila
– it’s an iced lavender tea for you!
Lavender Oil
Lavender oil is one of the most favored essential oils. With its relaxing
scent and functionality as massaging oil, addition for a refreshing dip in the
bathtub, healing of wounds, cuts or burns as well as reduction of
congestion and easing away of sinusitis – there’s no wonder that lavender
oil is one of the most commonly used oils.
What you will need:
Page 190
Learn Herbal
Lavender flowers
Carrier Oil (Ideally, an oil with a mild scent and fair color e.g. Olive oil,
Almond oil, Jojoba oil)
Fine mesh strainer or alternatively, a piece of cheesecloth
A dark bottle or jar
Instructions in making your lavender oil:
1. Pour your selected carrier oil in the jar or bottle with a tight-fitting lid.
2. Place the lavender flowers into the jar and stir it together with the oil.
3. Cover the jar tightly and let it steep for 48 hours or more (depending
on the strength of aroma you prefer) in a sunny or warm spot.
4. Use the strainer to separate the flowers from the oil. Use a spoon
against the strainer to squeeze away more essence from the flowers.
You can also use a piece of cheesecloth to strain away the flowers
from the oil and effectively squeeze away the oil from the flowers.
5. Pour the oil in the dark bottle or jar. If kept in a cool and dry place or if
refrigerated, your lavender oil can last for around six months.
Lavender Lotion
Lotions are essential in moisturizing the skin and they cost some money
too. Well, making your homemade version of a lavender lotion could
prove to cost lesser than ones bought from the store. With a little effort
and patience in making your own lotion, you’d surely save a lot! And with a
plus, you’ll be able to use your imagination and decide what ingredients or
materials you’ll be using! Here’s a suggested recipe for your own lavender
body lotion:
What you will need:
Page 191
Learn Herbal
Lavender essential oil
1 cup of oil (can be a mixture of ¾ cup of almond oil and ¼ cup of
jojoba oil)
¾ cup rose water
1/3 cup aloe vera gel
1 tsp. lanolin
2 tbsp. grated beeswax
Grapefruit seed extract
Mason Jar
Double Boiler
Blender
Silicone spoon
Rubber Spatula
Instructions in making your lavender lotion:
1. Combine the oil solution with the lanolin and beeswax in the double
boiler and allow the combination to melt together on low heat. Use
the spoon for stirring.
2. When completely melted together, set it aside and let it cool.
3. Mix the aloe vera gel, rose water and 30 drops of lavender oil together
then pour it into the blender and turn it on.
4. Slowly pour the oil and beeswax mixture in the blender to combine
the ingredients completely.
5. Put some grapefruit tree extract to better preserve the mixture and
then blend.
6. Finally, put the lotion in the mason jar.
Page 192
Learn Herbal
With its beauty, fragrance and importance in medicine, culinary and even
in commercial beauty and personal products – Lavender has always been
recognized as a wonder herb! Cultivate your own lavender plants now and
enjoy its wonderful benefits!
LEMON BALM
The lemon balm (Melissa officinalis) is actually a member of the mint
family. This is an herb that is touted for its calming effects. The lemon
balm, with its delicately aromatic lemony smell and its soothing flavor, has
graced some of the most fabulous fragrant teas ever made. Like other
delicious mints, the lemon balm too has its lineage in the shrouds of
medieval Europe.
Page 193
Learn Herbal
The lemon balm has been used for ages as a nerve soothing aromatic
miracle. As a matter of fact, its use in the field of calming the hot headed,
stressful people dates back to even before the medieval ages in Europe! It
has been drank in teas, added to wines, and used in recipes with the goal of
achieving mental calm through the delicate taste and fragrant flavor.
Today, the tincture of lemon balm and its essential oil are wildly popular,
and act as a relief for the modern day workers exposed to stressful jobs.
Cultivation of Lemon Balm
Lemon balm, like other members of the mint family, is a hardy plant that
can handle tough conditions, such as a bit of shade and little soil nutrients.
Thus, not a particular lot of care is needed to grow this useful herb.
However, growing lemon balm with dedication and care is bound to give
you a lot of healthy, great flavored lemon balm leaves.
Page 194
Learn Herbal
1. A well tilled garden bed is recommended, as with any other
gardening venture. Make sure there are no stones, and the turned
over soil is loose for reception of the lemon balm.
2. Lemon balm prefers growing in soil that has plenty of moisture but is
well drained. So remember not to pack your garden bed soil.
3. The recommended pH for growing lemon balm is from 6 to 7. If the
pH is higher, use an alkali such as calcium.
4. Since lemon balm leaves are picked a lot, a good fertilizer will ensure
optimal growth. You can use organic compost for maximum results.
Simply dig a deep trench in the bed, lay down a layer of the fertilizer,
and cover that up with a good few inches of soil. Then plant your
lemon balm in the soil.
5. Lemon grass is best grown from a cutting or sapling. Simply transfer
saplings to the ready bed.
Tips on Growing Lemon Balm
Your lemon balm shrub should be regularly trimmed for best results.
During periods of drought or other hard times, simply cut down the shrub
to a small size. This will significantly decrease pressure on the plant, and it
will grow back all healthy in more opportune times.
Dry lemon balm leaves are flavorless at worst. Young leaves have the best
flavor. This makes lemon balm more or less a seasonal treat. Enjoy the
great flavor in periods of new leaf growth in spring.
Protect lemon balm from frosts - Lemon balm flowers are not particularly
effective, but they do spread around seeds. To prevent your lemongrass
from repopulating, you should use mulch around the ground near your
lemon balm plant.
Page 195
Learn Herbal
Medicinal Uses of Lemon Balm
Lemon balm has reputed medicinal use since ancient times. It has often
been used as a tonic for bad moods and stress. The simple, yet fragrant
flavor of lemon balm is a great source of relaxation.
Stress relief is crucial for good health, and the accumulation of stress
causes many health complications. The use of lemon balm is therefore
quite effective towards achieving good health. Furthermore, the
antioxidants in lemon grass boosts good health, and can be used to treat
herpes sores and indigestion.
A gentle, lukewarm tea of lemon balm, together with
other soothing flavored herbs such as chamomile and vanilla, can be an
effective reliever of stress problems.
Bust your stress -
Viruses that cause cold sores have been shown to be
combated by lemon balm. Although scabbing and scarring is not much
helped, herpes cold sores have been shown to reduce in redness upon
topical application of lemon balm cream.
Treat herpes sores -
In the laboratory, lemon balm has been seen to combat
some indigestion causing bacteria. This means that the lemon balm,
together with some other effective herbs, can be used to combat
indigestion.
Treat indigestion -
Take the sting away from a bee or wasp sting using an
ointment cream made from lemon balm extracts.
Treat insect bites -
Page 196
Learn Herbal
A soothing tea of lemon balm, with its fragrant
lemon smell, can easily remove stress induced headaches.
Get rid of your headache -
DIY Homemade Lemon Balm Solutions
Lemon Balm Wine
This invigorating and refreshing summer wine can really lighten up your
mood and open up the summer festivities. The unique flavor is thoroughly
enjoyable and is bound to draw compliments. Serve it chilled to capture
the very essence of summer. It is low in alcohol content.
What you need:
2 quarts of lemon balm leaves
1 pound sultanas
The juice and the rind of two large oranges
The juice and the rind on one large lemon
5 cups of sugar
1 teaspoon of tartaric acid
1 teaspoon of pectic enzyme
Campden tablet
Brewer’s yeast
Instructions for Making Lemon Balm Wine
Page 197
Learn Herbal
1. Wash the lemon balm thoroughly in cold water. Remove the leaves
from the stalks, and discard the stalks. Wash the leaves again.
2. Fill a saucepan with water and bring to boil.
3. Put the lemon balm leaves in a container and fill with boiling water.
4. Add a campden tablet to the water and dissolve.
5. Cover up the container and leave for 48 hours
6. Strain the lemon balm off after 48 hours
7. Add to the remaining liquid the orange pulp, the finely chopped
rinds, the lemon juice and the lemon rind (finely chopped), the
sultanas, the acids and the enzyme, and the yeast.
8. Ferment the mixture for about 4 days in a dry, cool place
9. Filter off the solution and add the sugar and top off with water to
make about 1 gallon. Now pour into a demijohn and ferment again.
10. Bottle up the wine when optimal alcoholic level has been reached.
Make sure to use strong bottles.
Lemon Balm Tea
The tea of lemon balm, with its refreshing properties, is an excellent way
to end a stressful, tiring day of hard work. Breathe in the lemony scent of
this delicious, well-loved tea, sink in the lemony goodness, and forget all
your woes and worries.
What you need:
Half a cup of lemon balm leaves
Two cups of water
Honey
Instructions:
Page 198
Learn Herbal
1. Heat the two cups of water in a kettle.
2. Shred the lemon balm leaves.
3. Place the lemon balm leaves in a stainless steel mesh tea ball.
4. Put the ball in hot (not boiling) water and steep for a few minutes.
5. Add honey to the tea as per taste. Enjoy.
There is not much really left to say about lemon balm. Its lemony flavor
and its hardy nature in the garden is enough to make any gardener fall in
love. As a herb, it is outstanding – the flavor is strong enough to make its
presence known,yet not overbearing.
It is really the perfect herb. It has been used to bust stress since before
stress became widely known and understood – and this goes to show how
effective lemon balm really is in relieving stress symptoms. So add this
incredible herb to your garden and your cooking today, and just watch
your mood elevate!
LIQUORICE
Page 199
Learn Herbal
Liquorice (Glycyrrhiza glabra) is a flowering perennial plant with purple
and white flowers. It is native to the Mediterranean, and South and Central
Asia. The most helpful part of this plant is the sweet tasting taproot that can
grow up to four feet deep. This gray taproot (yellow on the inside) has been
the feature of prescriptions since ancient times.
Page 200
Learn Herbal
Hippocrates, the man who defined modern day medical practice in
Ancient Greece, named the root of the plant ā€˜glukos riza’; the ā€˜sweet root’ -
which is a clear indication of how sweet and pleasant tasting the root is.
Ayurvedic treatment has long prescribed this herb for the effective
treatment of upper respiratory tract problems. But that is not the only use
of this herb. Liquorice contains a blend of compounds which makes it a
useful treatment for many different maladies,including ulcers, colds, and
even as a mild laxative. However, it is important not be liberal with the use
of Liquorice. It can cause potassium deficiency and an increase in blood
pressure, and high blood pressure patients, along with diabetics, should
avoid Liquorice.
Cultivation of Liquorice
Liquorice is a very popular plant these days, and it should not be too
difficult to obtain a few seeds of the plant from the nearest nursery. The
important thing to remember is that Liquorice growing requires a bit of
patience – it takes about three to four years for the roots to grow long
enough to be harvested.
Page 201
Learn Herbal
1. Use a nail file to file off a little section of the husk of each seed.
2. Soak the seeds in water for about 24 hours.
3. Transfer the seeds into separate, sturdy 4 inch pots that can
accommodate watering.
4. Sprinkle about 1/4 inch of soil on the seeds. Give the seeds 8 to 10
hours of sunlight, and water regularly. Germination can take from a
week to two weeks.
5. When the seedlings are sturdy enough, transfer to a bed. The bed
must be turned over well, with loose soil and no weeds.
6. Dig holes into the soil, about three feet apart that are the same depth
as the 4 inch pots, but about twice as wide.
7. Slide the seedlings out of the pot and transfer to the holes. Sprinkle
soil in loosely.
8. Water the roots diligently for the first year. After a year of root
growth, the plant comes fairly drought resistant.
Tips on Growing Liquorice
During the seedling stage, it is important to keep the pots well drained. Do
not over water or the roots will rot.
It may be a good idea to grow separate batches of Liquorice every year, as
Liquorice takes 4 years to grow. That way, you can consistently harvest
Liquorice every year after four years.
Medicinal Uses of Liquorice
Liquorice roots are excellent cures for a wide array of health
complications. The leaves and stems, too, can be useful. Prescribed since
ancient times, it has been touted both through long experience of cure,
and by modern scientific research based verification.
Page 202
Learn Herbal
Liquorice can help with reducing
cholesterol by increasing the flow of bile. Liquorice root also contains
antioxidants which can significantly increase capillary health and stop
arterial plaque from depositing.
Cholesterol and cardiovascular health -
Liquorice contains anti-inflammatory and
anti-spasmodic compounds, and even has mild levels of estrogen-like
substances. So Liquorice can be used to relieve PMS symptoms.
Relief from menstrual cramps -
Liquorice has antibacterial and anti-viral properties.
This can help with preventing the return of cold sores from herpes.
Relief from herpes-
Liquorice helps cool down the stomach acid, relieving
gastric troubles.
Gastric relief -
Liquorice has surprising mood enhancing properties.
Researchers believe this is based in Liquorice’s ability to stimulate the
adrenal glands. In any case, sipping on a well-made Liquorice tea can well
uplift your mood.
Depression cure -
However, Liquorice users need to be careful not to exceed recommended
dosages. Liquorice can increase blood pressure and cause potassium
deficiency. Those suffering from high blood pressure and diabetes should
stay off Liquorice concoctions.
DIY Homemade Liquorice Solutions
Liquorice Tea
Page 203
Learn Herbal
Liquorice tea is an excellent cure for colds, sores and fevers. Rich in
antioxidants and antibacterial and antiviral compounds, it can really help
perk up your health and mood. Liquorice root is sweet as it is, and thus
Liquorice tea requires no addition of harmful sugar in order to make it
palatable.
Here is how you can make a healthy Liquorice tea:
Ingredients:
Liquorice roots
Peppermint leaves or cinnamon (optional)
Instructions:
1. Shred the Liquorice roots into coarse, small pieces using a knife,
shredder or a blender. You will need about 1 teaspoon of grated root.
2. Boil about a cup of water in a kettle
3. Place the grated Liquorice in a steel tea ball or a mesh infuser. Place it
in the hot (not boiling) water and let the root steep.
4. Add peppermint leaves or cinnamon for flavor. You may add other
herbs too. You can add these either in the infuser, or just let the leaves
into the water.
5. Drink the tea when it is mildly lukewarm. You can drink about three
cups a day, but be careful not to over drink, as Liquorice can have
some side effects in excess.
Liquorice Candy
Page 204
Learn Herbal
Liquorice candies are a favorite of young and older people alike. It’s a
healthy sweet that doesn’t use harmful refined table sugars for the
yummy sweetness. These days the commercial ā€œLiquorice candyā€ don’t
have actual Liquorice, as excess Liquorice can be harmful to health. So you
can make some delicious Liquorice sweets at home, but be careful not to
overindulge!
Ingredients:
Molasses
Liquorice roots
Anise
Flour
Instructions
1. Add one cup of molasses to a heating pan. Heat gently for about ten
minutes, but do not allow the molasses to bubble.
2. Add one teaspoon of powdered anise and one teaspoon of powdered
Liquorice root to the molasses, and stir thoroughly.
3. Add half a cup flour to the molasses mixture. Keep adding with flour
until a consistent paste has been formed. About one cup of flour
should be required in total.
4. Take the dough out of the pan, and place on a counter top. Cut it out
into several pieces, and shape into tube like candies, about half inches
thick.
5. Wait until the candy has cooled. It should harden with cooling. Store
the hardened candy and enjoy when ready.
Liquorice Leaf Salad
Page 205
Learn Herbal
You can enjoy Liquorice leaves in fresh produce salads. Although they are
not as effective as the Liquorice roots, you can still derive great health
benefits from them. Rich in vitamins and minerals, they are a great
addition to any diet.
You can make a tasty Greek salad from Liquorice leaves. Surprise guests
with this delicious culinary adventure, or try it yourself.
What you need:
Half a bowl of Liquorice leaves
Olive oil
Vinegar
Parmesan cheese
Olives
Two large tomatoes, diced
Instructions:
1. Mix the diced tomatoes with the Liquorice leaves.
2. Apply a liberal dash of olive oil and toss gently.
3. Pour a dash of vinegar for the sour taste and flavor.
4. Sprinkle on about half a cup of finely grated parmesan cheese.
5. Throw in a few olives.
6. Serve in a large salad bowl.
Page 206
Learn Herbal
So that is Liquorice – an ancient herb that has deeply rooted itself into
health practice rituals with its sweet, tasty taproot. Be sure to try the
recipes yourself and experience the powers of this gray root. You know the
herb really works when everyone from Hippocrates to modern scientific
research claims its benefits and prescribes it. However, Liquorice users
should be careful not to exceed recommended dosages. Take a little care,
and enjoy the benefits of this great herb!
MARSHMALLOW
While we all wish the puffy, campfire confectionary has tremendous
health effects, it is rather the Marshmallow herb (Althea officinalis) that
does. The marshmallow has been featured in prescriptions worldwide
since ancient times. It was also quite popular as a food – so widespread was
its popularity as a food that the ancient Chinese, Romans, Sumatrans and
Egyptians have all been known to use this herb.
Page 207
Learn Herbal
The Arabs have used its leaves in poultices to combat inflammation. The
roots and the leaves of this plant contain a sticky substance called
mucilage, which can be mixed with water to form a slick gel that can be
applied topically on the throat and stomach as a balm. People with chapped
skin may also find the gel useful.
Although marshmallow has little scientific study to tout its beneficial uses,
its long history is certainly food for thought. One recent study has also
shown that preparations from marshmallow can help soothe irritated
mucous membranes. Other diseases it can help with are cough, asthma,
indigestion, ulcers and many more.
Cultivation of Marshmallow
The marshmallow is a hardy plant that grows in the wild in swamps and
marshes (hence the name). With soft, velvety leaves and beautiful pink
flowers that bloom all year, the marshmallow is an ideal decorative plant.
Unfortunately, although the marshmallow can survive (even thrive) in over
watering and other harsh conditions, marshmallows can be a little tricky to
germinate.
But you should find it easy enough with these steps:
Page 208
Learn Herbal
1. Mix the seeds with damp sand and place in a plastic bag. Leave at
room temperature for 24 hours for the moisture to set in.
2. Place the bag in a refrigerator for about 4 weeks. Give the bag a shake
from time to time to see if any seeds have sprouted.
3. If any seed has sprouted, remove it immediately and transfer to a pot
with good potting soil. Cover the seed with a sprinkling of the sand
from the bag.
4. Keep the pot covered with a plastic cling film. Always attempt to keep
the soil as damp as possible, as marshmallows thrive in swampy lands
in nature.
5. Keep the pot in a sunny but cool area, such as a windowsill.
6. When the seedlings are starting to sprout, transfer them from the pot
to a bed outdoors. To do this, till a garden bed well, and then dig holes
about a foot apart. Place the seedlings along with the potting soil from
the pot to the hole.
7. Water each plant deeply and frequently for the first year.
Tips on Growing Marshmallow
Keep in mind the conditions in which marshmallows grow in nature. They
favor a swampy land, and you should emulate this in your garden bed by
watering very frequently. Marshmallows grow very slowly in their first
year, so be patient.
After a year, they may grow much faster, and you may have to re-space the
plants to avoid overcrowding.
Medical Uses of Marshmallow
Page 209
Learn Herbal
Although marshmallow sap has found its most popular use in the famous,
well-loved marshmallow candy, the marshmallow itself has been said to
have many health benefits.
Although few studies have been conducted on the health benefits of its
use, it has been used with good effect for centuries in traditional medicinal
practices. The success of these treatments can only signify the usefulness
of the marshmallow plant in treating health complaints.
Here are some of its more widespread uses:
Marshmallow contains a demulcent that
soothes rashes, abrasions, inflammations and wounds. Use it in a poultice
to soothe skin wounds.
As a balm for skin irritation -
Marshmallow roots can be steeped in warm
water, which can then be drunk in a soothing tea that can treat bladder
infections. Some laboratory research shows that it can be as effective as the
unhealthy antibiotics.
Treat bladder infections -
Marshmallow has been seen to have a good effect on
gum health. Chew on marshmallow leaves, or toss them in a salad.
Improve gum health -
A soothing marshmallow tea can help alleviate tooth
ache, and even slow or stop tooth infections.
Reduce toothaches -
DIY Homemade Marshmallow Solutions
Marshmallow Salad
Page 210
Learn Herbal
Marshmallow leaves are tasty, crunchy and have a flavor that can truly
enhance a creative salad. You can have it regularly, and the pleasant taste
soon becomes habit forming. Enjoy all the goodness of marshmallow in a
tasty, invigorating salad.
What you will need:
Half a bowl of marshmallow leaves
Two large tomatoes
A few olives
1/2 cup finely grated parmesan cheese
onions chopped in rings
Two large carrots, diced
Olive oil
Instructions:
1. Chop the tomatoes into rough dices.
2. Add in the diced carrots, the marshmallow leaves, the olives the
ringed onions and the tomatoes in a large salad bowl.
3. Add a liberal dash of olive oil and toss vigorously.
4. Sprinkle the parmesan cheese on top.
5. You may add a commercial salad dressing if you wish, but these are
often unhealthy so avoid if you can. You can add a dash of vinegar for
added flavor.
6. Serve the delicious salad as a starter.
Marshmallow Tea
Page 211
Learn Herbal
A soothing marshmallow tea can be really helpful for sore gums or a
toothache. You can steep either the leaves or the roots of the marshmallow
plant in hot water, and brew a wonderfully calming tea that soothes the
nerves and gives you a relaxed feeling.
What you need:
Marshmallow leaves and roots
Instructions:
1. Coarsely chop the marshmallow roots and leaves with a pair of
kitchen scissors.
2. Heat a cup of water in a kettle.
3. Bring the water to boil and then pour into a cup.
4. Place the marshmallow leaves and roots in a steel tea ball.
5. Put the ball in the hot water and steep for a few minutes.
6. Stir the ball and shake gently to get the maximum extraction.
7. You can add some cinnamon for flavor. You can also add vanilla
essence to enhance flavor.
8. Avoid adding sugar as it is unhealthy. However, you may add some
sugar if you must.
9. Consume the tea lukewarm for maximum effect.
Marshmallow and Herb Soup
You can cook marshmallow leaves in a delicious soup that is chock full of
herbaceous goodness.
Page 212
Learn Herbal
You can combine several herbs of your choice in this sup, or you can just
add marshmallow leaves to the recipe of any of your favorite soups. The
flavor of marshmallow leaves works well with most ingredients.
Here is one recipe that works well:
What you need:
2 teaspoons olive oil
2 cloves of garlic
1/2 an onion, finely chopped
1 stalk of celery, finely chopped
1 medium sized white potato, cubed
2 cups chicken stock
2 cups milk
Six ouches of fresh marshmallow leaves, fine chopped
Black pepper, finely ground
1 cup fat free sour cream
Instructions:
1. Heat oil in large saucepan. Add garlic, celery, onion, and potato and
sautƩ for 5 minutes.
2. Add the chicken stock and milk, and bring to boil. Simmer for 10
minutes.
3. Use half of the marshmallow leaves. Cover and simmer gently for ten
minutes.
4. Place the soup in a blender and blend. Add the remaining spinach and
blend again for a creamy consistency
5. Add the sour cream. Serve.
Page 213
Learn Herbal
As you can see, marshmallow is a great herb that can be used in a large
repertoire of applications. Add this healthy herb to your diet and you are
bound to feel healthier every day. Marshmallow leaves are tasty too, and
trying them in your cooking is bound to receive great appreciation.
NETTLE
The stinging nettle (Urtica dioica and related Urtica urens) is a herb that
has a long history of use for beneficial human health practices. The use of
this surprisingly helpful herb dates back to medieval European traditional
medicine, where it was used as a diuretic (a substance that stimulates
urination - helping to get rid of excess water) and as an effective balm for
muscle pain.
Page 214
Learn Herbal
By itself, the stinging nettle can be rather unpleasant to the skin. The
stinging nettle has fine hairs which can be very stinging to touch. It
contains some irritating chemicals that cause this sting. However, when
applied to painful areas on the body, it helps to relieve pain in that area. It is
thought that the chemicals in stinging nettle interfere with the nervous
system, thus alleviating the muscle pain.
Cultivation of Nettle
Nettle is a highly invasive species. This can be a blessing if you are growing
nettles, and a curse if you are growing anything else. This distant cousin of
the mint can be rather painful to control. One good idea would be to grow
your nettles indoors, or to separate your nettle growing operation in
another part of the house, such as the backyard.
Here is how you can grow your nettles:
1. You can find nettle seeds in most nurseries. There is no need to
germinate them separately or take any special care – simply find a
secluded garden bed, far away from your precious flower beds or
vegetable patches, sprinkle the seeds and sprinkle soil on.
2. Water the nettle bed every once in a while. Don’t water log the seeds.
3. When the seeds have germinated, keep watering for healthy growth.
Fertilization is not particularly necessary.
Tips on Growing Stinging Nettles
Always use protective gear when picking nettles. Wear gloves, long pants
and don’t leave any skin exposed to the nettles. Diligence is the only way to
avoid hours or stinging pain.
Page 215
Learn Herbal
The plant grows to six feet long. In summer, you must chop down the
nettle shrubs. If you don’t do so, the seeds can spread all over your garden
by the wind, invading your precious flower beds.
Keep the children away: Educate your children on the very painful nature
of your herbs. Prevention is the best medicine with the sting of the nettle.
Medicinal Uses of Nettle
The stinging nettle is a herb deeply rooted in ancient European culture
and folklore. Knights of yore have found benefit in this stinging herb for
their health complaints and muscle sores. You may not be brandishing
huge swords or convening at Arthur’s Round table, but you will be sure to
benefit from the many health benefits of the stinging nettle.
Here are just a few highly effective uses of stinging nettles:
The ancient use of the stinging nettle is one
you can benefit from right after hitting the gym again after many days.
Apply the stinging branch of the nettle right on the muscle sore, and just
feel your pain disappear. Be careful while picking the nettle though! You
don’t want to be stung in places where it doesn’t hurt.
As a cure for muscle sores -
Page 216
Learn Herbal
This is a useful
application of stinging nettle that has been touted by some serious
research. As a matter of fact, this is the more popular treatment for an
enlarged prostate in Europe. The medical treatment in fact decreases the
size of the prostate, whereas the treatment using stinging nettle stops it
from growing, and alleviates the problems caused by enlarged prostate,
such as inability to urinate properly, constant desire to urinate, and
incomplete urination.
As a cure for Benign Prostatic Hyperplasia (BPH) -
Say goodbye to arthritic pain – apply stinging
nettle topically to get rid of pesky joint pain.
As a cure for Osteoarthritis -
Hay fever can be an annoying condition. Use nettle
capsules to relieve itching and sneezing problems.
Cure hay fever -
Blood pressure and blood sugar levels can be
lowered by using nettle. This has been shown in animal research, but not
much research has been done on humans – yet.
Lower blood pressure -
DIY Homemade Nettle Solutions
Nettle Beer
When served chilled, this is a truly refreshing and energizing drink. It is
not a very hard drink to prepare, and can be a very welcome beverage in
summer. Whip up this incredible brew and surprise family members and
guests alike with the goodness of nettle.
What you need:
Page 217
Learn Herbal
2 pounds of nettle tops (must be from young plants)
1 gallon of water
1 pound of Demerara sugar
2 large lemons
Brewer’s yeast
1 quart Cream of Tartar
Instructions
1. Wash the nettles in cold water and sort.
2. Place nettles in a saucepan. Add thinly sliced rinds of lemon and
water.
3. Bring to boil and then simmer the water for about 20 minutes.
4. Strain the mixture. Add the strained liquid to one gallon water and
add the sugar.
5. Add the cream of tartar and cool.
6. Add the yeast mixture when the solution reaches appropriate
temperature. Also add the lemon at this stage.
7. Pour the mixture into a demijohn, leave for 3 to 5 days.
8. Cool off the mixture to stop the yeast’s action.
9. Bottle the mixture into strong bottles. Make sure to use sturdy
containers that will not burst under internal pressure.
10. Serve chilled.
Nettle Risotto
Any risotto is a difficult feat to get right, and this nettle risotto is no
exception. However, if done right (which is very rare) this risotto can be
very pleasing, with the nettle providing a unique taste.
What You Need:
Page 218
Learn Herbal
1/4 lb nettles (from young plants)
11 oz of Arborio (risotto rice)
1 large onion, finely chopped
2 tbsp butter
1/2 cup white wine
6 cups of chicken stock
Parmesan cheese, grated
Salt and pepper
:
Instructions
1. Wash and sort the nettle leaves. Blanch in boiling salt water for a few
minutes.
2. Drain the nettles and finely chop.
3. Use half the butter to sautƩ the onions for a few minutes.
4. Add in the nettle and cook for a few more minutes, stirring.
5. Add in the rice and heat at a higher temperature for about 2 minutes.
6. Add in the wine.
7. Heat until the wine has evaporated.
8. Pour in boiling chicken stock (heat it beforehand in a saucepan). First
add a cup, and then keep pouring in half cup portions as the stock
evaporates.
9. Keep cooking for about 15 minutes, when the rice riches the ā€˜al dente’
consistency – soft but with a bite.
10. Pour out the risotto and add in the remaining butter. Season with salt
and pepper.
Nettle Omelet
Page 219
Learn Herbal
A cheerful nettle omelet is a perfect breakfast item, or a great snack for
some hungry time. You can whip it out in no time at all, and the nettle
really adds a different dimension to the egg.
Things you need:
2 large eggs
Olive oil
Mozzarella cheese
A few nettle leaves, coarsely chopped
A clove of garlic, finely chopped
Salt and pepper
Instructions:
1. SautƩ the nettle leaves and the garlic with olive oil.
2. Beat the eggs to a smooth consistency.
3. Add in the grated mozzarella cheese.
4. Add in the garlic and the nettle leaves (cooled) and beat into the
mixture until consistent.
5. Heat oil in the frying pan and pour in the mixture. Fold and turn for
the perfect omelet.
6. Season with salt and pepper and serve hot.
The nettle is a great, surprisingly useful herb. From its ancient European
origins, it has consistently shown that behind unpleasant stinging exteriors
often lie useful interiors. Add nettle to your garden, but with care not to
have it rule your yard. Experiment with the delicious nettle recipes and
rediscover this great herb.
Page 220
Learn Herbal
PEPPERMINT
Peppermint (Mentha piperita) is a very popular herb for its characteristic
hot, minty flavor. It is used in cooking for its exotic flavor, and peppermint
extracts have found their way to toothpastes, teas, and balms.
The uses of peppermint are wide and varied, and they rely mainly on the
numbing and calming effect of peppermint. Peppermint offers sweet relief
from headaches, nausea, skin irritations, flatulence, diarrhea, menstrual
cramps, and many other health problems. Peppermint extracts have also
been shown to have some antibacterial and anti-fungal properties in the
laboratory. When topically applied, it can soothe pains, skin irritations and
relieve cough symptoms. In the stomach, peppermint relaxes the stomach
muscles, and also helps to boost the flow of bile from the liver. This helps
speed up the digestion process, and relieves flatulence and gas problems.
Page 221
Learn Herbal
Cultivation of Peppermint
Peppermint is a hardy perennial plant that is very easy to grow. It is so easy
to grow, in fact, that it is very invasive, and will soon take over a garden
unless proper precaution is taken. So be careful with the cultivation of this
herb. Some people also like to have a bedding of peppermint on their yard
or garden in place of grass and you can consider this unique option too.
1. Choose a well tilled flower bed that drains well. Fertilization is not
particularly required, but can be used for quick growth.
2. It is best to grow peppermint in full sunlight, but it grows in partial
sunlight too.
3. You can either start off your cultivation with cuttings or seeds. With
seeds, sprinkle on the soil and sprinkle some soil on top. It is not
necessary to be particularly caring, as peppermint can well take care
of itself.
4. Harvest leaves when fully grown.
Tips on Growing Peppermint
You might have a lot of trouble keeping this persistent herb’s population in
control. Try to pluck off any excess growing outside your garden bed as
soon as possible.
Menthol and menthyl acetate, the substances that give peppermint its
characteristic flavor, are mostly found on older, more mature leaves. So for
cooking purposes, only use fully grown leaves.
Page 222
Learn Herbal
It might be a good idea to grow peppermint in pots indoors. They thrive
well in indoor conditions – just give them a patch of sunlight. This ensures
that your garden is not overrun with peppermint.
Peppermint has been known to deter insects, and you can even use a
peppermint spray to ward off insects from other plants. So not much
attention is needed for pests, except caterpillars – which grow into very
beautiful butterflies.
Medicinal Uses of Peppermint
Peppermint is, of course, a very popular kitchen herb. Surprisingly,
however, it has also found a great deal of use in medical applications.
Peppermint has a calming, gentle flavor that makes very soothing teas to
relieve stress. It also has a great deal of powerful health enhancing
capabilities, including anti-inflammatory properties, improving digestion,
and improving the quality and flow of bile, and many more. The leaves of
the peppermint tea are generally used.
Sipping on a gently flavored, healthy
peppermint tea is great way to bust stress after a long day.
Cures stress and mental fatigue -
Peppermint freshens the breath by killing off smell
inducing bacteria. Instead of using commercial peppermint toothpaste, you
can just as easily enhance regular toothpaste with a few drops of essential
peppermint oil.
As a breath freshener -
Peppermint contains menthol, which gives it
its minty flavor. Menthol is great for the stomach lining, and can sooth
stomach pain stemming from the lining of the stomach.
Soothes the digestive tract -
Page 223
Learn Herbal
Menthol also causes good quality bile to be
produced, and a healthy flow to be maintained. Bile is a substance
important for the digestion of fat, so peppermint can really help when
included with a fat rich meal.
Induces healthy flow of bile -
Peppermint is rich in vitamins A and C, which are very
important for the body.
Vitamin boost -
DIY Homemade Peppermint Solutions
Peppermint Tea
This is actually a very popular drink all over the world, especially in
Arabia, where peppermint leaves are also sometimes added to regular tea
for the flavor. A soothing peppermint tea has a large number of benefits. It
is a nerve soothing experience that you should treat yourself after a long
day of work. And it also has great benefits for the stomach. A serving of
peppermint tea after a meal can vastly improve digestion.
What you need
Peppermint leaves
Instructions:
Page 224
Learn Herbal
1. Shred the peppermint leaves roughly into small pieces.
2. Put a cup of water into the kettle and bring to boil.
3. Place the shredded peppermint leaves into a steel teal ball or a steel
infuser.
4. Add the ball to the hot water, and steep for a few minutes.
5. You can add some cinnamon or other herbs for flavor. However,
peppermint has a distinct, enjoyable flavor by itself.
6. Consume the tea when it is lukewarm. You can have sugar with the
tea, but it is best to avoid refined table sugars as much as possible!
Peppermint Tincture
Peppermint tinctures are a great cure for all kinds of illnesses. You can
apply them topically to muscle sores to remove the aching pain. You can
use the concentrated peppermint goodness as a few drops in toothpaste, or
in diets of sick family members.
One teaspoon of this tincture should be enough to treat indigestion and
heartburns and nausea in adults.
Things you need:
Half a cup of dry peppermint leaves
Half a cup of diced ginger roots
One fourth cup dried fennel seeds
One and a half cup water
One and a half cup drinkable rum or vodka, with about 40% alcohol
:
Instructions
Page 225
Learn Herbal
1. Place dried peppermint leaves, ginger and fennel seeds in a glass jar.
2. Cover the leaves, ginger and fennel seeds with boiling water.
3. Fill up the rest of the jar with the vodka or rum.
4. Keep the jar in a cool dry place for 2 to 6 weeks. Do not exceed 6
weeks.
5. Strain off the mixture after 2 to 6 weeks using a filter cloth or
cheesecloth.
6. Store the mixture in jars or vials.
Peppermint Soup
Peppermint is often used as a spicy addition to many cooking preparations.
But the minty flavor itself is quite enjoyable. This minty soup, where
peppermint is the key ingredient, can be a great food if you are suffering
from a cold, not only will it taste and feel great, but your cold will also be
cured faster.
Here’s what you need:
One large onion, finely chopped
Olive oil
2 cloves of garlic
1 medium sized white potato, cubed
2 cups chicken stock
One large chicken breast, finely diced
2 cups milk
Six ouches of peppermint leaves, finely chopped
Black pepper, finely ground
1 cup fat free sour cream
:
Instructions
Page 226
Learn Herbal
1. Heat the oil in large saucepan. The garlic, celery, onion, and potato
should be sautƩed for a few minutes until golden brown.
2. Add the chicken stock, milk, and chicken breasts and bring to boil.
Simmer for 15 minutes.
3. Add the peppermint leaves to the mixture.
4. Stir thoroughly, and boil for around 7 minutes.
5. Pour in the sour cream and whip up a creamy consistency.
6. Serve hot for great results.
Peppermint is by no means an obscure herb. It has the classic flavor that
has made it famous for centuries. With its great health benefits as a
precious add on, this is a herb that you simply must grow and consume in
your daily diet. With a creative mind, you can incorporate the peppermint
flavor in a large portion of your cooking for some truly exotic tasting treats.
Here is to your adventure with peppermint!
PLANTAIN
Plantain (Plantago major) is a weed that you may have thrown out many
times from your garden. This is an abundantly growing plant found all
over North America. It has oval, ribbed short-stemmed leaves, with spiky
flowers. The plant grows in clumps. A very persistent plant, it has been
seen to grow in cracks in walls, on fences, and virtually anywhere it is
uninterrupted.
Page 227
Learn Herbal
Most people throw out weeds on the first instance of appearance, but you
should know that plantain is a very beneficial herb that has been used for
centuries in the treatment of medical complaints such as mouth sores,
bronchitis, tuberculosis, and many others.
The leaves of plantain are rich in tannin and allatonin, chemicals which
help heal wounds quickly. As a result, plantain leaves have anti-
inflammatory properties. The plant is also rich in vitamins and minerals,
and thus can be ingested with great benefit in salads.
Cultivation of Plantain
The important thing to remember with plantain is that it is a wild herb that
can well take care of itself. It doesn’t require extra fuss or care. On the
other hand, if allowed to grow free, it will soon take over your entire
garden, so your main effort will be in keeping its population in control.
Page 228
Learn Herbal
Plantain is best grown indoors, as placing it in garden beds is only asking
for trouble. If you are determined, however, to have a large growth of
plantain, you may keep a separate bed for them, but make sure it is
sufficiently separated from the rest of your garden, or you will soon find
your precious flower beds invaded by this weed.
Plantain seeds are probably not available in nurseries, although it doesn’t
hurt to look.
If you find wild plantain growing outdoors, pluck it out and bring it home.
Replant it in potting soil. It should soon spread seeds and reproduce quite
past in your pot.
Tips on Growing Plantain
Keep away any plantain from the rest of your garden. Once
introduced to the fertile soils of your flower beds or vegetable
patches, it may be quite hard to remove.
If you do have plantain growing in your garden, remove them and add
to your cooking as soon as possible. Delaying may cause seeds to be
spread, and you are bound to have a much more difficult time later. A
stitch in time saves nine!
Keep explanations well ready for curious neighbors who might
wonder why you are dedicating time and effort in growing what is
apparently just a weed!
Don’t worry about replanting in appropriate time - the hardy plant will
reproduce with such vigor that you are guaranteed to have a fresh
supply throughout the year.
Medicinal Uses of Plantain
Page 229
Learn Herbal
While plantain may have the humbling description tag of being just a
common garden weed, it is in fact a potent source of powerful health
benefits. Do not be fooled by its weed status – plantain comes chock full of
surprises, and a wide range of applications.
Plantain can act as an effective pain reliever. Heat the leaves
and apply to sore muscles or other areas to relieve pain.
Pain reliever -
Applying plantain tincture or a poultice to
wounds can help them to heal quickly. This is due to the anti-inflammatory
and astringent properties of chemicals found in the plantain leaves. A
chemical found in plantain leaves, called Allatoin, helps cure wounds
faster
Helps heal wounds quickly -
Plantain tea can easily relieve a sore throat. For best
results, ingest it lukewarm
Sore throat cure -
Plantain contains valuable and
important vitamins and minerals, such as Thiamine (Vitamin B1) and
riboflavin (Vitamin B2)
A great source of vitamins and minerals -
DIY Homemade Plantain Solutions
Plantain Omelet
Plantain omelets are a great way to use this pleasant herb, while boosting
your morning intake of valuable vitamins. It will also give your regular
omelet a new twist, and the delicious flavor is bound to make you a fan.
What you need:
Page 230
Learn Herbal
A few plantain leaves, coarsely chopped
Mozzarella cheese, grated
Olive oil
Salt and pepper
1 clove garlic, fine chopped
1 medium onion
Finely chopped
2 large eggs
Instructions:
1. Add a dash of olive oil to a saucepan. SautƩ the garlic, onions and
plantain leaves in the pan.
2. Beat the eggs in a bowl to a smooth consistency
3. Add the cooled, sautƩed garlic, onions and plantain leaves, and finely
grated mozzarella cheese, and beat until the mixture is consistent
4. Heat some oil in a pan. Pour mixture in the heated oil, and fry.
5. Turn the omelet. Place in a plate. Season to taste with salt and pepper
Potato Plantain Soup
This delicious clear soup owes its goodness to the incredible harmony of
potatoes and plantain. It is full of vegetarian goodness, and is chock full of
vitamins and minerals.
Things you need:
Page 231
Learn Herbal
2 cups of finely chopped plantain leaves
6 small potatoes
About 8 cups of water
One large onion, coarsely chopped
Parsley, coarsely chopped
Three cloves of garlic, coarsely chopped
Salt and water to taste
Olive oil
Two large egg whites
Instructions:
1. SautƩ the onion, garlic and plantain leaves in olive oil.
2. Pour in water and add the potatoes.
3. Simmer for about 45 minutes.
4. Mash the potatoes to get a rich, creamy consistency.
5. Add in the parsley.
6. Whisk the egg whites.
7. Pour in the egg whites in a thin trickle and stir the soup in order to get
an egg net.
8. Season to taste with salt and pepper.
9. Serve piping hot for best results.
Plantain Tea
A plantain tea is a perfect way to get all the goodness of plantain in one go.
It is a soothing tea that can be flavored with peppermint, cinnamon and
vanilla to get a truly invigorating and healthy tea. Have this tea by itself in
the morning to get your early morning dosage of vitamins, or later in the
day to combat stress.
Page 232
Learn Herbal
Things you need:
Half a cup of plantain leaves
Optional: half a cup of peppermint and a stick of cinnamon
a large cup of water
Instructions:
1. Boil the water in a kettle.
2. Finely chop the plantain leaves and the peppermint.
3. Add the leaves in a stainless steel mesh tea ball.
4. Steep in hot water for a few minutes.
5. Add sugar if necessary, but avoid if possible.
6. Serve lukewarm.
Plantain Salad
Plantain leaves provide the crunchy feeling that work great in salads. They
also have a great flavor that works great in any salad. The vitamin and
mineral goodness contained in its leaves is the reason why this salad is a
great idea.
Things you need:
One bowl plantain leaves
One large onion, chopped into rings and separated
½ cup grated parmesan cheese
Olive oil
Vinegar or lemon juice
Page 233
Learn Herbal
Instructions:
1. Wash the plantain leaves and drain.
2. Place the leaves, onions in a salad bowl.
3. Throw in a dash of olive oil.
4. Pour a dash of vinegar or lemon juice for flavor
5. Toss the leaves.
6. Sprinkle grated parmesan cheese on top.
So this is plantain. A weed that you have probably plucked out countless
times from your flower beds. A persistent weed that keeps growing – in
wall cracks and in dull corners - despite all the herbicides and all the
unfriendliness the cruel world throws at it. But it hides in its despised
frame more goodness than your average spinach. It is time to introduce
this amazing plant in your diet and to your lifestyle. Enjoy the weed and all
its healthy goodness, and see this much despised plant in a whole new
light.
RED CLOVER
Page 234
Learn Herbal
Red clover is a perennial wild flower that grows in meadows all over
Europe and Asia naturally. These days, it is also wild-growing in North
America. It is a plant of the legume family – which includes beans, pulses
and lentils. It is generally grazed on by cattle and sheep. However, this
plant has some very surprising health benefits. The red clover is rich in a
wide range of minerals, including magnesium, niacin, calcium, chromium,
phosphorus, thiamine, and vitamin C and potassium.
The red clover is rich in isoflavins - substances that act like the hormone
estrogen. As a result, red clover can potentially be used to treat hot flashes
and menopausal complications.
Page 235
Learn Herbal
However, research is still being conducted on the effectiveness of such
treatment, and present results are a bit inconclusive - even though many
people swear by it.
Traditionally, red clover has been used to prevent cancer, and as a diuretic
(a substance that stimulates urination), and as an expectorant (a substance
that clears mucous from lungs).
Cultivation of Red Clover
Red clover is often grown for its vivid red flowers. The great thing about
red clover is that it is a legume. Legume plants develop root nodules
where bacteria live, which ā€˜fix the nitrogen in the soil, making it available
in a form usable by plants. This means that cultivating legumes in a bed
will enrich the nitrogen content of the bed – for free! This is an effect
normally achieved by the use of expensive chemical or organic fertilizers.
Page 236
Learn Herbal
1. Till the bed well and throw away any stones.
2. Test the ph of the soil. Red clover thrives best in a neutral to slightly
acidic soil, and the ideal pH for red clover growing ranges from 6.0 to
6.5.
3. Phosphorus and potassium are also required, and enrich these
minerals with fertilizers if necessary
4. Seed ten to twelve pounds of seeds per acre of soil.
5. The best time for sowing the seeds is in late winter to early spring for
north to central US (or areas with similar clime) warmer climate
regions should have red clover seeded in autumn.
6. Harvest the clover when it is in early bloom. This may be about
summer. Up to three harvests are possible. Three cuttings are
recommended too, as it will help the red clover from spreading seed
(and thus becoming invasive) and will also keep a high nutritional
profile in the harvested produce.
Tips on Growing Red Clover
Red clover is best grown with a companion crop, such as wheat, barley
or oats. You can also plant with grass. In that case, use about 7 pounds
of seed per acre.
The seeds should be inoculated with the nitrogen fixing ā€œRhizobium
trifolii" bacterium in order to ensure its growth in the root nodules of
the plant. The seeds of the plant often come inoculated, so ask at the
nursery before buying.
Medicinal Uses of Red Clover
Page 237
Learn Herbal
The red leaf clover may be merely a humble grazing fodder for cattle and
sheep, but it is in fact a potent herb that stores some powerful capabilities.
It contains some surprisingly healthy perks that come packed in this tiny
plant with beautiful bloom. Both the leaves, and the flower itself can be
consumed for health benefit, along with the occasional use of the root.
Red clover contains numerous phytoestrogens and
four different types of isoflavins - chemicals which help increase the effect
of estrogens. This helps with alleviating the symptoms of menopause.
Menopausal relief -
The estrogen boosting capabilities of the
red clover also help combat menstrual cramps, along with other PMS
symptoms.
Relief from menstrual cramps -
Red clover cleans the blood, with its
antioxidant action. This helps lower cholesterol levels significantly.
Helps lower cholesterol levels -
The blood
cleansing properties of red clover also help improve heart health. It keeps
the capillaries healthy by preventing the deposition of arterial plaque.
Cleanses blood to help improve cardiovascular health -
Bone density loss patterns are also busted by the use of red
clover. It can help ensure continued bone health in post-menopausal
women.
Helps decrease the possibility of bone density loss from the onset of
menopause -
DIY Homemade Red Clover Solutions
Clover Blossom Tea
Page 238
Learn Herbal
A tea of red clover blossoms is a perfect solution for getting all the
goodness of red clover in just a few sips. Additionally, it is quite soothing to
sip on red clover tea, and a mild sedative action that is provided by some
chemicals in red clover ensures that this refreshing drink will bust all your
daily stress worries.
What you need:
A cupful of red clover blossoms
A jar of water
Instructions:
1. Heat the water in a kettle. Bring to boil.
2. Place the blossoms in a jar.
3. Fill the jar with hot water and cover up the jar for about 10 hours
4. You may add other flavorful herbs – such as peppermint or sage – to
enhance the flavor of this tea. Avoid sugar.
5. Consume about 3 cups of this tea every day.
Red Clover Blossom Tincture
The red clover tincture is a powerful medicine for all kinds of health
worries. It lowers the bad LDL cholesterol levels, it cleanses blood, it
relieves menopausal symptoms and menstrual complaints. It even battles
some types of cancer. What more can you ask for in a herb? Follow this
easy recipe to make a really useful red clover tincture:
Things you need:
Page 239
Learn Herbal
1 and 1/2 cups of dry red clover blossoms
Ginger roots, finely diced (about ½ a cup)
One and a half cup water
One and a half cup drinkable rum or vodka, with about 40% alcohol
(do NOT use rubbing alcohol or stearyl alcohol!). A higher percentage
of alcohol is preferable.
Instructions:
1. Finely shred the red clover blossoms.
2. Place the shredded red clover blossoms and the diced ginger in a
glass jar.
3. Cover up the blossoms and the ginger with piping hot, boiling water.
4. Top up the jar with the vodka or the rum.
5. Keep the jar in a cool dry place for 2 to 6 weeks. Do not exceed 6
weeks.
6. Strain off the mixture after 2 to 6 weeks using a filter cloth or
cheesecloth.
7. Store the mixture in jars or vials.
Crystallized Red Clover Blossom
You can crystallize the red clover blossoms with sugar. These crystallized
blossoms will be a great addition to any dessert, and they are great, vividly
colored decorative items that will vastly improve the plating of any dish.
You can go really creative with their use, and combine red clover blossoms
with other edible flowers to come up with truly unique plating options.
Things you will need:
Page 240
Learn Herbal
A dozen red clover flowers (or as many as you would want to
crystallize)
Crystallized sugar
Egg whites from one egg
Water
Instructions:
1. Whisk the egg white and about two teaspoons of water thoroughly,
until a creamy consistency is reached.
2. Slightly wet the flowers with water, and flick off the water.
3. Coat the flowers with sugar.
4. Use a paint brush to apply egg whites on the sugar coating. This takes
some time and patience.
5. Sprinkle some more sugar over the painted flowers. You can catch the
sugar that falls off in a bowl, but you can’t reuse it.
6. Place the coated and painted red clover blossoms in a baking tray that
has been lined with greased paper.
7. Dry off the flowers. You can bake for a few minutes in the over if you
want, but that is not really necessary. The egg whites should give you
hardened, crystallized flowers in about 2 days. Use in any recipe for a
beautiful decoration.
The red clover is a herb that can be used very creatively for some amazing
health benefits. As always, you should consult your doctor before pursuing
any treatment option, but the red clover offers relief and health benefit for
many educated users. Benefit from using this amazing herb today.
ROSEMARY
Page 241
Learn Herbal
The name rosemary (Rosmarinus officinalis) is derived from the Latin
words ros (meaning ā€œdewā€) and marinus (meaning ā€œseaā€). ā€œDew of the
seaā€ was so named because in some places, the plant required no water
apart from the mist carried by the breeze from the sea. Native to Asia and
the Mediterranean region, rosemary is known for its sweet, herbaceous
flavor, its use as an ornamental plant, and its role in traditional
Mediterranean cuisine. The rosemary plant is a woody, aromatic shrub
with blue, purple, or white flowers and leaves like pine needles.
Cultivation of Rosemary
Page 242
Learn Herbal
Rosemary can be grown from seeds, cuttings, and roots. Use
moderately-fertilized loam with a neutral acidity and grow the plant
in a sunny area with good air circulation.
Remove some cuttings about 4 inches long each from the rosemary
bush and place them in pots filled with peat moss and coarse sand.
Place the pots in a warm, sun-filled area.
Water regularly until roots begins to grow.
If you wish to transfer your rosemary plants into your garden, find an
area where the soil is dry and drains well. If your soil has high acidity,
you can add some lime to it.
Once the plants are in the ground, watering should be done less
frequently. Overwatering your transplanted plants is not advisable.
Tips on Growing Rosemary
Rosemary prefers a Mediterranean climate, which means dry and
warm. It is, however, adaptable to whatever conditions it is grown in.
Slightly alkaline soil produces a more fragrant rosemary shrub.
Rosemary is relatively pest-resistant.
Medicinal Uses of Rosemary
Aside from its usefulness in the kitchen, rosemary is cultivated for its
efficacy in traditional and alternative medicine, its versatility as a
commercial product, and for various ceremonial uses. This remarkable
herb is chockfull of vitamins, minerals, and phytonutrients, and is an
exceptionally good source of folic acid, vitamin A, vitamin C, and iron. It
contains rosmarinic acid, a potent antioxidant, as well as numerous
compounds that lend it its antiseptic, antifungal, anti-inflammatory, and
anti-allergic qualities.
Page 243
Learn Herbal
Don’t let body pains ruin your day. Take charge and
apply rosemary oil to body parts affected by arthritis, sprains, neuralgia,
and sciatica. Oil of rosemary is an effective rubefacient that relieves tired
and aching muscles.
Kiss pain goodbye -
The scent of rosemary alone is enough
to soothe a worried mind and is conducive to meditation, yoga practice,
and quiet time. But, amazingly, rosemary contains rosmarinic acid, an
antioxidant that has been found effective in improving concentration and
preventing memory loss. Burn rosemary incense or put some rosemary oil
in a burner next time you need to relax or focus on a complicated task.
Improve your memory and focus -
Apply rosemary oil to your scalp to promote hair
growth. Rosemary oil and rosemary herb extractions stimulate the scalp
and hair follicles, helping prevent premature baldness. Rosemary also
helps relieve dryness and itching of the scalp.
Prevent bald spots -
Rosemary is a popular ingredient in hair
and skin care products. To experience the benefits of natural and authentic
rosemary on your hair, work a few drops of rosemary essential oil onto
your scalp and hair, coating it from root to tip. You will immediately notice
a change in texture and luster. Use a combination of rosemary tea and
nettle infusion as a hair rinse to get rid of dandruff. Use rosemary oil as a
post-bath moisturizer to soothe joint problems and treat skin irritations.
Get silky smooth skin and hair -
Page 244
Learn Herbal
Rosemary is used to treat and/or relieve the
symptoms of hypertension, fatigue, colds, scabies, depression, headaches,
and lupus. It helps prevent uterine spasms and menstrual cramps, speeds
the healing of wounds, and is a natural insect repellant. Scientists have
even found that rosemary may have a preventive effect against cancer.
An all-around wonder herb -
DIY Homemade Rosemary Solutions
Apart from its role in the kitchen, rosemary has been central to numerous
aspects of culture and history. During the Middle Ages, it was an important
part of wedding ceremonies. It was used in divination and in witchcraft,
and was alluded to in Hamlet and in Don Quixote. Today, rosemary serves
countless culinary and cosmetic uses and can be found in most
supermarket aisles and pantries. Try making these three rosemary
products from your plants at home.
Rosemary Tea
Who doesn’t love a good cup of tea? Try this herbal tea made with fresh
rosemary. It’s wholesome, nutritious, and has a soothing flavor and aroma
perfect for winding down.
What you will need:
1 to 2 sprigs of fresh rosemary
1 to 2 cups of cold water
A tea pot
Natural sweetener like honey and stevia (optional)
Instructions for Making Your Rosemary Tea:
Page 245
Learn Herbal
1. Get some fresh rosemary sprigs from your plant and wash them.
2. Boil the water.
3. Pour the boiling water into the teapot containing the herbs. You might
want to keep the leaves or needles on the stem so you won’t have to
filter the tea later on.
4. Let the rosemary steep in the teapot for at least three minutes. The
longer you let it steep, the more nutritious but also the more bitter it
becomes.
5. Add some natural sweetener like stevia or honey to counteract the
bitter taste.
Rosemary oil can be toxic when taken orally. Note that the tea is made by
brewing the herb, not by mixing the oil with hot water. Don’t consume
large amounts of rosemary tea if you are pregnant, diabetic, or
hypertensive.
Rosemary Hair Rinse/Shampoo
Regular use of a rosemary hair rinse or shampoo will give you long,
healthy locks and will free you from dandruff and hair loss. A rosemary
hair treatment is so easy and inexpensive to make, and is a much safer
alternative to chemical hair treatments you get at the salon.
What you will need:
Page 246
Learn Herbal
4 to 6 rosemary sprigs
A paper sack
A rubber band
A vacuum container or Ziploc bag
A non-aluminum sauce pan or pot
A glass jar
Camphor oil/lemon juice/lavender oil
Instructions for making your rosemary hair rinse:
1. Rinse the rosemary sprigs in cold water then dry using paper towels.
2. Hold the stems together then remove the lower leaves.
3. Put the bunch in the paper bag with the lower ends sticking out. Use
the string or rubber band to tie the bag and stems together, sealing off
the opening.
4. Let the bundle hang in a dry room for two weeks. By this time the
leaves should have dried up.
5. Remove the leaves and place them in a Ziploc bag.
6. Make a tea out of the leaves by boiling clean water in a saucepan or
pot and then stirring the leaves into it. Let it steep for a few hours.
7. Pour the tea into a glass jar. Keep it in the refrigerator. You are now
ready to create your rosemary hair rinse or shampoo based on the
kind of treatment your hair needs.
8. If you have dandruff, get a cup of the rosemary tea and add 2 to 3
drops of camphor oil. Use a cotton ball to dab some of the mixture
directly onto your scalp. Wait 30 minutes before rinsing.
For a refreshing and soothing sensation and scent, you can add some
lemon juice and a few drops of lavender oil. Add some camphor oil and
you have an all-natural shampoo.
Page 247
Learn Herbal
Rosemary Foot Scrub
There’s nothing quite like a nice foot scrub at the end of a long workday.
Prepare this rosemary foot scrub and keep it in a glass jar ready for when
you need a relaxing end-of-the-day foot pampering at home.
What you will need:
3 drops of rosemary essential oil
3 drops of peppermint oil
1 ounce of sweet almond oil
Half a cup of cornmeal
A ceramic bowl
Instructions for making your rosemary scrub:
1. In a ceramic bowl, mix all the oils together.
2. Add the cornmeal gradually until you get the desired consistency and
texture. Stir continuously until the mixture becomes a paste.
3. Scrub away!
It makes your roasts taste phenomenal, your hair soft and shiny, and keeps
your health in tip-top shape. And it’s a charming and beautiful addition to
your garden or landscaping too. Plant some rosemary today and enjoy
good food and good times.
SAGE
Page 248
Learn Herbal
The importance of sage as a medicinal herb is apparent in its scientific
name, Salvia officinalis. The word salvia was derived from salve, which
means ā€œto saveā€ or ā€œto healā€, and officinalis came from officina, meaning a
storeroom inside a monastery where medicines and herbs were kept
during ancient times.
For centuries before it was classified by Linnaeus in the 1700s, the herb
was extolled for purported miraculous properties. The Greeks and the
Romans wrote about how it could fend off evil and cure snake bites. In the
Middle Ages, it was used in a tonic thought to ward off the plague.
Today, sage is a staple in many European, North American, and Middle
Eastern kitchens. It has a soft, earthy, and slightly sweet flavor that
enhances meats and goes well with cheese, fish, and vegetables. The sage
plant is a low-growing perennial shrub with grayish green leaves and a
woody stem. It can be grown both indoors and outdoors, and will thrive in
both.
Cultivation of Sage
Page 249
Learn Herbal
Most varieties of sage are native to the Mediterranean region and Asia
Minor. Though it will grow easily in almost any climate, sage grows best
when conditions are similar to that of its native habitat. This means full
sun, warm temperatures, and dry, nearly pH-neutral soil. You can start
cultivating sage either from seeds or cuttings. For seeds:
1. You will need a pot at least six inches deep and some potting soil. To
start off, pour a quart of water on the soil.
2. Once it is drained but still moist, you can place 10 to 12 seeds on top of
the soil at equal distances.
3. Cover the seeds with dry soil at least an eighth of an inch deep.
4. Use plastic food wrap to cover the pot and help the seeds germinate.
Covering the pot keeps heat and moisture in.
5. Place the pot in an area away from direct sunlight but with ample
lighting. This will prevent the soil from drying up too quickly.
6. Check the soil regularly. Add a cup of water if the soil gets too dry, but
be sure to replace the plastic cover.
7. Once the seedlings grow an inch high, you can transplant them to an
area where sunlight is plentiful. Keep the seedlings at least two feet
apart.
Tips on Growing Sage
Page 250
Learn Herbal
Transplant the seedlings after the cold season, when the danger of
freezing has passed
Sage can grow up to 36 inches high and 24 inches wide, hence the 2
feet of space between plants.
Sage grows best in soil with 6.0 to 6.5 pH.
Do some light pruning to encourage the plant to stay bushy.
The plant will become woody after 4 or 5 years, and will need to be
replaced. You can start new sage plants from cuttings from the parent
plants.
Dry sage leaves quickly so they don’t become moldy. Hang them to
dry in a warm room with good air circulation. Keep the dried sage in
an air-tight container away from sunlight.
Medicinal Uses of Sage
Ancient Egyptian women were known to consume sage tea and tonics in
hopes of getting pregnant. It was also believed that sage can effectively
lengthen one’s life span. Though these claims need to be backed up by
scientific research, there are lots of other health benefits to be acquired
from sage.
Sage is effective in treating various stomach
problems. Flatulence, gastritis, bloating, diarrhea, and appetite loss can be
treated with sage.
Keep your tummy happy -
Sage has antispasmodic properties that provide
relief from menstrual cramps, hot flashes, and excess bleeding. Its
estrogenic effects help regulate hormonal changes; its flavonoids and
phytosterols help improve fertility. It even aids in proper milk flow while
breastfeeding.
A woman’s secret weapon -
Page 251
Learn Herbal
Sage essential oil has antiseptic, antifungal,
and antibacterial qualities that help prevent and treat infections. It is used
in mouthwashes, soaps, vaginal douches, and toothpastes.
Potent antibacterial qualities -
Studies are ongoing to determine
the effect of sage on this dreaded condition. Preliminary research has
shown that taking sage extract improved the memory and thought
processes of test subjects.
Possible cure for Alzheimer’s disease -
Sage can cure a great variety of ailments! It is used to
treat cold sores, gingivitis, sore throat, asthma, heavy sweating, memory
loss, depression, cough, and fever. It helps reduce hot flashes during
menopause, enhances the appetite, improves liver function, lowers blood
glucose levels, treats diabetes, and prevents hair loss.
All-around remedy -
DIY Homemade Sage Solutions
You can experience the amazing health benefits of sage without spending a
lot. Making sage products from home is easy, convenient, inexpensive, and
rewarding.
Sage Hair Dye
Did you know that you can use sage to restore your natural hair color? Yes,
it will cover up the gray, and will make your hair soft and shiny as well.
And all this without the harmful effects of nasty chemical hair colors.
What you will need:
Page 252
Learn Herbal
A cup of dried sage
A quart of water
A large pot
Lavender oil or rosemary oil (optional)
Instructions for making your sage hair dye:
1. Pour some clean water into a pot and place it over high heat. Let the
water boil.
2. Add the sage to the boiling water and let it boil for 30 minutes to an
hour. You will notice that the water gets darker as you let the sage
steep in the water.
3. Take the pot out of the fire and let the resulting tea cool down.
4. Lean over the sink or tub, and scoop the tea over your head. Do this
repeatedly until you get the shade you desire.
5. To give your hair a refreshing scent, add some lavender oil or
rosemary oil into your homemade sage dye for your last rinse. This
also helps make your scalp healthier and your hair smoother.
Sage Incense
This is another no-brainer DIY project that you’ll wish you’d known about
long ago. Homemade sage incense gets rid of nasty odors, sets the mood
for meditation and yoga practice, and helps relax your tired mind and
body. Making incense out of sage and other herbs is incredibly easy and
won’t cost a dime.
What you will need:
Several branches of sage and other herbs like rosemary
Thread or any thin string
Page 253
Learn Herbal
Instructions for making your sage incense:
1. Make a bundle out of the branches of herbs and cut them into the
same length.
2. Tie the branches together by winding the thread or string from one
end to the other at an angle and winding it again towards the bottom
end at the opposite angle. This will create a crisscross pattern which
will help hold the branches together. Tie a knot on the finishing end,
making sure there is a loop formed.
3. Hang the tied-up branches using the loop. Let the branches dry
completely.
4. Once the herbs are completely dry, you can use it as incense. Simply
burn one end of the bundle and it will give off a nice scent.
5. Be careful when lighting and using your sage-and-rosemary incense
to prevent fire from spreading.
Sage Body Scrub
Did you know that if you rub a garlic clove on your big toe, you will taste it
in your mouth in less than 15 minutes? That is how quickly the body
absorbs anything you put on your skin. If you’re still using chemical-laden
skin products, now is the time to learn about and begin using all-natural
alternatives. This sage body scrub is a good place to start.
What you will need:
Page 254
Learn Herbal
4 to 6 leaves of fresh sage
A grapefruit
2 cups fine sea salt
Half a cup of date sugar
A cup of olive oil
A blender
A grater
A bowl
Instructions for making your sage body scrub:
1. Put the olive oil and sage leaves into a blender and then puree them.
2. In a bowl, combine the puree with the sea salt and date sugar. Mix all
the ingredients well with a spoon.
3. Use a grater to remove the zest from the grapefruit. Add the zest to
the sage mixture.
4. Cover the bowl and place your body scrub in the refrigerator.
5. During your shower, get a spoonful of your homemade body scrub
and massage it all over your body. Do so in a circular manner,
targeting the rough spots. Return the body scrub inside the fridge
when you’re done.
Sage is both an indispensable culinary herb (great in stuffing and in pasta
sauce!) and a one-of-a-kind natural medicine that works its wonders on a
wide variety of health problems. Start growing sage and enliven your
kitchen and your health.
SPEARMINT
Page 255
Learn Herbal
Native to much of Europe and southwest Asia, spearmint (Mentha spicata)
is a species of herb that is easily bruised and produces a wonderfully
refreshing smell as a result. This bright green herb, also known as the
garden mint or common mint, with its broad feathery-edged leaves is a
favorite ingredient of all chefs for it adds a unique flavor to any imaginable
dish, making it both look and taste fresh. It is used as a garnish for recipes
as well as for flavoring drink beverages such as mojito and embellishing
salads. Often, it is added to iced tea for that extra refreshing zing.
Cultivation of Spearmint
This bright green member of the mint family prefers moist, loose and
fertile soil with underground runners. The herb can grow up to 30 inches
in height with characteristic serrated leaves fanning out at 2-3.5 inches
long. The herb should be grown under full sun or partial shade conditions
in spring or fall. During late summer, it exhibits thin pointed spikes of
mauve flowers. Be warned, though: if you’re not careful, the spearmint’s
runners can take over your garden plot in no time.
Page 256
Learn Herbal
1. Buy a fresh, healthy mother plant from your local grocery store and
place it in a pot. Growing mint from seeds is extremely difficult, so
unless you’re prepared to dedicate significant time and effort into it,
don’t even try.
2. Make sure your pot is large enough and has a hole at the bottom. This
will allow excess water to flow away. Place a plate at the bottom so that
the plant can absorb the leftover water again when needed.
3. Place the pot where it can get plenty of morning sun and adequate
afternoon shade.
4. Spearmint needs plenty of water to survive. You don’t have to water it
all day long, but you want to make sure that the soil is always humid.
Remember, a thirsty spearmint is a dead spearmint.
5. Harvest spearmint sprigs before the plant flowers. You can do this by
cutting off spearmint sprigs (quarter of an inch above the junction)
from the mother plant and placing them in glasses filled with water.
6. Small white roots should grow under the water after a week.
Replenish the glasses with water when needed. Wait for the roots to
grow to a decent length and when it is long enough, take the sprig out
of the water and plant it in another pot. Do this for all your sprigs and
you should be on your way to being the owner of a fragrant spearmint
garden paradise.
Tips on Growing Spearmint
Page 257
Learn Herbal
To extend the harvesting season, pinch off the flowering birds as they
appear.
When planting in a flower bed, submerge the container at least 5
inched under the soil in order to contain the rapid growth of
spearmint roots. Otherwise, the herb will take over your garden.
The importance of super moist conditions for the growth of this plant
can’t be stressed enough.
Medicinal Uses of Spearmint
Spearmint has seen commercial use in oral hygiene products such as
mouthwash and toothpaste, as well as a flavoring agent for the ever
popular breath refresher Mentos. Since ancient times, this easily bruised
perennial rhizome has added flavor to food, transforming mediocre dishes
into delicacy. Given the fame of its flavoring properties, most would be
hard pressed to imagine that this verdant herb has an array of medicinal
uses as well. Here are some of the known medicinal benefits of this
versatile rhizome:
The essential oil, menthol, has analgesic,
counterirritant and anesthetic properties, and can help to keep your
mouth feeling fresh and devoid of pesky germs.
Get rid of bad breath -
Spearmint can take of various digestive
disorders, including indigestion, nausea, irritable bowel syndrome (IBS),
gas, diarrhea, gallstones and many more.
No more stomach aches -
Headaches, stress, fatigue, nervous conditions
and irritable itching stand no chance against a good old spearmint oil
massage or the more subtle and sophisticated spearmint aromatherapy.
Soothe all sorts of pains -
Page 258
Learn Herbal
While a good remedy for stress, fatigue and headaches,
the spearmint really show it versatility with its ability to alleviate several
respiratory problems such as asthma, bronchitis and catarrh.
Breathe freely -
Applying liberal amount of spearmint
cream or lotion to affected skin can get rid of itching, dermatitis and hives.
Maintain healthy and radiant skin -
DIY Homemade Spearmint Solutions
This bright perennial herb, at first glance useful for only flavoring
purposes, has an astounding number of uses. It has domestic uses in
repelling ants and freshening up a musty old closet, and both spearmint
tea and spearmint oil can be made easily at home with effort that is
minimal compared to its great benefits. Here’s how you can make them:
Spearmint Tea
Spearmint tea, according to a study published in early 2007, can be a great
way for women with hirsutism to remove excess body and facial hair
because it lowers levels of androgens. It’s a simple and affordable way to
battle hirsutism, but the refreshing flavor of this herbal tea alone is alone
reason to have it daily. Try out this easy three-step recipe for spearmint tea:
What you will need:
Page 259
Learn Herbal
A handful of fresh spearmint
4 cups of water
A pot
A strainer
Lemon (optional)
Raw honey (optional)
Instructions for making and using your spearmint tea:
1. Pour the water in a pot and put it atop a stove. Set the temperature
between moderate to high.
2. Crush a handful of spearmint between your palms to get out the
flavor and smell while the water boils.
3. When the temperature of the water is suitably high, add the crushed
spearmint and let it steep for 10-15 minutes.
4. Use a strainer placed over a glass container or tea cup to separate the
crushed spearmint from the tea.
5. Honey or lemon can be added in order to supplement the spearmint’s
natural flavor.
Spearmint in boiled water is also ideal for rinsing your hair or taking
herbal baths.
Spearmint Essential Oil
Page 260
Learn Herbal
Although not as popular as peppermint oil, spearmint oil is more suitable
for children and those who find peppermint oil hard to use. Whereas
peppermint rejuvenates the body, spearmint relaxes it. Spearmint oil has a
multitude of uses such as curing sore throats, relieving headaches and
being used as a flavoring ingredient for exotic dishes. It also has great
antibacterial, antiviral and antifungal properties, making it a very effective
disinfectant.
What you will need:
Freshly picked spearmint leaves
A dark colored jar
Carrier oil like vegetable oil or olive oil
Water
Strainer
Corn starch
Instructions for making your spearmint oil:
Page 261
Learn Herbal
1. Pick out any bruised or dark leaves. Leave the stems attached as well
can be extracted from them.
2. Wash the leaves carefully. Make sure they’re free of insects.
3. Pack the leaves as tightly as you can into the jar and add generous
amounts of carrier oil.
4. Seal the jar and place in the sun for 2-3 weeks. This will allow the
carrier oil to pull out the spearmint oil.
5. Open the jar and mix in a few drops of corn starch.
6. Let the mixture settle for a day or two. This will give the corn starch
enough time to take up the spearmint’s fragrance.
7. Open the lid and use a strainer to separate the oil from the leaves.
8. Store the oil in a dark airtight container.
Spearmint oil can be ā€œproperlyā€ made using steam distillation, but this is
not viable in the average household. This version of spearmint essential oil
is by no means high in oil content, but should be helpful for small aches
and pains.
ST JOHN’S WORT
Page 262
Learn Herbal
Named after its time of bloom – June 24, the birthday of John the Baptist –
St. John’s wort has yellow flowers with distinctive oval-shaped, elongated
petals, as well as a rich history of being used as medicine dating back to
ancient Greece. Theorized by scientists to be native to Europe, the western
United States and parts of Africa and Asia, St. John’s wort (Hypericum
perforatum) possesses impressive antibacterial, antiviral and anti-
inflammatory properties and is thus used for a variety of medical purposes,
such as alleviating depression and relieving physical and emotional
symptoms of premenstrual syndrome (PMS) in women.
Cultivation of St John’s Wort
St. John’s wort is a perennial plant that likes its sun (but will stubbornly
thrive in partial shade). Likewise, it loves light, warm, sandy soil, but can
also spring to a healthy height of just about 3 feet even in poor soil. So easy
it is to grow that it is considered a pernicious weed in some locations. If
you’re growing St. John’s wort, make sure to keep a close eye on its growth
spread because it has a tendency to crowd out more delicate herbs. The
best time to grow St. John’s wort is in early spring or fall.
1. Locate an area (preferably indoors) that receives plenty of sunlight.
2. You can grow St. John’s wort from either seeds, stem cuttings or root
divisions. In order to accelerate germination, soak in warm water
overnight or for a few hours.
3. Let the plant flower before you harvest. St. John’s wort usually
produces yellow blooms in late July. Harvest a third of the plant – both
flowers and leaves.
4. Dry the leaves and flowers by storing in a dark and cool place from 7-
10 days or speed up drying using a dessicator.
Page 263
Learn Herbal
Tips on Growing St. John’s Wort
Separate each plant by at least one feet as the roots have a wide
spread.
If you live in a cold area, then consider growing in a pot and burying it
in soil to get through the winter.
During the winter, cover the plant with a layer of mulch.
Medicinal Uses of St John’s Wort
St. John’s wort was highly valued in ancient Greece as both a medicinal
plant and as a charm that could ward off evil. It was used as a cure for a
range of illnesses, including ā€œnervous disordersā€, but the story goes
deeper than that. Its name, ā€œHypericumā€, comes from the Greek word
which means ā€œover an apparitionā€, indicating that the plant was considered
powerful enough to ward off evil spirits. Today, it is widely used as a
substitute for anti-depressants due to the fact that it produces
comparatively fewer side effects, and is also used for numerous other
medicinal purposes.
While the jury is still out on the efficacy of St. John’s
wort as an antidepressant, scientists are generally on the consensus that it
might be effective in fighting low to mild depression, such as seasonal
mood disorder, without any of the side effects. It may also soother anxiety,
increase appetite and concentration, and make for easier sleeping.
Fight depression -
Cramps, food cravings, irritability and breast
tenderness are some of the main problems that women have to face at that
time of the month. A small dose of St. John’s wort tea or liquid extract can
relieve those symptoms of PMS considerably.
Say bye-bye to PMS -
Page 264
Learn Herbal
Cleanse your skin before applying St.
John’s wort oil on top of the burns. The healing effect should be
immediately apparent, but sometimes, they can take time. Moreover, this
plant has been proven to be highly effective and clinically safe way to treat
regular burns unrelated to the sun.
Stop worrying about sunburns -
The antibacterial properties of St. John’s
wort help in fighting inflammation, muscle pain, as well as wounds and
hemorrhoids. If the wounds are open, then mix the oil with alcohol before
applying topically.
Soothe minor wounds and pains -
St. John’s wort acts as a mild antibiotic, but also has the
ancillary properties of a disinfectant. It is an excellent antiseptic, an active
microbicide, and helps to fight gastritis and gingivitis. It is also a great
weapon against thrush. Using it in oil form will yield the best results, but
the capsule form doesn’t do too shabbily either.
Prevent infection -
Applying St. John’s oil is a great way to increase
circulation beneath your skin, which helps to keep your skin hydrated and
moisturized. Skin diseases like dermatitis and eczema are no match for the
healing power of this versatile plant. Moreover, St. John’s wort’s
antioxidant properties allow it to not only rejuvenate dry skin, but also
maintain natural skin moisture, thus keeping your skin looking radiant.
Bring life back to dry skin -
Commonly known as RA,
Rheumatoid Arthritis is an autoimmune disease that causes its victims
severe pain. It is recommended to massage St. John’s wort oil, rather than
the powder, over the areas where the pain is most intense.
Treat Restrained Rheumatoid Arthritis -
Page 265
Learn Herbal
DIY Homemade St. John’s Wort Solutions
St John’s Wort Oil
Of all the mediums that St. John’s wort products can be found in the
market, the most effective is its dark red oil rather than capsule or powder.
Here is what you need to do...
What you will need:
1 cupful of St. John wort’s fresh flowers
Olive oil
A jar with a lid
Instructions on how to make your St. John Wort’s Oil:
1. Make sure the jar is clean as you’re going to be extracting your oil in
there.
2. The flowers should be insect-free. You can do this by shaking the
plants and leaving them in a sunny area for around an hour.
3. Put the flowers in the jar.
4. Add enough olive oil to cover all the flowers and close lid.
5. Keep in a warm, sunny place for at least 2 weeks (4 weeks
recommended) until the oil starts taking on a deep red tone.
6. Strain the flowers by using a strainer over a bowl. Squeeze out every
bit of oil using your hands – this is more fun than it sounds!
7. Pour the thus extracted oil into dark bottles because they are better
for preservation or inside a cupboard.
8. Enjoy your bright red St. John wort’s oil for a year!
St John’s Wort Facial Toner
Page 266
Learn Herbal
Have dry and scaly skin? No problem! St. John’s wort facial cream will take
care of it in no time. Although St. John’s wort skin creams are still
relatively new to the market, they have proved effective in giving life back
to dry, dead skin. The herb is also rich in salicylic acid and ursolic acid,
which can be effective for treating acne. Reap the benefits of this
wonderful herb and revive your skin by making the facial toner at home
yourself:
What you will need:
Freshly picked St. John’s wort flowers
Boiled water (in a 1:1 ratio with the herb)
Lemon grass
A small bottle or bowl
Instructions for making and using your St. John’s Wort facial toner:
1. Make sure that your bottle or bowl is sterile, as you will be using its
contents on your face.
2. Boil it in water for around ten minutes then dry thoroughly with a
clean cloth.
3. Once clean and dry, fill it halfway with water and put a peppering of
lemon grass in it.
4. Crush dry St. John’s wort and soak in lemon grass-water mixture to
get a pasty mash.
5. Boil to a temperature of 140-158 °F (60-70°C) then cool it.
6. Apply the mask to clean skin for 15-20 minutes then wash with hot
water. This should be done 2-3 times a week.
Page 267
Learn Herbal
Whether as a spiritual charm against evil or the versatile medicinal herb it
has proven to be today, St. John’s wort is a plant definitely worth having
around the house, preferable in a warm airy spot by the window, if only for
the way its leaves perforate prettily (hence perforatum) in the sun.
THYME
Thyme (Thymus vulgaris and others in the genus Thymus) is a perennial
herb of Southern European origin. Popularly known as a Mediterranean
cooking ingredient, thyme possesses a distinctive herbaceous flavor and a
heady aroma that matches well with meat, cheese, and tomatoes. It is a
traditional component of the Arab herb mixture za’atar, and the French
herbes de Provence and bouquet garni. Aside from its role in various
cuisines, thyme is also known for its medicinal uses. Oil of thyme is a
common homeopathic treatment, while thymol, the herb’s active
ingredient, is found in commercial products such as Listerine. Historically,
thyme was used by the Egyptians for embalming and by the Greeks as
incense.
Cultivation of Thyme
Page 268
Learn Herbal
Though thyme prefers sunny and warm locales, it can also grow on
mountain highlands and in areas that experience drought and deep freeze.
It is an easy herb to grow, and will thrive whether planted indoors or
outdoors. If you intend to grow some for your self-consumption, here are
the steps you need to follow:
1. Locate an area that receives full sun. Prepare dry, well-draining soil in
a pot or plant box.
2. You can grow thyme from seeds or cuttings or root divisions. Grow
them from root divisions if you want to harvest as soon as possible.
3. If you’re starting off with seeds, you can plant them in pots filled with
potting soil, then cover them with a thin layer of compost. Planting
them in pots allows you to move them when conditions outside are
unfavorable. If starting with roots, gather the divisions (root and
foliage) from three- or four-year-old plants and then re-plant them.
4. It is important not to water them too frequently. Thyme needs
minimal watering and should only be watered during dry conditions.
Tips on Growing Thyme
Thyme effectively repels insects. You can even use a spray made with
thyme tea to keep pests away from other plants.
There are more than a hundred varieties of thyme to choose from.
The three most popular are the common thyme, lemon thyme and
wild thyme.
When the plant begins to flower, cut off the top part and dry the herb
by hanging.
Medicinal Uses of Thyme
Page 269
Learn Herbal
The medicinal properties of thyme were known even in ancient times.
Hippocrates wrote about the herb, as did the botanist Pedanius
Dioscorides. The Ancient Greeks, Egyptians, and Romans all found uses
for the fragrant, versatile plant. Today, scientists have confirmed and
continue to explore the many health benefits and curative effects of thyme.
Kiss halitosis goodbye with thyme. Oil of thyme has
powerful antibacterial properties that get rid of nasty germs in your mouth.
Get rid of bad breath -
Thyme essential oil is often used to treat whooping
cough, bronchitis, asthma, laryngitis, and other respiratory problems,
especially those involving the upper respiratory tract. Thyme contains
terpenoids that make it a good expectorant and help improve the function
of the cilia. Hot thyme tea has a soothing effect and relaxes the bronchi.
Those who suffer from sinus infections can get the same benefits from
thyme inhalation therapy.
Clear your lungs -
Thyme’s antiseptic, antifungal, and antibacterial
properties help keep acne and other skin diseases away. Thyme oil can be
incorporated into facial washes, soaps, hand creams, lotions, and toners for
a detoxifying and exfoliating effect.
Get blemish-free skin -
The terpenoids in thyme, especially the ursolic and
rosmarinic acids, have been found to help prevent cancer.
Fight cancer -
Page 270
Learn Herbal
Known as a digestive herb,
thyme enhances the appetite, aids digestion, and stimulates the liver. Take
thyme to cure an upset stomach or to banish that bloated feeling you get
after a heavy meal.
Take thyme and make your tummy happy -
Thyme has antiparasitic, antifungal, antiviral, and
antibacterial properties, which is why it is often used in products such as
antibiotics, fungicides, and antiseptics. This is also why thyme is used to
treat nail fungus, wounds, cuts, burns, parasitic diseases, and various
infections.
Eliminate nasty germs -
DIY Homemade Thyme Solutions
Thyme-Infused All-Purpose Home Cleaner
You’ve probably heard of the disinfecting power of vinegar and tried using
it for cleaning. It’s great for getting rid of germs, but the smell can be a bit
overwhelming! To remedy this, infuse your vinegar-and-water solution
with some aromatic herbs. Here is what you need to do:
What you will need:
A plastic bottle with spray nozzle
Half a cup of distilled water
Half a cup of distilled white vinegar
12 to 24 drops of thyme essential oil
Other essential oils (optional)
A funnel
Instructions on how to make your thyme all-purpose cleaner:
Page 271
Learn Herbal
1. Pour the vinegar and water into the spray bottle using a funnel. If you
don’t have a funnel, you can cut out the top part of a plastic soda bottle
and turn it into a funnel.
2. Add the thyme essential oil. You also have the option of adding drops
of other essential oils to give your homemade all-purpose cleaner a
unique fragrance. Some of the other oils that you can use are tea tree
oil, orange oil, lemon oil, and peppermint oil. Lavender oil works well
too because of its scent and its antimicrobial property.
3. Cover the bottle and shake.
4. When not in use, store your home cleaner away from direct sunlight
or heat. Exposure to such elements may alter the chemical makeup of
the essential oils.
Another method for making your natural disinfectant is to use thyme
leaves instead of thyme essential oil. Here’s how:
1. Boil some water in a pot.
2. Add one to two spoonfuls of thyme leaves, dried or fresh. Let them
steep as though making tea.
3. Let the thyme tea cool before pouring it in your spray bottle.
4. Add vinegar.
5. You can also add essential oils to make your disinfectant more
aromatic.
6. If you’re dealing with hard-to-remove stains and molds, use more
vinegar than water in your homemade cleaner.
Thyme Tea
Page 272
Learn Herbal
Herbal teas are chockfull of good stuff like antioxidants, vitamins and
minerals. Regular consumption of these teas is a good way to stay healthy
and provides great relief when suffering from sore throats and colds.
When thyme is consumed as a tea, you get the optimum amount of
thymol, its beneficial active ingredient. Create your own tea out of thyme
and other herbs and make them a part of your daily life.
What you need:
2 tablespoons of fresh thyme leaves OR 1 tablespoon of dried thyme
A pot
2 cups of water
Lemon juice (optional)
Raw honey (optional)
Instructions for making your thyme tea:
1. Bring 2 cups of water to a boil.
2. Finely chop about 2 tablespoons of fresh thyme.
3. Put the chopped fresh thyme OR a tablespoon of dried thyme into
cups and then fill them with boiling water.
4. Let the thyme steep in the boiling water for up to ten minutes.
5. Add lemon juice and/or honey to taste.
6. Enjoy your tea!
Thyme Facial Toner
Page 273
Learn Herbal
Recently, a study conducted by scientists at Leeds Metropolitan University
showed that thyme works better than conventional benzoyl peroxide-
containing prescription creams in fighting acne. Isn’t that great? And apart
from getting rid of acne,thyme also soothes inflammation, gently
exfoliates, and moisturizes dry skin. Reap the benefits of thyme and make
your skin look flawless by making and using this thyme facial toner.
What you will need:
1 tablespoon of dried thyme
3 to 4 tablespoons of witch hazel
A small bottle or bowl
Instructions for making and using your thyme facial toner:
1. Make sure that your bottle or bowl is sterile, as you will be using its
contents on your face. Boil it in water for around ten minutes then dry
thoroughly with a clean cloth.
2. Once clean and dry, put one tablespoon of the dried thyme in it.
3. Pour three to four tablespoons of witch hazel into the bottle. Then
cover the bottle and shake it well.
4. Let the thyme steep in witch hazel for 20 minutes. The witch hazel
should be light brown or darker by the time you reach the 20-minute
mark.
5. Pour a drop or two of the toner on a ball of cotton or a clean and soft
face towel and dab it onto your face gently. Let the toner linger on
spots infected with acne.
If you don’t have witch hazel, you can get the same effect by mixing thyme
oil or dried thyme with your facial products.
Page 274
Learn Herbal
You know there’s truth to a plant’s purported health benefits when even
the ancients were raving about it. And now, modern science has shown
what the Greeks and Romans knew all along. Thyme is a powerful herb
with many valuable uses to offer. Keep a pot of thyme on your windowsill
or in your garden to enjoy its benefits any time you want.
TURMERIC
If you’ve dined at an authentic Indian restaurant or have tried cooking an
Indian dish, then you’ve probably come across turmeric. This powerful
herb imparts a bright yellow color and a distinctive, pungent taste and
aroma to food. Turmeric (Curcuma longa) is a plant native to South Asia
that looks similar to ginger. It is an important ingredient in Indian and
Asian cuisine, is an Ayurvedic medicine, and has been used as a natural
dye for more than 2,000 years.
Page 275
Learn Herbal
Cultivation of Thyme
Turmeric plants do not produce seeds. You have to cultivate them from
roots or rhizomes.
1. Get fresh turmeric roots from your local market or nursery. Select
plump, juicy-looking rhizomes that already have little buds growing.
2. You can either plant the root directly or cut the buds or ā€œfingersā€ off
and plant them one by one in pots filled with well-draining soil. Dig
holes 12 to 16 inches apart and at least 2 inches deep, then place the
roots with their buds facing upwards.
3. Place the pots in areas where they can get full sun. They can also
grow in slightly shaded spots.
4. Because turmeric plants are prone to root rot, avoid giving them too
much water.
5. After a few weeks, you will start to see some sprouts peeking through
the soil. You will then have to wait 8 to 10 months before the roots are
ready for harvesting.
Tips on Growing Turmeric
You can plant the roots directly outside, though it may be better and
safer if you keep them in pots first before transplanting them.
Transplanting should be done during late fall.
Turmeric needs temperatures between 20°C and 30°C to thrive.
Medicinal Uses of Turmeric
Page 276
Learn Herbal
This ancient herb has served numerous uses for thousands of years. Apart
from adding flavor to food, it has also been used to dye clothes and
condiments. Turmeric also serves a variety of ceremonial uses: as a
thanksgiving offering, as a dye for the robes of Buddhist monks, and as a
paste to color the body of brides and grooms.
Through the centuries, it has also gradually carved its niche in the field of
medicine. In fact, scientific studies have shown again and again turmeric’s
beneficial effects to our health. Here are some of the known medicinal
benefits of this versatile rhizome:
Turmeric has antibacterial and antiseptic properties.
Use it to keep cuts and burns from getting infected.
Helps treat wounds -
Results from a number of laboratory tests
using mice as test subjects showed considerable success after using
turmeric to prevent the spread of breast cancer. Combined with
cauliflower, it has been proven to prevent the growth of prostate cancer. It
also stops the growth of blood vessels in existing tumors.
Positive results against cancer -
Studies have shown that the
herb helps stop the buildup of amyloid plaque in the brain, which in turn
slows down the progression of this dreaded disease.
Possible treatment for Alzheimer’s disease -
Turmeric is great for the skin. It helps
prevent and treat various skin diseases like psoriasis, and can be used for
exfoliating, getting rid of acne, lightening stretch marks, healing burns,
and keeping wrinkles away.
Keeps skin healthy and flawless -
Page 277
Learn Herbal
Use turmeric for weight management. Its active
ingredient, curcumin, stimulates gallbladder activity, aids digestion, and
hastens fat metabolism. Add it to your stews, soups, and roasts to reap its
slimming benefits.
Aids in weight loss -
Because of its anti-inflammatory properties, turmeric
has been found helpful in treating and managing the symptoms of arthritis.
It is also used to detoxify the liver, treat depression, prevent metastases,
regulate cholesterol levels, and reduce the physical effects of a stressful
lifestyle.
And so much more -
DIY Homemade Turmeric Solutions
The number of ways by which you can use this humble herb is astounding.
Turmeric can be used to make homemade soaps, toothpaste, and dye for
arts and crafts projects. You can even use it to make temporary tattoos!
Below are three turmeric products that you can make at home.
Turmeric Face Pack
Using an ingredient so pungent and stain-inducing to improve the skin’s
appearance may sound counterintuitive, but, in fact, turmeric can be made
into different kinds of face packs to deal with specific skin problems. Even
famous celebrities,such as the actress Thandie Newton, have shared that
they use turmeric in their makeup and in their moisturizer. Try this recipe
for a turmeric face pack to both moisturize and exfoliate the skin.
What you will need:
Page 278
Learn Herbal
2 tablespoons of fresh cream or curd
1/4 teaspoon of turmeric powder
1/2 teaspoon of jojoba oil
A drop of sandalwood oil
A tablespoon of honey
A small bowl
Instructions for making and using your turmeric face pack:
1. Mix all the ingredients in a small bowl.
2. Wash your face with lukewarm water and then dry it with a soft
towel.
3. Scoop a small amount of the face pack and gently massage it all over
your face with your fingertips. Be careful not to get it in your eyes.
4. Keep it on your face for around 15 minutes before you wash it off with
warm water.
For best results, use this natural face pack three times a week.
If you’re dealing with acne, you need a face pack that contains neem leaves
as well as turmeric. Because of its anti-fungal and antibacterial properties,
neem can effectively treat acne and other skin infections.
What you will need:
At least 30 fresh neem leaves
5 drops of neem oil
A spoon of turmeric (grated or ground)
Instructions for making and using your anti-pimple turmeric face pack:
Page 279
Learn Herbal
1. Place all the ingredients in a blender and blend until you get a paste-
like consistency.
2. Pour the paste into a bowl.
3. To use, dab the paste on the affected areas and let it sit for a few
minutes before washing your face with clean, lukewarm water.
Turmeric Juice
To maximize the health benefits of turmeric, take it in juice form. This way,
you get all of the nutrients and antioxidants that are normally lost during
cooking. But because turmeric has a strong taste and odor, you will need a
few more ingredients to make it palatable. Here is one way to make
turmeric juice:
What you will need:
Turmeric (a 5- to 7-inch piece will suffice)
5 to 7 pieces of tamarind
A couple of lemons
Raw honey
Water
A large pot
A sauce pan
A blender
A strainer
A small bowl
Any glass jar with a lid
Instructions for making your turmeric juice:
Page 280
Learn Herbal
1. Peel the turmeric.
2. Get the inner fruit of the tamarind by cracking the shell open and
extricating it from the roots.
3. Pour some water in a large pot and add the turmeric. Bring the water
to a boil and then let it boil for 20 more minutes or until the water
turns bright yellow in color.
4. In a sauce pan, add about an inch of water and the tamarind. Place it
over low heat.
5. Don’t let the tamarind settle in the pan. Instead, use a wooden spoon
to move it around continuously. Do this until the tamarind melts into
the water and becomes something like a jam. Add water if the
mixture seems too dry.
6. Turn the heat off once the mixture is soft enough and when the seeds
start to separate from the pulp. Set aside and let it cool.
7. If the turmeric water is still too hot, pour a bit of cold water into it.
Then pour the turmeric water it into a blender along with the
softened turmeric root. By blending them, the color should turn into a
more vivid yellow.
8. Next, use a strainer and a wooden spoon to drain the tamarind
mixture into a small bowl. Make sure that no peel or seed gets
through.
9. Add the strained tamarind mixture into the blender containing the
turmeric water and blend some more.
10. Roll the lemons to loosen the pulp inside before slicing them and
squeezing the juice into the blender. Give it a final whizz.
11. You’re now ready to enjoy your natural homemade turmeric juice.
Pour it into glass jars and serve chilled. It will keep for four days in the
fridge.
Page 281
Learn Herbal
Turmeric Tea
Turmeric tea is imbued with the natural goodness of the herb. Take it
every morning and/or before meals to cleanse your liver, improve
digestion, and relieve stress.
What you will need:
¼ cup of grated turmeric root or 1 tablespoon of ground turmeric
2 tablespoons of grated ginger root or ginger powder
4 cups of water
A pot
A strainer
A glass container
Lemon (optional)
Raw honey (optional)
Instructions for making your turmeric tea:
1. Peel and grate both the turmeric and the ginger root.
2. Pour the water into the pot along with the grated turmeric and ginger.
3. Boil the mixture for up to 20 minutes.
4. Use a strainer placed over a glass container or tea cup to separate the
grated turmeric and ginger from the tea.
5. Let it cool for a few minutes.
6. Add lemon and/or honey to your liking.
Page 282
Learn Herbal
If you are using ground turmeric and powdered ginger, allow the water to
boil before adding them. The recipe above makes 4 cups of turmeric tea,
which is enough for a whole day. However, if you are pregnant, nursing or
suffering from gallstones or an acidic stomach, it is better that you refrain
from having or lessen your consumption of turmeric tea. You might also
want to get your toothbrush ready after drinking the tea, as turmeric is
notorious for staining everything it comes in contact with – including your
teeth.
VALERIAN
Page 283
Learn Herbal
Native to Europe and parts of Asia, valerian is a perennial flowing plant
with straight, hollow stems topped by an umbrella-shaped fringe of
delicate pink or white flowers. Despite its elegant look, its roots, when dry,
can give off an unpleasant odor. Ever since the time of ancient Greece and
Rome, valerian (Valeriana officinalis) has been used as a folk remedy for a
variety of ailments, such as insomnia, anxiety, nervousness and heart
palpitations. Its popularity as a sleeping aide gradually decreased with the
advent of modern sleep prescription medication. In 17th century Europe, it
was popularly used as a perfume extract. Scientists are unsure how this
herbs, but believe it to be responsible for the increased production of
gamma aminobutyric acid (GABA) in the brain, which regulates nerve cells
and alleviates anxiety. While this plant of many names – Setwall, Capon’s
Tail, Setewale etc. – has its medicinal uses, nowadays it is also used widely
as ornamentation.
Cultivation of Valerian
Valerian, or All-Heal or Amantilla as it is sometimes known, blooms
abundantly throughout the summer months, prolifically popping out
flowers that smell like vanilla and cherry – or perhaps aged cheese. Its
leaves are a moderate green that brings out the light white and pink of the
petals nicely, perfect for decoration. Valerian likes its light, and while it
seems to require plenty of water during its infant stage, it does well on dry
soil as an adult. This sedate herb with its trumpet-shaped cluster of airy
pink and white flowers is notoriously hard to grow from seed.
Page 284
Learn Herbal
1. The germination rates of valerian seeds are unpredictable (in fact, the
plant does not bloom its first year from seed), so get root divisions or
rooted runners of an established plant from your local nursery if
possible.
2. Plant the roots firmly in fertile soil in a place where it gets plenty of
sunlight. Water frequently enough so that the roots don’t dry out: a
growing valerian needs its moisture.
3. The roots are the medicinal part of the plant. Harvest in fall before the
frost starts biting.
Tips on Growing Valerian
Valerian has been known to attract dogs and cats (it acts like a catnip
for the latter, in fact), so in order to avoid having your valerian dug out
by the pesky feline addicts, wedge in some rocks in the root around
the soil.
Add mulch to your valerian during both spring and fall.
If you really want to try growing valerian from seeds, purchase fresh
seeds and plant them in moist, well-worked soil. Start planting in the
spring, but beware of birds. Valerian seeds germinate close to the
ground since they need light – as such, they’re very prone to
predation. By keeping the seeds more or less moist, you should have
germinating seeds on your hands in about 10 days.
Medicinal Uses of Valerian
Page 285
Learn Herbal
In medieval Sweden, this hardy, aromatic herb was tucked in the pockets
of bridegrooms in order to ward off the evil eye of elves, and it is rumored
that the Pied Piper used valerian to entice the rats into following him to the
river. Such superstitious and fantastical applications are well and all, but it
is perhaps more important to note that valerian has been long dubbed as
ā€œthe poor man’s Valiumā€ for its sedative effects.
And that should come as no surprise because ever since the time of
ancient Rome and Greece, valerian has been used as a treatment for
insomnia. Today, valerian ranks as the most used non-prescription sedative
in Europe. Here are a few ways in which valerian can be used for medicinal
purposes:
One of the most effective ways to battle insomnia is to use
valerian, which does not leave a ā€œhangoverā€ effect (characterized by
fatigue or drowsiness) unlike some other sleeps aides. Although not all
studies show a positive correlation between valerian intake and quality or
longevity of sleep, positive results can be achieved if valerian is consumed
daily over a period of 2-4 weeks along with a combination of hops
(Humulus lupulus), lemon balm (Melissa officianalis) and other herbs that
induce drowsiness.
Sleep like a log -
Although no concrete evidence for its effectiveness in
curing anxiety yet exists, valerian has long been used as a treatment for
illness related to anxiety and psychological stress, including nervous
asthma, headaches, migraine, hypochondria (the irrational fear or illness),
and stomach upsets.
Ease your anxiety -
Page 286
Learn Herbal
For muscles pains and joint aches, valerian is ideal.
Some women take valerian as to ward off menstrual cramps and other
symptoms, for example, hot flushes, associated with menopause.
Say goodbye to pain -
The uses of valerian are many and varied. This
perennial herb can be used to battle against epilepsy, neuralgia, multiple
sclerosis, vertigo, chronic skin diseases and sciatica. Like spearmint,
valerian has a calming and relaxing effect on the body.
And so much more -
DIY Homemade Valerian Solutions
For an herb whose medicinal properties scientists still fiercely debate over,
valerian has seen a mind-blowing number of applications. Galen, the
ancient Roman pharmacist, surgeon and philosopher, named it ā€œphuā€ after
its pungent smell, prescribing it as a cure for insomnia. This perennial herb
protected bridegrooms from the evil eye of elves during the Middle Ages
and came to be used as popular European perfume extract in the 17th
century. Native Americans turned to valerian as a substitute for flour;
Germans used it as a coffee substitute; and the British used it as base for
soup. During World War I, soldiers and civilians used it to relieve stress
and anxiety.
Valerian Tea
Having trouble with insomnia, anxiety or migraines? Taking some valerian
tea every other day can help to get you back in top form. The tea’s pungent
smell might not be for everyone, but its curative effects are more than
enough reason to take the time and effort to brew it. Here’s one way to
brew valerian tea:
What you will need:
Page 287
Learn Herbal
1 teaspoon of dried valerian root
Stainless steel or ceramic kettle
8oz of hot water and tap water
A tea pot
A strainer
Milk (optional)
Raw honey (optional)
Sweetener (optional)
Instructions:
1. Fill the tea pot with hot tap water in order to prepare the container.
2. Pour about 6-8oz of filtered water into the kettle and boil until
bubbles form and burst rapidly.
3. Drain the tea pot of tap water, add valerian root then pour in the boiled
kettle water. Cover the tea pot with a lid.
4. Let it steep for around 10-15 minutes. The steep time is so long
because valerian roots are hardy, unlike more delicate flowers and
shrubs, and it takes time for its medicinal properties to infuse with the
water.
5. Uncover and place a strainer over a cup. Pour the tea down in order to
separate the leaves from the liquid.
6. Let it cool for a while before serving.
7. Add milk, honey or sweetener to your heart’s content.
One way to facilitate the release of medicinal components into your tea is
to use an infusion device such as a heat seal tea bag or a tea ball. Fill your
infusion device with valerian root then steep in boiled water. This arguably
produces better results than loose leaf steeping. While handling the roots,
beware that they can give off an unpleasant smell when dry.
Page 288
Learn Herbal
As ornamentation for the garden of your new cottage home, valerian with
its bright cherry-vanilla flowers attracts equally colorful butterflies. As a
protector of medieval Swedish bridegrooms against the evil eye of elves, it
has no equal. If you find yourself suddenly impecunious and can no longer
afford coffee or flour, then valerian is an ideal substitute. And as a
medicinal herb that makes your nights easier, valerian is a true friend.
YARROW
Page 289
Learn Herbal
A member of the aster family, yarrow (Achillea millefolium) is closely
related to chamomile and chrysanthemums. Native to temperate regions
of the Northern Hemisphere in Asia, Europe and North America, this
flower thrives in warm, sunny slopes,as well as meadows and roadsides.
Typically, the flowers are arranged in white clusters with a hairy stem
(often no more than 3 feet in height) edged with feathery, cauline leaves,
but hot pink and pale purple flowers have been known to dominate entire
tracts of mountainous areas. Other colors include salmon, red and yellow.
Legend has it that yarrow was named after Achilles, who used this
herbaceous perennial plant as a salve to soother his soldiers’ wounds. In
fact,historically, it was for a time called herbal militaris for its ability to
stem blood flow from soldiers’ wounds. The plant has a sweet and
powerful scent, not unlike chrysanthemums.
Cultivation of Yarrow
Yarrows are easy to grow and maintain, given the right condition. A hot,
sunny place with sandy or loamy soil makes for a healthy yarrow plant.
This hardy member of the aster family will thrive in dry average to poor
soil, but will not tolerate wet soil. It is ideal to start planting in either early
spring or summer.
Page 290
Learn Herbal
1. Select a site with full exposure to sun and well-drained soil.
2. With the help of a garden fork, cut a 12-15 inch hole into the soil (at
least twice the diameter of the pot the plant resides in), then fill it with
2-4 inches of compost.
3. Carefully remove the plant from the pot and lower it into the hole.
Firm the soil around the root ball gently then water adequately.
4. Harvest only after the flowers are open and while they are still
vibrant-looking.
Tips on Growing Yarrow
Space the plants 1 to 2 feet apart. Yarrow is fast-growing and invasive
and can take over your garden if you’re not careful.
Add a thin layer of compost and at least a 2-inch layer of mulch each
spring.
If it is especially dry during the summer (less than 1 inch of rain per
week), remember to water the plants adequately.
Medicinal Uses of Yarrow
Hailed as a powerful and healing magical herb for centuries, yarrow was
used to ā€œdrive out the devilā€ from those who were unfortunate enough to
be possessed. However, the holy mass had to be recited 7 times in order for
this to work – and the victim was obliged to drink yellow while hanging
upside down from a church bell… Less superstitiously, the plant has its
history conjoined with advances in metallurgy since 5000 BP
.
Page 291
Learn Herbal
As hard bronze knives and swords with sharp edges capable of cutting
deep into skin became more common, so did the risk of large open
wounds that would often have been fatal – if not for the blood staunching
properties of yarrow. For thousands of years, yarrow, or the Soldier’s
Woundwort, has acted as superior wound dressing, but that’s not all. The
yarrow has plenty of other medicinal uses; here are some of them:
Yarrow’s has a great ability to staunch blood flow.
Close open wounds -
- Have unbearable menstrual cramps? A
healthy dose of yarrow tea can relax your uterine muscles, driving the pain
away in no time.
Say goodbye to nasty PMS cramps
Yarrow also has the ability to relax stomach
muscles and contains flavonoids, plant-based chemicals that increase
saliva and stomach acid production, helping digestion. In combination with
other herbs, it is effective in battling against bloating, flatulence, mild
gastrointestinal (GI) cramping and other GI-related problems.
No more stomach pains -
The ability of this perennial herb to makes us sweat has
been somewhat eclipsed by its ability to staunch blood flow in open
wounds. Nevertheless, as Dr. Christopher once wrote, ā€œYarrow, when
administered hot and copiously, will raise the heat of the body, equalize the
circulation, and produce perspiration.ā€ A cup of yarrow tea during fever
should be effective in sweating out infection. Fevers are often accompanied
by cold, which too yarrow can solve when combined with elderflower and
peppermint.
Sweat out fevers -
Page 292
Learn Herbal
Because of its antiseptic properties, yarrow is believed
to be a kidney and urinary tract cleanser. It is effective as a diuretic and
anti-inflammatory in case of urinary infection, such as cystitis.
A natural diuretic -
The wonderful anti-inflammatory and analgesic
properties of this herb make it ideal for a number of medicinal uses. It can
be used for amenorrhea (irregular menstrual cycles), improving
circulation by dilating the blood vessels, heartburn and so much more!
And so much more -
DIY Homemade Yarrow Solutions
From being the greatest weapon of Achilles, who was an excellent student
of the healing arts, to being used to ward off the devil in dubious church
rituals, the number of uses that yarrow has seen boggles the mind. Apart
from its blood-staunching and sweat-inducing properties, yarrow was
celebrated among tribes for a number of things: The flower heads of
yarrow served as deodorant for the armpits of the Flathead Indians of
Montana while the Okanagon people used it as mosquito repellent by
placing it over hot coal in order to make a kind of smudge. You can try
making some simple remedies yourself.
Yarrow Oil
Containing a chemical called proazulenes, this dark blue essential oil is
extremely easy to apply and can be massaged over varicose veins or
hemorrhoids in combination with Agrimoni oil or used as chest rubs for
cold and influenza.
What you will need:
Page 293
Learn Herbal
Fresh or dried yarrow leaves and flowering tops
Olive oil (3 ounces of yarrow per pint volume)
Wide-mouthed jar
Water
Instructions for making and using your yarrow oil:
1. Make sure the yarrow is free of insects and pests. You can do this by
leaving it out in the sun for an hour or two.
2. Stuff the herb into the jar, then douse with a generous amount of olive
oil. Close the lid once the jar is filed with oil.
3. Stir every four hours on the first day and continue this daily regime
for just up to a month.
4. Keep the temperature conditions at 105-110 degrees Fahrenheit.
5. It is advisable to compensate for water content if fresh herb is used.
Once all the oil seeps out, use it to your heart’s content.
Yarrow Tea
One of the best ways to reap the benefits of the herb is to consume it in tea
form. The best use of yarrow tea is as a cold-fighting remedy or
preventative due to the presence of substances like achillin and
balchanolide, which are believed to boost the immune system. Its oil also
contains antimicrobial agents.
What you will need:
Page 294
Learn Herbal
1 cup of yarrow
6 cups of water
A pot
A strainer
Lemon (optional)
Raw honey (optional)
Instructions for making your yarrow tea:
1. Boil a pot full of water until bug bubbles rapidly form and burst.
2. Add in yarrow.
3. Let it steep for over 5 minutes. You want your yarrow tea to take on a
nice honey-toned color.
4. Place a strainer over a cup and pour the tea in order to filter out the
leaves.
5. Let it cool for a few minutes.
6. Add lemon and/or honey to your liking.
Whether to splash some color into a monotonously green garden or to use
as remedy for cold, fevers or chest pains, yarrow with its many names and
colors is a plant worth having around the house. You never know when you
might be in dire need of herbal gauze for open wounds!
Learn herbs

Learn herbs

  • 1.
  • 2.
  • 3.
    Page 2 Learn Herbal DISCLAIMERAND/OR LEGAL NOTICES The Publisher does not accept responsibility for the accuracy or completeness of any material contained herein. Please note that none of the information, techniques, skills and concepts contained herein is in any way recommended in place of professional or medical help. It is in no way the intent or purpose of this document to overwrite any such professional help. Furthermore, the Publisher expressly disclaims all liability to any person in respect of anything, and of the consequences of anything, done or omitted to be done by any such person in reliance, whether wholly or partially, upon any information presented in this document. I thank you God for this most amazing day, for the leaping greenly spirits of trees, and for the blue dream of sky and for everything which is natural, which is infinite, which is yes. - E.E Cummings. For Your Information 7 A Brief History of Herbs: Their Emergence in Western Culture 8 What is an Herb Anyway? 13 The Common Active Components of Herbs 16 The Safety and Quality of Herbs 21 The Benefits of Growing Your Own Herbs 25
  • 4.
    Page 3 Learn Herbal Soiland Space: How to Get Quality Soil and Design Your Garden Space 29 Harvesting and Storing Herbs 32 How To Dry Herbs 36 Setting Up Your Kitchen Herbal Pharmacy 41 How To Buy Dried Herbs and Detect Good Quality Practices While Purchasing 44 What are Essential Oils? 47 How To Check For Quality Essential Oils 51 Amazing Herbs To Get Started With – Tips On How To Grow Them, Their Medicinal Properties, and Recipes You'll Love 55 ALOE VERA 56 Cultivation Of Aloe Vera 56 Tips On Growing Aloe Vera 57 Medicinal Uses Of Aloe Vera 57 DIY Homemade Aloe Vera Solutions 58 BURDOCK 62 Cultivation Of Burdock 62
  • 5.
    Page 4 Learn Herbal TipsOn Growing Burdock 63 Medicinal Uses Of Burdock 63 DIY Homemade Burdock Solutions 64 CALENDULA 68 Cultivation Of Calendula 68 Tips On Growing Calendula 69 Medicinal Uses Of Calendula 69 DIY Homemade Calendula Solutions 70 CHAMOMILE 74 Cultivation Of Chamomile 74 Tips On Growing Chamomile 75 Medicinal Uses Of Chamomile 75 DIY Homemade Chamomile Solutions 76 CHICKWEED 80 Cultivation Of Chickweed 80 Tips On Growing Chickweed 81
  • 6.
    Page 5 Learn Herbal MedicinalUses Of Chickweed 81 DIY Homemade Chickweed Solutions 82 DANDELION 86 Cultivation Of Dandelion 86 Tips On Growing Dandelion 87 Medicinal Uses Of Dandelion 87 DIY Homemade Dandelion Solutions 88 ECHINACEA 91 Cultivation Of Echinacea 91 Tips On Growing Echinacea 92 Medicinal Uses Of Echinacea 92 DIY Homemade Echinacea Solutions 93 ELDER 96 Cultivation Of Elder 96 Tips On Growing Elder 97 Medicinal Uses Of Elder 97
  • 7.
    Page 6 Learn Herbal DIYHomemade Elder Solutions 98 GINGER 101 Cultivation Of Ginger 101 Tips On Growing Ginger 102 Medicinal Uses Of Ginger 102 DIY Homemade Ginger Solutions 103 HAWTHORN 107 Cultivation Of Hawthorn 108 Tips On Growing Hawthorn 108 Medicinal Uses Of Hawthorn 109 DIY Homemade Hawthorn Solutions 110 BASIL 112 Cultivation Of Basil 112 Tips On Growing Basil 113 Medicinal Uses Of Basil 113 DIY Homemade Basil Remedies & Solutions 114
  • 8.
    Page 7 Learn Herbal CAYENNEPEPPER 117 Cultivation Of Cayenne Pepper 117 Tips On Growing Cayenne Pepper 118 Medicinal Uses Of Cayenne Pepper 118 Homemade Cayenne Pepper Remedies and Solutions 119 CINNAMON 122 Buying and Keeping Cinnamon 122 Medicinal Uses Of Cinnamon 123 DIY Homemade Cinnamon Remedies and Solutions 124 GARLIC 127 Cultivation of Garlic 127 Tips On Growing Garlic 128 Medicinal Uses of Garlic 128 DIY Homemade Garlic Remedies and Solutions 129 LAVENDER 132 Cultivation of Lavender 132
  • 9.
    Page 8 Learn Herbal TipsOn Growing Lavender 133 Medicinal Uses of Lavender 133 DIY Homemade Lavender Solutions 134 LEMON BALM 137 Cultivation of Lemon Balm 137 Tips On Growing Lemon Balm 138 Medicinal Uses of Lemon Balm 138 DIY Homemade Lemon Balm Solutions 139 LIQUORICE 142 Cultivation of Liquorice 143 Tips On Growing Liquorice 143 Medicinal Uses Of Liquorice 143 DIY Homemade Liquorice Solutions 144 MARSHMALLOW 147 Cultivation of Marshmallow 148 Tips On Growing Marshmallow 148
  • 10.
    Page 9 Learn Herbal MedicalUses Of Marshmallow 148 DIY Homemade Marshmallow Solutions 149 NETTLE 152 Cultivation of Nettle 152 Tips On Growing Stinging Nettles 153 Medicinal Uses Of Nettle 153 DIY Homemade Nettle Solutions 154 PEPPERMINT 157 Cultivation of Peppermint 157 Tips On Growing Peppermint 158 Medicinal Uses of Peppermint 158 DIY Homemade Peppermint Solutions 159 PLANTAIN 162 Cultivation of Plantain 163 Tips On Growing Plantain 163 Medicinal Uses Of Plantain 163
  • 11.
    Page 10 Learn Herbal DIYHomemade Plantain Solutions 164 RED CLOVER 168 Cultivation of Red Clover 169 Tips On Growing Red Clover 169 Medicinal Uses Of Red Clover 169 DIY Homemade Red Clover Solutions 170 ROSEMARY 173 Cultivation of Rosemary 173 Tips On Growing Rosemary 174 Medicinal Uses of Rosemary 174 DIY Homemade Rosemary Solutions 175 SAGE 178 Cultivation of Sage 179 Tips On Growing Sage 179 Medicinal Uses Of Sage 179 DIY Homemade Sage Solutions 180
  • 12.
    Page 11 Learn Herbal SPEARMINT183 Cultivation of Spearmint 183 Tips On Growing Spearmint 184 Medicinal Uses of Spearmint 184 DIY Homemade Spearmint Solutions 185 ST JOHN’S WORT 188 Cultivation of St John’s Wort 188 Tips On Growing St. John’s Wort 189 Medicinal Uses of St John’s Wort 189 DIY Homemade St. John’s Wort Solutions 190 THYME 192 Cultivation Of Thyme 192 Tips On Growing Thyme 193 Medicinal Uses of Thyme 193 DIY Homemade Thyme Solutions 194 TURMERIC 198
  • 13.
    Page 12 Learn Herbal CultivationOf Thyme 198 Tips On Growing Turmeric 199 Medicinal Uses of Turmeric 199 DIY Homemade Turmeric Solutions 200 VALERIAN 204 Cultivation Of Valerian 204 Tips On Growing Valerian 205 Medicinal Uses of Valerian 205 DIY Homemade Valerian Solutions 206 YARROW 209 Cultivation Of Yarrow 209 Tips On Growing Yarrow 210 Medicinal Uses Of Yarrow 210 DIY Homemade Yarrow Solutions 211 For Your Information
  • 14.
    Page 13 Learn Herbal GasMark Fahrenheit Celsius Description 1/4 225 110 Very Cool/ Very Slow 1/2 250 130 — 1 275 140 Cool 2 300 150 — 3 325 170 Very Moderate 4 350 180 Moderate 5 375 190 —- 6 400 200 Moderately Hot 7 425 220 Hot 8 450 230 —- 9 475 240 —- A Brief History of Herbs: Their Emergence in Western Culture
  • 15.
    Page 14 Learn Herbal Herbshave been used for hundreds of thousands of years, and their earliest uses can be traced back to scents, foods, flavorings, medicines, disinfectants and even currency. One of the first cultures that were known to experiment with herbs was the Ancient Egyptians that lived in 3500 B.C. This ancient civilization understood that herbs could play a significant role in treating disease, which was a unique perception since many old civilizations believed that magic was at the root of healing. By 2700 B.C., Chinese dynasties began using herbs in a scientific manner.
  • 16.
    Page 15 Learn Herbal In460 B.C., our friend Hippocrates borrowed the beliefs from earlier cultures and developed a system for diagnosing various illnesses using herbs. At this time, it was believed that sickness was not a supernatural event but a natural one that required the help of herbs instead of magic. Although much progress was made in terms of science and medicine, much was lost with the fall of the Roman Empire. The Middle Ages retracted to many of the original beliefs that earlier cultures had: sickness and disease were supernatural, and herbs should be used in mystic rituals. During the Renaissance period, trade with other civilizations became more abundant, and with this practice, knowledge surrounding herbs grew. In fact, the New World was discovered as a result of searching for herbs and spices that would provide medicinal purposes. In the 16th and 17th centuries, universities taught botany and herbalism, and psychic gardens were planted on their premises. There was a firmer understanding for the nature of herbs but also much confusion. A single plant may have had many names, and a single name may have been given to many plants. Also, there was a conflict between herbs and doctors. In 1652, Nicholas Culpeper published a book on natural remedies and how people should rely on these herbs to recover from illness rather than the advice of doctors. Naturally, doctors did not agree with his works. As society moved into the 18th and 19th centuries, people began relying on medicinal cures instead. In some parts of the Western world, herbalism was outlawed unless practiced by a qualified doctor. Herbs in Other Cultures: A Global Commodity
  • 17.
    Page 16 Learn Herbal Herbsget a lot of recognition in Western culture, but they have been prominent in numerous civilizations across the globe. The Chinese have been using herbs for some of the longest periods of time, and they still rely heavily on certain herbal blends to aid in the prevention and treatment of various medical conditions. Native Americans have also used herbs for many centuries and lived longer, healthier lives than the Europeans did before Christopher Columbus arrived. People often believe that Europeans had the edge in terms of health, technology and education, but this wasn’t always the case, and many primitive cultures surpassed the Europeans during the 12th and 18th centuries. Growing Herbs: An Apothecary for American Pioneers During the 1800s, it was commonplace for American homes to have their own gardens, equipped with an apothecary section that included a variety of herbs. These herbs were designed to treat a variety of illnesses or unpleasant symptoms as well as to flavor foods, preserve meats, fragrance the home, keep linens fresh and disinfect floors and surfaces. Having these herbs in the garden was a practical choice and an essential feature of pioneer homes. Herb gardens were generally placed in a corner near the home so that the herbs were readily available as needed. If you’ve ever had your own garden planted near the home, you understand how convenient it is to go outdoors and pick a fresh herb or ripe tomato to use in your cooking. What made this particular time in history especially conducive to growing herbs is that there were many settlers coming to America. They were bringing a variety of herbs with them that were native to their country, and this resulted in the exchange of different plants.
  • 18.
    Page 17 Learn Herbal Someof the most abundant herbs during this time included watercress, liverwort, lavender, wild leeks, sorrel, anise and pennyroyal. Today, there are many types of herbs that can be planted in the modern-day garden, but the classification of them differs. You may find that one book mentions 50- something herbs while another lists 70-something. Herbs are broken down into various categories, including the following: - Culinary Herbs - Aromatic Herbs - Ornamental Herbs - Medicinal Herbs - Annuals - Biennials - Perennials The 21st Century Shift to Simplicity
  • 19.
    Page 18 Learn Herbal Duringthe late 1800s and 1900s, people started relying more on chemical ingredients and less on herbal ones to treat and cure illness. And, rightfully so. In many contexts, chemical ingredients were more effective. Penicillin was used to treat infection, anesthesia was given to surgery patients and an emphasis was placed on sterile environments. With more research in the early 1900s, people were beginning to understand the link between germs and sickness. Improvements in public health and nutrition were being made to reduce the number of lethal outbreaks, and it was working. Today, we rely on conventional medications to help with just about everything, but this mentality has taken a turn for the worse. Although medicine is a vital part of our lives that allows us to prevent and treat disease, there is a price to pay for our dependence on these drugs. Mounting Problems from Conventional Medications Just think about how many articles have been written, television shows made and songs sung about how dependent we are as a nation on medication. We’ve been referred to as Pill Nation, Pill Poppers or Operation Pill Nation. We’ve become so accustomed to treating the symptom, we’re afraid to feel anything. When we only treat the symptom, we don’t uncover the root of the symptom. For instance, you could be living with thyroid disease without knowing because the symptoms of fatigue, constipation and weight gain would be treated with caffeine, laxatives and diet pills.
  • 20.
    Page 19 Learn Herbal Emergencyrooms have seen a significant spike in the number of patients being brought in for drug interactions. Poison control centers receive numerous calls from people who have overdosed on their medication. Then there are the terrible allergic reactions that children and adults have suffered from conventional medication. The medical community also worries about the growing resistance to antibiotics. What about America’s drug problem that revolves around pain medications, muscle relaxers and mood enhancers? Many of our youth have spiraled into heroin addictions because of an earlier addiction to pain medication. Why are pain medications such a popular drug for teens? They can be found in the medicine cabinets of parents and grandparents. Finally, allergies, attention disorders, chronic fatigue and mental illness are conditions that have exploded into modern culture. As the medical experts look for new diagnoses and medications to treat these ailments, the unforeseen nature of these conditions has left us yearning for something simple and natural instead. While traditional medication is valuable and necessary to our existence, our reliance on it is not. Modern Life, Modern Problems
  • 21.
    Page 20 Learn Herbal Evenin the wake of new problems, we can still expect something good to come from them. This is exactly what is happening as we speak. As we hear another story or come face-to-face with a personal experience, we see that conventional medication has its complications, especially when not used correctly. This new way of thinking has led many people to start questioning what other types of prevention and treatment is available. Do you need antibiotics for every sinus infection? Can walking and exercise do more good for the mind than an antidepressant? What herbs are available to treat allergies, fatigue or muscle weakness? As a result of modern-day problems, there has been a strong preference for using organic and natural products. People have suffered allergic reactions and skin conditions from the chemicals used in body and hair products. We’ve witnessed an obesity problem emerge from poor eating habits from processed and fast foods as well as a sedentary lifestyle complicated by emerging technology. As a result of increased allergies, attention disorders, early puberty in children and certain cancers, people have started to question every product they pick up. At one time, organic or natural products were not the norm. They were almost unheard of. Yet now, these are the products that consumers are demanding. Even in the midst of a recession, consumers are still willing to spend more on a natural product compared to one stuffed with chemicals. Manufacturers are completely aware of this trend, and more are starting to redesign their labels and rethink their ingredients to fit the more accepted and approved organic profile.
  • 22.
    Page 21 Learn Herbal Basically,people want to get back to the basics and depend on natural products before chemically enhanced ones. From makeup to hair products to the foods we eat, everyone is starting to ask, ā€œWhat’s in this product? Where did it come from? How will it benefit my family?ā€ It’s this mentality that has led us back to our ancestors and their use for herbs. Herbs in the 21st Century: Do They Have a Place? Herbs are natural, and while it’s important to know their effects since they too can have negative reactions, they are about as natural as you can get. There are more products being offered to consumers that are herb-based, including soaps,skin products and supplements. Instead of flavoring foods with salt and butter, people are turning to natural herbs like chives, mint and oregano. Herbal teas have also been known to alleviate symptoms like sore throats, stuffy noses and headache. Even the simple sniff of a lemon balm leaf can do wonders for the soul. We still have a long way to go, but we are headed in the right direction. While herbs certainly won’t cure or prevent everything, they should be used in conjunction with conventional medication. If you consider the benefits to a natural ingredient before jumping to medicine, you can avoid some of the long-term consequences of prolonged chemical exposure. The bottom line is that the more you understand and appreciate the simplicity and efficacy of herbs, the better you can meet the unique needs of your family while protecting their precious health and wellbeing. What is an Herb Anyway?
  • 23.
    Page 22 Learn Herbal Herbsare plants that are used in medicine, cuisine and aromatherapy. In the culinary industry, herbs have a more specific meaning and refer to the leafy green parts of the plant. Herbs can be dried or fresh, and they are used to flavor dishes but never act as the main ingredient. Some of the most common herbs include basil, parsley, thyme, dill and rosemary. When it comes to a broad topic like herbs, you’ll find that there are many definitions that are accepted around the world. Botanists have a more general definition for herbs and describe them as coming from small, seed-bearing plants that have fleshy parts rather than woody ones. Herbs may also include trees, shrubs, vines and annuals as well as ferns, mosses and algae.
  • 24.
    Page 23 Learn Herbal Itmay be easy to tell an herb apart from something like a vegetable. Take spinach for instance. Spinach is green and part of a plant, but you can prepare this food on its own and use it as the main ingredient in a dish. It’s the same case with lettuce; the plant is green and found in the ground, but it acts as the main ingredient. Therefore, both spinach and lettuce are vegetables, not herbs. Vegetables and herbs have a clear difference, but the lines become blurred when making the distinction between herbs and spices. Since herbs are the green parts of the plants that are used for flavoring dishes, spices are pretty much everything else. Things like roots, berries, twigs and dried bark are all examples of spices. Some of the most common spices include allspice (dried berries), cinnamon (bark) and cloves (dried flower buds). What are the Uses for Herbs? Herbs are found all around the world, and some are native to the area while others have been introduced. For people who study herbs, they understand the dynamic nature of these small but intriguing plants. For instance, did you know that there are over 90 varieties of rosemary? With so many different varieties of herbs, you can imagine that they have many uses in traditional living. Herbs are valued for their flavor, fragrance, medicinal purposes, pesticidal properties, dyes and health qualities. Let’s delve deeper into the various contexts where herbs are used. Culinary Herbs
  • 25.
    Page 24 Learn Herbal Oneof the most common uses for herbs is to add flavor to dishes. Every American home has some type of dried herbs in their spice cabinet, and they may even have a fresh herb garden in their backyard. Most culinary herbs are perennials or biennials such as thyme, rosemary, basil and parsley. Culinary herbs have been used for centuries, and they were especially popular during the pioneer days when immigrants were traveling to America and bringing native herbs with them. While herbs have remained a large part of the culinary world, processed, frozen and fast foods have become popular staples for American families because of their convenience. These foods rely on preservatives and sodium to bring flavor, but they also carry little nutrients or health value. Thankfully, this trend is starting to reverse itself, and there is more appreciation for flavoring fine cuisine with a blend of herbs and spices rather than salt and butter. As we learn more about how these ingredients can contribute to health problems, there is a drive to get back to the basics and start cooking with natural ingredients. Herbs also have many health benefits, so adding them to foods delivers both flavor and a natural health boost. Medicinal Herbs
  • 26.
    Page 25 Learn Herbal Sinceplants have photochemicals in them, they have the potential to cause various effects on the body. The same goes for herbs; when ingesting them into the body, they have certain effects, many of which are beneficial to the functioning of our bodies. The medicinal purposes for herbs are no secret, and our ancestors used them regularly to treat certain health conditions. The problem was that the information surrounding medicinal herbs was a bit confusing, and quantities, dosages and the types of herbs could be easily confused. For instance, St. John’s Wart extract in a low, controlled dose can help with depression and stress. Yet if you take the extract in large quantities, it can lead to toxic overload that can result in serious complications for the body. Still,herbs can be a powerful tool in alternative medicine. When used appropriately, herbs can provide the body with antioxidants, aid in digestion, calm upset stomach and anxiety and deliver anti-inflammatory properties. Some of the most common medicinal herbs include chamomile, ginger, milk thistle, peppermint and ginkgo biloba. Sacred Herbs Another use for herbs is in a sacred manner. Interestingly, some of our earliest uses for herbs were in sacred rituals, as sickness was often tied to a supernatural occurrence. In countries other than America, herbs are actually quite popular to be used in rites of passage, religious ceremonies and spiritual cleansings. Yet there are many people across our own country who choose to use herbs in their practice of magic to aid in spiritual enhancement, protection and healing.
  • 27.
    Page 26 Learn Herbal Beforenow, you probably didn’t think much about what an herb really was and the many ways it could be used. Herbs are very interesting, and their numerous uses have given them a solid role in our world. Before processed foods and commercial products, our ancestors depended on what the world around them could produce – water, plants, herbs and wild game for example. Today, we are starting to appreciate this simplicity and recognize that sometimes things in their most basic form are the best for our health and survival. The Common Active Components of Herbs Have you ever wondered what the active ingredients in herbs are?
  • 28.
    Page 27 Learn Herbal Whenwe start to turn to more natural lifestyle solutions, herbs pop up in just about all areas. They can be used in cleaning products, hair and skin products and supplements. They can be used to flavor foods, aid in relaxation during massage or aromatherapy and be prescribed as an alternative medicine. Before we turn to these products to replace conventional, chemical-based ones, we can’t help but wonder, what are the components that make up an herb? Herbs are similar to foods in that they contain a variety of ingredients, including vitamins and minerals. Below are the active components found in plant-producing herbs that modern medicine and science has discovered thus far. Flavonoids Flavonoids are compounds that are found naturally in certain foods and beverages. They are most commonly linked to foods like wine, berries, tea, chocolate, fruits and vegetables. They are also responsible for creating the yellow and orange colors in herbs. Flavonoids have many benefits for the body, including antiseptic and anti-inflammatory properties. They can also act as diuretics, lowering blood pressure and healing the blood vessels. Volatile Oils
  • 29.
    Page 28 Learn Herbal Volatileoils, or essential oils, are made up of various chemical compounds that create their flavorful aromas. Volatile oils are most commonly used in massage therapy or aromatherapy thanks to their relaxing effects on the mind and body. Science has yet to prove that volatile oils can be beneficial from a medical perspective, but many people firmly believe that essential oils can treat and prevent certain health conditions, and because of their complex chemical structures,there is no reason to believe why they can’t. Volatile oils are taken from the plant through a process called distillation. The oils are a mix of hydrocarbons and oxygenated compounds. The oxygenated state is what determines the taste and smell of the mixture since it’s this form that is soluble in water and alcohol. Monoterpenes are the largest group of volatile oils and include camphor and menthol. Essential oils are used in settings beyond aromatherapy and massage therapy thanks to their antiseptic and fungicidal properties. Volatile oils have anti-inflammatory and anti-parasitic effects, allowing them to be used for conditions like ringworm, hair loss, colitis and irritable bowel disease. They enhance the body’s ability to fight off certain infections, and they can be used as expectorants or diuretics. Some of the most common volatile oils used for these purposes include thyme, rosemary, chamomile and parsley. Volatile oils can be absorbed through the skin, inhaled or taken in foods, drinks and herbal medicines. Phenols
  • 30.
    Page 29 Learn Herbal Phenolsare found in the tissues of the plant, and their chemical structures are varied, leaving them to exhibit their own unique characteristics and traits. Thymol, eugenol and salicylic acid are examples of simple herb phenols. Although phenols have many different chemical structures, they are often used for their antibacterial and antiseptic qualities. In some instances, phenols can be used for anesthetic purposes as well. Tannins Tannins are polyphenols that are found in tree bark, wood and the leaves and roots of a plant. What’s interesting about tannin is that it is found in almost all plants across the world. Some plants have a lesser quantity of tannins, such as algae and fungi, but most plants will have some level of these polyphenols. Tannins can be divided into two groups: hydrolysable tannins and condensed tannins. In plants, tannins are meant to protect them from microorganisms, but tannins also have many uses in our everyday world. For instance, tannins can be used to dye leather or cloth. It has strong antiseptic properties, so it can also be used as a medicinal astringent. Since tannin is designed to protect plants, it also has unique properties that may help with gingivitis and provide anti-bacterial, anti-inflammatory and anti-parasitic benefits.
  • 31.
    Page 30 Learn Herbal Teaand coffee also contain tannins; the slightly bitter aftertaste and brown color can be attributed to tannins. Who knew? Wine is another drink that has tannins from the grape plants. Too much tannin is not ideal since it can lead to calcium deficiencies, but you would need to drink a lot of coffee or tea for this to happen. Still, it’s a factor to keep in mind if you consume a lot of these beverages, as it may be best to switch to a white or green tea. Polysaccharides You may remember from science class that polysaccharides are the long chains of sugar that store carbohydrates for plants and animals. For humans, polysaccharides are one of the three types of carbohydrates. Examples of polysaccharides include starch, pectin and cellulose. Foods with these simple sugars are beneficial to the body since they provide it with energy, help maintain healthy digestion and allow the body to feel fuller for longer. Since the majority of foods with polysaccharides are starchy ones – potatoes, beans and grains – they can lead to weight gain if you eat too much of them. This happens because polysaccharides are insoluble in water and are able to store glucose without affecting other cells until the glucose is needed. When you consume a lot of carbohydrates, you can gain weight. While a human may not appreciate this fact, for plants and animals that don’t have readily available food like we do, the ability to store energy is crucial. Alkaloids
  • 32.
    Page 31 Learn Herbal Alkaloidsare plant-derived organic compounds that are composed of oxygen, hydrogen, carbon and nitrogen. Some alkaloids are toxic, but many others are used for medicinal purposes. All alkaloids have physiological effects on the body. Many of the plant components we’ve discussed today may be foreign to you, but you’ll be surprised to learn that substances like cocaine and caffeine are alkaloids. Alkaloids are generally found in herbs that are used by herbalists and doctors,and they tend to have potent effects, so they must be used carefully. The good news is that as long as the dose is controlled, the effects are generally safe. The most common alkaloids include morphine (opium poppy), nicotine (tobacco),atropine (deadly nightshade) and theobromide (coffee, black tea and cocoa leaves). Glucosinolates Glucosinolates are organic compounds that contain both sulfur and nitrogen and are found in plants from the Brassica genus. When humans eat vegetables such as broccoli, cauliflower and Brussels sprouts, they consume glucosinolates in their normal diet, which is beneficial to the functioning of our bodies. Glucosinolates detoxify the human body from harmful carcinogens, and they contain antioxidants and enzymes that help the body fight off certain cancers, including breast, lung and colon cancers.
  • 33.
    Page 32 Learn Herbal Moreover,glucosinolates work in conjunction with other components such as flavonoids, folate and Vitamin C to cleanse the body and remove toxins and free radicals. It’s important that we eat a diet that is rich in glucosinolates, about five cups a week of vegetables like kale, cabbage and spinach. Other good picks for glucosinolate-rich foods include bok choy, turnips, mustard greens and arugula. Vitamins and Minerals Herbs are packed with vitamins and minerals that are essential for the healthy functioning of our bodies. With dozens of herbs such as fenugreek, kelp, saffron, watercress and parsley, it’s possible to get a healthy boost just by adding more herbs to your diet. Below are some of the most common vitamins found in herbs.
  • 34.
    Page 33 Learn Herbal VitaminA is found in herbs such as dandelion, okra pods and parsley. It’s good for the eyes and the functioning of the mucous membranes and skin cells. Vitamin B1 and B2 are good for growth and development and are part of a healthy diet. These vitamins are found in herbs such as fenugreek, dulse and bladderwrack. Vitamin B12 helps the development of red blood cells and can help maintain weight in young children. It’s found in kelp and alfalfa. Vitamin C is needed daily since it cannot be stored in the body, but it keeps our immunities boosted and our teeth and gums strong. This nutrient can be found in elder berries, marigold and paprika, among others. Vitamin D is essential for building strong bones and teeth, and it is contained in herbs like watercress and wheat germ. Vitamin E is known for its healthy bone building qualities as well as contributing to healthy eyes and skin. Herbs like wheat germ, watercress and dandelion leaves contain plenty. In addition to the above vitamins, herbs contain Vitamin G, K and B as well as niacin. All of these vitamins and minerals help the body function properly, boost immunity and keep the skin, bones and teeth healthy and strong. By eating plant-based foods or using herbs to flavor dishes, you can nourish the body with more of these wholesome ingredients that are naturally good to the body, unlike fatty oils, dressings and butters. The Safety and Quality of Herbs
  • 35.
    Page 34 Learn Herbal Overthe past two decades, the use of herbs in the United States has greatly increased as a result of more people shifting to simpler, all-natural methods to manage, prevent and treat various health conditions. Herbs can be used for therapeutic and medicinal purposes, but they must be used correctly. Many people are under the impression that because herbs are natural, they are safe. Unfortunately, this isn’t necessarily true. Let’s review the reasons why we need to exercise caution when using herbs, preferably under the care of a medical professional. Misleading Information Online
  • 36.
    Page 35 Learn Herbal Whentaking an herbal supplement, you can easily educate yourself online. If you notice, much of the information is positive and written by herb enthusiasts, so it can add to the image that herbs are always safe. You need to be especially aware of exaggerated accounts of herbal supplements that are used for marketing purposes. There are companies out there that are merely interested in profits and sales, so they will write anything to make their product look better. There are also many websites that have no marketing motive, but they still write about herbs positively and recommend them for treating certain conditions, even if they have no authority to make the claims. They may be sharing their own experience or belief, but this doesn't mean that taking the herb will have the same outcome for you. Why is there so much misleading information online? The biggest reason is because there is so little evidence supporting Medicinal Uses of herbs. Scientific studies show that conventional medications are best for treating health conditions, and the effects of herbs are not supported. This contradicts with what many people believe, and science hasn’t exactly ruled out the fact that herbs can’t help. With their complex chemical structures and clear benefits in relaxing the mind and body with their fruitful aromas, there may be certain ingredients in herbs that can be used medically; we just haven’t been able to prove this yet.
  • 37.
    Page 36 Learn Herbal It’simportant to be aware that when reading information online, you determine where the information is coming from (an individual, a company or a respected organization), if they have any motive for posting positive testimonials and if their claims are well supported. Just by being aware that not everything you read about herbs is accurate or factual, you can make better decisions for your health and your wellbeing. Lack of Quality Control Another reason why we must be careful about the safety of herbs is that this industry is largely unregulated. With conventional medications, decades are spent researching the drug, experimenting with various chemicals and studying their effects. These drugs are heavily regulated by the FDA, and all information regarding them must be relayed to the general public. If you’ve ever taken a prescription, you know the lengthy packet that is included with the medication, explaining in detail all of the side effects, drug interactions and complications. This same information is not included with herbal products, and in fact, you won’t see much information besides a label printed on the bottle. The FDA does not regulate this industry, leaving companies to have free reign over how they want to market their products. While there are many reputable, honest companies, there are others that don’t hold the same standards. Without regulations to follow, herbal supplements can be mislabeled, making these products confusing, ineffective or risky.
  • 38.
    Page 37 Learn Herbal Also,there is a big difference between the quality and purity in herbal supplements, and with no clear distinctions, consumers may pay more for an inferior product. You may have a hard time making the distinction when looking at the bottle,but just imagine trying to determine the quality of what’s tucked inside. Facilities where herbs are grown and used for commercial purposes are not regulated either, so there are varying measures of how the herbs are grown, dried and stored. Herbs are very sensitive, and if they are not handled correctly, the purity and integrity of the product is jeopardized. The way the herbs are handled is integral to how pure, potent and effective the product actually is, so look for companies that are happy to walk you through their method for growing and storing herbs. Shortage of Research A final barrier in determining herbal safety is that there is a shortage of research on many of these natural ingredients. While the United States may be familiar with the popular Western herbs, there are plants from countries like Asia, Africa and South America that we know little about. Some of these herbs are coming into the U.S. from these countries, but we have yet to research the effects, safety, efficacy and purity of the plants. Additionally, many herbs, including Western-based ones, have yet to be tested in various contexts. A healthy person with no allergies may react fine to a particular herb, but if they have a chronic health condition or are pregnant, there may be serious side effects. When it comes to the special populations, such as children, elders and pregnant women, it’s especially important that herbs are only taken under the supervision of a doctor.
  • 39.
    Page 38 Learn Herbal Wemust also recognize that many people who opt for herbal drugs take other types of medications, and we know little about how herbs interact with these chemically-based drugs. While the FDA studies how various drugs interact with each other,we don’t have the same information for herbs and traditional medication. Our intention is not to scare you away from using herbs but to educate you on making the best decisions. Until there is more control over this industry, it’s up to people to do the research, talk to their doctor and select a reputable company to purchase herbal products from. When we know that we can’t take everything we read online for granted, we can be more cautious about the companies we trust with our sales and our health. How Do I Ensure Quality? If you’re ready to try a few herbs, you may be wondering how you can go about the process safely. Your first step is to talk to your doctor. It’s important that you get the green light on taking any herbs, since your doctor should be aware of any medications you are on as well as any factors that may affect your ability to take herbs, such as a chronic illness or allergy. When you get the doctor’s approval, you can begin your search. If possible, get a recommendation from your doctor or a friend who has been using herbs. They can refer you to a dependable, reputable company that delivers an ideal product. You can also read online testimonials and reviews, but remember that many of these are doctored up by the company itself for marketing purposes. Still, you can learn a lot about a company and its products just by doing a bit of research online.
  • 40.
    Page 39 Learn Herbal Whileit’s not a guarantee, look for products that offer a lot of information. You’ll find that many lower quality herbs will be sold in bottles with printed labels and won’t have any additional information other than what’s on the label. Reputable companies tend to have details about their company and their process for growing and storing herbs. They know where the herbs are coming from and what the true identity of the product is. Contact information should be printed boldly on the website as well. Your goal is to find a brand that you like and trust. Once you do, you can count on the company for all of your needs. Before you find ā€œthe one,ā€ stick to products that are sold in the stores or recommended to you. Mail orders and online companies should be avoided, at least until you’ve found a trusted company to work with. If you want the very best herbs, the solution is to grow your own. When you grow an herb garden, you can choose the herbs you want to add to your diet and control their purity and integrity. You never have to second guess what you’re putting into your body, and you can take charge of your health in a whole new way. The Benefits of Growing Your Own Herbs
  • 41.
    Page 40 Learn Herbal Learningthat the herbal industry is largely unregulated by the FDA, or any government source for that matter, can be unsettling for the people who trust their herbal products to someone else. Not that there aren't many notorious products out there that are regulated by the FDA and yet are still questionable in their safety. There’s no doubt that herbs have some wonderful benefits for the human body, and at a minimum, they can be used to flavor foods and boost the health content of what we eat. If you’re keen on taking herbs as part of your diet, the best solution may be growing your own plants.
  • 42.
    Page 41 Learn Herbal Manypeople around the United States have their own herb gardens that can be planted either indoors or outdoors. These small gardens have a host of herbs such as parsley, oregano and thyme. For the most part, gardeners stick to the basic herbs since these are the ones we know the most about, and they can be easily added to dishes like pasta, soups and meats. Having an herb garden gives you endless possibilities, so you can spread your wings and experiment with a variety of herbal ingredients. Basil won’t just be basil anymore. Let’s discuss the many benefits to growing an herb garden. These perks may be just the motivation you need to get started with your own hobby. Fresh Herbs are Always Available Tired of running to the supermarket every time you need a few groceries? Or maybe you’re simply leaving out key ingredients because you don’t have those ā€œextrasā€ that are added to popular dishes, such as bay leaves, fresh parsley or a sprinkle of dill. When you have an herb garden, you can count on fresh ingredients every day of the week. Your dishes will taste better and have added health content and fresh flavors that can’t be replicated from dried spices. Emerging Hobby
  • 43.
    Page 42 Learn Herbal Manyof us envy the neighbor who has a green thumb, but we don’t take the initiative to start our own garden. Often times, we’re just worried that we will put in the time and have nothing to show for it, but this couldn’t be farther from the truth. Starting an herb garden is starting a new hobby. It may take time and practice to get things right, but that’s the fun in learning. You can uncover unique uses for the herbs and expand your culinary palette. For instance, did you know that there are over 30 different types of basil? Gardening is a healthy hobby that links us to nature, and you will finally have something in common with that neighbor of yours. Also take the opportunity to show your children or grandchildren the importance of gardening, spending time outdoors and eating healthy. Gardening is a teachable moment for young children, and they never mind digging in some dirt! Physical Exercise If you plant an herb garden outdoors, there’s no doubt that you’ll work in some physical exercise. All that bending, digging, planting and watering takes physical energy, and while you won’t be dropping pounds like at the gym, you will be toning your muscles and working your body. The added time in the sun is also refreshing, so you can also enjoy a glowing tone as well. Improved Connection with Nature
  • 44.
    Page 43 Learn Herbal Someof the best therapy takes place outdoors, and having an herb garden will promote this relationship. Planting herbs outdoors will improve your connection with nature because you’ll be outside, listening to the birds and taking in the sights and smells of the season. Yet even planting an herb garden indoors keeps you connected since you’ll be learning about plants that are naturally grown in nature. People are often surprised to see just how much they appreciate Mother Nature when they have the opportunity to work alongside her. Having this greater relationship with the world we live in is rewarding in itself. Saves Money If you’re not running to the store for ingredients every other day, you save money right off the bat. Plus, buying herbs is very expensive as you may have already noticed. You can plant an entire herb plant for pennies that produces an abundance of herbs all season long. Also remember that what you’re growing is essentially organic herbs, so you’re able to feed your family fresh products at a mere fraction of the cost of what you would find in a store. Endless Health Benefits Of course, we can’t discuss the benefits to growing your own herbs and not talk about how healthy they are. With your own garden, you know exactly where the herbs are coming from. You can be confident that they haven’t been treated with pesticides or harmful chemicals. They offer many health benefits because of their flavonoids, antioxidants, polyphenols, vitamins and minerals.
  • 45.
    Page 44 Learn Herbal It'spossible that herbs may help with diabetes, cancer and heart disease, so if these conditions run in your family, you can do more for your health by adding these ingredients to your dishes. Some of the best herbs from a health standpoint include thyme, rosemary, basil, garlic, oregano, cinnamon and turmeric. What's wonderful is that you can bring so much flavor to meals without adding calories. Curb Appeal Having an herb garden can bring your outdoor space much-needed curb appeal. Many of our gardens are lacking, but we’re not sure what they need. Herbs can add another element to the garden, especially because they have vibrant green colors,and some flower during the spring or summer. If you don’t have room for a separate herb garden, you may plant these shrubs in between other plants and flowers; they will blend in beautifully. For instance, Valerian and yarrow are hardy flowering herbs that can add color and character to your space while providing you with healthy herbs. Rest assured that herbs are hardy plants that are easy to work with. Once they are planted, they need minimum care, and most will produce an abundance of herbs. If the plants are producing more herbs than you can handle, clip off the leaves and store them for soups and stews during the winter months. You may not consider yourself to have a green thumb, but you’ll be quite pleased with how easy herb plants are to grow and nurture.
  • 46.
    Page 45 Learn Herbal Soiland Space: How to Get Quality Soil and Design Your Garden Space Getting started with an herb garden doesn’t require much effort, especially if you’ve already had some practice with gardening. In the long run, you will need good quality soil to keep your herbs growing strong. The healthier your soil is,the more productive and hardy your herb garden will be. How do you get good soil? We’ll show you how. First, know that good soil needs a mix of clay (to retain water), sand (to drain water) and organic material (to provide nutrients). Additionally, there needs to be the right balance of these ingredients to have healthy soil, as too much sand or clay can cause problems with drainage, growth and resiliency. Identify the Quality of Your Soil
  • 47.
    Page 46 Learn Herbal Yourfirst step is to determine the type of soil you have in your own community. What is it made from mostly? If it has more clay, add some sand. If it has more sand, add clay. Almost all soils need organic matter added to bring necessary nutrients to the plants. When you have the proper balance of soil in your garden, you will need to start adding organic materials such as rinds from fruits and vegetables. The best time to do this is in the fall after the plants have been harvested. Why Compost is Essential By adding organic green materials to the soil, you’re essentially making your own compost. Compost is an ideal component in soil because it delivers nutrients that are adequately balanced. Many people are quick to jump on fertilizer, but fertilizer can act quickly and cause damage to young plants. Compost slowly releases vitamins so that the plants are always being nourished. Compost also protects plants from pests and diseases, and it helps keep the soil healthy by retaining moisture and loosening up clay. Making Your Own Compost Rich Soil Now, let's get back to making your own great soil. Many people think they need a compost bin to make compost, but this isn’t necessary. Compost bins are convenient, especially if you’ll be using the compost in various areas, but you can do the same for your herb garden by throwing down the right stuff.
  • 48.
    Page 47 Learn Herbal Compostrequires a blend of brown and green materials. Brown materials include dried leaves, dead flowers, paper and straw. Green materials are nitrogen-rich and include grass clippings and kitchen waste, such as fruit rinds and cores. You should be able to find most of these items in your own home or backyard, but if you need additional sources, ask your neighbors for their dried leaves or grass clippings. They surely won't mind! Ideally, your space should be about 3 feet wide by 3 feet long. When you have the compost materials laid down, cover it with newspaper. The newspaper will hold in the heat from the plants that are decomposing and turn this into rich soil. Once you establish this healthy soil, you will need to maintain its integrity. Fortunately, this is easy to do and only involves turning the soil at the end of the growing season and adding organic materials regularly. You will also need to check the composition of the soil each year to ensure it has the right balance of clay, sand and organic material. Remember, you don’t have to spend money to get high-quality soil. Simple and natural works best in this context. Designing Your Garden Space
  • 49.
    Page 48 Learn Herbal Withnourishing soil for your garden, it’s time to start planting herbs. Designing how your space will look is a crucial element for an herb garden. This is where you will be spending time digging, planting and watering, so you want the layout to be conducive to these movements. You also want to meet the needs of the herbs, such as by providing them with sunlight or partial shade. It’s helpful to know what you’re planting so that you can determine where each plant will go. No matter how you choose to design your garden, remember this tip: keep it simple. The wonderful thing about nature is that everything is down-to-earth and uncomplicated. If you think that your garden needs expensive lawn decorations, solar lighting and a stone trim, you’re allowing our need for modern-day luxuries to get in the way of what should be a minimal hobby. If you take a look around your garage or shed, you may find that you already have what you need to create the perfect herb space. For instance, a piece of wood garden gating can work well, providing it has large enough squares to plant the herbs in. Simply lie this down in the soil and begin planting your herbs. You may also build your own spaces using pieces of treated wood that can be purchased from a home improvement store. A wagon wheel can also be useful and create a real visual treat in your outdoor space. Container Gardening and Raised Beds: Great for Urban Dwellers
  • 50.
    Page 49 Learn Herbal Ifyou live in an urban area, have poor soil quality or don’t have a yard where you can plant a garden, plant your herbs in a separate planter. You can still make your own compost and add the soil mixture to each container. Some gardeners choose long wooden planters while others opt for the small, individual herb planters. You can also build your own stand that will hold all of the planters in one convenient spot. Container gardening is smart and practical for everyone,and it may be a nice change of pace for the winter months when you want to keep a few of the most essential herbs on hand. Raised beds can also work wonders if there is poor soil in your area. These beds give the same feeling as an herb garden, except for the fact that the garden beds are raised off the ground. They can be built using pieces of wood and basic hardware for a minimal cost. Some gardeners make elaborate designs with these beds, and you can go that extra mile by adding a wire fence around the garden or installing pavers in between the beds. The bottom line is that creating an herb garden is effortless when you put your mind to it. You don’t need much money to get started, and you may even be able to find everything you need in your home already. Once the herbs begin to fill out,your garden will look absolutely stunning, and you can take a step back and be proud of your accomplishment. Harvesting and Storing Herbs
  • 51.
    Page 50 Learn Herbal Harvestingrefers to the process of removing parts of a plant to be used for consumption. You can’t harvest a plant at any particular time; you must wait until it’s ready to eat, which is when the oils responsible for creating aroma and flavor are at their climax. Timing is delicate since it depends on what part of the plant you want to harvest as well as what you intend to use the plant for. Below we discuss the various parts of herb plants that can be harvested and how to successfully complete the collection process. How to Harvest Buds and Flowers
  • 52.
    Page 51 Learn Herbal Ifyou are growing herbs such as borage, chamomile or lavender, you will want to harvest the flowers rather than the leaves. You can harvest the bud or the flower at any point when they grow in, but you’ll want to do it before they completely flower. The volatile oils that are in the herb plant are at their peak right before the buds start to open, making this the best time to harvest them. Another critical component is the time of the day that you harvest the flowers. It’s important that the plant is completely dry, so opt for the early morning, just after the dew has dissolved and before the sun is hot. If your area has gotten rain, also be sure to wipe off any raindrops that have settled on the plant. To begin, check your herb plant for flower buds that have grown in but haven’t flowered just yet. However, if the buds have opened into flowers, that doesn’t mean you’ve missed your opportunity. While the volatile oils may not be as strong,you ultimately want to collect the flowers before they have become withered and dry. There are two ways to cut the flowers. The first method is to cut the entire flower bud off the stem, just under the head of the flower. The second way is to cut both the stem and the flower off as if you were pruning the plant. Both ways are acceptable, and there are advantages to each.
  • 53.
    Page 52 Learn Herbal Ifyou cut just below the head of the flower bud, the plant will have the chance to grow back quickly, and you can keep harvesting the plant. With the quick turnaround of this method, you’ll want to have a drying screen on hand. If you decide to cut the flower bud and the stem, two new stems will grow, and the herb plant will get bigger. Also, you can conveniently hang the flowers by the stems to dry, so you won’t need to purchase a drying screen. The drawback to this method is that it will take time for the new stems to grow. If it’s early in the season and you don’t want to over-harvest the plant, cutting off the flower at the stem and above the leaves is best since it will allow your plant to grow bigger. If you need a lot of flowers in a short amount of time,cutting the buds off at the head is best. How to Harvest Leaves and Stems If you choose to harvest the leaves or stems of your herb plant, you’ll follow many of the same precautions as when you harvest the flower buds. First, the plant should be completely dry, so opting to harvest the leaves in the morning when the dew has dried and the sun is still cool is a good idea. Plus, you can enjoy a more comfortable environment that is conducive to gardening. Some of the most basic herbs that can be harvested include basil, dill, oregano, sage, parsley and thyme. Keep in mind that you want your plant to grow large and mature, so never harvest all of the leaves at one time. Aim for about 30 percent, leaving big, healthy leaves to continue the growing process. Also, clip the leaves before the plant flowers. You already know that this is the time when the volatile oils are their strongest and will produce the best flavor and aroma.
  • 54.
    Page 53 Learn Herbal Additionally,if you don’t want or need the flower buds, there’s no reason to let the plant expend its energy on producing flowers. Once this happens, the stems and leaves form a bitter taste, so pinch off the flower buds and encourage healthy stem growth. You’ll be surprised at just how quickly a healthy plant will create new buds, so be sure to check for these each day. Now, let’s get down to harvesting our leaves and stems. Never pull the leaves off your plant, even though it may seem like the simplest thing to do. If you want the leaves, cut the stem off and then gently pull the leaves from the stem. This avoids you from putting pressure on the plant itself. If you want the stem, proceed with the same method, except you don’t have to pull the leaves off. What’s interesting is that once you pull off a leaf from a plant, another one will never grow back in that spot. There are some cases where it is okay to pull off the leaves directly from the plant, such as if there are plenty of larger leaves that are blocking the plant’s ability to absorb sunlight, or if the plant is so massively huge, it just won’t matter. Yet early on, it’s best to cut the stem first, and then pull the leaves. How to Harvest Roots
  • 55.
    Page 54 Learn Herbal Harvestingthe roots of an herb plant is a bit different than harvesting the flowers or leaves. The ideal time to do this is in the fall since this is when the roots are their strongest. If you happen to miss this period, you can also harvest the roots in the springtime before new growth starts, but it can be more difficult to find the plant. Another obstacle is that the roots tend to be wetter during the springtime, so you’ll need to wait a longer period of time for the roots to dry. The only stipulation for fall root harvesting is to wait until the foliage has died off. Harvesting roots requires patience and a little digging. Most plants aren’t ready to be harvested in their first year, so you will have to wait until their second birthday before you can begin harvesting them. One plant you can harvest earlier is chicory; one plant you can harvest later (in the third year) is marshmallow. Most other herb roots, including barberry, bayberry, garlic, ginger, stone root and valerian root are best harvested in the second year, in the fall or early spring. To collect the roots, start with a spading fork and make sure the ground is slightly moist but not saturated. Dig deep using the spade and cut off the plant tops. Most gardeners opt to dig up the entire plant, but if you plan on having the herb come back next year, make sure to replant a hefty part of the root so that it can grow back. When the roots are gathered up, they will need a good washing. You can rinse off the roots, but if they still aren’t clean, use a brush to remove the built-up dirt. Once clean, hang the roots to dry. Some herbs have thick roots, such as Liquorice and burdock, so you may have to cut them vertically in order to speed up the drying process. People are quite surprised to see just how long this process can take; some roots take weeks to thoroughly dry.
  • 56.
    Page 55 Learn Herbal StoringHerbs All herbs should be stored in an airtight jar or container once they have been completely dried. If there is any moisture left, the herbs can grow mold. If the entire stem was dried, take off the leaves and crumble them just before placing them in the container. Keep the jars away from sunlight and heat, as this will ruin the quality of the herbs. Ceramic, glass or metal containers are best, and they darker the color, the better. You may use the herbs as needed, just be sure that they have airtight lids so that they stay fresh. It’s time to discard the herb contents when they have mold on them or have become dark and fragile. With proper storage techniques, most herbs can be stored for up to one year. A second option is to freeze herbs, as they will retain their freshness until they are thawed out. The process is a little different if you choose to freeze them. Start by washing them, and then blanch them in boiling water for 1-2 minutes. Once drained and cooled, they can be placed in individual packages and used as needed. Herbs like parsley, basil and oregano can be thawed out and added to pasta sauce, soups and purees. Harvesting and storing herbs is not difficult. Once you get familiar with harvesting the different parts of the plant, you will find uses for herbs like you never thought before! How to Dry Herbs
  • 57.
    Page 56 Learn Herbal Whatyou do with the herbs you have collected is just as important as the harvest itself. When the herbs have been gathered, inspect them to ensure that there are no insects or debris. If the herbs are clean, do not wet them. If they are dirty, gently rinse the herbs, shake off the excess water and lay them on a paper towel to dry. Also remove dead or damaged foliage. When the herbs have dried, you may proceed with the complete drying process. There are a variety of methods for drying herbs, yet most gardeners prefer natural air drying because of its simplicity and efficacy. Method #1: Natural Air Drying
  • 58.
    Page 57 Learn Herbal Whendrying herbs naturally, you will need an ideal location to do so. The best place to dry herbs is in a large, empty room, such as a closet, attic or pantry. In fact, many people like to hang herbs in a pantry or kitchen for added flair. Herbs should be kept away from direct sunlight, moisture and frost, as these conditions can severely compromise the quality and integrity of the herbs. Make sure you select a spot that has plenty of airflow so that the air circulates around the herbs and helps them to dry faster. The simplest way to air dry herbs is to tie the herbs into small bunches with string or twine and hang them upside down. Small, loose bundles are ideal since they allow the air to circulate the best. This method is also nice if you plan on using the herbs for decorative purposes. Gardeners sometimes worry that the herbs will collect dust by hanging out in the open, so if this is a concern, you may loosely tie a brown paper bag around the bundles. The herbs should be checked every day or two, and you should notice that the leaves and stems dry out a little more each time. If you are using brown paper bags and notice that the herbs are not drying out fast enough, poke holes in the bag or trim them down further so that the herbs receive improved air circulation. The herbs are ready to be stored when they are dry, brittle and break into pieces. Another natural air drying method is to set the herbs on a drying screen. Choose the same type of dark, empty room with good airflow and no direct sunlight. Position the drying screens in the room and lay the herbs on the screens. Turn them over as needed to ensure thorough drying. This is a simple way to dry out your herbs and about as low-tech as you can get.
  • 59.
    Page 58 Learn Herbal Onaverage, it takes about one week for herbs to dry, and you’ll notice that they become brittle and crispy. The length of time depends on the airflow and temperature of the room, so it could take a little bit more time. The bundles should be taken down immediately when they are dry, otherwise they will start to collect dust and may even mold. Collecting the dried herbs is easy; simply roll the bundles through your hands and let the dried leaves collect in a bowl. Or, cover a work area with newspaper and remove the leaves by running your hand down the stem. The dried leaves may then be stored in labeled jars in a cupboard, away from light. Most herbs can be stored for a year or more. Method #2: Oven Drying Air drying is the best way to dry herbs, but it also takes time. If you don’t have weeks to wait and you want to dry out the leaves as quickly as possible, then you can enlist the oven for some help. You may also have no choice but to use the oven if there is a lot of humidity in the air that is interfering with the herbs’ natural ability to dry out on their own. The good news is that you can finish drying the herbs using the oven, giving you the opportunity to dry them naturally for much of the duration. To use the oven method, place the herbs on a cookie sheet and remove some of the stems so they are not as bulky. Don’t overcrowd them either. Place the cookie sheet in the oven on the lowest setting possible, which should be no more than 180 degrees. There is a balance here, as you shouldn’t smell the herbs cooking. This means that the temperature is too high.
  • 60.
    Page 59 Learn Herbal Ifyou’re drying out leaves that have been freshly harvested, cooking them for about 2 to 4 hours on a setting of 180 degrees or less. If you’re completing the drying process, aim for a temperature of 150 degrees. The herbs are dried when the leaves are crispy and the stems feel brittle. You may proceed in the same way to collect the leaves by running the stems through your fingers and gathering the dried leaves over a bowl. Method #3: Microwave Drying Microwave drying is a fast and easy method, especially if you’re only looking to dry a small amount of herbs. Take the clean herbs and lay them on a paper towel, then place them in the microwave for 1 to 2 minutes. Even though microwaving herbs is quick and simple, it’s very easy to overheat the herbs. Drying times vary based on the type of herb, the moisture content and the wattage on the microwave. Check the herbs and heat them in 30 second intervals if they haven’t been fully dried within 1 to 2 minutes. If you smell the herbs burning at any point, remove them from the microwave immediately. Like oven drying, you may have no choice but to use the microwave to finish the drying process if the weather conditions are humid. Also keep in mind that some herbs are thick and will need to be dried out naturally before being placed in the microwave. Thankfully, because herbs have such low moisture content, they can be successfully dried in a microwave or oven. Fresh vs. Dried Herbs: Is There a Better Pick?
  • 61.
    Page 60 Learn Herbal Whenyou have an herb garden, you’ll find that there are many ways to use the herbs. For instance, you can harvest the seeds, the roots, the flowers, the leaves and the stems. You can also clip fresh leaves to use in dishes like pastas, soups and sauces. We’ve often been taught that fresh is best, so many gardeners are left wondering what the difference between fresh and dried herbs is and if there is a better pick. When it comes to herbs, the fresh vs. dried debate depends on the type of herb that you are using. Herbs like parsley, cilantro, dill and basil are often best in their fresh form. You can clip a few of the leaves off of the herb plant and add them to your favorite dishes for flavor and aroma. Herbs such as sage, lavender and oregano are best in their dried form. However, many herbs can be used in both their fresh and dried form, so really, it’s a matter of preference. Although fresh herbs are ideal in many cases, when they are dried, the drying process creates a different flavor in the herb. Fresh and dried herbs taste very different from each other, so your dish may taste better with one over the other. You’ll also find that ethnic dishes have their own preferences, as Middle Eastern cooking prefers fresh herbs like ginger and mint while Indian cooking prefers dried herbs that are mixed together. Dried herbs have a stronger flavor, and they can be added to raw meats or partially cooked foods to bring out extra taste and aroma. Dried herbs are also easier to work with since you can add them at any point in the meal and they don’t go bad nearly as quick. Most people store them for a year or more and use them as needed.
  • 62.
    Page 61 Learn Herbal Freshherbs have more limitations. They cannot be cooked on high heats for long periods of times, so it’s recommended that they are finely chopped and added at the end of the meal. Also, fresh herbs have a shorter shelf life, so they need to be used much faster. Fresh herbs can be hard to find at grocery stores, so most home chefs prefer dried herbs instead. However, if you have your own herb garden, you can enjoy fresh at your convenience. How to Freeze Herbs If you want the benefits of fresh herbs but want to give them a longer lifespan, you can opt for freezing the herbs. You will start in the same way as if you were going to dry them out, by rinsing the herbs if they are dirty and setting them out to dry. There are a variety of methods to freeze the leaves, so it’s about finding what works for you. The first and simplest method is to simply lay the herbs on a small tray or cookie sheet and place them in the freezer until frozen. When the leaves are frozen solid, place them in an airtight container and stick them back in the freezer. When you freeze the herbs individually, they will not stick together. You can use the herbs as needed and toss them directly into stews, pasta sauces and casserole dishes.
  • 63.
    Page 62 Learn Herbal Anotherconvenient method is to freeze the herbs in ice cube trays. Wash and dry the herbs as usual, and then chop them up into small pieces, even the stems are okay. Stuff the herbs into the ice cube sections and fill each one halfway with water. You’ll notice that the herbs will float a bit, and this is okay. Stick the ice cube tray in the freezer and when the ice has formed, you may fill up the tray with the rest of the water. When the ice cubes are frozen solid, remove each cube from the tray and place them in Ziploc bags. Store them in the freezer and drop them into your favorite dishes as needed. As you can see, drying herbs is a wonderful way to preserve your favorite plants and have an entire herb garden to choose from when cooking your favorite meals. Since some types of herbs taste better fresh, you may also freeze some herbs to expand your cooking palette. One thing is for certain: whether fresh or frozen, herbs are a healthy, no-calorie way to add flavor, aroma and zest to your dishes while reaping dozens of heart-healthy benefits! Setting Up Your Kitchen Herbal Pharmacy As you build your kitchen herbal pharmacy, you’ll need supplies to keep the herbs safe from damage and infestation. Herbs are natural plant materials, so they are sensitive to air, light, humidity and temperature. With the right supplies,you can prevent the herbs from deteriorating in their scent, flavor and color. With the time and effort you put forth in your garden, correctly storing herbs is the best gift you can give yourself.
  • 64.
    Page 63 Learn Herbal WhatSupplies Do I Need to Start an Herbal Kitchen Pharmacy? The advantage to starting an herb garden is that it’s very inexpensive. You can use things from around your own home to start planting your garden, such as a square garden gate and metal herb containers. When you harvest and dry the herbs,you can hang them upside down in individual bundles or place them on a drying screen. Up until this point, everything you need is minimal. When storing the herbs however, you will need a few basic supplies. Herbs are best stored in glass jars, preferably colored ones. Glass is ideal because it provides an airtight seal while also allowing the herbs to breathe. The dark colored glass is best since it blocks sunlight, but as long as the herbs aren’t in any contact with direct sun, clear glass jars will be suitable. Glass containers also have the advantage that you can see into them, which is nice when you want to know what herb is inside the jar.
  • 65.
    Page 64 Learn Herbal Plasticcontainers have their advantages because they are convenient, inexpensive and easy to find. The downside is that the plastic material doesn’t provide good airflow, so it won’t keep the herbs fresh for nearly as long. Additionally,plastic can affect the smell and taste of the herbs. If you do choose to use plastic, use it for a short time only. It’s not a long-term solution if you want to properly store herbs for an extended period. In addition to airtight glass containers, you will also need labels to stick onto the jars. This small but effective step will help keep track of what’s inside the jars. Write the name of the herb on the label as well as the date, and stick the label on the outside of the jar or on the lid, wherever you will see it best. As your herbal kitchen pharmacy grows, you will know exactly what herbs you have and how old they are. How Do I Store Herb Infused Medicinal Oils? Dried herbs aren’t the only things that can be stored in jars. As you learn about the various herbal mixtures you can make, you will need to store these too. Herb infused oils can sound intimidating to make, but they’re actually quite easy and an effective way to widen your herbal kitchen. Dried herbs are always best when making medicinal oils and will provide the mixture with a longer shelf life. Using glass jars, you can combine the dried herbs with an oil of your choice,such as olive oil, coconut oil or apricot oil.
  • 66.
    Page 65 Learn Herbal Themixture can then be stored in a glass container with an airtight seal, the same ones you would store herbs in. You’ll also use labels with these oils, except take it one step further by adding the ingredients that are in the jar. For instance,if you’ve combined dried herbs with grapeseed oil, write all of this information down on the label. Some people choose to add a preservative such as Vitamin E or grapefruit seed extract, and this should also be noted on the label. You should also write down how to use the medicinal oil so that you know exactly what the use is for. Imagine scrounging for something natural in the middle of the night to treat an upset stomach or a stuffy nose. If you choose the wrong jar,you could make the symptoms worse or create a negative reaction. Keep everything simple and easy to read, but be sure to provide enough information so that you know what you’re working with. Getting My Herbal Kitchen Pharmacy Set Up Glass Mason jars are ideal because they come in a wide variety of sizes, are made of sturdy glass and have tight-fitting lids. It’s easy to add labels to them, and if you buy the jars in a bulk case, labels will be included. Keep in mind that most Mason jars are clear, so if you opt for these, keep them in a dark space. You can also find colored jars that are used for jams and jellies and will help block out sunlight.
  • 67.
    Page 66 Learn Herbal Essentialoils can be stored in amber colored bottles that include droppers, or you may simply store the medicinal mixtures in the same glass Mason jars. Depending on the type of oil that you’ve made, it can be stored in the refrigerator or in a dark room, out of the way of direct sunlight. All of these supplies can be purchased online or from certain grocery or craft stores. You’ll save money if you buy in bulk, so consider shopping online for a case of glass jars that include airtight lids. Many gardeners find that printing labels off of their computer is cheap and effective since they can type up the name of the herb, the date and the ingredients, if applicable. The final piece to the puzzle is finding a prime location for your herbal kitchen pharmacy. Ideally, you want a space that is dark, empty and has good airflow. Large closets or pantries are a great start, but not everyone has these places. You may have to expand your boundaries and consider a basement, unused corner in the home or a shed. As you grow your pharmacy, it’s important that you have consistency and organization. The ideal herbal pharmacy includes shelves so that the herbs can be neatly placed in jars with labels clearly printed on the outside. You can easily build the shelves using pieces of wood or by creating a simple bookcase-style unit. Metal kitchen racks or wire shelves also work well. Building an herbal pharmacy takes time, but it will be your ultimate craft. When you have natural herb infused oils, dried herbs and essential oils to treat a variety of symptoms and boost the health content of your food, you will learn to trust the natural solutions that can enrich our lives both mentally and physically.
  • 68.
    Page 67 Learn Herbal Howto Buy Dried Herbs and Detect Good Quality Practices While Purchasing One of the greatest benefits to growing your own herb garden is that you know exactly where the finished product is coming from. You control the growing conditions, when the herbs are picked and how they are dried and stored. Buying herbs is a different story because you don’t know all of these fine yet pertinent details. An added disadvantage is that because herb-based products are not regulated by the FDA, companies can make claims about their herbs that are untrue. Even though there are many mediocre companies out there, many high-quality companies exist as well. By doing a bit of research and knowing what to look for, you can find good quality herbs to use for physical, mental and health purposes.
  • 69.
    Page 68 Learn Herbal Askfor Recommendations from Trusted Sources The easiest and most effective way to find dried herbs is to get a recommendation from a friend, family member or doctor. If they’ve used the products firsthand, they will be very familiar with the quality of the herbs and how the business operates. If you don’t know of anyone off the top of your head that uses fresh or dried herbs, send out a quick post on Twitter or Facebook asking for recommendations. You’ll be surprised to learn who uses herbs on a regular basis. Evaluate the Company's Website It’s still important to do your own research even with a recommendation. View the website of the company and get a good feel for the nature of their business. A trustworthy company should have experience in the industry, sustainable farming practices and a commitment to quality. They should be able to tell you exactly where the herbs are coming from and in what conditions they are grown, dried and stored. Dependable companies will also have their contact information posted on the top of the page. What Storing Practices Does the Company Use? When you have found what appears to be a reputable company, take a look at their storage practices. While we all wish that the herbs would be freshly picked just for us, it doesn’t work this way. In fact, the herbs you’re about to buy may have been sitting in a jar for months or years, making it less potent. Since you want to get the quality you’re paying for, there are a few things to look for.
  • 70.
    Page 69 Learn Herbal First,how are the herbs stored? Ideally, the herbs should be stored in a dark colored glass jar, although some companies store them in foil bags, which is also acceptable. Clear jars are not ideal since they let in light, and the light will cause the herbs to lose color and flavor. This process occurs because of oxidation, which is an interaction between oxygen molecules and the various substances they come into contact with along the way. If dried herbs are sitting in a clear glass jar, light will pass through the glass and come into contact with the herbs, thus diminishing their quality. They will fade in color, taste and aroma and be far less potent. Where are the Herbs Stored? In addition to the herbs being stored in dark glass jars, they should also be kept in a dark room with good air circulation. Most herb companies will have a large storage room where they stock the herbs on shelves. What you hope is that this room is an ideal arrangement with no direct sunlight and good airflow. Knowing that light can affect the quality of herbs, always inspect the product and ensure that it is of good quality. If the color of the herb is faded and the smell is not strong, chances are the herb was either not stored properly or is old. Are the Herbs Clean and in Good Condition?
  • 71.
    Page 70 Learn Herbal Ifyou are buying bulk herbs such as ginger root or dried flowers, be sure to inspect the condition of the herb. Dried herbs may be cleaned up already, but other raw materials may have grass or other debris still stuck to them. When these herbs are picked, they may not be cleaned all the way, so it’s a good idea to assess their condition for insects or other debris that can affect the purity of the herb. Thankfully, most herbs are well cleaned and dried before being sent out to the customer. Signs of a Good Quality Herb Old herbs are far less potent, so they won’t have nearly as good as an effect as one would hope for. If you’re adding dried herbs to oil for instance, you won’t get much aroma from the herbs. A good quality herb that is new and has been stored properly will have a vibrant color and a strong smell, so don’t be afraid to use your senses to inspect what you are getting. If you are making a purchase online, it’s difficult to assess the quality of the herb, so make a small initial purchase. If possible, stick to herbalist stores where you can look at the herbs, or shop with a company that has good recommendations. Once you know you can trust the supplier, you can buy online or through a mail order. Growing your own herb garden gives you the best quality products, but chances are, you’ll need to buy herbs from a company at some point. Whether it’s to try an herb that you haven’t grown or to buy an herb- infused product such as an essential oil, medicinal oil or supplement, it’s important that you have a company that you trust. There are many great retailers out there who are committed to the environment and produce high-quality herbal products at a fair price.
  • 72.
    Page 71 Learn Herbal Whatare Essential Oils? Essential oils are concentrated liquids from plants that contain volatile aroma compounds. They are most commonly used in aromatherapy and consist entirely of botanical matter. Essential oils may also be referred to as volatile oils or ethereal oils. Similar to herbs, essential oils have many uses that include aromatherapy, pharmacology, food flavoring and perfumery. Botanical oils should always be used with caution since they do carry potential dangers. Natural products are often healthy, but they must still be adequately dosed. Too much can be toxic to our delicate bodies. When experimenting with a new oil or trying essential oils for the first time, it’s important to carefully follow the directions. How are Essential Oils Made?
  • 73.
    Page 72 Learn Herbal Essentialoils are extracted from the plant by a process called distillation. The plant is cooked with steam so that it breaks down and releases the oils. The steam is cooled and then the water and oil are separated from each other. The oil is also filtered through to ensure its purity. Distillation is the most popular use for extracting oils since it’s easy and effective, but there are other methods that can be used as well. Sometimes, essential oils can be extracted just by pressing on the plant. For instance, grapes, oranges and lemons have strong smelling juices that can be extracted by pressing on the fruits. Uses for Essential Oils Botanical oils have many uses because of their fresh and abundant aromas. They are most commonly used in perfumes, cosmetics, cleaning products and soaps. They may also be added to foods and drinks thanks to their flavoring properties. We’ve learned from historic textbooks that essential oils were used for medicinal purposes, primarily to treat skin conditions and certain diseases. In modern times, chemically based medicines have proven to be effective in treating these conditions,and evidence-based research shows no proof that essential oils are effective from a medical standpoint.
  • 74.
    Page 73 Learn Herbal Still,essential oils have been drawing in more attention for their ability to act as an alternative medicine. While we recognize that an essential oil wouldn’t be effective at treating an infection or curing cancer, botanical oils may manage symptoms like anxiety and stress, lowering the risk of certain health conditions. Additionally, essential oils used in massage and aromatherapy can have curative effects on the total health and wellbeing of our bodies. Even though there may be some uncertainty regarding the healing effects of botanical oils, we can be certain that these oils are much better for our bodies than chemically based products. Using oil-based products may prevent certain cancers and health conditions, so in a way, they can be part of a preventative lifestyle. For instance, traditional cleaning products contain harsh chemicals that have been linked to various health conditions and especially dangerous for those with allergies and asthma. Thymol is an essential oil that is contained in all-natural cleaning products, and this ingredient is safe yet provides the same disinfectant properties as harsher ingredients. What would you choose for your own home? The bottom line is this: while we have yet to uncover all there is to know about essential oils, choosing products that are oil based rather than chemically based are better for the environment, our health and our wellbeing. Essential Oils and Aromatherapy
  • 75.
    Page 74 Learn Herbal Aromatherapydeserves its own spotlight since essential oils are the core of this alternative therapy. Aromatherapy uses volatile plant materials to alter the person’s mind, mood and health. It’s true that there is limited research that supports essential oils from a medical standpoint, but research does show that these oils may have benefits in a therapeutic setting. For those that truly believe in the power of these oils, great things can follow an aromatherapy session, especially when coupled with a massage. People have stated that botanical oils reduce anxiety, enhance energy and aid in short-term memory. Others have attested to essential oils’ ability to help with skin conditions, hair loss prevention and relaxation. To the many people who are comforted, relaxed and perhaps even relieved of various symptoms, scientific research doesn’t matter at this point. What matters is that something simple and natural can lead to improved health and cognitive functioning. Still, we must wonder what it is about essential oils that give them their healing effects, even if these effects can’t be measured in scientific analyses. Why Essential Oils May Have Curative Effects
  • 76.
    Page 75 Learn Herbal Whenlooking at the structure of botanical oils, we can understand how these substances can aid in natural healing. First, the aromas that are released from the oils go through the olfactory system and work on the limbic system. The limbic system is responsible for controlling our emotional responses; therefore, the soothing, calming scents produced by the oils have the same effects on the brain. When the brain is more relaxed, it means that we have a better state of mind. Obviously, with more relaxation comes less stress, anxiety and depression. We may approach an old problem in a new way, register pain differently or develop an improved sleep pattern, all of which alleviate depression and anxiety. Second, there may indeed be pharmacological effects of essential oils, even though our understanding of the connection between the body and aromatic oils has yet to be measured by conventional science and medicine. Buying Essential Oils If you decide that botanical oils may help improve your health and wellbeing, your next step will be purchasing the oils. Essential oils are sold in small bottles that are 5ml, 10ml or 15ml in size. When purchasing an essential oil, it should be used in the first few months since the solution will start to oxidize is six months or so. When oxidization occurs, the oil starts to lose its aroma and healing effects. There are some oils that contradict this in fact, as botanical oils like patchouli and sandalwood actually mature with age.
  • 77.
    Page 76 Learn Herbal It’sbest that all oils are stored in amber or cobalt blue bottles, as these dark bottles help filter out sunlight that can break down the structure of the oil. Glass is always the best material for the bottle, but essential oils can also be sold in aluminum-lined bottles. Plastic bottles are not ideal since the oils will eat away at the plastic. You may purchase essential oils in one kind or as a blend depending on what you plan to use the oils for. Blends can be a good option since you save yourself money from having to buy several separate oils. However, with oil blends, you have no control over how much of which oils are placed into the concoction. The price of essential oils varies greatly because of the quality of the oil. Factors that affect the quality of aromatic oils include the country of origin, the climate and growing conditions, the quality standards of the distiller and how much oil was produced. As with other products, it’s best to find a brand that you like and trust for your essential oil purchases. How to Use Essential Oils Essential oils are used in a variety of ways, but not all can be used in the same manner. For instance, oils are very popular in massage and aromatherapy, but only some can be applied directly to the skin. Lavender and tea tree oil are often safe to put directly on the skin while other oils will need ā€˜carrier oils’ to dilute them. Reading labels is important in this context, and it’s always best to try the oils on a small area on the skin to ensure it doesn’t cause an allergic reaction.
  • 78.
    Page 77 Learn Herbal Anotherway that aromatic oils can be used is through inhalation. Done carefully, the oils can provide therapeutic benefits as the oil molecules enter the lungs and are absorbed into the bloodstream. There are also certain oils that can be taken in a pill form, but this should only be done under the supervision of a medical professional. These pills can be taken orally or as a suppository, but like all medications, they do have side effects and should never be taken without the consent of a doctor. Essential oils are intriguing; they have been around for a very long time yet we still know so little about them. When used appropriately, botanical oils have natural effects on the body that can boost energy, reduce anxiety and combat fatigue without having to put any additional chemicals into the body. How to Check For Quality Essential Oils When you begin to use essential oils for therapeutic or aromatherapy purposes, you’ll enjoy the endless natural benefits that can be brought to your lifestyle. The trouble is that not all essential oils are the same, and if you don’t do your homework and be a smart buyer, you may end up purchasing oils that have very little potency to them. Since this industry is not regulated by the FDA, it’s easy for suppliers to make claims about their products that aren’t true. To protect your health and ensure that your money is going in the right place, it pays to be a savvy shopper.
  • 79.
    Page 78 Learn Herbal Askfor a Recommendation The best way to find a reputable supplier of essential oils is to ask for a recommendation from a trusted friend, family member or coworker. You may also ask your doctor for a suggestion. If someone offers you a name, ask if they have used the products before. Sometimes, people see the names of companies and use them as a suggestion, but that doesn’t mean that they have tried the product firsthand. You may also ask for suggestions on Facebook or Twitter; this opens you up to more responses from those in your cyber world. Do Your Own Research
  • 80.
    Page 79 Learn Herbal Letthe recommendations you receive from others serve as a base of where to start. It’s still important to do your own research. Read online reviews or testimonials and assess the quality and professionalism of the website. Is there contact information clearly posted on the site? Does the supplier know the origin of the herbs? Do they share their storage practices? Do they have inside knowledge on the industry that can help you make the right selections? While not a guarantee, most reputable vendors are honest and upfront about their products and well-versed in the industry. They may have sustainable growing practices, a strict grading system or be able to share inside knowledge on how to distill and store essential oils. Don’t be afraid to ask questions, too. If you get a good response from the company, you can assume that they know their stuff. Know the Storage Practices There are many companies out there that are respectable and love what they do, but that doesn’t mean they practice the best techniques. Essential oils, like herbs, are very delicate. They need to be stored properly and handled delicately in order to ensure their potency. Oils should be stored in dark-colored vials so that light does not pass through. Light will destroy the integrity of the product and cause it lose its aroma and potency.
  • 81.
    Page 80 Learn Herbal Somesuppliers sell their oils in aluminum bottles, and this is acceptable as long as the inside of the container is lined. Plastic is a definite no since the oils can leech into the plastic material. Although having a rubber eyedropper included with the bottle is convenient, it’s better to steer clear of these vials. The eyedropper bulb can soak up some of the oil and cause it to be contaminated. Finally, the essential oils should be kept in a dark room with no direct sunlight and proper airflow. It can be hard to buy essential oils from local vendors, especially if you don’t live near a large city. If you have no choice but to buy online, seek out vendors that test out their essential oils and are willing to supply samples. Again,don’t be afraid to ask questions (even if you know the answer) to test the supplier for their knowledge on essential oils. Reputable suppliers will often have the Latin names of the herbs, the country of origin and the extraction method. Be Label Smart A big issue to watch for is the purity of the essential oil. You may find a great website with strong reviews and solid information, but that doesn’t mean that what they’re selling is of the highest quality. The oil may be acceptable quality,especially for those who are unfamiliar with the herb world, but it may not be the quality you are looking for. For instance, for an oil to be labeled an "essential oil," it only has to be 51 percent oil. Chances are, you want 100 percent,right?
  • 82.
    Page 81 Learn Herbal Additionally,terms like ā€œfragrance oil,ā€ ā€œnature identical oilā€ and ā€œperfume oilā€ should be avoided. These terms indicate that what you’re about to buy is not a pure essential oil. Instead, it’s most likely a combination of oils and other chemicals that are mixed together. Also, terms like ā€œaromatherapy gradeā€ or ā€œtherapeutic gradeā€ are loosely used, and since the FDA doesn’t regulate this market, there is no minimum requirement to meet this ā€œgrade.ā€ Your best bet is to ask the vendor exactly what they mean by their grading system. Some suppliers use therapeutic or aromatherapy grade while others have chosen the more professional-sounding ā€œclinical grade.ā€ Remember, since there are no requirements, anything is up for grabs. You need to be careful with organic and certified organic labels as well since organic does not automatically mean quality. Some oils may have organic ingredients but still be distilled under high pressure. Again, ask questions, do your research and find out why the product you’re about to buy is labeled as such. Knowing all of this, many people assume that they will just stick to products labeled ā€œpure essential oils.ā€ After all, what else could be in there? But even this is an overused term that doesn’t guarantee anything. Don’t get carried away and put automatic trust in the product just because it says pure, natural, organic or the like. It could be old, the oils could have been distilled from poor quality crops or the product may have been mishandled. Again, look for 100 percent pure on the label as well as proper storage techniques, such as the oils being sold in dark-colored vials that are 4 ounces in size and do not contain eyedropper bulbs.
  • 83.
    Page 82 Learn Herbal YouPay for What You Get A final point to consider is the price. We all have to watch our money, so it’s not surprising that you’ll be apt to go after an economically priced essential oil, especially if the label says good things like ā€œorganicā€ or ā€œtherapeutic grade.ā€ Yet price is a big indicator in the quality of the product. Reputable vendors spend a lot of time and money locating high- quality oils, paying fees to test the oils and providing free or low-cost samples upon request. They have to pay more for the product to begin with because of the harvest and distillation techniques, and all of these costs will be passed down to the consumer. Also, be cautious about suppliers that charge the same amount of money for all of their essential oils. Basic citrus oils are the least expensive, and high-quality patchouli will cost more than eucalyptus. It’s also best to work with companies that sell essential oils for aromatherapy and therapeutic uses only. Vendors that work with the perfumery or food and beverage industries often re-distill their products. Always ask about the distillation methods that the company uses if you choose to buy from a vendor in this industry. There are many high-quality essential oils on the market that are pure and will offer endless therapeutic benefits. If possible, get a solid recommendation, but also be sure to do your own research to be a smart buyer. It can be difficult to separate high-quality essential oils from poor- quality ones, but the signs are usually right there in front of us.
  • 84.
    Page 83 Learn Herbal Justremember that in most cases, you get what you pay for. Opting for an inexpensive oil probably means that it has poor distillation practices and is combined with other oils or chemicals. A truly pure product will cost more, but it will offer you the potency you’re looking for. Amazing Herbs to Get Started With – Tips on How to Grow Them, Their Medicinal Properties, and Recipes You'll Love ALOE VERA Native Americans called it the Wand of Heaven. Ancient Egyptians called it the Plant of Immortality. Today, aloe vera (Aloe barbadensis) is probably most recognized for its role in hair and skin care products. Fair enough, but there really is so much more to this incredible plant.
  • 85.
    Page 84 Learn Herbal Thehealing and soothing properties of aloe vera have made it a popular herbal and alternative medicine, as well as a highly sought ingredient in the cosmetic and food industries. Aloe vera is thought to have come from somewhere in northern Africa, but it is now cultivated all over the world for its diverse uses. The aloe vera plant is a beautiful succulent with thick leaves bordered by tiny white ā€œteethā€. Products made from aloe vera include aloe vera gel (for eating and as a component of creams and lotions), aloe vera juice, and aloe vera capsules. Cultivation of Aloe Vera The aloe vera plant is perfect for those without much gardening experience. It can grow both indoors and outdoors, and it doesn’t require a lot of TLC. There are more than 500 known aloe species. The varieties that grow well indoors include lace aloe (Aloe aristata), the common aloe (Aloe barbadensis), and the partridge breast aloe (Aloe variegata). Aloe vera thrives in full sun and warm temperatures. If you are keeping them indoors, make sure you give them bright artificial light or place them near a window. If you are keeping them outside, place them where they can get sunlight all day long. However, if you live in the tropics, keep them in pots so that you can control their exposure to sunlight. Although they love the sun, too much can burn them.
  • 86.
    Page 85 Learn Herbal Aloevera will grow best in dry, gritty, well-drained soil that has been moderately fertilized. The plant can be a bit sensitive to over- and under- watering. Because the aloe vera plant is 95% water, avoid watering during the cold months. Always check the soil before watering. If it is completely dry, then you can give it two cups of water. During the summer, you have to soak the soil completely and let it dry before watering again. While your plant grows, it develops ā€œpupsā€ or baby aloe plants on its sides. Remove these ā€œpupsā€ and replant them in another pot. Tips on Growing Aloe Vera If you don’t have soil suited for the needs of the plant, you can purchase a packaged cacti and succulent soil mix. If you wish to fertilize, use the bloom type (10-40-10) and do so only during spring. If the leaves of your aloe vera plant aren’t growing upwards (as they should), it isn’t getting enough light. If the leaves are turning brown, the plant is getting too much light. If the leaves aren’t fleshy and plump, the plant isn’t getting enough water. Medicinal Uses of Aloe Vera The aloe vera plant offers a wide variety of medicinal and cosmetic uses. For thousands of years, we have been using aloe vera for a plethora of therapeutic uses, from soothing sunburn to improving cardiovascular health. Even Cleopatra knew about the miraculous benefits of the plant! Legend has it that applying aloe vera gel was part of her daily beauty regimen, and that it was the reason for her youthful appearance. Below are just some of the many uses of aloe vera.
  • 87.
    Page 86 Learn Herbal Usealoe leaves as an impromptu moisturizing body scrub. Just cut off a leaf from the plant, slice it lengthwise, and scrub your body with the inner sides. You can also scoop the gel out with a spoon and use it as a liquid soap or body wash, or use it as a shampoo. Aloe vera helps hasten hair growth and reduce dandruff. Use it as a leave-on conditioner for smoother, more manageable hair. Great shower buddy - Aloe vera is your skin’s best friend. Use it to treat sunburn, psoriasis, eczema, rashes, itching, insect bites, blisters, acne, skin irritations, allergic skin reactions, and burns. Use it as an all- natural moisturizer for dry skin. Use it the way Cleopatra did and get rid of wrinkles and blemishes. Use it to exfoliate, reduce the appearance of scars, and brighten your complexion. A quick fix for skin issues - Use inhalation therapy to relieve the symptoms of asthma. Boil some aloe vera leaves in a pot of water and breathe in the vapors. The anti-inflammatory properties of the plant will help you breathe easier. Relief from asthma - Aloe vera juice has a laxative effect. It is also an adaptogen, which means that it is effective in relieving diarrhea and constipation. Aloe vera also aids in improving digestion, and in treating acid reflux and irritable bowel syndrome. Loose Bowel Movement? No problem -
  • 88.
    Page 87 Learn Herbal Aloevera helps lower cholesterol, prevents the development of kidney stones, enhances the body’s cardiovascular performance, cures candida infections, treats Crohn’s disease and ulcers, and provides glyconutrients,vitamins A, C and E, and minerals like magnesium and calcium. It helps stop the growth of tumors, detoxifies and alkalizes the body, and boosts the immune system. And many more - DIY Homemade Aloe Vera Solutions It is said that Alexander the Great seized Socotra in the Indian Ocean explicitly for the aloe vera which grew plentiful on the island. He wanted the plants for his many injured men. Such was the value of aloe vera as a medicinal plant that a war was waged for it. Today, you don’t have to go far or risk your neck to reap the benefits of aloe vera. These three simple products can be made right in the comforts of your own home. Aloe Vera Gel The clear, colorless secretion that pours out of the aloe vera leaf when it is cut is a highly valued ingredient in many industries. It is used in the production of lotion, facial tissues, moisturizer, yogurt, desserts, soaps, shampoos, and countless other products. Aloe vera gel contains 200 different phytonutrients, 20 minerals, 18 amino acids, and 12 vitamins. What you will need:
  • 89.
    Page 88 Learn Herbal Aloevera leaves Grapefruit seed extract, coconut oil, vitamin E oil or any essential oil A blender, hand mixer, or mortar and pestle A strainer A glass jar A knife Instructions for Making Your Aloe Vera Gel: 1. Pick some leaves from your aloe vera plant. Choose those that are in the middle and closer to the ground. Once cut, hold the leaves upright for 15 minutes until the dark resin flows out. This might cause irritation, so make sure that all of the dark stuff comes out. Don’t skip this step. 2. Wash the leaves thoroughly with clean water. 3. Cut the large leaves into smaller pieces to make it easier to peel off the skin. Once the leaves are peeled, you should be left with the gel. 4. Blend the aloe with a few drops of any of the following: grapefruit seed extract, coconut oil, vitamin E oil, or any other essential oil. You can also use a hand mixer or a mortar and pestle for this. 5. After blending, use a strainer or a sieve and strain the mixture into a glass jar. This will help separate the small fibers from your aloe gel. Cover the jar. Keep it in the fridge to extend the shelf life. Aloe Vera Shampoo
  • 90.
    Page 89 Learn Herbal Takea walk down the personal care aisle in your local supermarket and you’ll find aloe vera listed as an ingredient in many of the soaps and shampoos. Aloe vera is indeed moisturizing, revitalizing, soothing, brightening, enhancing, and clarifying. But to get the maximum beautifying effect from aloe vera, use aloe gel straight from the plant. This way, you can be assured that the aloe you’re using is pure and that there are no harmful chemicals in your shampoo/soap. What you will need: 1/4 cup of homemade aloe gel 2 tablespoons of honey 2 tablespoons of apple cider vinegar A blender Essential oils (optional) Instructions for Making Your Aloe Vera Shampoo: 1. Make your own aloe vera gel with the recipe above. 2. Combine ¼ cup of your homemade aloe gel with 2 tablespoons of honey and 2 tablespoons of apple cider vinegar. Puree the mixture in a blender. If you don’t have a blender, you can mix the ingredients with a hand mixer or with a spoon and a little effort. The resulting mixture will have a not-so-pleasant smell. You can use it on your hair as is and just rinse immediately or you can add a few drops of aromatic essential oils to it to make it smell better.
  • 91.
    Page 90 Learn Herbal Makejust the amount of natural aloe shampoo that you will need every day. Honey tends to spoil when mixed with other ingredients, so it is best to make the shampoo right before your bath. Aloe Vera Face Pack All-natural face packs can be used to reduce the appearance of pigmentation and blemishes, remove a tan, get glowing skin, and get rid of pimples. This aloe vera face pack can do all of the above. What you will need: Aloe vera Ground turmeric A teaspoon of honey A teaspoon of milk Rose water A small bowl A blender Instructions for Making and Using Your Aloe Vera Face Pack: 1. In a small bowl, combine a pinch of ground turmeric, a teaspoon of milk, a teaspoon of honey, and a couple of drops of rose water. Mix everything with a spoon until a paste is formed. 2. Add aloe vera gel into the paste and mix well. You can use a blender to get a smoother paste. 3. Pour the face pack into a glass container. 4. To use, just dab some of the aloe vera face pack onto your face and spread evenly. Let it sit for 20 minutes and then wash it off with warm water.
  • 92.
    Page 91 Learn Herbal Keepa pot or two of aloe vera on your kitchen windowsill so you can break off a leaf any time you need one. Use it to moisturize your hands after washing and as first aid for burns and cuts. Keep it in the bathroom and other parts of the house as well. This useful little succulent is not just edible and medicinal; it is an attractive house plant too. BURDOCK Burdock, or the genus Arctium, is a biennial plant once popular in Europe as an ingredient in making beer before hops stole the show. Today, burdock continues to thrive as part of the Japanese pilaf and other dishes, and the herb remains a popular ingredient in Asian cuisine. A native of Europe and Northern Asia, burdock has also found its purpose as a soft drink ingredient in the United Kingdom. Even if you think you are not familiar with the plant, chances are that you’ve encountered them before. Or, you may have seen the burrs of the burdock. Remember those tiny balls that cling to your pants after a walk out in the tall grass? Those are burrs, and they were the inspiration for Velcro. Cultivation of Burdock Burdock is a fairly easy plant to grow. Here’s how:
  • 93.
    Page 92 Learn Herbal 1.Burdock is grown from seeds. Prepare some for propagation by soaking them in water overnight. This will enhance their germination rate. 2. Find an area large enough to grow burdock which can reach up to 6 feet in height and 3 feet in width. It is also better if the spot receives full sun, though burdock can grow in partial shade as well. 3. Burdock prefers rich and well-draining soil. If the soil doesn’t seem rich enough, you can add some compost. You can also till the soil and get rid of stones and rocks that may hinder the growth of the roots. Since the plant may grow very high, tilling the soil up to two feet will help the roots grow longer and help stabilize the plant. 4. Plant the seeds ¼ of an inch deep and at intervals of up to 3 inches. Each row of seeds should be separated by at least a foot. Cover them with seed starting soil up to ¾ inch thick. 5. Though burdock can grow on its own, you can help them out by giving them water regularly. 6. In one or two weeks, you will notice some seedlings. Make sure you weed frequently but carefully to prevent accidentally pulling them out. You also need to thin them out so that there is around 3 to 4 inches of space between the plants. Remove the ones with weak root systems. 7. As the plant grows, remove the young shoots that develop by simply pulling them out. These can already be eaten, though harvesting is typically done at 10 weeks. You also need to prune the young leaves with clippers and prevent the flowers from setting seed by removing them. Tips on Growing Burdock
  • 94.
    Page 93 Learn Herbal Youcan use high-nitrogen fertilizer to promote the plant’s growth. Burdock roots normally grow up to 4 feet long, but there are some varieties that grow up to 9 feet. Wear a mask or any type of covering for your face to avoid inhaling the seeds’ microscopic hairs, which can trigger allergic reactions. Burdock is a biennial plant, so you can only enjoy its benefits for a couple of years. Roots are harvested during the first year while the seeds are gathered on the second year. Medicinal Uses of Burdock Burdock has been used throughout history as an herbal medicine to treat many ailments. It is popular among herbalists as a natural blood cleaner, diaphoretic, and diuretic. Burdock is a good source of inulin, which stimulates the appetite and the action of the stomach. It also helps the digestive system and treats stomach and digestive problems. Burdock also aids in cleansing the liver. Works wonder for digestion and elimination - Burdock is one of the best-known blood-purifying herbs, and has been used for thousands of years to flush waste and toxins out of the bloodstream. Purifies the blood - Through its blood-cleansing ability, burdock also effectively flushes out the toxins that cause skin diseases like acne, psoriasis, and eczema. Say goodbye to skin problems -
  • 95.
    Page 94 Learn Herbal Scientificstudies have shown that burdock, as main ingredient of some herbal formulas, can help stop the growth of tumors. Aside from stopping the development and shrinking the size of cancer growths, these herbal formulas also help relieve pain and enhance the body’s immunity which cancer patients badly need. Fights cancer - DIY Homemade Burdock Solutions To experience burdock’s curative and beneficial effects, you can purchase it in powder, decoction, tincture, pill, and extract form. Or you can try making any of these burdock products right from home. Burdock Leave-on Conditioner Burdock has medicinal qualities that are perfect for hair care. It helps strengthen the hair shaft and keeps hair strands moisturized. Burdock has also been found effective against hair loss. It contains mucilage, a gelatinous substance that has polysaccharides and protein, which accounts for its ability to strengthen and condition hair and prevent hair tangles. Mucilage also has other medicinal benefits for the body including lowering cholesterol, preventing constipation, and inhibiting pathogenic bacteria from causing intestinal decomposition. What you will need:
  • 96.
    Page 95 Learn Herbal 20dried hibiscus flowers 3 tablespoons of dried burdock root 3 tablespoons of dried marshmallow root Water A pot Plastic wrap A strainer A squeeze bottle A funnel Instructions for making burdock leave-on conditioner: 1. Pour some water in a pot and place it over medium heat. 2. When the water starts to simmer or is on low boil, lower the heat and then add the dried hibiscus flowers. Let the flowers simmer for about 5 minutes. Avoid letting the water boil. 3. Remove the pot from the heat and pick out the flowers. 4. Add the dried marshmallow root followed by the dried burdock root. Stir. 5. With a plastic wrap, cover the pot and allow the herbs to infuse. Let it stand for about 15 minutes. 6. Use a strainer to separate the liquid from the remains of the burdock and marshmallow roots. Pour it directly into a plastic squeeze bottle or use a funnel if available. You can use your natural burdock conditioner after shampooing. Just squeeze some into your hand and massage onto your hair. Use a comb to spread the conditioner. Leave it on and let your hair dry naturally. Burdock Root Oil
  • 97.
    Page 96 Learn Herbal Havingsome homemade burdock root oil at hand is good for your health. Some have attested to the effectiveness of this root oil against skin conditions like acne. Others use it on their hair to treat itchy scalp. Some people add their burdock root oil into things such as face packs, shampoos, and conditioners. Others prefer to dab the oil directly on areas that need it. If you want some burdock root oil at your disposal, below is a simple guide on how to make some. What you will need: 1 to 2 stalks of burdock root Extra virgin olive oil or any other vegetable oil A knife A mortar and pestle A vacuum-sealed glass jar Instruction for making your burdock root oil:
  • 98.
    Page 97 Learn Herbal 1.Wash the roots in hot water. 2. You can either peel and slice them into small pieces with a knife or pound the cut pieces with a mortar and pestle until the flesh comes out. 3. If you smash the roots with the mortar and pestle, give it a day to dry out. Drying the roots allows the nutrients to stay within the root. After drying, place the root pieces in a clean glass jar. 4. Fill the glass jar with extra virgin olive oil and then seal tightly. 5. Set the glass jar aside, preferably in a dark room, for 4 to 6 weeks. This will allow the root to infuse. Check it at least once a week to see if there are little bubbles present. These signify gas buildup. Just open the lid to let the gas out before resealing tightly. Burdock Root Tea In Japan and in other Asian countries, burdock is not only a key ingredient in dishes but also a popular tea. Burdock tea may be a bit strong in taste and aroma as compared to other more common herbal teas. What you will need: Fresh burdock root or 1 tablespoon dried burdock root 3 cups of water A knife A stainless steel pot with a lid Instructions for making burdock root tea:
  • 99.
    Page 98 Learn Herbal 1.Chop the root and place about 2 tablespoons of it in a stainless steel pot. 2. Fill the pot with 3 cups of water and then bring to a boil. 3. Lower the heat and let it simmer for about 30 minutes. 4. Remove the pot from the heat and let it steep for 20 more minutes. An alternative way of preparing your burdock root tea is by using a peeler to slice off pieces of the root instead of chopping them with a knife. Also, you can dry them under the sun for up to 6 hours. You’ll need to turn the pieces over every now and then while drying them. For a different flavor, you can roast the dried burdock slices in a frying pan without any oil. Wait until they become golden brown, which may take around 10 minutes. The next step is to let them cool before storing the dried and roasted burdock root in an airtight glass jar. Burdock tea is made by steeping an ample amount of the stored root pieces in hot water. You can also boil the burdock roots along with the water. CALENDULA Pot marigold, goldbloom, mary bud, Calendula officinalis… these are just a few of the many names that calendula goes by. Whatever you call it, calendula is one of the most popular and most versatile plants there is. Calendula is not only a great-looking plant for your garden, it also has its uses in the kitchen and in medicine, and is even an important part of some rituals and traditional ceremonies.
  • 100.
    Page 99 Learn Herbal Cultivationof Calendula Thanks to its bright yellow flowers, the calendula has been the star of many a garden. But the benefits of calendula don’t end with its ability to beautify a place. The plant is also useful in the field of medicine and in cooking. To enjoy all its many uses right from home, here’s how you can grow them:
  • 101.
    Page 100 Learn Herbal 1.Look for an area in your backyard that receives full sun. Calendula loves sunlight. 2. As long as the soil is rich enough to grow other plants, then you can grow your calendula there as well. 3. Calendula is grown from seeds. Till the soil a little and then plant the seeds about half an inch deep and at least four inches from each other. Cover them with garden soil about a fourth of an inch thick. Plant calendula during the spring. 4. Right after planting the seeds, give them just enough water to moisten the soil. Water the soil regularly for two weeks or until the seeds start to germinate. Don’t let the bed soak. Just give them enough to stay moist. 5. Thin the plants when the seedlings reach around 3 inches. You need them to be at least 8 inches apart. 6. You may opt not to use chemical fertilizer and go the natural route. Add a thin layer of compost during midsummer. This will give the plants enough nutrients until they reach full bloom. Some blossoms will inevitably fade. You may remove them to encourage the plant to produce more blossoms and retain its beauty. Tips on Growing Calendula Calendula attracts pests like aphids and is prone to mildew. Use natural pesticides to get rid of them. You can enjoy your calendula for years as they can reseed on their own. Medicinal Uses of Calendula
  • 102.
    Page 101 Learn Herbal Calendulahas antiviral, anti-inflammatory, anti-spasmodic, and anti- genotoxic properties. It can be used as a tincture, infusion, oil, salve, tea, and in various other forms. Calendula contains powerful antioxidants in its petals. These antioxidants help heal wounds and treat burns on your skin. Heal your wounds - Most diaper creams use calendula as one of its main ingredients. The herb is also used in making lotions and creams for treating minor skin conditions. Keep you and your baby rash-free - Dab calendula tincture or calendula suspension on acne. It will dry up pimples, control bleeding, reduce swelling and redness, and heal damaged skin. Get pimple-free skin - An impressive amount of flavonoids is found in calendula, making it a good weapon against free radicals that damage the cells and sometimes lead to serious diseases. Protect yourself from free radicals - Aside from protecting the cells from free radicals, calendula also helps enhance protein and collagen metabolism, which is important in cell re-growth or the production of new cells. Great for cell re-growth - Calendula is the only thing in this world that contains calendic acid. It is an omega-6 fatty acid that works as an antiseptic, though there is a possibility that it can also help treat cancer, specifically colon cancer. Contains calendic acid -
  • 103.
    Page 102 Learn Herbal Calendulacan be used in treating insect bites, bee stings, athlete’s foot, swelling, sore eyes, fever, stomach ache, small pox, measles, gum disease, and indigestion. Lots of other uses - DIY Homemade Calendula Solutions Calendula Tea Drink calendula tea to cure an upset stomach, reduce skin inflammations, and combat infections. It is a great post-meal drink that helps with indigestion and, when taken regularly, helps cleanse the body and improve overall health. What you will need: 2 teaspoons of calendula petals A cup of water A pot A strainer A cup Lemon (optional) Honey (optional) Instructions for making your calendula tea: 1. Put the calendula petals in a pot. 2. Pour boiling water over the petals. 3. Let the tea steep for about 15 minutes. 4. Strain the tea into cups. 5. Add honey and lemon to your liking. Calendula Salve
  • 104.
    Page 103 Learn Herbal Asalve is a must-have in any home. It is an ointment that can treat various minor medical conditions including bites, stings, cuts, scratches, burns, rashes, and swelling. Some salves can also be used to treat boils, sebaceous cysts, hemorrhoids,and stretch marks. A salve with calendula as its main ingredient is effective in treating these conditions, along with muscle pain, menstrual and stomach cramps, eczema, topical thrush, warts, athlete’s foot, sunburn, and many other ailments. Making your own natural salve provides you with all the benefits of the plant but without the worry of chemical substances like petroleum products that most over-the-counter ointments contain. Also, your DIY calendula salve will help you save money. To make your salve even more potent, you can add other herbs. What you will need: 2 cups of calendula petals 1 to 2 cups of olive oil or hemp oil ½ cup of beeswax 5 to 10 drops of lavender essential oil 5 drops of tea tree oil A stainless steel pot A strainer/cheesecloth/tea filter Jars with covers Instructions for making your calendula salve:
  • 105.
    Page 104 Learn Herbal 1.Make calendula-infused oil by filling a pot with your olive oil or hemp oil and calendula petals. 2. Place the pot over low heat. Stir occasionally, making sure the oil doesn’t get too hot. One way to determine the temperature is to look for tiny bubbles. If you reach this stage, maintain it for two hours. Anything hotter than that is bad for your infusion. 3. When your calendula oil is at the tail end of its infusion, you can begin melting your beeswax. Just place it over low heat, preferably from a double boiler. You also need to control its temperature. Your calendula oil and melted beeswax should be of the same temperature when you mix them later. 4. Separate the petals from the oil infusion using a strainer. Get as much of the oil as you can. 5. While the beeswax is still in the double boiler, pour the calendula oil slowly into it. Slowly stir them together. 6. Add 5 to 10 drops of your lavender essential oil and stir to combine. 7. Add 5 drops of tea tree oil and stir. 8. While still warm, pour your end-product into your jars or containers and let them sit. Once they cool down and solidify, you can put the jar lids on. Keep them in a cool place. Calendula Soap Making soap using calendula is another way of benefiting from the plant. By making your own soap, you enjoy an all-natural and skin-sensitive soap that anyone in your family, even your baby, can use. What you will need:
  • 106.
    Page 105 Learn Herbal 4ounces of calendula-infused oil 24 ounces of olive oil 12 ounces of lye 24 ounces of coconut oil 38 ounces of vegetable shortening 32 ounces of distilled water Dried botanical herbs (optional) A plastic container with cover for molding A stainless steel pot A thermometer Wooden spoons Glass containers Rubber gloves Eye protection Instructions for making your calendula soap:
  • 107.
    Page 106 Learn Herbal 1.Start by making your calendula oil. Gather some petals and add them to a pot with olive oil. Place them over low heat and stir occasionally. After 2 hours, strain the petals and pour the infusion in a jar. 2. Use some of your vegetable shortening to grease your soap mold. Put some on the sides and bottom. Set the mold aside. 3. Use a wooden spoon to dissolve the lye with cold water in a glass container. Set aside. 4. Melt the rest of your vegetable shortening and coconut oil in a pot. Place over low heat and stir continuously with a different wooden spoon. 5. After the shortening and coconut oil have melted, remove the pot from the heat and add the olive oil. 6. You should now have two mixtures. Continue stirring both mixtures with their respective wooden spoons. Check the temperatures. They should be somewhere between 95° and 98°F. If they are too hot, you can place the container in a cold bath. You can also use a hot bath if they aren’t warm enough. 7. Once you achieve the desired warmth, pour the lye mixture into the oil mixture in a gradual steady stream. Stir continuously as you pour. 8. The mixture should become creamy and thick after 10 minutes of continuous stirring. Once it has reached this consistency, you can add all your dried herbs. Scoop around 2 cups of your soap mixture and pour it into another container and then add your herbs and other ingredients. Stir them in quickly. Pour this new mixture back into your soap mixture and stir once more. 9. It’s time to make your bar of soap. Pour the mixture into your mold, cover it and place in a warm area with blankets over it. Leave it for 18 hours.
  • 108.
    Page 107 Learn Herbal 10.The soap mixture should now have solidified. Remove the lid and let it sit for at least 8 more hours. Take the soap out and slice into smaller pieces. 11. Calendula is a gardener’s favorite, not only because it produces such lovely, vibrant, mood-boosting blooms, but because it is such an effective natural remedy for many ailments. Plant some calendula and perk up your garden and your health! CHAMOMILE The word chamomile is derived from the Greek ā€œchamaimelonā€, meaning ā€œearth appleā€, and is the name used to refer to a number of herbs from the Asteraceae family. The chamomile plant is a delicate-looking shrub with a sweet scent and flowers similar to daisies. It is popular worldwide as an herbal tea, sleep aid, and aromatherapy oil. Cultivation of Chamomile
  • 109.
    Page 108 Learn Herbal Thetwo most commonly used chamomile species are the German chamomile (Matricaria recutita) and the Roman chamomile (Chamaemelum nobile). The German chamomile grows up to 3 feet while the Roman chamomile only grows about a foot and is best for ground cover. The former is an annual plant while the latter is a perennial. Choose which chamomile species will suit your needs and cultivate them from seeds. Here’s how: 1. Prepare the soil for planting. Chamomile needs sandy, slightly acidic soil that drains well but also retains moisture. Add a moderate amount of compost or fertilizer. 2. Scatter the seeds onto moistened soil. Do not cover them. You can do this outdoors in the ground or indoors in a pot or tray. 3. Let the seeds germinate for a couple of weeks. 4. Once seedlings have grown, thin the plants to 18 inches (for ornamental purposes) or to 6 inches (for ground cover). 5. Though chamomile plants are resistant to drought, watering them regularly will keep their stems sturdy and upright. 6. Add fertilizer or rotted compost regularly for optimum growth. 7. Harvest the chamomile once the flowers have opened fully. Use them fresh or dry them for future use. Tips on Growing Chamomile
  • 110.
    Page 109 Learn Herbal Becauseyou will be leaving the seeds exposed as they germinate, start planting after the last frost. Chamomile needs full sun to thrive. However, if you live in an area with extremely hot temperatures, place the plants where they can get some shade in the afternoon. Chamomile plants naturally repel insects, but are vulnerable to aphids and thrips. If you plan on using your chamomile for culinary or medicinal purposes, use an organic treatment to get rid of pests. Remove dead flowers regularly to keep new ones growing. Medicinal Uses of Chamomile Chamomile is one of those herbs that old country folk are always talking about, and if you have a grandparent with an herbal garden, then you’ve probably come across the plant. This wonderful herb has been used for thousands of years as an herbal remedy for a wide range of ailments; even the ancient Egyptians revered chamomile and dedicated it to their gods. The entire plant is of value, but the medicinal quality is centered in the blossoms. The disk and the florets that make up the blossoms are used to make tonics, infusions, oils, extracts, teas, compresses, and decoctions for various medicinal purposes. These are just some of the curative effects and health benefits of this wonderful plant: Grind some dried chamomile, mix it with a bit of water to form a paste, and apply it to the aching tooth for instant relief! Relieves tooth pain -
  • 111.
    Page 110 Learn Herbal Chamomileis exceptionally effective in treating indigestion, heartburn, flatulence, loss of appetite, and related ailments. Chamomile infusion taken an hour before meals helps relieve most of these problems. Settles an upset stomach - Chamomile extract and chamomile pills made from chamomile blossoms have long been used to treat summer diarrhea in children. The plant has anti-spasmodic, antibacterial, and antiviral qualities. Stops diarrhea - Chamomile is probably best known as a calming agent. Taken as a tea before bedtime, chamomile helps soothe stressed minds and bodies and aids in sleep. It is also used to fight bouts of anxiety and panic attacks. It’s a sedative - Chamomile is an antibiotic, an antiseptic, a bactericide, and a disinfectant. Chamomile essential oil has been found effective against the herpes simplex virus type 2 and chamomile compresses have been proven just as effective as 1% hydrocortisone ointment in treating skin lesions. Kills germs - DIY Homemade Chamomile Solutions Chamomile steeped in hot water makes a soothing tea and a great tonic for cosmetic uses. It reduces skin inflammation, fights breakouts, and is an effective hair lightener. Chamomile is, in fact, one of the most commonly- used herbal supplements in the production of commercial soaps, shampoos, and conditioners. Make your own chamomile products at home with these recipes: Chamomile Tea
  • 112.
    Page 111 Learn Herbal Chamomiletea is famous for its ability to calm nerves, banish stomach pains, and aid in sleep. Do you remember how Mrs. Rabbit sent Peter off to bed with a dose of chamomile tea after his run-in with Mr. McGregor? It was just what he needed after a particularly harrowing ordeal. This comforting drink has a sedative effect when served hot and a refreshing effect when served cold. Combine it with other herbal teas and flowers for a unique tea blend or add it to a fruity summer punch. Chamomile tea is best made with flowers straight from the garden. This way, you’ll be certain that the flowers you’re putting in your cup don’t have traces of insecticide and other harmful chemicals. What you will need: Freshly-picked OR dried chamomile blossoms (2-3 teaspoons to a cup of water) Water Tea pot Tea ball or strainer Honey, stevia, or any other sweetener (optional) Lemon (optional) Instructions for making your chamomile tea:
  • 113.
    Page 112 Learn Herbal 1.Put the chamomile flowers into a pot. 2. Boil the water and pour it in with the chamomile. 3. Let the tea infuse for 3 minutes. 4. Pour the tea through a strainer into cups. Alternatively, place the chamomile blossoms in a tea ball and submerge the ball into hot water. 5. Add honey and/or lemon to your liking. The safety of consuming herbal teas during pregnancy is still a hot topic of debate. According to some, chamomile tea in excessive amounts can act as an abortion drug. If you are pregnant or suspect that you are pregnant, play it safe and don’t drink chamomile tea. Because chamomile is a relative of the ragweed, those who are allergic to ragweed should also refrain from drinking chamomile tea. Chamomile Lightening Hair Rinse Attention, blondes! If your hair has gone dull because of winter or if you simply want to lighten and brighten your locks, try this all-natural and oh- so-easy-to-make hair lightening treatment. It works almost the same way as lemon juice, but it smells better and leaves your hair softer and thicker too! This natural chamomile hair rinse works better than commercial chamomile hair lighteners, and are safer and cheaper. Why pay for it at the drugstore when you can make some at home? What you will need:
  • 114.
    Page 113 Learn Herbal Atablespoon or two of freshly-picked or dried chamomile blossoms A cup of water A few drops of lavender oil Pot Strainer Cup or bowl Instructions for making and using your chamomile lightening hair rinse: 1. Bring the water to a boil in a pot. 2. Add the chamomile blossoms to the water. 3. Lower the heat to a simmer. 4. Let the infusion simmer for at least 15 minutes. 5. Turn off the heat and let the infusion cool down. 6. Strain it into a cup or bowl. 7. Add a few drops of lavender oil. 8. Mix well. 9. To use your chamomile lightening hair rinse, shampoo and condition your hair as you usually do. 10. Rinse with warm water and squeeze off excess water. 11. Stand over the tub or sink and pour the chamomile rinse all over your hair, making sure that every strand is coated. 12. Repeat the process until you’ve used up all the hair rinse. 13. Wrap your saturated hair with a towel for 10 minutes. 14. Let your hair dry naturally. If possible, allow it to dry in the sun to really make your highlights bright and golden. If you don’t have fresh or dried chamomile blooms, you can use 3 to 4 organic chamomile tea bags to make this hair rinse.
  • 115.
    Page 114 Learn Herbal ChamomileShampoo You can also get the lightening effect of chamomile from chamomile shampoo. Make your own chamomile shampoo and use it to make your highlights stand out, your scalp healthier, and your hair smell terrific. This chamomile shampoo recipe is a great way to use old chamomile blossoms from last season. Use a bar of pure soap for the soap flakes and get glycerin from the pharmacy. Keep the shampoo in your fridge to make it last longer. Take out just the amount you need every time you shower. What you will need: ½ cup of dried chamomile blossoms 2 ½ cups of soap flakes 2 ½ cups of boiling water 2 tablespoons of glycerin Sieve or strainer Heat-proof bowls A wooden spoon A clean glass jar with a lid Whisk Instructions for making your chamomile shampoo:
  • 116.
    Page 115 Learn Herbal 1.Put the dried chamomile blossoms in one of the heat-proof bowls or in a pot. 2. Add the boiling water to the chamomile. 3. Let the tea infuse for 15 minutes. 4. Strain it into the other heat-proof bowl. 5. Clean and dry the first bowl. 6. Put the soap flakes in the first bowl. To make soap flakes, get a bar of all-natural soap and shred it with a grater or a knife. 7. Add the chamomile infusion to the soap flakes. 8. Let the hot infusion melt the soap. This will take about 5 minutes. 9. Use a whisk to beat in the glycerin until fully incorporated. 10. When the shampoo is cool enough, pour it into a glass jar. 11. Keep the shampoo in a cool place, away from direct sunlight. Because it has so many uses and is so simple to prepare, chamomile is a wonderful herb to have at hand. Include it in your herb or flower garden and let the fragrant beauty work its spell on your yard and on your health. CHICKWEED
  • 117.
    Page 116 Learn Herbal Chickweed,as its name implies, is a favorite of the poultry species. Chickens love eating the plant, particularly its seeds. But chickweed isn’t just for chickens; the plant also has culinary uses and is a valued herbal medicine. It is actually quite a shame that most people only know it as a weed and an invasive plant. Chickweed has a distinct fresh taste that goes well with soups and green salads. It is chockfull of nutrients and, as an herbal medicine, chickweed is known to help prevent and treat a number of ailments. Cultivation of Chickweed
  • 118.
    Page 117 Learn Herbal Ifyou want to grow your own chickweed to enjoy at home, there are two ways to do so. One is to find a chickweed plant and transplant it to your own garden or in a pot. Two, grow them from seeds. Here’s how: 1. Chickweed can grow even if it’s completely under shade, so you can choose practically any spot in your backyard. Prepare the soil by tilling and adding some compost. 2. If you wish to control the growth of your plant, you have to surround your cultivated soil with uncultivated land. Since chickweed only likes cultivated soil, it will not spread any farther than the boundary you create. 3. Use a garden hoe to make furrows. Water the furrows, but don’t soak them. 4. After the water has drained, plant 3 chickweed seeds for every inch, and then cover with topsoil. 5. You can expect the seeds to sprout in a week. When the seedlings reach 2 to 4 inches, you can start thinning them so that there will be 4 to 6 inches of space between the chickweed plants. Tips on Growing Chickweed It is best to start growing chickweed during early spring when the ground has thawed. Chickweed thrives on its own. You can leave it undisturbed right after planting the seeds until thinning is needed. Medicinal Uses of Chickweed Though some people, mostly farmers and gardeners, would rather get rid of this plant, it actually deserves a place in the kitchen and in the medicine cabinet. These are just some of its medicinal uses:
  • 119.
    Page 118 Learn Herbal Chickweed,in tea form, is a diuretic and an appetite suppressant. It allows the body to flush out contaminants through urination, which helps lessen water retention and bloating. And because it suppresses the appetite, it helps you avoid food binges and helps keep your waistline in check. It’s a weight-loss tool - Because of chickweed’s anti-inflammatory property, body pains caused by arthritis, menstruation, rheumatism and other culprits are lessened. Chickweed tea may be applied directly on affected areas to help reduce swelling and pain. Bye-bye, pain - - Our forefathers knew about the beneficial effects of chickweed and used it to flush out toxins from the kidney and the liver. Cleanses the kidney and the liver Having problem with digestion and constipation? Can’t stand stomach pains any longer? Drink some chickweed tea for instant relief. Improves digestive functions - - Chickweed is one of the most nutritious plants known to man and it is quite ironic that man considers it a pest. Some of the nutrients and other beneficial substances that chickweed contains are calcium, magnesium, potassium, zinc, selenium, vitamin C, ascorbic acid, beta-carotene, riboflavin, niacin, rutin, carboxylic acids, coumarins and hydroxycoumarins, genistein, gamma-linolenic-acid, hentriacontanol, oleic-acid, triterpenoids, thiamin, saponin glycosides, and flavonoids. A hodgepodge of vitamins and minerals DIY Homemade Chickweed Solutions
  • 120.
    Page 119 Learn Herbal Thereare more ways of enjoying chickweed other than adding them to your salad and other dishes. Here are some you can do at home: Chickweed Tea Drinking herbal teas is one of the most beneficial and healthy practices one can do. Chickweed tea, for one, is rich in essential nutrients that the body needs to function better. In fact, aside from eating chickweed as is, making a tea infusion out of it is the next best way to benefit from its nutrients. Having at least one cup a day helps your body cope with numerous medical issues ranging from simple upset stomachs to minor skin conditions and even to weight loss, as mentioned earlier. If you are the tea-drinking type, plant some chickweed and start making chickweed tea. What you will need: 2 to 3 tablespoons of dried or finely chopped fresh chickweed A cup of cold water A small pot or teapot A knife A chopping board A strainer or cheesecloth Instructions for making your chickweed tea:
  • 121.
    Page 120 Learn Herbal 1.If you have fresh chickweed, wash the leaves thoroughly with clean water before drying them. Once dry, chop the chickweed leaves finely on a clean chopping board. Put the chopped chickweed leaves into your teacup and set aside. 2. Boil the cold water in a teapot or a small pot. 3. Pour the boiling water into the cup containing the chopped chickweed. If you are using dried chickweed, pour the boiling water into the cup first before adding the dried herb. 4. Wait for 15 to 20 minutes while the chickweed is steeping. Strain afterwards. You can use a piece of cheesecloth with a sieve if you don’t have a strainer. 5. Dried chickweed steeps a little faster. Wait at least 5 minutes before straining. Enjoy your tea! Chickweed Salve A homemade chickweed salve has so many uses! It is a great first aid treatment for minor skin ailments such as acne, burns, rashes, wounds, scratches, and itchiness. It may also be used for boils, psoriasis and eczema. Since you are making a salve out of natural ingredients, it is safe to say that you can use your chickweed salve as often as needed. Here’s how to make one: What you will need:
  • 122.
    Page 121 Learn Herbal Freshchickweed Olive oil 1/8 cup of beeswax ½ tablespoon of Vitamin E (per one cup of herbal oil) Small tins and jars A strainer or cheesecloth A wooden spoon A saucepan Lavender essential oil (optional) Instructions for making your chickweed salve:
  • 123.
    Page 122 Learn Herbal 1.You will need to make chickweed oil first. Gather some fresh chickweed then wash and dry them. 2. Place the dried chickweed into a small jar and then fill it with olive oil. Make sure that there are no air bubbles to avoid spoilage. Cover the jar tightly and let it sit for two weeks. 3. Shake your jar of oil at least once a day. 4. After two weeks, use a strainer or cheesecloth to separate the oil from the chickweed. Pour the oil into a saucepan. 5. You can use a wooden spoon to squeeze out as much of the oil as you can. 6. Once your chickweed oil is ready, you can start making your salve by adding the beeswax and Vitamin E to the oil. You can also add a few drops of lavender oil. This will give your salve a refreshing scent and help prevent it from spoiling. 7. Place the saucepan containing the oil mixture over low heat. You can check your salve’s thickness by pouring some of the oil on a spoon and placing it in the freezer. Once the oil hardens, you can feel its texture and hardness. You can adjust the thickness by adding more beeswax to the oil mixture. If it’s too thick for your liking, add more olive oil instead. 8. Once you get your desired consistency, pour the oil mixture into small tins or jars. 9. Let them sit until the oil hardens and turns into a salve. Chickweed Tincture Tincture-making is a fairly easy process. All you need are some herbs and a bottle of alcohol. Any medicinal herb will make a good tincture. Tinctures are characterized by their long shelf lives. Make your own chickweed tincture by following this recipe:
  • 124.
    Page 123 Learn Herbal Whatyou will need: Fresh chickweed Pure grain alcohol A knife A small jar A strainer or cheese/muslin cloth A large bowl wooden spoon Instructions for making your chickweed tincture:
  • 125.
    Page 124 Learn Herbal 1.Gather some fresh chickweed. Make sure you don’t mix other weeds with your harvest as they are sometimes hard to differentiate. 2. Using a sharp knife, chop the leaves into little pieces. 3. Place the chopped chickweed in a small glass jar. It is better if you fill the glass jar with the herbs. Don’t use containers made from plastic or metallic materials as these may undergo adverse reactions with alcohol. Sterilize the glass jars before use. 4. Pour alcohol into your jar. Any 80- to 100-proof alcoholic beverage may be used. Vodka is a good choice since it has little flavor and no color, though rum and brandy may also be used. Another alternative is to use apple cider vinegar, especially if you have reservations with alcohol. 5. Remove any air bubbles that may form. 6. Cover the jar tightly and then label it. Include the date. Place in a cool area that cannot be accessed by kids and pets. 7. Let the tincture steep for at least 8 days up to one month. 8. After steeping, use a strainer or a muslin cloth to strain the liquid into a bowl. Squeeze out more liquid from the chickweed using a wooden spoon. 9. Pour the resulting liquid into small jars, cover, and label. Your chickweed tincture is now ready for use. There are so many uses for plants that we often think of as mere weeds. Chickweed is just one example. Nettle, mallow, and sow thistle are others. The next time you come across a plant you’re unfamiliar with, try to find out more about it. You may be in for a surprise. DANDELION
  • 126.
    Page 125 Learn Herbal Thedandelion is one amazing herb that is regularly used for medicinal and taste- improvement purposes. Aging back to around thirty million years, it is one of the oldest surviving plants in the world - and yet, a lot of people try to, unsuccessfully, remove all the dandelion from their garden. The dandelion (Taraxacum officinale) leaves were used as medicines in many popular traditions in Chinese and Native American culture. From boils to diabetes, this herb has been associated with amazing healing properties. Dandelion flowers can be used to make wine and the leaves are often added in salads to add flavor. Not to mention that it is full of vitamins and minerals and are terrific cures for a low appetite.
  • 127.
    Page 126 Learn Herbal Cultivationof Dandelion Dandelions are perennial, which means that they are capable of reproduction for two years before they require re-planting. You should not have much trouble in obtaining dandelion seeds. Early spring is the ideal time to plant dandelions.
  • 128.
    Page 127 Learn Herbal 1.Moist and rich soil would be an excellent place to plant, but it can grow in almost any soil. Well-drained and fertile soil is recommended. 2. Choose a spot where full sun is available most of the time, but partial shade works for it too. 3. Plant seeds directly in the garden. ¼ inches deep should be perfect. A single row or wide rows will be beneficial, and the seeds must be at least 8 inches apart. A fully grown dandelion can reach the height of 12 inches without trouble. 4. There is no need to water too much. Being a hardy plant in nature, dandelion are able to collect plenty of water for themselves. Tips on Growing Dandelion Within 95 days of planting, an average dandelion reaches full maturity. Medicinal Uses of Dandelion is a great medicinal herb. It is known to store a versatile array of disease cures. The root, the leaves and the flower, every part of the dandelion is very useful. Dandelion – Researches have found that dandelion proves to be a relief for urine problems. Liver and bladder problems are relieved by releasing body fluids with dandelions. Diuretic – Dandelion has long been used as a way of helping people to get their appetite back. If you've had a long bout of sickness where you were put off eating for a while, a regular drink of dandelion coffee is something lots of people swear by to help them get their appetite back. Get back your appetite
  • 129.
    Page 128 Learn Herbal -Dandelion tea is a great thing for someone who has been suffering from constipation or a stomach problem. Dandelion tea cleans up the entire digestive system and provides you a way to end the discomfort. Digestion - If you are suffering from a sting from a bee or any other lightly poisoned insect, the sap of dandelion is really great for it. Stings - If you are not a fan of your acne, dandelion is just the thing for you. Warts and calluses are cured by dandelion too. Goodbye acne - It cannot yet be confirmed it dandelions are a beneficial for diabetics, but it is under research and many species have positive results on their blood sugar level. Diabetes - The sap found in the stem of the dandelion, while not very edible, is very effective against common skin problems like rashes and sunburn. Skin care DIY Homemade Dandelion Solutions Dandelion Coffee Because of the harmful effects of too much caffeine, dandelion coffee is absolutely perfect. It gives you the effect of regular coffee without having to worry about the excessive caffeine consumption. Besides, there is the additional benefit of the extra vitamins and minerals that keep you healthy. Here is how you make dandelion coffee: What you will need:
  • 130.
    Page 129 Learn Herbal Alot of dandelion roots Instructions: 1. Wash the roots of dandelion as thoroughly as possible. 2. Chop the roots in to short stick-like pieces. 3. Allow them to dry for an hour. A dehydrator tray would work well. 4. Chop the roots into small pieces. 5. Roast the pieces in the oven at Gas-mark 6 or half an hour. 6. Grind the dry pieces to fine powder and then roast for a second time. 7. Now store the powder in an airtight box. Your dandelion coffee powder is ready to be served. Dandelion Wine Dandelion wine is quite popular and pretty easy to make. It even happens to share the name with a popular novel by Ray Bradbury. Make sure that the flowers are fresh. So let’s take a look at how to make this concoction. What you will need:
  • 131.
    Page 130 Learn Herbal 1-1/2teaspoons dried brewing yeast 6 cups of sugar 1/4 cup of warm water 2 quarts of whole dandelion flowers 4 cups of water 1 cup of orange juice 3 tablespoons of lemon juice 3 tablespoons of lime juice 1/2 teaspoon of powdered ginger 3 tablespoons of chopped orange zest 1 tablespoon of chopped lemon zest Instructions: 1. Wash the blossoms properly and let it soak for 48 hours. 2. Put the blossoms with the water and add up the lemon, orange and lime juices. 3. Now add the ginger, the peels of the fruits, sugar and cloves. 4. Stir and boil the mixture. 5. Strain over coffee filter papers. 6. Add yeast in the infusion that will be formed and stir again whole it is still moderately warm. 7. Place a lid or a cover and let it rest for the night. 8. Put it in a bottle with holes on the top. 9. Let it ferment for three weeks. 10. You will find a layer of sediment at the bottom of the container. Put the wine in another container to leave the sediment alone. 11. Store for a few months or a year for excellent taste. As they say, the older the wine, the better it is.
  • 132.
    Page 131 Learn Herbal Youshould probably know that fermentation can take up more than three weeks if your area happens to have a low temperature. So if you live in a cold place, give the fermentation more time. Dandelion Pumpkin Seed Pesto This is a recipe for a healthy pesto that will not displease your taste buds either. You are going to need a food processor for this particular menu. What you need: ¾ cup of green pumpkin seeds 3 cloves of minced garlic ¼ cup of parmesan cheese, freshly grated 2 cups of dandelion greens ½ tablespoon of lemon juice ½ cup pure virgin olive oil ½ teaspoon kosher salt Black pepper Instruction:
  • 133.
    Page 132 Learn Herbal 1.Preheat the oven up to gas mark 4 (350F) 2. Roast the pumpkin seeds in a baking sheet for 5 minutes, until it’s just fragrant. 3. Let it cool down. 4. Put the garlic and seeds in a food processor and pulse until they are chopped finely. 5. Add the cheese, the dandelions and the juice. 6. Process together until they are properly mixed. 7. The pesto should be very thick by now. Add olive oil until it is smooth. 8. Sprinkle salt and pepper according to your taste. So there you go. That was just barely scratching the surface of the immense possibilities dandelion stores in it. From kidney problems, diarrhea, rashes and (just as an edible and tasty herb) a dandelion is a great herb and the best part of it is that it's available just about everywhere. It is unfortunate that people often try to get rid of such a cool gift from nature. ECHINACEA One of the most popular herbs in America, echinacea is an effective and widely used remedy for common cold and flu. The name ā€œEchinaceaā€ was derived from the resemblance of the spikes on the central disc of the flower with ā€œechinosā€, the Greek for hedgehog.
  • 134.
    Page 133 Learn Herbal NativeAmericans used echinacea as a general medicine for all diseases and infected wounds. Records say that it was used against snake bites, diphtheria, anthrax, scarlet fever and as a general pain reliever. Nowadays, it is used for the cure of sore throat and other symptoms of cold, and research shows promises to cure ear infections, athlete’s foot and sinusitis and even act as a suppressor of the herpes simplex virus. The plant has 9 discovered species so far and they are commonly known as coneflowers. Cultivation of Echinacea Echinacea is perennial and are easy to grow from seeds. It is a very hardy plant, and can survive quite a cold winter. It grows well in the garden and the flowers are beautiful, giving your garden an aesthetic quality. Early spring is a good time for cultivation.
  • 135.
    Page 134 Learn Herbal 1.Echinacea prefers rich soil, so adding compost to your soil might be a smart idea. Also, make sure water does not flood your soil. A good drainage system is required and an elevated soil bed is a way to solve that problem. 2. Seeds should be sown when the soil is around 60°F. Sowing on the surface of the soil, 2 inches apart, will do. 3. When germination begins, push the seeds or add soil so that there is 1/8 inch soil over them. 4. Thin out the plants so that they are around 20 inches apart. Once germinated, echinacea will grow fairly fast. Tips on Growing Echinacea Rabbits and hedgehogs are fond of echinacea shoots, so make sure you have your garden protected well. See that they are watered as seeds but, after they grow, echinacea is capable of keeping itself watered from the moisture of the rain. So unless you live in a very dry region, there is no need to water the plant. Echinacea is not a very good competition for weeds, so if your garden has weeds, clear them up before echinacea suffers from lack of moisture. Medicinal Uses of Echinacea Echinacea has a large variety of medicinal uses - a fact that contributed heavily to its common and frequent use as a general, all-purpose medicine in the past. Extensive research of the plant is being conducted in Germany and even now scientists have found plenty of uses for this wonderful herb.
  • 136.
    Page 135 Learn Herbal -Echinacea is known to be a good immunity boost. Though there are some debates about it, it can heavily improve our immune system and fight infections. Immunity This is probably the most common medicinal use of echinacea. It is not yet confirmed if it works as a good cure or prevention, but the fact is, it has been shown by many to be very effective at giving your immune system a boost during cold and flu periods. Sore throats and other symptoms are not much of a challenge for echinacea. Cold - It is good for infections in the upper respiratory system. Traction or inflammation of these organs can be helped by echinacea. Infections - If used early enough, echinacea is often effective and helping the healing of wounds. Wounds - Boils, acne and skin infections are often treated with echinacea. Skin - It is also used for urinary tract infections, vaginal yeast infection, flu, gum disease, tonsillitis, genital herpes and more. Miscellaneous - DIY Homemade Echinacea Solutions Echinacea Tincture This tincture is an excellent cure for colds and can cure it in a very short time. It is easy to prepare and is very effective. So let’s go straight to the making of it. What you will need:
  • 137.
    Page 136 Learn Herbal 11-pint glass jar ¼ cup dried Echinacea 1 pint vodka Instructions: 1. Dry the echinacea and put it in the pint jar. 2. Pour the vodka on the jar, but keep a little room at the top. 3. Shut the lid tightly. 4. Now you have the menstruum which you have to leave in normal temperature for one to one and a half month. 5. Shake the jar every few days. 6. After the allotted time, place a filter cloth on the mouth of the jar instead of the lid 7. Take a bowl and pour the vodka out to it through the filter cloth. The herbs will stay as residue. 8. Take the cloth of herbs and squeeze it to get all the liquids. 9. You have your echinacea tincture. Hot Ginger Echinacea Lemon Tea Tea is a popular drink but a cup of echinacea tea is more helpful than your normal tea. It is great for colds and sore throats. So here’s the recipe. What you will need: 2 cups of boiling water A teaspoon of dried echinacea flowers A teaspoon of ginger, finely chopped and fresh Squeezed juice of 1 lemon A teaspoon of honey
  • 138.
    Page 137 Learn Herbal Instruction: 1.In a teapot, place the ginger and echinacea. 2. Pour boiling water in it. 3. Add honey and lemon juice. 4. Stir to mix. 5. Enjoy and stay cold-free. Elderberry-Echinacea Syrup This syrup is marvelous for colds, flu, and fever and even helps a little with blood pressure. The ingredients are all medically useful and are very effective. So here’s how you make it: What you will need: 1/2 cup dried elderberries 2 tablespoon of dried echinacea 1 tablespoon of dried ginger root 1-2 cinnamon sticks, broken in half 3 cup distilled water 3/4 cup raw honey Instructions:
  • 139.
    Page 138 Learn Herbal 1.Pour all ingredient except for the honey in a small bowl. 2. Add distilled water and let it boil, turn the burner to medium. 3. When you see a simmer, turn the burner to the lowest you can without switching it off. 4. Leave it like that for 45 minutes. 5. Stir occasionally and crush the elderberries to release their juices. 6. Now strain the mixture until you have just the liquid. 7. Wait for around 10 minutes. 8. Now add the honey. 9. Stir thoroughly. 10. Once done, keep it tightly shut with the lid and store in the refrigerator. 11. Use when you think you require them. Now as a fair warning, echinacea is not a harmful, but it is not best for all situations. Echinacea does not mix well with medications for immunity, so if you are on one of them, it is better to avoid echinacea. It is also advisable for diabetes, AIDS, multiple sclerosis, leukemia and any autoimmune disease patients to stay clear of echinacea. If you are allergic, echinacea can cause from mild rashes to life threatening reaction of throat tightening. Asthma allergic people are also considered unsafe from echinacea.
  • 140.
    Page 139 Learn Herbal Echinaceais one of the most popular herbs over the globe. It is easy to find, incredibly useful and gives a touch of pretty brightness to your garden. From hundreds of years ago, people used this beautiful flower to cure their wounds and diseases. Even in present, it is used as an effective medicine and still, scientists are conducting researches to find out more use from this wonderful herb. ELDER Elder, and its fruit elderberry, has been used as a medicine for flu for a long time and it has gained its reputation as a tasty fruit too. Both the flower and the berries are used for medicinal purposes, though it is strongly advised to cook the berries before using them, as raw berries have properties similar to cyanide poison. Elder is generally found in Europe, Africa, parts of Asia and even North America. Of its many species, Sambucus nigra, the European Elder, is the most commonly used type for medical purposes. The plant can grow up to 30 feet tall in dry or moist soil. The wood of the tree is white and easy to cut, and hence, is quite popular for making small objects. And the flowers are pretty enough to find a spot in a fancy garden!
  • 141.
    Page 140 Learn Herbal Cultivationof Elder The ideal soil to grow Elder is one with pH 5.5 to 6.5 and also moist, fertile and well drained, but it does not mind having other values of acidity, fertility or texture. If you have heard the rumor that elder prefers swamped spots, you should be aware that it is totally wrong. Elder is intolerant of bad drainage. So here is the method for planting elder. 1. Plant seeds in the spring. 2. It is suggested to plant them as soon as they are available, in the nursery. Waiting long will kill the seeds. 3. Elder is really fond of fertilizers, so add compost to the soil before sowing. 4. Plant the seeds 6 to 10 feet apart. Remember to leave about ¼ inch soil over the seeds. 5. You have to annually add fertilizer at early spring. One pound of ammonium nitrate for each plant is a good amount. Tips on Growing Elder Elder have shallow roots, so in the first season, you have to keep them well-watered. Also, as mentioned earlier, a good drainage system is a must. They should be weeded regularly, or there is the threat of elder plants taking up all the garden. Through the roots, elder will grow more plants. You can dig them up and replace to another spot or just mow them if you do not require more.
  • 142.
    Page 141 Learn Herbal MedicinalUses of Elder Elder is known to be one of the most useful medicinal herbs around and true to its reputation, it acts as a cure to many illness. It is an antioxidant, laxative, diaphoretic and anti-inflammatory properties among others have contributed to its fame in the medical world. It has been used in medicine in North America, Europe, Western Asia, and North Africa in the past. For the common cold, elderberries are very effective. Elderberry tea is an effective method to counter coughs and sore throats. Cold - Flu is not much of a challenge for this wonderful herb. Elder is thought to dampen the virus’ ability to affect the cells. Flu - Elder can fight bacterial and viral infections quite effectively. Infections - It helps to boost your immune system and improve your vision considerably if consumed regularly. Immunity - Elder is great when it comes to reducing cholesterol. Its antioxidant property comes really helpful in here and keeps the heart strong and cholesterol-free. Heart - Studies show that elder might be effective against inflammation of the bladder and the urinary tract, bronchitis, HIV and cancer. Under research - DIY Homemade Elder Solutions Elderberry Blossom Tea
  • 143.
    Page 142 Learn Herbal Elderberrytea is very effective for cold and sore throats, and the flavor is not bad either. This is how you make it: What you will need: 1 and 1/2 tablespoon of dried elderberry blossom. A cup of boiling water. A thin slice of lemon. Sugar for taste. Instructions: 1. Place the dried elderberry in a teapot. 2. Now add the boiling water. 3. Let it steep for a few minutes. 4. Strain with a cheesecloth. 5. Add the lemon and sugar. 6. Enjoy while it is warm. Elderberry Pie This is a delicious pie that can be enjoyed together in a Sunday evening or any other day. Apart from the mouth-watering taste, the pie contains a lot of vitamins and minerals that would keep you healthy and at the same time satisfy your taste buds. And it is a good idea to bake with a foil at the bottom. What you will need:
  • 144.
    Page 143 Learn Herbal Anormal recipe pastry for a double crust, 9 inch pie. 4 cups of elderberries 3 tablespoon of corn-starch 1 cup of white sugar 1 tablespoon of lemon juice Instructions: 1. Preheat the oven to 375 degrees F. 2. Mix the cornstarch in a small amount of water and then add the sugar and the berries. 3. Cook it, stirring until you get the thickness you desire. You can add extra cornstarch if you need to thicken it more. 4. Add the lemon juice. 5. Pour the mixture to the bottom layer. 6. Dot it with butter. 7. Now put on the top crust. 8. Bake for around 40 minutes until it becomes brown. Elderberry Wine Elderberry wine is just as tasty and effective as any other wine (blackberry, plums, etc.) which, in fact, can be prepared using the same recipe. So here it goes. What you will need:
  • 145.
    Page 144 Learn Herbal Around11lbs of elderberry without stem. 10 quarts of water. 4.5 lbs sugar. Tartaric acid. 1.5 teaspoon of pectic enzyme. 3 teaspoon of yeast nutrient. Wine yeast. Instructions: 1. Break the berries by crushing them by hand, or pulse in a food processor in batches. Do not squeeze and make them liquid. 2. Pour the crushed berries into a large pot with 10 quarts of water. Add the sugar. Turn off the heat when it is shimmering. 3. Pour the juice in a large bucket and let it cool down to room temperature. Taste the juice for sugar and acid. 4. Add another kilogram of sugar and maybe also some tartaric acid if the acidity and sugar is low. There should be about 1.5 teaspoons of acid in per liter of juice. 5. Add the enzyme, and cool to below 50°F in the fridge or with ice packs. Lay a sheet of plastic wrap on the juice to keep out air. 6. Keep the juice covered and maintain this temperature for up to 3 days. The longer you cold soak, the more flavor you get. 7. On the last day, bring the juice back up to normal temperature. 8. Now add half of the yeast nutrient while the juice warms up. 9. Once it is in room temperature, let your yeast hydrate and add in the juice. 10. Now let it ferment.
  • 146.
    Page 145 Learn Herbal Theelder plant is not just another plant in your garden, but it is one of the most useful herbs that is available to us. It does not restrict its greatness to just the field of tasty berries, but also has a great impact on the medical field. It has been, for centuries, used as a common cure for an awful lot of disease, illness, cuts and bruises and colds. The natives in the woods preferred elderberry for their medicine and, though shunned by the introduction of modern medicine at one point, the elderberry, along with other herbs, are regaining popularity and are proving to a gift from mother nature. It is being extensively researched and the results we had so far are promising that this herb has yet many potentials that will benefit mankind for a very long time. GINGER In China, India, and other parts of Asia, ginger has a long and storied history as a highly prized food item and herbal medicine. Most people only know ginger (Zingiber officinale) for its role in stir fries and in ginger ale, but it is actually an ancient herb that has been cultivated in the East for thousands of years.
  • 147.
    Page 146 Learn Herbal Cultivationof Ginger Though it is most prominent in Chinese and Southeast Asian cooking and medicine, ginger is also cultivated in North America, South America, Australia, and other parts of the world. Because it can be expensive in the West, those who consume ginger regularly choose to grow their own. The ginger plant requires little attention and can be easily grown in a pot indoors. To sprout ginger from root stock:
  • 148.
    Page 147 Learn Herbal 1.Get some fresh ginger rhizomes. Choose ones that already have growth buds. These are tiny protrusions that look like little horns at the end of each piece or ā€œfingerā€. 2. If you got your ginger from a store, it is best to soak them overnight, as they have likely been treated with a growth retardant. 3. You can either plant the ginger in a shallow tub or pot with some good potting soil or directly into the ground. Cut the ginger into pieces and plant each piece 2 to 5 inches into the soil, about 6 to 8 inches apart. 4. Cover the ginger pieces lightly with soil. 5. Water your ginger plants regularly but don’t over soak them. 6. At the end of the season, the leaves of your ginger plants will start to fade. You can then harvest the ginger for culinary use and for replanting. Tips on Growing Ginger Ginger is a tropical plant. It loves sunlight, humidity, and rich, moist soils. If you’re keeping your ginger plant indoors, put it in a sunny spot where it will receive plenty of sun in the morning and dappled sunlight in the afternoon. Ginger is not suited to frost, strong winds, and dry or waterlogged soil. Mix compost with your potting soil. If there is not enough humidity where you live, mist your ginger plants regularly. Medicinal Uses of Ginger Ginger is widely known as an herbal remedy for an astounding number of ailments.
  • 149.
    Page 148 Learn Herbal -Studies have shown that ginger is an effective anti-vomiting remedy. Taking raw ginger, ginger powder, or an infusion of ginger helps prevent and relieve motion sickness and pregnancy-related dizziness and nausea. Ginger also helps reduce nausea in chemotherapy and post- surgery patients. Fight nausea - Ginger has beneficial enzymes that heal and protect the gut. It stops the formation of ulcers, neutralizes excess acids in the stomach, and eliminates diarrhea-causing bacteria such as E. coli. Keep your tummy healthy – Ginger’s extraordinary ability to fight inflammation is extremely helpful to the heart, where inflammation can become chronic and lead to serious diseases. It also stimulates blood circulation and lowers cholesterol levels. Take ginger for good heart health - A natural immune booster, ginger has antibacterial and antiviral properties that protect you from airborne diseases such as the flu and the common cold. Dodge the common cold A ginger a day makes the blues go away! Some studies report that taking ginger on a regular basis can help reduce the symptoms of depression and anxiety. Take ginger and boost your mood - Ginger has a ā€œwarmingā€ effect that will help you sweat out a fever. It can also reduce pain and fight infections. Sweat out a fever with ginger -
  • 150.
    Page 149 Learn Herbal Scientistshave found that there are chemicals in ginger that fight cancer cells in test tubes. More tests need to be done to see if they will have the same effect on humans but, for sure, ginger has anticancer properties. Prevent the big C - …and a host of other serious diseases! Is there anything ginger can’t cure? This powerful herb has also been found effective in treating or reducing the pain caused by osteoarthritis, fibromyalgia, alcoholism, toothaches, frostbite, liver disease, flatulence, dysmenorrhea, colic,indigestion, and hypertension. DIY Homemade Ginger Solutions It’s easy to reap the health benefits of ginger. These three amazing ginger products can be made at home and are inexpensive too! Ginger Tea Ginger tea tastes great and has a soothing aroma perfect for post-spa sessions and after-dinner relaxation. A cup of hot ginger tea relieves the pain and discomfort from sore throats and clogged noses, and is a comforting drink to have when ill, stressed, or just feeling out of sorts. A recommended part of Ayurvedic morning cleansing routines, ginger tea is thought to flush out toxins and restore warmth to the body. It is also supposed to reduce your craving for sweet and salty foods. Some health practitioners suggest drinking a cup of ginger tea before every meal and eating the ginger in the tea to prevent post-meal digestive problems.
  • 151.
    Page 150 Learn Herbal Whatyou will need: 4 to 6 slices of fresh ginger 1 to 2 cups of water Honey, stevia, or some other sweetener (optional) Lemon (optional) Instructions for making your ginger tea: 1. First, make sure that your ginger is fresh and plump, not tough and shriveled. If the peel is too dry and wrinkled, the ginger has been in storage for too long. The inside will be woody and will be lacking in flavor. 2. If your ginger is very fresh, you can opt not to peel it. Simply grate an inch or two off your ginger into a tea cup. 3. You can also peel the ginger with a spoon or a paring knife and then chop it thinly until you have about three ounces of sliced ginger. 4. Pour boiling water over the ginger. 5. Let the tea steep for 2 to 3 minutes. 6. Strain the ginger pieces out or let them settle at the bottom of the cup. 7. Add honey, stevia, or agave nectar to your liking. Squeeze in some fresh lemon. Stir. 8. Enjoy your cup of tea! Ginger Oil
  • 152.
    Page 151 Learn Herbal Gingeroil has so many uses! As a massage oil, it leaves a gently warming sensation perfect for aching joints, sore muscles, upset stomachs, and menstrual cramps. It can also be used by breastfeeding moms suffering from blocked ducts – just don’t get any on your nipple; your baby might not like the taste! Ginger oil can also be used as a salve and moisturizer. Add it to some very hot water and inhale the steam to unclog your nose and relieve flu symptoms. Add it to your bath water for a relaxing soak. If you use a high- quality edible oil, you can even add it to your salad! There are different ways to make ginger oil. One is to combine the ginger and a carrier oil and cook the mixture in the oven for a few hours. However, because fresh ginger contains a lot of moisture, cooking it in a crock pot can be a more effective technique. Remember, the more moisture in your ginger oil, the more likely it is that mold will grow. Letting the ginger oil cook over a couple of days gives all the moisture in your ginger enough time to completely evaporate – and your house will smell divine! What you will need:
  • 153.
    Page 152 Learn Herbal 2cups of fresh ginger 3 cups of oil (olive, sesame, jojoba, coconut, or palm) An oven-safe bowl or crock pot Muslin or cheesecloth and rubber bands Strainer Another bowl A clean jar with a tight lid or a vial A clean funnel Instructions for making your ginger oil: 1. If you’re using the oven technique, combine the oil and the ginger in an oven-safe bowl and let it cook on low heat for a couple of hours. 2. After, cover the top of a clean bowl with cheesecloth or muslin. Strain the ginger-oil mixture through the cloth. Try to squeeze all the oil out with your hands. 3. Transfer the ginger oil into a vial, put the lid on tightly, and label the vial with the date. The ginger oil should keep for around six months if kept in a cool, dark place. 4. If you’re using the crock pot technique, put the oil and the ginger in your crock pot and leave it on the lowest heat setting for a couple of days. Don’t let the mixture burn or boil. Keep the lid slightly ajar to let the moisture evaporate. 5. Strain the oil mixture into a bowl. Let it sit for a day. 6. Transfer the ginger oil into vials or mason jars and label them. Ginger-Infused Scrub
  • 154.
    Page 153 Learn Herbal Theanti-inflammatory properties of ginger make it extra useful for the skin. Ginger helps get rid of redness and puffiness, diminishes the appearance of scars and blemishes, and helps reduce wrinkles. The oil used in this recipe moisturizes the skin and helps keep acne away. Because the skin (our largest organ!) so quickly absorbs anything and everything we put on it, try to use all-natural products to make this scrub. What you will need: Coconut oil Turbinado sugar Coarsely chopped ginger Cold-pressed oil Kosher salt Essential oil Instructions for making your ginger-infused scrub: 1. Infuse the coconut oil with ginger by cooking both over low heat for 10 to 15 minutes. Remove the mixture from the heat and strain it through a sieve or cheesecloth into a bowl. 2. Working quickly so the oil doesn’t cool and solidify, add the cold- pressed oil and stir until the whole thing cools down to room temperature. 3. Add the sugar and the salt. Stir some more. 4. If desired, add a drop or two of essential oil. 5. Put the scrub in a glass jar and cover it tightly.
  • 155.
    Page 154 Learn Herbal Gingeris a miracle herb that imparts its magic when eaten, drank, inhaled, or slathered onto the skin. This humble-looking and often overlooked plant is so easy to cultivate and is so worth keeping in the house or in the garden. So what are you waiting for? Grow your own ginger plant now! HAWTHORN
  • 156.
    Page 155 Learn Herbal Hawthornis a bush that is a member of the Crataegus species. This bush yields beautiful clusters of red (often black) berries, and it is a perfect example of the powerful, potent abilities of nature to heal health complaints and maladies. The use of the hawthorn bush, and its berry often known as the ā€œhaw,ā€ dates as far back as the 1st century AD. The particular strong point of the hawthorn is that it can cure many different cardio vascular conditions. Many clinical trials have proven its effectiveness quite conclusively. The official prescription of hawthorn berries has a reputed lineage too, with American doctors having prescribed it since the 19th century! The powerful nature of the herb is evident in its use – it can even treat mild heart failure. Apart from that, it can also lower blood pressure, help maintain good artery health, and cleanse the blood with its potent anti-oxidant power – thus keeping you fit, healthy, and on your feet. Cultivation of Hawthorn Hawthorn shrubs yields the completely edible hawthorn berries, which are quite popular. As a result, many gardens grow this delightful shrub. The delicate flowers of the hawthorn berry arrive around May, and the very useful berries are not far behind. This shrub is quite easy to grow, and aside from regular cutting and trimming, not much needs to be done.
  • 157.
    Page 156 Learn Herbal 1.The garden bed should be well tilled first. Remove any stones or other materials, and loosen the soil with a hoe. 2. Check the nutrient content of your soil. As hawthorn will give fruit, it needs some excess minerals, such as calcium and potassium for complete and good growth. If your soil is lacking of these ingredients, you should use fertilizers to get them up to range. In that case, dig a deep trench, and place the fertilizers there. Then cover up the fertilizer with a good few inches of unfertilized soil, and plant your hawthorn on top of this layer. 3. You can either grow hawthorns from cuttings, or from saplings or from seeds. For best results purchase saplings of the shrub from a nearby nursery 4. Plant the hawthorn shrubs about 1 to 2 feet apart. If you wish to build a wall, plant them closer together. Tips on Growing Hawthorn You don’t have to buy a large number of saplings to start your hawthorn garden. Just buy one. As it grows, you can take cuttings from this hawthorn shrub to get more shrubs. This is cost effective, and does not harm the plant in any way. Hawthorns are thorny bushes that can easily deter large wildlife, such as deer. You can easily use hawthorn to make an impenetrable outer wall for your garden. Plant your hawthorn cuttings around the perimeter of your garden and slowly build up this amazing fencing option.
  • 158.
    Page 157 Learn Herbal Hawthornberries are a prized edible of many birds, such as blackbirds and humming birds. These are very entertaining to watch, and you can consider having a water bath and sand bath installed in your garden for their pleasure. If, on the other hand, you want a large quantity of berries for yourself, you might have to net the plants while they are growing berries to keep the birds away. One solution is to have a few hawthorn shrubs, and to net some for yourself, and keep some open for the birds to enjoy. You have to keep the plants well-trimmed in order to ensure maximum berry output. Remember to trim well before they flower. Hawthorn berries flower around May. Medicinal Uses of Hawthorn Hawthorn is a potent berry that has some very practical medical applications. It has been shown to be great for the heart in both animal and human studies. Additionally, it has been prescribed for centuries for heart conditions. It also has some anti-inflammatory action that is great for treating wounds, sores and boils. Heart failure is a serious issue and you must never attempt to self-diagnose or treat your heart failure. Consult a doctor before use. However, studies have shown hawthorn berries to be greatly effective in preventing and treating heart failure. You should ask your doctor about the proper dosage, however. As a cure for mild heart failure -
  • 159.
    Page 158 Learn Herbal Hawthornberries and their powerful anti- oxidant action greatly improve artery health. Hawthorn users have been shown to have avoided atherosclerosis (ā€˜hardened arteriesā€) – they have flexible, healthy arteries, that are a key to good cardiovascular health. To improve artery health - Hawthorn can effectively get rid of the bad LDL cholesterol that is clogging up your arteries. Lowering cholesterol levels is quite a challenge, and hawthorn can make it easier. Bust your cholesterol - Hawthorn dilates blood vessels, and this can significantly lower blood pressure. Hawthorn can help maintain a regular, healthy blood pressure level. Lowers your blood pressure - Tapeworms and other intestinal complaints can be treated effectively with hawthorn berries. Bust intestinal infections - DIY Homemade Hawthorn Solutions Hawthorn Jam Hawthorn has traditionally been used in jams for a very long time. Hawthorn jams are perky, tasty, and full of all the goodness of hawthorn. You can enjoy hawthorn jams with bread, cakes or as just a standalone treat. Easy to make and rich in the power of hawthorn, you should definitely add this sweet treat to your diet. What you need: 2 1/4 lb of fresh hawthorn berries 3 ¾ cups of crystalline sugar Lemon juice (from one small lemon)
  • 160.
    Page 159 Learn Herbal Instructions: 1.Mash the hawthorn in a saucepan. Combine sugar and the lemon juice and mash well 2. Add a few cups of water and bring to boil 3. Stir thoroughly, and skim the foam that forms on top of the mixture 4. Keep stirring until the mixture reaches 430F (to check the temperature, take the saucepan off the fire, and use a candy thermometer) 5. Test the jam by taking a small portion in a plate and transferring to a freezer. The jam is ready if it can gel in the cold. Otherwise more heat and stirring Is necessary until the jam reaches appropriate texture. 6. When the jam has been prepared, allow it to cool, and ladle it into sterilized glass jam jars. Keep the jam refrigerated, as it contains no preservatives, and will easily go bad at room temperature. Hawthorn Leaf & Berry Salad Hawthorn leaves are in fact completely edible. They are crunchy, tasty, and a great addition to a salad. Combined with the sour flavor of slightly ripe hawthorns and a few olives, a simple salad of fresh young hawthorn leaves should leave a lingering, amazing taste in your mouth. Here is how you make a hawthorn salad to impress. What you need:
  • 161.
    Page 160 Learn Herbal Halfa bowl of young hawthorn leaves (fresh picked in spring are the best) One and a half cup of unripe hawthorns (a slightly sour taste is optimal) A few olives Apple cider vinegar or lemon juice One onion, chopped into rings Grated parmesan cheese Instructions: 1. Wash the hawthorn leaves thoroughly with cold water. Make sure they are fresh, young and not populated by unwanted caterpillars 2. Wash the hawthorn berries with cold water 3. Combine the hawthorn berries, leaves and onions in a salad bowl 4. Add a liberal dash of olive oil. Toss to mix properly 5. Add in some olives for decoration 6. Add a dash of vinegar or lemon juice for further sour flavor 7. Sprinkle with parmesan cheese and serve The Hawthorn berry is truly an amazing gift of nature. All gardens should come with one of these delightful shrubs – for the birds and for the continued health benefit of the owners. Hawthorn is indeed a powerful herb when it comes to improving heart health, and you should exploit this generous gift of nature for your wellbeing. BASIL
  • 162.
    Page 161 Learn Herbal Ifyou love Italian food, you’ll be very familiar with the taste and scent of basil, but there’s much more to this pungent herb than pasta sauces and pesto. In medieval times, basil was considered quite a dangerous herb to handle, being related to scorpions and the legendary basilisk; one herbalist of the time reported that ā€œbeing laid to rot in horse dung, it will breed venomous beasts,ā€ while the famous botanist Nicholas Culpepper glossed over its qualities in his herbal works and concluded ā€œI dare write no more of it.ā€ Today, we appreciate basil for its anti-inflammatory properties, its poison combating abilities and its antibiotic qualities. Cultivation of Basil Basil is usually grown from seed, which requires some patience as it’s a slow growing herb, but the resulting plants are well worth the effort whether you want to use basil in your cooking or for your health.
  • 163.
    Page 162 Learn Herbal 1.Sow in pots indoors all year round, or in a greenhouse in the summer. 2. When you have several seedlings in the same pot, transfer them together to a warm, sunny spot outside, in well-drained soil. 3. Water sparingly. 4. When flower buds appear at the tips of the shoot, nip them off in order to encourage further leaf growth – basil flowers are generally bitter tasting and do not have as many uses as the green leaves. Tips on Growing Basil Basil prefers humus rich soil, and is harmed by over-watering. Pick little and often as soon as the leaves are big enough to use. Sow new plants every month or two to maintain a healthy supply of basil. The most commonly grown variety is ā€œGenoveseā€, but you can also try ā€œBush Basilā€, ā€œAraratā€, ā€œKemangieā€ (also known as lemon basil) and ā€œPurple Rufflesā€, which as the name suggests has ruffled, purple leaves. Medicinal Uses of Basil In common with many herbs, basil has a wide variety of medicinal and healing uses as well as its obvious and well known culinary uses. - Tests have shown that inhaling basil essential oil increases the brain’s production of beta waves, which are the brainwaves produced when you are thinking clearly, analyzing or solving a problem. It seems that basil can help bring clarity of thought when you need it most. Clear your mind
  • 164.
    Page 163 Learn Herbal -Basil contains compounds which can help with healing many skin conditions. Try putting a fresh basil leaf over a wart and holding it in place with waterproof tape. Over the course of a week or so you should notice a significant improvement (and you’ll smell ā€œinterestingā€ too)! Get rid of that wart - Crushed basil leaves can help relieve the pain and swelling caused by bee stings, wasp stings, insect bites and minor snake bites, helping to draw the venom out of the wound. Anti-venom magic - Chewing fresh basil leaves seems to help to relieve stress and induce a state of calm – simply chew 8-10 leaves up to twice a day to see basil’s stress reducing properties in action. Stay calm under pressure Sipping water in which basil leaves have been boiled can help soothe many minor stomach complaints, including indigestion; as an added bonus, this will also relieve a sore throat and help to bring down a fever in colds or flu. Soothe indigestion and stomach ache - DIY Homemade Basil Remedies & Solutions Basil Poultice Try this easy to make basil poultice on insect bites and stings, minor skin wounds, grazes or acne. Leave the poultice in place for a few hours, and re- apply daily for up to a week to see significant improvement and reduction in swelling and itching. You will need:
  • 165.
    Page 164 Learn Herbal Ahandful of fresh, green basil leaves Rolling pin Clean cotton or lint free cloth Cling film or similar wrap How to make a basil poultice: 1. Cut the cotton or lint free cloth to a size which is big enough to wrap around or cover the affected area. 2. Trim away any excess large pieces of basil stalk. 3. Crush the leaves and small stalks with a rolling pin to release the juices. 4. Apply the mush directly to the skin, providing a good coverage of the area in question. 5. Cover with cotton or lint free cloth. 6. Wrap cling film over and around the poultice package where possible, to secure it to the body. You can also make a poultice with dried basil, although its effects won’t be as potent: 1. Grind or crush the dried herbs into a powder with a pestle and mortar or a rolling pin, and transfer them to a small bowl. 2. Add just enough water, a little at a time, to make a thick paste, sufficient to cover the area of skin affected. 3. Spread this paste onto your piece of cloth, and bind to the body as before. Use hot water if you’d prefer a warm poultice, or use a hot water bottle to provide extra heat to the area while the poultice is in use. Basil Insect Repellent
  • 166.
    Page 165 Learn Herbal Basilis well known for its insect repellent properties, and it’s very easy to harness these qualities into a homemade spray. Shop-bought insect repellents can be expensive and some irritate sensitive skin – with this homemade basil version,you can keep insects at bay without worrying about cost or adverse side effects. You will need: Fresh basil leaves or basil essential oil Water, if using fresh leaves Vodka or rubbing alcohol or witch hazel A spray bottle How to make basil insect repellent using fresh basil leaves: 1. Steep 4 ounces of fresh basil leaves in 4 fluid ounces of boiling water for several hours. 2. Strain the cooled liquid into a spray bottle. 3. Add 4 fluid ounces of either vodka, rubbing alcohol or witch hazel to the spray bottle. 4. Shake gently to mix. 5. Spray directly onto your skin or clothes, but avoid your eyes. How to make basil insect repellent using basil essential oil: 1. Add one part basil essential oil to ten parts vodka, rubbing alcohol or witch hazel. 2. Decant into spray bottle and shake gently to mix. 3. Spray directly onto your skin or clothes, but avoid your eyes. Basil Facial Steam
  • 167.
    Page 166 Learn Herbal Facialsteams are very helpful for both health and beauty – if you have a headache, a blocked nose or a sore throat, the steam helps to restore lost moisture and speeds up healing and pain relief. In terms of beauty, steam opens your pores and acts as a deep cleanser. Basil has antibacterial properties which make it especially suitable for facial steams, so this is an excellent and cost effective way to promote healthy skin as well as to keep your sinuses and throat clear. You will need: Handful of fresh basil leaves Water Bowl Large towel Hair band, if you have long hair How to make a basil facial steam: 1. Add a handful of fresh basil leaves to a saucepan of water and heat. 2. While the water is heating, tie back your hair and ensure you have somewhere to sit and somewhere safe and sturdy to put the bowl of steaming water. 3. When the water is steaming, pour it into a strong bowl. 4. Sit over the bowl and use the towel over your head to create a ā€œtentā€. 5. Relax, and inhale the basil infused steam for 3-5 minutes. You can leave your eyes open or closed, as you prefer. 6. When time is up, dispose of the hot water safely, and then splash your face with cold water to close the pores again and to refresh yourself.
  • 168.
    Page 167 Learn Herbal We’vecome a long way since medieval concerns that basil was a dangerous herb. It’s now one of our best loved herbs in the kitchen and in the household, and its many medicinal and health properties are only just beginning to be explored. By growing your own basil plants at home, you can enjoy the full range of this amazing plant’s properties – and you’ll never be short of ingredients for a pasta sauce either! CAYENNE PEPPER Cayenne peppers are part of the capsicum family and are closely related to other kinds of hot chili pepper. Since ancient times, it has been observed that hot and spicy foods increase the body’s metabolism and that heat, in this sense, generates heat. During the Spanish conquest of Latin America, it is said that priests were horrified by the widespread popularity of cayenne pepper and other peppers, considering them aphrodisiacs which were ā€œas hot as hell’s brimstone.ā€ Today,however, cayenne pepper has a wide range of medicinal uses, and can be both taken internally and used externally to treat many ailments and conditions. Cultivation of Cayenne Pepper
  • 169.
    Page 168 Learn Herbal Thenative climate for these chili peppers is hot and dry – this makes cayenne peppers a challenge to grow in colder climates, but it also means that they thrive under conditions of ā€œbenign neglectā€ and won’t suffer from a lack of watering. To grow cayenne pepper from seed, plan to sow the seeds about six weeks before planting outdoors. If you’re not blessed with lots of warmth where you live, consider planting cayenne pepper in pots which can be brought indoors or taken outdoors depending on the weather. 1. Sow indoors and allow seeds to sprout in a sunny spot or in a greenhouse. 2. Transfer seedlings to individual pots, but keep indoors for at least a further month to give the young plants a good start. 3. When there is no danger of frost, transfer to the plants to the garden, or to larger movable pots. Keep your plants at least 18 inches apart, with plenty of sun. 4. Cayenne pepper is ready for harvesting when the peppers are bright red and detach easily from the plant – typically around 70 days from outdoor planting. Tips on Growing Cayenne Pepper 1. Cayenne peppers prefer well fertilized, moist soil, without too much nitrogen. 2. Don’t plant too many – one plant can produce well over 50 peppers, so if you plant lots, you’ll end up with a lot of surplus peppers. 3. Cutting the peppers off the plant when you harvest causes less damage than twisting them off, but either way, support the fragile plant as you harvest.
  • 170.
    Page 169 Learn Herbal MedicinalUses of Cayenne Pepper In common with many herbs, basil has a wide variety of medicinal and healing uses as well as its obvious and well known culinary uses. Eating food flavored with cayenne pepper will help to thin the mucus in your lungs when you have bronchitis or a chesty cough – this helps you to cough more productively and to clear your chest and your airways faster. Get mucus moving - Think of it as fighting fire with fire – when you eat cayenne pepper and you have a fever, the fiery ingredient capsaicin will help to make you sweat. How does getting hot help reduce a fever? Well, although you’ll feel hotter, cayenne does not actually increase temperature; the burning sensation is a false message to your brain. It interprets this message and makes you sweat to cool down – thereby reducing your internal body temperature and helping to reduce fever. Reduce a fever - Add a tiny amount of water to some cayenne pepper powder to make a paste, and then use a small piece of cotton dipped in this paste on a tooth which is causing you pain. This is one for the brave only, as if the pad slips off your tooth you’ll get the full blast of cayenne pepper flavor, but it’s surprisingly effective at reducing or at least disguising tooth pain. Soothe toothache - A traditional folk remedy for cold feet is to add chopped or powdered cayenne peppers to your socks! The fiery ingredient of cayenne does draw blood to any area it contacts, to this does have a basis in fact – indeed, cayenne pepper has even been used to treat frostbite! Warm up those feet -
  • 171.
    Page 170 Learn Herbal HomemadeCayenne Pepper Remedies and Solutions Cayenne Pepper Cough Mixture If you have a wet, productive, mucus-y cough, a cough syrup made with cayenne pepper could help. Capsaicin will boost blood circulation, helping to speed the healing process, as well as making it easier for you to cough up the mucus. However,too much cayenne pepper can irritate the stomach, and has also been shown to reduce the effects of aspirin and ACE inhibitors, so don’t try this without asking your doctor first if you’re taking these kinds of medication. You will need: Cayenne pepper Lemon juice Honey Water How to make cayenne pepper cough mixture: 1. Boil a cup of water and allow to cool sufficiently for you to drink it. 2. Add one tablespoon of honey to the water, plus two tablespoons of lemon juice. 3. Mix thoroughly. 4. Add a pinch of cayenne pepper, and mix thoroughly again. 5. Drink immediately, and repeat as required.
  • 172.
    Page 171 Learn Herbal Thismixture should help to ease your cough and will also soothe the soreness in your throat caused by the coughing. Honey is a natural soother and will coat your throat, while lemon helps to reduce inflammation – combined with the cayenne pepper, this honey and lemon concoction is a strong ally in your fight against a cough. Cayenne Pepper Nasal Irrigation Solution Nasal irrigation is well known to be beneficial in keeping your nasal cavities clear and in reducing harmful mucus build-up. Adding a tiny amount of cayenne pepper to a nasal irrigation solution can be of benefit to those who suffer with sinusitis,but as with all cayenne pepper uses, be cautious in how much you use – too much and you will experience burning discomfort. Start with adding the cayenne to the solution for just a few seconds, and work up to a longer time/stronger solution gradually if you feel you can tolerate it. You will need: A neti or other nasal irrigation pot Boiled water cooled to tepid ½ teaspoon crushed cayenne pepper ½ teaspoon baking soda 1 teaspoon salt An infuser or small muslin cloth How to make cayenne pepper nasal irrigation solution:
  • 173.
    Page 172 Learn Herbal 1.Place the crushed cayenne pepper into the tea infuser or muslin bag and shake well to ensure that no pepper comes out loose. 2. Dissolve the baking soda and salt into two cups of tepid water, and shake well. 3. Add the infuser or muslin bag to the tepid water for five seconds and remove. 4. Shake again; the water should now have a pale pink tinge. 5. Use this solution according to the instructions with your nasal irrigator. Cayenne Pepper Tincture for Relief of Joint Pain Capsaicin acts on nerve endings, causing them to release a particular chemical known as substance P; substance P’s job is to transmit pain signals the brain. When cayenne pepper is applied to the skin, it effectively ā€œfoolsā€ the nerves into releasing a rush of substance P , which you experience as a feeling of heat. Once the nerves have used up their substance P in this way, they will not transmit any more pain signals for a while – this is why cayenne pepper can be an effective pain relief treatment for chronic joint pain, including arthritis. You will need: 1 tablespoon crushed cayenne pepper 1 pint cider vinegar Bottle with a tight fitting lid How to make cayenne pepper tincture for relief of joint pain:
  • 174.
    Page 173 Learn Herbal 1.Gently boil the cayenne pepper in the cider vinegar. 2. Bottle without straining, while still hot. 3. Apply regularly, directly to the affected joints. With so many healing and health-promoting properties, it’s no wonder that cayenne pepper is so widely used in home remedies. Whether you enjoy the taste of this red hot spice or not, putting it to use in your home is an excellent way of enjoying its anti-inflammatory, metabolism boosting, pain relieving properties. It’s even said that regularly eating cayenne pepper can help with weight loss – what a wonder-spice it truly is! CINNAMON
  • 175.
    Page 174 Learn Herbal Cinnamonis a spice with a rich and fascinating history. From the ancient Egyptians, who used it during the embalming process which produced mummies, to the ancient Chinese, who valued it more than gold, this sweet smelling spice has been traded, fought over and used for myriad purposes for thousands of years. It was among the most valuable of the spices which fueled the spice trade of the 17th century, and many myths were told by traders to hide and protect its true origins. Buying and Keeping Cinnamon Cinnamon is the inner bark of one of several trees in the Cinnamomum genus; as such it is extremely difficult to cultivate at home, and most of us must buy the cinnamon we use. Nearly 80% of the world’s cinnamon now comes from Sri Lanka. Ceylon cinnamon, sometimes also called ā€œtrue cinnamonā€ is usually only available from specialty stores. This type of cinnamon is more expensive than others, and has a milder taste with a citrus-y tang. The most commonly available type of cinnamon is cassia cinnamon, from cassia trees. Cassia cinnamon varies enormously in quality, so if you want the best you need to ensure that you’re buying premium quality spice. A good way to check is to look for a volatile oil content of at least 2%. Whether you buy cinnamon quills or ground cinnamon depends on your preferred uses of the spice, but you might want to buy some of each. Ground cinnamon will keep well for about six months in a cool, dark cupboard. Store cinnamon quills in an airtight jar away from direct sunlight, or even in the fridge – quills will stay fresh for around a year under the right conditions, although some preserved quills are hundreds of years old!
  • 176.
    Page 175 Learn Herbal MedicinalUses of Cinnamon Cinnamon’s many medicinal uses elevate it into the realm of a ā€œsuperfoodā€, but it’s important to note that pregnant women should not consume too much cinnamon. The normal amount of cinnamon consumed when used as a food is fine, but cinnamon supplements or extra usage of any kind during pregnancy should be avoided in case the spice stimulates contractions. Research and medical studies have shown that cinnamon can play a positive role in stabilizing and lowering blood sugar levels, because it slows down the rate at which the stomach empties. Eating cinnamon can therefore help people suffering from diabetes, when combined with medical treatment. Keep your blood sugar under control - Cinnamon smells lovely, so it’s quite rational that we might use it to mask bad odors. It also has antibacterial properties, so it’s the perfect spice to use to help combat halitosis. Get rid of bad breath - Those same antibacterial properties can be a great help against fungal infections, including candida, ringworm and athlete’s foot. Hang some crushed cinnamon in a muslin bag and run your bath water through it – you’ll not only smell great, but you’ll feel better too. Fight fungal infections - - Cinnamon tea is a popular ayurvedic medicine for heartburn. Simply add a teaspoon of crushed or powdered cinnamon to a cup of hot water, leave to steep for a few moments, strain and drink. Douse the flames of heartburn
  • 177.
    Page 176 Learn Herbal Havingtrouble sleeping? Cinnamon has mild sedative properties, so adding some to a glass of warm milk before bedtime can help relax you and combat insomnia, particularly during times of stress. Sweeten your bedtime - DIY Homemade Cinnamon Remedies and Solutions Cinnamon Antibacterial Spray This sweet-smelling spray is perfect as a mouthwash spritzer, or to spray on your feet to prevent foot odor and help combat fungal infections. Use as required. If you make several batches, you can decant some into a different, larger bottle and use it as a homemade antibacterial surface cleaner too – perfect for quick spray clean ups in the kitchen or bathroom. You will need: 8 cinnamon sticks 4 cups water A small spray bottle or similar container How to make cinnamon antibacterial spray: 1. Break up the cinnamon sticks and add to a saucepan. 2. Add the water, and bring to the boil. 3. Simmer for around five minutes. 4. Take off the heat and leave to steep for 45 minutes. 5. Strain, and decant into bottles as required.
  • 178.
    Page 177 Learn Herbal Forvaginal thrush infections, this solution can be used lukewarm as a daily douche until the infection is cleared, but do not use for more than one week and stop immediately if you are in discomfort or if the symptoms get worse. Easy Cinnamon Tea This delicious cinnamon tea is very easy to make, and can be enjoyed just for the taste - but it’s also a useful sleep tonic and could help keep blood sugar levels under control. You will need: Two cups of water One or two cinnamon sticks A regular tea bag Brown sugar or honey to taste Milk to taste How to Make Cinnamon Tea: 1. Add one or two cinnamon sticks to two cups of water in a saucepan. 2. Bring to the boil and simmer gently for about 20 minutes. 3. Add the regular tea bag and steep for a few minutes. 4. Remove the cinnamon sticks and stir in a teaspoon or two of honey or brown sugar – as much as you would normally add to your regular tea or coffee. 5. Pour into your cup and add milk to taste.
  • 179.
    Page 178 Learn Herbal Thisis for one person; if you’re making cinnamon tea for your family or for more people, allow two extra cups of water per person and one cinnamon stick per person. If you don’t like regular tea, you can omit the tea bag – it’s a matter of taste and preference. Children tend to love this tea as it’s sweet and satisfying, and quite creamy too depending on the milk you choose to use. Cinnamon Hair Refresher Hair easily becomes clogged with the chemical residues of gel, shampoos and conditioners, losing its tone and shine. Cinnamon, with its natural cleansing properties, can be an effective way of removing build up and allowing your hair to breathe. You will need: 1 tablespoon ground cinnamon 1 tablespoon bicarbonate of soda How to make cinnamon hair refresher: 1. Mix the ground cinnamon and the bicarbonate of soda together in a small dish or bowl. 2. Pick up the powder in pinches while you’re shampooing your hair as normal, and massage into your scalp. 3. Rinse thoroughly. As well as washing away chemicals from your hair, the powder will help to remove impurities. Cinnamon has hair lightening qualities, so you may notice a very slight change in your hair tone after use. Repeat the hair refreshing treatment once a week for best results.
  • 180.
    Page 179 Learn Herbal Ancientpeople were clearly onto something good when they realized the many and varied uses of cinnamon. For many of us, the smell of cinnamon conjures up memories of comfort baking, and particularly of Christmas, but careful use of this versatile spice can enhance our lives throughout the year. From cooking to cleaning and from hair care to skin care to infection fighting power, cinnamon has so much more to offer us than its delightful taste and aroma. GARLIC
  • 181.
    Page 180 Learn Herbal Wherewould we be without garlic? From keeping vampires at bay to keeping over-eager suitors at bay, garlic has long been prized for its pungent aroma, unique taste and huge variety of medicinal and health- giving properties. Hippocrates wrote of garlic that it could be used against parasites, to regulate the digestion, to combat respiratory problems and to boost low energy – these days, we can add to that list, with claims that garlic can help prevent heart disease, lower blood pressure and even prevent cancer. More than 10,000 pharmacological studies have been carried out into the properties of garlic, and the results seem to indicate that it’s among the most versatile, powerful and useful of all kitchen- garden remedies. Cultivation of Garlic Garlic as we commonly know it is a species in the onion genus, closely related to onions, shallots, leeks and chives. It’s a hardy plant, and relatively easy to grow in any garden. 1. Plant whole cloves, ideally in late autumn. 2. When planting, push the cloves into the soil until the tip is about an inch below the surface, and space the cloves around 6 inches apart. 3. Water regularly. 4. From early summer, the plants can be harvested as ā€œwet garlicā€ – this is when the plants are still leafy but there are reasonable sized heads underground. 5. Harvest the rest when the foliage starts to dry out in late summer. When it has dried out, dig up the bulbs and allow them to dry on the ground in the sun. Tips on Growing Garlic
  • 182.
    Page 181 Learn Herbal A5ft row of planted cloves will yield around 10 bulbs of garlic. If affected with rust disease (red spots on the foliage), destroy the affected plants and don’t grow onions or garlic in that spot again for several years, to give the nitrogen levels a chance to even out. Dry harvested garlic bulbs well and store indoors rather than in a shed – storing in a colder temperature may kick start the growing process. Treat ā€œwet garlicā€ like a fresh vegetable and use immediately. Medicinal Uses of Garlic Note that garlic allergies, although rare, do exist – if you are not certain whether or not you are allergic, you should always do a skin test patch before using garlic in direct application to the skin. Tests have shown that eating garlic daily can reduce your cholesterol level by between 9 and 12 percent. One or two raw or lightly cooked cloves a day are sufficient to reap the benefits; if you don’t want bad breath after eating garlic, chew some parsley leaves to help get rid of the odor. Lower your cholesterol - Raw, crushed garlic is a highly effective antibiotic and antiseptic – so much so, in fact, that battlefield medics used it during both world wars to help prevent infections at the front line. Applying raw garlic to a cut may sting for a short while, but in an emergency can make the difference between an infection developing or not. Treat wounds, cuts, grazes and scrapes -
  • 183.
    Page 182 Learn Herbal Somebreastfeeding mums like to avoid garlic, as it does pass into breast milk and can affect the flavor – however, some studies have shown that babies prefer the garlicky taste and will stay at the breast for longer if their mothers have recently eaten garlic, thereby helping with fussy feeders. Breastfeeding support - Hold a raw garlic clove in your mouth and breathe the fumes into your throat and lungs. Garlic’s active compounds include allicin and allin, which have been shown in test tube studies to kill a wide variety of nasties. Alternatively, chop a clove into tiny pieces and swallow quickly with a glass of water. Nip a cold in the bud - Eat lots of garlic before you go on a camping trip. The odor is known to come through in sweat, and insects are repelled by it. Keep biting insects away - DIY Homemade Garlic Remedies and Solutions Antibacterial Garlic Ear Drops Earaches can be excruciating, but garlic can help to soothe an ear infection before it takes hold. Try these easy to make garlic ear drops, and attack the problem from the inside too by eating plenty of garlic in your meals. You will need: A clove of garlic A few teaspoons of olive oil A small glass An ear dropper Cotton wool
  • 184.
    Page 183 Learn Herbal Howto make antibacterial garlic ear drops: 1. Squeeze a clove of garlic to extract the juice. 2. Put the olive oil into the glass and gently warm with your hands for a few moments. 3. Add the garlic juice to the olive oil and mix well. 4. Using the ear dropper, drop a few drops of the mixture into your ear, with your ear facing upwards. 5. Keep your head tilted for a couple of minutes, then straighten your head again and let the oil drain into the cotton wool. 6. Repeat daily until symptoms ease, but if symptoms do not improve or get worse, consult your doctor. Garlic Acne-Busting Face Mask Garlic’s antibacterial, anti-inflammatory and antiseptic qualities make it the perfect ingredient for an acne fighting face mask. This easy to make mask smells delicious and will do wonders to help clear up troublesome skin, reaching right down into the pores. For best results, use every other day to clear an acne breakout, and weekly thereafter to help keep skin in great condition. You will need: 2 cloves of garlic 1 teaspoon honey 4 drops tea tree essential oil 1 teaspoon cornmeal How to make garlic acne-busting face mask:
  • 185.
    Page 184 Learn Herbal 1.Chop the cloves of garlic into tiny pieces. 2. Put the garlic, honey and tea tree oil into a blender and blend thoroughly. 3. Stir the blended mixture into the cornmeal. 4. Apply evenly onto the face and leave for 15 minutes. 5. Rinse off. 6. Splash your skin with cold water to close the pores. Garlic Tea As you can imagine, garlic tea can be an acquired taste! However, this easy to make tea is useful for a whole host of conditions and ailments, from coughs, colds and flu to digestion problems, stress and all round fatigue. You will need: 6 cloves of garlic A lemon 1 teaspoon grated raw ginger 5 cups boiled water How to make garlic tea:
  • 186.
    Page 185 Learn Herbal 1.Boil the water. 2. While the water is heating, crush the garlic clove and grate the ginger. 3. Squeeze the lemon, extracting as much juice as possible. 4. Remove the water from the heat, and all the garlic, lemon juice and grated ginger. 5. Leave the tea to steep for half an hour. 6. Strain the tea, reserving only the liquid. 7. Drink all five cups within 24 hours for maximum effect – either drink it cold (it’s surprisingly good chilled) or reheat gently for a few moments. As we’ve seen, garlic can be a tremendously useful addition to your medicine chest, whether you eat it, brew it, mash it up and apply it or work any other kind of garlicky magic with it. It should be noted, though, that garlic has been shown to interact with warfarin and antiplatelet medication, so if you are taking this kind of medication, do not exceed the normal culinary amount of garlic without taking medical advice first. LAVENDER
  • 187.
    Page 186 Learn Herbal Lavenderengulfs one’s senses with delight and pleasure – beautiful flowers in purple, lilac, white, pink or mauve shades featuring a sweet and soothing herbaceous aroma. Lavender plants are definitely a lovely sight to behold and a relaxing scent to smell after a stressful day! Lavender (Lavandula), is a flowering plant cultivated for its use as a flavoring herb, medicinal herb, ornamental plant for landscaping and gardening and for the extraction of oils used widely in bath soaps, perfumes, cosmetics, body lotions, salves, and topical ointments. Cultivation of Lavender With its relevance in both health and aesthetics, lavenders are widely cultivated. Lavenders can be propagated from cuttings and seeds although many gardeners prefer cuttings.
  • 188.
    Page 187 Learn Herbal 1.Take lavender cuttings by snipping off 7.5-10 cm. (3-4 inches) stem from healthy but non-flowering lavender shoots. Remove around two- thirds of the leaves and dip the tip in a rooting solution. Plant the cuttings 2 inches deep in a pot filled with damp sand. 2. Place the pot indoors in a sunny spot and water it to keep the roots slightly damp. Reduce watering upon observing growth of some leaves and roots. 3. You can now place the pot outdoors after one month when it already have enough roots to easily survive outside. Tips on Growing Lavender Lavender thrives well in sandy or gravelly well-drained soils. Lavenders love dry conditions and thus it is best to put them in a sunny spot. Do not overwater the plants to avoid root rotting. Prune the lavender plants during late summer. Harvest lavender when the flowers are just opening because it is during this stage that they are at their peak in aroma and colors. Medicinal Uses of Lavender Lavender is recognized not just because of its beauty but also with its healing properties. Got some big eye bags because of sleeplessness? Combat insomnia by drinking lavender tea! Lavender is known to be a tonic which can help in getting a better and more refreshing sleep. Sleep better with lavender -
  • 189.
    Page 188 Learn Herbal -After a long stressful and exhausting day, lavender can help you feel calmer and more relaxed through its soothing effect helping you combat anxiety, agitation and stress. Relax and take it easy - Suffering from wounds, sores or cuts? Lavender can help heal these and additionally avoid infections through its anti-inflammatory and antiseptic properties. Lavender: A Miracle Wash - Are you in pain? Lavender can help relieve headaches/migraines, joint and nerve pains, toothaches and sprains. Pain, pain – Go away - Get a healthier and dandruff-free hair with lavender! Lavender used as a hair rinse can help reduce hair loss and get rid of nasty dandruff. Lavender for your crowning glory DIY Homemade Lavender Solutions Here are some easy lavender solutions which you could do yourself in the comfort of your home. Through these, you’ll be able to save some money while increasing your knowledge and skills! Lavender Tea For an upset stomach or for soothing away your worries, irritation, stress or exhaustion, making lavender tea is as easy as 1-2-3! Relax your day away with these easy steps in making your very own lavender tea! What you will need:
  • 190.
    Page 189 Learn Herbal 1½ tbsp. of dried lavender blossoms or 3 tbsp. of fresh lavender flowers Hot water Honey and lemon (optional) Strainer Tea pot Tea cups Instructions in making your lavender tea: 1. Put hot water to the tea pot and add your lavender blossoms. 2. Let it boil and then remove tea pot from heat. 3. Steep for 3-5 minutes. 4. Strain the flower buds if necessary. 5. Serve tea with honey and sliced lemon if preferred. ** Lavender tea can be served hot or iced. Just add some ice cubes and voila – it’s an iced lavender tea for you! Lavender Oil Lavender oil is one of the most favored essential oils. With its relaxing scent and functionality as massaging oil, addition for a refreshing dip in the bathtub, healing of wounds, cuts or burns as well as reduction of congestion and easing away of sinusitis – there’s no wonder that lavender oil is one of the most commonly used oils. What you will need:
  • 191.
    Page 190 Learn Herbal Lavenderflowers Carrier Oil (Ideally, an oil with a mild scent and fair color e.g. Olive oil, Almond oil, Jojoba oil) Fine mesh strainer or alternatively, a piece of cheesecloth A dark bottle or jar Instructions in making your lavender oil: 1. Pour your selected carrier oil in the jar or bottle with a tight-fitting lid. 2. Place the lavender flowers into the jar and stir it together with the oil. 3. Cover the jar tightly and let it steep for 48 hours or more (depending on the strength of aroma you prefer) in a sunny or warm spot. 4. Use the strainer to separate the flowers from the oil. Use a spoon against the strainer to squeeze away more essence from the flowers. You can also use a piece of cheesecloth to strain away the flowers from the oil and effectively squeeze away the oil from the flowers. 5. Pour the oil in the dark bottle or jar. If kept in a cool and dry place or if refrigerated, your lavender oil can last for around six months. Lavender Lotion Lotions are essential in moisturizing the skin and they cost some money too. Well, making your homemade version of a lavender lotion could prove to cost lesser than ones bought from the store. With a little effort and patience in making your own lotion, you’d surely save a lot! And with a plus, you’ll be able to use your imagination and decide what ingredients or materials you’ll be using! Here’s a suggested recipe for your own lavender body lotion: What you will need:
  • 192.
    Page 191 Learn Herbal Lavenderessential oil 1 cup of oil (can be a mixture of ¾ cup of almond oil and ¼ cup of jojoba oil) ¾ cup rose water 1/3 cup aloe vera gel 1 tsp. lanolin 2 tbsp. grated beeswax Grapefruit seed extract Mason Jar Double Boiler Blender Silicone spoon Rubber Spatula Instructions in making your lavender lotion: 1. Combine the oil solution with the lanolin and beeswax in the double boiler and allow the combination to melt together on low heat. Use the spoon for stirring. 2. When completely melted together, set it aside and let it cool. 3. Mix the aloe vera gel, rose water and 30 drops of lavender oil together then pour it into the blender and turn it on. 4. Slowly pour the oil and beeswax mixture in the blender to combine the ingredients completely. 5. Put some grapefruit tree extract to better preserve the mixture and then blend. 6. Finally, put the lotion in the mason jar.
  • 193.
    Page 192 Learn Herbal Withits beauty, fragrance and importance in medicine, culinary and even in commercial beauty and personal products – Lavender has always been recognized as a wonder herb! Cultivate your own lavender plants now and enjoy its wonderful benefits! LEMON BALM The lemon balm (Melissa officinalis) is actually a member of the mint family. This is an herb that is touted for its calming effects. The lemon balm, with its delicately aromatic lemony smell and its soothing flavor, has graced some of the most fabulous fragrant teas ever made. Like other delicious mints, the lemon balm too has its lineage in the shrouds of medieval Europe.
  • 194.
    Page 193 Learn Herbal Thelemon balm has been used for ages as a nerve soothing aromatic miracle. As a matter of fact, its use in the field of calming the hot headed, stressful people dates back to even before the medieval ages in Europe! It has been drank in teas, added to wines, and used in recipes with the goal of achieving mental calm through the delicate taste and fragrant flavor. Today, the tincture of lemon balm and its essential oil are wildly popular, and act as a relief for the modern day workers exposed to stressful jobs. Cultivation of Lemon Balm Lemon balm, like other members of the mint family, is a hardy plant that can handle tough conditions, such as a bit of shade and little soil nutrients. Thus, not a particular lot of care is needed to grow this useful herb. However, growing lemon balm with dedication and care is bound to give you a lot of healthy, great flavored lemon balm leaves.
  • 195.
    Page 194 Learn Herbal 1.A well tilled garden bed is recommended, as with any other gardening venture. Make sure there are no stones, and the turned over soil is loose for reception of the lemon balm. 2. Lemon balm prefers growing in soil that has plenty of moisture but is well drained. So remember not to pack your garden bed soil. 3. The recommended pH for growing lemon balm is from 6 to 7. If the pH is higher, use an alkali such as calcium. 4. Since lemon balm leaves are picked a lot, a good fertilizer will ensure optimal growth. You can use organic compost for maximum results. Simply dig a deep trench in the bed, lay down a layer of the fertilizer, and cover that up with a good few inches of soil. Then plant your lemon balm in the soil. 5. Lemon grass is best grown from a cutting or sapling. Simply transfer saplings to the ready bed. Tips on Growing Lemon Balm Your lemon balm shrub should be regularly trimmed for best results. During periods of drought or other hard times, simply cut down the shrub to a small size. This will significantly decrease pressure on the plant, and it will grow back all healthy in more opportune times. Dry lemon balm leaves are flavorless at worst. Young leaves have the best flavor. This makes lemon balm more or less a seasonal treat. Enjoy the great flavor in periods of new leaf growth in spring. Protect lemon balm from frosts - Lemon balm flowers are not particularly effective, but they do spread around seeds. To prevent your lemongrass from repopulating, you should use mulch around the ground near your lemon balm plant.
  • 196.
    Page 195 Learn Herbal MedicinalUses of Lemon Balm Lemon balm has reputed medicinal use since ancient times. It has often been used as a tonic for bad moods and stress. The simple, yet fragrant flavor of lemon balm is a great source of relaxation. Stress relief is crucial for good health, and the accumulation of stress causes many health complications. The use of lemon balm is therefore quite effective towards achieving good health. Furthermore, the antioxidants in lemon grass boosts good health, and can be used to treat herpes sores and indigestion. A gentle, lukewarm tea of lemon balm, together with other soothing flavored herbs such as chamomile and vanilla, can be an effective reliever of stress problems. Bust your stress - Viruses that cause cold sores have been shown to be combated by lemon balm. Although scabbing and scarring is not much helped, herpes cold sores have been shown to reduce in redness upon topical application of lemon balm cream. Treat herpes sores - In the laboratory, lemon balm has been seen to combat some indigestion causing bacteria. This means that the lemon balm, together with some other effective herbs, can be used to combat indigestion. Treat indigestion - Take the sting away from a bee or wasp sting using an ointment cream made from lemon balm extracts. Treat insect bites -
  • 197.
    Page 196 Learn Herbal Asoothing tea of lemon balm, with its fragrant lemon smell, can easily remove stress induced headaches. Get rid of your headache - DIY Homemade Lemon Balm Solutions Lemon Balm Wine This invigorating and refreshing summer wine can really lighten up your mood and open up the summer festivities. The unique flavor is thoroughly enjoyable and is bound to draw compliments. Serve it chilled to capture the very essence of summer. It is low in alcohol content. What you need: 2 quarts of lemon balm leaves 1 pound sultanas The juice and the rind of two large oranges The juice and the rind on one large lemon 5 cups of sugar 1 teaspoon of tartaric acid 1 teaspoon of pectic enzyme Campden tablet Brewer’s yeast Instructions for Making Lemon Balm Wine
  • 198.
    Page 197 Learn Herbal 1.Wash the lemon balm thoroughly in cold water. Remove the leaves from the stalks, and discard the stalks. Wash the leaves again. 2. Fill a saucepan with water and bring to boil. 3. Put the lemon balm leaves in a container and fill with boiling water. 4. Add a campden tablet to the water and dissolve. 5. Cover up the container and leave for 48 hours 6. Strain the lemon balm off after 48 hours 7. Add to the remaining liquid the orange pulp, the finely chopped rinds, the lemon juice and the lemon rind (finely chopped), the sultanas, the acids and the enzyme, and the yeast. 8. Ferment the mixture for about 4 days in a dry, cool place 9. Filter off the solution and add the sugar and top off with water to make about 1 gallon. Now pour into a demijohn and ferment again. 10. Bottle up the wine when optimal alcoholic level has been reached. Make sure to use strong bottles. Lemon Balm Tea The tea of lemon balm, with its refreshing properties, is an excellent way to end a stressful, tiring day of hard work. Breathe in the lemony scent of this delicious, well-loved tea, sink in the lemony goodness, and forget all your woes and worries. What you need: Half a cup of lemon balm leaves Two cups of water Honey Instructions:
  • 199.
    Page 198 Learn Herbal 1.Heat the two cups of water in a kettle. 2. Shred the lemon balm leaves. 3. Place the lemon balm leaves in a stainless steel mesh tea ball. 4. Put the ball in hot (not boiling) water and steep for a few minutes. 5. Add honey to the tea as per taste. Enjoy. There is not much really left to say about lemon balm. Its lemony flavor and its hardy nature in the garden is enough to make any gardener fall in love. As a herb, it is outstanding – the flavor is strong enough to make its presence known,yet not overbearing. It is really the perfect herb. It has been used to bust stress since before stress became widely known and understood – and this goes to show how effective lemon balm really is in relieving stress symptoms. So add this incredible herb to your garden and your cooking today, and just watch your mood elevate! LIQUORICE
  • 200.
    Page 199 Learn Herbal Liquorice(Glycyrrhiza glabra) is a flowering perennial plant with purple and white flowers. It is native to the Mediterranean, and South and Central Asia. The most helpful part of this plant is the sweet tasting taproot that can grow up to four feet deep. This gray taproot (yellow on the inside) has been the feature of prescriptions since ancient times.
  • 201.
    Page 200 Learn Herbal Hippocrates,the man who defined modern day medical practice in Ancient Greece, named the root of the plant ā€˜glukos riza’; the ā€˜sweet root’ - which is a clear indication of how sweet and pleasant tasting the root is. Ayurvedic treatment has long prescribed this herb for the effective treatment of upper respiratory tract problems. But that is not the only use of this herb. Liquorice contains a blend of compounds which makes it a useful treatment for many different maladies,including ulcers, colds, and even as a mild laxative. However, it is important not be liberal with the use of Liquorice. It can cause potassium deficiency and an increase in blood pressure, and high blood pressure patients, along with diabetics, should avoid Liquorice. Cultivation of Liquorice Liquorice is a very popular plant these days, and it should not be too difficult to obtain a few seeds of the plant from the nearest nursery. The important thing to remember is that Liquorice growing requires a bit of patience – it takes about three to four years for the roots to grow long enough to be harvested.
  • 202.
    Page 201 Learn Herbal 1.Use a nail file to file off a little section of the husk of each seed. 2. Soak the seeds in water for about 24 hours. 3. Transfer the seeds into separate, sturdy 4 inch pots that can accommodate watering. 4. Sprinkle about 1/4 inch of soil on the seeds. Give the seeds 8 to 10 hours of sunlight, and water regularly. Germination can take from a week to two weeks. 5. When the seedlings are sturdy enough, transfer to a bed. The bed must be turned over well, with loose soil and no weeds. 6. Dig holes into the soil, about three feet apart that are the same depth as the 4 inch pots, but about twice as wide. 7. Slide the seedlings out of the pot and transfer to the holes. Sprinkle soil in loosely. 8. Water the roots diligently for the first year. After a year of root growth, the plant comes fairly drought resistant. Tips on Growing Liquorice During the seedling stage, it is important to keep the pots well drained. Do not over water or the roots will rot. It may be a good idea to grow separate batches of Liquorice every year, as Liquorice takes 4 years to grow. That way, you can consistently harvest Liquorice every year after four years. Medicinal Uses of Liquorice Liquorice roots are excellent cures for a wide array of health complications. The leaves and stems, too, can be useful. Prescribed since ancient times, it has been touted both through long experience of cure, and by modern scientific research based verification.
  • 203.
    Page 202 Learn Herbal Liquoricecan help with reducing cholesterol by increasing the flow of bile. Liquorice root also contains antioxidants which can significantly increase capillary health and stop arterial plaque from depositing. Cholesterol and cardiovascular health - Liquorice contains anti-inflammatory and anti-spasmodic compounds, and even has mild levels of estrogen-like substances. So Liquorice can be used to relieve PMS symptoms. Relief from menstrual cramps - Liquorice has antibacterial and anti-viral properties. This can help with preventing the return of cold sores from herpes. Relief from herpes- Liquorice helps cool down the stomach acid, relieving gastric troubles. Gastric relief - Liquorice has surprising mood enhancing properties. Researchers believe this is based in Liquorice’s ability to stimulate the adrenal glands. In any case, sipping on a well-made Liquorice tea can well uplift your mood. Depression cure - However, Liquorice users need to be careful not to exceed recommended dosages. Liquorice can increase blood pressure and cause potassium deficiency. Those suffering from high blood pressure and diabetes should stay off Liquorice concoctions. DIY Homemade Liquorice Solutions Liquorice Tea
  • 204.
    Page 203 Learn Herbal Liquoricetea is an excellent cure for colds, sores and fevers. Rich in antioxidants and antibacterial and antiviral compounds, it can really help perk up your health and mood. Liquorice root is sweet as it is, and thus Liquorice tea requires no addition of harmful sugar in order to make it palatable. Here is how you can make a healthy Liquorice tea: Ingredients: Liquorice roots Peppermint leaves or cinnamon (optional) Instructions: 1. Shred the Liquorice roots into coarse, small pieces using a knife, shredder or a blender. You will need about 1 teaspoon of grated root. 2. Boil about a cup of water in a kettle 3. Place the grated Liquorice in a steel tea ball or a mesh infuser. Place it in the hot (not boiling) water and let the root steep. 4. Add peppermint leaves or cinnamon for flavor. You may add other herbs too. You can add these either in the infuser, or just let the leaves into the water. 5. Drink the tea when it is mildly lukewarm. You can drink about three cups a day, but be careful not to over drink, as Liquorice can have some side effects in excess. Liquorice Candy
  • 205.
    Page 204 Learn Herbal Liquoricecandies are a favorite of young and older people alike. It’s a healthy sweet that doesn’t use harmful refined table sugars for the yummy sweetness. These days the commercial ā€œLiquorice candyā€ don’t have actual Liquorice, as excess Liquorice can be harmful to health. So you can make some delicious Liquorice sweets at home, but be careful not to overindulge! Ingredients: Molasses Liquorice roots Anise Flour Instructions 1. Add one cup of molasses to a heating pan. Heat gently for about ten minutes, but do not allow the molasses to bubble. 2. Add one teaspoon of powdered anise and one teaspoon of powdered Liquorice root to the molasses, and stir thoroughly. 3. Add half a cup flour to the molasses mixture. Keep adding with flour until a consistent paste has been formed. About one cup of flour should be required in total. 4. Take the dough out of the pan, and place on a counter top. Cut it out into several pieces, and shape into tube like candies, about half inches thick. 5. Wait until the candy has cooled. It should harden with cooling. Store the hardened candy and enjoy when ready. Liquorice Leaf Salad
  • 206.
    Page 205 Learn Herbal Youcan enjoy Liquorice leaves in fresh produce salads. Although they are not as effective as the Liquorice roots, you can still derive great health benefits from them. Rich in vitamins and minerals, they are a great addition to any diet. You can make a tasty Greek salad from Liquorice leaves. Surprise guests with this delicious culinary adventure, or try it yourself. What you need: Half a bowl of Liquorice leaves Olive oil Vinegar Parmesan cheese Olives Two large tomatoes, diced Instructions: 1. Mix the diced tomatoes with the Liquorice leaves. 2. Apply a liberal dash of olive oil and toss gently. 3. Pour a dash of vinegar for the sour taste and flavor. 4. Sprinkle on about half a cup of finely grated parmesan cheese. 5. Throw in a few olives. 6. Serve in a large salad bowl.
  • 207.
    Page 206 Learn Herbal Sothat is Liquorice – an ancient herb that has deeply rooted itself into health practice rituals with its sweet, tasty taproot. Be sure to try the recipes yourself and experience the powers of this gray root. You know the herb really works when everyone from Hippocrates to modern scientific research claims its benefits and prescribes it. However, Liquorice users should be careful not to exceed recommended dosages. Take a little care, and enjoy the benefits of this great herb! MARSHMALLOW While we all wish the puffy, campfire confectionary has tremendous health effects, it is rather the Marshmallow herb (Althea officinalis) that does. The marshmallow has been featured in prescriptions worldwide since ancient times. It was also quite popular as a food – so widespread was its popularity as a food that the ancient Chinese, Romans, Sumatrans and Egyptians have all been known to use this herb.
  • 208.
    Page 207 Learn Herbal TheArabs have used its leaves in poultices to combat inflammation. The roots and the leaves of this plant contain a sticky substance called mucilage, which can be mixed with water to form a slick gel that can be applied topically on the throat and stomach as a balm. People with chapped skin may also find the gel useful. Although marshmallow has little scientific study to tout its beneficial uses, its long history is certainly food for thought. One recent study has also shown that preparations from marshmallow can help soothe irritated mucous membranes. Other diseases it can help with are cough, asthma, indigestion, ulcers and many more. Cultivation of Marshmallow The marshmallow is a hardy plant that grows in the wild in swamps and marshes (hence the name). With soft, velvety leaves and beautiful pink flowers that bloom all year, the marshmallow is an ideal decorative plant. Unfortunately, although the marshmallow can survive (even thrive) in over watering and other harsh conditions, marshmallows can be a little tricky to germinate. But you should find it easy enough with these steps:
  • 209.
    Page 208 Learn Herbal 1.Mix the seeds with damp sand and place in a plastic bag. Leave at room temperature for 24 hours for the moisture to set in. 2. Place the bag in a refrigerator for about 4 weeks. Give the bag a shake from time to time to see if any seeds have sprouted. 3. If any seed has sprouted, remove it immediately and transfer to a pot with good potting soil. Cover the seed with a sprinkling of the sand from the bag. 4. Keep the pot covered with a plastic cling film. Always attempt to keep the soil as damp as possible, as marshmallows thrive in swampy lands in nature. 5. Keep the pot in a sunny but cool area, such as a windowsill. 6. When the seedlings are starting to sprout, transfer them from the pot to a bed outdoors. To do this, till a garden bed well, and then dig holes about a foot apart. Place the seedlings along with the potting soil from the pot to the hole. 7. Water each plant deeply and frequently for the first year. Tips on Growing Marshmallow Keep in mind the conditions in which marshmallows grow in nature. They favor a swampy land, and you should emulate this in your garden bed by watering very frequently. Marshmallows grow very slowly in their first year, so be patient. After a year, they may grow much faster, and you may have to re-space the plants to avoid overcrowding. Medical Uses of Marshmallow
  • 210.
    Page 209 Learn Herbal Althoughmarshmallow sap has found its most popular use in the famous, well-loved marshmallow candy, the marshmallow itself has been said to have many health benefits. Although few studies have been conducted on the health benefits of its use, it has been used with good effect for centuries in traditional medicinal practices. The success of these treatments can only signify the usefulness of the marshmallow plant in treating health complaints. Here are some of its more widespread uses: Marshmallow contains a demulcent that soothes rashes, abrasions, inflammations and wounds. Use it in a poultice to soothe skin wounds. As a balm for skin irritation - Marshmallow roots can be steeped in warm water, which can then be drunk in a soothing tea that can treat bladder infections. Some laboratory research shows that it can be as effective as the unhealthy antibiotics. Treat bladder infections - Marshmallow has been seen to have a good effect on gum health. Chew on marshmallow leaves, or toss them in a salad. Improve gum health - A soothing marshmallow tea can help alleviate tooth ache, and even slow or stop tooth infections. Reduce toothaches - DIY Homemade Marshmallow Solutions Marshmallow Salad
  • 211.
    Page 210 Learn Herbal Marshmallowleaves are tasty, crunchy and have a flavor that can truly enhance a creative salad. You can have it regularly, and the pleasant taste soon becomes habit forming. Enjoy all the goodness of marshmallow in a tasty, invigorating salad. What you will need: Half a bowl of marshmallow leaves Two large tomatoes A few olives 1/2 cup finely grated parmesan cheese onions chopped in rings Two large carrots, diced Olive oil Instructions: 1. Chop the tomatoes into rough dices. 2. Add in the diced carrots, the marshmallow leaves, the olives the ringed onions and the tomatoes in a large salad bowl. 3. Add a liberal dash of olive oil and toss vigorously. 4. Sprinkle the parmesan cheese on top. 5. You may add a commercial salad dressing if you wish, but these are often unhealthy so avoid if you can. You can add a dash of vinegar for added flavor. 6. Serve the delicious salad as a starter. Marshmallow Tea
  • 212.
    Page 211 Learn Herbal Asoothing marshmallow tea can be really helpful for sore gums or a toothache. You can steep either the leaves or the roots of the marshmallow plant in hot water, and brew a wonderfully calming tea that soothes the nerves and gives you a relaxed feeling. What you need: Marshmallow leaves and roots Instructions: 1. Coarsely chop the marshmallow roots and leaves with a pair of kitchen scissors. 2. Heat a cup of water in a kettle. 3. Bring the water to boil and then pour into a cup. 4. Place the marshmallow leaves and roots in a steel tea ball. 5. Put the ball in the hot water and steep for a few minutes. 6. Stir the ball and shake gently to get the maximum extraction. 7. You can add some cinnamon for flavor. You can also add vanilla essence to enhance flavor. 8. Avoid adding sugar as it is unhealthy. However, you may add some sugar if you must. 9. Consume the tea lukewarm for maximum effect. Marshmallow and Herb Soup You can cook marshmallow leaves in a delicious soup that is chock full of herbaceous goodness.
  • 213.
    Page 212 Learn Herbal Youcan combine several herbs of your choice in this sup, or you can just add marshmallow leaves to the recipe of any of your favorite soups. The flavor of marshmallow leaves works well with most ingredients. Here is one recipe that works well: What you need: 2 teaspoons olive oil 2 cloves of garlic 1/2 an onion, finely chopped 1 stalk of celery, finely chopped 1 medium sized white potato, cubed 2 cups chicken stock 2 cups milk Six ouches of fresh marshmallow leaves, fine chopped Black pepper, finely ground 1 cup fat free sour cream Instructions: 1. Heat oil in large saucepan. Add garlic, celery, onion, and potato and sautƩ for 5 minutes. 2. Add the chicken stock and milk, and bring to boil. Simmer for 10 minutes. 3. Use half of the marshmallow leaves. Cover and simmer gently for ten minutes. 4. Place the soup in a blender and blend. Add the remaining spinach and blend again for a creamy consistency 5. Add the sour cream. Serve.
  • 214.
    Page 213 Learn Herbal Asyou can see, marshmallow is a great herb that can be used in a large repertoire of applications. Add this healthy herb to your diet and you are bound to feel healthier every day. Marshmallow leaves are tasty too, and trying them in your cooking is bound to receive great appreciation. NETTLE The stinging nettle (Urtica dioica and related Urtica urens) is a herb that has a long history of use for beneficial human health practices. The use of this surprisingly helpful herb dates back to medieval European traditional medicine, where it was used as a diuretic (a substance that stimulates urination - helping to get rid of excess water) and as an effective balm for muscle pain.
  • 215.
    Page 214 Learn Herbal Byitself, the stinging nettle can be rather unpleasant to the skin. The stinging nettle has fine hairs which can be very stinging to touch. It contains some irritating chemicals that cause this sting. However, when applied to painful areas on the body, it helps to relieve pain in that area. It is thought that the chemicals in stinging nettle interfere with the nervous system, thus alleviating the muscle pain. Cultivation of Nettle Nettle is a highly invasive species. This can be a blessing if you are growing nettles, and a curse if you are growing anything else. This distant cousin of the mint can be rather painful to control. One good idea would be to grow your nettles indoors, or to separate your nettle growing operation in another part of the house, such as the backyard. Here is how you can grow your nettles: 1. You can find nettle seeds in most nurseries. There is no need to germinate them separately or take any special care – simply find a secluded garden bed, far away from your precious flower beds or vegetable patches, sprinkle the seeds and sprinkle soil on. 2. Water the nettle bed every once in a while. Don’t water log the seeds. 3. When the seeds have germinated, keep watering for healthy growth. Fertilization is not particularly necessary. Tips on Growing Stinging Nettles Always use protective gear when picking nettles. Wear gloves, long pants and don’t leave any skin exposed to the nettles. Diligence is the only way to avoid hours or stinging pain.
  • 216.
    Page 215 Learn Herbal Theplant grows to six feet long. In summer, you must chop down the nettle shrubs. If you don’t do so, the seeds can spread all over your garden by the wind, invading your precious flower beds. Keep the children away: Educate your children on the very painful nature of your herbs. Prevention is the best medicine with the sting of the nettle. Medicinal Uses of Nettle The stinging nettle is a herb deeply rooted in ancient European culture and folklore. Knights of yore have found benefit in this stinging herb for their health complaints and muscle sores. You may not be brandishing huge swords or convening at Arthur’s Round table, but you will be sure to benefit from the many health benefits of the stinging nettle. Here are just a few highly effective uses of stinging nettles: The ancient use of the stinging nettle is one you can benefit from right after hitting the gym again after many days. Apply the stinging branch of the nettle right on the muscle sore, and just feel your pain disappear. Be careful while picking the nettle though! You don’t want to be stung in places where it doesn’t hurt. As a cure for muscle sores -
  • 217.
    Page 216 Learn Herbal Thisis a useful application of stinging nettle that has been touted by some serious research. As a matter of fact, this is the more popular treatment for an enlarged prostate in Europe. The medical treatment in fact decreases the size of the prostate, whereas the treatment using stinging nettle stops it from growing, and alleviates the problems caused by enlarged prostate, such as inability to urinate properly, constant desire to urinate, and incomplete urination. As a cure for Benign Prostatic Hyperplasia (BPH) - Say goodbye to arthritic pain – apply stinging nettle topically to get rid of pesky joint pain. As a cure for Osteoarthritis - Hay fever can be an annoying condition. Use nettle capsules to relieve itching and sneezing problems. Cure hay fever - Blood pressure and blood sugar levels can be lowered by using nettle. This has been shown in animal research, but not much research has been done on humans – yet. Lower blood pressure - DIY Homemade Nettle Solutions Nettle Beer When served chilled, this is a truly refreshing and energizing drink. It is not a very hard drink to prepare, and can be a very welcome beverage in summer. Whip up this incredible brew and surprise family members and guests alike with the goodness of nettle. What you need:
  • 218.
    Page 217 Learn Herbal 2pounds of nettle tops (must be from young plants) 1 gallon of water 1 pound of Demerara sugar 2 large lemons Brewer’s yeast 1 quart Cream of Tartar Instructions 1. Wash the nettles in cold water and sort. 2. Place nettles in a saucepan. Add thinly sliced rinds of lemon and water. 3. Bring to boil and then simmer the water for about 20 minutes. 4. Strain the mixture. Add the strained liquid to one gallon water and add the sugar. 5. Add the cream of tartar and cool. 6. Add the yeast mixture when the solution reaches appropriate temperature. Also add the lemon at this stage. 7. Pour the mixture into a demijohn, leave for 3 to 5 days. 8. Cool off the mixture to stop the yeast’s action. 9. Bottle the mixture into strong bottles. Make sure to use sturdy containers that will not burst under internal pressure. 10. Serve chilled. Nettle Risotto Any risotto is a difficult feat to get right, and this nettle risotto is no exception. However, if done right (which is very rare) this risotto can be very pleasing, with the nettle providing a unique taste. What You Need:
  • 219.
    Page 218 Learn Herbal 1/4lb nettles (from young plants) 11 oz of Arborio (risotto rice) 1 large onion, finely chopped 2 tbsp butter 1/2 cup white wine 6 cups of chicken stock Parmesan cheese, grated Salt and pepper : Instructions 1. Wash and sort the nettle leaves. Blanch in boiling salt water for a few minutes. 2. Drain the nettles and finely chop. 3. Use half the butter to sautĆ© the onions for a few minutes. 4. Add in the nettle and cook for a few more minutes, stirring. 5. Add in the rice and heat at a higher temperature for about 2 minutes. 6. Add in the wine. 7. Heat until the wine has evaporated. 8. Pour in boiling chicken stock (heat it beforehand in a saucepan). First add a cup, and then keep pouring in half cup portions as the stock evaporates. 9. Keep cooking for about 15 minutes, when the rice riches the ā€˜al dente’ consistency – soft but with a bite. 10. Pour out the risotto and add in the remaining butter. Season with salt and pepper. Nettle Omelet
  • 220.
    Page 219 Learn Herbal Acheerful nettle omelet is a perfect breakfast item, or a great snack for some hungry time. You can whip it out in no time at all, and the nettle really adds a different dimension to the egg. Things you need: 2 large eggs Olive oil Mozzarella cheese A few nettle leaves, coarsely chopped A clove of garlic, finely chopped Salt and pepper Instructions: 1. SautƩ the nettle leaves and the garlic with olive oil. 2. Beat the eggs to a smooth consistency. 3. Add in the grated mozzarella cheese. 4. Add in the garlic and the nettle leaves (cooled) and beat into the mixture until consistent. 5. Heat oil in the frying pan and pour in the mixture. Fold and turn for the perfect omelet. 6. Season with salt and pepper and serve hot. The nettle is a great, surprisingly useful herb. From its ancient European origins, it has consistently shown that behind unpleasant stinging exteriors often lie useful interiors. Add nettle to your garden, but with care not to have it rule your yard. Experiment with the delicious nettle recipes and rediscover this great herb.
  • 221.
    Page 220 Learn Herbal PEPPERMINT Peppermint(Mentha piperita) is a very popular herb for its characteristic hot, minty flavor. It is used in cooking for its exotic flavor, and peppermint extracts have found their way to toothpastes, teas, and balms. The uses of peppermint are wide and varied, and they rely mainly on the numbing and calming effect of peppermint. Peppermint offers sweet relief from headaches, nausea, skin irritations, flatulence, diarrhea, menstrual cramps, and many other health problems. Peppermint extracts have also been shown to have some antibacterial and anti-fungal properties in the laboratory. When topically applied, it can soothe pains, skin irritations and relieve cough symptoms. In the stomach, peppermint relaxes the stomach muscles, and also helps to boost the flow of bile from the liver. This helps speed up the digestion process, and relieves flatulence and gas problems.
  • 222.
    Page 221 Learn Herbal Cultivationof Peppermint Peppermint is a hardy perennial plant that is very easy to grow. It is so easy to grow, in fact, that it is very invasive, and will soon take over a garden unless proper precaution is taken. So be careful with the cultivation of this herb. Some people also like to have a bedding of peppermint on their yard or garden in place of grass and you can consider this unique option too. 1. Choose a well tilled flower bed that drains well. Fertilization is not particularly required, but can be used for quick growth. 2. It is best to grow peppermint in full sunlight, but it grows in partial sunlight too. 3. You can either start off your cultivation with cuttings or seeds. With seeds, sprinkle on the soil and sprinkle some soil on top. It is not necessary to be particularly caring, as peppermint can well take care of itself. 4. Harvest leaves when fully grown. Tips on Growing Peppermint You might have a lot of trouble keeping this persistent herb’s population in control. Try to pluck off any excess growing outside your garden bed as soon as possible. Menthol and menthyl acetate, the substances that give peppermint its characteristic flavor, are mostly found on older, more mature leaves. So for cooking purposes, only use fully grown leaves.
  • 223.
    Page 222 Learn Herbal Itmight be a good idea to grow peppermint in pots indoors. They thrive well in indoor conditions – just give them a patch of sunlight. This ensures that your garden is not overrun with peppermint. Peppermint has been known to deter insects, and you can even use a peppermint spray to ward off insects from other plants. So not much attention is needed for pests, except caterpillars – which grow into very beautiful butterflies. Medicinal Uses of Peppermint Peppermint is, of course, a very popular kitchen herb. Surprisingly, however, it has also found a great deal of use in medical applications. Peppermint has a calming, gentle flavor that makes very soothing teas to relieve stress. It also has a great deal of powerful health enhancing capabilities, including anti-inflammatory properties, improving digestion, and improving the quality and flow of bile, and many more. The leaves of the peppermint tea are generally used. Sipping on a gently flavored, healthy peppermint tea is great way to bust stress after a long day. Cures stress and mental fatigue - Peppermint freshens the breath by killing off smell inducing bacteria. Instead of using commercial peppermint toothpaste, you can just as easily enhance regular toothpaste with a few drops of essential peppermint oil. As a breath freshener - Peppermint contains menthol, which gives it its minty flavor. Menthol is great for the stomach lining, and can sooth stomach pain stemming from the lining of the stomach. Soothes the digestive tract -
  • 224.
    Page 223 Learn Herbal Mentholalso causes good quality bile to be produced, and a healthy flow to be maintained. Bile is a substance important for the digestion of fat, so peppermint can really help when included with a fat rich meal. Induces healthy flow of bile - Peppermint is rich in vitamins A and C, which are very important for the body. Vitamin boost - DIY Homemade Peppermint Solutions Peppermint Tea This is actually a very popular drink all over the world, especially in Arabia, where peppermint leaves are also sometimes added to regular tea for the flavor. A soothing peppermint tea has a large number of benefits. It is a nerve soothing experience that you should treat yourself after a long day of work. And it also has great benefits for the stomach. A serving of peppermint tea after a meal can vastly improve digestion. What you need Peppermint leaves Instructions:
  • 225.
    Page 224 Learn Herbal 1.Shred the peppermint leaves roughly into small pieces. 2. Put a cup of water into the kettle and bring to boil. 3. Place the shredded peppermint leaves into a steel teal ball or a steel infuser. 4. Add the ball to the hot water, and steep for a few minutes. 5. You can add some cinnamon or other herbs for flavor. However, peppermint has a distinct, enjoyable flavor by itself. 6. Consume the tea when it is lukewarm. You can have sugar with the tea, but it is best to avoid refined table sugars as much as possible! Peppermint Tincture Peppermint tinctures are a great cure for all kinds of illnesses. You can apply them topically to muscle sores to remove the aching pain. You can use the concentrated peppermint goodness as a few drops in toothpaste, or in diets of sick family members. One teaspoon of this tincture should be enough to treat indigestion and heartburns and nausea in adults. Things you need: Half a cup of dry peppermint leaves Half a cup of diced ginger roots One fourth cup dried fennel seeds One and a half cup water One and a half cup drinkable rum or vodka, with about 40% alcohol : Instructions
  • 226.
    Page 225 Learn Herbal 1.Place dried peppermint leaves, ginger and fennel seeds in a glass jar. 2. Cover the leaves, ginger and fennel seeds with boiling water. 3. Fill up the rest of the jar with the vodka or rum. 4. Keep the jar in a cool dry place for 2 to 6 weeks. Do not exceed 6 weeks. 5. Strain off the mixture after 2 to 6 weeks using a filter cloth or cheesecloth. 6. Store the mixture in jars or vials. Peppermint Soup Peppermint is often used as a spicy addition to many cooking preparations. But the minty flavor itself is quite enjoyable. This minty soup, where peppermint is the key ingredient, can be a great food if you are suffering from a cold, not only will it taste and feel great, but your cold will also be cured faster. Here’s what you need: One large onion, finely chopped Olive oil 2 cloves of garlic 1 medium sized white potato, cubed 2 cups chicken stock One large chicken breast, finely diced 2 cups milk Six ouches of peppermint leaves, finely chopped Black pepper, finely ground 1 cup fat free sour cream : Instructions
  • 227.
    Page 226 Learn Herbal 1.Heat the oil in large saucepan. The garlic, celery, onion, and potato should be sautƩed for a few minutes until golden brown. 2. Add the chicken stock, milk, and chicken breasts and bring to boil. Simmer for 15 minutes. 3. Add the peppermint leaves to the mixture. 4. Stir thoroughly, and boil for around 7 minutes. 5. Pour in the sour cream and whip up a creamy consistency. 6. Serve hot for great results. Peppermint is by no means an obscure herb. It has the classic flavor that has made it famous for centuries. With its great health benefits as a precious add on, this is a herb that you simply must grow and consume in your daily diet. With a creative mind, you can incorporate the peppermint flavor in a large portion of your cooking for some truly exotic tasting treats. Here is to your adventure with peppermint! PLANTAIN Plantain (Plantago major) is a weed that you may have thrown out many times from your garden. This is an abundantly growing plant found all over North America. It has oval, ribbed short-stemmed leaves, with spiky flowers. The plant grows in clumps. A very persistent plant, it has been seen to grow in cracks in walls, on fences, and virtually anywhere it is uninterrupted.
  • 228.
    Page 227 Learn Herbal Mostpeople throw out weeds on the first instance of appearance, but you should know that plantain is a very beneficial herb that has been used for centuries in the treatment of medical complaints such as mouth sores, bronchitis, tuberculosis, and many others. The leaves of plantain are rich in tannin and allatonin, chemicals which help heal wounds quickly. As a result, plantain leaves have anti- inflammatory properties. The plant is also rich in vitamins and minerals, and thus can be ingested with great benefit in salads. Cultivation of Plantain The important thing to remember with plantain is that it is a wild herb that can well take care of itself. It doesn’t require extra fuss or care. On the other hand, if allowed to grow free, it will soon take over your entire garden, so your main effort will be in keeping its population in control.
  • 229.
    Page 228 Learn Herbal Plantainis best grown indoors, as placing it in garden beds is only asking for trouble. If you are determined, however, to have a large growth of plantain, you may keep a separate bed for them, but make sure it is sufficiently separated from the rest of your garden, or you will soon find your precious flower beds invaded by this weed. Plantain seeds are probably not available in nurseries, although it doesn’t hurt to look. If you find wild plantain growing outdoors, pluck it out and bring it home. Replant it in potting soil. It should soon spread seeds and reproduce quite past in your pot. Tips on Growing Plantain Keep away any plantain from the rest of your garden. Once introduced to the fertile soils of your flower beds or vegetable patches, it may be quite hard to remove. If you do have plantain growing in your garden, remove them and add to your cooking as soon as possible. Delaying may cause seeds to be spread, and you are bound to have a much more difficult time later. A stitch in time saves nine! Keep explanations well ready for curious neighbors who might wonder why you are dedicating time and effort in growing what is apparently just a weed! Don’t worry about replanting in appropriate time - the hardy plant will reproduce with such vigor that you are guaranteed to have a fresh supply throughout the year. Medicinal Uses of Plantain
  • 230.
    Page 229 Learn Herbal Whileplantain may have the humbling description tag of being just a common garden weed, it is in fact a potent source of powerful health benefits. Do not be fooled by its weed status – plantain comes chock full of surprises, and a wide range of applications. Plantain can act as an effective pain reliever. Heat the leaves and apply to sore muscles or other areas to relieve pain. Pain reliever - Applying plantain tincture or a poultice to wounds can help them to heal quickly. This is due to the anti-inflammatory and astringent properties of chemicals found in the plantain leaves. A chemical found in plantain leaves, called Allatoin, helps cure wounds faster Helps heal wounds quickly - Plantain tea can easily relieve a sore throat. For best results, ingest it lukewarm Sore throat cure - Plantain contains valuable and important vitamins and minerals, such as Thiamine (Vitamin B1) and riboflavin (Vitamin B2) A great source of vitamins and minerals - DIY Homemade Plantain Solutions Plantain Omelet Plantain omelets are a great way to use this pleasant herb, while boosting your morning intake of valuable vitamins. It will also give your regular omelet a new twist, and the delicious flavor is bound to make you a fan. What you need:
  • 231.
    Page 230 Learn Herbal Afew plantain leaves, coarsely chopped Mozzarella cheese, grated Olive oil Salt and pepper 1 clove garlic, fine chopped 1 medium onion Finely chopped 2 large eggs Instructions: 1. Add a dash of olive oil to a saucepan. SautƩ the garlic, onions and plantain leaves in the pan. 2. Beat the eggs in a bowl to a smooth consistency 3. Add the cooled, sautƩed garlic, onions and plantain leaves, and finely grated mozzarella cheese, and beat until the mixture is consistent 4. Heat some oil in a pan. Pour mixture in the heated oil, and fry. 5. Turn the omelet. Place in a plate. Season to taste with salt and pepper Potato Plantain Soup This delicious clear soup owes its goodness to the incredible harmony of potatoes and plantain. It is full of vegetarian goodness, and is chock full of vitamins and minerals. Things you need:
  • 232.
    Page 231 Learn Herbal 2cups of finely chopped plantain leaves 6 small potatoes About 8 cups of water One large onion, coarsely chopped Parsley, coarsely chopped Three cloves of garlic, coarsely chopped Salt and water to taste Olive oil Two large egg whites Instructions: 1. SautƩ the onion, garlic and plantain leaves in olive oil. 2. Pour in water and add the potatoes. 3. Simmer for about 45 minutes. 4. Mash the potatoes to get a rich, creamy consistency. 5. Add in the parsley. 6. Whisk the egg whites. 7. Pour in the egg whites in a thin trickle and stir the soup in order to get an egg net. 8. Season to taste with salt and pepper. 9. Serve piping hot for best results. Plantain Tea A plantain tea is a perfect way to get all the goodness of plantain in one go. It is a soothing tea that can be flavored with peppermint, cinnamon and vanilla to get a truly invigorating and healthy tea. Have this tea by itself in the morning to get your early morning dosage of vitamins, or later in the day to combat stress.
  • 233.
    Page 232 Learn Herbal Thingsyou need: Half a cup of plantain leaves Optional: half a cup of peppermint and a stick of cinnamon a large cup of water Instructions: 1. Boil the water in a kettle. 2. Finely chop the plantain leaves and the peppermint. 3. Add the leaves in a stainless steel mesh tea ball. 4. Steep in hot water for a few minutes. 5. Add sugar if necessary, but avoid if possible. 6. Serve lukewarm. Plantain Salad Plantain leaves provide the crunchy feeling that work great in salads. They also have a great flavor that works great in any salad. The vitamin and mineral goodness contained in its leaves is the reason why this salad is a great idea. Things you need: One bowl plantain leaves One large onion, chopped into rings and separated ½ cup grated parmesan cheese Olive oil Vinegar or lemon juice
  • 234.
    Page 233 Learn Herbal Instructions: 1.Wash the plantain leaves and drain. 2. Place the leaves, onions in a salad bowl. 3. Throw in a dash of olive oil. 4. Pour a dash of vinegar or lemon juice for flavor 5. Toss the leaves. 6. Sprinkle grated parmesan cheese on top. So this is plantain. A weed that you have probably plucked out countless times from your flower beds. A persistent weed that keeps growing – in wall cracks and in dull corners - despite all the herbicides and all the unfriendliness the cruel world throws at it. But it hides in its despised frame more goodness than your average spinach. It is time to introduce this amazing plant in your diet and to your lifestyle. Enjoy the weed and all its healthy goodness, and see this much despised plant in a whole new light. RED CLOVER
  • 235.
    Page 234 Learn Herbal Redclover is a perennial wild flower that grows in meadows all over Europe and Asia naturally. These days, it is also wild-growing in North America. It is a plant of the legume family – which includes beans, pulses and lentils. It is generally grazed on by cattle and sheep. However, this plant has some very surprising health benefits. The red clover is rich in a wide range of minerals, including magnesium, niacin, calcium, chromium, phosphorus, thiamine, and vitamin C and potassium. The red clover is rich in isoflavins - substances that act like the hormone estrogen. As a result, red clover can potentially be used to treat hot flashes and menopausal complications.
  • 236.
    Page 235 Learn Herbal However,research is still being conducted on the effectiveness of such treatment, and present results are a bit inconclusive - even though many people swear by it. Traditionally, red clover has been used to prevent cancer, and as a diuretic (a substance that stimulates urination), and as an expectorant (a substance that clears mucous from lungs). Cultivation of Red Clover Red clover is often grown for its vivid red flowers. The great thing about red clover is that it is a legume. Legume plants develop root nodules where bacteria live, which ā€˜fix the nitrogen in the soil, making it available in a form usable by plants. This means that cultivating legumes in a bed will enrich the nitrogen content of the bed – for free! This is an effect normally achieved by the use of expensive chemical or organic fertilizers.
  • 237.
    Page 236 Learn Herbal 1.Till the bed well and throw away any stones. 2. Test the ph of the soil. Red clover thrives best in a neutral to slightly acidic soil, and the ideal pH for red clover growing ranges from 6.0 to 6.5. 3. Phosphorus and potassium are also required, and enrich these minerals with fertilizers if necessary 4. Seed ten to twelve pounds of seeds per acre of soil. 5. The best time for sowing the seeds is in late winter to early spring for north to central US (or areas with similar clime) warmer climate regions should have red clover seeded in autumn. 6. Harvest the clover when it is in early bloom. This may be about summer. Up to three harvests are possible. Three cuttings are recommended too, as it will help the red clover from spreading seed (and thus becoming invasive) and will also keep a high nutritional profile in the harvested produce. Tips on Growing Red Clover Red clover is best grown with a companion crop, such as wheat, barley or oats. You can also plant with grass. In that case, use about 7 pounds of seed per acre. The seeds should be inoculated with the nitrogen fixing ā€œRhizobium trifolii" bacterium in order to ensure its growth in the root nodules of the plant. The seeds of the plant often come inoculated, so ask at the nursery before buying. Medicinal Uses of Red Clover
  • 238.
    Page 237 Learn Herbal Thered leaf clover may be merely a humble grazing fodder for cattle and sheep, but it is in fact a potent herb that stores some powerful capabilities. It contains some surprisingly healthy perks that come packed in this tiny plant with beautiful bloom. Both the leaves, and the flower itself can be consumed for health benefit, along with the occasional use of the root. Red clover contains numerous phytoestrogens and four different types of isoflavins - chemicals which help increase the effect of estrogens. This helps with alleviating the symptoms of menopause. Menopausal relief - The estrogen boosting capabilities of the red clover also help combat menstrual cramps, along with other PMS symptoms. Relief from menstrual cramps - Red clover cleans the blood, with its antioxidant action. This helps lower cholesterol levels significantly. Helps lower cholesterol levels - The blood cleansing properties of red clover also help improve heart health. It keeps the capillaries healthy by preventing the deposition of arterial plaque. Cleanses blood to help improve cardiovascular health - Bone density loss patterns are also busted by the use of red clover. It can help ensure continued bone health in post-menopausal women. Helps decrease the possibility of bone density loss from the onset of menopause - DIY Homemade Red Clover Solutions Clover Blossom Tea
  • 239.
    Page 238 Learn Herbal Atea of red clover blossoms is a perfect solution for getting all the goodness of red clover in just a few sips. Additionally, it is quite soothing to sip on red clover tea, and a mild sedative action that is provided by some chemicals in red clover ensures that this refreshing drink will bust all your daily stress worries. What you need: A cupful of red clover blossoms A jar of water Instructions: 1. Heat the water in a kettle. Bring to boil. 2. Place the blossoms in a jar. 3. Fill the jar with hot water and cover up the jar for about 10 hours 4. You may add other flavorful herbs – such as peppermint or sage – to enhance the flavor of this tea. Avoid sugar. 5. Consume about 3 cups of this tea every day. Red Clover Blossom Tincture The red clover tincture is a powerful medicine for all kinds of health worries. It lowers the bad LDL cholesterol levels, it cleanses blood, it relieves menopausal symptoms and menstrual complaints. It even battles some types of cancer. What more can you ask for in a herb? Follow this easy recipe to make a really useful red clover tincture: Things you need:
  • 240.
    Page 239 Learn Herbal 1and 1/2 cups of dry red clover blossoms Ginger roots, finely diced (about ½ a cup) One and a half cup water One and a half cup drinkable rum or vodka, with about 40% alcohol (do NOT use rubbing alcohol or stearyl alcohol!). A higher percentage of alcohol is preferable. Instructions: 1. Finely shred the red clover blossoms. 2. Place the shredded red clover blossoms and the diced ginger in a glass jar. 3. Cover up the blossoms and the ginger with piping hot, boiling water. 4. Top up the jar with the vodka or the rum. 5. Keep the jar in a cool dry place for 2 to 6 weeks. Do not exceed 6 weeks. 6. Strain off the mixture after 2 to 6 weeks using a filter cloth or cheesecloth. 7. Store the mixture in jars or vials. Crystallized Red Clover Blossom You can crystallize the red clover blossoms with sugar. These crystallized blossoms will be a great addition to any dessert, and they are great, vividly colored decorative items that will vastly improve the plating of any dish. You can go really creative with their use, and combine red clover blossoms with other edible flowers to come up with truly unique plating options. Things you will need:
  • 241.
    Page 240 Learn Herbal Adozen red clover flowers (or as many as you would want to crystallize) Crystallized sugar Egg whites from one egg Water Instructions: 1. Whisk the egg white and about two teaspoons of water thoroughly, until a creamy consistency is reached. 2. Slightly wet the flowers with water, and flick off the water. 3. Coat the flowers with sugar. 4. Use a paint brush to apply egg whites on the sugar coating. This takes some time and patience. 5. Sprinkle some more sugar over the painted flowers. You can catch the sugar that falls off in a bowl, but you can’t reuse it. 6. Place the coated and painted red clover blossoms in a baking tray that has been lined with greased paper. 7. Dry off the flowers. You can bake for a few minutes in the over if you want, but that is not really necessary. The egg whites should give you hardened, crystallized flowers in about 2 days. Use in any recipe for a beautiful decoration. The red clover is a herb that can be used very creatively for some amazing health benefits. As always, you should consult your doctor before pursuing any treatment option, but the red clover offers relief and health benefit for many educated users. Benefit from using this amazing herb today. ROSEMARY
  • 242.
    Page 241 Learn Herbal Thename rosemary (Rosmarinus officinalis) is derived from the Latin words ros (meaning ā€œdewā€) and marinus (meaning ā€œseaā€). ā€œDew of the seaā€ was so named because in some places, the plant required no water apart from the mist carried by the breeze from the sea. Native to Asia and the Mediterranean region, rosemary is known for its sweet, herbaceous flavor, its use as an ornamental plant, and its role in traditional Mediterranean cuisine. The rosemary plant is a woody, aromatic shrub with blue, purple, or white flowers and leaves like pine needles. Cultivation of Rosemary
  • 243.
    Page 242 Learn Herbal Rosemarycan be grown from seeds, cuttings, and roots. Use moderately-fertilized loam with a neutral acidity and grow the plant in a sunny area with good air circulation. Remove some cuttings about 4 inches long each from the rosemary bush and place them in pots filled with peat moss and coarse sand. Place the pots in a warm, sun-filled area. Water regularly until roots begins to grow. If you wish to transfer your rosemary plants into your garden, find an area where the soil is dry and drains well. If your soil has high acidity, you can add some lime to it. Once the plants are in the ground, watering should be done less frequently. Overwatering your transplanted plants is not advisable. Tips on Growing Rosemary Rosemary prefers a Mediterranean climate, which means dry and warm. It is, however, adaptable to whatever conditions it is grown in. Slightly alkaline soil produces a more fragrant rosemary shrub. Rosemary is relatively pest-resistant. Medicinal Uses of Rosemary Aside from its usefulness in the kitchen, rosemary is cultivated for its efficacy in traditional and alternative medicine, its versatility as a commercial product, and for various ceremonial uses. This remarkable herb is chockfull of vitamins, minerals, and phytonutrients, and is an exceptionally good source of folic acid, vitamin A, vitamin C, and iron. It contains rosmarinic acid, a potent antioxidant, as well as numerous compounds that lend it its antiseptic, antifungal, anti-inflammatory, and anti-allergic qualities.
  • 244.
    Page 243 Learn Herbal Don’tlet body pains ruin your day. Take charge and apply rosemary oil to body parts affected by arthritis, sprains, neuralgia, and sciatica. Oil of rosemary is an effective rubefacient that relieves tired and aching muscles. Kiss pain goodbye - The scent of rosemary alone is enough to soothe a worried mind and is conducive to meditation, yoga practice, and quiet time. But, amazingly, rosemary contains rosmarinic acid, an antioxidant that has been found effective in improving concentration and preventing memory loss. Burn rosemary incense or put some rosemary oil in a burner next time you need to relax or focus on a complicated task. Improve your memory and focus - Apply rosemary oil to your scalp to promote hair growth. Rosemary oil and rosemary herb extractions stimulate the scalp and hair follicles, helping prevent premature baldness. Rosemary also helps relieve dryness and itching of the scalp. Prevent bald spots - Rosemary is a popular ingredient in hair and skin care products. To experience the benefits of natural and authentic rosemary on your hair, work a few drops of rosemary essential oil onto your scalp and hair, coating it from root to tip. You will immediately notice a change in texture and luster. Use a combination of rosemary tea and nettle infusion as a hair rinse to get rid of dandruff. Use rosemary oil as a post-bath moisturizer to soothe joint problems and treat skin irritations. Get silky smooth skin and hair -
  • 245.
    Page 244 Learn Herbal Rosemaryis used to treat and/or relieve the symptoms of hypertension, fatigue, colds, scabies, depression, headaches, and lupus. It helps prevent uterine spasms and menstrual cramps, speeds the healing of wounds, and is a natural insect repellant. Scientists have even found that rosemary may have a preventive effect against cancer. An all-around wonder herb - DIY Homemade Rosemary Solutions Apart from its role in the kitchen, rosemary has been central to numerous aspects of culture and history. During the Middle Ages, it was an important part of wedding ceremonies. It was used in divination and in witchcraft, and was alluded to in Hamlet and in Don Quixote. Today, rosemary serves countless culinary and cosmetic uses and can be found in most supermarket aisles and pantries. Try making these three rosemary products from your plants at home. Rosemary Tea Who doesn’t love a good cup of tea? Try this herbal tea made with fresh rosemary. It’s wholesome, nutritious, and has a soothing flavor and aroma perfect for winding down. What you will need: 1 to 2 sprigs of fresh rosemary 1 to 2 cups of cold water A tea pot Natural sweetener like honey and stevia (optional) Instructions for Making Your Rosemary Tea:
  • 246.
    Page 245 Learn Herbal 1.Get some fresh rosemary sprigs from your plant and wash them. 2. Boil the water. 3. Pour the boiling water into the teapot containing the herbs. You might want to keep the leaves or needles on the stem so you won’t have to filter the tea later on. 4. Let the rosemary steep in the teapot for at least three minutes. The longer you let it steep, the more nutritious but also the more bitter it becomes. 5. Add some natural sweetener like stevia or honey to counteract the bitter taste. Rosemary oil can be toxic when taken orally. Note that the tea is made by brewing the herb, not by mixing the oil with hot water. Don’t consume large amounts of rosemary tea if you are pregnant, diabetic, or hypertensive. Rosemary Hair Rinse/Shampoo Regular use of a rosemary hair rinse or shampoo will give you long, healthy locks and will free you from dandruff and hair loss. A rosemary hair treatment is so easy and inexpensive to make, and is a much safer alternative to chemical hair treatments you get at the salon. What you will need:
  • 247.
    Page 246 Learn Herbal 4to 6 rosemary sprigs A paper sack A rubber band A vacuum container or Ziploc bag A non-aluminum sauce pan or pot A glass jar Camphor oil/lemon juice/lavender oil Instructions for making your rosemary hair rinse: 1. Rinse the rosemary sprigs in cold water then dry using paper towels. 2. Hold the stems together then remove the lower leaves. 3. Put the bunch in the paper bag with the lower ends sticking out. Use the string or rubber band to tie the bag and stems together, sealing off the opening. 4. Let the bundle hang in a dry room for two weeks. By this time the leaves should have dried up. 5. Remove the leaves and place them in a Ziploc bag. 6. Make a tea out of the leaves by boiling clean water in a saucepan or pot and then stirring the leaves into it. Let it steep for a few hours. 7. Pour the tea into a glass jar. Keep it in the refrigerator. You are now ready to create your rosemary hair rinse or shampoo based on the kind of treatment your hair needs. 8. If you have dandruff, get a cup of the rosemary tea and add 2 to 3 drops of camphor oil. Use a cotton ball to dab some of the mixture directly onto your scalp. Wait 30 minutes before rinsing. For a refreshing and soothing sensation and scent, you can add some lemon juice and a few drops of lavender oil. Add some camphor oil and you have an all-natural shampoo.
  • 248.
    Page 247 Learn Herbal RosemaryFoot Scrub There’s nothing quite like a nice foot scrub at the end of a long workday. Prepare this rosemary foot scrub and keep it in a glass jar ready for when you need a relaxing end-of-the-day foot pampering at home. What you will need: 3 drops of rosemary essential oil 3 drops of peppermint oil 1 ounce of sweet almond oil Half a cup of cornmeal A ceramic bowl Instructions for making your rosemary scrub: 1. In a ceramic bowl, mix all the oils together. 2. Add the cornmeal gradually until you get the desired consistency and texture. Stir continuously until the mixture becomes a paste. 3. Scrub away! It makes your roasts taste phenomenal, your hair soft and shiny, and keeps your health in tip-top shape. And it’s a charming and beautiful addition to your garden or landscaping too. Plant some rosemary today and enjoy good food and good times. SAGE
  • 249.
    Page 248 Learn Herbal Theimportance of sage as a medicinal herb is apparent in its scientific name, Salvia officinalis. The word salvia was derived from salve, which means ā€œto saveā€ or ā€œto healā€, and officinalis came from officina, meaning a storeroom inside a monastery where medicines and herbs were kept during ancient times. For centuries before it was classified by Linnaeus in the 1700s, the herb was extolled for purported miraculous properties. The Greeks and the Romans wrote about how it could fend off evil and cure snake bites. In the Middle Ages, it was used in a tonic thought to ward off the plague. Today, sage is a staple in many European, North American, and Middle Eastern kitchens. It has a soft, earthy, and slightly sweet flavor that enhances meats and goes well with cheese, fish, and vegetables. The sage plant is a low-growing perennial shrub with grayish green leaves and a woody stem. It can be grown both indoors and outdoors, and will thrive in both. Cultivation of Sage
  • 250.
    Page 249 Learn Herbal Mostvarieties of sage are native to the Mediterranean region and Asia Minor. Though it will grow easily in almost any climate, sage grows best when conditions are similar to that of its native habitat. This means full sun, warm temperatures, and dry, nearly pH-neutral soil. You can start cultivating sage either from seeds or cuttings. For seeds: 1. You will need a pot at least six inches deep and some potting soil. To start off, pour a quart of water on the soil. 2. Once it is drained but still moist, you can place 10 to 12 seeds on top of the soil at equal distances. 3. Cover the seeds with dry soil at least an eighth of an inch deep. 4. Use plastic food wrap to cover the pot and help the seeds germinate. Covering the pot keeps heat and moisture in. 5. Place the pot in an area away from direct sunlight but with ample lighting. This will prevent the soil from drying up too quickly. 6. Check the soil regularly. Add a cup of water if the soil gets too dry, but be sure to replace the plastic cover. 7. Once the seedlings grow an inch high, you can transplant them to an area where sunlight is plentiful. Keep the seedlings at least two feet apart. Tips on Growing Sage
  • 251.
    Page 250 Learn Herbal Transplantthe seedlings after the cold season, when the danger of freezing has passed Sage can grow up to 36 inches high and 24 inches wide, hence the 2 feet of space between plants. Sage grows best in soil with 6.0 to 6.5 pH. Do some light pruning to encourage the plant to stay bushy. The plant will become woody after 4 or 5 years, and will need to be replaced. You can start new sage plants from cuttings from the parent plants. Dry sage leaves quickly so they don’t become moldy. Hang them to dry in a warm room with good air circulation. Keep the dried sage in an air-tight container away from sunlight. Medicinal Uses of Sage Ancient Egyptian women were known to consume sage tea and tonics in hopes of getting pregnant. It was also believed that sage can effectively lengthen one’s life span. Though these claims need to be backed up by scientific research, there are lots of other health benefits to be acquired from sage. Sage is effective in treating various stomach problems. Flatulence, gastritis, bloating, diarrhea, and appetite loss can be treated with sage. Keep your tummy happy - Sage has antispasmodic properties that provide relief from menstrual cramps, hot flashes, and excess bleeding. Its estrogenic effects help regulate hormonal changes; its flavonoids and phytosterols help improve fertility. It even aids in proper milk flow while breastfeeding. A woman’s secret weapon -
  • 252.
    Page 251 Learn Herbal Sageessential oil has antiseptic, antifungal, and antibacterial qualities that help prevent and treat infections. It is used in mouthwashes, soaps, vaginal douches, and toothpastes. Potent antibacterial qualities - Studies are ongoing to determine the effect of sage on this dreaded condition. Preliminary research has shown that taking sage extract improved the memory and thought processes of test subjects. Possible cure for Alzheimer’s disease - Sage can cure a great variety of ailments! It is used to treat cold sores, gingivitis, sore throat, asthma, heavy sweating, memory loss, depression, cough, and fever. It helps reduce hot flashes during menopause, enhances the appetite, improves liver function, lowers blood glucose levels, treats diabetes, and prevents hair loss. All-around remedy - DIY Homemade Sage Solutions You can experience the amazing health benefits of sage without spending a lot. Making sage products from home is easy, convenient, inexpensive, and rewarding. Sage Hair Dye Did you know that you can use sage to restore your natural hair color? Yes, it will cover up the gray, and will make your hair soft and shiny as well. And all this without the harmful effects of nasty chemical hair colors. What you will need:
  • 253.
    Page 252 Learn Herbal Acup of dried sage A quart of water A large pot Lavender oil or rosemary oil (optional) Instructions for making your sage hair dye: 1. Pour some clean water into a pot and place it over high heat. Let the water boil. 2. Add the sage to the boiling water and let it boil for 30 minutes to an hour. You will notice that the water gets darker as you let the sage steep in the water. 3. Take the pot out of the fire and let the resulting tea cool down. 4. Lean over the sink or tub, and scoop the tea over your head. Do this repeatedly until you get the shade you desire. 5. To give your hair a refreshing scent, add some lavender oil or rosemary oil into your homemade sage dye for your last rinse. This also helps make your scalp healthier and your hair smoother. Sage Incense This is another no-brainer DIY project that you’ll wish you’d known about long ago. Homemade sage incense gets rid of nasty odors, sets the mood for meditation and yoga practice, and helps relax your tired mind and body. Making incense out of sage and other herbs is incredibly easy and won’t cost a dime. What you will need: Several branches of sage and other herbs like rosemary Thread or any thin string
  • 254.
    Page 253 Learn Herbal Instructionsfor making your sage incense: 1. Make a bundle out of the branches of herbs and cut them into the same length. 2. Tie the branches together by winding the thread or string from one end to the other at an angle and winding it again towards the bottom end at the opposite angle. This will create a crisscross pattern which will help hold the branches together. Tie a knot on the finishing end, making sure there is a loop formed. 3. Hang the tied-up branches using the loop. Let the branches dry completely. 4. Once the herbs are completely dry, you can use it as incense. Simply burn one end of the bundle and it will give off a nice scent. 5. Be careful when lighting and using your sage-and-rosemary incense to prevent fire from spreading. Sage Body Scrub Did you know that if you rub a garlic clove on your big toe, you will taste it in your mouth in less than 15 minutes? That is how quickly the body absorbs anything you put on your skin. If you’re still using chemical-laden skin products, now is the time to learn about and begin using all-natural alternatives. This sage body scrub is a good place to start. What you will need:
  • 255.
    Page 254 Learn Herbal 4to 6 leaves of fresh sage A grapefruit 2 cups fine sea salt Half a cup of date sugar A cup of olive oil A blender A grater A bowl Instructions for making your sage body scrub: 1. Put the olive oil and sage leaves into a blender and then puree them. 2. In a bowl, combine the puree with the sea salt and date sugar. Mix all the ingredients well with a spoon. 3. Use a grater to remove the zest from the grapefruit. Add the zest to the sage mixture. 4. Cover the bowl and place your body scrub in the refrigerator. 5. During your shower, get a spoonful of your homemade body scrub and massage it all over your body. Do so in a circular manner, targeting the rough spots. Return the body scrub inside the fridge when you’re done. Sage is both an indispensable culinary herb (great in stuffing and in pasta sauce!) and a one-of-a-kind natural medicine that works its wonders on a wide variety of health problems. Start growing sage and enliven your kitchen and your health. SPEARMINT
  • 256.
    Page 255 Learn Herbal Nativeto much of Europe and southwest Asia, spearmint (Mentha spicata) is a species of herb that is easily bruised and produces a wonderfully refreshing smell as a result. This bright green herb, also known as the garden mint or common mint, with its broad feathery-edged leaves is a favorite ingredient of all chefs for it adds a unique flavor to any imaginable dish, making it both look and taste fresh. It is used as a garnish for recipes as well as for flavoring drink beverages such as mojito and embellishing salads. Often, it is added to iced tea for that extra refreshing zing. Cultivation of Spearmint This bright green member of the mint family prefers moist, loose and fertile soil with underground runners. The herb can grow up to 30 inches in height with characteristic serrated leaves fanning out at 2-3.5 inches long. The herb should be grown under full sun or partial shade conditions in spring or fall. During late summer, it exhibits thin pointed spikes of mauve flowers. Be warned, though: if you’re not careful, the spearmint’s runners can take over your garden plot in no time.
  • 257.
    Page 256 Learn Herbal 1.Buy a fresh, healthy mother plant from your local grocery store and place it in a pot. Growing mint from seeds is extremely difficult, so unless you’re prepared to dedicate significant time and effort into it, don’t even try. 2. Make sure your pot is large enough and has a hole at the bottom. This will allow excess water to flow away. Place a plate at the bottom so that the plant can absorb the leftover water again when needed. 3. Place the pot where it can get plenty of morning sun and adequate afternoon shade. 4. Spearmint needs plenty of water to survive. You don’t have to water it all day long, but you want to make sure that the soil is always humid. Remember, a thirsty spearmint is a dead spearmint. 5. Harvest spearmint sprigs before the plant flowers. You can do this by cutting off spearmint sprigs (quarter of an inch above the junction) from the mother plant and placing them in glasses filled with water. 6. Small white roots should grow under the water after a week. Replenish the glasses with water when needed. Wait for the roots to grow to a decent length and when it is long enough, take the sprig out of the water and plant it in another pot. Do this for all your sprigs and you should be on your way to being the owner of a fragrant spearmint garden paradise. Tips on Growing Spearmint
  • 258.
    Page 257 Learn Herbal Toextend the harvesting season, pinch off the flowering birds as they appear. When planting in a flower bed, submerge the container at least 5 inched under the soil in order to contain the rapid growth of spearmint roots. Otherwise, the herb will take over your garden. The importance of super moist conditions for the growth of this plant can’t be stressed enough. Medicinal Uses of Spearmint Spearmint has seen commercial use in oral hygiene products such as mouthwash and toothpaste, as well as a flavoring agent for the ever popular breath refresher Mentos. Since ancient times, this easily bruised perennial rhizome has added flavor to food, transforming mediocre dishes into delicacy. Given the fame of its flavoring properties, most would be hard pressed to imagine that this verdant herb has an array of medicinal uses as well. Here are some of the known medicinal benefits of this versatile rhizome: The essential oil, menthol, has analgesic, counterirritant and anesthetic properties, and can help to keep your mouth feeling fresh and devoid of pesky germs. Get rid of bad breath - Spearmint can take of various digestive disorders, including indigestion, nausea, irritable bowel syndrome (IBS), gas, diarrhea, gallstones and many more. No more stomach aches - Headaches, stress, fatigue, nervous conditions and irritable itching stand no chance against a good old spearmint oil massage or the more subtle and sophisticated spearmint aromatherapy. Soothe all sorts of pains -
  • 259.
    Page 258 Learn Herbal Whilea good remedy for stress, fatigue and headaches, the spearmint really show it versatility with its ability to alleviate several respiratory problems such as asthma, bronchitis and catarrh. Breathe freely - Applying liberal amount of spearmint cream or lotion to affected skin can get rid of itching, dermatitis and hives. Maintain healthy and radiant skin - DIY Homemade Spearmint Solutions This bright perennial herb, at first glance useful for only flavoring purposes, has an astounding number of uses. It has domestic uses in repelling ants and freshening up a musty old closet, and both spearmint tea and spearmint oil can be made easily at home with effort that is minimal compared to its great benefits. Here’s how you can make them: Spearmint Tea Spearmint tea, according to a study published in early 2007, can be a great way for women with hirsutism to remove excess body and facial hair because it lowers levels of androgens. It’s a simple and affordable way to battle hirsutism, but the refreshing flavor of this herbal tea alone is alone reason to have it daily. Try out this easy three-step recipe for spearmint tea: What you will need:
  • 260.
    Page 259 Learn Herbal Ahandful of fresh spearmint 4 cups of water A pot A strainer Lemon (optional) Raw honey (optional) Instructions for making and using your spearmint tea: 1. Pour the water in a pot and put it atop a stove. Set the temperature between moderate to high. 2. Crush a handful of spearmint between your palms to get out the flavor and smell while the water boils. 3. When the temperature of the water is suitably high, add the crushed spearmint and let it steep for 10-15 minutes. 4. Use a strainer placed over a glass container or tea cup to separate the crushed spearmint from the tea. 5. Honey or lemon can be added in order to supplement the spearmint’s natural flavor. Spearmint in boiled water is also ideal for rinsing your hair or taking herbal baths. Spearmint Essential Oil
  • 261.
    Page 260 Learn Herbal Althoughnot as popular as peppermint oil, spearmint oil is more suitable for children and those who find peppermint oil hard to use. Whereas peppermint rejuvenates the body, spearmint relaxes it. Spearmint oil has a multitude of uses such as curing sore throats, relieving headaches and being used as a flavoring ingredient for exotic dishes. It also has great antibacterial, antiviral and antifungal properties, making it a very effective disinfectant. What you will need: Freshly picked spearmint leaves A dark colored jar Carrier oil like vegetable oil or olive oil Water Strainer Corn starch Instructions for making your spearmint oil:
  • 262.
    Page 261 Learn Herbal 1.Pick out any bruised or dark leaves. Leave the stems attached as well can be extracted from them. 2. Wash the leaves carefully. Make sure they’re free of insects. 3. Pack the leaves as tightly as you can into the jar and add generous amounts of carrier oil. 4. Seal the jar and place in the sun for 2-3 weeks. This will allow the carrier oil to pull out the spearmint oil. 5. Open the jar and mix in a few drops of corn starch. 6. Let the mixture settle for a day or two. This will give the corn starch enough time to take up the spearmint’s fragrance. 7. Open the lid and use a strainer to separate the oil from the leaves. 8. Store the oil in a dark airtight container. Spearmint oil can be ā€œproperlyā€ made using steam distillation, but this is not viable in the average household. This version of spearmint essential oil is by no means high in oil content, but should be helpful for small aches and pains. ST JOHN’S WORT
  • 263.
    Page 262 Learn Herbal Namedafter its time of bloom – June 24, the birthday of John the Baptist – St. John’s wort has yellow flowers with distinctive oval-shaped, elongated petals, as well as a rich history of being used as medicine dating back to ancient Greece. Theorized by scientists to be native to Europe, the western United States and parts of Africa and Asia, St. John’s wort (Hypericum perforatum) possesses impressive antibacterial, antiviral and anti- inflammatory properties and is thus used for a variety of medical purposes, such as alleviating depression and relieving physical and emotional symptoms of premenstrual syndrome (PMS) in women. Cultivation of St John’s Wort St. John’s wort is a perennial plant that likes its sun (but will stubbornly thrive in partial shade). Likewise, it loves light, warm, sandy soil, but can also spring to a healthy height of just about 3 feet even in poor soil. So easy it is to grow that it is considered a pernicious weed in some locations. If you’re growing St. John’s wort, make sure to keep a close eye on its growth spread because it has a tendency to crowd out more delicate herbs. The best time to grow St. John’s wort is in early spring or fall. 1. Locate an area (preferably indoors) that receives plenty of sunlight. 2. You can grow St. John’s wort from either seeds, stem cuttings or root divisions. In order to accelerate germination, soak in warm water overnight or for a few hours. 3. Let the plant flower before you harvest. St. John’s wort usually produces yellow blooms in late July. Harvest a third of the plant – both flowers and leaves. 4. Dry the leaves and flowers by storing in a dark and cool place from 7- 10 days or speed up drying using a dessicator.
  • 264.
    Page 263 Learn Herbal Tipson Growing St. John’s Wort Separate each plant by at least one feet as the roots have a wide spread. If you live in a cold area, then consider growing in a pot and burying it in soil to get through the winter. During the winter, cover the plant with a layer of mulch. Medicinal Uses of St John’s Wort St. John’s wort was highly valued in ancient Greece as both a medicinal plant and as a charm that could ward off evil. It was used as a cure for a range of illnesses, including ā€œnervous disordersā€, but the story goes deeper than that. Its name, ā€œHypericumā€, comes from the Greek word which means ā€œover an apparitionā€, indicating that the plant was considered powerful enough to ward off evil spirits. Today, it is widely used as a substitute for anti-depressants due to the fact that it produces comparatively fewer side effects, and is also used for numerous other medicinal purposes. While the jury is still out on the efficacy of St. John’s wort as an antidepressant, scientists are generally on the consensus that it might be effective in fighting low to mild depression, such as seasonal mood disorder, without any of the side effects. It may also soother anxiety, increase appetite and concentration, and make for easier sleeping. Fight depression - Cramps, food cravings, irritability and breast tenderness are some of the main problems that women have to face at that time of the month. A small dose of St. John’s wort tea or liquid extract can relieve those symptoms of PMS considerably. Say bye-bye to PMS -
  • 265.
    Page 264 Learn Herbal Cleanseyour skin before applying St. John’s wort oil on top of the burns. The healing effect should be immediately apparent, but sometimes, they can take time. Moreover, this plant has been proven to be highly effective and clinically safe way to treat regular burns unrelated to the sun. Stop worrying about sunburns - The antibacterial properties of St. John’s wort help in fighting inflammation, muscle pain, as well as wounds and hemorrhoids. If the wounds are open, then mix the oil with alcohol before applying topically. Soothe minor wounds and pains - St. John’s wort acts as a mild antibiotic, but also has the ancillary properties of a disinfectant. It is an excellent antiseptic, an active microbicide, and helps to fight gastritis and gingivitis. It is also a great weapon against thrush. Using it in oil form will yield the best results, but the capsule form doesn’t do too shabbily either. Prevent infection - Applying St. John’s oil is a great way to increase circulation beneath your skin, which helps to keep your skin hydrated and moisturized. Skin diseases like dermatitis and eczema are no match for the healing power of this versatile plant. Moreover, St. John’s wort’s antioxidant properties allow it to not only rejuvenate dry skin, but also maintain natural skin moisture, thus keeping your skin looking radiant. Bring life back to dry skin - Commonly known as RA, Rheumatoid Arthritis is an autoimmune disease that causes its victims severe pain. It is recommended to massage St. John’s wort oil, rather than the powder, over the areas where the pain is most intense. Treat Restrained Rheumatoid Arthritis -
  • 266.
    Page 265 Learn Herbal DIYHomemade St. John’s Wort Solutions St John’s Wort Oil Of all the mediums that St. John’s wort products can be found in the market, the most effective is its dark red oil rather than capsule or powder. Here is what you need to do... What you will need: 1 cupful of St. John wort’s fresh flowers Olive oil A jar with a lid Instructions on how to make your St. John Wort’s Oil: 1. Make sure the jar is clean as you’re going to be extracting your oil in there. 2. The flowers should be insect-free. You can do this by shaking the plants and leaving them in a sunny area for around an hour. 3. Put the flowers in the jar. 4. Add enough olive oil to cover all the flowers and close lid. 5. Keep in a warm, sunny place for at least 2 weeks (4 weeks recommended) until the oil starts taking on a deep red tone. 6. Strain the flowers by using a strainer over a bowl. Squeeze out every bit of oil using your hands – this is more fun than it sounds! 7. Pour the thus extracted oil into dark bottles because they are better for preservation or inside a cupboard. 8. Enjoy your bright red St. John wort’s oil for a year! St John’s Wort Facial Toner
  • 267.
    Page 266 Learn Herbal Havedry and scaly skin? No problem! St. John’s wort facial cream will take care of it in no time. Although St. John’s wort skin creams are still relatively new to the market, they have proved effective in giving life back to dry, dead skin. The herb is also rich in salicylic acid and ursolic acid, which can be effective for treating acne. Reap the benefits of this wonderful herb and revive your skin by making the facial toner at home yourself: What you will need: Freshly picked St. John’s wort flowers Boiled water (in a 1:1 ratio with the herb) Lemon grass A small bottle or bowl Instructions for making and using your St. John’s Wort facial toner: 1. Make sure that your bottle or bowl is sterile, as you will be using its contents on your face. 2. Boil it in water for around ten minutes then dry thoroughly with a clean cloth. 3. Once clean and dry, fill it halfway with water and put a peppering of lemon grass in it. 4. Crush dry St. John’s wort and soak in lemon grass-water mixture to get a pasty mash. 5. Boil to a temperature of 140-158 °F (60-70°C) then cool it. 6. Apply the mask to clean skin for 15-20 minutes then wash with hot water. This should be done 2-3 times a week.
  • 268.
    Page 267 Learn Herbal Whetheras a spiritual charm against evil or the versatile medicinal herb it has proven to be today, St. John’s wort is a plant definitely worth having around the house, preferable in a warm airy spot by the window, if only for the way its leaves perforate prettily (hence perforatum) in the sun. THYME Thyme (Thymus vulgaris and others in the genus Thymus) is a perennial herb of Southern European origin. Popularly known as a Mediterranean cooking ingredient, thyme possesses a distinctive herbaceous flavor and a heady aroma that matches well with meat, cheese, and tomatoes. It is a traditional component of the Arab herb mixture za’atar, and the French herbes de Provence and bouquet garni. Aside from its role in various cuisines, thyme is also known for its medicinal uses. Oil of thyme is a common homeopathic treatment, while thymol, the herb’s active ingredient, is found in commercial products such as Listerine. Historically, thyme was used by the Egyptians for embalming and by the Greeks as incense. Cultivation of Thyme
  • 269.
    Page 268 Learn Herbal Thoughthyme prefers sunny and warm locales, it can also grow on mountain highlands and in areas that experience drought and deep freeze. It is an easy herb to grow, and will thrive whether planted indoors or outdoors. If you intend to grow some for your self-consumption, here are the steps you need to follow: 1. Locate an area that receives full sun. Prepare dry, well-draining soil in a pot or plant box. 2. You can grow thyme from seeds or cuttings or root divisions. Grow them from root divisions if you want to harvest as soon as possible. 3. If you’re starting off with seeds, you can plant them in pots filled with potting soil, then cover them with a thin layer of compost. Planting them in pots allows you to move them when conditions outside are unfavorable. If starting with roots, gather the divisions (root and foliage) from three- or four-year-old plants and then re-plant them. 4. It is important not to water them too frequently. Thyme needs minimal watering and should only be watered during dry conditions. Tips on Growing Thyme Thyme effectively repels insects. You can even use a spray made with thyme tea to keep pests away from other plants. There are more than a hundred varieties of thyme to choose from. The three most popular are the common thyme, lemon thyme and wild thyme. When the plant begins to flower, cut off the top part and dry the herb by hanging. Medicinal Uses of Thyme
  • 270.
    Page 269 Learn Herbal Themedicinal properties of thyme were known even in ancient times. Hippocrates wrote about the herb, as did the botanist Pedanius Dioscorides. The Ancient Greeks, Egyptians, and Romans all found uses for the fragrant, versatile plant. Today, scientists have confirmed and continue to explore the many health benefits and curative effects of thyme. Kiss halitosis goodbye with thyme. Oil of thyme has powerful antibacterial properties that get rid of nasty germs in your mouth. Get rid of bad breath - Thyme essential oil is often used to treat whooping cough, bronchitis, asthma, laryngitis, and other respiratory problems, especially those involving the upper respiratory tract. Thyme contains terpenoids that make it a good expectorant and help improve the function of the cilia. Hot thyme tea has a soothing effect and relaxes the bronchi. Those who suffer from sinus infections can get the same benefits from thyme inhalation therapy. Clear your lungs - Thyme’s antiseptic, antifungal, and antibacterial properties help keep acne and other skin diseases away. Thyme oil can be incorporated into facial washes, soaps, hand creams, lotions, and toners for a detoxifying and exfoliating effect. Get blemish-free skin - The terpenoids in thyme, especially the ursolic and rosmarinic acids, have been found to help prevent cancer. Fight cancer -
  • 271.
    Page 270 Learn Herbal Knownas a digestive herb, thyme enhances the appetite, aids digestion, and stimulates the liver. Take thyme to cure an upset stomach or to banish that bloated feeling you get after a heavy meal. Take thyme and make your tummy happy - Thyme has antiparasitic, antifungal, antiviral, and antibacterial properties, which is why it is often used in products such as antibiotics, fungicides, and antiseptics. This is also why thyme is used to treat nail fungus, wounds, cuts, burns, parasitic diseases, and various infections. Eliminate nasty germs - DIY Homemade Thyme Solutions Thyme-Infused All-Purpose Home Cleaner You’ve probably heard of the disinfecting power of vinegar and tried using it for cleaning. It’s great for getting rid of germs, but the smell can be a bit overwhelming! To remedy this, infuse your vinegar-and-water solution with some aromatic herbs. Here is what you need to do: What you will need: A plastic bottle with spray nozzle Half a cup of distilled water Half a cup of distilled white vinegar 12 to 24 drops of thyme essential oil Other essential oils (optional) A funnel Instructions on how to make your thyme all-purpose cleaner:
  • 272.
    Page 271 Learn Herbal 1.Pour the vinegar and water into the spray bottle using a funnel. If you don’t have a funnel, you can cut out the top part of a plastic soda bottle and turn it into a funnel. 2. Add the thyme essential oil. You also have the option of adding drops of other essential oils to give your homemade all-purpose cleaner a unique fragrance. Some of the other oils that you can use are tea tree oil, orange oil, lemon oil, and peppermint oil. Lavender oil works well too because of its scent and its antimicrobial property. 3. Cover the bottle and shake. 4. When not in use, store your home cleaner away from direct sunlight or heat. Exposure to such elements may alter the chemical makeup of the essential oils. Another method for making your natural disinfectant is to use thyme leaves instead of thyme essential oil. Here’s how: 1. Boil some water in a pot. 2. Add one to two spoonfuls of thyme leaves, dried or fresh. Let them steep as though making tea. 3. Let the thyme tea cool before pouring it in your spray bottle. 4. Add vinegar. 5. You can also add essential oils to make your disinfectant more aromatic. 6. If you’re dealing with hard-to-remove stains and molds, use more vinegar than water in your homemade cleaner. Thyme Tea
  • 273.
    Page 272 Learn Herbal Herbalteas are chockfull of good stuff like antioxidants, vitamins and minerals. Regular consumption of these teas is a good way to stay healthy and provides great relief when suffering from sore throats and colds. When thyme is consumed as a tea, you get the optimum amount of thymol, its beneficial active ingredient. Create your own tea out of thyme and other herbs and make them a part of your daily life. What you need: 2 tablespoons of fresh thyme leaves OR 1 tablespoon of dried thyme A pot 2 cups of water Lemon juice (optional) Raw honey (optional) Instructions for making your thyme tea: 1. Bring 2 cups of water to a boil. 2. Finely chop about 2 tablespoons of fresh thyme. 3. Put the chopped fresh thyme OR a tablespoon of dried thyme into cups and then fill them with boiling water. 4. Let the thyme steep in the boiling water for up to ten minutes. 5. Add lemon juice and/or honey to taste. 6. Enjoy your tea! Thyme Facial Toner
  • 274.
    Page 273 Learn Herbal Recently,a study conducted by scientists at Leeds Metropolitan University showed that thyme works better than conventional benzoyl peroxide- containing prescription creams in fighting acne. Isn’t that great? And apart from getting rid of acne,thyme also soothes inflammation, gently exfoliates, and moisturizes dry skin. Reap the benefits of thyme and make your skin look flawless by making and using this thyme facial toner. What you will need: 1 tablespoon of dried thyme 3 to 4 tablespoons of witch hazel A small bottle or bowl Instructions for making and using your thyme facial toner: 1. Make sure that your bottle or bowl is sterile, as you will be using its contents on your face. Boil it in water for around ten minutes then dry thoroughly with a clean cloth. 2. Once clean and dry, put one tablespoon of the dried thyme in it. 3. Pour three to four tablespoons of witch hazel into the bottle. Then cover the bottle and shake it well. 4. Let the thyme steep in witch hazel for 20 minutes. The witch hazel should be light brown or darker by the time you reach the 20-minute mark. 5. Pour a drop or two of the toner on a ball of cotton or a clean and soft face towel and dab it onto your face gently. Let the toner linger on spots infected with acne. If you don’t have witch hazel, you can get the same effect by mixing thyme oil or dried thyme with your facial products.
  • 275.
    Page 274 Learn Herbal Youknow there’s truth to a plant’s purported health benefits when even the ancients were raving about it. And now, modern science has shown what the Greeks and Romans knew all along. Thyme is a powerful herb with many valuable uses to offer. Keep a pot of thyme on your windowsill or in your garden to enjoy its benefits any time you want. TURMERIC If you’ve dined at an authentic Indian restaurant or have tried cooking an Indian dish, then you’ve probably come across turmeric. This powerful herb imparts a bright yellow color and a distinctive, pungent taste and aroma to food. Turmeric (Curcuma longa) is a plant native to South Asia that looks similar to ginger. It is an important ingredient in Indian and Asian cuisine, is an Ayurvedic medicine, and has been used as a natural dye for more than 2,000 years.
  • 276.
    Page 275 Learn Herbal Cultivationof Thyme Turmeric plants do not produce seeds. You have to cultivate them from roots or rhizomes. 1. Get fresh turmeric roots from your local market or nursery. Select plump, juicy-looking rhizomes that already have little buds growing. 2. You can either plant the root directly or cut the buds or ā€œfingersā€ off and plant them one by one in pots filled with well-draining soil. Dig holes 12 to 16 inches apart and at least 2 inches deep, then place the roots with their buds facing upwards. 3. Place the pots in areas where they can get full sun. They can also grow in slightly shaded spots. 4. Because turmeric plants are prone to root rot, avoid giving them too much water. 5. After a few weeks, you will start to see some sprouts peeking through the soil. You will then have to wait 8 to 10 months before the roots are ready for harvesting. Tips on Growing Turmeric You can plant the roots directly outside, though it may be better and safer if you keep them in pots first before transplanting them. Transplanting should be done during late fall. Turmeric needs temperatures between 20°C and 30°C to thrive. Medicinal Uses of Turmeric
  • 277.
    Page 276 Learn Herbal Thisancient herb has served numerous uses for thousands of years. Apart from adding flavor to food, it has also been used to dye clothes and condiments. Turmeric also serves a variety of ceremonial uses: as a thanksgiving offering, as a dye for the robes of Buddhist monks, and as a paste to color the body of brides and grooms. Through the centuries, it has also gradually carved its niche in the field of medicine. In fact, scientific studies have shown again and again turmeric’s beneficial effects to our health. Here are some of the known medicinal benefits of this versatile rhizome: Turmeric has antibacterial and antiseptic properties. Use it to keep cuts and burns from getting infected. Helps treat wounds - Results from a number of laboratory tests using mice as test subjects showed considerable success after using turmeric to prevent the spread of breast cancer. Combined with cauliflower, it has been proven to prevent the growth of prostate cancer. It also stops the growth of blood vessels in existing tumors. Positive results against cancer - Studies have shown that the herb helps stop the buildup of amyloid plaque in the brain, which in turn slows down the progression of this dreaded disease. Possible treatment for Alzheimer’s disease - Turmeric is great for the skin. It helps prevent and treat various skin diseases like psoriasis, and can be used for exfoliating, getting rid of acne, lightening stretch marks, healing burns, and keeping wrinkles away. Keeps skin healthy and flawless -
  • 278.
    Page 277 Learn Herbal Useturmeric for weight management. Its active ingredient, curcumin, stimulates gallbladder activity, aids digestion, and hastens fat metabolism. Add it to your stews, soups, and roasts to reap its slimming benefits. Aids in weight loss - Because of its anti-inflammatory properties, turmeric has been found helpful in treating and managing the symptoms of arthritis. It is also used to detoxify the liver, treat depression, prevent metastases, regulate cholesterol levels, and reduce the physical effects of a stressful lifestyle. And so much more - DIY Homemade Turmeric Solutions The number of ways by which you can use this humble herb is astounding. Turmeric can be used to make homemade soaps, toothpaste, and dye for arts and crafts projects. You can even use it to make temporary tattoos! Below are three turmeric products that you can make at home. Turmeric Face Pack Using an ingredient so pungent and stain-inducing to improve the skin’s appearance may sound counterintuitive, but, in fact, turmeric can be made into different kinds of face packs to deal with specific skin problems. Even famous celebrities,such as the actress Thandie Newton, have shared that they use turmeric in their makeup and in their moisturizer. Try this recipe for a turmeric face pack to both moisturize and exfoliate the skin. What you will need:
  • 279.
    Page 278 Learn Herbal 2tablespoons of fresh cream or curd 1/4 teaspoon of turmeric powder 1/2 teaspoon of jojoba oil A drop of sandalwood oil A tablespoon of honey A small bowl Instructions for making and using your turmeric face pack: 1. Mix all the ingredients in a small bowl. 2. Wash your face with lukewarm water and then dry it with a soft towel. 3. Scoop a small amount of the face pack and gently massage it all over your face with your fingertips. Be careful not to get it in your eyes. 4. Keep it on your face for around 15 minutes before you wash it off with warm water. For best results, use this natural face pack three times a week. If you’re dealing with acne, you need a face pack that contains neem leaves as well as turmeric. Because of its anti-fungal and antibacterial properties, neem can effectively treat acne and other skin infections. What you will need: At least 30 fresh neem leaves 5 drops of neem oil A spoon of turmeric (grated or ground) Instructions for making and using your anti-pimple turmeric face pack:
  • 280.
    Page 279 Learn Herbal 1.Place all the ingredients in a blender and blend until you get a paste- like consistency. 2. Pour the paste into a bowl. 3. To use, dab the paste on the affected areas and let it sit for a few minutes before washing your face with clean, lukewarm water. Turmeric Juice To maximize the health benefits of turmeric, take it in juice form. This way, you get all of the nutrients and antioxidants that are normally lost during cooking. But because turmeric has a strong taste and odor, you will need a few more ingredients to make it palatable. Here is one way to make turmeric juice: What you will need: Turmeric (a 5- to 7-inch piece will suffice) 5 to 7 pieces of tamarind A couple of lemons Raw honey Water A large pot A sauce pan A blender A strainer A small bowl Any glass jar with a lid Instructions for making your turmeric juice:
  • 281.
    Page 280 Learn Herbal 1.Peel the turmeric. 2. Get the inner fruit of the tamarind by cracking the shell open and extricating it from the roots. 3. Pour some water in a large pot and add the turmeric. Bring the water to a boil and then let it boil for 20 more minutes or until the water turns bright yellow in color. 4. In a sauce pan, add about an inch of water and the tamarind. Place it over low heat. 5. Don’t let the tamarind settle in the pan. Instead, use a wooden spoon to move it around continuously. Do this until the tamarind melts into the water and becomes something like a jam. Add water if the mixture seems too dry. 6. Turn the heat off once the mixture is soft enough and when the seeds start to separate from the pulp. Set aside and let it cool. 7. If the turmeric water is still too hot, pour a bit of cold water into it. Then pour the turmeric water it into a blender along with the softened turmeric root. By blending them, the color should turn into a more vivid yellow. 8. Next, use a strainer and a wooden spoon to drain the tamarind mixture into a small bowl. Make sure that no peel or seed gets through. 9. Add the strained tamarind mixture into the blender containing the turmeric water and blend some more. 10. Roll the lemons to loosen the pulp inside before slicing them and squeezing the juice into the blender. Give it a final whizz. 11. You’re now ready to enjoy your natural homemade turmeric juice. Pour it into glass jars and serve chilled. It will keep for four days in the fridge.
  • 282.
    Page 281 Learn Herbal TurmericTea Turmeric tea is imbued with the natural goodness of the herb. Take it every morning and/or before meals to cleanse your liver, improve digestion, and relieve stress. What you will need: ¼ cup of grated turmeric root or 1 tablespoon of ground turmeric 2 tablespoons of grated ginger root or ginger powder 4 cups of water A pot A strainer A glass container Lemon (optional) Raw honey (optional) Instructions for making your turmeric tea: 1. Peel and grate both the turmeric and the ginger root. 2. Pour the water into the pot along with the grated turmeric and ginger. 3. Boil the mixture for up to 20 minutes. 4. Use a strainer placed over a glass container or tea cup to separate the grated turmeric and ginger from the tea. 5. Let it cool for a few minutes. 6. Add lemon and/or honey to your liking.
  • 283.
    Page 282 Learn Herbal Ifyou are using ground turmeric and powdered ginger, allow the water to boil before adding them. The recipe above makes 4 cups of turmeric tea, which is enough for a whole day. However, if you are pregnant, nursing or suffering from gallstones or an acidic stomach, it is better that you refrain from having or lessen your consumption of turmeric tea. You might also want to get your toothbrush ready after drinking the tea, as turmeric is notorious for staining everything it comes in contact with – including your teeth. VALERIAN
  • 284.
    Page 283 Learn Herbal Nativeto Europe and parts of Asia, valerian is a perennial flowing plant with straight, hollow stems topped by an umbrella-shaped fringe of delicate pink or white flowers. Despite its elegant look, its roots, when dry, can give off an unpleasant odor. Ever since the time of ancient Greece and Rome, valerian (Valeriana officinalis) has been used as a folk remedy for a variety of ailments, such as insomnia, anxiety, nervousness and heart palpitations. Its popularity as a sleeping aide gradually decreased with the advent of modern sleep prescription medication. In 17th century Europe, it was popularly used as a perfume extract. Scientists are unsure how this herbs, but believe it to be responsible for the increased production of gamma aminobutyric acid (GABA) in the brain, which regulates nerve cells and alleviates anxiety. While this plant of many names – Setwall, Capon’s Tail, Setewale etc. – has its medicinal uses, nowadays it is also used widely as ornamentation. Cultivation of Valerian Valerian, or All-Heal or Amantilla as it is sometimes known, blooms abundantly throughout the summer months, prolifically popping out flowers that smell like vanilla and cherry – or perhaps aged cheese. Its leaves are a moderate green that brings out the light white and pink of the petals nicely, perfect for decoration. Valerian likes its light, and while it seems to require plenty of water during its infant stage, it does well on dry soil as an adult. This sedate herb with its trumpet-shaped cluster of airy pink and white flowers is notoriously hard to grow from seed.
  • 285.
    Page 284 Learn Herbal 1.The germination rates of valerian seeds are unpredictable (in fact, the plant does not bloom its first year from seed), so get root divisions or rooted runners of an established plant from your local nursery if possible. 2. Plant the roots firmly in fertile soil in a place where it gets plenty of sunlight. Water frequently enough so that the roots don’t dry out: a growing valerian needs its moisture. 3. The roots are the medicinal part of the plant. Harvest in fall before the frost starts biting. Tips on Growing Valerian Valerian has been known to attract dogs and cats (it acts like a catnip for the latter, in fact), so in order to avoid having your valerian dug out by the pesky feline addicts, wedge in some rocks in the root around the soil. Add mulch to your valerian during both spring and fall. If you really want to try growing valerian from seeds, purchase fresh seeds and plant them in moist, well-worked soil. Start planting in the spring, but beware of birds. Valerian seeds germinate close to the ground since they need light – as such, they’re very prone to predation. By keeping the seeds more or less moist, you should have germinating seeds on your hands in about 10 days. Medicinal Uses of Valerian
  • 286.
    Page 285 Learn Herbal Inmedieval Sweden, this hardy, aromatic herb was tucked in the pockets of bridegrooms in order to ward off the evil eye of elves, and it is rumored that the Pied Piper used valerian to entice the rats into following him to the river. Such superstitious and fantastical applications are well and all, but it is perhaps more important to note that valerian has been long dubbed as ā€œthe poor man’s Valiumā€ for its sedative effects. And that should come as no surprise because ever since the time of ancient Rome and Greece, valerian has been used as a treatment for insomnia. Today, valerian ranks as the most used non-prescription sedative in Europe. Here are a few ways in which valerian can be used for medicinal purposes: One of the most effective ways to battle insomnia is to use valerian, which does not leave a ā€œhangoverā€ effect (characterized by fatigue or drowsiness) unlike some other sleeps aides. Although not all studies show a positive correlation between valerian intake and quality or longevity of sleep, positive results can be achieved if valerian is consumed daily over a period of 2-4 weeks along with a combination of hops (Humulus lupulus), lemon balm (Melissa officianalis) and other herbs that induce drowsiness. Sleep like a log - Although no concrete evidence for its effectiveness in curing anxiety yet exists, valerian has long been used as a treatment for illness related to anxiety and psychological stress, including nervous asthma, headaches, migraine, hypochondria (the irrational fear or illness), and stomach upsets. Ease your anxiety -
  • 287.
    Page 286 Learn Herbal Formuscles pains and joint aches, valerian is ideal. Some women take valerian as to ward off menstrual cramps and other symptoms, for example, hot flushes, associated with menopause. Say goodbye to pain - The uses of valerian are many and varied. This perennial herb can be used to battle against epilepsy, neuralgia, multiple sclerosis, vertigo, chronic skin diseases and sciatica. Like spearmint, valerian has a calming and relaxing effect on the body. And so much more - DIY Homemade Valerian Solutions For an herb whose medicinal properties scientists still fiercely debate over, valerian has seen a mind-blowing number of applications. Galen, the ancient Roman pharmacist, surgeon and philosopher, named it ā€œphuā€ after its pungent smell, prescribing it as a cure for insomnia. This perennial herb protected bridegrooms from the evil eye of elves during the Middle Ages and came to be used as popular European perfume extract in the 17th century. Native Americans turned to valerian as a substitute for flour; Germans used it as a coffee substitute; and the British used it as base for soup. During World War I, soldiers and civilians used it to relieve stress and anxiety. Valerian Tea Having trouble with insomnia, anxiety or migraines? Taking some valerian tea every other day can help to get you back in top form. The tea’s pungent smell might not be for everyone, but its curative effects are more than enough reason to take the time and effort to brew it. Here’s one way to brew valerian tea: What you will need:
  • 288.
    Page 287 Learn Herbal 1teaspoon of dried valerian root Stainless steel or ceramic kettle 8oz of hot water and tap water A tea pot A strainer Milk (optional) Raw honey (optional) Sweetener (optional) Instructions: 1. Fill the tea pot with hot tap water in order to prepare the container. 2. Pour about 6-8oz of filtered water into the kettle and boil until bubbles form and burst rapidly. 3. Drain the tea pot of tap water, add valerian root then pour in the boiled kettle water. Cover the tea pot with a lid. 4. Let it steep for around 10-15 minutes. The steep time is so long because valerian roots are hardy, unlike more delicate flowers and shrubs, and it takes time for its medicinal properties to infuse with the water. 5. Uncover and place a strainer over a cup. Pour the tea down in order to separate the leaves from the liquid. 6. Let it cool for a while before serving. 7. Add milk, honey or sweetener to your heart’s content. One way to facilitate the release of medicinal components into your tea is to use an infusion device such as a heat seal tea bag or a tea ball. Fill your infusion device with valerian root then steep in boiled water. This arguably produces better results than loose leaf steeping. While handling the roots, beware that they can give off an unpleasant smell when dry.
  • 289.
    Page 288 Learn Herbal Asornamentation for the garden of your new cottage home, valerian with its bright cherry-vanilla flowers attracts equally colorful butterflies. As a protector of medieval Swedish bridegrooms against the evil eye of elves, it has no equal. If you find yourself suddenly impecunious and can no longer afford coffee or flour, then valerian is an ideal substitute. And as a medicinal herb that makes your nights easier, valerian is a true friend. YARROW
  • 290.
    Page 289 Learn Herbal Amember of the aster family, yarrow (Achillea millefolium) is closely related to chamomile and chrysanthemums. Native to temperate regions of the Northern Hemisphere in Asia, Europe and North America, this flower thrives in warm, sunny slopes,as well as meadows and roadsides. Typically, the flowers are arranged in white clusters with a hairy stem (often no more than 3 feet in height) edged with feathery, cauline leaves, but hot pink and pale purple flowers have been known to dominate entire tracts of mountainous areas. Other colors include salmon, red and yellow. Legend has it that yarrow was named after Achilles, who used this herbaceous perennial plant as a salve to soother his soldiers’ wounds. In fact,historically, it was for a time called herbal militaris for its ability to stem blood flow from soldiers’ wounds. The plant has a sweet and powerful scent, not unlike chrysanthemums. Cultivation of Yarrow Yarrows are easy to grow and maintain, given the right condition. A hot, sunny place with sandy or loamy soil makes for a healthy yarrow plant. This hardy member of the aster family will thrive in dry average to poor soil, but will not tolerate wet soil. It is ideal to start planting in either early spring or summer.
  • 291.
    Page 290 Learn Herbal 1.Select a site with full exposure to sun and well-drained soil. 2. With the help of a garden fork, cut a 12-15 inch hole into the soil (at least twice the diameter of the pot the plant resides in), then fill it with 2-4 inches of compost. 3. Carefully remove the plant from the pot and lower it into the hole. Firm the soil around the root ball gently then water adequately. 4. Harvest only after the flowers are open and while they are still vibrant-looking. Tips on Growing Yarrow Space the plants 1 to 2 feet apart. Yarrow is fast-growing and invasive and can take over your garden if you’re not careful. Add a thin layer of compost and at least a 2-inch layer of mulch each spring. If it is especially dry during the summer (less than 1 inch of rain per week), remember to water the plants adequately. Medicinal Uses of Yarrow Hailed as a powerful and healing magical herb for centuries, yarrow was used to ā€œdrive out the devilā€ from those who were unfortunate enough to be possessed. However, the holy mass had to be recited 7 times in order for this to work – and the victim was obliged to drink yellow while hanging upside down from a church bell… Less superstitiously, the plant has its history conjoined with advances in metallurgy since 5000 BP .
  • 292.
    Page 291 Learn Herbal Ashard bronze knives and swords with sharp edges capable of cutting deep into skin became more common, so did the risk of large open wounds that would often have been fatal – if not for the blood staunching properties of yarrow. For thousands of years, yarrow, or the Soldier’s Woundwort, has acted as superior wound dressing, but that’s not all. The yarrow has plenty of other medicinal uses; here are some of them: Yarrow’s has a great ability to staunch blood flow. Close open wounds - - Have unbearable menstrual cramps? A healthy dose of yarrow tea can relax your uterine muscles, driving the pain away in no time. Say goodbye to nasty PMS cramps Yarrow also has the ability to relax stomach muscles and contains flavonoids, plant-based chemicals that increase saliva and stomach acid production, helping digestion. In combination with other herbs, it is effective in battling against bloating, flatulence, mild gastrointestinal (GI) cramping and other GI-related problems. No more stomach pains - The ability of this perennial herb to makes us sweat has been somewhat eclipsed by its ability to staunch blood flow in open wounds. Nevertheless, as Dr. Christopher once wrote, ā€œYarrow, when administered hot and copiously, will raise the heat of the body, equalize the circulation, and produce perspiration.ā€ A cup of yarrow tea during fever should be effective in sweating out infection. Fevers are often accompanied by cold, which too yarrow can solve when combined with elderflower and peppermint. Sweat out fevers -
  • 293.
    Page 292 Learn Herbal Becauseof its antiseptic properties, yarrow is believed to be a kidney and urinary tract cleanser. It is effective as a diuretic and anti-inflammatory in case of urinary infection, such as cystitis. A natural diuretic - The wonderful anti-inflammatory and analgesic properties of this herb make it ideal for a number of medicinal uses. It can be used for amenorrhea (irregular menstrual cycles), improving circulation by dilating the blood vessels, heartburn and so much more! And so much more - DIY Homemade Yarrow Solutions From being the greatest weapon of Achilles, who was an excellent student of the healing arts, to being used to ward off the devil in dubious church rituals, the number of uses that yarrow has seen boggles the mind. Apart from its blood-staunching and sweat-inducing properties, yarrow was celebrated among tribes for a number of things: The flower heads of yarrow served as deodorant for the armpits of the Flathead Indians of Montana while the Okanagon people used it as mosquito repellent by placing it over hot coal in order to make a kind of smudge. You can try making some simple remedies yourself. Yarrow Oil Containing a chemical called proazulenes, this dark blue essential oil is extremely easy to apply and can be massaged over varicose veins or hemorrhoids in combination with Agrimoni oil or used as chest rubs for cold and influenza. What you will need:
  • 294.
    Page 293 Learn Herbal Freshor dried yarrow leaves and flowering tops Olive oil (3 ounces of yarrow per pint volume) Wide-mouthed jar Water Instructions for making and using your yarrow oil: 1. Make sure the yarrow is free of insects and pests. You can do this by leaving it out in the sun for an hour or two. 2. Stuff the herb into the jar, then douse with a generous amount of olive oil. Close the lid once the jar is filed with oil. 3. Stir every four hours on the first day and continue this daily regime for just up to a month. 4. Keep the temperature conditions at 105-110 degrees Fahrenheit. 5. It is advisable to compensate for water content if fresh herb is used. Once all the oil seeps out, use it to your heart’s content. Yarrow Tea One of the best ways to reap the benefits of the herb is to consume it in tea form. The best use of yarrow tea is as a cold-fighting remedy or preventative due to the presence of substances like achillin and balchanolide, which are believed to boost the immune system. Its oil also contains antimicrobial agents. What you will need:
  • 295.
    Page 294 Learn Herbal 1cup of yarrow 6 cups of water A pot A strainer Lemon (optional) Raw honey (optional) Instructions for making your yarrow tea: 1. Boil a pot full of water until bug bubbles rapidly form and burst. 2. Add in yarrow. 3. Let it steep for over 5 minutes. You want your yarrow tea to take on a nice honey-toned color. 4. Place a strainer over a cup and pour the tea in order to filter out the leaves. 5. Let it cool for a few minutes. 6. Add lemon and/or honey to your liking. Whether to splash some color into a monotonously green garden or to use as remedy for cold, fevers or chest pains, yarrow with its many names and colors is a plant worth having around the house. You never know when you might be in dire need of herbal gauze for open wounds!