This repair manual provides instructions for dismantling and repairing the Krupp HM 1000 hydraulic hammer. It details the necessary tools and safety precautions. Dismantling begins by removing the working tool, then the percussion mechanism, high-pressure accumulator, valves, cylinder cover, and other internal components.
Manual de servicio de toyota NEW LAND CRUSIER 70, 1VD-FTV motor COMMON Rail, para que el técnico con la ayuda del manual pueda ajustar de acuerdo a los datos del fabricante.
Manual de servicio de toyota NEW LAND CRUSIER 70, 1VD-FTV motor COMMON Rail, para que el técnico con la ayuda del manual pueda ajustar de acuerdo a los datos del fabricante.
PERKINS 2200 SERIES 2206D-E13TA INDUSTRIAL ENGINE Service Repair Manualjsnekmse
This is the Highly Detailed factory service repair manual for thePERKINS 2200 SERIES 2206D-E13TA INDUSTRIAL ENGINE , this Service Manual has detailed illustrations as well as step by step instructions,It is 100 percents complete and intact. they are specifically written for the do-it-yourself-er as well as the experienced mechanic.PERKINS 2200 SERIES 2206D-E13TA INDUSTRIAL ENGINE Service Repair Workshop Manual provides step-by-step instructions based on the complete dis-assembly of the machine. It is this level of detail, along with hundreds of photos and illustrations, that guide the reader through each service and repair procedure. Complete download comes in pdf format which can work under all PC based windows operating system and Mac also, All pages are printable. Using this repair manual is an inexpensive way to keep your vehicle working properly.
Operation and Maintenance Manual Cover:
Safety Section
Product Information Section
Operation Section
Maintenance Section
Warranty Section
Index Section
Engine Schematic
Systems Operation Testing and Adjusting Cover:
Systems Operation Section
Testing and Adjusting Section
Fuel System
Air Inlet and Exhaust System
Lubrication System
Cooling System
Basic Engine
Electrical System
Index Section
Troubleshooting Manual Cover:
Introduction
Electronic System Overview
Configuration Parameters
Diagnostic Trouble Codes
Event Codes
Symptom Troubleshooting
Circuit Tests
Service
Index Section
File Format: PDF
Compatible: All Versions of Windows & Mac
Language: English
Requirements: Adobe PDF Reader
NO waiting, Buy from responsible seller and get INSTANT DOWNLOAD, Without wasting your hard-owned money on uncertainty or surprise! All pages are is great to havePERKINS 2200 SERIES 2206D-E13TA INDUSTRIAL ENGINE Service Repair Workshop Manual.
Looking for some other Service Repair Manual,please check:
https://www.aservicemanualpdf.com/
Thanks for visiting!
8
Caterpillar ofrece una amplia variedad de
accesorios optativos e instalados en fábrica
para mejorar el rendimiento y la administración
del equipo en el sitio de trabajo, Caterpillar ofrece una amplia variedad de
accesorios optativos e instalados en fábrica
para mejorar el rendimiento y la administración
del equipo en el sitio de trabajo.
1999 Sea Doo Challenger 1800 Service Repair Manualujfjjsjefksekm
This is the Highly Detailed factory service repair manual for the1999 SEA DOO CHALLENGER 1800, this Service Manual has detailed illustrations as well as step by step instructions,It is 100 percents complete and intact. they are specifically written for the do-it-yourself-er as well as the experienced mechanic.1999 SEA DOO CHALLENGER 1800 Service Repair Workshop Manual provides step-by-step instructions based on the complete dis-assembly of the machine. It is this level of detail, along with hundreds of photos and illustrations, that guide the reader through each service and repair procedure. Complete download comes in pdf format which can work under all PC based windows operating system and Mac also, All pages are printable. Using this repair manual is an inexpensive way to keep your vehicle working properly.
Service Repair Manual Covers:
Safe Notice
Introduction
Service Tools and Products
Maintenance
Troubleshooting
Engine
Cooling System
Lubrication System
Electrical
Propulsion System
Steering System
Hull / Deck
Technical Data
Wiring Diagrams
File Format: PDF
Compatible: All Versions of Windows & Mac
Language: English
Requirements: Adobe PDF Reader
NO waiting, Buy from responsible seller and get INSTANT DOWNLOAD, Without wasting your hard-owned money on uncertainty or surprise! All pages are is great to have1999 SEA DOO CHALLENGER 1800 Service Repair Workshop Manual.
Thanks for visiting!
PERKINS 2000 SERIES 2006 DIESEL ENGINE(model 2006TWG2)Service Repair Manualjnsekmdmm
This is the Highly Detailed factory service repair manual for thePERKINS 2000 SERIES 2006 DIESEL ENGINE, this Service Manual has detailed illustrations as well as step by step instructions,It is 100 percents complete and intact. they are specifically written for the do-it-yourself-er as well as the experienced mechanic.PERKINS 2000 SERIES 2006 DIESEL ENGINE Service Repair Workshop Manual provides step-by-step instructions based on the complete dis-assembly of the machine. It is this level of detail, along with hundreds of photos and illustrations, that guide the reader through each service and repair procedure. Complete download comes in pdf format which can work under all PC based windows operating system and Mac also, All pages are printable. Using this repair manual is an inexpensive way to keep your vehicle working properly.
Service Repair Manual Covers:
10 General information
11 Specifications
12 Cylinder head assembly
13 Piston and connecting rod assembly
14 Crankshaft assembly
15 Wheelcase and drive assembly
16 Cylinder block assembly
17 Engine timing
18 Aspiration system
19 Lubrication system
20 Fuel system
21 Cooling system
22 Flywheel and flywheel housing
23 Electrical equipment
24 Auxiliary equipment
25 Running-in and test
26 List of special tools
USER’S HANDBOOK Cover:
1 General information
2 Engine views
3 Operation instructions
4 Preventive maintenance
5 Engine systems
6 Fault diagnosis
File Format: PDF
Compatible: All Versions of Windows & Mac
Language: English
Requirements: Adobe PDF Reader
NO waiting, Buy from responsible seller and get INSTANT DOWNLOAD, Without wasting your hard-owned money on uncertainty or surprise! All pages are is great to havePERKINS 2000 SERIES 2006 DIESEL ENGINE Service Repair Workshop Manual.
Looking for some other Service Repair Manual,please check:
https://www.aservicemanualpdf.com/
Thanks for visiting!
8
"Trans Failsafe Prog" on your BMW X5 indicates potential transmission issues requiring immediate action. This safety feature activates in response to abnormalities like low fluid levels, leaks, faulty sensors, electrical or mechanical failures, and overheating.
In this presentation, we have discussed a very important feature of BMW X5 cars… the Comfort Access. Things that can significantly limit its functionality. And things that you can try to restore the functionality of such a convenient feature of your vehicle.
𝘼𝙣𝙩𝙞𝙦𝙪𝙚 𝙋𝙡𝙖𝙨𝙩𝙞𝙘 𝙏𝙧𝙖𝙙𝙚𝙧𝙨 𝙞𝙨 𝙫𝙚𝙧𝙮 𝙛𝙖𝙢𝙤𝙪𝙨 𝙛𝙤𝙧 𝙢𝙖𝙣𝙪𝙛𝙖𝙘𝙩𝙪𝙧𝙞𝙣𝙜 𝙩𝙝𝙚𝙞𝙧 𝙥𝙧𝙤𝙙𝙪𝙘𝙩𝙨. 𝙒𝙚 𝙝𝙖𝙫𝙚 𝙖𝙡𝙡 𝙩𝙝𝙚 𝙥𝙡𝙖𝙨𝙩𝙞𝙘 𝙜𝙧𝙖𝙣𝙪𝙡𝙚𝙨 𝙪𝙨𝙚𝙙 𝙞𝙣 𝙖𝙪𝙩𝙤𝙢𝙤𝙩𝙞𝙫𝙚 𝙖𝙣𝙙 𝙖𝙪𝙩𝙤 𝙥𝙖𝙧𝙩𝙨 𝙖𝙣𝙙 𝙖𝙡𝙡 𝙩𝙝𝙚 𝙛𝙖𝙢𝙤𝙪𝙨 𝙘𝙤𝙢𝙥𝙖𝙣𝙞𝙚𝙨 𝙗𝙪𝙮 𝙩𝙝𝙚 𝙜𝙧𝙖𝙣𝙪𝙡𝙚𝙨 𝙛𝙧𝙤𝙢 𝙪𝙨.
Over the 10 years, we have gained a strong foothold in the market due to our range's high quality, competitive prices, and time-lined delivery schedules.
Symptoms like intermittent starting and key recognition errors signal potential problems with your Mercedes’ EIS. Use diagnostic steps like error code checks and spare key tests. Professional diagnosis and solutions like EIS replacement ensure safe driving. Consult a qualified technician for accurate diagnosis and repair.
Core technology of Hyundai Motor Group's EV platform 'E-GMP'Hyundai Motor Group
What’s the force behind Hyundai Motor Group's EV performance and quality?
Maximized driving performance and quick charging time through high-density battery pack and fast charging technology and applicable to various vehicle types!
Discover more about Hyundai Motor Group’s EV platform ‘E-GMP’!
5 Warning Signs Your BMW's Intelligent Battery Sensor Needs AttentionBertini's German Motors
IBS monitors and manages your BMW’s battery performance. If it malfunctions, you will have to deal with an array of electrical issues in your vehicle. Recognize warning signs like dimming headlights, frequent battery replacements, and electrical malfunctions to address potential IBS issues promptly.
Why Is Your BMW X3 Hood Not Responding To Release CommandsDart Auto
Experiencing difficulty opening your BMW X3's hood? This guide explores potential issues like mechanical obstruction, hood release mechanism failure, electrical problems, and emergency release malfunctions. Troubleshooting tips include basic checks, clearing obstructions, applying pressure, and using the emergency release.
What Exactly Is The Common Rail Direct Injection System & How Does It WorkMotor Cars International
Learn about Common Rail Direct Injection (CRDi) - the revolutionary technology that has made diesel engines more efficient. Explore its workings, advantages like enhanced fuel efficiency and increased power output, along with drawbacks such as complexity and higher initial cost. Compare CRDi with traditional diesel engines and discover why it's the preferred choice for modern engines.
What Does the Active Steering Malfunction Warning Mean for Your BMWTanner Motors
Discover the reasons why your BMW’s Active Steering malfunction warning might come on. From electrical glitches to mechanical failures and software anomalies, addressing these promptly with professional inspection and maintenance ensures continued safety and performance on the road, maintaining the integrity of your driving experience.
Things to remember while upgrading the brakes of your carjennifermiller8137
Upgrading the brakes of your car? Keep these things in mind before doing so. Additionally, start using an OBD 2 GPS tracker so that you never miss a vehicle maintenance appointment. On top of this, a car GPS tracker will also let you master good driving habits that will let you increase the operational life of your car’s brakes.
What Does the PARKTRONIC Inoperative, See Owner's Manual Message Mean for You...Autohaus Service and Sales
Learn what "PARKTRONIC Inoperative, See Owner's Manual" means for your Mercedes-Benz. This message indicates a malfunction in the parking assistance system, potentially due to sensor issues or electrical faults. Prompt attention is crucial to ensure safety and functionality. Follow steps outlined for diagnosis and repair in the owner's manual.
Comprehensive program for Agricultural Finance, the Automotive Sector, and Empowerment . We will define the full scope and provide a detailed two-week plan for identifying strategic partners in each area within Limpopo, including target areas.:
1. Agricultural : Supporting Primary and Secondary Agriculture
• Scope: Provide support solutions to enhance agricultural productivity and sustainability.
• Target Areas: Polokwane, Tzaneen, Thohoyandou, Makhado, and Giyani.
2. Automotive Sector: Partnerships with Mechanics and Panel Beater Shops
• Scope: Develop collaborations with automotive service providers to improve service quality and business operations.
• Target Areas: Polokwane, Lephalale, Mokopane, Phalaborwa, and Bela-Bela.
3. Empowerment : Focusing on Women Empowerment
• Scope: Provide business support support and training to women-owned businesses, promoting economic inclusion.
• Target Areas: Polokwane, Thohoyandou, Musina, Burgersfort, and Louis Trichardt.
We will also prioritize Industrial Economic Zone areas and their priorities.
Sign up on https://profilesmes.online/welcome/
To be eligible:
1. You must have a registered business and operate in Limpopo
2. Generate revenue
3. Sectors : Agriculture ( primary and secondary) and Automative
Women and Youth are encouraged to apply even if you don't fall in those sectors.
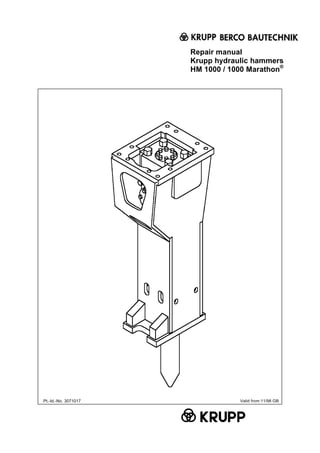
2. Repair manual HM 1000 / 1000 Marathon
®
Version 11/98
Contents
1
Contents
Chapter Title Version Page
1. General........................................................................................11/98............... 1
1.1 Explanation of the symbols in the repair manual .................................................. 2
2. Operational safety.......................................................................11/98............... 1
2.1 General................................................................................................................ 1
2.2 Accident prevention regulations............................................................................ 1
2.3 Tools, measuring and testing equipment............................................................... 2
2.4 Operating media/consumables.............................................................................. 2
3. Tools............................................................................................11/98............... 1
3.1 General tools........................................................................................................ 1
3.2 Toolbox 3............................................................................................................. 2
3.3 Special accessories.............................................................................................. 3
3.3.1 Accumulator filling device..................................................................................... 3
3.3.2 Power wrench....................................................................................................... 4
3.3.3 Heli-Coil tools....................................................................................................... 4
3.3.4 Fitting aid for percussion piston............................................................................ 5
3.3.5 Press-out aid for wear bushes............................................................................... 5
4. Dismantling the hydraulic hammer............................................11/98............... 1
4.1 Removing the working tool................................................................................... 1
4.2 Removing the percussion mechanism of the HM 1000 from the hammer box....... 2
4.3 Removing the high-pressure accumulator............................................................. 3
4.4 Removing the control slide valve.......................................................................... 4
4.5 Removing the AutoControl - valve........................................................................ 5
4.6 Removing the perforated disk............................................................................... 6
4.7 Removing the cylinder cover................................................................................ 6
4.8 Removing the percussion piston and sealing bush................................................ 8
4.9 Removing the cylinder.......................................................................................... 8
4.10 Removing the external-thread flange.................................................................... 9
4.11 Removing the DustProtector................................................................................. 10
4.12 Removing the locking pins for the retainer bars in the lower hammer part............ 11
4.13 Removing the plastic bushes................................................................................ 11
5. Checking the hammer box.........................................................11/98............... 1
5.1 Checking for cracks and indentations.................................................................... 1
5.2 Wear to the bottom plate...................................................................................... 1
5.3 Checking the elastic pad....................................................................................... 2
5.4 Checking the damping elements........................................................................... 2
5.5 Checking the guide plates and the dust collar....................................................... 3
5.5.1 Checking the guide plates..................................................................................... 3
5.5.2 Checking the upper guide..................................................................................... 4
5.5.3 Checking the dust collar....................................................................................... 4
3. Repair manual HM 1000 / 1000 Marathon
®
Version 11/98
Contents
2
Contents
Chapter Title Version Page
6. Assembling the hydraulic hammer........................................................11/98... 1
6.1 Tightening torques for screws and screw couplings on the HM 1000..................... 1
6.2 Fitting the cylinder................................................................................................ 2
6.3 Fitting the percussion piston and sealing bush...................................................... 2
6.4 Fitting the cylinder cover...................................................................................... 3
6.5 Fitting the AutoControl – valve............................................................................. 5
6.6 Fitting the perforated disk..................................................................................... 6
6.7 Fitting the control slide valve................................................................................ 6
6.8 Fitting the high-pressure accumulator................................................................... 6
6.9 Fitting the external-thread flanges........................................................................ 7
6.10 Filling the piston accumulator............................................................................... 8
6.11 Fitting the HM 1000 percussion mechanism in the hammer box........................... 10
6.12 Connecting ContiLube
®
II to the HM 1000 Marathon
®
........................................... 11
6.13 Fitting the working tool.......................................................................................... 12
6.14 Fitting the DustProtector....................................................................................... 13
7. Changing the seals.................................................................................11/98... 1
7.1 Changing the cylinder seals.................................................................................. 1
7.2 Changing the seals between cylinder and cylinder cover...................................... 3
7.3 Changing the seals on the external-thread flange................................................. 3
7.4 Changing the seals on the control casing cover.................................................... 3
7.5 Changing the seals on the high pressure accumulator.......................................... 4
7.6 Changing the seals on the sealing bush................................................................ 4
8. Repair work.............................................................................................11/98... 1
8.1 Changing the Allen screws on the high-pressure accumulator............................... 1
8.2 Changing the high-pressure accumulator.............................................................. 1
8.3 Changing the tie rods............................................................................................ 2
8.4 Removing scores from control slide valve and bore.............................................. 3
8.5 Removing scores on percussion piston and cylinder bore..................................... 3
8.6 Replacing retainer bars and working tool.............................................................. 4
8.7 Changing the wear bushes.................................................................................... 4
8.8 Replacing the complete hammer box.................................................................... 8
8.9 Replacing guide plates and damping elements in hammer box............................. 8
8.10 Replacing the dust collar in the hammer box........................................................ 8
8.11 Replacing the wear protection set......................................................................... 9
8.12 Replacing the DustProtector................................................................................. 9
8.13 Repairing cracked welds....................................................................................... 10
8.14 Replacing the bottom plate on the hammer box.................................................... 10
8.15 Reworking the retainer pins for the damping elements.......................................... 11
8.16 Weld seam preparation........................................................................................ 11
8.17 Preheating temperature........................................................................................ 11
8.18 Fillers................................................................................................................... 11
8.19 Post-treatment of welds........................................................................................ 11
Authorised dealers and regional service centres
4. Repair manual HM 1000 / 1000 Marathon
®
Version 11/98
Chapter 1
1
1. General
In order to maintain the operational safety of all versions of the HM 1000 hydraulic hammer, repair work
should only be carried out by Krupp trained specialists using genuine Krupp spare parts. Krupp trained
specialists know which parts need replacing and when.
Although this repair manual applies to all versions of the HM 1000 hydraulic hammer, the manual refers
only to the HM 1000 by way of simplification. Specific differences between the versions are however
highlighted.
5. Repair manual HM 1000 / 1000 Marathon
®
Version 11/98
Chapter 1
2
1.1 Explanation of the symbols in the repair manual
To emphasise their importance, certain points in the repair manual are marked with symbols, which are
described below.
Theses passages contain information on the
correct use of the hydraulic tool and are aimed at
avoiding mistakes during operation.
Passages marked in this way contain safety
information and instructions aimed at avoiding
damage.
Passages marked in this way contain safety
information and instructions aimed at preventing
accidents and avoiding injury.
Please note!
Warning!
Caution!
6. Repair manual HM 1000 / 1000 Marathon
®
Version 11/98
Chapter 2
1
2. Operational safety
2.1 General
In order to maintain the operational safety of the
hydraulic hammer, repair work should only be
carried out by trained specialists using genuine
Krupp spare parts. This work should therefore only
be entrusted to Krupp trained specialists who know
which spare parts need replacing and when.
2.2 Accident prevention
regulations
To avoid the possibility of injury, please
observe the following instructions
Before starting work:
Please familiarise yourself with the repair manual
and the appropriate regulations before starting
work on the hydraulic hammer.
When using or working on hydraulic hammers in
the countries of the European Union, the
regulations of the EC machinery directive
98/37/EG must be observed and followed, as must
national accident prevention regulations and
regulations covering pressurised vessels.
In countries outside the European Union, the valid
local statutes and regulations will apply.
The hydraulic hammer should only be repaired by
specialists.
When lifting/transporting the hydraulic hammer,
use only the lug provided and hoisting equipment
with sufficient capacity.
Clear hand signals must be agreed on with the
hoist operator beforehand.
Never stand beneath hoisted loads.
Stand the hydraulic hammer in a suitable device
and secure it against falling over.
The repair area must be clear and easily
accessible.
Always wear protective glasses when fitting or
removing the working tool since metal splinters
may fly off when hammering out the locking pins.
Working tools should only be fitted as described in
the operating manual.
The hammer's integrated piston accumulator is
pressurised.
Before dismantling the hydraulic hammer and
before removing the complete filling valve “G”,
the piston accumulator must be fully
depressurised.
Never use nails, screwdrivers or similar objects to
bleed off the gas since this would damage the
filling valve. Bleed off the gas using only the
nozzle of the filling/test hose.
Never use your fingers to check the alignment of
the working tool recesses to the oblong holes for
the locking bars.
Never dismantle a hydraulic hammer which is still
hot from running as there is a high risk of injury
through burns. Always wait until the hammer has
cooled down before dismantling it. Collect any oil
which runs out and dispose of it correctly.
The piston accumulator must only be filled with
nitrogen from the green cylinder.
Make sure that no other gas (e.g. air or oxygen) is
allowed into the piston accumulator.
When attaching the adapter use only Allen screws
with a material quality of σs = 640 N/mm
2
(material
quality 8.8)!
Caution!
Caution!
Caution
Risk of explosion!
7. Repair manual HM 1000 / 1000 Marathon
®
Version 11/98
Chapter 2
2
2.3 Tools, measuring and
testing equipment
The tools required for dismantling and
reassembling the HM 1000 are to be provided by
the user (see Chapter 3.1).
The special accessories used in this section are
listed in Chapter 3.3
2.4 Operating media /
consumables
Use Comments
HP oil
HLP 32
Running the
HM 1000
In warmer
climates, oils
with a higher
viscosity class
should be used.
High-
performance
bearing grease
with solids
content
Working tool
lubrication
Krupp chisel
paste (see
operating
manual)
Nitrogen N2 Filling the
- high-pressure
accumulator
– piston
accumulator
Abrasive
polishing
paper, grain
600
Removing
scores
Caution!
8. Repair manual HM 1000 / 1000 Marathon
®
Version 11/98
Chapter 3
1
3. Tools
3.1 General tools
The tools required for repair work are listed below:
Designation Part ID no. Qty.
Sledgehammer 2 kg 1031811 1
Sledgehammer 4 kg 1146433 1
Grease gun cpl. 3034567 1
Slugging ring spanner size 55 0439439 1
Heavy-duty box spanner size 55 0478217 1
Jaw spanner size 41/46 0430613 1
Socket spanner size 24/27 0431002 1
Socket spanner size 22 1031835 1
Socket spanner size 14 3031396 1
Claw spanner size 46/50 0478861 1
Allen key size 22 0209445 1
Allen key size 19 0209253 1
Allen key size 17 0209252 1
Allen key size 14 0204963 1
Allen key size 12 0209251 1
Allen key size 5 0209249 1
Power screwdriver insert size 55 / 1 ½” 1
Adapter 1”J / 1 ½”A 1
Adapter ¾”J / 1”A 1
Screwdriver 8 mm 328143 1
Torque wrench 140-760 Nm / ¾” 1
9. Repair manual HM 1000 / 1000 Marathon
®
Version 11/98
Chapter 3
2
3.2 Toolbox 3
The tools required for service work on the
hammers are contained in Toolbox 3
Fig. 1
Toolbox 3
Dimensions
Length 760 mm
Width 215 mm
Height 250 mm
Toolbox 3 and contents can be
ordered under part ident. no. 3034016.
Item Qty. Designation Pt. ID no.
- 1 Toolbox, empty 2267014
1 1 Chisel paste 3066065
2 1 Nitrogen cylinder 2l 3034504
3 1 Filler valve 1329516
4 1 Test pressure gauge 1329518
5 1 Hose 1329517
6 1 Test gauge HM 1000 3002794
7 1
Pin punch d=15.5
L=130
1848819
8 1
Claw spanner size 50
with tommy bar
0478861
9 1 Screwdriver size 5 3066376
10 1
Hexagonal head bolt
M 12x150
0103866 Fig. 2
Service tools
10. Repair manual HM 1000 / 1000 Marathon
®
Version 11/98
Chapter 3
3
3.3 Special accessories
This chapter lists the special tools and apparatus
which can be purchased from Krupp Berco
Bautechnik to equip the workshop.
3.3.1 Accumulator filling device
The tools listed in the table below are used to fill
the high-pressure accumulator. The filling process
also requires the nitrogen cylinder (2/2) and the
filler valve (2/3) from Toolbox 3.
Item Designation Pt. ID no.
Filling device cpl. with
pressure gauge, check
valve, Phillips screwdriver
and tommy screw, as well
as items 1 to 3
0920415
1 Filling hose 1329805
2 Phillips screw insert 1329890
3 Mushroom head adapter 1329889 Fig. 3
Accumulator filling device
11. Repair manual HM 1000 / 1000 Marathon
®
Version 11/98
Chapter 3
4
3.3.2 Power wrench
You can choose between an electronic or a
hydraulic power wrench.
3.3.3 Heli-Coil tools
The tools listed in the table below are used to
replace the Heli-Coil inserts.
Item. Designation Pt. ID no. Use
1
Screw tap
M 14
3066426
2
Threaded insert
M 14
1031946
3
Screw-in tool
M 14
3066427
Cylinder-
cover
(P + T)
4
Screw tap
M 16
0920358
5
Threaded insert
M 16
1031989
6
Screw-in tool
M 16
0920354
High-
pressure
accumulator
7
Screw tap
M 20
0920359
8
Threaded insert
M 20
1031529
9
Screw-in tool
M 20
0920355
Cylinder
cover
(Control
system)
10
Screw tap
M 30
0920360
11
Threaded insert
M 30
0478261
12
Screw-in tool
M 30
0920356
Adapter
13
Screw tap
RD 36x5
-
14
Threaded insert
RD 36x5
3031774
15
Screw-in tool
RD 36x5
3066418
Lower
hammer
part
Fig. 4
Electronic power wrench
Fig. 5
Hydraulic power wrench
Fig. 6
Heli-Coil tools
12. Repair manual HM 1000 / 1000 Marathon
®
Version 11/98
Chapter 3
5
3.3.4 Fitting aid for percussion piston
Designation Pt. Id No.
Eye bolt 0206700
3.3.5 Press-out aid for wear bushes
Item Designation Pt. Id No.
- Press-out tool, compl. -
1 Grip -
2 Screw -
3 Press-out element -
Fig. 7
Fitting aid
Fig. 8
Press-out aid
13. Repair manual HM 1000 / 1000 Marathon
®
Version 11/98
Chapter 4
1
4. Dismantling the
hydraulic hammer
4.1 Removing the working tool
• Lay the hydraulic hammer on a suitable base.
• Remove the plugs (1/5) and (1/9) from the
hammer box.
• Using the pin punch from Toolbox 3 (1/7), and
a hand-held hammer (1/8), knock the locking
pins (1/2) for the retainer bars (1/3) out of the
side of the lower hammer part (1/1).
• Wear protective glasses!
Risk of injury from flying metal splinters.
• Remove the two sealing plugs (1/4) from the
oblong holes for the retainer bars.
• Remove the retainer bars (1/3).
The retainer bars have an M12 thread on the
front end.
Take an M 12x150 hexagonal head screw
from Toolbox 3, screw it into the threaded bore
and use it to pull out the retainer bar.
• Remove the working tool (1/6) from the bore in
the lower hammer part and deposit safely.
Fig. 1
Removing the working tool
Caution!
14. Thank you very much for
your reading. Please Click
Here. Then Get COMPLETE
MANUAL. NO WAITING
NOTE:
If there is no response to
click on the link above,
please download the PDF
document first and then
click on it.
15. Repair manual HM 1000 / 1000 Marathon
®
Version 11/98
Chapter 4
2
4.2 Removing the percussion
mechanism of the HM 1000
from the hammer box
• Stand hammer box with hydraulic hammer
vertically and secure against falling over.
• Remove Allen screws (2/2) using Allen key
size 22 (2/3) and remove adapter from
hammer box using a hoist/crane.
• Remove elastic pad (Fig. 3).
• Marathon
®
version:
Remove grease/oil line between ContiLube
®
II
and hydraulic hammer.
• Screw two eye bolts M24 into the two threaded
bores on the upper face of the cylinder cover
as far as they will go.
• Using a hoist/crane, lift the percussion
mechanism of the HM 1000 out of the hammer
box (Fig. 4).
• If the percussion mechanism has jammed in
the hammer box, e.g. due to heavy
contamination, the hoist must not be used as a
pulling device with the hammer box held
firmly.
• Secure hammer box against falling over.
• Stand percussion mechanism of HM 1000
vertically and secure against falling over (e.g.
place on a stand similar to that in Fig. 5).
Fig. 2
Unscrewing the adapter from the hammer box
Fig. 3
Removing the elastic pad
Fig. 4
Lifting the percussion mechanism out of the
hammer box
Fig. 5
Stand
Caution!
Caution!
Warning!
16. Repair manual HM 1000 / 1000 Marathon
®
Version 11/98
Chapter 4
3
4.3 Removing the high-pressure
accumulator
• Stand hydraulic hammer vertically and secure
against falling over (e.g. on a stand similar to
Fig. 5), or lay flat.
If the HM 1000 is still attached to the carrier, the
hydraulic system must be depressurised prior to
removing the high-pressure accumulator.
e.g.
• On hoses with screw couplings, relieve
pressure on check valves and depressurise
(open the hose ports on the hammer).
• Release Allen screws (6/1) on accumulator
using a size 14 Allen key (6/2) and screw them
out (Fig. 6), removing the locking washers at
the same time.
Collect any oil which runs out and dispose of it
correctly.
• Remove high-pressure accumulator (Fig. 7).
• Check threaded insert (part no. 54), replace if
necessary.
The high-pressure accumulator on the HM 1000
has a capacity of 0.9 l and a max. permissible
operating pressure of 200 bar (2900psi).
If repairs are necessary, the statutory regulations
of the country in question must be observed and
followed (see repair manual for high-pressure
accumulator, part ident. no. 1855714).
Fig. 6
Releasing and unscrewing the Allen screws
Fig. 7
Removing the high-pressure accumulator
Fig. 8
Removing the O-ring and back-up ring
Caution!
Warning!