This shop manual provides information for servicing Komatsu WA800 wheel loaders. It details the structure and function, testing and adjusting procedures, disassembly and assembly instructions, and maintenance standards for the engine, power train, steering system, brake and air system, work equipment system, electrical and electronic systems, and other components. The manual is divided into chapters for major component groups, with sections on structure/function, testing/adjusting, disassembly/assembly, and maintenance standards. Safety notices are provided throughout and special symbols highlight important safety and technical points.
Komatsu wa800 1 wheel loader service repair manual (sn 10001-10499)ufjsjekfksemm
This shop manual provides information for repair and maintenance of Komatsu WA800 wheel loaders. It details the structure and function, testing procedures, disassembly and assembly instructions, and maintenance standards for the engine, power train, steering, brakes, work equipment, electrical and electronic systems. The manual instructs technicians on safety precautions and proper repair procedures to correctly service the equipment. It is intended as an aid to improve repair quality and understanding of the loader.
This document contains instructions for using a shop manual, including:
- The manual is divided into sections covering structure/function, testing/adjusting, disassembly/assembly, and maintenance standards.
- Important points regarding safety, quality, and technical details are marked with symbols.
- Revised pages are listed, and additional or replacement pages are indicated clearly.
- Pages should be filed in proper numerical order to ensure the information is accessible.
Komatsu sk714 5 skid steer loader service repair manual (sn 37 af01876 and up)fjkskmmdmme
This document is a shop manual that provides instructions and safety precautions for servicing Komatsu skid-steer loaders models SK714-5, SK815-5, and SK815-5 turbo. The manual contains sections on structure and function, testing and adjusting, disassembly and assembly, and maintenance standards. It emphasizes safety practices such as wearing protective equipment, using lifting devices properly, and relieving pressures before working on hydraulic or cooling systems. The manual is organized by component and provides repair procedures, adjustment instructions, and criteria for inspecting parts.
Komatsu ck35 1 skid steer loader service repair manual (sn f00003 and up)fjkskmmdmme
This document provides information about a CK35-1 crawler skid-steer loader. It contains sections on structure and function, testing and adjusting, removal and installation, maintenance standards, and other topics. The safety section outlines important safety precautions that must be followed when working on the machine, such as wearing protective equipment and blocking the machine securely before beginning any repairs. It also provides standards for tightening bolts and nuts during assembly.
Komatsu ck20 1 skid steer loader service repair manualfjkskmmdmme
This document provides instructions for removing and installing a cab on a CK20-1 crawler skid-steer loader. The removal process involves disconnecting hoses, removing safety pins and cables, and tilting the cab onto a stand using hoisting tackle. The installation process reverses these steps, ensuring hoses are fully connected and tightened to the correct torque, and filling coolant circuits before testing. Safety precautions are noted such as lowering attachments first and applying tension to hoisting tackle during cab removal.
Komatsu sk1026 5 n skid steer loader service repair manual (sn a80001 and up)fjkskmmdmme
- The document is a shop manual for the SK1026-5N skid steer loader that provides information on maintenance, repair, testing and troubleshooting.
- It details procedures for removing and installing components like the engine assembly, radiator assembly, and battery. Safety precautions are emphasized throughout.
- The manual is divided into sections covering general information, structure and maintenance, specifications, testing, troubleshooting, disassembly/assembly, and diagrams. Symbols are used to mark important safety information.
This shop manual provides instructions for servicing an SK1026-5 turbo skid-steer loader. It contains sections on structure and function, testing and adjusting, disassembly and assembly, and maintenance standards. Safety precautions are outlined, including wearing protective equipment and following proper lifting procedures. The document provides instructions for removing the engine hood and tilting the cab to access components.
Komatsu ck30 1 skid steer loader service repair manual (sn f00003 and up)fjkskmmdmme
This document provides instructions for removing and installing various components on a CK30-1 crawler skid-steer loader, including:
1. The engine hood, requiring removal of retainer screws and nuts.
2. The cab, which involves disconnecting hydraulic lines, cables, and removing safety pins before lifting the cab off with hoisting tackle.
3. The battery, starting motor, and alternator, each involving disconnecting electrical connections and loosening mounting hardware.
4. The air intake filter, which requires loosening a clamp and disconnecting a sensor connector.
Precautions are provided for each procedure, and the instructions note to reverse the removal steps for installation. Torque specifications and
Komatsu 8 v170 1 series engine service repair manualfjskemdme
This document provides instructions for disassembling an engine. It lists 19 steps to remove parts like the oil pan, oil pump, alternator, turbocharger assemblies, exhaust manifolds, fuel injection tubes, and other components. Special tools are required for some removal processes. Safety precautions and cleaning procedures are outlined at the beginning. Diagrams accompany each step to illustrate which parts are being removed.
Komatsu sk820 5 n skid steer loader service repair manual (sn a40001 and up)fjkskmmdmme
This shop manual provides instructions for servicing the Komatsu SK820-5N skid steer loader. It contains sections on general information, structure and maintenance standards, testing procedures, troubleshooting guides, disassembly and assembly instructions, and diagrams. The manual is intended to help technicians correctly service the loader by explaining how to perform repairs, make judgments, and follow safety precautions. Customers should contact their distributor for the latest revision as Komatsu continuously improves its products.
Komatsu sk815 5 n skid steer loader service repair manual (sn a30001 and up)fjkskmmdmme
This shop manual provides service information for Komatsu SK815-5N and SK815-5NA skid steer loaders. It contains sections on general information, structure and maintenance, standard values, testing and adjusting, troubleshooting, disassembly and assembly, and diagrams. The manual aims to improve repair quality by accurately explaining the product and correct repair procedures. It is divided into sections and subgroups to help technicians efficiently service the loaders. Komatsu will provide updates to distributors to keep the information current.
Komatsu WA420-3 Wheel Loader Service Repair Manual SN:WA420H20051 and upfujdfjjksekfkem
The document provides specifications for a WA420-3 wheel loader including its dimensions, weights, performance capabilities, and engine details. Key specifications listed are an operating weight of 20,020kg, a 3.6m3 bucket capacity, a maximum travel speed of 39km/h, and that it is powered by a Cummins 6CTA8.3 inline 6-cylinder diesel engine producing 167kW.
Komatsu 6D125 Diesel Engine Service Repair Manualuejjdksemme
This document provides safety guidelines and instructions for servicing a 6D125 series diesel engine. It begins with general safety precautions that should be followed, such as wearing protective equipment and blocking the machine before working on it. Detailed instructions are given for preparations like cooling the engine first before removing parts. Guidelines are provided for safe hoisting practices when removing heavy components. The document also lists various coating materials and their appropriate applications to use during repairs.
Komatsu sk714 5 skid steer loader service repair manual sn37 af00004 and upujfjjdkkkkmm
This document contains safety information and instructions for servicing SK714-5, SK815-5, and SK815-5 turbo machines. It discusses general safety precautions, preparations for work, precautions during work, hoisting instructions, and standard tightening torques. The safety section emphasizes wearing protective equipment, blocking the machine, and lowering equipment before working. It also provides guidance for draining fluids, disconnecting parts, and assembling components correctly.
Komatsu sa12 v140z 1 series diesel engine service repair manualGingerHines
This shop manual provides information to aid technicians in performing repairs on Komatsu engines. It is divided into sections covering general information, structure and function, testing and troubleshooting, disassembly and assembly, maintenance standards, and repair of parts. The manual recommends specific coating materials for different applications and advises safety precautions for hoisting heavy components during repairs. Technicians are instructed to keep the manual up to date using revision information from distributors.
Komatsu wd600 3 wheel dozer service repair manual (sn 50001 and up)ujjjjfkksekmmdm
This 3-sentence summary provides the high-level information from the document:
This shop manual is for the WD600-3 wheel loader and contains instructions for maintenance, repair, and servicing. It includes sections on structure and function, testing and adjusting, disassembly and assembly, maintenance standards, and other technical information. Technicians should carefully follow the safety precautions outlined in the manual when working on the machine.
Komatsu WA470-3 Wheel Loader Service Repair Manual SN: WA470H20051 and upfusjfjjsekkdmm
This document provides specifications, dimensions, weights, and other technical details for a Komatsu WA470-3 wheel loader. It includes specifications for machines produced up through serial number WA470H20668, as well as later models from serial numbers WA470H20669 through WA470H20941 and machines from serial number WA470H20942 onward. The document provides information on the loader's operating capacity, bucket sizes, ground clearance, and other key technical specifications. Safety guidelines and procedures for maintenance, testing, disassembly and repair are also outlined.
Komatsu wa470 3 wheel loader service repair manual (wa470-3 serial wa470 h200...fjsjjefkskekm
This document is a shop manual for the WA470-3 Wheel Loader that provides instructions and safety precautions for maintenance and repair work. It contains sections on general safety, structure and function of components, testing and adjusting, disassembly and assembly, and maintenance standards. The manual stresses the importance of following safety precautions when working and taking the necessary actions to ensure safety. It provides guidance on preparations for work, precautions during work, and filing the manual pages in the correct order.
Komatsu wa470 6 wheel loader service repair manual (sn a46001 and up)fujsjefksekmm
This shop manual provides service technicians with information to repair Komatsu WA470-6 and WA480-6 wheel loaders. It consists of several sections, including structure and function, standard values, testing and adjusting procedures, troubleshooting guides, disassembly and assembly instructions, and diagrams. The manual establishes maintenance standards and safety procedures to properly service the equipment. It is recommended that technicians refer to the most up-to-date information from their distributor when performing repairs.
Komatsu wa800 l 3 wheel loader service repair manual (sn 52001 and up)fjjkskekfsxswamem
1) This shop manual provides instructions for servicing and repairing the WA800L-3 wheel loader. It details the machine's structure, testing and adjustment procedures, disassembly and assembly instructions, and maintenance standards.
2) Safety precautions are marked with symbols throughout the manual and should always be followed carefully when working on the machine. Precautions include using lifting equipment properly, releasing pressure from hydraulic circuits, and ensuring parts are reassembled correctly.
3) The manual is divided into sections covering the machine's general information, structure and function, testing and adjusting, disassembly and assembly, maintenance standards, and other technical details such as diagrams. It should be used along with other relevant manuals
Komatsu 12V170-2 Series Engine Service Repair Manual.pdffujkseodidk3e
This document provides disassembly instructions for an engine. It lists 21 steps to disassemble parts like the air cleaner, muffler, turbocharger, exhaust manifolds, water pump, and oil cooler. Safety precautions are provided, such as draining fluids, cleaning parts before disassembly, and noting weights of parts to ensure proper lifting. Disassembly is done in order from exterior parts to internal engine components.
Komatsu 12V170-2 Series Engine Service Repair Manual.pdff7uusejkddkm3e
This document provides disassembly instructions for an engine. It lists 21 steps to disassemble parts like the air cleaner, muffler, turbocharger, exhaust manifolds, water pump, and oil cooler. Safety precautions are provided, such as draining fluids and cleaning parts before disassembly. Weights and removal tools are noted for some components. The instructions are accompanied by diagrams to illustrate the disassembly process.
Komatsu 12V170-2 Series Engine Service Repair Manual.pdf8fseujdkdmde3
This document provides disassembly instructions for an engine. It lists 21 steps to disassemble parts like the air cleaner, muffler, turbocharger, exhaust manifolds, water pump, and oil cooler. Safety precautions are provided, such as draining fluids and cleaning parts before disassembly. Weights and removal tools are noted for some components. The instructions are accompanied by diagrams to illustrate the disassembly process.
Komatsu 12V170-2 Series Engine Service Repair Manual.pdfufjsekdmdidj3e
This document provides disassembly instructions for an engine. It lists 21 steps to disassemble parts like the air cleaner, muffler, turbocharger, exhaust manifolds, water pump, and oil cooler. Safety precautions are marked with a symbol. Weights and capacities are provided for removed parts and fluids. Detailed photographs illustrate the disassembly process.
Komatsu 12V170-2 Series Engine Service Repair Manual.pdfnii776204
This document provides disassembly instructions for an engine. It lists 21 steps to disassemble parts like the air cleaner, muffler, turbocharger, exhaust manifolds, water pump, and oil cooler. Safety precautions are provided, such as draining fluids and cleaning parts before disassembly. Weights and removal tools are noted for some components. The instructions are accompanied by diagrams to illustrate the disassembly process.
Komatsu 12V170-2 Series Engine Service Repair Manual.pdffjkkskmdmmd
This document provides disassembly instructions for an engine. It lists 21 steps to disassemble parts like the air cleaner, muffler, turbocharger, exhaust manifolds, water pump, and oil cooler. Safety precautions are provided, such as draining fluids and cleaning parts before disassembly. Weights and removal tools are noted for some components. The instructions are accompanied by diagrams to illustrate the disassembly process.
Komatsu 12V170-2 Series Engine Service Repair Manual.pdfdksmiekddmdmd
This document provides disassembly instructions for an engine. It lists 21 steps to disassemble parts like the air cleaner, muffler, turbocharger, exhaust manifolds, water pump, and oil cooler. Safety precautions are provided, such as draining fluids and cleaning parts before disassembly. Weights and removal tools are noted for some components. The instructions are accompanied by diagrams to illustrate the disassembly process.
Komatsu wa800 3 wheel loader service repair manual (sn 50001 and up)jfjkskekfsmem
This shop manual provides service technicians with information to properly repair a Komatsu WA800-3 wheel loader. The manual is divided into sections covering general information, structure and function, testing and adjusting, disassembly and assembly, maintenance standards, and other technical details. Safety precautions are marked throughout and technicians should carefully follow all safety instructions. The manual explains how to correctly use tools, lift heavy components, and connect hydraulic couplings. It aims to improve repair quality and ensure repairs are done accurately and safely.
Komatsu wa900 3 wheel loader service repair manual (sn50001 and up)fjjkskekfsxswamem
This shop manual provides instructions for servicing a Komatsu WA900-3 wheel loader. It contains sections on the machine's general information, structure and function, testing and adjusting procedures, disassembly and assembly instructions, and maintenance standards. Safety precautions are emphasized throughout to prevent injury during service and repair work. Technicians should carefully follow the manual's guidance to properly maintain the loader.
Case 580 super m+ series 2 backhoe loader parts catalogue manualjfjkskekfsmem
This document is a parts catalog for the 580 Super M Series 2 and 580 Super M+ Series 2 loader backhoes. It contains 9 sections covering various systems of the machine like the engine, fuel system, electrical system, tracks/steering, powertrain, brakes, and hydraulics. It also includes an index and 4 revisions made between 2004-2006 with changes to applicable machines and remarks. The table of contents lists over 80 subsections covering specific components.
Komatsu 8 v170 1 series engine service repair manualfjskemdme
This document provides instructions for disassembling an engine. It lists 19 steps to remove parts like the oil pan, oil pump, alternator, turbocharger assemblies, exhaust manifolds, fuel injection tubes, and other components. Special tools are required for some removal processes. Safety precautions and cleaning procedures are outlined at the beginning. Diagrams accompany each step to illustrate which parts are being removed.
Komatsu sk820 5 n skid steer loader service repair manual (sn a40001 and up)fjkskmmdmme
This shop manual provides instructions for servicing the Komatsu SK820-5N skid steer loader. It contains sections on general information, structure and maintenance standards, testing procedures, troubleshooting guides, disassembly and assembly instructions, and diagrams. The manual is intended to help technicians correctly service the loader by explaining how to perform repairs, make judgments, and follow safety precautions. Customers should contact their distributor for the latest revision as Komatsu continuously improves its products.
Komatsu sk815 5 n skid steer loader service repair manual (sn a30001 and up)fjkskmmdmme
This shop manual provides service information for Komatsu SK815-5N and SK815-5NA skid steer loaders. It contains sections on general information, structure and maintenance, standard values, testing and adjusting, troubleshooting, disassembly and assembly, and diagrams. The manual aims to improve repair quality by accurately explaining the product and correct repair procedures. It is divided into sections and subgroups to help technicians efficiently service the loaders. Komatsu will provide updates to distributors to keep the information current.
Komatsu WA420-3 Wheel Loader Service Repair Manual SN:WA420H20051 and upfujdfjjksekfkem
The document provides specifications for a WA420-3 wheel loader including its dimensions, weights, performance capabilities, and engine details. Key specifications listed are an operating weight of 20,020kg, a 3.6m3 bucket capacity, a maximum travel speed of 39km/h, and that it is powered by a Cummins 6CTA8.3 inline 6-cylinder diesel engine producing 167kW.
Komatsu 6D125 Diesel Engine Service Repair Manualuejjdksemme
This document provides safety guidelines and instructions for servicing a 6D125 series diesel engine. It begins with general safety precautions that should be followed, such as wearing protective equipment and blocking the machine before working on it. Detailed instructions are given for preparations like cooling the engine first before removing parts. Guidelines are provided for safe hoisting practices when removing heavy components. The document also lists various coating materials and their appropriate applications to use during repairs.
Komatsu sk714 5 skid steer loader service repair manual sn37 af00004 and upujfjjdkkkkmm
This document contains safety information and instructions for servicing SK714-5, SK815-5, and SK815-5 turbo machines. It discusses general safety precautions, preparations for work, precautions during work, hoisting instructions, and standard tightening torques. The safety section emphasizes wearing protective equipment, blocking the machine, and lowering equipment before working. It also provides guidance for draining fluids, disconnecting parts, and assembling components correctly.
Komatsu sa12 v140z 1 series diesel engine service repair manualGingerHines
This shop manual provides information to aid technicians in performing repairs on Komatsu engines. It is divided into sections covering general information, structure and function, testing and troubleshooting, disassembly and assembly, maintenance standards, and repair of parts. The manual recommends specific coating materials for different applications and advises safety precautions for hoisting heavy components during repairs. Technicians are instructed to keep the manual up to date using revision information from distributors.
Komatsu wd600 3 wheel dozer service repair manual (sn 50001 and up)ujjjjfkksekmmdm
This 3-sentence summary provides the high-level information from the document:
This shop manual is for the WD600-3 wheel loader and contains instructions for maintenance, repair, and servicing. It includes sections on structure and function, testing and adjusting, disassembly and assembly, maintenance standards, and other technical information. Technicians should carefully follow the safety precautions outlined in the manual when working on the machine.
Komatsu WA470-3 Wheel Loader Service Repair Manual SN: WA470H20051 and upfusjfjjsekkdmm
This document provides specifications, dimensions, weights, and other technical details for a Komatsu WA470-3 wheel loader. It includes specifications for machines produced up through serial number WA470H20668, as well as later models from serial numbers WA470H20669 through WA470H20941 and machines from serial number WA470H20942 onward. The document provides information on the loader's operating capacity, bucket sizes, ground clearance, and other key technical specifications. Safety guidelines and procedures for maintenance, testing, disassembly and repair are also outlined.
Komatsu wa470 3 wheel loader service repair manual (wa470-3 serial wa470 h200...fjsjjefkskekm
This document is a shop manual for the WA470-3 Wheel Loader that provides instructions and safety precautions for maintenance and repair work. It contains sections on general safety, structure and function of components, testing and adjusting, disassembly and assembly, and maintenance standards. The manual stresses the importance of following safety precautions when working and taking the necessary actions to ensure safety. It provides guidance on preparations for work, precautions during work, and filing the manual pages in the correct order.
Komatsu wa470 6 wheel loader service repair manual (sn a46001 and up)fujsjefksekmm
This shop manual provides service technicians with information to repair Komatsu WA470-6 and WA480-6 wheel loaders. It consists of several sections, including structure and function, standard values, testing and adjusting procedures, troubleshooting guides, disassembly and assembly instructions, and diagrams. The manual establishes maintenance standards and safety procedures to properly service the equipment. It is recommended that technicians refer to the most up-to-date information from their distributor when performing repairs.
Komatsu wa800 l 3 wheel loader service repair manual (sn 52001 and up)fjjkskekfsxswamem
1) This shop manual provides instructions for servicing and repairing the WA800L-3 wheel loader. It details the machine's structure, testing and adjustment procedures, disassembly and assembly instructions, and maintenance standards.
2) Safety precautions are marked with symbols throughout the manual and should always be followed carefully when working on the machine. Precautions include using lifting equipment properly, releasing pressure from hydraulic circuits, and ensuring parts are reassembled correctly.
3) The manual is divided into sections covering the machine's general information, structure and function, testing and adjusting, disassembly and assembly, maintenance standards, and other technical details such as diagrams. It should be used along with other relevant manuals
Komatsu 12V170-2 Series Engine Service Repair Manual.pdffujkseodidk3e
This document provides disassembly instructions for an engine. It lists 21 steps to disassemble parts like the air cleaner, muffler, turbocharger, exhaust manifolds, water pump, and oil cooler. Safety precautions are provided, such as draining fluids, cleaning parts before disassembly, and noting weights of parts to ensure proper lifting. Disassembly is done in order from exterior parts to internal engine components.
Komatsu 12V170-2 Series Engine Service Repair Manual.pdff7uusejkddkm3e
This document provides disassembly instructions for an engine. It lists 21 steps to disassemble parts like the air cleaner, muffler, turbocharger, exhaust manifolds, water pump, and oil cooler. Safety precautions are provided, such as draining fluids and cleaning parts before disassembly. Weights and removal tools are noted for some components. The instructions are accompanied by diagrams to illustrate the disassembly process.
Komatsu 12V170-2 Series Engine Service Repair Manual.pdf8fseujdkdmde3
This document provides disassembly instructions for an engine. It lists 21 steps to disassemble parts like the air cleaner, muffler, turbocharger, exhaust manifolds, water pump, and oil cooler. Safety precautions are provided, such as draining fluids and cleaning parts before disassembly. Weights and removal tools are noted for some components. The instructions are accompanied by diagrams to illustrate the disassembly process.
Komatsu 12V170-2 Series Engine Service Repair Manual.pdfufjsekdmdidj3e
This document provides disassembly instructions for an engine. It lists 21 steps to disassemble parts like the air cleaner, muffler, turbocharger, exhaust manifolds, water pump, and oil cooler. Safety precautions are marked with a symbol. Weights and capacities are provided for removed parts and fluids. Detailed photographs illustrate the disassembly process.
Komatsu 12V170-2 Series Engine Service Repair Manual.pdfnii776204
This document provides disassembly instructions for an engine. It lists 21 steps to disassemble parts like the air cleaner, muffler, turbocharger, exhaust manifolds, water pump, and oil cooler. Safety precautions are provided, such as draining fluids and cleaning parts before disassembly. Weights and removal tools are noted for some components. The instructions are accompanied by diagrams to illustrate the disassembly process.
Komatsu 12V170-2 Series Engine Service Repair Manual.pdffjkkskmdmmd
This document provides disassembly instructions for an engine. It lists 21 steps to disassemble parts like the air cleaner, muffler, turbocharger, exhaust manifolds, water pump, and oil cooler. Safety precautions are provided, such as draining fluids and cleaning parts before disassembly. Weights and removal tools are noted for some components. The instructions are accompanied by diagrams to illustrate the disassembly process.
Komatsu 12V170-2 Series Engine Service Repair Manual.pdfdksmiekddmdmd
This document provides disassembly instructions for an engine. It lists 21 steps to disassemble parts like the air cleaner, muffler, turbocharger, exhaust manifolds, water pump, and oil cooler. Safety precautions are provided, such as draining fluids and cleaning parts before disassembly. Weights and removal tools are noted for some components. The instructions are accompanied by diagrams to illustrate the disassembly process.
Komatsu wa800 3 wheel loader service repair manual (sn 50001 and up)jfjkskekfsmem
This shop manual provides service technicians with information to properly repair a Komatsu WA800-3 wheel loader. The manual is divided into sections covering general information, structure and function, testing and adjusting, disassembly and assembly, maintenance standards, and other technical details. Safety precautions are marked throughout and technicians should carefully follow all safety instructions. The manual explains how to correctly use tools, lift heavy components, and connect hydraulic couplings. It aims to improve repair quality and ensure repairs are done accurately and safely.
Komatsu wa900 3 wheel loader service repair manual (sn50001 and up)fjjkskekfsxswamem
This shop manual provides instructions for servicing a Komatsu WA900-3 wheel loader. It contains sections on the machine's general information, structure and function, testing and adjusting procedures, disassembly and assembly instructions, and maintenance standards. Safety precautions are emphasized throughout to prevent injury during service and repair work. Technicians should carefully follow the manual's guidance to properly maintain the loader.
Similar to Komatsu wa800 2 wheel loader service repair manual (sn 10501 and up) (10)
Case 580 super m+ series 2 backhoe loader parts catalogue manualjfjkskekfsmem
This document is a parts catalog for the 580 Super M Series 2 and 580 Super M+ Series 2 loader backhoes. It contains 9 sections covering various systems of the machine like the engine, fuel system, electrical system, tracks/steering, powertrain, brakes, and hydraulics. It also includes an index and 4 revisions made between 2004-2006 with changes to applicable machines and remarks. The table of contents lists over 80 subsections covering specific components.
Bobcat a300 skid steer loader parts catalogue manual (sn 526411001 & above )jfjkskekfsmem
This document provides a parts list for a main frame and operator cab. It includes 44 line items describing individual parts with their part numbers, descriptions, remarks, serial numbers if applicable, and quantities. The parts listed are primarily for structural components, fasteners, bushings, plugs, shields, and accessories for the main frame and operator cab.
Bobcat 773 g series skid steer loader parts catalogue manual (sn 5181 11004 &...jfjkskekfsmem
This document contains a parts list for a main frame and various components. It includes 27 line items with references to part numbers, descriptions, serial numbers, and quantities of parts. A second page continues the parts list. Additional pages list parts for an operator cab, seat and seat bar, panels, and rear door.
Kioti daedong dk501 c tractor parts catalogue manualjfjkskekfsmem
This document provides instructions for using a manual that calculates standard operation times for servicing jobs on tractors. It explains that the standard times are based on an average mechanic working in a properly equipped workshop. The manual includes job codes, illustrations, and definitions of terms like service time and spare time used to calculate standard operation times. It also lists conditions that would be excluded from warranty coverage.
Hyster h50 xm (h177) forklift service repair manualjfjkskekfsmem
This document provides instructions for servicing and repairing various components of a lift truck, including the operator module, overhead guard, hood, side covers, counterweight, and LED backup lights. It describes removing and installing these parts, highlights important safety warnings, and notes specifications for tightening fasteners. Diagrams are included to illustrate the components and repair procedures.
Hyster f187 (s2.5 ft europe) forklift service repair manualjfjkskekfsmem
The document provides instructions for servicing and repairing a lift truck. It warns that the lift truck must be properly supported on blocks during maintenance that involves removing heavy components to prevent instability. It then details how to remove and replace the hood, seat, side covers, and LPG tank and bracket. Removal involves disconnecting wiring, removing fasteners, and swinging or lifting parts off. Replacement is the reverse of removal, making sure to properly align, position, and secure all parts. Safety precautions are provided for working with the LPG system.
Hyster f108 (e50 xm (pre sem)(up to sn f10840w)) forklift service repair manualjfjkskekfsmem
This document provides information about steering systems for various lift truck models. There are two types of steering systems: power steering and power steering with on-demand. The power steering system uses an electric motor to continuously power a hydraulic pump, while the on-demand system only powers the pump when the steering wheel is turned. When the steering wheel is rotated, hydraulic fluid is routed to either a steering motor that turns the master drive unit, or a steering cylinder that turns the steering axle. A steering control unit and optical encoder work with the hydraulic system to sense steering input and direct fluid flow accordingly.
Hyster f004 (s80 xm bcs) forklift service repair manualjfjkskekfsmem
This document provides specifications and details for the mechanical components and hydraulic operation of a single-speed powershift transmission. It describes the transmission components including the torque converter, oil pump, three shaft assemblies, ring gear, pinion, and differential assembly. It also explains the mechanical function of the torque converter, input shaft, reverse clutch shaft, and countershaft. Hydraulic operation and the control valve are discussed but not described in detail.
Hyster f004 (s4.50 xm europe) forklift service repair manualjfjkskekfsmem
This document provides specifications and details for the steering axle assembly on various models of lift trucks. It describes the main components of the steering axle including the axle frame, steering cylinder, tie rods, and spindle and hub assemblies. Diagrams show the steering axle components and their connections. Torque specifications are provided for fasteners.
Hyster f003 (h2.50 j europe) forklift service repair manualjfjkskekfsmem
This document provides repair procedures and troubleshooting information for a single speed powershift transmission. It describes removing the transmission from the engine, disassembling the transmission, cleaning and inspecting parts, and checking clearances during disassembly. Detailed steps are given to disassemble the transmission housing, differential assembly, planetary gear carrier, pinion assembly, and control valve.
Hyster c177 (h3.00 xl europe) forklift service repair manualjfjkskekfsmem
1) This document provides specifications for Hyster lift trucks models H2.00XL, H2.50XL, and H3.00XL, including engine, hydraulic, electrical, and transmission specifications as well as lift truck weights, speeds, and capacities.
2) It lists information on four engine models used across the trucks such as bore/stroke, displacement, compression ratio, oil pressure, and ignition timing.
3) Hydraulic specifications include pump type, flow rates, relief pressures, system capacities, and operating temperatures.
Hyster c098 (e80 xl3) forklift service repair manualjfjkskekfsmem
This document provides descriptions and repair procedures for hydraulic brake systems on certain lift truck models. It describes the operation of the brake booster and master cylinder, which differ between models. It also describes the service brake assembly, parking brake, and optional seat brake. The repair section provides instructions for removing and disassembling brake shoe assemblies, including warnings about the hazards of brake dust. Diagrams are included to illustrate the components.
Hyster b416 (j3.20 xm europe) forklift service repair manualjfjkskekfsmem
The document provides descriptions and repair procedures for the differential, drive axle, traction motor, and wet disc brakes of a lift truck. It describes the main components of the drive unit including the traction motor, differential assembly, gearbox, main housings, and speed sensor. The document outlines procedures for removing and replacing the gearbox, intermediate flange, and wet disc brake components.
Hyster b177 (h60 xl) forklift service repair manualjfjkskekfsmem
This document provides service procedures for brake systems on H40XL-H60XL lift trucks. It describes the components of the service brake and parking brake systems. Procedures are provided for removing and disassembling the 260mm service brakes, cleaning brake parts, inspecting components, and reassembling and installing the 260mm service brakes. Key steps include removing the wheel assembly, brake shoes and adjuster assembly; cleaning brake parts to avoid creating dust; inspecting wear limits; and ensuring proper installation of springs, links, and adjuster wheel assemblies.
Hyster b168 (j60 xl) forklift service repair manualjfjkskekfsmem
This document provides information about steering systems for J40XL, J50XL, and J60XL trucks. It describes the components and operation of both power steering and power steering with on-demand systems. Power steering uses an electric motor and pump to constantly supply hydraulic pressure, while on-demand steering only operates the pump when the steering wheel is turned. The steering control unit routes hydraulic fluid to turn the master drive unit on three-wheel trucks or the steering cylinder on trucks with a steering axle.
Hyster a216 (j65 xm) forklift service repair manualjfjkskekfsmem
The document provides instructions for servicing the steering axle of a lift truck. It describes the main components of the steering axle assembly including the axle frame, steering cylinder, spindle and hub assemblies, and tie rods. The repair procedures described include removing and installing the entire steering axle assembly, wheels and hubs, spindles and bearings, and the steering cylinder. Detailed steps are provided for disassembly, cleaning, inspection, and reassembly of these components. Safety warnings are also given regarding putting the lift truck on blocks for maintenance.
Hyster a177 (h3.00 xl europe) forklift service repair manualjfjkskekfsmem
This document provides specifications for Hyster lift trucks models H2.00XL, H2.50XL, and H3.00XL, including:
1. Weights and dimensions of each model lift truck.
2. Engine specifications for various engine options, including displacement, compression ratio, oil pressure specifications.
3. Hydraulic specifications like pump type, relief pressures, tank capacities.
4. Additional specifications like travel speeds, tire sizes, mast speeds, fluid capacities.
5. Transmission pressure specifications are also provided for different transmission types.
Hyster (p005) h90 ft forklift service repair manualjfjkskekfsmem
The document provides service repair instructions for dry brake systems used on certain lift truck models. It describes the components of the dry brake system, including the master cylinder, parking brake system, brake shoes and wheel cylinders. The document provides step-by-step instructions for removing and disassembling the dry brake system, cleaning the parts, inspecting components, and reassembling and installing the system. Safety warnings are provided throughout regarding creating dust from brake linings and preventing contamination of parts.
Automotive Engine Valve Manufacturing Plant Project Report.pptxSmith Anderson
The report provides a complete roadmap for setting up an Automotive Engine Valve. It covers a comprehensive market overview to micro-level information such as unit operations involved, raw material requirements, utility requirements, infrastructure requirements, machinery and technology requirements, manpower requirements, packaging requirements, transportation requirements, etc.
Kalyan chart DP boss guessing matka results➑➌➋➑➒➎➑➑➊➍
8328958814Satta Matka is a number-based game. There are several markets, each with its owner responsible for releasing the lottery satta Matka market results on time. Kalyan market, Worli market, main Mumbai market, Rajdhani market, and Milan market are some of the main markets or bazaars involved in the satta Matka game. The oldest and most legitimate markets are in Kalyan and Main Mumbai. Every Satta Market has an open and close time. The satta results for these markets are published on or shortly after the open and close times. During the open result, two numbers are decoded, one of which is a three-digit number and the other a single-digit number. Similarly, three-digit and single-digit numbers are declared during the satta market's close. The last digit after adding the three digits of the open or close result is usually the single digit declared during the open and close results.KALYAN MATKA | MATKA RESULT | KALYAN MATKA TIPS | SATTA MATKA | MATKA.COM | MATKA PANA JODI TODAY | BATTA SATKA | MATKA PATTI JODI NUMBER | MATKA RESULTS | MATKA CHART | MATKA JODI | SATTA COM | FULL RATE GAME | MATKA GAME | MATKA WAPKA | ALL MATKA RESULT LIVE ONLINE | MATKA RESULT | KALYAN MATKA RESULT | DPBOSS MATKA 143 | MAINSATTA MATKA SATTA FAST RESULT KALYAN TOP MATKA RESULT KALYAN SATTA MATKA FAST RESULT MILAN RATAN RAJDHANI MAIN BAZAR MATKA FAST TIPS RESULT MATKA CHART JODI CHART PANEL CHART FREE FIX GAME SATTAMATKA ! MATKA MOBI SATTA 143 spboss.in TOP NO1 RESULT FULL RATE MATKA ONLINE GAME PLAY BY APP SPBOSSdp boss net, dp satta, dpboss dpboss, indian satta matka, kalyan matkà result today , matka boss, matka result live, matka satta result today, satamatka com, satta boss, satta matka king, sattamatkà, sattamatkà result, sattamatta com, sattmatka sattmatka, star matka, tara matka, tara satta matka, worli matka, indian matka, matka live, kalyan guessing, satta fix, kalyan final ank, dp matka, dpboss net, sata mata com, सट्टा मटका, sattamatkà 143, golden matka, satta matta matka 143, satta fast, kalyan open, satta 143, dpboss 143 guessing, dpboss satta, golden satta matka, satta bajar
Satta Matka Market is India's leading website providing the quickest sattamatka outcome, experienced in Satta Matka game. Our services include free Satta Matka Trick and Tips for Kalyan Matka and Disawar Satta King, as well as satta matka graphs, online play, tips and more. Our team of experts strive to help you recoup your losses quickly through our proposals such as Free Satta Matka Tips and Kalyan Bazar Tips. We are known as India's best Matka DpBoss portal site, here to deliver updates on all sorts of Satta Market like Kalyan Bazar, Milan, Rajdhani, Time Bazaar, Main and the most current charts. Stay tuned with us for more live updates on the Satta market
Top-Quality AC Service for Mini Cooper Optimal Cooling PerformanceMotor Haus
Ensure your Mini Cooper stays cool and comfortable with our top-quality AC service. Our expert technicians provide comprehensive maintenance, repairs, and performance optimization, guaranteeing reliable cooling and peak efficiency. Trust us for quick, professional service that keeps your Mini Cooper's air conditioning system in top condition, ensuring a pleasant driving experience year-round.
Komatsu wa800 2 wheel loader service repair manual (sn 10501 and up)
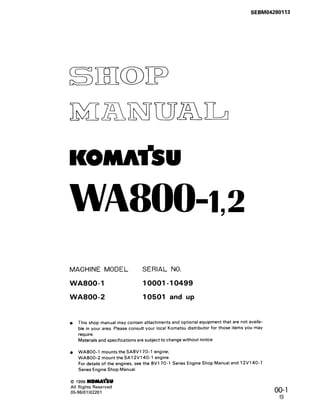
1. SEBM04280113
WA8OO42
MACHINE MODEL SERIAL NO.
WA800- 1 10001-10499
WA800-2 10501 and up
l This shop manual may contain attachments and optional equipment that are not availa-
ble in your area. Please consult your local Komatsu distributor for those items you may
require.
Materials and specifications are subject to change without notice.
l WA8OO-1 mounts the SA8V170-1 engine;
WA800-2 mount the SA12V140-1 engine.
For details of the engines, see the 8V170-1 Series Engine Shop Manual and 12V14O-1
Series Engine Shop Manual.
0 1996 KOMAlhJ
All Rights Reserved
05-96(01)02201 00-l
0
2. CONTENTS
10 ENGINE
11 STRUCTURE AND FUNCTION ..........
12 TESTING AND ADJUSTING ............
13 DISASSEMBLY AND ASSEMBLY .......
14 MAINTENANCE STANDARD ...........
20 POWER TRAIN
21 STRUCTURE AND FUNCTION .........
22 TESTING AND ADJUSTING ...........
23 DISASSEMBLY AND ASSEMBLY ......
24 MAINTENANCE STANDARD ..........
40 STEERING SYSTEM
41 STRUCTURE AND FUNCTION .........
42 TESTING AND ADJUSTING ...........
43 DISASSEMBLY AND ASSEMBLY ......
44 MAINTENANCE STANDARD ..........
50 BRAKE AND AIR SYSTEM
5 1 STRUCTURE AND FUNCTION .........
52 TESTING AND ADJUSTING ............
53 DISASSEMBLY AND ASSEMBLY ......
54 MAINTENANCE STANDARD ..........
60 WORK EQUIPMENT SYSTEM
61
62
63
64
STRUCTURE AND FUNCTION ..........
TESTING AND ADJUSTING ............
DISASSEMBLY AND ASSEMBLY .......
MAINTENANCE STANDARD ...........
80 ELECTRIC AND ELECTRONIC SYSTEM
No. of page
................................ 1 l-l
................................ 12-l
................................ 13-1
................................ 14-l
................................... 21-1
................................... 22-l
................................... 23-l
................................... 24-l
. .
. . .
. . .
. . .
. . .
........
........
........
. . . . . . . .
. . . . . . . .
. . . ...... 41-l
. . . ...... 42-l
. . . ...... 43-l
. . .
. . . . . . 44-l r*1
g
:
...... 51-1
...... 52-l
...... 53-l
...... 54-l
................................ 61-1
................................ 62-l
................................ 63-l
................................ 64-l
81 STRUCTURE AND FUNCTION ............................................... 81-l
82 TESTING AND ADJUSTING ................................................. 82-1
83 DISASSEMBLY AND ASSEMBLY ............................................ 83-l
90 OTHERS
91 STRUCTURE AND FUNCTION ..........
93 DISASSEMBLY AND ASSEMBLY .......
97 GEAR PUMP ..........................
.................................. 91-1
.................................. 93-l
.................................. 97-l
3. A IMPORTANT SAFETY NOTICE
Proper service and repair is extremely important for the safe operation of your machine.
The service and repair techniques recommended by Komatsu and described in this
manual are both effective and safe methods of operation. Some of these operations re-
quire the use of tools specially designed by Komatsu for the purpose.
To prevent injury to workers, the symbols A
YYand
*
are used to mark safety pre-
cautions in this manual. The cautions accompanying these symbols should always be
followed carefully. If any dangerous situation arises or may possibly arise, first consider
safety, and take the necessary actions to deal with the situation.
A SAFETY
GENERAL PRECAUTIONS
Mistakes in operation are extremely dangerous.
Read the Operation and Maintenance Manual
carefully BEFORE operating the machine.
1. Before carrying out any greasing or repairs,
read all the precautions given on the
decals which are fixed to the machine.
q When carrying out any operation, always
wear safety shoes and helmet. Do not wear
loose work clothes, or clothes with buttons
missing.
. Always wear safety glasses when hitting
parts with a hammer.
. Always wear safety glasses when
grinding parts with a grinder, etc.
If welding repairs are needed, always have a
trained, experienced welder carry out the
work. When carrying out welding work,
always wear welding gloves, apron, glasses,
cap and other clothes suited for welding
work.
When carrying out any operation with two
or more workers, always agree on the op-
erating procedure before starting. Always
inform your fellow workers before starting
any step of the operation. Before starting
work, hang UNDER REPAIR signs on the
controls in the operator’s compartment.
Keep all tools in good condition and learn
the correct way to use them.
6. Decide a place in the repair workshop to
keep tools and removed parts. Always keep
the tools and parts in their correct places.
Always keep the work area clean and make
sure that there is no dirt or oil on the floor.
Smoke only in the areas provided for
smoking. Never smoke while working.
PREPARATIONS FOR WORK
7
8
9
IO
Before adding oil or making any repairs,
park the machine on hard, level ground, and
block the wheels or tracks to prevent the
machine from moving.
Before starting work, lower blade, ripper,
bucket or any other work equipment to the
ground. If this is not possible, insert the
safety pin or use blocks to prevent the work
equipment from falling. In addition, be sure
to lock all the control levers and hang
warning signs on them.
When disassembling or assembling, sup-
port the machine with blocks, jacks or
stands before starting work.
Remove all mud and oil from the steps or
other places used to get on and off the
machine. Always use the handrails, ladders
or steps when getting on or off the
machine. Never jump on or off the machine.
If it is impossible to use the handrails,
ladders or steps, use a stand to provide safe
footing.
00-3
4. PRECAUTIONS DURING WORK
Il. When removing the oil filler cap, drain plug
or hydraulic pressure measuring plugs,
loosen them slowly to prevent the oil from
spurting out.
Before disconnecting or removing compo-
nents of the oil, water or air circuits, first
remove the pressure completely from the
circuit.
12.The water and oil in the circuits are hot
when the engine is stopped, so be careful
not to get burned.
Wait for the oil and water to cool before car-
rying out any work on the oil or water
circuits.
13. Before starting work, remove the leads from
the battery. Always remove the lead from
the negative (- 1terminal first.
14. When raising heavy components, use a
hoist or crane.
Check that the wire rope, chains and hooks
are free from damage.
Always use lifting equipment which has
ample capacity.
Install the lifting equipment at the correct
places. Use a hoist or crane and operate
slowly to prevent the component from hit-
ting any other part. Do not work with any
part still raised by the hoist or crane.
15. When removing covers which are under in-
ternal pressure or under pressure from a
spring, always leave two bolts in position on
opposite sides. Slowly release the pressure,
then slowly loosen the bolts to remove.
16. When removing components, be careful not
to break or damage the wiring. Damaged
wiring may cause electrical fires.
17. When removing piping, stop the fuel or oil
from spilling out. If any fuel or oil drips on to
the floor, wipe it up immediately. Fuel or oil
on the floor can cause you to slip, or can
even start fires.
18.As a general rule, do not use gasoline to
wash parts. In particular, use only the mini-
mum of gasoline when washing electrical
parts.
19. Be sure to assemble all parts again in their
original places.
Replace any damaged parts with new parts.
l When installing hoses and wires, be
sure that they will not be damaged by
contact with other parts when the ma-
chine is being operated.
20. When installing high pressure hoses, make
sure that they are not twisted. Damaged
tubes are dangerous, so be extremely care-
ful when installing tubes for high pressure
circuits. Also, check that connecting parts
are correctly installed.
21 When assembling or installing parts, always
use the specified tightening torques. When
installing protective parts such as guards, or
parts which vibrate violently or rotate at
high speed, be particularly careful to check
that they are installed correctly.
22. When aligning two holes, never insert your
fingers or hand. Be careful not to get your
fingers caught in a hole.
23. When measuring hydraulic pressure, check
that the measuring tool is correctly assem-
bled before taking any measurements.
24 Take care when removing or installing the
tracks of track-type machines.
When removing the track, the track sepa-
rates suddenly, so never let anyone stand at
either end of the track.
00-4
5. FOREWORD
This shop manual has been prepared as an aid to improve the quality of repairs by giving the
serviceman an accurate understanding of the product and by showing him the correct way to perform
repairs and make judgements. Make sure you understand the contents of this manual and use it to full
effect at every opportunity.
This shop manual mainly contains the necessary technical information for operations performed in
a service workshop.
For ease of understanding, the manual is divided into chapters for each main group of
components; these chapters are further divided into the following sections.
STRUCTURE AND FUNCTION
This section explains the structure and function of each component. It serves not only to give
an understanding of the structure, but also serves as reference material for troubleshooting.
TESTING AND ADJUSTING
This section explains checks to be made before and after performing repairs, as well as
adjustments to be made at completion of the checks and repairs.
Troubleshooting charts correlating “Problems” to “Causes” are also included in this section.
DISASSEMBLY AND ASSEMBLY
This section explains the order to be followed when removing, installing, disassembling or
assembling each component, as well as precautions to be taken for these operations.
MAINTENANCE STANDARD
This section gives the judgement standards when inspecting disassembled parts.
NOTICE
The specifications contained in this shop manual are subject to change at any
time and without any advance notice. Contact your KOMATSU distributor for the
latest information.
00-5
6. HOW TO READ THE SHOP MANUAL
HOW TO READ THE SHOP MANUAL
VOLUMES
Shop manuals are issued as a guide to carry-
ing out repairs. They are divided as follows:
Chassis volume: Issued for every machine
model
Engine volume: Issued for each engine series
Electrical volume :
Attachments volume :
Each issued as
one volume to
cover all models
These various volumes are designed to avoid
duplicating the same information. Therefore to
deal with all repairs for any model, it is neces-
sary that chassis, engine, electrical and attach-
ment volumes are ready.
DISTRIBUTION AND UPDATING
Any additions, amendments or other
changes will be sent to KOMATSU distributers.
Get the most up-to-date information before
you start any work.
FILING METHOD
1. See the page number on the bottom of the
page. File the pages in correct order.
2. Following examples shows how to read the
page number.
Example 1 (Chassis volume):
IO-3
F
Item number (IO. Structure
and Function)
Consecutive page number for
each item.
Example 2 (Engine volume):
12-410
F
Unit number (I. Engine)
Item number (2. Testing and
Adjusting)
Group No. (4. Fuel system)
Consecutive page No. (Page
10 of Group 4)
3. Additional pages: Additional pages are in-
dicated by a hyphen (-1 and number after the
page number. File as in the example.
Example:
1o-4 12-203
REVISED EDITION MARK ((ijo@ .... )
When a manual is revised, an edition mark is
recorded on the bottom outside corner of the
pages.
REVISIONS
Revised pages are shown at the LIST OF
REVISED PAGES on the between the title page
and SAFETY page.
SYMBOLS
So that the shop manual can be of ample
practical use, important places for safety and
quality are marked with the following symbols.
Symbol Item
A
Y &
$
*
63kg
Safety
Caution
Weight
Tighten-
ng torque
Coat
3il, water
Drain
Remarks
Special safety precautions are
necessary when performing the
work.
Extra special safety precautions
are necessary when performing
the work because it is under
internal pressure.
Special technical precautions or
other precautions for
preserving standards are
necessary when performing the
work.
Weight of parts or systems.
Caution necessary when
selecting hoisting wire, or when
working posture is important,
etc.
Places that require special
attention for the tightening
torque during assembly.
Places to be coated with
adhesives and lubricants etc.
Places where oil, water or fuel
must be added, and the
capacity.
Places where oil or water must
be drained, and quantity to be
drained.
1o-5 12-204
00-6
7. HOISTING INSTRUCTIONS
HOISTING INSTRUCTIONS
A Heavy parts (25 kg or more) must be
lifted with a hoist etc. In the Disassembly
and Assembly section, every part weigh-
ing 25 kg or more is indicated clearly with
the symbol &
1. If a part cannot be smoothly removed from
the machine by hoisting, the following
checks should be made:
. Check for removal of all bolts fastening
the part to the relative parts.
. Check for existence of another part
causing interference with the part to be
removed.
2. Wire ropes
11Use adequate ropes depending on the
weight of parts to be hoisted, referring to
the table below:
Wire ropes
(Standard “Z” or “S” twist ropes
without galvanizing)
Slinging near the edge of the hook may
cause the rope to slip off the hook during
hoisting, and a serious accident can result.
Hooks have maximum strength at the
middle portion.
I
!!VI!
100% 88% 79% 71% 41%
FSO064
3) Do not sling a heavy load with one rope
alone, but sling with two or more ropes
symmetrically wound on to the load.
A Slinging with one rope may cause
turning of the load during hoisting,
untwisting of the rope, or slipping of
the rope from its original winding
position on the load, which can result
in a dangerous accident.
4) Do not sling a heavy load with ropes
forming a wide hanging angle from the
hnnk
Rope diameter (mm) Allowable load (tons)
10 1.o
11.2 1.4
12.5 1.6
14 2.2
16 2.8
18 3.6
20 4.4
22.4 5.6
30 10.0
40 18.0
50 28.0
60 40.0
The allowable load value is estimated to
be one-sixth or one-seventh of the
breaking strength of the rope used.
2) Sling wire ropes from the middle portion
of the hook.
When hoisting a load with two or more
ropes, the force subjected to each rope
will increase with the hanging angles. The
table below shows the variation of
allowable load (kg) when hoisting is made
with two ropes, each of which is allowed
to sling up to 1000 kg vertically, at various
hanging angles.
When two ropes sling a load vertically, up
to 2000 kg of total weight can be
suspended. This weight becomes 1000 kg
when two ropes make a 120” hanging
angle. On the other hand, two ropes are
subjected to an excessive force as large as
4000 kg if they sling a 2000 kg load at a
lifting angle of 150”.
A
2000
1900
1700
?f-y&
a
1400
@
‘r 52
u,
.
,o
30” 60” 90” 120” 150”
Lifting angle : 0
FSO065
00-7
8. STANDARD TIGHTENING TORQUE
STANDARD TIGHTENING TORQUE
1. STANDARD TIGHTENING TORQUE OF BOLTS AND NUTS
The following charts give the standard tightening torques of bolts and nuts. Exceptions are given in
sections of “Disassembly and Assembly”.
Thread diameter Width
of bolt across flat
(mm) (mm)
kgm
6 10 1.35kO.15
8 13 3.2a0.3
10 17 6.7kO.7
12 19 11.5&1.0
14 22 18.Ok2.0
f
Nm
13.22 1.4
31.4IL2.9
65.726.8
112-+9.8
177*19
16 24 28.5r3 279*29
18 27 39-14 383-+39
20 30 56*6 549k58
22 32 7628 745*78
24 36 94.5r10 927298
27 41 135r15
30 46 175-+20
33 50 225+25
36 55 280&30
39 60 335*35
1320+140
1720&190
221Ok240
27502 290
3280*340
This torque table does not apply to the bolts with which nylon packings or other non-
ferrous metal washers are to be used, or which require tightening to otherwise specified
torque.
* Nm (newton meter): 1 Nm k 0.1 kgm
2.TlGHTENlNG TORQUE OF SPLIT FLANGE BOLTS
Use these torques for split flange bolts.
Threaodfg$yeter
(mm)
10
12
16
Width
across flats
(mm)
14
17
22
Tightening torque
kgm Nm
6.7kO.7 65.7k6.8
11.5&l 11229.8
28.5*3 279*29
00-8
9. STANDARD TIGHTENING TORQUE
Sealing surface
3.TlGHTENlNG TORQUE FOR NUTS OF FLARED
Use these torques for nut part of flared.
Thread diameter Width across flats
of nut part of nut part
(mm) (mm)
T
kgm
14 19 2.5kO.5
18 24 5&Z
22 27 8-t2
24 32 14k3
30 36 1823
33 41 20r5
36 46 25k5
42 55 30+-5
Tightening torque
COATING MATERIALS
-T-
Nm
I
24.5 24.9
49k19.6
78.5 +- 19.6
137.3t29.4
176.5k29.4
196.1 249
245.2 f49
294.2 +49
The recommended coating materials prescribed in Komatsu Shop Manuals are listed below.
Nomenclature
Adhesives
Komatsu code
LT-IA
LT-1 B
LT-2’
Applications
Used to apply rubber pads, rubber gaskets, and cork plugs.
Used to apply resin, rubber, metallic and
non-metallic parts when a fast, strong seal is needed.
Preventing bolts, nuts and plugs from loosening and leaking oil.
LT-3
Provides an airtight, electrically insulating seal.
Used for aluminum surfaces.
Sealant gasket
Antifriction compound
(Lubricant including
molybdenum disulfide)
Grease
(Lithium grease)
Vaseline
LT-4
LG-1
LG-3
LG-4
LG-5
LG-6
LG-7
LM-P
G2-LI
-
Used to coat plugs (plate shaped, bowl shaped) and holes, and
mating portion of shaft.
Used with gaskets and packings to increase sealing effect.
Heat-resistant gasket for precombustion chambers
and exhaust piping.
Used b itself on mounting surfaces on the final drive and transmission
cases. Thrckness after tightening: 0.07 - 0.08 mm)Y
Used by itself to seal grease fittings, tapered screw fittings and tapered
screw fittings in hydraulic circuits of less than 50 mm in diameter.
Silicon base type used in combination with LG-1 and LG-4.
Has a shorter curing time than LG-6, and is easier
to peel off.
Applied to bearings and taper shafts to facilitate press-fitting and to
prevent sticking, burning or rusting.
Applied to bearings, sliding parts and oil seals for lubrication, rust
prevention and facilitation of assembling work.
Used for protecting battery electrode terminals from corrosion.
‘LT-2 is also called LOCTITE in the shop manuals
00-9
10. ELECTRIC WIRE CODE
ELECTRIC WIRE CODE
In the wiring diagrams, various colors and symbols are employed to indicate the thickness of wires
This wire code table will help you understand WIRING DIAGRAMS.
Example: 5WB indicates a cable having a nominal number 5 and white coating with black stripe.
CLASSIFICATION BY THICKNESS
Nominal
number
0.85
2
Copper wire
Cable O.D. Current rating
Number Dia. of strands Cross section (mm) (A)
Applicable circuit
strands (mm) (mm?)
11 0.32 0.88 2.4 12 Starting, lighting, signal etc.
26 0.32 2.09 3.1 20 Lighting, signal etc.
5 65
I I I I
0.32 5.23 4.6 37 Charging and signal
15 84 0.45 13.36 7.0 59 Starting (Glow plug)
40 85 0.80 42.73 11.4 135 Starting
60 127 0.80 63.84 13.6 178 Starting
100 217 0.80 109.1
I
17.6 230 Starting
CLASSIFICATION BY COLOR AND CODE
Prior-
ity
2
5
6
Charging Ground Starting Lighting Instrument Signal Other
Pri-
Code W B B R Y G L
rnav Color White Black Black Red Yellow Green Blue
Code WR - BW RW YR GW LW
Color White& Red - Black &White Red &White Yellow & Red Green & White Blue &White
Code WB -
Auxi_ Color White&Black -
liary
Code WL -
Color White&Blue -
Code WG -
BY RB YB GR LR
Black &Yellow Red &Black Yellow & Black Green &Red Blue & Red
BR RY YG GY LY
Black & Red Red & Yellow Yellow &Green Green &Yellow Blue &Yellow
- RG YL (GB) (LB)
1 Color 1White &Green 1 - 1 - Red & Green 1 Yellow & Blue ) (Green & Black) 1 (Blue &Black)
Code - - - RL YW (GL) -
Color - Red & Blue Yellow & White (Green & Blue)
00-l0
11. CONVERSION TABLE
CONVERSION TABLE
Method of using the Conversion Table
The Conversion Table in this section is provided to enable simple conversion of figures. For details of the
method of using the Conversion Table, see the example given below.
Example
l Method of using the Conversion Table to convert from millimeters to inches
1, Convert 55 mm into inches.
(1)
12)
(3)
Locate the number 50 in the vertical column at the left side, take this as @, then draw a horizontal
line from @.
Locate the number 5 in the row across the top, take this as @J, then draw a perpendicular line
down from @.
Take the point where the two lines cross as 0. This point 0 gives the value when converting
from millimeters to inches. Therefore, 55 mm = 2.165 inches.
2. Convert 550 mm into inches.
(1) The number 550 does not appear in the table, so divide by 10 (move the decimal point one place
to the left) to convert it to 55 mm.
(2) Carry out the came procedure as above to convert 55 mm to 2.165 inches.
(3) The original value (550 mm) was divided by 10, so multiply 2.165 inches by 10 (move the decimal
point one place to the right) to return to the original value. This gives 550 mm = 21.65 inches.
(
5
Millimeters to inches 1 mm = 0.03937 in
1 2 3 6 7 8 90 4
0
IO
20
30
40
50_----_
60
70
80
90
0.039 0.079 0.118 0.157
0.433 0.472 0.512 0.551
0.827 0.866 0.906 0.945
1.220 1.260 1.299 1.339
1.614 1.654 1.693 1.732
2.008 2.047 2.087 2.126---_-_ -- __ - _ _ _---__ .-----
2.402 2.441 2.480 2.520
2.795 2.835 2.874 2.913
3.189 3.228 3.268 3.307
3.583 3.622 3.661 3.701
0.197
0.591
0.984
1.378
1.772
0
12.165
2.559
2.953
3.346
3.740
0.236 0.276 0.315 0.354
0.630 0.669 0.709 0.748
1.024 1.063 1.102 1.142
1.417 1.457 1.496 1.536
1.811 1.850 1.890 1.929
2.205 2.244 2.283 2.323
2.598 2.638 2.677 2.717
2.992 3.032 3.071 3.110
3.386 3.425 3.465 3.504
3.780 3.819 3.858 3.898
0.394
0.787
1.181
1.575
1.969---___
2.362
2.756
3.150
3.543
@-
__
00-l 1
12. ENGINE
II STRUCTURE AND FUNCTION
Radiator and cooler ........................ 1 I-2
Engine speed control ..................... 1 l-3- 1
Servo cylinder ............................. 11-4
Engine low idling select system .............. 1 1-7
WA800-1
13. RADIATOR AND COOLER
1. Radiator cap
2. Water level sensor
3. Fan guard
4. Upper tank
5. Radiator
6. Hydraulic oil cooler
Eng.oil
cooler
Thermostat
r--l
i ~
Radiator
A 6
427F0
Specification
Core type: Model G7
Total heat dissipating area: 201 .OO m2
Cross-sectional area of water tubes: 288.52 cm2
14
A. Oil inlet port
B. Oil outlet port
WA800-1
14. l WA800-2
1. Radiator cap
2. Water level sensor
3. Fan guard
4. Upper tank
5. Radiator
6. Hydraulic oil cooler
-----_
~hdiator j
I /I
k--__plp
550ehin
1 Hyd. ’
coolei
T/C cooler 450 Plmin
F4270200
Specification
Core type: Model G7
Total heat dissipating area: 201 .OO m2
Cross-sectional area of water tubes: 288.52 cm2
1
A. Oil inlet port
B. Oil outlet port
WA800-1 11-3
!5,
15. ENGINE SPEED CONTROL
l WASOO-1
View 2
427FOO6
1. Accelerator pedal
2. Cable
3. Servo cylinder
4. Injection pump
5. Absorber
6. Air cylinder
7. Transmission oil filler
WA800-1
16. l WA800-2
6
View Y
View Z
427FO1004
1. Accelerator pedal
2. Cable
3. Servo cylinder
4. Injection pump
5. Absorber
6. Air cylinder
7. Transmission oil filler
WA800-1
112-2
17. SERVO CYLINDER
1 A B 2 3 4 5
View Z
427FOO7
1. Rod
2. Spring
3. Body
4. Piston
5. Yoke
OUTLINE
l The servo cylinder is installed to the engine
linkage.
This acts to reduce the operating force without
changing the amount of movement of the accel-
erator pedal cable and injection pump rod.
A. Oil outlet port (Drain to transmission oil filler)
6. Oil inlet port (From oil filter)
11-4 WA800-1
18. OPERATION
1. Accelerator pedal not depressed
To TIC. TIM valve
Accelerator pedal (6) is not being depressed, so
the servo cylinder is not actuated.
The pressurized oil from the transmission filter
passes through the middle of rod (3) and flows
to port A.
2. Accelerator pedal depressed
T/M filter
427FOO9
When accelerator pedal (6) is depressed, cable
(7) moves rod (3) to the left in the direction of
the arrow.
The oil from the transmission filter flows from
port A through the hole in piston (2) and goes to
chamber B.
WA800-1 1l-5
19. Thank you very much for
your reading. Please Click
Here. Then Get COMPLETE
MANUAL. NO WAITING
NOTE:
If there is no response to
click on the link above,
please download the PDF
document first and then
click on it.
20. To TIC. TIM valve
427FOlO
When the oil flowing to chamber 6 reaches the
specified pressure, it overcomes the force of
spring (8) and moves piston (2) to the left.in the
direction of the arrow.
Piston (2) continues to move until the hole in
piston (2) is closed.
3. Accelerator pedal released
To T/C. TIM valve
As a result, the length of movement of rod (3)
becomes equal to the length of movement of the
piston, and the operating force is reduced by the
hydraulic pressure.
I
427FOll
When accelerator pedal (6) is released, cable (7)
moves rod (3) to the right in the direction of the
arrow.
As a result, the oil at chamber B is drained. When
this happens, piston (2) is moved to the right by
spring (8) until the hole in piston (2) is closed.
11-6 WA800-1
21. ENGINE LOW IDLING SELECT SYSTEM
OUTLINE
l By using the engine low idling selector device to
set the engine low idling speed to two stages, it
is possible to carry out operations more
eff icientiy.
OPERATION
Selector switch OFF
When the selector switch is OFF, no electric current
flows to solenoid valve (1). so the solenoid valve is
not actuated and the air supply to air cylinder (2) is
shut off. As a result, the air cylinder is not actuated
and the engine speed is set to 650 rpm.
l WA800-1
From dry
air tank
427FO12
9 WA800-2
From dry
air tank
427FO1005
WA800-1
22. Selector switch ON
When the selector switch is turned ON, electric cur-
rent flows to solenoid valve (I), and the solenoid
valve is actuated. Air flows to air cylinder (21, and the
air cylinder rod is pushed out by the air pressure. The
air cylinder rod is connected by a link to accelerator
pedal (3). so the accelerator pedal is depressed by an
amount equal to the movement of the rod. When this
happens, the engine speed is set to approximately
850 rpm.
. WA800-1
427FO13
l WASOO-2
427FO1006
WA800-1
23. ENGINE
12 TESTING AND ADJUSTING
Standard value table . . . . 12- 2
Tool list for testing and adjusting 12- 6
Adjusting valve clearance . . 12- 7
Measuring compression pressure 12- 9
Testing and adjusting fuel injection timing . 12-l 0
Measuring accelerator pedal operating force 12-I 3
Measuring accelerator pedal operating angle 12-I 7
* The following precautions are necessary when using the Standard Value Tables to make judgement during
troubleshooting or during testing and adjusting.
1. The values in these tables are based on the values for new machines leaving the plant, so they should be
used as target values when repairing or when estimating wear after a period of use.
2. The standard values in these tables for judgement when troubleshooting are estimated values based on
the standard values for the machine when shipped from the plant, and on the results of various tests.
Therefore, they should be used as reference in combination with repair and operating records when mark-
ing judgements.
3. These standard value tables must not be used for standard values when judging claims. In addition, do not
use these values alone to make simple judgements.
A When carrying out testing, adjusting or troubleshooting, stop the machine on level ground, insert the
safety pins and block the tires.
A When working in groups, use agreed signals and do not allow unauthorized persons near the machine.
A When checking the water level in the radiator wait for the water to cool. Do not remove the radiator
cap while the water is hot. Boiling water may spurt out.
A Be careful not to get caught in rotating parts.
WA800-1
‘%j’