
Recommended
More Related Content
Similar to Kohler aegis 20 hp liquid cooled vertical crankshaft service repair manual
Similar to Kohler aegis 20 hp liquid cooled vertical crankshaft service repair manual (12)
More from fjjsekwsxkdmmem
More from fjjsekwsxkdmmem (20)
Recently uploaded
Recently uploaded (20)
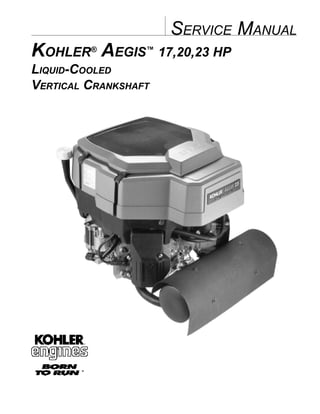
Kohler aegis 20 hp liquid cooled vertical crankshaft service repair manual
- 2. Contents Section 1. Safety and General Information ............................................................................ Section 2. Special Tools .......................................................................................................... Section 3. Troubleshooting ..................................................................................................... Section 4. Air Cleaner and Air Intake System ........................................................................ Section 5. Fuel System and Governor .................................................................................... Section 6. Lubrication System ................................................................................................ Section 7. Cooling System ...................................................................................................... Section 8. Electrical System and Components ..................................................................... Section 9. Disassembly ........................................................................................................... Section 10. Inspection and Reconditioning ........................................................................... Section 11. Reassembly........................................................................................................... 1 2 3 4 5 6 7 8 9 10 11
- 3. 1.1 Section 1 Safety and General Information 1 Section 1 Safety and General Information Safety Precautions To insure safe operations please read the following statements and understand their meaning. Also refer to your equipment manufacturer's manual for other important safety information. This manual contains safety precautions which are explained below. Please read carefully. WARNING Warning is used to indicate the presence of a hazard that can cause severe personal injury, death, or substantial property damage if the warning is ignored. CAUTION Caution is used to indicate the presence of a hazard that will or can cause minor personal injury or property damage if the caution is ignored. NOTE Note is used to notify people of installation, operation, or maintenance information that is important but not hazard-related. For Your Safety! These precautions should be followed at all times. Failure to follow these precautions could result in injury to yourself and others. LV560, LV625, LV675 Rotating Parts can cause severe injury. Stay away while engine is in operation. WARNING Rotating Parts! Keep hands, feet, hair, and clothing away from all moving parts to prevent injury. Never operate the engine with covers, shrouds, or guards removed. Hot Parts can cause severe burns. Do not touch engine while operating or just after stopping. WARNING Hot Parts! Engine components can get extremely hot from operation. To prevent severe burns, do not touch these areas while the engine is running - or immediately after it is turned off. Never operate the engine with heat shields or guards removed. Accidental Starts can cause severe injury or death. Disconnect and ground spark plug leads before servicing. WARNING Accidental Starts! Disabling engine. Accidental starting can cause severe injury or death. Before working on the engine or equipment, disable the engine as follows: 1) Disconnect the spark plug lead(s). 2) Disconnect negative (-) battery cable from battery. Go Back
- 4. 1.2 Section 1 Safety and General Information Carbon Monoxide can cause severe nausea, fainting or death. Do not operate engine in closed or confined area. WARNING WARNING Electrical Shock can cause injury. Do not touch wires while engine is running. CAUTION Hot liquid can cause severe burns. Do not loosen radiator cap while engine is operating or warm to the touch. WARNING Explosive Gas can cause fires and severe acid burns. Charge battery only in a well ventilated area. Keep sources of ignition away. Lethal Exhaust Gases! Engine exhaust gases contain poisonous carbon monoxide. Carbon monoxide is odorless, colorless, and can cause death if inhaled. Avoid inhaling exhaust fumes, and never run the engine in a closed building or confined area. Hot Liquid! The liquid coolant can get extremely hot from operation. Turning the radiator cap when the engine is hot can allow steam and scalding liquid to blow out and burn you severely. Shut off machine. Only remove radiator cap when cool enough to touch with bare hands. Slowly loosen cap to first stop to relieve pressure before removing completely. Explosive Gas! Batteries produce explosive hydrogen gas while being charged. To prevent a fire or explosion, charge batteries only in well ventilated areas. Keep sparks, open flames, and other sources of ignition away from the battery at all times. Keep batteries out of the reach of children. Remove all jewelry when servicing batteries. Before disconnecting the negative (-) ground cable, make sure all switches are OFF. If ON, a spark will occur at the ground cable terminal which could cause an explosion if hydrogen gas or gasoline vapors are present. Explosive Fuel can cause fires and severe burns. Stop engine before filling fuel tank. WARNING Explosive Fuel! Gasoline is extremely flammable and its vapors can explode if ignited. Store gasoline only in approved containers, in well ventilated, unoccupied buildings, away from sparks or flames. Do not fill the fuel tank while the engine is hot or running, since spilled fuel could ignite if it comes in contact with hot parts or sparks from ignition. Do not start the engine near spilled fuel. Never use gasoline as a cleaning agent. Cleaning Solvents can cause severe injury or death. Use only in well ventilated areas away from ignition sources. WARNING Flammable Solvents! Carburetor cleaners and solvents are extremely flammable. Keep sparks, flames, and other sources of ignition away from the area. Follow the cleaner manufacturer’s warnings and instructions on its proper and safe use. Never use gasoline as a cleaning agent. Electrical Shock! Never touch electrical wires or components while the engine is running. They can be sources of electrical shock.
- 5. 1.3 Section 1 Safety and General Information 1 L V 675 S A. Model No. Liquid Cooled Vertical Crankshaft Displacement/Size (cc) Version Code S = Electric Start Figure 1-2. Explanation of Engine Identification Numbers. Engine Identification Numbers When ordering parts, or in any communication involving an engine, always give the Model, Specification and Serial Numbers, including letter suffixes if there are any. The engine identification numbers appear on a decal, or decals, affixed to the engine shrouding. See Figure 1-1. An explanation of these numbers is shown in Figure 1-2. Figure 1-1. Engine Identification Decal Location. B. Spec. No. Engine Model Code Code Model 81 LV560 83 LV625 85 LV675 85 1500 Variation of Basic Engine 30 05810334 Factory Code C. Serial No. Year Manufactured Code Code Year 30 2000 31 2001
- 6. 1.4 Section 1 Safety and General Information Oil Recommendations Using the proper type and weight of oil in the crankcase is extremely important. So is checking oil daily and changing oil regularly. Failure to use the correct oil, or using dirty oil, causes premature engine wear and failure. Oil Type Use high-quality detergent oil of API (American Petroleum Institute) Service Class SG, SH, SJ or higher. Select the viscosity based on the air temperature at the time of operation as shown in the following table. NOTE: Using other than service class SG, SH, SJ or higher oil or extending oil change intervals longer than recommended can cause engine damage. A logo or symbol on oil containers identifies the API service class and SAE viscosity grade. See Figure 1-3. *Use of synthetic oil having 5W-20 or 5W-30 rating is acceptable, up to 4°C (40°F). **Synthetic oils will provide better starting in extreme cold below -23°C (-10°F). Figure 1-3. Oil Container Logo. Refer to Section 6 - “Lubrication System” for detailed procedures on checking the oil, changing the oil and changing the oil filter. Coolant Recommendations Use equal parts of ethylene glycol and water only. Distilled or deionized water is recommended, especially in areas where the water contains a high mineral content. Propylene glycol based anti-freeze is not recommended. This mixture will provide protection from -37º C (-34º F) to 108º C (226º F). For protection and use outside the indicated temperature limits, follow the anti-freeze manufacturer's instructions on the container, but do not exceed 70% anti-freeze. DO NOT use anti-freeze with stop-leak additive(s), or put any other additives in the cooling system. Fuel Recommendations WARNING: Explosive Fuel! Gasoline is extremely flammable and its vapors can explode if ignited. Store gasoline only in approved containers, in well ventilated, unoccupied buildings, away from sparks or flames. Do not fill the fuel tank while the engine is hot or running, since spilled fuel could ignite if it comes in contact with hot parts or sparks from ignition. Do not start the engine near spilled fuel. Never use gasoline as a cleaning agent. General Recommendations Purchase gasoline in small quantities and store in clean, approved containers. A container with a capacity of 2 gallons or less with a pouring spout is recommended. Such a container is easier to handle and helps eliminate spillage during refueling. Do not use gasoline left over from the previous season, to minimize gum deposits in your fuel system and to ensure easy starting. Do not add oil to the gasoline. Do not overfill the fuel tank. Leave room for the fuel to expand. * **
- 7. 1.5 Section 1 Safety and General Information 1 Fuel Type For best results, use only clean, fresh, unleaded gasoline with a pump sticker octane rating of 87 or higher. In countries using the Research method, it should be 90 octane minimum. Unleaded gasoline is recommended, as it leaves fewer combustion chamber deposits. Leaded gasoline may be used in areas where unleaded is not available and exhaust emissions are not regulated. Be aware, however, that the cylinder head will require more frequent service. Gasoline/Alcohol blends Gasohol (up to 10% ethyl alcohol, 90% unleaded gasoline by volume) is approved as a fuel for Kohler engines. Other gasoline/alcohol blends are not approved. Gasoline/Ether blends Methyl Tertiary Butyl Ether (MTBE) and unleaded gasoline blends (up to a maximum of 15% MTBE by volume) are approved as a fuel for Kohler engines. Other gasoline/ether blends are not approved. Periodic Maintenance WARNING: Accidental Starts! Disabling engine. Accidental starting can cause severe injury or death. Before working on the engine or equipment, disable the engine as follows: 1) Disconnect the spark plug lead(s). 2) Disconnect negative (-) battery cable from battery. Maintenance Schedule These required maintenance procedures should be performed at the frequency stated in the table. They should also be included as part of any seasonal tune-up. 1 Perform these maintenance procedures more frequently under extremely dusty, dirty conditions. 2 Only required for Denso starters. Not necessary on Delco starters. Have a Kohler Engine Service Dealer perform this service. Refer to: Section 5 Section 6 Section 7 Section 4 Section 4 Maintenance Required Frequency • Fill fuel tank. • Check oil level. • Check coolant level. • Check air cleaner for dirty1 , loose, or damaged parts. • Check air intake screen, radiator, and cooling areas, clean as necessary1 . Daily or Before Starting Engine Section 4 Section 4 Section 7 Section 5 Section 6 Section 8 • Service precleaner element1 . • Replace air cleaner element1 . • Clean and check cooling areas. • Replace fuel filter. Every 25 Hours Every 100 Hours Annually or Every 200 Hours • Change oil and oil filter (more frequently under severe conditions). • Check spark plug condition and gap. Section 8 Section 8 • Have solenoid shift starter disassembled and cleaned2 . • Replace spark plugs. • Change engine coolant. Annually or Every 500 Hours Every 2 Years or Every 1000 Hours Section 7
- 8. 1.6 Section 1 Safety and General Information Storage If the engine will be out of service for two months or more, use the following storage procedure: 1. Clean the exterior surfaces of the radiator and engine. 2. Change the oil and filter while the engine is still warm from operation. See “Change Oil and Filter” in Section 6. 3. The coolant (anti-freeze) mixture should be in good condition and tested to guard against freezing in cold temperatures. The recommended equal parts mixture will normally provide protection down to temperatures of -37° C (-34° F). If storage temperatures will fall below this, the cooling system should be drained. A note should then be attached to the equipment and/or engine as a reminder to refill the cooling system before starting. 4. The fuel system must be completely emptied, or the gasoline must be treated with a stabilizer to prevent deterioration. If you choose to use a stabilizer, follow the manufacturer’s recommendations, and add the correct amount for the capacity of the fuel system. Fill the fuel tank with clean, fresh gasoline. Run the engine for 2-3 minutes to get stabilized fuel into the carburetor. Close fuel shut-off valve when unit is being stored or transported. To empty the system, run the engine until the tank and system are empty. 5. Remove the spark plugs. Add one tablespoon of engine oil into each spark plug hole. Install plugs, but do not connect the plug leads. Crank the engine two or three revolutions. 6. Store the engine in a clean, dry place.
- 9. 4.2 Section 4 Air Cleaner and Air Intake System Figure 4-4. Cleaning Separated Screen Assembly. Always reinstall the upper blower assembly after it has been removed for service. Do not operate the engine with the upper blowing housing or screen removed. Air Cleaner General These engines are equipped with a replaceable, high- density paper air cleaner element surrounded by an oil, foam precleaner, located under the upper blower housing. See Figures 4-5 and 4-6. Service Daily or before starting the engine, remove the upper blowing housing and check the air cleaner system. See Figures 4-5 and 4-6. Again, check for dirt or debris and clean it away. Make sure the precleaner is not damaged, ripped, or missing. The air cleaner elements must be fastened with the retainer strap, and the bottom of the element must be sealed against the air cleaner base. Make sure the base is secured tightly to the carburetor and not cracked of damaged. Also make sure the breather hose is secured to the air cleaner base and to the breather outlet fitting on the valve cover. NOTE: Damaged, worn or loose breather hose or air cleaner components can allow unfiltered air into the engine causing premature wear and failure. Tighten or replace all loose or damaged components. Figure 4-5. Air Cleaner Assembly. Figure 4-6. Air Cleaner System Components. Precleaner Service If so equipped, wash and reoil the precleaner every 25 hours of operation (more often under extremely dusty or dirty conditions). To service the precleaner perform the following steps. 1. Unhook the four retaining straps and remove the upper blower housing and screen assembly. See Figure 4-2. Foam Precleaner Air Cleaner Element Retainer Strap Air Cleaner Base
- 10. 4.3 Section 4 Air Cleaner and Air Intake System 4 2. Remove the precleaner from the paper element. See Figure 4-7. Figure 4-7. Removing Precleaner from Paper Element. 3. Wash the precleaner in warm water with detergent. Rinse the precleaner thoroughly until all traces of detergent are eliminated. Squeeze out excess water (do not wring). Allow the precleaner to air dry. 4. Saturate the precleaner with new engine oil. Squeeze out all excess oil. 5. Reinstall the serviced precleaner over the paper element, outside the filter element retaining strap. 6. Clean the air cleaner base area, upper blower housing, and screen assembly of any debris accumulation. 7. Reinstall the upper blower housing/screen assembly, and secure with the four retaining straps. 8. When precleaner replacement is necessary, order Kohler Part No. 66 083 03-S. Paper Element Service (Standard Type) Every 100 hours of operation (more often under extremely dusty or dirty conditions), replace the paper element. 1. Unhook the four retaining straps and remove the upper blower housing and screen assembly. See Figure 4-2. 2. Remove the precleaner from the paper element. See Figure 4-7. 3. Unhook the filter element retaining strap and remove the paper element from the air cleaner base. See Figure 4-8. Figure 4-8. Unhooking Retainer Strap. 4. Do not wash the paper element or use pressurized air, this will damage the element. Replace a dirty, bent, or damaged element with a genuine Kohler element. Handle new elements carefully; do not use if the sealing surfaces are bent or damaged. 5. Clean the air cleaner base area, upper blower housing, an screen assembly of any debris accumulation. 6. Install the new paper element; Kohler Part No. 66 083 01-S and secure with the filter element retainer strap. Disassembly/Reassembly - Standard Type If the air cleaner base has to be removed, proceed as follows. 1. Unhook the four retaining straps and remove the upper blower housing and screen assembly. See Figure 4-2. 2. Remove the precleaner and air cleaner element from base. See Figures 4-7 and 4-8. 3. Remove the two hex. flange nuts securing air cleaner base and mounting clamp for vacuum (fuel pump) hose onto carburetor studs. See Figure 4-9.
- 11. 4.4 Section 4 Air Cleaner and Air Intake System 4. Disconnect the breather hose from the air cleaner base. Figure 4-9. Base Plate Removal on Standard Type. Fuel Pump Vacuum Line Breather Hose 5. Slide the clamp and air cleaner base off the stud. 6. Reverse procedure to reassemble components. Torque the hex. flange nuts to 9.9 N·m (88 in. lb.). Radiator Cleaning Every time the upper blower housing assembly is removed to check or service the air cleaner, the condition of the radiators should also be checked. If the cleaning is necessary, follow the instructions in Section 7 Cooling System, found on page 7.2, "Cooling System Maintenance and Service."
- 12. 5.1 Section 5 Fuel System and Governor 5 Section 5 Fuel System and Governor Description WARNING: Explosive Fuel! Gasoline is extremely flammable and its vapors can explode if ignited. Store gasoline only in approved containers, in well ventilated, unoccupied buildings, away from sparks or flames. Do not fill the fuel tank while the engine is hot or running, since spilled fuel could ignite if it comes in contact with hot parts or sparks from ignition. Do not start the engine near spilled fuel. Never use gasoline as a cleaning agent. Fuel System Components The typical fuel system and related components include the following: • Fuel Tank • In-line Fuel Filter • Fuel Pump • Carburetor • Fuel Lines Operation The fuel from the tank is moved through the in-line filter and fuel lines by the fuel pump. On engines not equipped with a fuel pump, the fuel tank outlet is located above the carburetor inlet allowing gravity to feed fuel to the carburetor. Fuel then enters the carburetor float bowl and is moved into the carburetor body. There, the fuel is mixed with air. This fuel-air mixture is then burned in the engine combustion chamber. Fuel Recommendations General Recommendations Purchase gasoline in small quantities and store in clean, approved containers. A container with a capacity of 2 gallons or less with a pouring spout is recommended. Such a container is easier to handle and helps eliminate spillage during refueling. • Do not use gasoline left over from the previous season, to minimize gum deposits in your fuel system and to ensure easy starting. • Do not add oil to the gasoline. • Do not overfill the fuel tank. Leave room for the fuel to expand. Fuel Type For best results, use only clean, fresh, unleaded gasoline with a pump sticker octane rating of 87 or higher. In countries using the Research fuel rating method, it should be 90 octane minimum. Unleaded gasoline is recommended, as it leaves less combustion chamber deposits. Leaded gasoline may be used in areas where unleaded is not available and exhaust emissions are not regulated. Be aware however, that the cylinder head will require more frequent service. Gasoline/Alcohol blends Gasohol (up to 10% ethyl alcohol, 90% unleaded gasoline by volume) is approved as a fuel for Kohler engines. Other gasoline/alcohol blends are not approved. Gasoline/Ether blends Methyl Tertiary Butyl Ether (MTBE) and unleaded gasoline blends (up to a maximum of 15% MTBE by volume) are approved as a fuel for Kohler engines. Other gasoline/ether blends are not approved. Fuel Filter Most engines are equipped with an in-line fuel filter. Periodically inspect the filter and replace when dirty with a genuine Kohler filter. LV560, LV625, LV675 Go Back
- 13. 5.2 Section 5 Fuel System and Governor Fuel System Tests When the engine starts hard, or turns over but will not start, it is possible that the problem is in the fuel system. To find out if the fuel system is causing the problem, perform the following tests. Troubleshooting – Fuel System Related Causes Test Conclusion 1. Check the following: a. Make sure the fuel tank contains clean, fresh, proper fuel. b. Make sure the vent in fuel tank cap is open. c. Make sure the fuel valve is open. d. Make sure vacuum and fuel lines to fuel pump are secured and in good condition. 2. Check for fuel in the combustion chamber. a. Disconnect and ground spark plug leads. b. Close the choke on the carburetor. c. Crank the engine several revolutions. d. Remove the spark plug and check for fuel at the tip. 2. If there is fuel at the tip of the spark plug, fuel is reaching the combustion chamber. If there is no fuel at the tip of the spark plug, check for fuel flow from the fuel tank (Test 3). 3. Check for fuel flow from the tank to the fuel pump. a. Remove the fuel line from the inlet fitting of fuel pump. b. Hold the line below the bottom of the tank. Open the shut-off valve (if so equipped) and observe flow. 3. If fuel does flow from the line, check for faulty fuel pump (Test 4). If fuel does not flow from the line, check the fuel tank vent, fuel pickup screen, in-line filter, shut-off valve, and fuel line. Correct any observed problem and reconnect the line. 4. Check the operation of fuel pump. a. Remove the fuel line from the inlet fitting of carburetor. b. Crank the engine several times and observe flow. 4. If fuel does flow from the line, check for faulty carburetor. (Refer to the "Carburetor" portions of this section). If fuel does not flow from the line, check for a clogged fuel line. If the fuel line is unobstructed, check for overfilled crankcase and/or oil in pulse line. If none of the checks reveal the cause of the problem, replace the pump.
- 14. 5.3 Section 5 Fuel System and Governor 5 2. Remove the hex. flange screws (securing pump to blower housing) and fuel pump. 3. Remove the vacuum line that connects the pump to the crankcase. 4. Install a new pump using the hex. flange screws. NOTE: Make sure the orientation of the new pump is consistent with the removed pump. Internal damage may occur if installed incorrectly. 5. Connect vacuum line between pulse pump and crankcase. Route line so there are no low spots where oil could collect. 6. Tighten the hex. flange screws to 2.3 N·m (20 in. lb.). 7. Connect the fuel lines to the inlet and outlet fittings. Carburetor General Engines in this series are equipped with fixed main jet carburetors. Most applications also utilize a fuel shut- off solenoid, which is installed in place of the fuel bowl retaining screw. All carburetors feature the self- relieving choke components shown in the exploded view on page 5.9. These carburetors include three main circuits which function as follows. Float Circuit: Fuel level in the bowl is maintained by the float and fuel inlet needle. The buoyant force of the float stops fuel flow when the engine is at rest. When fuel is being consumed, the float will drop and fuel pressure will push the inlet needle away from the seat, allowing more fuel to enter the bowl. When demand ceases, the buoyant force of the float will again overcome the fuel pressure and stop the flow. Fuel Pump General These engines are equipped with an external pulse fuel pump. The pumping action is created by the oscillation of positive and negative pressures within the crankcase. This pressure is transmitted to the pulse pump through a rubber hose connected between the pump and crankcase. The pumping action causes the diaphragm on the inside of the pump to pull fuel in on its downward stroke and to push it into the carburetor on its upward stroke. Two check valves prevent fuel from going backward through the pump. Performance Minimum fuel delivery rate must be 7.5 L/hr. (2 gal./hr.) with a pressure at .3 psi and a fuel lift of 24". A 1.3 L/hr. (.34 gal./hr.) fuel rate must be maintained at 5 Hz. Replacing the Fuel Pump Replacement pumps are available through your source of supply. To replace the pulse pump follow these steps. Note orientation of pump before removing. 1. Disconnect the fuel lines from the inlet and outlet fittings. Figure 5-1. Fuel Pulse Pump Connections.
- 15. 5.4 Section 5 Fuel System and Governor Slow Circuit: (Figure 5-2) At low speeds the engine operates only on the slow circuit. As a metered amount of air is drawn through the slow air bleed jet, fuel is drawn through the main jet and further metered through the slow jet. Air and fuel are mixed in the body of the slow jet and exit to the transfer port. From the transfer port this air fuel mixture is delivered to the idle progression chamber. From the idle progression chamber the air fuel mixture is metered through the idle port passage. At low idle when the vacuum signal is weak, the air fuel mixture is controlled by the metered idle fuel passage. This mixture is then mixed with the main body of air and delivered to the engine. As the throttle plate opening increases, greater amounts of air fuel mixture are drawn in through the fixed and metered idle progression holes. As the throttle plate opens further the vacuum signal becomes great enough so the main circuit begins to work. Figure 5-2. Slow Circuit. Fuel Inlet Float Valve Seat Float Valve Main Jet Float Main Emulsion Hole Idle Speed (RPM) Adjustment Screw Air Fuel Mixture Check Valve Spring Outlet Check Valve Leak Jet Adjustment Screw Diaphragm Spring Pump Diaphragm Inlet Check Valve ACCELERATOR PUMP ASSEMBLY (Some Carburetors) Fuel Shut-Off Solenoid with Main Jet Main Jet Slow Passage Pipe Main Nozzle Throttle Valve Idle Progression Holes Idle Limiter Jet Capped/Preset Low (Idle) Mixture Setting Idle Port Idle Progression Chamber Slow Jet Slow Air Bleed Jet Choke Valve Main Air Bleed Jet Accelerator Pump Nozzle Bowl Vent
- 16. 5.5 Section 5 Fuel System and Governor 5 Main Circuit: (Figure 5-3) At high speeds the engine operates mostly on the main circuit. As a metered amount of air is drawn through the main air bleed jet, fuel is drawn through the main jet. The air and fuel are mixed in the main nozzle and then enter the main body of air flow, where further mixing of the fuel and air takes place. This mixture is then delivered to the combustion chamber. The carburetor has a fixed main circuit. There is no adjustment feature present. Figure 5-3. Main Circuit. Check Valve Spring Outlet Check Valve Leak Jet Adjustment Screw Diaphragm Spring Pump Diaphragm Inlet Check Valve ACCELERATOR PUMP ASSEMBLY (Some Carburetors) Fuel Shut-Off Solenoid with Main Jet Main Jet Main Nozzle Throttle Valve Choke Valve Main Air Bleed Jet Accelerator Pump Nozzle Bowl Vent Fuel Inlet Float Valve Seat Float Valve Main Jet Float Main Emulsion Hole Idle Speed (RPM) Adjustment Screw Air Fuel Mixture
- 17. Thank you very much for your reading. Please Click Here. Then Get COMPLETE MANUAL. NO WAITING NOTE: If there is no response to click on the link above, please download the PDF document first and then click on it.
- 18. 5.6 Section 5 Fuel System and Governor Troubleshooting Checklist When the engine starts hard, runs roughly or stalls at low idle speed, check the following areas before adjusting or disassembling the carburetor. • Make sure the fuel tank is filled with clean, fresh gasoline. • Make sure the fuel tank cap vent is not blocked and that it is operating properly. • Make sure fuel is reaching the carburetor. This includes checking the fuel shut-off valve, fuel tank filter screen, in-line fuel filter, fuel lines and fuel pump for restrictions or faulty components as necessary. • Make sure the air cleaner base and carburetor are securely fastened to the engine using gaskets in good condition. • Make sure the air cleaner element is clean and all air cleaner components are fastened securely. • Make sure the ignition system, governor system, exhaust system, and throttle and choke controls are operating properly. If the engine is hard-starting or runs roughly, or stalls at low idle speed, it may be necessary to service the carburetor. Troubleshooting – Carburetor Related Causes Condition Possible Cause/Probable Remedy 1a. Low idle speed improperly adjusted. Adjust the low idle speed screw. b. Low idle fuel mixture circuit blocked/restricted. Clean carburetor as required. 1. Engine starts hard, runs roughly or stalls at idle speed. 2. Engine runs rich (indicated by black, sooty exhaust smoke, misfiring, loss of speed and power, governor hunting, or excessive throttle opening). 2a. Clogged air cleaner. Clean or replace. b. Choke partially closed during operation. Check the choke lever/ linkage to ensure choke is operating properly. c. Float level too high. Separate fuel bowl from carburetor body. Free (if stuck), or replace float. d. Dirt under the fuel inlet needle. Remove needle; clean needle and seat and blow with compressed air. e. Bowl vent or air bleeds plugged. Clean vent, ports, and air bleeds. Blow out all passages with compressed air. f. Leaky, cracked, or damaged float. Submerge float to check for leaks. 3. Engine runs lean (indicated by misfiring, loss of speed and power, governor hunting, or excessive throttle opening). 3a. Float level too low. Separate fuel bowl from carburetor body. Free (if stuck), or replace float. b. Idle holes plugged; dirt in fuel delivery channels. Clean main fuel jet and all passages; blow out with compressed air. 4. Fuel leaks from carburetor. 4a. Float stuck. See Remedy 2d. b. Dirt under fuel inlet needle. See Remedy 2e. c. Bowl vents plugged. Blow out with compressed air. d. Carburetor bowl gasket leaks. Replace gasket.
- 19. 5.7 Section 5 Fuel System and Governor 5 Fuel Shut-off Solenoid Carburetors are equipped with a fuel shut-off solenoid, which also contains the main jet. The solenoid has a spring loaded pin which retracts when the key switch is ‘‘on’’, allowing the engine to function normally. When the key switch is turned ‘‘off’’, the pin extends and prevents fuel from entering the engine. Below is a simple test made with the engine off, that can determine if the solenoid is functioning properly: 1. Shut off the fuel and remove the solenoid from the carburetor. When the solenoid is loosened and removed, gas will leak out of the carburetor. Have a container ready to catch the fuel. 2. Wipe the tip of the solenoid with a shop towel or blow it off with compressed air, to remove any remaining fuel. Take the solenoid to a location with good ventilation and no fuel vapors present. You will need a 12 volt power source that can be switched on and off. 3. Be sure the power source is switched off. Connect the negative power source lead to the black solenoid lead, and connect the positive power source lead to the red lead of the solenoid. Turn on the power source, while observing the pin in the center of the solenoid. 4. If the pin retracted when the power source was turned on, the solenoid is good. If the power source is turned off, the pin should return to its original position. Adjustments General In compliance with government emission standards, the carburetor is calibrated to deliver the correct air-to- fuel mixture to the engine under all operating conditions. Both the low and the high speed mixture circuits are pre-established and cannot be adjusted. The low idle speed (RPM) is the only adjustment available. NOTE: Low idle speed (RPM) adjustment should be made only after the engine has warmed up. Adjusting Low Idle Speed (RPM) Setting 1. Start the engine and run at half throttle for 5 to 10 minutes to warm up. The engine must be warm before making final low idle speed (RPM) adjustment. Check that the throttle and choke plates can fully open. 2. Place the throttle control into the ‘‘idle’’ or ‘‘slow’’ position. 3. Set the low idle speed to 1200 RPM* (±75 RPM) by turning the low idle speed adjusting screw in or out. Check the speed using a tachometer. *NOTE: The actual low idle speed depends on the application. Refer to the equipment manufacturer’s recommendations. The low idle speed for basic engines is 1200 RPM. To ensure best results when setting the low idle fuel needle, the low idle speed should be 1200 RPM (± 75 RPM). Figure 5-4. Carburetor and Solenoid.