Kato Kimura - The Ancient Art of Bonsai - 2007.pdf
•
0 likes•113 views

The Ancient Art of Bonsai

Recommended
More Related Content
Similar to Kato Kimura - The Ancient Art of Bonsai - 2007.pdf
Similar to Kato Kimura - The Ancient Art of Bonsai - 2007.pdf (20)
More from thang tong
More from thang tong (17)
Recently uploaded
Recently uploaded (20)
Kato Kimura - The Ancient Art of Bonsai - 2007.pdf
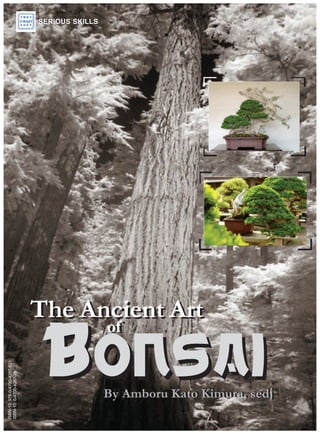
- 1. The Ancient Art The Ancient Art of of Bonsai Bonsai By Saburo Kato Kimura, sedj By Amboru Kato Kimura, sedj SERIOUS SKILLS SERIOUS SKILLS ISBN-13: 978-0-4700-4287-833 ISBN-10: 0-4700-4287-76
- 2. The Ancient Art of Bonsai Bonsai By Amboru Kato Kimura, sedj SERIOUS SKILLS Wiley Publishing, Inc. Second Edition
- 3. Cover Designer: Pompeii Clarenz Cover Image by Curacho Images. Copyright © 2007 by Amboru Kato Kimura, sedj Published by Wiley Publishing, Inc., Indianapolis, Indiana Published simultaneously in Canada, Japan and UK ISBN-13: 978-0-4700-4287-833 ISBN-10: 0-4700-4287-76 No part of this publication may be reproduced, stored in a retrieval system or transmitted in any form or by any means, electronic, mechani- cal, photocopying, recording, scanning or otherwise, except as permitted under Sections 107 or 108 of the 1976 United States Copyright Act, without either the prior written permission of the Publisher, or authoriza- tion through payment of the appropriate per-copy fee to the Copyright Clearance Center, 222 Rosewood Drive, Danvers, MA 01923, (978) 750- 8400, fax (978) 646-8600. Requests to the Publisher for permission should be addressed to the Legal Department, Wiley Publishing, Inc., 10475 Crosspoint Blvd., Indianapolis, IN 46256, (317) 572-3447, fax (317) 572-4355, or online at http://www.wiley.com/go/permissions. Limit of Liability/Disclaimer of Warranty: The publisher and the author make no representations or warranties with respect to the accuracy or complete- ness of the contents of this work and specifically disclaim all warranties, including without limitation warranties of fitness for a particular purpose. No warranty may be created or extended by sales or promotional materi- als. The advice and strategies contained herein may not be suitable for every situation. This work is sold with the understanding that the pub- lisher is not engaged in rendering legal, accounting, or other professional services. If professional assistance is required, the services of a compe- tent professional person should be sought. Neither the publisher nor the author shall be liable for damages arising herefrom. The fact that an organization or Website is referred to in this work as a citation and/or a potential source of further information does not mean that the author or the publisher endorses the information the organization or Website may provide or recommendations it may make. Further, readers should be aware that Internet Websites listed in this work may have changed or disappeared between when this work was written and when it is read. For general information on our other products and services or to obtain technical support, please contact our Customer Care Department within the U.S. at (800) 762-2974, outside the U.S. at (317) 572-3993 or fax (317) 572-4002. Wiley also publishes its books in a variety of electronic formats. Some content that appears in print may not be available in electronic books. Library of Congress Cataloging-in-Publication Data is available from the publisher. TRADEMARKS: Wiley, the Wiley logo, and the Sybex logo are trademarks or registered trademarks of John Wiley & Sons, Inc. and/or its affiliates, in the United States and other countries, and may not be used without written permission. All other trademarks are the property of their respec- tive owners. Wiley Publishing, Inc., is not associated with any product or vendor mentioned in this book.
- 4. Pemphis acidula, one of the world’s best bonsai materials from the wild.
- 5. "You ask me why I dwell in the green mountain; I smile and make no reply for my heart is free of care. As the peach blossom which flows downstream and is gone into the unknown, I have a world apart that is not among men." -- Li Po
- 6. To Presy
- 7. CHAPTER 1 - The history of bonsai • Penjing: History, aesthetics & spiritual background • The ancient arts of bonsai and penjing • Zen and the art of bonsai maintenance CHAPTER 2 - Acquiring & caring for bonsai • Creating your own bonsai • Purchasing a tree • Sunlight • Watering • Misting • Fertilizing • Repotting • Trimming & pruning • Pests & diseases • Winter care CHAPTER 3 - Styles of bonsai trees CHAPTER 4 - Shaping the bonsai • How to prune bonsai trees CHAPTER 5 - How to train your bonsai tree • How to begin • Wiring a bonsai tree • Dealing with breaks • Care after wiring • Removing the wire CHAPTER 6 - Additional training techniques • Tying • Weighting • Spreading • Snugging • Potting Table Of Contents
- 8. CHAPTER 7 - Displaying your bonsai outdoors CHAPTER 8 - Special bonsai plantings • Rock plantings • Group plantings • Saikei, bonseki and bonkei CHAPTER 9 - Trees suitable for bonsai culture Table Of Contents (continued)
- 10. 1 The History of Bonsai G azing upon the stark beauty of a bonsai, images of isolated monasteries on a steep mountainside often come to mind. While no one can say with certainty, it is quite likely that the gentle Chinese monks first began transplanting naturally dwarfed trees into ornamental containers, and that it was they who first began to appreciate the windswept beauty of these trees in their homes and gardens. The Japanese, however, have since been responsible for refining the art of cultivating bonsai trees to its present standards. The word bonsai simply means “a plant in a tray”. Authentic records of bonsai trees date back to the early 14th century. It is quite possible, however, that the practice of bonsai culture originated over 1,000 years ago in China on a very basic scale known as pun-sai, where only a single specimen is grown in a pot. These early specimens displayed sparse foliage and rugged, gnarled trunks which often looked like animals, dragons and birds. There are a great number of myths and legends surrounding Chinese bonsai, and the grotesque or animal-like trunks and root formations are still highly-prized today. Chinese bonsai come from the landscape of the imagination and images of fiery dragons and coiled serpents take far greater precedence over the natural beauty of the trees, which is preferred by Japanese bonsai artists - so the two forms of this art are quite far apart. The Japanese tend to focus on using native species for their bonsai - namely pines, azaleas and maples (regarded as the traditional bonsai plants). In other countries however, people are more open to opinion, and even perennial herbs and common weeds are may be grown as summer bonsai. It is generally accepted, however, that most bonsai are trees or shrubs. With Japan’s adoption of many cultural 10
- 11. trademarks of China - bonsai was also taken up, introduced to Japan during the Kamakura period (1185 - 1333) by means of Zen Buddhism - which at this time was rapidly spreading around Asia. The exact time is debatable, although it is possible that it had arrived in AD 1195 as there appears to be a reference to it in a Japanese scroll attributed to that period. Once bonsai was introduced into Japan, the art was refined to an extent not yet approached in China. Over time, the simple trees were not just confined to the Buddhist monks and their monasteries, but also later were introduced to be representative of the aristocracy - a symbol of prestige and honor. The ideals and philosophy of bonsai were greatly changed over the years. For the Japanese, bonsai represents a fusion of strong ancient beliefs with the Eastern philosophies of the harmony between man, the soul and nature. In an ancient Japanese scroll written in Japan around the Kamakura period, it is translated to say : “To appreciate and find pleasure in curiously curved potted trees is to love deformity.” Whether this was intended as a positive or negative statement, it leaves us to believe that growing dwarfed and twisted trees in containers was an accepted practice among the upper class of Japan by the Kamakura period. By the fourteenth century bonsai was indeed viewed as a highly refined art form, meaning that it must have been an established practice many years before that time. Bonsai were brought indoors for display at special times by the “Japanese elite” and became an important part of Japanese life by being displayed on specially designed shelves. These complex plants were no longer permanently reserved for outdoor display, although 11
- 12. Over time, bonsai began to take on different styles, each which varied im- mensely from one another. 12
- 13. the practices of training and pruning did not develop until later - the small trees at this time still being taken from the wild. In the 17th and 18th century, the Japanese arts reached their peak and were regarded very highly. Bonsai again evolved to a much higher understanding and refinement of nature - although the containers used seemed to be slightly deeper than those used today. The main factor in maintaining bonsai was now the removal of all but the most important parts of the plant. The reduction of everything just to the essential elements and ultimate refinement was very symbolic of the Japanese philosophy of this time - shown by the very simple Japanese gardens such as those in the famous temple - Roan-ji. At around this time, bonsai also became commonplace to the general Japanese public - which greatly increased demand for the small trees collected from the wild and firmly established the art-form within the culture and traditions of the country. Over time, bonsai began to take on different styles, each which varied immensely from one another. Bonsai artists gradually looked into introducing other culturally important elements in their bonsai plantings such as rocks, supplementary and accent plants, and even small buildings and people which itself is known as the art of bon-kei. They also looked at reproducing miniature landscapes in nature - known as sai-kei which further investigated the diverse range of artistic possibilities for bonsai. Finally, in the mid-19th century, after more than 230 years of global isolation, Japan opened itself up to the rest of the world. Word soon spread from travelers who visited Japan of the miniature trees in ceramic containers which mimicked aged, 13
- 14. Bonsai is no longer reserved for the upper-class, but is a joy shared by executive and factory worker alike. 14
- 15. mature, tall trees in nature. Further exhibitions in London, Vienna and Paris in the latter part of the century – especially the Paris World Exhibition in 1900 opened the world’s eyes up to bonsai. Due to this phenomenal upsurge in the demand for bonsai, the now widely expanding industry and lack of naturally-forming, stunted plants led to the commercial production of bonsai by artists through training young plants to grow to look like bonsai. Several basic styles were adopted, and artists made use of wire, bamboo skewers and growing techniques to do this – allowing the art to evolve even further. The Japanese learned to capitalize on the interest in this art form very quickly - opening up nurseries dedicated solely to grow, train and then export bonsai trees. Different plants were now being used to cater for worldwide climates and to produce neater foliage and more suitable growth habits. Bonsai techniques such as raising trees from seed or cuttings and the styling and grafting of unusual, different or tender material onto hardy root stock were further developed. Bonsai has now evolved to reflect changing tastes and times - with a great variety of countries, cultures and conditions in which it is now practiced. In Japan today, bonsai are highly regarded as a symbol of their culture and ideals. The New Year is not complete unless the tokonoma - the special niche in every Japanese home used for the display of ornaments and prized possessions - is filled with a blossoming apricot or plum tree. Bonsai is no longer reserved for the upper-class, but is a joy shared by executive and factory worker alike. 15
- 16. The penjing artist’s goal is not only to re-create a natural scenery in a container, but to capture its essence and spirit. 16
- 17. Penjing: History, aesthetics & spiritual background Many people think of bonsai as exclusively Japanese. But there is a long tradition of bonsai from China. Penjing is the Chinese art of creating a miniature landscape in a container. The word consists of the two characters shown on the left: “pen” - “pot” or “container”, and “jing” - “scenery”. An artist may use plant material and natural stone to portray an idyllic mountain retreat with a murmuring brook or a waterscape with a lush tropical island. Or he or she may design a much simpler scene where one single tree makes up the entire composition. Penjing and bonsai are closely related art forms. Penjing is the older form from which bonsai derived. While the similarities by far outweigh the differences, there is a significant variance in scope: “Bonsai” literally means a “tree in a pot” and therefore as an art form, bonsai is more narrowly defined than penjing, a “landscape in a pot”. Many of the beautiful, elaborate tray sceneries created by Chinese artists clearly defy the parameters of bonsai. While penjing can be found in many variations, the Chinese themselves recognize three distinct categories: • Tree Penjing (shumu penjing) • Landscape Penjing (shanshui penjing) • Water-and-Land Penjing (shuihan penjing) Penjing as an art form spans over a thousand years. Our earliest historical records of a stone and a plant arranged in a container to form an artistic scenery date from the Tang Dynasty (618-907). By the Song Dynasty (960-1279 ), the Chinese already practiced the art at an advanced artistic level. Paintings from that period depict pieces that would be prized among seasoned collectors today. Penjing artists have drawn much of their inspiration not only from nature, but from nature poetry and landscape painting. Similar aesthetic considerations have guided all three art forms. With landscape painting attaining unprecedented heights 17
- 18. Penjing and bonsai are closely related art forms. Penjing is the older form from which bonsai derived. While the similarities by far outweigh the differences, there is a significant variance in scope: “Bonsai” literally means a “tree in a pot” and therefore as an art form, bonsai is more narrowly defined than penjing, a “landscape in a pot”. 18
- 19. during the Song Dynasty (960-1279), penjing, too, was poised for vigorous artistic development. By the early years of the Qing Dynasty (1644-1911), the art had become very popular, and the first manuals appeared. With increasing popularity, however, more commercial, folkloristic, and regionally defined strands of penjing sprang up alongside the more sophisticated, artistic forms. In addition to aesthetically refined penjing, one could find trees whose trunks had been coiled to represent dragons or whose canopies were to depict cloud layers, or trees shaped to resemble the strokes of fortuitous characters. The variations were endless. In the later years of the Qing Dynasty, the 19th century, foreign aggression and domination led to a decline in penjing, and this development was exacerbated during the years of foreign occupation and humiliation, war, civil war, and cultural revolution that China experienced during much of this century. Old collections were lost, artists struggled to survive and to pass on their wisdom and insights. Only in the last twenty-plus years have the conditions in China allowed for a renaissance of this ancient art form. Today, a quickly growing number of enthusiasts and collectors have discovered their roots in penjing. It is assumed that the art of creating miniature trees reached Japan by the 13th century. Beginning in 600 A.D., Japan sent envoys to China to study her arts and architecture, her language and literature as well as her law and the forms of Buddhism evolving there, which were grafted on the original Indian teachings. During China’s Southern Song Dynasty (1127-1279) in particular, the Japanese imported Chinese culture and arts on a large scale. It was during that time that the Chinese form of Buddhism known as “Ch’an” was introduced to Japan and given the name “Zen” - the name by which it is known in the West today. This massive transmission of culture begun in the the 1200’s would last for centuries as Japanese artists continued looking to their Chinese counterparts for guidance and inspiration. The penjing artist’s goal is not only to re-create a natural scenery in a container, but to capture its essence and spirit. To 19
- 21. achieve this objective, a wide palette of artistic devices comes into play. Like a Chinese landscape painting, a penjing is a study in contrasts. On a philosophical level, this presentation of opposites is evidence of the Chinese artist’s conceptualization of the universe as being governed by two poles of cosmic energy, the yin and the yang. Artistically, the contrasts create rhythm and dramatic tension which then is resolved in a dynamic balance, a delicately tuned equilibrium. The attainment of overall structural unity is critical, especially in a more complex composition like a water-and-land penjing where design elements such as trees, rocks, mosses, small grasses, and water all need to harmonize with each other and contribute to the design in a meaningful fashion. Careful selection is critical. In addition to deciding on a container and determining the tentative placement of the composition, the artist will consider the tree species, number of trees to be used, their sizes, trunk angles and the density of their foliage mass. He or she will choose rocks for their size, color, shape, surface details, and compatibility with the trees. In the end, each and every element in the design needs to relate to all the others so that the entire landscape appears as an all-embracing, encompassing entity. Penjing artists do not seek to create perfection. As a matter of fact, trees trained into highly stylized forms where every angle and every root and branch placement has been meticulously calculated by a rigid formula do not suit their tastes. Apart from being beautiful, an outstanding penjing must look entirely natural. It should look as if Nature herself had spontaneously created it - like a marvellous accident of Nature. Spiritual background Bonsai and penjing may be viewed as objects of meditation. The act of creating bonsai or penjing by itself is a contemplative, meditative exercise - a practice of Zen. The little trees and miniature landscapes can be seen as a celebration of Nature and the healing powers extended by an 21
- 23. intact natural environment. Creating and taking care of bonsai and penjing will draw you closer to Nature, enabling you to experience her in a more direct, intimate way. For a more in-depth understanding of bonsai and penjing, the practice of creating miniature trees and landscapes should be viewed against the backdrop of two of China’s great philosophical traditions, Daoism (Taoism) and Zen Buddhism. Daoism has exerted a profound infl uence over Far Eastern arts for over two thousand years. It’s a way of thinking and living that can liberate mind and body. Daoism proposes the return to a state of original spontaneity by discarding the rules of rigid conventional behavior and thinking. It suggests that by learning to go with the flow and allowing our minds to function naturally, tremendous creative power can be unleashed. Tuning into the rhythm of Nature and understanding the interrelatedness of all things around us are key components of Daoist teachings. Zen Buddhism - known as “Ch’an” in Chinese - evolved as a new strand of Buddhism with unique Chinese features after Indian monks introduced Mahayana Buddhism around 500 A.D. It came about when a form of Indian Buddhism was grafted upon the native Chinese Daoist tradition. Chinese-style sitting meditation (“zuo Ch’an”, a concept called “za zen” in Japanese) does not seek to bring the mind under rigid control as does traditional Indian Buddhism, but instead seeks to liberate, encouraging the mind to fl ow without impediment and to follow its own, intrinsically good, nature. Ch’an, popularized in the West under its Japanese name, Zen, teaches that the receptive 23
- 25. mind can find Enlightenment everywhere, at any time, in the form of “sudden awakening”. And so it is that a bonsai or penjing artist, working with natural materials and concentrating moment to moment, may come upon sudden insights, inspirations, and resolutions. This is the creative process. It fi nds the artist quietly absorbed in a state of active meditation. Arranging trees and placing rocks, he suddenly discovers something new, not pre-meditated - a composition that flows naturally and harmoniously, engendering great beauty and universal, eternal truths with seemingly little effort. The ancient art of bonsai and penjing Masters of Japanese bonsai and Chinese penjing techniques are gardening artists. The tiny trees they meticulously shape— ranging in age from newborn to centenarian — create a sense of full-grown trees in their natural surroundings while taking up only the space of a coffee table. Perfecting such miniature masterpieces is truly the pinnacle of gardening skill. A well-trained bonsai or penjing specimen should give the impression of being a tree, not a shrub. Trees have well-defined foliage layers with open areas between them, while shrubs are masses of foliage that need pruning to define and improve their branch structure. Though many people believe such trees are simply dwarfed versions of natural trees, the truth of the art form lies in the creation of the image. Masters manipulate potentially full-sized trees and mold them into beautiful pieces of art that, with proper care, can last for generations—sometimes centuries. But take a bonsai or penjing tree out of its pot and plant it in the ground, and it’ll reach its full, normal height. Masters coax the roots of penjing or bonsai specimens over large rocks placed at the base of young trees or shrubs in 25
- 26. The idea of growing and refining a tree in miniature in the confines of a glazed clay pot is intriguing and found to be a challenge to many who have grown trees or other plants with success. 26
- 27. training. The roots of bonsai plants often rise in sculptural shapes above the stones. Some penjing has been trained, or molded, into the shape of a dragon, with one of its larger branches looking like a head and another, a tail. Eventually, the art of penjing migrated from China through Korea to Japan. The Japanese term “bonsai” refers both to the plant and to the pot or tray in which it sits. The two must complement each other to create visual harmony. Bonsai come in all sizes: miniature (six inches tall or less), small (six to 12 inches), medium (12 to 24 inches), and large (24 to 48 inches). It’s certainly not easy to create a miniaturized tree, and it can be daunting countless days, months, and years can be spent learning techniques for creating and maintaining bonsai and penjing. With practice, you can shape a tree by removing a branch, allowing one to develop in a desirable location, or allowing the trunk to grow more. Balcony view of one of the four rooms at the National Bonsai Exhibition held in the Tokyo Metropolitan Art Museum. This room has large size bonsai while the room on the upper left has medium size bonsai. 27
- 29. Repotting lets you place the trunk where you’d like in the pot, wiring lets you alter the position of the branches, and pruning keeps the branches short. Creating a bonsai from seed can be tricky. So one popular way is to start by choosing a nursery tree, shrub, or even a vine, then potting and beginning to style your bonsai—a step called “pre-bonsai” or “bonsai in training.” This process of training a plant in a pot takes several years. With proper care and the appropriate techniques, one day it may earn the title of “masterpiece.” While training a plant, one may need to replace the original pot as the tree gets bigger, and special attention needs to be given to drainage and soil mixes so that the tree remains healthy. Once fully formed, a bonsai will have a thick trunk, a shape like the normal-sized tree, branches of the right size and in the right place, leaves that are as small as they can get, and a pot perfectly matched to the style and color of the tree. This maintenance process requires years of trimming and restyling, but it’s very satisfying to the owners and gives a deep sense of artistic pleasure. Zen and the Art of Bonsai Maintenance Over the last couple of decades, according to writer Michael Turley, there has been a dramatic increase in the number of Westerners who have become involved with bonsai as a hobby. Many of these people have come to bonsai through an interest in gardening or horticulture. The idea of growing and refining a tree in miniature in the confines of a glazed clay pot is intriguing and found to be a challenge to many who have grown trees or other plants with success. 29
- 30. The art of bonsai needs the knowledge and the technical expertise of the gardener for the physical bonsai to survive and flourish. 30
- 31. For them, bonsai is the next logical step in refining their horticultural skills. For others, the art of bonsai is what draws them to the hobby. Instead of using clay or paint or some other traditional media, plant material is used to create a “living sculpture”. The “artist” looks at the raw material to “see” the tree inside, then gradually removes the unnecessary parts to reveal the prize within. The artist continues the development of his or her “sculpture” over a period of years through strategic wiring and pruning, taking great pride in the resulting artistic “creation”. However, there is another aspect or discipline of bonsai that rarely gets the attention it deserves, even though it has played a significant role in the evolution of bonsai design and display. This third aspect is “religion” or “spirituality” – the “soul” of the art of bonsai. While our numbers are fewer than those who follow the traditional paths of art or horticulture, those of us who follow the “spiritual” path of bonsai are in good historical company. Religion and/or spirituality have a long historical connection to the development of bonsai, especially in Japan. Bonsai can be traced back for over ten centuries in China where it was known as “penjing”. The term “penjing” included both miniature landscapes and individual or groups of trees in pots. Penjing was often practiced by members of the elite or religious communities, so when penjing, later to be known as “bonsai”, was introduced to Japan, it was natural for it to come by way of Zen Buddhism, which was rapidly spreading throughout Asia at that time. In fact, the name for the “bunjin” or “literati” style of bonsai comes from the artist class of calligraphers, painters, and 31
- 32. Like Christianity, which celebrates a divine trinity, Zen also has its trinities, especially in its relationship to bonsai. One of these is the three basic virtues that are needed to create bonsai: shin-zen-bi, or truth, goodness, and beauty. The trinity is also expressed as a relationship between “god” or a “universal life energy”, man or the bonsai artist, and nature or the bonsai itself. 32
- 33. poets, often members of religious orders, who were the early custodians of bonsai in Japan. During this earliest period of bonsai in Japan, the practice of bonsai was almost exclusively the domain of Buddhist monks and their monasteries. Bonsai design underwent a significant change during this time as the practice of Zen spread throughout Japan. In China, the Linguan-style of clip- and grow was the predominant method of developing and styling bonsai. However, this changed as the more abstract and minimalist philosophy of Zen influenced more areas of Japanese culture. Like Christianity, which celebrates a divine trinity, Zen also has its trinities, especially in its relationship to bonsai. One of these is the three basic virtues that are needed to create bonsai: shin-zen-bi, or truth, goodness, and beauty. The trinity is also expressed as a relationship between “god” or a “universal life energy”, man or the bonsai artist, and nature or the bonsai itself. This is mirrored in the traditional “tokonoma” found in most Japanese homes. In the tokonoma, bonsai are displayed on stands accompanied by a wall hanging or painting and a viewing stone or “accompanying plant” on the floor. In this setting, the painting represents “god” or the “life energy”, the stone or accompanying plant represent the earth or nature, and the bonsai itself represents man. This triad of design continues in the actual structure of the bonsai tree itself. The trunk is divided into thirds with the first third absent of branches, the next third containing the first three main branches, and the final third containing the balance of the tree including the apex. The first three branches are 33
- 35. maintained at different heights, usually circling the trunk from side to back to opposite side. The remaining branches are also grouped in threes as they move towards the apex. The shape of the overall tree reflects the shape of a triangle with the topmost corner representing the deity, the lowest corner representing the earth, and the middle corner representing man between god and nature. The Zen trinity is further represented in the concepts of “kami”, “wabi”, and “sabi”. Kami is synonymous with “divinity” and relates to the inner spirit or life force that inhabits all life forms – human, animal, and plant. The concept of wabi and sabi are more elusive to the Western mind. Wabi refers to an inner peace or tranquility and the notion of humility when confronting or meditating on nature. While in the West, man is often placed in the center of the universe, in Zen, man is just a part of a balanced natural design. The concept of sabi is even more difficult to understand for many Westerners. It relates to the pleasure derived from the tending, loving, and possessing of things that have been transformed by man, nature, and time. As these concepts apply to bonsai, the bonsai hobbyist or enthusiast recognizes that he or she is a part of nature and at one with nature, and through meditation on his or her trees, the bonsaist reaches deeper into his or her own soul or spirit to find fulfillment or enlightenment. How we come to bonsai is really immaterial to the growth of bonsai in the West. The art of bonsai needs the knowledge and the technical expertise of the gardener for the physical bonsai to survive and flourish. The craft of growing trees in pots needs the artist to transform leaves, bark, roots, and branches into living works of 35
- 37. art. However, the bonsai, and the bonsai artist, is not complete without the “soul” of bonsai – that recognition of our relationship to our “creations” and the world around us, the sun, rain, and elements that nourish our trees – for without this connection, a bonsai is just a pretty little tree in a pot. 37
- 38. 38 Maple
- 39. 2 A BONSAI is literally a “tree in a pot,” which further imitates, in miniature, the appearance of an old tree in nature. Old specimens in nature, unlike juvenile trees, have compact rounded tops, and horizontal or drooping branches, which make them appear aged and graceful. There are three sizes of bonsai, ranging from under five inches to about 30 inches in height. Not all plants are equally effective as bonsai. To produce a realistic illusion of a mature tree, all parts of the ideal bonsai - trunk, branches, twigs, leaves, flowers, fruits, buds, roots - should be in perfect proportion with the size of the tree. Plants used for bonsai should have small leaves or leaves that become small under bonsai culture. Plants with overly large leaves, such as the avocado, will look out of proportion if chosen for bonsai. Sycamores also develop leaves that are too large. Certain species of both maple and elm trees usually respond well to bonsai culture and develop leaves that are in proportion. Among the plants with small leaves and needles appropriate for bonsai are spruce, pine, zelkova, and pomegranate. Leaves will miniaturize naturally the longer a tree grows in a shallow container, but one must still begin with a relatively small- leafed type. Plants chosen for bonsai should have attractive bark, and the trunk must give the illusion of maturity. The trunk should have girth, but must remain in proportion to the entire tree and should taper gradually toward the Acquiring & Caring For Bonsai Bonsai material hunters in the Philippines looking for Pemphis acidula. 39
- 40. Plants for bonsai can be collected from the wild, but it is a slow method and there are many unknown factors. It is difficult to tell the age of a plant found in the wild and since they must be collected while dormant, it is also difficult to be sure that the specimen is healthy. 40
- 41. top of the tree. An ideal trunk has good buttress rootage at the base, and graceful movement as it rises to the apex. Branches that occur lower down on the trunk should be the longest, and biggest in diameter, with branches growing higher on the trunk becoming successively shorter and smaller in diameter. This imitates the natural appearance of a tree, suggesting that the lowest branches are the oldest (biggest/longest), and higher branches, having grown more recently, are smaller and shorter. Most bonsai trees sold at garden centers and nurseries are of excellent quality, but there are a few points to bear in mind when buying a new plant. • Age and shape of the tree • General health • Soil should be damp but not soggy, unless it has just been watered • Leaves should look bright and healthy, not burnt around the edges or spotty • If buying a deciduous tree in winter, last year’s growth should be smooth and plump, with no sign of bark wrinkling • The tree should be steady in its container, which should have at least one drainage hole • A white fungus in and around the drainage hole is natural and harmless Creating Your Own Bonsai Plant Selection. It is safest to begin with common plants that do well in your area. Be sure that the plants you consider meet the requirements for good bonsai. Some old favorites for 41
- 43. bonsai specimens are Sargent juniper (Juniperus chinensis ‘Sargentii’), Japanese black pine (Pinus thunbergiana), Japanese wisteria (Wisteria floribunda), Chinese wisteria (Wisteria sinensis), Japanese flowering cherry (Prunus yedoensis), and Japanese or sawleaf zelkova (Zelkova serrata). Nursery stock can be a very good selection since the plant’s roots have already become accustomed to being containerized. Look for well-rooted specimens with good branches. Plants for bonsai can be collected from the wild, but it is a slow method and there are many unknown factors. It is difficult to tell the age of a plant found in the wild and since they must be collected while dormant, it is also difficult to be sure that the specimen is healthy. Take all the equipment needed to keep the plant in good condition after digging. This includes plastic bags to wrap the root ball, moss to pack around the roots, and water to keep the specimen moist if it cannot be replanted soon after digging. Don’t forget the crowbar; roots are sometimes wrapped securely around rocks. Be sure to have permission before digging plants on property other than your own, and don’t forget to check the endangered species list for protected plants before you begin. It is not legal to take plants from national parks and other conserved areas. After the plant is selected, dug, and brought home, plant it in a protected area in your garden. Water the plant and feed it sparingly. After one year, it is ready to be placed in a training container. A light pruning of the branches can take place at potting time, but training should not begin for another year. It is possible to propagate your own bonsai. It is a slow method, but it has the advantage of letting you shape the plant from the very beginning. Plant seedlings in the ground outside so that 43
- 44. Most bonsai are hardy trees and shrubs whose natural habitat is out in the open. They are not permanent houseplants; and even semi-tropical trees should be placed outside when weather permits. 44
- 45. the trunks will develop rapidly. They may need to stay outdoors for two to five years. Each spring, dig up the plant and prune its roots as you would if it were potted. Bonsai can also be started from cuttings. Make cuttings in late spring before the buds open. Some plants that propagate easily from cuttings are olive, willow, cotoneaster, firethorn, azalea, and boxwood. Plants can also be propagated by layering and grafting, but these methods are not recommended for the beginner. Purchasing A Tree When buying a tree from a store during the summer, be sure to give it at least two weeks outside, avoiding heavy rain and high winds before displaying it indoors. If purchasing in winter, however, do not allow it to be exposed to frost for the rest of the season, as it will probably have begun to shoot. This is most important with deciduous trees, and while varieties of junipers are very hardy it is as well not to take any chances. Most bonsai are hardy trees and shrubs whose natural habitat is out in the open. They are not permanent houseplants; and even semi-tropical trees should be placed outside when weather permits. During the summer the plant must be able to carry out the process of photosynthesis, and during winter it is resting and building up its strength for the coming spring. Too long in a warm room will persuade it that spring has arrived early and it will start budding. If this happens more than once, the tree will simply die of exhaustion. Sunlight Sunlight is critical for a tree’s good health, but how much is best? For most conifers – spruces, pines, junipers, tamarack, 45
- 46. For many broadleaf, deciduous trees full morning sun and partial afternoon sun is best. 46
- 47. etc. – full sun is best. For many broadleaf, deciduous trees full morning sun and partial afternoon sun is best. In general trees with thick coarse leaves will tolerate more sun than those with thin, delicate leaves. As an example of the later, the Japanese maple, full sun can desiccate the leaf margins, so these grow best in filtered sunlight. Sunlight, especially the ultra-violet ray, affects the growth of trees. Therefore, except inspecial cases such as immediately after repotting, extensive trimming, etc, bonsai should be placed in a sunny location. Bright light will also work well but the tree should not be placed more than 12" away from the direct light source. An east, west or southern exposure works best. A northern exposure will require the use of “grow lights” which should remain on up to 16 hours each day and the lamp should not be more than two inches from the top of the tree. Incandescent light is too hot and will not provide the various spectrum of light that is required to maintain your bonsai tree. If you do not have a window or light source that provides an east, west or southern exposure, be sure to select a bonsai tree that does well in lower lighting conditions. 47
- 48. All bonsai trees are grown in special bonsai potting mix – not dirt, not potting soil, and not garden soil. This special bonsai soil is coarse and granular, and should allow for water to freely run through it. 48
- 49. Watering Watering is the single most important factor in keeping your trees alive. It is also the hardest skill to learn. This is because various species of trees have different water demands. Some trees tolerate dry conditions better than others. Some trees will tell you when they are thirsty when their leaves look limp. For other trees limp leaves mean the tree has already died. So where do we start? All bonsai trees are grown in special bonsai potting mix – not dirt, not potting soil, and not garden soil. This special bonsai soil is coarse and granular, and should allow for water to freely run through it. All bonsai pots have holes for drainage. When bonsai are watered, most of the water runs out the bottom of the pot, and only a small amount is retained in the pot. If a bonsai is growing in a free draining soil mix, during the active growing period (spring to fall) they are usually watered once a day. Water your bonsai with a watering can, or with an attachment to your garden hose that will deliver a gentle spray of water. Be careful you do not blast the soil from the pot with too strong a spray. Water until water runs from the bottom of the pot. Watering is best done in the morning so the tree and soil are fully hydrated during the hottest part of the day. It is often said that it is impossible to over-water a bonsai if it is in a good potting mix. However, down and become more compacted, the pot will not drain as freely as it once did. So some trees may require water today and others not. You should check to see if your bonsai need water by gently probing with your finger slightly below the soil surface to check for moisture. Do not water if the soil is still moist. However, do not let the soil become bone dry. Some bonsai growers insert a short section of wooden chopstick near the edge of the pot. To 49
- 50. Because bonsai trees are cultivated in limited amounts of soil, adequate feed is very important. As a general rule, a small amount of feed is given in the spring and a larger amount in the fall. 50
- 51. check moisture simply withdraw the chopstick and examine it for moisture. Then replace it again. Most conifers generally don’t like their roots to be wet all the time and tolerate dry conditions better than broadleaf trees. Smaller pots will require more frequent watering than larger pots. Wind, humidity, pot size, temperature, and soil compaction all are factors in how often you should water. When you go on vacation have a reliable neighbor water your trees. Unlike a houseplant, bonsai trees use a “free draining” type of soil because their roots cannot tolerate “wet feet”. In addition, they are grown in significantly less soil and, therefore require more watering. Factors such as tree location, temperature, lighting conditions, quantity of soil used, and the changing seasons will determine the frequency of watering. You can get to know when your tree needs to be watered by observing the foliage, testing the soil with your index finger just below the surface, or just by the weight of the pot. (The drier the tree, the lighter it will feel.) To take the guesswork out of watering, an inexpensive moisture meter which works very much like a thermometer comes in handy. Insert it into the soil and the movement of the needle will tell you if it is time to water. Rainwater is best for watering plants, but tap water that has stood for a few hours is adequate. In summer, trees should be watered in the early morning or late afternoon to avoid the midday heat. This will prevent the leaves of the finer bonsai from burning. In winter, water early to permit any excess to 51
- 52. All potted plants will eventually outgrow their containers. While houseplants need to be “potted- up”, that is, placed in larger and larger containers, the miniatur- ization of a bonsai trees is maintained by keeping the roots confined to the small container. 52
- 53. drain before the night frost. Plunging the pot into a bowl to soak is ideal for recently potted trees, small collections and for trees that have dried out. Be sure to drain properly, however! Misting All trees grow in more humid conditions than our homes, offices and dormitories. So what can we do to provide this essential humidity ? Misting the tree is only beneficial for a short time, so what we recommend is to place the tree on a humidity tray and add water to the tray. As the water in the tray evaporates it creates a humid environment around the tree 24 hours a day. When the water in the tray is gone, add more water. It’s a good idea to separate the pot from the water in the tray by adding some pebbles to the bottom of the tray. This will prevent any roots from sitting in the water. Fertilizing Because bonsai trees are cultivated in limited amounts of soil, adequate feed is very important. As a general rule, a small amount of feed is given in the spring and a larger amount in the fall. Feed for bonsai should contain three principle ingredients; nitrogen, phosphoric acid, and potash. It is also a good idea to use a fertilizer containing “chelated” iron. Water before fertilizing your tree and then apply at half the strength recommended by the brand’s manufacturer. Rotate the use of brands since different manufacturers add different amounts of trace elements and minerals. You could also add Superthrive, 53
- 54. On average, repotting will be necessary every 3-5 years, but the tree should be removed from its container and its root system inspected once a year. 54
- 55. which is a vitamin supplement to the fertilizer mix. You may find it simpler and easier to use slow release fertilizer granules (placed over the soil) whose nutrients are released with each watering. Repotting Repotting must be done periodically to keep your bonsai healthy. Trimming the roots prevents the tree from becoming pot bound and also stimulates new root growth. For almost all varieties of bonsai, repotting is best done in the spring just as the plant is awaking from dormancy. Most bonsai need to have this done every two or three or four years. Older trees require less frequent potting than younger trees; conifers require repotting less often than broadleaf deciduous trees. To repot a bonsai the tree is carefully removed from its pot (there may be a wire anchoring it in place. Cut this wire and remove it.). The roots are then carefully combed out with a root hook. Trim off the root ends enough so that it will fit back into the same pot. Replace the soil with new bonsai potting mix. Secure the tree in its pot with wire to anchor it in place. A tree that wiggles in its pot will have difficulty growing new roots. Newly repotted trees should not be exposed to full sun and drying winds until the roots are actively taking up water. All potted plants will eventually outgrow their containers. While houseplants need to be “potted-up”, that is, placed in larger and larger containers, the miniaturization of a bonsai trees is maintained by keeping the roots confined to the small container. On average, repotting will be necessary every three to five years, but the tree should be removed from its container and its root system inspected once a year. If the roots form a circular ball around the perimeter of the pot, it is time to trim the roots and repot. 55
- 56. The main objective of trimming and pruning is to shape the bonsai into the desired form and to reduce growth above ground in order to maintain a balance with root growth. 56
- 57. When repotting remember to: • Use only bonsai soil • Remove air pockets by working the soil down through the roots • Do not remove more that 20% of the root system • Repot during the appropriate repotting season • Water well and keep out of the sun for a week or two Trimming & Pruning The main objective of trimming and pruning is to shape the bonsai into the desired form and to reduce growth above ground in order to maintain a balance with root growth. The process of shaping begins when the tree is very young and is on-going as it continues its growth. Trimming is accomplished by using a sharp scissors or shears. This traditional tool is called butterfly shears or bonsai shears and is used for removing foliage and light branches. When heavier branches are removed, we call it pruning and the tool to use is the concave cutter, for which there is no substitute. The concave cutter allows you to remove small, medium and even large branches without leaving any visible scars. Some trees such as the Juniper should be trimmed by using the thumb and index finger to remove new growth and to prevent browning 57
- 58. Bonsai from forest trees must live outdoors except for short periods of time when they may be brought inside for viewing. 58
- 59. and a “sheared” appearance. Pests & Diseases Many, if not most, insects are not harmful to your bonsai. Some are beneficial in that they prey on insects that will do damage to your trees. If you find that harmful insects have taken up residence on your bonsai, you need to take action. Many of these can be washed or picked off. Many are small and difficult to see. Red spider mites are frequently a problem with junipers, and can be discerned by holding a white piece of paper below a branch and tapping on the branch. If you see what looks like moving red paprika, you have a spider mite problem. Treat with an appropriate insecticide. Be sure to read all labels and application instructions for any pesticide. To do otherwise is a violation of federal law. As living trees, bonsai are susceptible to insect attacks and disease. Preventive and corrective measures include: • Keeping your bonsai in good health, since insects and bacteria tend to attack weak trees • Giving your tree ample light, fresh air and ventilation • Keeping the soil free of spent blooms and fallen leaves etc. You may also use an insecticidal soap spray which is not harmful to humans or animals. This soap derivative, however, may require more than one application to control the insect population. It’s also a good idea to use this spray weekly to prevent any attacks. Just remember that bonsai from forest trees must live outdoors except for short periods of time when they may be brought inside for viewing. These indoor periods should only be for two or three hours and should not occur at all in summer unless the interior is well ventilated. In the summer, bonsai need 59
- 60. Tropical and sub- tropical trees can be grown as indoor bonsai. A few hobby- ists grow these indoors all year long with supplemental lighting. 60
- 61. cool nights, sunny days, and mist or rain almost daily. If your climate does not offer these conditions naturally, you must supply them. Avoid any extremes in temperature, light, rain, and wind. Water the entire plant daily, but do not let them become water logged. Placing bonsai on a slatted stand in the garden is a good way to keep drainage conditions optimum. Learn the conditions (culture) that your bonsai requires. Junipers and pines need full sun all day. Maples, elms and boxwoods need morning sun and afternoon shade, etc. Apply fertilizer only before and during active growth. A houseplant fertilizer diluted from one quarter to one half strength will suffice. In the fall, bonsai must be prepared for the winter. Slow the growth of the plants by watering less frequently and discontinuing fertilizer application. Do not prune or cut any branches after mid-August. Winter’s low temperatures and drying winds can easily kill bonsai. If the winter temperature drops below 28º F, bonsai must be protected by a greenhouse, pit, or coldframe. However, do not overprotect the plants; they must be kept cool to stay dormant. Don’t forget to water them while inside the coldframe. Winter watering may be necessary only once a week. More bonsai are killed by over-watering than by desiccation. A dormant period is necessary for all temperate trees, and trees that are not given this period of rest will die. This does not apply to tropical or sub-tropical varieties, which are described on the next page. The type of winter protection needed by your trees depends on the type of tree that you have and the severity of winter in your area. If you live in an area where the coldest night temperatures in the winter are no 61
- 62. 62
- 63. colder than about mid twenties Fahrenheit – typically the deep south - your trees will not need any special protection, and can remain on their benches all winter. But for most regions of the United States your trees will require winter protection of some sort. This can be accomplished by placing your tree in an unheated garage; an unheated shed; a cold frame; a window well on the north facing side of your house; a root cellar; by healing them into a flower bed; by carefully burying them in light snow. Wherever you store your bonsai, they should not be subjected to repeated cycles of freeze-thaw. A sun porch that gets warm during the day and freezing at night would not be a favorable location. Also check periodically during the winter months to see if the tree needs to be watered. Other bonsai growers in your area are a good source of information regarding winter care. In the spring, start new bonsai, prune the old ones, and continue training measures. The remaining part of the growing season is used for the plants’ adjustments to these practices. The rule-of-thumb is, if the soil is still wet – don’t water. Indoor Bonsai Tropical and sub-tropical trees can be grown as indoor bonsai. A few hobbyists grow these indoors all year long with supplemental lighting. But even these trees will do best if they are grown outdoors during the normal growing season. When night temperatures drop below 50 degrees Fahrenheit, these trees need to be brought indoors. Tropical environments receive about 12 hours of daylight all year long. Indoors, give your bonsai as much light as possible, perhaps supplemented with grow lights set on a timer to mimic natural conditions. Most of our homes have a low relative humidity during the winter. Misting the foliage, or grouping your plants together, or placing pans of gravel and water under, or near, your bonsai will help raise the humidity. Remember, however, your bonsai pot must never be sitting in water deeper than the feet on the pot. The water level must never be above the bottom of the pot. 63
- 64. The most popular bonsai styles today are the simple but relaxed forms. 64
- 65. 3 B onsai trees and plants vary greatly in style and size. Miniature specimens, up to 6 inches tall, are usually naturally dwarf plants trained even smaller. Small bonsai stand up to 12 inches tall, and medium trees from 1 – 2 1/2 feet. Bonsai do not have to be small however, with some magnificent trees at the Imperial Palace in Tokyo growing more than six feet tall. These plants are hundreds of years old! The most important classification of style refers to the angle at which the trunk stands in the container. These range from the formal upright style, in which the trunk grows straight and vertical, to the full cascade, in which the bonsai tree is trained so that the upper growth sweeps down below the pot. The most popular bonsai styles today are the simple but relaxed forms such as the informal upright and leaning styles, together with small groups. BONSAI STYLES In the Japanese bonsai tradition, each bonsai must conform to a clearly defined style. There are more than 100 recognized styles in bonsai, but most experts consider five basic styles to be essential — formal upright, informal upright, slanting, cascade and semi-cascade. This guide will help you become familiar with the essential bonsai styles and their Japanese names. Formal Upright (Chokkan) - A bonsai tree trained in the formal upright style mimics the growth of a tree under perfect natural conditions. The most important requirement for this style is that the trunk must be perfectly straight, tapering naturally and evenly from bottom to top. The best species for training in the formal upright style are larches, junipers, pines and spruces because of their naturally tapered shape. Styles Of Bonsai Trees 65
- 66. At the outdoor sales area of the Ueno Green Club bonsai (Japan), prebonsai, containers, tools, soil and seeds can be found for sale. Note many of the large size bonsai on the roof are sold as bare-root specimens. 66
- 67. Informal Upright (Moyogi) - In nature, trees bend or change their growth direction in response to their environment. They might grow away from the wind or other trees, or grow toward sunlight. The informal upright bonsai style represents this natural curve of a tree trunk in an imperfect environment. In the informal upright style, the top of the tree, its apex, is usually positioned directly over its base, so the overall effect is that of an upright tree. Most species of sturdy plants are suitable for training in this style, but the most popular are maples. Slanting (Shakkan) - Trees slant naturally as a result of exposure to buffeting winds or deep shade when they are young. A bonsai tree trained in this style displays a trunk that leans to the left or right to imply a difficult childhood. Some bonsai trees that have been trained to slant look as if they will fall over because of the angle at which they lean. No need to worry, though – these trees have strong roots growing under the soil that support the tree’s weight. The slanting bonsai style is similar to the informal upright, but in this style the tree’s apex is not directly over its base. Cascade (Kengai) - The cascade style of bonsai calls to mind a weather-beaten old tree clinging to a cliff face. In this style, the tree’s growing tip extends below the base of its container. A cascade bonsai appears to be struggling against gravity or seeking out scant sunlight. The semi- cascade (han-kengai) bonsai style is similar to the cascade style. In this form, the tree grows over the rim of the 67
- 68. 68
- 69. 69
- 70. Juniper bonsai being airlayered 70
- 71. container but does not drop below the container’s base. Many species of plants will adapt to cascade training, as long as they are not strongly upright naturally. Juniper is a favorite for training in the cascade and semi-cascade styles. Broom (Hokidachi) - A broom-style bonsai looks like a conventional handmade broom, turned upside down. Branches fan out from the top of a single straight trunk. This style imitates one of the common natural shapes of trees. Because the broom shape is so common in nature, broom-style bonsai trees are often considered to be the most realistic-looking. The broom style, though, is considered an advanced technique and is difficult to achieve. Deciduous trees are the best candidates for training in this style, especially those with fine branches and leaves. The elm is the most popular species of tree used for growing and training in the broom style. Windswept (Fukinagashi) - The windswept bonsai has all of its living branches facing the same direction, a training method creating the illusion of a tree that grew up in a very windy place. When done well, windswept bonsai trees can look as if they are still being lashed by the wind. The windswept effect can be applied to basic bonsai styles of trees, including formal or informal upright, slanting or semi-cascade trees. You may see a bonsai that fits into more than one styling category because of a combination of techniques The windswept style is most effectively applied to conifer species of trees. The effect is more difficult to achieve convincingly with deciduous trees because their leaves face in all directions. 71
- 73. Forest (Yose-ue) - Forest-style bonsai plantings consist of several trees of the same species growing in a single pot. In the Japanese tradition, trees are always planted in odd-numbered groups that are said to echo the randomness of nature. Although a bonsai forest is viewed from outside, the style is meant to give the viewer the sensation of actually being within a forest. 73
- 75. 4 Shaping the Bonsai B efore deciding on the shape of your bonsai, study the tree carefully and take into account the natural form of the species. To achieve an impression of age and reality, observe the way mature trees of the same kind grow in their natural setting. Decide on the final shape and size of your bonsai before beginning. Make a rough sketch of what you wish to create, and use it as a guide. Bonsai are shaped by pruning, wiring and pinching. Pruning and wiring create the tree’s structure by shaping its woody parts, whereas pinching back the long ends of soft foliage helps side buds to develop, making a branch bushier or twiggier (this is called “ramification”). Pruning is less stressful for the tree than wiring, but both are usually necessary to achieve refinement. Pruning should be done with a concave cutter, a special bonsai tool for making sharp cuts without collars (stubs). All but maintenance pruning should be done at the same time of year as root pruning in order to maintain a supply-and-demand balance between foliage and roots. Deciduous trees can be pruned back quite severely if an equivalent amount of root is removed at the same time. Older evergreens should be pruned back very gradually. Starting at the bottom of the trunk, remove branches that are growing straight up, those that grow inward towards the trunk, and one of two branches that grow opposite one another, after selecting the correct one to keep, usually according to an alternating (side-to-side) arrangement of branches that start near the 75
- 76. 76 bottom. Only after wiring should you prune to shorten remaining branches, leaving lower ones longer than upper ones. Wiring can be done at any time of year, but it is most easily done on deciduous trees in the winter when they have no leaves. Buy annealed aluminum or copper wire made for use on bonsai, which is much more pliable than regular wire. To make the branches flexible before wiring, do not water the plant the day before you wire it. Begin at the bottom of the tree when wiring and shaping, and work upward. Anchor the end of the wire at the base of the tree by pushing it into the soil. Use foam pads under the wire to protect the branches. Keep turns around the branches or trunk about one quarter inch apart, and spiral upward at a 45 degree angle. Do not wire too tightly. If a branch should snap, the ends can be rejoined if not completely broken. Wind some garden tape around the break. If a branch snaps off, prune it back at the first side branch. Wire should not be kept on the plant longer than one growing season. When removing wire, start at the end of the branch and work back carefully. How To Prune Bonsai Trees Bonsai trees need training throughout their lives in order to: (1) Maintain the small size of a naturally large tree (2) Give the plant an appearance of age and maturity Pruning Tools Pruning instruments should always be sharp and clean because blunt tools will leave a ragged stump, which could easily become a doorway for disease and pests. Heavy pruning cuts should be whittled down to a slight hollow in the trunk or branch in order to encourage the formation of a callous. Large cuts should be painted with protective paint. When pruning a branch, try to make the cut just above
- 77. a bud that is pointing in the direction you want the branch to grow. If the cut slopes downwards, then the water will run off and the chances of rot will be considerably lessened. Main branch pruning Heavy pruning should be carried out in autumn, winter, or early spring, and is the major way of shaping a bonsai tree. The main priorities are to remove any branch that is too low at the front any branch directly opposite another any that creates a so-called cartwheel effect and any that crosses the front or back to the other side of the tree. Hollow out all stumps with a sharp knife . General Pruning Throughout the growing season, cut back shoots of maples zelkovas and other broad-leaves to the first or second pair of leaves. Pinch out the tips of juniper shoots . With pines, remove the center “candles” and pinch back the others. Leaf Cutting Do this in early summer on deciduous trees that do not flower or fruit. Use sharp scissors to remove half of each leaf on weak branches or trees, but all but the stalk on strong wood. In a few weeks the stalk will drop and new small foliage and shoots will grow. 77
- 78. 78
- 79. 5 How To Train Your Bonsai O ften considered the most difficult training technique, wiring is used to bend the trunk and branches of a tree into the shape you would like your bonsai to take. Beginners can learn to judge tension in different sized branches, and the various ways of securing wire, by first practicing on a small branch from an ordinary tree or shrub. Never rush. Deciding the shape your tree will take is a lifetime decision, so be sure to examine all angles and possibilities. Copper wire, though expensive, is most suitable for wiring a bonsai- to-be such as the juniper above, because it remains soft. Galvanized iron or plastic coated wire may be used, but they tend to look rather ugly and detract from your tree. Remember, the larger coniferous trees will be wearing their wires for 12 - 18 months, so please take care in choosing the best “look” for your bonsai. If you study very carefully the way trees grow in nature, it is possible to design a realistic looking bonsai without knowing the names of styles, etc. The most important part is always remember that you are working with a living plant. Look carefully at its natural characteristics and you may discern within them a suitable style, or styles. Once a certain “shape” begins to reveal itself, you will find that gentle bending of a branch before wiring will increase its flexibility and give you an idea of the correct strength of wire. What you are looking for is a wire that will give you a tension slightly more than the 79
- 81. tension of the branch. Tender- barked trees, such as maples, should be trained with paper- wrapped wire to protect the bark. When To Wire Deciduous trees should be wired after their leaves have matured, in early summer, and the wires removed in autumn to avoid wounding the bark. Coniferous trees should be wired during the winter months, since they take considerably longer to become fixed in position. All trees should be protected from hot sun and heavy rain for a month after wiring. Wiring A Bonsai Tree Begin wiring from the base of the trunk, anchoring the wire in the soil. You may need two wires to hold the trunk in position. After securing the base of the trunk, proceed to the main, and then the smaller branches, ending with the highest twigs. Wires should be wound at about 45 degrees to the line of the branch. Gauge the tension carefully, as tight wiring will cut into the bark, and loose wiring will slip. Bonsai Wiring Rules 1. Size of the wire is 1/3 the size of the branch for copper wire. Aluminum wire is slightly larger. 2. Apply wire at a 45 degree angle to the branch. 50 degrees is better. 3. Spiral gap between wire loops should be equal. 4. Spiral should be closer to the way the branch bends. Never leave gaps between wire and branch. 5. Change the thickness of the wire as the branch thickness changes. 6. Wire heaviest wire first to the thinnest wire. 7. Wire 2 branches with one piece of wire, not far apart or too close. 81
- 82. Top view of a section of the bonsai exhibition. Here one can study the placement of each bonsai display and also the overall silhouette of each masterpiece. 82
- 83. 8. End of the wire always faces backward and upward. End of the wire faces upward to support the tip (bud) of the branch. 9. Positioning of your hands and body is fundamental to wiring because it is important to achieve the 45 degree angle of wire placement. 10. Hold branches underneath when wiring. 11. Hold wire from the end to keep wiring hand free of the tree and not to disturb buds. Hand tension holds the branch bottom while the other hand holds the wire. 12. The left hand is stiff while the right hands are loose when wiring (Right handed people). 13. Never move both hands at the same time. Move inside to outside when wiring. 14. Over wire thick branches and under wire thin branches. 15. Wire on the outside of the branch where pressure is to be applied. 16. Always support the weakest part of the branch when bending. 17. Wire from the thickest branch to the thinnest branch. 18. Wire from the bottom of the tree to the top of the tree. 19. Start wiring from the inside to the outside of the branch. 20. Always bend the branch first, not the wire. 21. Wire the branch to bend it in the direction of your intended movement, i.e. wire on top to bend the branch downward, wire on the bottom to bend the branch upward, wire the back to bend the branch forward, and wire the front to bend the branch backward. 22. Wiring at the branch junction is very important. 83
- 84. 84
- 85. 23. Crossing wires should be avoided. This causes gaps between wire and the branch and it could result in damaging parts of the tree when underneath wires are removed. Dealing With Breaks Even if you are very careful, you may bend a branch to its breaking point while wiring. If the break is simply a fracture with the broken part still partially attached, you have a chance of saving the branch. Very gently ease the broken part into place, carefully fitting both ends of the break together. Wrap the break with garden tape or raffia and tie it securely, but not too tightly. Within several months, the fractured branch tissue may knit together. If the break is complete or the ends fail to unite, you have several choices. You can cut the broken branch back to where side branches grow out from it, or you can cut it back to its point of origin. Care After Wiring To help your bonsai recover from the trauma of wiring, keep it out of direct sunlight for several days. It’s also a good idea to keep it sheltered from wind for several weeks. Water the plant routinely, giving the foliage a daily sprinkling. Removing The Wire To give wired branches a good chance to grow into their new positions, leave wires in place for a full growing season. Then, in early autumn, remove them to avoid any constriction during the next growth phase. If wires are left in place too long, the bark will show unsightly spiral scars for years. With stiff copper wire, it is best to cut it carefully from branches to 85
- 86. All bonsai begin their development in training pots, where they stay until they have a good, fibrous root system and relatively full foliage develop- ment which make them look like bonsai rather than just a shrub or tree in a pot. Training pots help trees grown for bonsai make the transition between a deep nursery container, a balled and burlapped root system, or land- scape, to the shallow confinement of a bonsai pot. 86
- 87. avoid inflicting damage by uncoiling. Aluminum wire can be uncoiled, starting at the outmost end and carefully uncoiling toward the anchor end. If wired branches still need more coaxing to achieve the desired positions, they can be rewired at the appropriate time for another year of training. When you rewire a branch, vary the wire position from that of the previous year. 87
- 88. All bonsai pots have large drainage holes, which are essential for the rapid drainage that promotes root health 88
- 89. 6 B efore wiring became standard practice, bonsai practitioners manipulated the shapes of their plants in other ways. These methods lack the relative unobtrusiveness of wire, but they are still effective training techniques. Bending Branches If you need to make a simple downward bend in a branch, there are three reasonably easy ways to do it: 1. Tying to the trunk: Branches too stiff to bend by wiring can often be bent by tying. You simply attach wire to the branch, bend the branch down and tie the wire to the trunk. You can use a thinner gauge of wire for tying than for wiring a bend. Encircle the branch with a loose wire loop, protecting the wood by slipping padding (such as cloth, paper, or rubber) between the branch and the wire. Also place padding between the wire and the trunk where the wire exerts pressure against the trunk. Make the bend gradually in order to avoid breaking the limb. Start by pulling the limb about 1/3 of the way toward its desired position. After two - three months, bend the branch a bit more, and then give it more time Additional Training Techniques 89
- 90. The Ueno Green Club (Japan) on the left is the three story headquarters for the Japan Bonsai Cooperative where exhibits, auctions, sales and meet- ings are held. During the National Bonsai Exhibition the parking lot is transformed into a sales area, in addition to all three levels of the building. 90
- 91. to adjust to that position. Repeat this process until you eventually achieve the bend you desire. 2. Tying to the container: You can also wire branches to the plant’s container to pull them downward. Loop a strand of wire under the pot and up over the soil, then tie the ends together snugly. Now run a separate loop of padded wire from each branch that you wish to bend down to the wire that goes across the pot. Pull down on the wire until the branch is in the position you want, then secure the branch wire to the pot wire. As with the previous method, it’s best to do this in gradual stages so that the branch doesn’t break. 3. Weighting a branch: A third way to bend a branch down is to attach a weight to it. Fishing weights suspended from the branch by a string are traditional, but any object heavy enough to exert the desire pressure will work. Choose the weight with care - if it’s too heavy, it may break the branch. Don’t use this method if you bonsai plant is in a breezy location: in a wind, weighted branches can pump up and down to the breaking point. Spreading & Snugging If your bonsai has a pair of branches or trunks that are either too close together or too far apart and you can’t separate them by wiring, these two training methods off a simple solution to the problem. Spreading: a simple wedge can permanently spread apart two branches that are growing too close. This works particularly well to separate parallel trunks and forked branches. Take a small piece of wood, cut it into a triangular or trapezoidal shape, and gently wedge it between the limbs until they are separated as far as you want. Be very careful when separating forked branches; too much pressure can cause a split down the fork. Remove the wedge after 4 months. If the branches 91
- 92. If you grow just a few bonsai plants, you will have no problem displaying them. All you need is something that elevates the pots so that you can view them from the front rather than from the top down. 92
- 93. return to their original positions, put the wedge back in place. Eventually the branches will lose their tendency to spring back when you take away the wedge. Snugging: to bring branches closer, especially parallel ones, loop a soft cord or a small belt around them and pull them into the desired position. Or form a piece of sturdy wire into an “S” shape, hooking each branch into one of the curves of the “S”. In time, the branches will stay in place on their own. Bonsai Containers All bonsai begin their development in training pots, where they stay until they have a good, fibrous root system and relatively full foliage development which make them look like bonsai rather than just a shrub or tree in a pot. Training pots help trees grown for bonsai make the transition between a deep nursery container, a balled and burlapped root system, or landscape, to the shallow confinement of a bonsai pot. Above all, resist the urge to collect (dig) a tree and put it directly into a bonsai pot, where its chances of survival are slight. The best sort of training pot is often a large-diameter nursery container with good drainage holes, and with its top cut off to a depth of eight to 10 inches. During its time in a training pot, the tree should be grown in coarse, fast-draining soil. Traditional bonsai pots, available at bonsai nurseries, and some large nurseries and import stores, are round, oval, square, rectangular or hexagonal. Some are unglazed on the exterior (traditional for evergreens) and some are glazed and are suitable for most types of trees, as long as the pot 93
- 94. 94
- 95. complements but does not compete with the tree. Pots for cascade, semi-cascade and flowering bonsai are deeper than others. All bonsai pots have large drainage holes, which are essential for the rapid drainage that promotes root health, but which must be covered with screening on the inside bottom of the pot to prevent coarse soil from washing away with draining water. Bonsai containers should be unglazed on their inside walls, and on the bottoms, both inside and out. Before repotting, familiarize yourself with the proper time of year to repot specific types of trees. For example, junipers can be repotted at any time during the growing season because they grow throughout it. Pines and most other evergreens must be repotted during the late winter before they show signs of new growth. Most deciduous trees should be repotted before they leaf out in very early spring. A bonsai that is ready for a bonsai pot should not be transplanted into it until all foliage work (pruning, wiring, pinching) has been completed. This precaution prevents the tree’s newly placed roots from being dislodged. At the time of “potting up,” turn the bonsai container so that its front side (essentially the same for all shapes except rectangular, in which case only one of the two long sides should be the front) is toward you roughly at eye-level. Hold the tree with its front view toward you and place the base of the trunk very slightly off-center to the opposite side from which the dominant visual weight of its branches occurs. In other words, if most branches occur on the left when viewing the tree from the front, place the base of the trunk 95
- 96. Keeping your collection of bonsai trees on a stand makes them easier to work with and to see, and gives protection from extremes of weather. 96
- 97. slightly off-center to the right. This maintains the asymmetrical balance that is the basis of Japanese design. Comb out the roots, pruning back (shortening) those that have become wiry or stiff deep in the soil. Keep, but trim, fibrous roots and spread them out inside the container. Add coarse porous soil such as Turface (a soil amendment), or “soilless soil,” which can be purchased at large landscape supply businesses. Water the tree thoroughly and keep it in a dry protected place for the next few days. Check it for soil moisture daily, but do not water it until the soil on top begins to feel a bit dry. 97
- 98. In the tokonoma, bonsai are displayed on stands accompanied by a wall hanging or painting and a viewing stone or “accompanying plant” on the floor. In this setting, the painting represents “god” or the “life energy”, the stone or accompanying plant represent the earth or nature, and the bonsai itself represents man. 98
- 99. 7 R emember that simplicity is very important in Japanese aesthetics and bonsai should be displayed in an uncluttered environment where the details of the plant can be appreciated. This is, after all, a wonder of nature - trees and shrubs made miniature. Gravel beds in the garden are good backgrounds for bonsai outdoors, and a simple stand or table before a blank wall makes an appropriate setting indoors. Make sure that the front view faces the viewer. Your beautiful bonsai can greatly benefit by the right setting. Outdoor Display If you grow just a few bonsai plants, you will have no problem displaying them. All you need is something that elevates the pots so that you can view them from the front rather than from the top down. A patio bench, for example, will accommodate one or several bonsai plants, and can also define the edge of a deck or serve as seating. Benches and Shelves You can put together a simple bonsai bench in a matter of minutes. Select a sturdy wooden plank, such as a 2 x 12, and raise it on concrete blocks, bricks, or flat stones. If you use slats (2 x 2’s, or 2 x 4’s) instead of a single plank, water will drain through the bench. If you display bonsai on shelves placed against a wall or Displaying Your Bonsai Outdoors 99
- 100. 100
- 101. fence, remember that the heat reflection from light- colored walls can seriously damage bonsai plants in the summer. Make sure these displays are sheltered from direct sun during the warmest part of the day, usually late morning through afternoon. Tables Outdoor tables will certainly hold a collection of bonsais trees, but they may not display them to their best advantage as all the pots rest on the same level. If you do keep your collection on a table, choose one just wide enough for three plants, then place the larger specimens in the center, with smaller plants on the outside rows. Stagger placement so that no plant is directly behind another one. For better display, construct a unit along the lines of a patio table that has built-in benches. Make the center section (table) just wide enough to hold a single or double row of plants; the two lower sections (benches) can be just a bit wider to show off a number of smaller specimens on each side. Outdoor Bonsai Maintenance Tips • Don’t crowd bonsai plants. You should leave about 8 - 12 inches of space between the outspread branches of adjacent plants so that each plant can develop independently. • Make sure the plants receive at least morning sun, more if climate permits. This is particularly important in spring when plants are putting out new growth. • Rotate containers about a quarter turn in the same direction every other week to expose all sides to the same conditions. Otherwise, new growth will be strongest on the side facing the light while roots will tend to grow away from the sun. 101
- 102. The exquisite beauty of a bonsai tree well trained in a simple style, and growing vibrantly in a pot of suitable size and shape, can be the focus of many happy hours of contemplation. 102
- 103. Specimens placed too close to a wall or fence can become one- sided as rear branches dwindle from lack of light. • Rotating small containers is easy; turning larger specimens is more difficult. Use a lazy susan-type turntable, and you’ll be able to turn the largest bonsai with the push of a finger. Display Stands & Winter Shelter Display Stands. Keeping your collection of bonsai trees on a stand makes them easier to work with and to see, and gives protection from extremes of weather. The large design on the left is simple to build from wood, having a shade of timber battens and a slatted bench-top. There is a shelf for miniature bonsai at the back and a tool drawer under the bench. In severe weather, the trees can be placed under the bench and enclosed with heavygauge clear plastic sheeting (shown rolled). Building A Display Stand.The number of trees in your bonsai collection will determine the size of the stand. When calculating the dimensions, be sure to allow each tree plenty of space, and remember that small as they are, they do grow. To allow for easier working, the stand should be made a little higher than an indoor table. It should be made of good quality wood, treated with a preservative, or it could have a metal frame with a wooden top. The trees can be placed on a gravel bed, as this cuts down on the need to water; but in this case they should be lifted every now and then to make sure the roots are not growing into the gravel. Above the stand, around the sides and at the 103
- 104. 104
- 105. back, a weather-shade of thin timber laths or canes should be made. Each strip should be secured an inch apart. This will help protect the trees from all extremes: hot sunlight, heavy rain, high winds, and even a certain amount of frost. For harder winter conditions the bottom of the stand can be enclosed and the trees placed inside. Winter Care Container plantings of any kind are more subject to damage from cold than plants growing in the ground. Containers just don’t hold enough soil to insulate plant roots. Where winter temperatures are frost free or relatively mild (above 20F or -7C) you can leave a bonsai outside if its normal display area is protected from wind. Spreading straw or mulch around the pots also helps insulate the soil. An unheated greenhouse is ideal as a winter shelter since the plants receive good light, are somewhat protected from the cold, and with a door ajar or vents opened slightly, get plenty of air. You can devise a polyethylene plastic and wood greenhouse by extending a lean- to from under house eaves. Leave all or part of one end open, unless winters are severe. Building A Cold Frame With just a bit more effort you can build a simple cold frame - essentially a low greenhouse with a translucent hinged top. Placed against a south-facing wall and recessed into the ground it will keep plants dormant but not frozen (unless you live in the colder regions of Canada, for example). Dig a rectangle about six to eight inches deep beside the wall. Using scrap lumber or plywood, build a frame with sides the slope down toward the front; a six inch slope is sufficient. Make sure the front is high enough (about 18 inches) to accommodate your shortest bonsai. Then set the frame againt the wall and spread 3 - 4 inches of gravel in the bottom. Traditionally, old window 105
- 107. sashes formed the tops of cold frames, but you can also use clear plastic, fiberglass, or polyethylene plastic sheeting. In snowy areas, first cover the fame with fine mesh chicken wire or hardware cloth. Place the bonsai on the gravel base and surround and cover the pots lightly with straw. Close the lid for protection from extreme cold, opening it slightly for ventilation when the temperature is above freezing. Winter Watering During freezing weather, water your bonsai (if they need it) in the morning. This allows excess water to drain out before the temperature drops. Water-soaked soil expands as it freezes, which can cause containers to crack. 107
- 108. Displaying Shohin-bonsai isn't the easiest thing in the world compared to displaying traditional bonsai. Shohin-bonsai demands more trees available at the time of displaying, and more creativity must be put into the display some times. The main theme of displaying Shohin or Mame-bonsai is the seasonal approach. Good quality trees must be at hand, and using a traditional Shohin rack demands at least three good Shohin- bonsai to succeed. It is "allowed" to replace a tree with an accent planting or a figurine i.e., as long as the aesthetic approach is all right. Setting up a rack with Shohin-bonsai may be full of compromises. How many of us yet have a load full of quality Shohin to choose from? So compromises has to be made until a good collection is available, fulfilling the needs at the time of year the trees are at their best. If one is not importing already styled trees it will take a while to build up such a collection, but until then it is still possible to play with the set up of a Shohin or Mame display. In the start smaller displays are the goal, and later racks with room for more trees will be appropriate. 108
- 109. 8 T he exquisite beauty of a bonsai tree well trained in a simple style, and growing vibrantly in a pot of suitable size and shape, can be the focus of many happy hours of contemplation. For some people, such simplicity is all that is necessary. Others, however, may prefer the more complex drama of a tree trained to cling to a rock, or the grandeur of a bonsai group planting. Such scenes are more complicated to create, but the basic rule of all bonsai still applies: the finished planting should evoke a natural theme. Rock Plantings The idea of planting trees on or over rocks has come from nature herself in the picture of a gnarled pine clinging to the protection of an outcropping of rock, or of a small, twisted tree growing on a cliff face. In rock plantings, the tree can either be planted in or on the rock itself, or it can be trained over the rock, with the roots buried in the soil of the container.Rocks used for such plantings should be fairly hard, since soft rocks tend to rot after prolonged exposure to the elements. They should not be too smooth, and should be pitted with plenty of small crevices and small pockets where the roots can grab hold. Rocks with a saddle-shaped depression or a large, deep pocket are ideal for planting directly onto the rock. Just make sure that the drainage is correct, as if the water doesn’t run Special Bonsai Plantings 109
- 110. Most bonsai are hardy outdoor plants that need a period of cold dormancy in the winter to thrive, but they should be protected from the harshest winter conditions. 110
- 111. off and instead pools in the pocket, the roots could rot; while if the water runs off straight away, the tree would get no moisture. Relatively small trees with small leaves, such as Cotoneaster are ideal for planting on rock. Group Plantings Whether planting a small copse of three trees, or a more ambitious miniature forest, the composition should first be planned out on paper. A shallow but wide container should be used, and the trees selected should be of the same variety, but of various heights. They should always be planted in odd numbers, not only because the Japanese dislike even numbers (especially 4), but because it will be found in practice that a balanced composition is easier to create with odd numbers. The soil mixture required would be that which is normally used for the type of tree being grown. To Begin: • Always start by planting the largest tree first. This focal point is normally set to the right or left of center. • The second largest tree is then planted to compliment the first... and so on with the remaining trees. • Be sure to check and see how the planting is looking, not only from the front, but from the back and sides as you are trying to maintain an even balance. • Do not tie down the trees until the exact position of each has been determined. • After planting, thin out any inward growing branches, except for those trees planted around the outer edge. Saikei: Group and rock plantings can be taken a step further by adding small underplantings of alpine plants and tiny shrubs. Rocks can be embedded into the soil and small streams suggested by the use of white sand. Such a planting is 111
- 112. Dwarf plants, however, do not always convey the same impression as their full size counter- parts because their growth habits are quite different. 112
- 113. generally called saikei, and small figurines and bridges are sometimes added to the landscape. Bonseki: Using a shallow tray of almost any composition, you can create a meditative bonseki composition. This generally consists of a group of rocks or stones placed in raked sand, which gives the impressions of small islands in the sea. As there are no living plants in bonseki, it doesn’t require any care and can be kept indefinitely. Children love bonseki! Bonkei: Bonkei is another type of tray landscape which attempts to replicate natural or imaginary scenes. Every type of material available can be used, including artificial or real plants, figurines, false rocks, and paint. The finished effect, however, should again mimic nature and retain a natural elegance. 113
- 114. American gardeners have taken bonsai concepts and applied them to houseplants. By combining traditional procedures for handling houseplants with bonsai concepts of design, growers have created different bonsai styles. 114
- 115. 9 A ny substantial plant can be trained into a bonsai if it can adapt to the shallow pots and restricted growth that bonsai require. Most bonsai are hardy outdoor plants that need a period of cold dormancy in the winter to thrive, but they should be protected from the harshest winter conditions. Some of the most popular species have remained so for centuries among bonsai enthusiasts. They offer special features such as flowers, attractive bark, small foliage or seasonal fruits and cones. They include the following plants: Azalea (Rhododendron) - These are easily trained into tree form and can be used for most styles. In late spring, they produce spectacular flowers. Several flower colors are available. Beech (Fagus) - Deciduous beeches tend to be grown in informal bonsai styles. They require very special and delicate technique in styling. Fig (Ficus) - This tropical family includes some species that have been trained to grow as indoor bonsai. Still, these plants should be placed outside when the weather allows. Juniper (Juniperus) - Probably the easiest genus for a beginner, evergreen juniper is readily available and can be trained in most styles. Maple (Acer) - Two main species of maple are used in bonsai: Japanese maple (Acer palmatum) and trident maple Trees Suitable For Bonsai Culture 115
- 116. 116 Bonsai are shaped by pruning, wiring and pinching. Pruning and wiring create the tree’s structure by shaping its woody parts, whereas pinching back the long ends of soft foliage helps side buds to develop, making a branch bushier or twiggier
- 117. (Acer buergerianum). These deciduous plants are easy to care for, and many display stunning fall colors. Pine (Pinus) - Pines make beautiful bonsai, but are not ideal for a first tree because they are difficult to train. Pemphis acidula - Pemphis make one- of-a-kind bonsai, but are not ideal since collection of the material from the wild is very difficult and expensive. Bonsai Plant Guide Trees and shrubs are suitable for traditional bonsai. Specialty nurseries often have a wide selection of dwarf and semi-dwarf varieties of many species. Dwarf plants, however, do not always convey the same impression as their full size counterparts because their growth habits are quite different. Some trees and shrubs that work well as bonsai are azalea, beech, boxwood, ginkgo, maple, oak, pine, wisteria, and zelkova. AZALEA: Hiryu, Rhododendron obtusum; Satsuki azalea, Rhododendron indicum; Kurume, Rhododendron obtusum BEECH: American, Fagus grandifolia; European, Fagus sylvatica BOXWOOD: Buxus species ELM: Chinese, Ulmus parvifolia (many small-leaved cultivars) FIRETHORN: Pyracantha species GINKGO: Ginkgo biloba HAWTHORN: English, Crataegus laevigata; Washington, Crataegus phaenopyrum 117
- 118. HEATHER: Scotch heather, Calluna vulgaris HORNBEAM: American, Carpinus caroliniana (for large bonsai); Korean, Carpinus coreana; Japanese, Carpinus japonica IVY: English ivy, Hedera helix and cultivars MAPLE: Japanese, Acer palmatum (use palmate rather than dissectum type, preferably a seedling, not a grafted tree); Amur, Acer ginnala; Hedge, Acer campestre; Trident, Acer buergeranum OAK: Willow oak, Quercus phellos PINE: Austrian, Pinus nigra Bristlecone, Pinus aristata Japanese red, Pinus densiflora Japanese white, Pinus parviflora Japanese black, Pinus thunbergiana Mugo, Pinus mugo Scots(Scotch), Pinus sylvestris Swiss stone, Pinus cembra White, Pinus strobus (dwarf varieties) Pemphis acidula: Santigue WISTERIA: Japanese, Wisteria floribunda YEW: Taxus species and cultivars ZELKOVA: Japanese, Zelkova serrata American gardeners have taken bonsai concepts and applied them to houseplants. By combining traditional procedures for handling houseplants with bonsai concepts of design, growers have created different bonsai styles. The following woody plants (native to the tropics and subtropics of the world) have been grown as indoor bonsai. These plants can be obtained from either local or specialized nurseries. ACACIA: Acacia baileyana ARALIA: Balfour, Polyscias balfouriana; Ming, Polyscias fruticosa; Geranium-leaf, Polyscias guilfoylei CAMELLIA: Common, Camellia japonica; Sasanqua, Camellia sasanqua 118
- 119. CITRUS: Citrus species (calamondin, kumquat, lemon, lime, orange, and tangerine) CHERRY: Surinam, Eugenia uniflora CYPRESS: Monterey, Cupressus macrocarpa FIG: Mistletoe, Ficus diversifolia HERB: Elfin, Cuphea hypssopifolia HIBISCUS: Chinese hibiscus, Hibiscus rosa sinensis ‘Cooperi’ HOLLY: Miniature, Malpighia coccigera JACARANDA: Jacaranda acutifolia JADE: Crassula species JASMINE: Jasminum parkeri; Orange, Murraea paniculata; Confederate star, Trachelospermum jasminoides LAUREL: Indian, Ficus retusa MYRTLE:Classic, Myrtus communis OAK: Cork, Quercus suber; Silk, Grevillea robusta ORCHID TREE: Bauhinia variegata OLIVE: Common, Olea europaea PEPPER TREE: California, Schinus molle PLUM: Natal, Carissa grandiflora POINCIANA: Royal, Delonix regia POMEGRANATE: Dwarf, Punica granatum ‘Nana’ POPINAC: White, Leucaena glauca POWDERPUFF TREE: Calliandra surinamensis SERISSA (Snow Rose, Tree of a Thousand Stars): Serissa foetida (nicest of all indoor bonsai) 119