This document provides the service manual for JCB Drivetrain Systems Ltd SD70/PT axles. It includes information on unit identification, replacement parts, torque settings, and a list of recommended service tools. The manual is organized into sections covering general information, care and safety, routine maintenance, and procedures for specific components like hydraulics, axles, and brakes. Record of change pages document the manual's update history, noting additions of information on topics like a parking brake system.
Symptoms like intermittent starting and key recognition errors signal potential problems with your Mercedes’ EIS. Use diagnostic steps like error code checks and spare key tests. Professional diagnosis and solutions like EIS replacement ensure safe driving. Consult a qualified technician for accurate diagnosis and repair.
What Does the PARKTRONIC Inoperative, See Owner's Manual Message Mean for You...Autohaus Service and Sales
Learn what "PARKTRONIC Inoperative, See Owner's Manual" means for your Mercedes-Benz. This message indicates a malfunction in the parking assistance system, potentially due to sensor issues or electrical faults. Prompt attention is crucial to ensure safety and functionality. Follow steps outlined for diagnosis and repair in the owner's manual.
What Exactly Is The Common Rail Direct Injection System & How Does It WorkMotor Cars International
Learn about Common Rail Direct Injection (CRDi) - the revolutionary technology that has made diesel engines more efficient. Explore its workings, advantages like enhanced fuel efficiency and increased power output, along with drawbacks such as complexity and higher initial cost. Compare CRDi with traditional diesel engines and discover why it's the preferred choice for modern engines.
Fleet management these days is next to impossible without connected vehicle solutions. Why? Well, fleet trackers and accompanying connected vehicle management solutions tend to offer quite a few hard-to-ignore benefits to fleet managers and businesses alike. Let’s check them out!
Ever been troubled by the blinking sign and didn’t know what to do?
Here’s a handy guide to dashboard symbols so that you’ll never be confused again!
Save them for later and save the trouble!
In this presentation, we have discussed a very important feature of BMW X5 cars… the Comfort Access. Things that can significantly limit its functionality. And things that you can try to restore the functionality of such a convenient feature of your vehicle.
"Trans Failsafe Prog" on your BMW X5 indicates potential transmission issues requiring immediate action. This safety feature activates in response to abnormalities like low fluid levels, leaks, faulty sensors, electrical or mechanical failures, and overheating.
𝘼𝙣𝙩𝙞𝙦𝙪𝙚 𝙋𝙡𝙖𝙨𝙩𝙞𝙘 𝙏𝙧𝙖𝙙𝙚𝙧𝙨 𝙞𝙨 𝙫𝙚𝙧𝙮 𝙛𝙖𝙢𝙤𝙪𝙨 𝙛𝙤𝙧 𝙢𝙖𝙣𝙪𝙛𝙖𝙘𝙩𝙪𝙧𝙞𝙣𝙜 𝙩𝙝𝙚𝙞𝙧 𝙥𝙧𝙤𝙙𝙪𝙘𝙩𝙨. 𝙒𝙚 𝙝𝙖𝙫𝙚 𝙖𝙡𝙡 𝙩𝙝𝙚 𝙥𝙡𝙖𝙨𝙩𝙞𝙘 𝙜𝙧𝙖𝙣𝙪𝙡𝙚𝙨 𝙪𝙨𝙚𝙙 𝙞𝙣 𝙖𝙪𝙩𝙤𝙢𝙤𝙩𝙞𝙫𝙚 𝙖𝙣𝙙 𝙖𝙪𝙩𝙤 𝙥𝙖𝙧𝙩𝙨 𝙖𝙣𝙙 𝙖𝙡𝙡 𝙩𝙝𝙚 𝙛𝙖𝙢𝙤𝙪𝙨 𝙘𝙤𝙢𝙥𝙖𝙣𝙞𝙚𝙨 𝙗𝙪𝙮 𝙩𝙝𝙚 𝙜𝙧𝙖𝙣𝙪𝙡𝙚𝙨 𝙛𝙧𝙤𝙢 𝙪𝙨.
Over the 10 years, we have gained a strong foothold in the market due to our range's high quality, competitive prices, and time-lined delivery schedules.
Comprehensive program for Agricultural Finance, the Automotive Sector, and Empowerment . We will define the full scope and provide a detailed two-week plan for identifying strategic partners in each area within Limpopo, including target areas.:
1. Agricultural : Supporting Primary and Secondary Agriculture
• Scope: Provide support solutions to enhance agricultural productivity and sustainability.
• Target Areas: Polokwane, Tzaneen, Thohoyandou, Makhado, and Giyani.
2. Automotive Sector: Partnerships with Mechanics and Panel Beater Shops
• Scope: Develop collaborations with automotive service providers to improve service quality and business operations.
• Target Areas: Polokwane, Lephalale, Mokopane, Phalaborwa, and Bela-Bela.
3. Empowerment : Focusing on Women Empowerment
• Scope: Provide business support support and training to women-owned businesses, promoting economic inclusion.
• Target Areas: Polokwane, Thohoyandou, Musina, Burgersfort, and Louis Trichardt.
We will also prioritize Industrial Economic Zone areas and their priorities.
Sign up on https://profilesmes.online/welcome/
To be eligible:
1. You must have a registered business and operate in Limpopo
2. Generate revenue
3. Sectors : Agriculture ( primary and secondary) and Automative
Women and Youth are encouraged to apply even if you don't fall in those sectors.
Core technology of Hyundai Motor Group's EV platform 'E-GMP'Hyundai Motor Group
What’s the force behind Hyundai Motor Group's EV performance and quality?
Maximized driving performance and quick charging time through high-density battery pack and fast charging technology and applicable to various vehicle types!
Discover more about Hyundai Motor Group’s EV platform ‘E-GMP’!
5 Warning Signs Your BMW's Intelligent Battery Sensor Needs AttentionBertini's German Motors
IBS monitors and manages your BMW’s battery performance. If it malfunctions, you will have to deal with an array of electrical issues in your vehicle. Recognize warning signs like dimming headlights, frequent battery replacements, and electrical malfunctions to address potential IBS issues promptly.
Why Is Your BMW X3 Hood Not Responding To Release CommandsDart Auto
Experiencing difficulty opening your BMW X3's hood? This guide explores potential issues like mechanical obstruction, hood release mechanism failure, electrical problems, and emergency release malfunctions. Troubleshooting tips include basic checks, clearing obstructions, applying pressure, and using the emergency release.
Things to remember while upgrading the brakes of your carjennifermiller8137
Upgrading the brakes of your car? Keep these things in mind before doing so. Additionally, start using an OBD 2 GPS tracker so that you never miss a vehicle maintenance appointment. On top of this, a car GPS tracker will also let you master good driving habits that will let you increase the operational life of your car’s brakes.
Things to remember while upgrading the brakes of your car
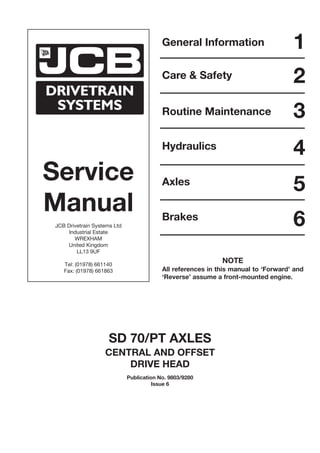
JCB SD70 PT Axles Service Repair Manual Instant Download.pdf
1. Service
Manual
JCB Drivetrain Systems Ltd
Industrial Estate
WREXHAM
United Kingdom
LL13 9UF
Tel: (01978) 661140
Fax: (01978) 661863
General Information
Care & Safety
Routine Maintenance
Hydraulics
Axles
1
2
3
4
5
Brakes
6
SD 70/PT AXLES
CENTRAL AND OFFSET
DRIVE HEAD
Publication No. 9803/9280
Issue 6
NOTE
All references in this manual to ‘Forward’ and
‘Reverse’ assume a front-mounted engine.
2. SD70/PT Axles Service Manual
Publication No. 9803/9280
Record of Changes
4th Update
1
Date Page Issue Changes
Novs 2002 Cover 5 Issue number raised.
1/1-3 2 Addition to Service Tools list.
1/4-3 2 Addition to Service Tools illustrations.
6/Cont-1 2 Additions as details following:
6/1-1 2 Parking brake added to Technical Data.
6/6-1 1 New page - New parking brake torque figures.
6/6-2 1 New page - Parking brake caliper - removal and replacement.
6/6-3 1 New page - Parking brake component list illustration.
6/6-4 1 New page - Parking brake caliper - dismantling and assembly.
6/6-5 1 New page - Parking brake caliper illustration.
6/6-6 1 New page - Parking brake caliper - assembly.
6/6-7 1 New page - Parking brake disc, removal and replacement.
6/7-1 1 New page - Service procedures - Park brake, testing.
6/7-2 1 New page - Service procedures - Park brake, adjustment.- Type A
6/7-3 1 New page - Service procedures - Park brake, switch adjustment- Type A
6/7-4 1 New page - Service procedures - Park brake adjustment - Type B
6/7-5 1 New page - Service procedures - Park brake adjustment - Type B
6/7-6 1 New page - Service procedures - renewing brake pads.
3. SD70/PT Axles Service Manual
Publication No. 9803/9280
Record of Changes
3rd Update
1
Date Page Issue Changes
May 2001 Cover 4 Issue number raised.
5/Cont i 2 Additions as details following.
5/1-2 2 Trunnion Mounted added to Installation.
5/2-3 1 New Page - Illustration - Description Cutaway of SD70/PT Axle - Central Drive Head (with
Dropbox) added
5/7-1 2 Page heading - (Pad Mounted) added.
5/7-2 2 Page heading - (Pad Mounted) added.
5/7-3 2 Page renumbered - illustration Central Drive Head (Trunnion Mounted) added.
5/7-4 2 Page renumbered - New Text - Central Drive Head (Trunnion Mounted) added.
5/7-5 1 New Page - Text Proximity Switch Settings Procedure moved from 7-3.
5/7-6 1 New Page - Text/illustrations - Propshafts, Removal and Replacement move from 7-4.
5/10-8 1 New Page - Central Drive Head - Drop Box (with no Park Brake - 2/4WD fitted).
5/10-9 1 New Page - Central Drive Head - Drop Box (with no Park Brake - 2/4WD fitted).
5/10-10 1 New Page - Drop Box (with no Park Brake -2/4WD fitted).
5/10-11 1 New Page - Drop Box (with no Park Brake - 2/4WD fitted).
5/10-12 1 New Page - Drop Box (with no Park Brake fitted)
5/10-13 1 New Page - Drop Box (with Park Brake fitted).
5/10-14 1 New Page - Drop Box (with Park Brake - 2/4WD fitted).
5/10-15 1 New Page - Drop Box (with Park Brake - 2/4WD fitted).
5/10-16 1 New Page - Drop Box (with P{ark Brake - 2/4WD fitted).
5/10-17 1 New Page - Drop Box (with Park Brake - 2/4WD fitted).
5/10-18 1 New Page - Drop Box (with Park Brake fitted (Yokes fitted to Driveshafts)).
5/10-19 1 New Page - Drop Box (with Park Brake fitted (Yokes fitted to Driveshafts)).
5/10-20 1 New Page - Drop Box (Optional 2/4WD Disconnect).
4. SD70/PT Axles Service Manual
Publication No. 9803/9280
Record of Changes
2nd Update
1
Date Page Issue Changes
Dec 1998 Cover 3 Issue number raised.
1/Cont i 2 Axle Build Identification was Limited Slip Differential.
2/4-2 2 Warnings GEN-1-12 and GEN-1-13 added.
5. SD70/PT Axles Service Manual
Publication No. 9803/9280
Record of Changes
1st Update
1
Date Page Issue Changes
Sept 1998 Cover 2 Issue number raised.
1/1-1 2 Axle Build Identification heading was Limited Slip Differential.
6. 9803/9280 Issue 1
Introduction
This publication is designed for the benefit of Service Engineers.
These personnel should have a sound knowledge of workshop practice, safety procedures, and general techniques associated
with the maintenance and repair of hydraulic equipment.
Renewal of oil seals, gaskets, etc., and any component showing obvious signs of wear or damage is expected as a matter of
course. It is expected that components will be cleaned and lubricated where appropriate, and that any opened hose or pipe
connections will be blanked to prevent excessive loss of hydraulic fluid and ingress of dirt. Finally, please remember above all
else
SAFETY MUST COME FIRST!
The manual is compiled in sections, the first three are numbered and contain information as follows:
1 = General Information - includes torque settings and service tools.
2 = Care & Safety - includes warnings and cautions pertinent to aspects of workshop procedures etc.
3 = Routine Maintenance - includes service schedules and recommended lubricants etc.
The remaining sections deal with Dismantling, Overhaul etc. of specific components:
4 = Hydraulics
5 = Axles
6 = Brakes
The page numbering in each section is not continuous. This allows for the insertion of new items in later issues of the manual.
Section contents, technical data, operation descriptions etc. are inserted at the beginning of each section.
All sections are listed on the front cover; tabbed divider cards align directly with individual sections on the front cover for rapid
reference.
Page cross references are generally made by presenting the subject title printed in bold, followed by the title of the section
containing the subject. For example:
“24 If the axle is still on the machine, fit the brake calipers (see Brake Caliper Removal and Replacement, Section 6).”
Note: If only the subject title in bold is given, i.e. no section title, the cross reference is to another part of the same section.
Use the contents list at the beginning of each section to find the exact page number.
Where a torque setting is given as a single figure it may be varied by plus or minus 3%. Torque figures indicated are for dry
threads, hence for lubricated threads may be reduced by one third.
‘Left Hand’ and ‘Right Hand’ are as viewed from the rear of the machine facing forwards.
7. i
Section 1 General Information
9803/9280
Section 1
i
Issue 2*
Contents Page No.
Unit Identification 1 - 1
Replacement Parts 1 - 1
Axle Build Identification 1 - 1
Torque Settings 2 - 1
Service Tools Numerical List 3 - 1
Service Tools 4 - 1
Sealing and Retaining Compounds 5 - 1
*
8. 1 - 1
Unit Identification
Axle Serial Plate (Central Drive Head)
The axle serial number is stamped on a plate mounted to the
front face of the axle, as shown.
Section 1 General Information
9803/9280
Section 1
1 - 1
Issue 3*
147950
Axle Serial Plate (Offset Drive Head)
The axle serial number is stamped on a plate mounted on
the axle.
Axle Build Identification
To identify an axle build, the number on the axle data plate
should be cross-referenced with the part number in the parts
information.
Example:
450 / 2760 / 1 / 0091
450/2760: Axle assembly part number (450/27600)
without the final zeros.
/1: Internal issue number of the main manufacturing
drawing.
/0091: Axle serial number. The complete 12 digit number
must be quoted for warranty purposes. The parts
information will detail the number of friction plates
required for the axle.
A
A
B
C
B C
Replacement Parts
1 When replacement parts are required, always ensure
that the correct parts are obtained, e.g. in the case of
gear replacements, always check the part number
stamped on the gear, and the number of teeth.
2 When ordering replacement parts, quote the details on
the serial plate shown.
3 It is essential that all gaskets and seals removed while
dismantling, should be renewed on reassembly.
4 On reassembly care should be taken that all parts are
correctly replaced since any component omitted or
incorrectly assembled can lead to a complete failure.
5 Lubricants should comply with the recommended list
as provided in this manual. It is important to adhere to
the oil changing procedure.
6 It is advisable to lightly lubricate with a recommended
lubricant, parts such as gears, shafts, thrust washers
and oil seals during reassembly.
*
9. 2 - 1
Torque Settings
Use only where no torque setting is specified in the text. Values are for dry threads and may be within three per cent of the
figures stated. For lubricated threads the values should be REDUCED by one third.
UNF Grade 'S' Bolts
Bolt Size Hexagon (A/F) Torque Settings
in (mm) in Nm kgf m lbf ft
1/4 (6.3) 7/16 14 1.4 10
5/16 (7.9) 1/2 28 2.8 20
3/8 (9.5) 9/16 49 5.0 36
7/16 (11.1) 5/8 78 8.0 58
1/2 (12.7) 3/4 117 12.0 87
9/16 (14.3) 13/16 170 17.3 125
5/8 (15.9) 15/16 238 24.3 175
3/4 (19.0) 11/8 407 41.5 300
7/8 (22.2) 15/16 650 66.3 480
1 (25.4) 11/2 970 99.0 715
11/4 (31.7) 17/8 1940 198.0 1430
11/2 (38.1) 21/4 3390 345.0 2500
Metric Grade 8.8 Bolts
Bolt Size Hexagon (A/F) Torque Settings
(mm) mm Nm kgf m lbf ft
M5 (5) 8 7 0.7 5
M6 (6) 10 12 1.2 9
M8 (8) 13 28 3.0 21
M10 (10) 17 56 5.7 42
M12 (12) 19 98 10 72
M16 (16) 24 244 25 180
M20 (20) 30 476 48 352
M24 (24) 36 822 84 607
M30 (30) 46 1633 166 1205
M36 (36) 55 2854 291 2105
Metric Grade 12.9 Bolts
Bolt Size Torque Settings
(mm) Nm kgf m lbf ft
M8 (8) 48 4.9 35
M10 (10) 94 9.6 69
M12 (12) 166 16.9 122
M14 (14) 320 32.6 236
M16 (16) 400 40.8 295
Note: All bolts are high tensile and must not be replaced by bolts of a lesser tensile specification.
Section 1 General Information
9803/9280
Section 1
2 - 1
Issue 1
11. 4 - 1
Section 1 General Information
9803/9280
Section 1
4 - 1
Issue 1
Service Tools
892/00182 Bearing Pad Driver
892/00817 17 mm A/F x 3/4 in square drive
892/00818 22 mm A/F x 3/4 in square drive
892/00819 15 mm A/F x 1/2 in square drive
892/00333 19 mm A/F x 3/4 in square drive
992/04000
Torque Multiplier (use in conjunction with a torque wrench to give a
5:1multiplication when tightening pinion nuts)
892/00174
Measuring Cup - Pinion Head
Bearing
S190770
892/00224
Impulse Extractor Set for Hub Bearing Seals
S197070
892/00822
Splined Bolt Socket for
driveshafts
S197060
S197030
892/00812 Drive Coupling Spanner for axle
yoke couplings
12. 992/04000
Torque Multiplier (use in conjunction with a torque wrench to give a
5:1multiplication when tightening pinion nuts)
4 - 2
Section 1 General Information
9803/9280
Section 1
4 - 2
Issue 1
Service Tools (cont'd)
892/00174
Measuring Cup - Pinion Head
Bearing
S190770
892/00224
Impulse Extractor Set for Hub Bearing Seals
S197070
892/00812 Drive Coupling Spanner for axle
yoke couplings
S196720
892/00822
Splined Bolt Socket for
driveshafts
S197060
892/00334 Gland Seal Fitting tool
S197030
992/00800 Extractor for removing axle pivot pin
13. 4 - 3
Section 1 General Information
9803/9280
Section 1
4 - 3
Issue 2*
Service Tools (cont'd)
A272520
892/00891 Oil Seal Insertion Tool
892/00833 Annulus Removal Tool
892/00225 Adapter - Impulse Extractor
992/04800
Flange Spanner - for locking pinion
flange while pinion nut is slackened or
torque set
S197040
*
14. 5 - 1
Sealing and Retaining Compounds
Loctite 574 or A medium strength sealant suitable for all
Permabond A136 sizes of gasket flanges, and for hydraulic
fittings of 25-65 mm diameter. 4102/1212
Loctite 275 or For all size of flanges where the strength
Permabond A140 of the joint is important. † 4102/0552
Loctite 932 or For all retaining parts which are likely to
Permabond A137 be dismantled and for use on threads larger
than 50 mm dia. 4101/0451
Loctite 242 or A medium strength locking fluid for sealing
Permabond A113 and retaining nuts, bolts, and screws up to
50 mm diameter, and for hydraulic fitttings
up to 25 mm diameter. † 4101/0251
Loctite 243 A medium strength locking fluid similar
to Loctite 242 but with greater resistance
to thread contamination 4101/0250
Loctite 648 or For retaining parts which are unlikely
Permabond A118 to be dismantled. 4101/0651
Loctite 577 A medium strength thread sealing compound. 4102/1951
Superbonder Bonding/Sealant † 4103/0955
Loctite Activator A cleaning primer which speeds the curing † 4104/0251 Aerosol
rate of anaerobic products. † 4104/0253 Bottle
Cleaner/Degreaser For degreasing components prior to use of
anaerobic adhesives and sealants. † 4104/1557 Aerosol
Anti-Seize Paste A compound used for assembly and prevention
of thread seizure. † 4003/0211
Note: The above list is the range of sealants and retaining compounds available. Items marked † are those referred to within
the sections.
Section 1 General Information
9803/9280
Section 1
5 - 1
Issue1
15. Suggest:
If the above button click is invalid.
Please download this document
first, and then click the above link
to download the complete manual.
Thank you so much for reading
16. i
Section 2 Care & Safety
9803/9280
Section 2
i
Issue 1
Contents Page No.
Safety Notices 1 - 1
General safety 2 - 1
Operating safety 3 - 1
Maintenance safety 4 - 1