This document provides a summary of service tools for various components of JCB excavators and loaders. It lists tools for working on the body and framework, electrics, hydraulics, and other sections. The tools include equipment for testing hydraulics like pressure gauges and adapters, as well as specialized tools for tasks like removing slew motor seals and pistons. Diagrams are provided for some custom tools.
JCB JS145W WHEELED EXCAVATOR Service Repair Manual SN:816000 Onwardskjsemfm ukjfmd
This is the Highly Detailed factory service repair manual for theJCB JS145W WHEELED EXCAVATOR, this Service Manual has detailed illustrations as well as step by step instructions,It is 100 percents complete and intact. they are specifically written for the do-it-yourself-er as well as the experienced mechanic.JCB JS145W WHEELED EXCAVATOR Service Repair Workshop Manual provides step-by-step instructions based on the complete dis-assembly of the machine. It is this level of detail, along with hundreds of photos and illustrations, that guide the reader through each service and repair procedure. Complete download comes in pdf format which can work under all PC based windows operating system and Mac also, All pages are printable. Using this repair manual is an inexpensive way to keep your vehicle working properly.
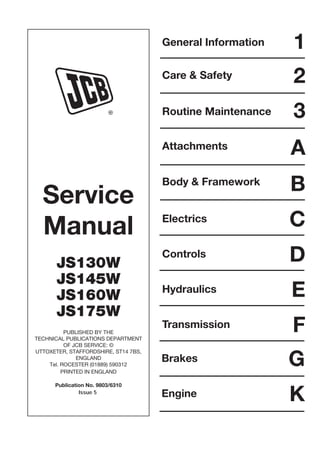
Service Repair Manual Covers:
General Information
Care and Safety
Routine Maintenance
Attachments
Body and Framework
Electrics
Controls
Hydraulics
Transmission
Brakes
Engine
File Format: PDF
Compatible: All Versions of Windows & Mac
Language: English
Requirements: Adobe PDF Reader
NO waiting, Buy from responsible seller and get INSTANT DOWNLOAD, Without wasting your hard-owned money on uncertainty or surprise! All pages are is great to haveJCB JS145W WHEELED EXCAVATOR Service Repair Workshop Manual.
Looking for some other Service Repair Manual,please check:
https://www.aservicemanualpdf.com/
Thanks for visiting!
JCB JS160W WHEELED EXCAVATOR Service Repair Manual SN:718500 Onwardsjhennd iesofku
This is the Highly Detailed factory service repair manual for theJCB JS160W WHEELED EXCAVATOR, this Service Manual has detailed illustrations as well as step by step instructions,It is 100 percents complete and intact. they are specifically written for the do-it-yourself-er as well as the experienced mechanic.JCB JS160W WHEELED EXCAVATOR Service Repair Workshop Manual provides step-by-step instructions based on the complete dis-assembly of the machine. It is this level of detail, along with hundreds of photos and illustrations, that guide the reader through each service and repair procedure. Complete download comes in pdf format which can work under all PC based windows operating system and Mac also, All pages are printable. Using this repair manual is an inexpensive way to keep your vehicle working properly.
Service Repair Manual Covers:
General Information
Care and Safety
Routine Maintenance
Attachments
Body and Framework
Electrics
Controls
Hydraulics
Transmission
Brakes
Engine
File Format: PDF
Compatible: All Versions of Windows & Mac
Language: English
Requirements: Adobe PDF Reader
NO waiting, Buy from responsible seller and get INSTANT DOWNLOAD, Without wasting your hard-owned money on uncertainty or surprise! All pages are is great to haveJCB JS160W WHEELED EXCAVATOR Service Repair Workshop Manual.
Looking for some other Service Repair Manual,please check:
https://www.aservicemanualpdf.com/
Thanks for visiting!
JCB JS145W WHEELED EXCAVATOR Service Repair Manual SN:816000 Onwardskjsemfm ukjfmd
This is the Highly Detailed factory service repair manual for theJCB JS145W WHEELED EXCAVATOR, this Service Manual has detailed illustrations as well as step by step instructions,It is 100 percents complete and intact. they are specifically written for the do-it-yourself-er as well as the experienced mechanic.JCB JS145W WHEELED EXCAVATOR Service Repair Workshop Manual provides step-by-step instructions based on the complete dis-assembly of the machine. It is this level of detail, along with hundreds of photos and illustrations, that guide the reader through each service and repair procedure. Complete download comes in pdf format which can work under all PC based windows operating system and Mac also, All pages are printable. Using this repair manual is an inexpensive way to keep your vehicle working properly.
Service Repair Manual Covers:
General Information
Care and Safety
Routine Maintenance
Attachments
Body and Framework
Electrics
Controls
Hydraulics
Transmission
Brakes
Engine
File Format: PDF
Compatible: All Versions of Windows & Mac
Language: English
Requirements: Adobe PDF Reader
NO waiting, Buy from responsible seller and get INSTANT DOWNLOAD, Without wasting your hard-owned money on uncertainty or surprise! All pages are is great to haveJCB JS145W WHEELED EXCAVATOR Service Repair Workshop Manual.
Looking for some other Service Repair Manual,please check:
https://www.aservicemanualpdf.com/
Thanks for visiting!
JCB JS160W WHEELED EXCAVATOR Service Repair Manual SN:718500 Onwardsjhennd iesofku
This is the Highly Detailed factory service repair manual for theJCB JS160W WHEELED EXCAVATOR, this Service Manual has detailed illustrations as well as step by step instructions,It is 100 percents complete and intact. they are specifically written for the do-it-yourself-er as well as the experienced mechanic.JCB JS160W WHEELED EXCAVATOR Service Repair Workshop Manual provides step-by-step instructions based on the complete dis-assembly of the machine. It is this level of detail, along with hundreds of photos and illustrations, that guide the reader through each service and repair procedure. Complete download comes in pdf format which can work under all PC based windows operating system and Mac also, All pages are printable. Using this repair manual is an inexpensive way to keep your vehicle working properly.
Service Repair Manual Covers:
General Information
Care and Safety
Routine Maintenance
Attachments
Body and Framework
Electrics
Controls
Hydraulics
Transmission
Brakes
Engine
File Format: PDF
Compatible: All Versions of Windows & Mac
Language: English
Requirements: Adobe PDF Reader
NO waiting, Buy from responsible seller and get INSTANT DOWNLOAD, Without wasting your hard-owned money on uncertainty or surprise! All pages are is great to haveJCB JS160W WHEELED EXCAVATOR Service Repair Workshop Manual.
Looking for some other Service Repair Manual,please check:
https://www.aservicemanualpdf.com/
Thanks for visiting!
JCB JS70 Tracked Excavator Service Repair Manual SN:695501 Onwardsfudfjjjskjkmeme
This is the Highly Detailed factory service repair manual for theJCB JS70 TRACKED EXCAVATOR, this Service Manual has detailed illustrations as well as step by step instructions,It is 100 percents complete and intact. they are specifically written for the do-it-yourself-er as well as the experienced mechanic.JCB JS70 TRACKED EXCAVATOR Service Repair Workshop Manual provides step-by-step instructions based on the complete dis-assembly of the machine. It is this level of detail, along with hundreds of photos and illustrations, that guide the reader through each service and repair procedure. Complete download comes in pdf format which can work under all PC based windows operating system and Mac also, All pages are printable. Using this repair manual is an inexpensive way to keep your vehicle working properly.
Service Repair Manual Covers:
General Information
Care and Safety
Routine Maintenance
Attachments
Body and Framework
Electrics
Hydraulics
Transmission
Brakes
Track and Running Gear
EnginE
File Format: PDF
Compatible: All Versions of Windows & Mac
Language: English
Requirements: Adobe PDF Reader
NO waiting, Buy from responsible seller and get INSTANT DOWNLOAD, Without wasting your hard-owned money on uncertainty or surprise! All pages are is great to haveJCB JS70 TRACKED EXCAVATOR Service Repair Workshop Manual.
Looking for some other Service Repair Manual,please check:
https://www.aservicemanualpdf.com/
Thanks for visiting!
What Exactly Is The Common Rail Direct Injection System & How Does It WorkMotor Cars International
Learn about Common Rail Direct Injection (CRDi) - the revolutionary technology that has made diesel engines more efficient. Explore its workings, advantages like enhanced fuel efficiency and increased power output, along with drawbacks such as complexity and higher initial cost. Compare CRDi with traditional diesel engines and discover why it's the preferred choice for modern engines.
What Does the Active Steering Malfunction Warning Mean for Your BMWTanner Motors
Discover the reasons why your BMW’s Active Steering malfunction warning might come on. From electrical glitches to mechanical failures and software anomalies, addressing these promptly with professional inspection and maintenance ensures continued safety and performance on the road, maintaining the integrity of your driving experience.
Why Is Your BMW X3 Hood Not Responding To Release CommandsDart Auto
Experiencing difficulty opening your BMW X3's hood? This guide explores potential issues like mechanical obstruction, hood release mechanism failure, electrical problems, and emergency release malfunctions. Troubleshooting tips include basic checks, clearing obstructions, applying pressure, and using the emergency release.
Core technology of Hyundai Motor Group's EV platform 'E-GMP'Hyundai Motor Group
What’s the force behind Hyundai Motor Group's EV performance and quality?
Maximized driving performance and quick charging time through high-density battery pack and fast charging technology and applicable to various vehicle types!
Discover more about Hyundai Motor Group’s EV platform ‘E-GMP’!
Things to remember while upgrading the brakes of your carjennifermiller8137
Upgrading the brakes of your car? Keep these things in mind before doing so. Additionally, start using an OBD 2 GPS tracker so that you never miss a vehicle maintenance appointment. On top of this, a car GPS tracker will also let you master good driving habits that will let you increase the operational life of your car’s brakes.
"Trans Failsafe Prog" on your BMW X5 indicates potential transmission issues requiring immediate action. This safety feature activates in response to abnormalities like low fluid levels, leaks, faulty sensors, electrical or mechanical failures, and overheating.
Symptoms like intermittent starting and key recognition errors signal potential problems with your Mercedes’ EIS. Use diagnostic steps like error code checks and spare key tests. Professional diagnosis and solutions like EIS replacement ensure safe driving. Consult a qualified technician for accurate diagnosis and repair.
5 Warning Signs Your BMW's Intelligent Battery Sensor Needs AttentionBertini's German Motors
IBS monitors and manages your BMW’s battery performance. If it malfunctions, you will have to deal with an array of electrical issues in your vehicle. Recognize warning signs like dimming headlights, frequent battery replacements, and electrical malfunctions to address potential IBS issues promptly.
In this presentation, we have discussed a very important feature of BMW X5 cars… the Comfort Access. Things that can significantly limit its functionality. And things that you can try to restore the functionality of such a convenient feature of your vehicle.
𝘼𝙣𝙩𝙞𝙦𝙪𝙚 𝙋𝙡𝙖𝙨𝙩𝙞𝙘 𝙏𝙧𝙖𝙙𝙚𝙧𝙨 𝙞𝙨 𝙫𝙚𝙧𝙮 𝙛𝙖𝙢𝙤𝙪𝙨 𝙛𝙤𝙧 𝙢𝙖𝙣𝙪𝙛𝙖𝙘𝙩𝙪𝙧𝙞𝙣𝙜 𝙩𝙝𝙚𝙞𝙧 𝙥𝙧𝙤𝙙𝙪𝙘𝙩𝙨. 𝙒𝙚 𝙝𝙖𝙫𝙚 𝙖𝙡𝙡 𝙩𝙝𝙚 𝙥𝙡𝙖𝙨𝙩𝙞𝙘 𝙜𝙧𝙖𝙣𝙪𝙡𝙚𝙨 𝙪𝙨𝙚𝙙 𝙞𝙣 𝙖𝙪𝙩𝙤𝙢𝙤𝙩𝙞𝙫𝙚 𝙖𝙣𝙙 𝙖𝙪𝙩𝙤 𝙥𝙖𝙧𝙩𝙨 𝙖𝙣𝙙 𝙖𝙡𝙡 𝙩𝙝𝙚 𝙛𝙖𝙢𝙤𝙪𝙨 𝙘𝙤𝙢𝙥𝙖𝙣𝙞𝙚𝙨 𝙗𝙪𝙮 𝙩𝙝𝙚 𝙜𝙧𝙖𝙣𝙪𝙡𝙚𝙨 𝙛𝙧𝙤𝙢 𝙪𝙨.
Over the 10 years, we have gained a strong foothold in the market due to our range's high quality, competitive prices, and time-lined delivery schedules.
Comprehensive program for Agricultural Finance, the Automotive Sector, and Empowerment . We will define the full scope and provide a detailed two-week plan for identifying strategic partners in each area within Limpopo, including target areas.:
1. Agricultural : Supporting Primary and Secondary Agriculture
• Scope: Provide support solutions to enhance agricultural productivity and sustainability.
• Target Areas: Polokwane, Tzaneen, Thohoyandou, Makhado, and Giyani.
2. Automotive Sector: Partnerships with Mechanics and Panel Beater Shops
• Scope: Develop collaborations with automotive service providers to improve service quality and business operations.
• Target Areas: Polokwane, Lephalale, Mokopane, Phalaborwa, and Bela-Bela.
3. Empowerment : Focusing on Women Empowerment
• Scope: Provide business support support and training to women-owned businesses, promoting economic inclusion.
• Target Areas: Polokwane, Thohoyandou, Musina, Burgersfort, and Louis Trichardt.
We will also prioritize Industrial Economic Zone areas and their priorities.
Sign up on https://profilesmes.online/welcome/
To be eligible:
1. You must have a registered business and operate in Limpopo
2. Generate revenue
3. Sectors : Agriculture ( primary and secondary) and Automative
Women and Youth are encouraged to apply even if you don't fall in those sectors.
What Does the PARKTRONIC Inoperative, See Owner's Manual Message Mean for You...Autohaus Service and Sales
Learn what "PARKTRONIC Inoperative, See Owner's Manual" means for your Mercedes-Benz. This message indicates a malfunction in the parking assistance system, potentially due to sensor issues or electrical faults. Prompt attention is crucial to ensure safety and functionality. Follow steps outlined for diagnosis and repair in the owner's manual.
2. Contents Page No.
Machine and Axle Identification 1 - 1
Torque Settings 2 - 1
Service Tools
Body and Framework (Section B) 4 - 1
Electrics (Section C) 5 - 1
Hydraulics (Section E) 6 - 1
Transmission (Section F) 7 - 1
Axles (Section F) 8 - 1
Sealing and Retaining Compounds 9 - 1
i
General Information
9803/6310
i
Issue 1
Section 1 Section 1
i
3. 1 - 1
Machine Serial Plates
Each machine has a Data Plate, located to the rear left,
inside the cab as shown at A. The machine serial number is
inscribed at B and the engine number at C.
If the engine is replaced by a new one, the data plate serial
number will be wrong. Either stamp the new number on the
plate or stamp out the old one. This will prevent the wrong
number being quoted when ordering replacement parts.
Axle Serial Plate
The axle serial number is stamped on a plate mounted to the
rear face of the axle, as shown.
1 When replacement parts are required, always ensure
that the correct parts are obtained, e.g. in the case of
gear replacements, always check the part number
stamped on the gear, and the number of teeth.
2 When ordering replacement parts, quote the details on
the serial plate as shown.
Section 1 General Information
9803/6310
Section 1
1 - 1
Issue 1
Machine and Axle Identification
JS06050
JS06060
C
A
B
S156570
4. 2 - 1
Section 1 General Information
9803/6310
Section 1
2 - 1
Issue 2*
Torque Settings
Torque Settings
Note 1: The figures quoted are for non-plated fasteners and are to be used only when there is no torque setting specified in
the relevant procedure in this service manual.
Note 2: The 4T grade settings DO NOT APPLY to fasteners used on the engine. If any 4T specification fasteners are found on
the engine, these must be tightened to the figure quoted in the relevant engine manual.
Bolt
Size Strength Grade of Bolt or Stud
4T 8.8 10.9 12.9
Nm kgf m lbf ft Nm kgf m lbf ft Nm kgf m lbf ft Nm kgf m lbf ft
M3 0.39 0.04 0.28 - - - - - - - - -
M4 0.78 0.08 0.57 - - - - - - - - -
M5 1.67 0.17 1.2 - - - - - - - - -
M6 2.84 0.29 2.1 8.04 0.82 5.9 11.3 1.15 8.3 - - -
M8 7.06 0.72 5.2 19.6 2.00 14.5 27.7 2.82 20.4 48.0 4.9 35
M10 14.0 1.43 10.3 39.1 3.99 28.8 55.0 5.61 40.6 94.0 9.6 69
M12 24.6 2.51 18.1 68.5 6.98 50.5 96.2 9.81 71 166 16.9 122
M16 61.9 6.31 45.7 173 17.6 127.6 242 24.7 178.5 400 40.8 295
M20 122 12.4 90 337 34.4 249 475 48.4 350 - - -
M22 167 17.0 123 464 47.3 342 652 66.5 481 - - -
M24 210 21.4 155 584 59.5 431 821 83.7 606 - - -
M27 311 31.7 229 864 88.1 637 1220 124 900 - - -
M30 420 42.8 310 1170 119 863 1650 168 1217 - - -
M33 576 58.7 425 1600 163 1180 2260 230 1667 - - -
M36 736 75.1 543 2050 209 1512 2880 294 2124 - - -
M39 961 98.0 709 2680 273 1977 3760 383 2773 - - -
M42 1190 121 878 3300 336 2434 4640 473 3422 - - -
M45 1490 152 1099 4140 422 3054 5820 593 4293 - - -
M48 1780 182 1312 4960 506 3659 6970 711 5141 - - -
Note: All bolts are high tensile and must not be replaced by bolts of a lesser tensile specification.
*
*
5. 4 - 1
Section 1 General Information
9803/6310
Section 1
4 - 1
Issue 1
Service Tools
Body and Framework (Section B)
S186240
Hand Cleaner - special blend for the removal of
polyurethane adhesives.
4104/1310 (454g; 1lb tub)
S186250
12V Mobile Oven - 1 cartridge capacity - required to
pre-heat adhesive prior to use. It is fitted with a male
plug (703/23201) which fits into a female socket
(715/04300).
992/12300
S186260
240V Static Oven - available with 2 or 6 cartridge
capacity - required to pre-heat adhesive prior to use.
No plug supplied. Note: 110V models available upon
request - contact JCB Technical Service
992/12400 - 2 cartridge x 240V
992/12600 - 6 cartridge x 240V
S186270
Cartridge Gun - hand operated - essential for the
application of sealants, polyurethane materials etc.
892/00845
'
S186280
Folding Stand for Holding Glass - essential for
preparing new glass prior to installation.
892/00843
S186300
Glass Lifter - minimum 2 off - essential for glass
installation, 2 required to handle large panes of glass.
Ensure suction cups are protected from damage
during storage.
892/00842
6. 4 - 2
Section 1 General Information
9803/6310
Section 1
4 - 2
Issue 1
Service Tools (cont’d)
Body and Framework (Section B) (cont’d)
S186310
Wire Starter - used to access braided cutting wire
(below) through original polyurethane seal.
892/00848
S186320
Glass Extractor (Handles) - used with braided cutting
wire (below) to cut out broken glass.
892/00846
S186330
Braided Cutting Wire - consumable heavy duty
cut-out wire used with the glass extraction tool
(above).
892/00849 (approx 25m length)
S186340
Cut-out Knife - used to remove broken glass.
992/12800
'
S186350
'L' Blades - 25mm (1in.) cut - replacement blades for
cut-out knife (above).
992/12801 (unit quantity = 5 off)
S186360
Long Knife - used to give extended reach for normally
inaccessible areas.
892/00844
7. 4 - 3
Section 1 General Information
9803/6310
Section 1
4 - 3
Issue 1
Service Tools (cont’d)
Body and Framework (Section B) (cont’d)
S186470
Nylon Spatula - general tool used for smoothing
sealants - also used to re-install glass in rubber glazing
because metal tools will chip the glass edge.
892/00847
S186550
Rubber Spacer Blocks - used to provide the correct
set clearance between glass edge and cab frame.
926/15500
(unit quantity = 500 off)
8. 5 - 1
Section 1 General Information
9803/6310
Section 1
5 - 1
Issue 2*
Service Tools
SECTION C - ELECTRICS
Electrical Test Equipment
1 892/00283 Tool Kit Case
2 892/00281 AVO Meter
3 892/00286 Surface Temperature Probe
4 892/00284 Microtach Digital Tachometer
5 892/00282 Shunt - open type
6 892/00285 Hydraulic Oil Temperature Probe
7 892/00298 Fluke 85 Multimeter
892/01033 Data Link Adaptor
Used with AMS Machines Only
A360250
9. Service Tools (continued)
SECTION E - HYDRAULICS
6 - 1
Section 1 General Information
9803/6310
Section 1
6 - 1
Issue 2*
Pressure Test ‘T’ Adapters
892/00262 1/4 in BSP x 1/4 in F BSP x Test Point
816/55038 3/8 in BSP x 3/8 in F BSP x Test Point
816/55040 1/2 in BSP x 1/2 in F BSP x Test Point
892/00263 5/8 in BSP x 5/8 in F BSP x Test Point
892/00264 3/4 in BSP x 3/4 in F BSP x Test Point
892/00265 1 in M BSP x 1 in F BSP x Test Point
892/00266 1,1/4 in M BSP x 1,1/4 in F BSP x Test Point
892/00267 1,1/2 in M BSP x 1,1/2 in F BSP x Test Point
Pressure Test Adapters
892/00255 1/4 in BSP x Test Point
892/00256 3/8 in BSP x Test Point
892/00257 1/2 in BSP x Test Point
892/00258 5/8 in BSP x Test Point
816/15118 3/4 in BSP x Test Point
892/00259 1 in BSP x Test Point
892/00260 1,1/4 in BSP x Test Point
892/00261 5/8 in UNF x Test Point
Hydraulic Pressure Test Gauges and Connections
1 892/00279 Pressure Gauge 0-400 bar (0-6000 lbf/in2)
2 892/00346 Pressure Gauge 0-70 bar (0-1000 lbf/in2)
3 892/00347 Connector
4 892/00254 Hose
5 892/00280 Pressure Gauge 0-600 bar (0-9000 lbf/in2)
1/2/5
10. 6 - 2
Section 1 General Information
9803/6310
Section 1
6 - 2
Issue 1
Service Tools (continued)
SECTION E - HYDRAULICS
Hand Pump Equipment
892/00223 Hand Pump
892/00137 Micro-bore Hose 1/4 in BSP x 5 metres
892/00274 Adapter 1/4 in M BSP x 3/8 in M BSP Taper
892/00262 1/4 in M BSP x 1/4 in F BSP x Test Point
892/00706 Test Probe
892/00278 Gauge 0 - 40 bar (0 - 600 lb/in2)
892/00279 Gauge 0 - 400 bar (0 - 6000 lb/in2)
892/00280 Gauge 0 - 600 bar (0 - 8500 lb/in2)
816/50005 1/2 in BSP (A) x 1/2 in BSP (B)
816/60096 3/4 in BSP (A) x 3/4 in BSP (B)
816/00018 1 in BSP (A) x 1 in BSP (B)
Female Cone Blanking Plug
892/00055 1/4 in BSP
892/00056 3/8 in BSP
892/00057 1/2 in BSP
892/00058 5/8 in BSP
892/00059 3/4 in BSP
892/00060 1 in BSP
Male Cone Blanking Plug
816/00294 1/4 in BSP
816/00189 3/8 in BSP
816/00190 1/2 in BSP
816/00197 5/8 in BSP
816/00196 3/4 in BSP
816/00193 1 in BSP
11. 6 - 3
Section 1 General Information
9803/6310
Section 1
6 - 3
Issue 2*
Service Tools (continued)
SECTION E - HYDRAULICS
Ram Piston Nut Removal/Fitting Rig
993/99525 Rig Assembly (not including spanners and
ram)
993/99522 Anchor Side Plate (supplied loose unwelded)
993/99523 Anchor Cross Member (supplied loose
unwelded)
993/99524 Ram Eye End Modification Plate Assembly
556/43400 Lift Ram
545/18000 Lynch Pin
811/50232 1,1/4” Pivot Pin
Ram Piston Nut Removal/Fitting Spanner
993/99512 Spanner 55 mm A/F
993/99513 Spanner 60 mm A/F
993/99514 Spanner 65 mm A/F
993/99515 Spanner 70 mm A/F
993/99516 Spanner 75 mm A/F
993/99517 Spanner 85 mm A/F
993/99518 Spanner 90 mm A/F
993/99519 Spanner 100 mm A/F
993/99520 Spanner 110 mm A/F
993/99521 Spanner 115 mm A/F
SSP0046 Spanner 80 mm A/F
SSP0047 Spanner 95 mm A/F
JS07050
12. 6 - 4
Service Tools (cont’d)
Hydraulics (Section E) (cont’d)
Slew Motor Unit - JS130W/145W
Section 1 General Information
9803/6310
Section 1
6 - 4
Issue 2*
Seal Fitting Tool (Oil Seal 2) JS07110
30
o
155 (6.10")
2 (0.079")
14 (0.55")
4 (0.16")
ø38.
0.2
(1.50"
0.008)
+
-
+
-
ø61.
0.2
(2.40"
0.008)
+
-
+
-
ø70
(2.76")
Fitting Tool for Inner Ring of Taper Roller Bearing 3
ø42
(1.65")
JS07120
100 (3.94")
110 (4.33")
ø32.2.
0.1
(ø1.27
0.004)
+
-
+
-
15
o
ø35.5.
0.1
(ø1.40
0.004)
+
-
+
-
Seal Protector
Heat polyvinyl tube in hot water and form to required shape.
ø38
(1.50")
50 (1.97")
80 (3.15")
5 o
JS07130
Fitting Tool for Inner Ring 1
ø40
(1.57")
JS07140
ø31.4
0.1
(1.24"
0.004)
+
-
+
-
50 (1.97")
60 (2.36")
*
13. 6 - 5
Service Tools (cont’d)
Hydraulics (Section E) (cont’d)
Slew Motor Unit - JS160W/JS175W
Section 1 General Information
9803/6310
Section 1
6 - 5
Issue 2*
Puller for Brake Piston
Stud is threaded M10 on both ends for 20 mm (0.8 in) and fitted with two M10 nuts.
JS07100
40
(1.57")
40
(1.57")
2 x ø9 (0.35")
100
(3.94")
200
(9.84")
10
(0.39")
180
(7.09")
240
(9.45")
M10
ø11 (0.43")
Inner diameter
*
14. 6 - 6
Service Tools (cont’d)
Hydraulics (Section E) (cont’d)
Hydraulic Tank - JS130W/JS145W/JS160W/JS175W
A Dia. 40 mm (1.57 in)
B Dia. 26 mm (1.02 in)
C 40 mm (1.47 in)
D 50 mm (1.97 in)
E Dia. 10 mm (0.39 in)
F 550 mm (21.7 in)
G 9 mm (0.35 in)
H 24 mm (0.94 in)
I Dia. 81 mm (3.91 in )
J Dia. 76 mm (2.99 in )
K 24 mm (0.94 in)
L 95 mm (3.74 in)
M Radius 0.7 mm (0.028 in)
N 120 mm (16.5 in)
O 4.0 mm (0.157 in)
P 3.0 mm (0.118 in)
Q 15°
O-ring G75
Section 1 General Information
9803/6310
Section 1
6 - 6
Issue 2*
+0
-0.1
+0
-0.004
+0
-0.1
+0
-0.004
JS07150
A
B
C D
G
H
F
N
J
I
K
Q O
P
L
M
E
Blank for Suction Strainer
*
15. 6 - 7
Service Tools (cont’d)
Hydraulics (Section E) (cont’d)
Remote Control Valve - JS130W/JS145W/JS160W/JS175W
Section 1 General Information
9803/6310
Section 1
6 - 7
Issue 2*
JS07160
ø30
ø25
ø21
ø28
ø19
42
25
17
19
50
13
65
ø26.5
23.5
15
1
2
Joint Removal Tool
Items 1 and 2 are assembled with an interference fit.
*
17. 6 - 9
Service Tools (cont’d)
Hydraulics (Section E) (cont’d)
Hydraulic Rams
Reconditioning
Section 1 General Information
9803/6310
Section 1
6 - 9
Issue 1
Bush Removal/Assembly Jig Seal Ring Insertion Jig (Inner)
Bush Removal/Assembly Jig Seal Ring Bedding Jig
Cylinder Head Insertion Jig
Seal Ring Insertion Jig (Outer)
Wiper Ring Installation Jig
18. Seal Fitting Jig
Service Tools (cont’d)
Transmission (Section F)
Slew Gearbox - JS130W/145W
7 - 1
Section 1 General Information
9803/6310
Section 1
7 - 1
Issue 2*
ø50 (1.97")
14
(0.55")
6
(0.236")
15
(0.59")
30
(1.18")
JS07170
ø94.5 0.2
(3.72" 0.008)
+
-
+
-
ø120 (4.72")
ø130 (5.43")
3
(0.118")
15
o
Seal Protector
Heat polyvinyl tube in hot water and form to the required
shape on the pinion shaft
ø65
(2.56")
60 (2.36")
100 (3.94")
5 o
JS07180
Bearing and Oil Seal assembly Jig
Slew Gearbox - JS160W/175W
ø100
(ø3.937")
JS07190
80
(3.15"
)
+0.3
-0
+0.012"
-0
Seal Fitting Jig
ø149
(ø5.866")
JS07200
2.5
(0.098")
ø155
(ø6.094")
*
*
19. Service Tools (cont’d)
Transmission (Section F) (cont’d)
Slew Gearbox - JS160W/175W (cont’d)
7 - 2
Section 1 General Information
9803/6310
Section 1
7 - 2
Issue 2*
Seal Fitting Jig
ø50
3 15
9
15
30
ø99.8
ø124
ø158
JS07210
Seal Fitting Jig (SST0033)
JS07220
30
o
155
2
16
4
ø49.5
80
ø75
Jig for Taper Roller Bearing Inner Ring
ø36
(ø50)
JS07230
100
110
ø30.5.
0.1
(ø46.5
0.1)
+
-
+
-
*
21. 992/07609 Adapter - Steer/Drive Axle Pinion Bearing
Cone
992/07606 Measuring Cup - Pinion Bearing
8 - 1
Section 1 General Information
9803/6310
Section 1
8 - 1
Issue 1
Service Tools (cont'd)
Axles (Section F)
992/07604 Replacer - Crownwheel Bearing
and Differential Bearing Cones
992/07614 Adapter Set - Bull Pinion Bearing
Remover/Replacer
892/00182 Bearing Pad Driver
892/00817 17 mm A/F x 3/4 in square drive
892/00818 22 mm A/F x 3/4 in square drive
892/00819 15 mm A/F x 1/2 in square drive
892/00333 19 mm A/F x 3/4 in square drive
992/07601 Spanner for Half Shaft Nuts 992/07603 Replacer - Pinion Head Bearing Cup
992/07607 Spacer - Pinion Bearing Preload
22. 992/04000
Torque Multiplier (use in conjunction with a torque wrench to give a
5:1 multiplication when tightening pinion nuts)
8 - 2
Section 1 General Information
9803/6310
Section 1
8 - 2
Issue 1
Service Tools (cont'd)
Axles (Section F) (cont’d)
892/00174
Measuring Cup - Pinion Head
Bearing
S190770
892/00224
Impulse Extractor Set for Hub Bearing Seals
S197070
892/00812 Drive Coupling Spanner for axle
yoke couplings
S196720
892/00822
Splined Bolt Socket for
driveshafts
S197060
892/00334 Gland Seal Fitting tool
S197030
992/00800 Extractor for removing axle pivot pin
23. 8 - 3
Section 1 General Information
9803/6310
Section 1
8 - 3
Issue 2*
Service Tools (cont'd)
Axles (Section F) (cont’d)
993/59500 Adapter - Impulse Extractor
892/00891 Oil Seal Insertion Tool
A272520
892/00833 Annulus Removal Tool
*
24. 9 - 1
Section 1 General Information
9803/6310
Section 1
9 - 1
Issue 2*
Sealing and Retaining Compounds
JCB Multi-Gasket A medium strength sealant suitable for all sizes of gasket 4102/1212 50 ml
flanges, and for hydraulic fittings of 25-65 mm diameter.
JCB Threadlocker For threads of 50 mm diameter upwards, 4101/0451 50 ml
e.g. suction strainer.
JCB Threadlocker A high strength locking fluid for use with threaded 4102/0551 50 ml
(High Strength) components. Gasketing for all sizes of flange where
the strength of the joint is important.
JCB Retainer (High Strength) For all retaining parts which are unlikely to be dismantled. 4101/0651 50 ml
JCB Threadlocker and Sealer A medium strength locking fluid for sealing and retaining 4101/0250 10 ml
nuts, bolts, and screws up to 50 mm diameter, and 4101/0251 50 ml
for hydraulic fittings up to 25 mm diameter.
JCB Threadlocker and Sealer A high strength locking fluid for sealing and retaining 4101/0550 10 ml
(High Strength) nuts, bolts, and screws up to 50 mm diameter, and for 4101/0552 200 ml
hydraulic fittings up to 25 mm diameter.
JCB Threadseal A medium strength thread sealing compound. 4102/1951 50 ml
JCB Activator A cleaning primer which speeds the curing rate of 4104/0251 Aerosol (1 ltr)
anaerobic products. 4104/0253 Bottle (200 ml)
JCB Cleaner/Degreaser For degreasing components prior to use of anaerobic 4104/1557 Aerosol (400 ml)
adhesives and sealants.
Anti-Seize Paste A compound used for assembly and prevention of 4003/0211
parts seizure.
Direct Glazing Kit For one pane of glass; comprises items marked † below
plus applicator nozzle etc.
† Ultra Fast Adhesive For direct glazing 4103/2109 310 ml
† Active Wipe 205 For direct glazing 4104/1203 250 g
† Black Primer 206J For direct glazing 4201/4906 30 ml
Clear Silicone Sealant To seal butt jointed glass. 4102/0901
25. Contents Page No.
Safety Notices 1 - 1
General Safety 2 - 1
Operating Safety 3 - 1
Maintenance Safety 4 - 1
i
Care & Safety
9803/6310
i
Issue 1
Section 2 Section 2
26. 1 - 1
Section 2 Care & Safety
9803/6310
Section 2
1 - 1
Issue 2*
In this publication and on the machine, there are safety notices. Each notice starts
with a signal word. The signal word meanings are given below.
!
! DANGER
Denotes an extreme hazard exists. If proper precautions are not taken, it is
highly probable that the operator (or others) could be killed or seriously
injured.
INT-1-2-1
!
! WARNING
Denotes a hazard exists. If proper precautions are not taken, the operator (or
others) could be killed or seriously injured.
INT-1-2-2
!
! CAUTION
Denotes a reminder of safety practices. Failure to follow these safety practices
could result in injury to the operator (or others) and possible damage to the
machine.
INT-1-2-3
*
27. 2 - 1
All construction and agricultural equipment can be
hazardous. When a JCB Excavator is correctly operated and
properly maintained, it is a safe machine to work with. But
when it is carelessly operated or poorly maintained it can
become a danger to you (the operator) and others.
Do not work with the machine until you are sure that you can
control it.
Do not start any job until you are sure that you and those
around you will be safe.
If you are unsure of anything, about the machine or the job,
ask someone who knows. Do not assume anything.
Remember
BE CAREFUL
BE ALERT
BE SAFE
GEN-1-6
As well as the warnings in the following pages, specific
warnings are given throughout the book. This section is
designed to give a safety code for use of the machine
generally and for operation and maintenance practices.
General Safety
!
!
WARNING
Lifting Equipment
You can be injured if you use faulty lifting equipment. Make
sure that lifting equipment is in good condition. Make sure
that lifting tackle complies with all local regulations and is
suitable for the job. Make sure that lifting equipment is
strong enough for the job.
INT-1-3-7
!
!WARNING
Clothing
You can be injured if you do not wear the proper clothing.
Loose clothing can get caught in the machinery. Wear
protective clothing to suit the job. Examples of protective
clothing are: a hard hat, safety shoes, safety glasses, a well
fitting overall, ear-protectors and industrial gloves. Keep
cuffs fastened. Do not wear a necktie or scarf. Keep long
hair restrained.
INT-1-3-6
!
!
WARNING
Alcohol and Drugs
It is extremely dangerous to operate machinery when under
the influence of alcohol or drugs. Do not consume alcoholic
drinks or take drugs before or whilst operating the machine
or attachments. Be aware of medicines which can cause
drowsiness.
INT-1-3-9
Note: This section includes a certain amount of operating
safety information. But remember that whenever you drive
the machine or operate its controls, you are in effect a
machine operator. Therefore you should read and
understand the information given in the Operator Handbook
before driving the machine or operating its controls.
!
!
WARNING
Care and Alertness
All the time you are working with or on the machine, take
care and stay alert. Always be careful. Always be alert for
hazards.
INT-1-3-5
!
!WARNING
Raised Equipment
Raised equipment can fall and injure you. Do not walk or
work under raised equipment unless safely supported.
13-1-1-6
!
! DANGER
Before removing the boom from the machine, ensure that
the counterweight is adequately supported as in certain
ground conditions the machine could tip backwards. Never
travel or transport the machine with the boom removed.
BF 6-3
Section 2 Care & Safety
*9803/6310
Section 2
2 - 1
Issue 2*
28. 3 - 1
Operating Safety
!
!WARNING
Engine
The engine has rotating parts. Do not open the engine cover
while the engine is running. Do not use the machine with the
cover open.
INT-2-1-6
!
!WARNING
Entering/Leaving
Always face the machine when entering and leaving the cab.
Use the step(s) and handrails. Make sure the step(s),
handrails and your boot soles are clean and dry. Do not
jump from the machine. Do not use the machine controls as
handholds, use the handrails.
INT-2-1-7
!
!WARNING
Controls
You or others can be killed or seriously injured if you operate
the control levers from outside the cab. Operate the control
levers only when you are correctly seated inside the cab.
INT-2-1-3
!
!WARNING
Visibility
Accidents can be caused by working in poor visibility. Keep
windows clean and use your lights to improve visibility. Do
not operate the machine if you cannot see properly.
INT-2-1-11
!
!WARNING
Machine Limits
Operating the machine beyond its design limits can damage
the machine, it can also be dangerous. Do not operate the
machine outside its limits. Do not try to upgrade the
machine performance with unapproved modifications.
INT-2-1-4
!
!WARNING
Exhaust Gases
Breathing the machine exhaust gases can harm and
possibly kill you. Do not operate the machine in closed
spaces without making sure there is good ventilation. If
possible, fit an exhaust extension. If you begin to feel
drowsy, stop the machine at once. Get out of the cab into
fresh air.
INT-2-1-10
!
!WARNING
Front Axle Lock
DO NOT travel on the road unless the front axle is free to
pivot. Lock the axle only while excavating or lifting.
8-2-9-1/1
!
!WARNING
Ramps and Trailers
Water, mud, ice, grease and oil on ramps or trailers can
cause serious accidents. Make sure ramps and trailers are
clean before driving onto them. Use extreme caution when
driving onto ramps and trailers.
INT-2-2-6
!
!WARNING
Communications
Bad communications can cause accidents. Keep people
around you informed of what you will be doing. If you will be
working with other people, make sure any hand signals that
may be used are understood by everybody. Work sites can
be noisy, do not rely on spoken commands.
INT-2-2-3
!
! DANGER
Sparks
Explosions and fire can be caused by sparks from the
exhaust or the electrical system. Do not use the machine in
closed areas where there is flammable material, vapour or
dust.
INT-2-2-10
!
!WARNING
Controls
Keep the machine controls clean and dry. Your hands and
feet could slide off slippery controls. If that happens, you will
lose control of the machine.
2-2-3-6
!
!WARNING
Hazardous Atmospheres
This machine is designed for use in normal outdoor
atmospheric conditions. It should not be used in an
enclosed area without adequate ventilation. Do not use the
machine in a potentially explosive atmosphere, i.e.
combustible vapours, gas or dust, without first consulting
your JCB Distributor.
INT-2-1-14
!
!WARNING
Boom Removal
Never remove the boom from the machine as this would
severely upset the machine’s balance so that in certain
ground conditions it could tip backwards.
8-2-8-4/2
Section 2 Care & Safety
*9803/6310
Section 2
3 - 1
Issue 2*
29. 4 - 1
Maintenance Safety
!
!WARNING
Soft Ground
A machine can sink into soft ground. Never work under a
machine on soft ground.
INT-3-2-4
!
!WARNING
Metal Splinters
You can be injured by flying metal splinters when driving
metal pins in or out. Use a soft faced hammer or drift to
remove and fit metal pins. Always wear safety glasses.
INT-3-1-3
!
!WARNING
Communications
Bad communications can cause accidents. If two or more
people are working on the machine, make sure each is
aware of what the others are doing. Before starting the
engine, make sure the others are clear of the danger areas;
examples of danger areas are: the rotating blades and belt
on the engine, the attachments and linkages, and anywhere
beneath or behind the machine. People can be killed or
injured if these precautions are not taken.
INT-3-1-5
!
!WARNING
Diesel Fuel
Diesel fuel is flammable; keep naked flames away from the
machine. Do not smoke while refuelling the machine or
working on the engine. Do not refuel with the engine running.
There could be a fire and injury if you do not follow these
precautions.
INT-3-2-2
!
!WARNING
Petrol
Do not use petrol in this machine. Do not mix petrol with the
diesel fuel; in storage tanks the petrol will rise to the top and
form flammable vapours.
INT-3-1-6
!
!WARNING
Oil
Oil is toxic. If you swallow any oil, do not induce vomiting,
seek medical advice. Used engine oil contains harmful
contaminants which can cause skin cancer. Do not handle
used engine oil more than necessary. Always use barrier
cream or wear gloves to prevent skin contact. Wash skin
contaminated with oil thoroughly in warm soapy water. Do
not use petrol, diesel fuel or paraffin to clean your skin.
INT-3-2-3
!
!WARNING
Fires
If your machine is equipped with a fire extinguisher, make
sure it is checked regularly. Keep it in the operator's cab
until you need to use it.
Do not use water to put out a machine fire, you could spread
an oil fire or get a shock from an electrical fire. Use
carbondioxide, dry chemical or foam extinguishers. Contact
your nearest fire department as quickly as possible. Fire
fighters should use self-contained breathing apparatus.
INT-3-2-7/1
!
!WARNING
Battery
A battery with frozen electrolyte can explode if it is used or
charged. Do not use a machine with a frozen battery. To help
prevent the battery from freezing, keep the battery fully
charged.
INT-3-1-7
!
!WARNING
Battery Gases
Batteries give off explosive gases. Keep flames and sparks
away from the battery. Do not smoke close to the battery.
Make sure there is good ventilation in closed areas where
batteries are being used or charged. Do not check the
battery charge by shorting the terminals with metal; use a
hydrometer or voltmeter.
INT-3-1-8
!
!WARNING
Battery Terminals
The machine is negatively earthed. Always connect the
negative pole of the battery to earth.
When connecting the battery, connect the earth (-) lead last.
When disconnecting the battery, disconnect the earth (-)
lead first.
INT-3-1-9
!
!WARNING
Electrical Circuits
Understand the electrical circuit before connecting or
disconnecting an electrical component. A wrong connection
can cause injury and/or damage.
INT-3-1-4
!
! CAUTION
Never use water or steam to clean inside the cab. The use of
water or steam could damage the on-board computer and
render the machine inoperable. Remove dirt using a brush or
damp cloth.
8-3-4-8
Section 2 Care & Safety
*9803/6310
Section 2
4 - 1
Issue 2*
30. 4 - 2
Maintenance Safety (cont’d)
!
! CAUTION
Arc Welding
Before carrying out any arc welding on the machine,
completely remove the Control Computer to avoid damage
to the circuits; also disconnect the alternator plug and
battery leads.
When welding items to the mainframe make sure that the
earth clamp is positioned on the mainframe and when
welding to the undercarriage make sure that the earth clamp
is positioned on the undercarriage. If you earth one and weld
the other, you may cause severe damage to the slew ring.
Always connect the earth clamp to any other component
being welded, i.e. boom or dipper, to avoid damage to pivot
pins and bushes.
8-1-2-6/1
!
!WARNING
Hydraulic Hoses
Damaged hoses can cause fatal accidents. Inspect the
hoses regularly for:
Damaged end fittings
Chafed outer covers
Ballooned outer covers
Kinked or crushed hoses
Embedded armouring in outer covers
Displaced end fittings.
INT-3-3-2
!
!WARNING
DO NOT remove the hydraulic tank filler cap or cover plate
when the engine is running. The hydraulic system is under
pressure. You or others could be injured. First stop the
engine and then release the pressure.
8-3-4-4/1
!
!WARNING
Hydraulic Pressure
Hydraulic fluid at system pressure can injure you. Before
disconnecting or connecting hydraulic hoses, stop the
engine and operate the controls to release pressure trapped
in the hoses. Make sure the engine cannot be started while
the hoses are open.
INT-3-1-11/1
!
!WARNING
Hydraulic Fluid
Fine jets of hydraulic fluid at high pressure can penetrate the
skin. Do not use your fingers to check for hydraulic fluid
leaks. Do not put your face close to suspected leaks. Hold a
piece of cardboard close to suspected leaks and then
inspect the cardboard for signs of hydraulic fluid. If hydraulic
fluid penetrates your skin, get medical help immediately.
INT-3-1-10/1
!
! CAUTION
Rams
The efficiency of the rams will be affected if they are not kept
free of solidified dirt. Clean dirt from around the rams
regularly. When leaving or parking the machine, close all
rams if possible to reduce the risk of weather corrosion.
INT-3-2-10
!
! CAUTION
Cleaning
Cleaning metal parts with incorrect solvents can cause
corrosion. Use only recommended cleaning agents and
solvents.
INT-3-2-11
!
! CAUTION
'O'-rings, Seals and Gaskets
Badly fitted, damaged or rotted 'O'-rings, seals and gaskets
can cause leakages and possible accidents. Renew
whenever disturbed unless otherwise instructed. Do not use
Trichloroethane or paint thinners near 'O' rings and seals.
INT-3-2-12
!
!WARNING
Hot Coolant
The cooling system is pressurised when the engine is hot.
Hot coolant can spray out when you remove the radiator
cap. Let the system cool before removing the radiator cap.
To remove the cap; turn it to the first notch and let the
system pressure escape, then remove the cap.
INT-3-2-9
!
!WARNING
Protect your eyes when grinding metal. Wear safety glasses
or goggles. Remove or protect any combustible materials
from the area which could be ignited by sparks.
GEN-1-12
Section 2 Care & Safety
*9803/6310
Section 2
4 - 2
Issue 2*
31. Contents Page No.
Lubricants and Capacities 1 - 1
Lubricants - Health and Safety 1 - 3
Service Schedules 2 - 1
Greasing
Slew Ring Teeth and Slew Pinion 3 - 1
Slew Ring Bearing 3 - 1
Greasing (50 hours) 3 - 2
Greasing (General) 3 - 4
Battery 4 - 1
Fuses See Section C
Tyres and Wheels
Tyre Inflation 5 - 1
Checking the Wheel Nut Tightness 5 - 1
Hydraulics
Checking the Fluid Level 7 - 1
Releasing Tank Pressure 7 - 1
Topping-up Fluid Level 7 - 1
Changing the Fluid 7 - 2
Changing the Return Filter Element 7 - 3
Flushing Filters 7 - 3
Cleaning/Changing the Suction Strainer 7 - 4
Changing the Plexus Filter 7 - 5
Changing the Air Breather Element 7 - 7
Draining Tank Impurities 7 - 7
Changing the Servo Oil Filter 7 - 8
Changing the Drain Line Filter Element 7 - 9
Changing the Steering Line Filter Element 7 - 9
Changing the Breaker In-line Filter (if fitted) 7 - 10
Air Bleeding Procedures 7 - 11
Transmission
Checking the Slew Gearbox Oil Level 8 - 1
Changing the Slew Gearbox Oil 8 - 1
Replenishing Slew Gearbox Grease 8 - 2
Checking the Drive Gearbox Oil Level 8 - 3
Changing the Drive Gearbox Oil 8 - 3
Checking the Front Axle Differential Oil Level 8 - 4
Changing the Front Axle Differential Oil 8 - 4
Checking the Front Axle Hub Oil Level 8 - 5
Changing the Front Axle Hub Oil 8 - 5
Checking the Rear Axle Differential/Hub Oil Level 8 - 6
Changing the Rear Axle Differential/Hub Oil 8 - 6
i
Routine Maintenance
9803/6310
i
Issue 4*
Section 3 Section 3
*
32. ii
Routine Maintenance
9803/6310
ii
Issue 2*
Section 3 Section 3
Contents Page No.
Engine
Changing the Air Filter Outer Element 9 - 1
Changing the Air Filter Inner Element 9 - 2
Checking the Oil Level 9 - 3
Changing the Oil and Filters 9 - 3
Checking the Coolant Level 9 - 4
Coolant Mixtures 9 - 4
Changing the Coolant 9 - 5
Cleaning the Radiator and Oil Cooler 9 - 5
Adjusting the Fan Belt 9 - 6
Fitting a New Fan Belt 9 - 6
Draining Fuel Tank Impurities 9 - 7
Draining the Fuel System Water Separator 9 - 7
Changing the Fuel Filter Element 9 - 8
Cleaning the Fuel Lift Pump Strainer 9 - 8
Bleeding the Fuel System 9 - 9
Component Location Diagrams 10 - 1
Falling Objects Protection Structure (FOPS)
Checking the FOPS structure 12 - 1
*
33. 1 - 1
Section 3 Routine Maintenance
9803/6310
Section 3
1 - 1
Issue 2*
Lubricants and Capacities
Note: New engines DO NOT require a running-in period. The engine should be used in a normal work cycle immediately;
glazing of the piston cylinder bores, resulting in excessive oil consumption, could occur if the engine is gently run-in. Under no
circumstances should the engine be allowed to idle for extended periods (e.g. warming-up without load).
International Capacity
Item Fluid/Lubricant Specification
JS130W JS145W/JS160W
ENGINE See separate chart 12.1 litres 12.1 litres
(2.7 UK gal) (2.7 UK gal)
SLEW GEARBOX JCB Gear Oil HD90 API-GL-5: MIL-L-2105C 5 litres 5 litres
(1.09 UK gal) (1.09 UK gal)
JCB HP Grease Lithium based, No. 2 1 litre 1 litre
consistency (0.22 UK gal) (0.22 UK gal)
HYDRAULIC SYSTEM JCB Special Hydraulic Vickers 35VQ25/V104C: 124 litres 124 litres
Fluid HP46 Sundstrand, Denison and (27.3 UK gal) (27.3 UK gal)
FZG Approval Tests
SLEW RING
- BEARINGS JCB HP Grease Lithium based, No. 2 - -
- GEAR TEETH JCB HP Grease consistency 17 kg (37.48 lb) 17 kg (37.48 lb)
PROPSHAFTS JCB HP Grease Lithium based, No. 2
consistency
ALL OTHER GREASE Lithium based, No. 2
POINTS JCB HP Grease consistency
COOLING SYSTEM See Coolant Mixtures ASTM D3306-74 16.4 litres 17.2 litres
(3.6 UK gal) (3.78 UK gal)
FUEL TANK See Fuel System, ASTM D975-66T 240 litres 240 litres
Types of Fuel in
Operator Handbook Nos 1D, 2D (52.8 UK gal) (52.8 UK gal)
FRONT AXLE
- DIFFERENTIAL JCB Special Gear Oil Plus API GL4: M2C-41B/134D, 18 litres 18 litres
JD20C (3.9 UK gal) (3.9 UK gal)
- HUB (x 2) JCB Special Gear Oil Plus MGF M1135/M1141/M1143 1.5 litres 1.5 litres
(0.33 UK gal) (0.33 UK gal)
REAR AXLE
- DIFFERENTIAL JCB Special Gear Oil Plus API GL4: M2C-41B/134D, 17.7 litres 17.7 litres
AND HUBS (x 2) JD20C (3.9 UK gal) (3.9 UK gal)
MGF M1135/M1141/M1143
DRIVE GEARBOX JCB Super 15W/40 API CF4/SG: MIL-L-2104F 3.8 litres 3.8 litres
Multigrade Engine Oil (0.83 Uk gal) (0.83 UK gal)
34. 1 - 2
Section 3 Routine Maintenance
9803/6310
Section 3
1 - 2
Issue 2*
Lubricants and Capacities
Note: New engines DO NOT require a running-in period. The engine should be used in a normal work cycle immediately;
glazing of the piston cylinder bores, resulting in excessive oil consumption, could occur if the engine is gently run-in. Under
no circumstances should the engine be allowed to idle for extended periods (e.g. warming-up without load).
International Capacity
Item Fluid/Lubricant Specification
JS175W
ENGINE See separate chart 21.5 litres
(4.72 UK gal)
SLEW GEARBOX JCB Gear Oil HD90 API-GL-5: MIL-L-2105C 5 litres
(1.09 UK gal)
HYDRAULIC SYSTEM JCB Special Hydraulic Vickers 35VQ25/V104C: 124 litres
Fluid HP46 Sundstrand, Denison and (27.3 UK gal)
FZG Approval Tests
SLEW RING
- BEARINGS JCB HP Grease Lithium complex (NLGI) inc. -
- GEAR TEETH JCB HP Grease extreme pressure additives 17 kg (37.48 lb)
PROPSHAFTS JCB HP Grease Lithium complex (NLGI) inc.
extreme pressure additives
ALL OTHER GREASE Lithium complex (NLGI) inc.
POINTS JCB HP Grease extreme pressure additives
COOLING SYSTEM See Coolant Mixtures ASTM D3306-74 25.5 litres
(5.6 UK gal)
FUEL TANK See Fuel System, ASTM D975-66T 240 litres
Types of Fuel Nos 1D, 2D (52.8 UK gal)
FRONT AXLE
- DIFFERENTIAL JCB Special Gear API GL4: M2C-41B/134D, 18 litres
Oil Plus JD20C (3.9 Uk gal)
- HUB (x 2) JCB Special Gear MGF M1135/M1141/ 1.5 litres
Oil Plus M1143 (0.33 UK gal)
REAR AXLE
- DIFFERENTIAL JCB Special Gear API GL4: M2C-41B/134D 17.7 litres
AND HUBS (x 2) Oil Plus JD20C, (3.9 UK gal)
MGF M1135/M1141/
M1143
DRIVE GEARBOX JCB Super 15W/40 API CF4/SG: MIL-L-2104F 3.8 litres
Multigrade Engine Oil (0.83 UK gal)
35. 1 - 3
Section 3 Routine Maintenance
9803/6310
Section 3
1 - 3
Issue 2*
Lubricants and Capacities
(continued)
Use according to ambient temperature (°C)
Engine Lubrication Chart - All Machines
JCB SUPER 15W/40 MULTIGRADE ENGINE OIL
API CF4/SG MIL L-2104F
JCB SUPER 10W/30 MULTIGRADE ENGINE OIL
API CF4/SG MIL L-2104F
-30 -20 -10 0 10 20 30 40 50
36. 1 - 4
First Aid - Oil
Swallowing.
If oil is swallowed you should not induce vomiting. Get
medical advice.
Skin
In the case of excessive skin contact you should wash with
soap and water.
Eyes
In the case of eye contact, flush with water for 15 minutes. If
irritation persists, get medical attention.
Fires
Extinguish with carbon dioxide, dry chemical or foam.
Firefighters should use self contained breathing apparatus.
Hygiene
JCB lubricants are not a health risk when used properly for
their intended purposes.
However, excessive or prolonged skin contact can remove
the natural fats from your skin, causing dryness and
irritation.
Low viscosity oils are more likely to do this, therefore
particular care is necessary in handling used oils which can
be diluted with fuel contamination.
Whenever you are handling oil products you should maintain
good standards of care and personal and plant hygiene. For
details of these precautions we advise you to read the
relevant publications issued by your local health authority,
and note the following:
Storage
Always keep lubricants out of the reach of children.
Never store lubricants in open or unlabelled containers.
Handling
New Oil
There are no special precautions needed for the handling or
use of new oil, beside normal care and hygiene practices.
Used Oil
Used engine crankcase lubricants contain harmful
contaminants. In laboratory tests it was shown that used
engine oils can cause skin cancer.
Here are precautions to protect your health when handling
used engine oil:
1 Avoid prolonged, excessive or repeated skin contact
with used engine oils.
2 Apply a barrier cream to the skin before handling used
engine oil.
3 Note the following when removing engine oil from skin:
a Wash your skin thoroughly with soap and water.
b Using a nail brush will help.
c Use special hand cleansers to help clean dirty
hands.
d Never use petrol, diesel fuel or gas oil.
e Avoid skin contact with oil soaked clothing.
f Don't keep oily rags in pockets.
g Wash dirty clothing before re-use.
h Throw away oil-soaked shoes.
Waste Disposal
All waste products should be disposed of in accordance
with all the relevant regulations.
The collection and disposal of used engine oil should be in
accordance with any local regulations. Never pour used
engine oil into sewers or drains.
Spillage
Absorb on sand or a locally approved brand of absorbent
granules. Scrape up and remove to a chemical disposal
area.
Section 3 Routine Maintenance
9803/6310
Section 3
1 - 4
Issue 1*
Lubricants - Health and Safety
It is most important that you read and understand this information and the publications referred to. Make sure that all
of your colleagues who are concerned with lubricants read it too.
37. 2 - 1
Every 10 Operating Hours or Daily
Whichever occurs first
1 Clean
a Machine generally.
(When steam cleaning do not direct jet at grease
nipples.)
2 Grease
(If operating in very wet or severe conditions).
a Bucket/dipper pivot points.
3 Check (Engine Stopped)
a Generally for damage.
b For oil and coolant leakage.
c Security of bolts and nuts †.
d For disconnected or shorted wiring, loose terminals.
e Hydraulic fluid level.
f Engine oil level.
g Engine coolant level.
h Windscreen washer fluid level.
j Fuel system for leaks.
k Fuel level.
l Tyre pressures and condition.
m Seat belt condition and security.
n Tightness of wheel nuts (with wheel brace).
p The auxiliary circuit hydraulic oil filter visual indicator
(if using a rockbreaker or crusher).
† Tapping with a hammer will identify any loose nuts and
bolts which should then be tightened to the specified
torque.
4 Check (Engine Running)
a Operation of warning lights and audible alarm.
b Operation of brake lights and reversing lights.
c Operation of other electrical equipment.
d Exhaust for excessive smoke.
e Excavator operation.
f Dozer, stabiliser and attachment operation.
g Transmission operation.
h Footbrake operation.
j Steering operation.
k Parking brake operation.
l Operation of slew brake.
m Operation of hour meter.
Every 50 Operating Hours or Weekly
Whichever occurs first
1 Do the daily jobs plus:
2 Clean
a Drain water and sediment from fuel tank.
b Drain fuel water separator.
3 Grease
a All pivot pins.
Section 3 Routine Maintenance
9803/6310
Section 3
2 - 1
Issue 2*
Service Schedules
*
38. 2 - 2
Every 100 Operating Hours or 2-Weekly
Whichever occurs first
1 Do a 50 hour service plus:
2 Clean
a Battery terminals.
b Fuel lift pump strainer.
3 Grease
a Slew ring bearing.
b Axle pivot and steering joints ††.
c Propshafts.
4 Change
a Engine oil main filter element ††.
b Engine oil ††.
c Servo oil filter element ††.
d Engine oil filter by-pass element ††.
e Return filter element ††.
f Drain filter element ††.
g Slew gearbox oil ††.
h Front axle hub oil ††.
j Rear axle hub/differential oil ††.
k Drive gearbox oil ††.
l Fuel filter element ††.
5 Check (Engine Stopped)
a Hose and pipework for chafing or damage.
b Condition of ram piston rods.
c Bucket pivot pin grease seals ††.
d All grease seals.
e Tightness of engine mounting bolts.
f Security of major unit mounting bolts and nuts ††.
If loose, tighten to specified torque.
g Wiring for chafing.
h Fan belt tension.
j Accumulator operation.
k Radiator for damage.
l Oil cooler for damage.
m Exhaust system security.
n Teeth and sidecutters.
6 Check (Engine Running)
a Operation of throttle system.
b Operation of overload warning.
c Operation of stop control.
†† These procedures are only to be carried out after the
first 100 hours use of a new machine. Thereafter they
are to be carried out as detailed in the following periodic
checks.
Every 250 Operating Hours or Monthly
Whichever occurs first
1 Do a 100 hour service plus:
2 Clean
a Drain water and deposits from hydraulic oil tank.
b Air cleaner dust valve.
c Pre-cleaner
3 Grease
a Door and canopy hinges.
b Slew ring bearing.
4 Check (Engine Stopped)
a Battery electrolyte level.
b Security of major unit mounting bolts and nuts.
If loose, tighten to specified torque.
c Slew gearbox oil level.
d Fan belt adjustment.
e Front axle hub oil and differential oil levels.
f Rear axle hub/differential oil level.
g Drive gearbox oil level.
h Air inlet system security.
Section 3 Routine Maintenance
9803/6310
Section 3
2 - 2
Issue 2*
Service Schedules
*
*
39. Suggest:
If the above button click is invalid.
Please download this document
first, and then click the above link
to download the complete manual.
Thank you so much for reading
40. 2 - 3
Every 500 Operating Hours or 3-Monthly
Whichever occurs first
1 Do a 250 hour service plus:
2 Clean
a Radiator, grille and oil cooler fins.
3 Grease
a Slew ring teeth and slew pinion.
b Axle pivot and steering joints.
(JCB HP Grease should be used on all axle grease
points. If an alternative grease is used the service
interval must be reduced to 50 hours or weekly.)
4 Change
a Engine oil.
b Engine oil full flow filter elements.
c Fuel filter element.
d Engine oil filter by-pass element.
e Front axle hub oil.
f Rear axle hub/differential oil.
5 Check (Engine Stopped)
a Exhaust system security.
b Propshaft +.
c Servo accumulator operation +.
d Brake accumulator operation +.
e Hydraulic oil (check the degradation and cleanliness
by sampling).
f Seat belt condition and security.
g Teeth and sidecutters.
6 Check (Engine Running)
a Operation of throttle system.
b Operation of overload warning.
c Operation of stop control.
Every 1000 Operating Hours or 6-Monthly
Whichever occurs first
1 Do a 500 hour service plus:
2 Clean
a Fuel lift pump strainer.
b Hydraulic fluid suction strainer.
3 Grease
a Replenish slew gearbox grease.
4 Change (Engine Stopped)
a Engine air filter element (outer).
b Hydraulic tank air breather element.
c Slew gearbox oil.
d Return filter element †††.
e Nephron filter †††.
f Servo oil filter element †††.
g Drain filter †††.
h Front axle differential oil.
j Steering line filter element †††.
5 Check (Engine Stopped)
a Hub brake friction plates for wear.
Renew as necessry +.
Every 2000 Operating Hours or Yearly
Whichever occurs first
1 Do a 1000 hour service plus:
2 Clean
a Injectors (and test) +.
3 Check (Engine Stopped)
a. Valve clearance and lubrication.
b Sample hydraulic oil and replace if necessary.
4 Change
a Hydraulic fluid suction strainer.
b Engine air filter element (inner).
c Drive gearbox oil.
††† If using a breaker or crusher, see Revised Service
Schedules - Rockbreaker or Crusher Usage in
this section.
+ Indicates jobs which should be done by a specialist.
Section 3 Routine Maintenance
9803/6310
Section 3
2 - 3
Issue 2*
Service Schedules
*
*
*
*
*
*
*
*