Download to read offline


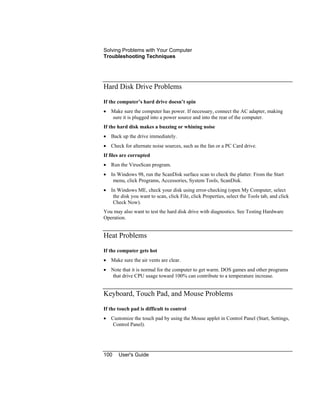


![Specifications and Regulatory Information
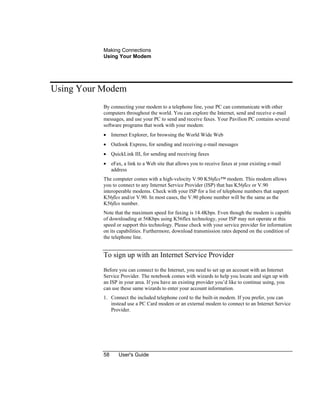
Regulatory Information
User's Guide 127
Options: All
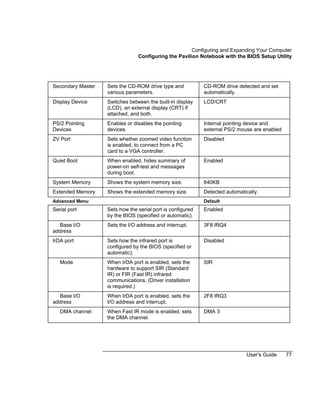
conforms to the following product specifications
Safety: IEC 950:1991+A1,A2 ,A3, A4 / EN 60950
(1992)+A1,A2, A3, A4 GB4943-1995
IEC 825-1:1993/EN60825-1:1994
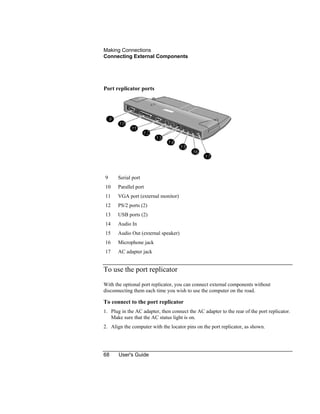
EMC: CISPR 22:1993 / EN 55022 (1994): Class B [1]
GB9254-1988
EN 50082-1:1992
IEC 801-2:1991 / prEN 55024-2 (1992): 4kV CD,
8kV AD
IEC 801-3:1984 / prEN 55024-3 (1991): 3V/m
IEC 801-4:1988 / prEN 55024-4 (1992): 0.5 kV
signal lines, 1.0kV power lines
FCC Title 47 CFR, Part 15 Class B
ANSI C63.4: 1992
AS/NZS 3548: 1995 Rules and Regulations of
Class B
Supplementary
Information:
The product herewith complies with the requirements
of the Low Voltage Directive 73/23/EEC, EMC
Directive 89/336/EEC and IEC 825-1 and carries the
CE marking accordingly.
This device complies with Part 15 of the FCC Rules.
Operation is subject to the following two conditions:
(1) this device may not cause harmful interference,
and (2) this device must accept any interference
received, including interference that may cause
undesired operation.
The HP F1740A and F1454A AC/DC adapter used
with this product is designed to operate on all power
systems, other than IT power systems.
[1] The product was tested in a typical configuration
with Hewlett-Packard personal computer peripherals.
Quality Department
Hewlett-Packard Company
Mobile Computing Division](https://image.slidesharecdn.com/bpi04347-181128074614/85/HP-pavilion-Notebook-pc-user-s-guide-127-320.jpg)


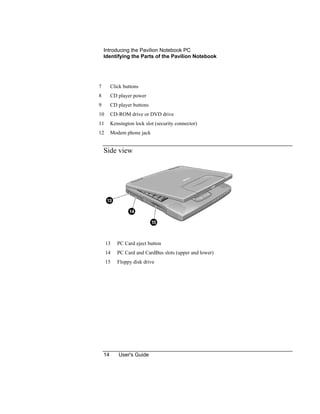
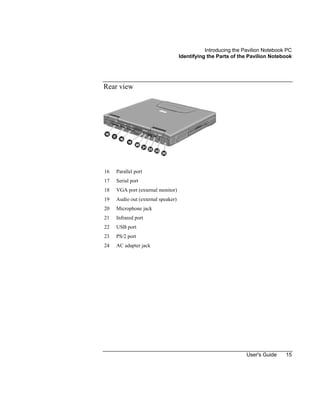
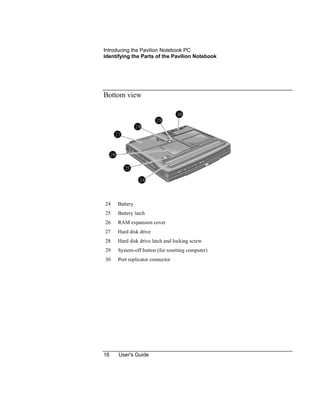
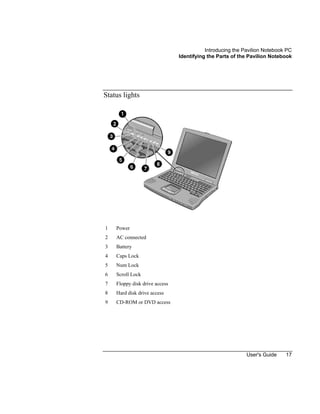
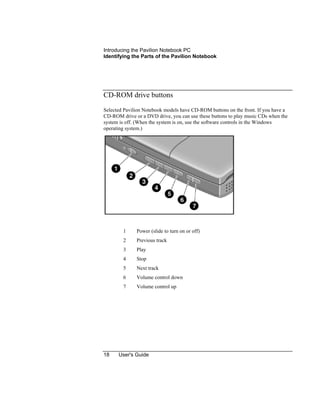
The document provides an overview of the parts and accessories included with the HP Pavilion Notebook PC. It describes the front, side, rear, and bottom views of the computer and explains the functions of the status lights and ports. Included with the computer are the main battery, AC adapter, phone cord, recovery CDs, and various software titles. The guide directs the user to sources of additional support information.


