More Related Content
Similar to Hp 2300 q2610 a
Similar to Hp 2300 q2610 a (13)
Hp 2300 q2610 a
- 1. AbsoluteCOLOR® • AbsoluteBLACK® • UniDrums • UniRollers • UniParts • UniCoatings
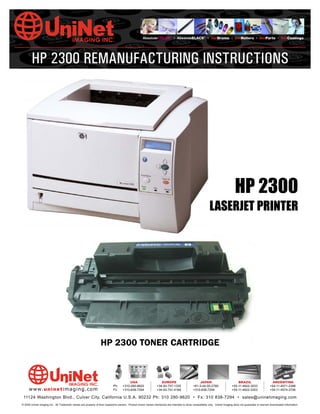
HP 2300 REMANUFACTURING INSTRUCTIONS
AbsoluteCOLOR • AbsoluteBLACK • UniDrums • UniRollers • UniParts • UniCoatings
HP 2300
LASERJET PRINTER
HP 2300 TONER CARTRIDGE
USA EUROPE JAPAN BRAZIL ARGENTINA
Ph: +310-280-9620 +34-93-757-1335 +81-3-44-55-2789 +55-11-4822-3033 +54-11-4571-2388
www.u n i n e t imaging.com Fx: +310-838-7294 +34-93-741-4166 +310-838-7294 +55-11-4822-3353 +54-11-4574-3706
11124 Washington Blvd., Culver City, California U.S.A. 90232 Ph: 310 280-9620 • Fx: 310 838-7294 • sales@uninetimaging.com
© 2005 Uninet Imaging Inc. All Trademark names are property of their respective owners. Product brand names mentioned are intended to show compatibility only. Uninet Imaging does not guarantee or warrant downloaded information.
- 2. UNINET IMAGING INC. • HP 2300 REMANUFACTURING INSTRUCTIONS
HP 2300 PRINTER SPECIFICATIONS
Released in March 2003, the HP 2300 series of information that is normally displayed, estimated
printers are the first new HP laser printers to hit the pages remaining, toner low reached, toner out
market this year.Designed around an improved ver- reached, etc., are replaced by a warning. “A non
sion of the HP 2200 engine, the performance of the Hewlett-Packard supply had been detected. Certain
HP2300 rivals that of the HP 4100 more than it features (such as remaining toner value data) may
does the HP 2200. The HP2300 features 1200 x not be available as a result of using this non
1200 dpi resolution, has a print speed of 25 pages Hewlett-Packard supply.”
per minute (except the HP 2300L, which can only
print 20ppm) and can deliver the first page in just The use of a cartridge with a used or “spent” chip
10 seconds. has disadvantages as well. The first, being that the
At an estimated starting price of $600 for the base display will continually flash “Replace Cartridge.”
model HP2300L, which is lower than the price of the The biggest problem being the information on the
HP 2200 and $700 for the HP 2300, which is about supply status page will be incorrect. The toner gauge
$300 less then the HP 4100. will read 0% or 1%, the estimated pages remaining
will always read 0, and the toner low and toner out
Like the machine the toner cartridge looks very sim- message will always read reached. The only informa-
ilar to the HP 2200, the most notable changes being tion that may be useful will be the pages printed
the design of the toner hopper and the green chip with this supply, however it will continue adding to
that is on the top left side of the waste hopper. The the previous total, having not been reset.
same style chips as found on the HP 4200 and HP
4300, are used to store information such as the car- The cartridge itself (Q2610A) holds approximately
tridge serial number, the cartridge manufacturing 360 grams of toner and yields an estimated 6,000
date, the number of pages printed using that car- pages @ 5% coverage that is 1,000 pages more
tridge, as well as “toner low” and “toner out” status. than the HP2200. The estimated street price of this
All this information can be viewed by running a cartridge is around $128. Some of the components
Printer Supplies Status Page. The HP 2300 will run on this cartridge, for example Doctor, Wiper and
with a used or “spent” chip, or with no chip at all, recovery Blades, mag roller bushings, shim washer
however steps must be taken and messages must for doctor blade, pins,etc are the same as for the HP
be overlooked to run the cartridge. 2200.
Without a chip the machine will display a “10.10.00
Supplies Memory Error”. To use the cartridge with-
out the chip the green button with the check on it
must be pressed. The machine will then display
“Non HP Cartridge Detected” before going to ready.
There are two other disadvantages to using the car-
tridge without the chip. The first is that the machine
will never display toner low (the cartridge will contin-
ue to run until it is stopped by the user). The second
problem is with the Supplies Status Page. All the
USA EUROPE JAPAN BRAZIL ARGENTINA
Ph: +1-310-280-9620 +34-93-757-1335 +81-3-44-55-2789 +55-11-4822-3033 +54-11-4571-2388
www.u n i n e t imaging.com Fx: +1-310-838-7294 +34-93-741-4166 +1-310-838-7294 +55-11-4822-3353 +54-11-4574-3706
11124 Washington Blvd., Culver City, California U.S.A. 90232 Ph: 310 280-9620 • Fx: 310 838-7294 • sales@uninetimaging.com
© 2005 Uninet Imaging Inc. All Trademark names are property of their respective owners. Product brand names mentioned are intended to show compatibility only. Uninet Imaging does not guarantee or warrant downloaded information.
- 3. UNINET IMAGING INC. • HP 2300 • DISASSEMBLING THE WASTE RESERVOIR SECTION
1. Like the HP2100 the cartridge pins need to be removed from the inside out.
Place the cartridge top down so the drum is facing up. Using a small flat blade screwdriver,
release the locking clip that holds the drum shutter arm to the toner hopper.
2. Remove the drum shutter arm from the 3. Attach the shutter arm tension spring to
drum shutter. the shutter arm as shown.
USA EUROPE JAPAN BRAZIL ARGENTINA
Ph: +1-310-280-9620 +34-93-757-1335 +81-3-44-55-2789 +55-11-4822-3033 +54-11-4571-2388
www.u n i n e t imaging.com Fx: +1-310-838-7294 +34-93-741-4166 +1-310-838-7294 +55-11-4822-3353 +54-11-4574-3706
11124 Washington Blvd., Culver City, California U.S.A. 90232 Ph: 310 280-9620 • Fx: 310 838-7294 • sales@uninetimaging.com
© 2005 Uninet Imaging Inc. All Trademark names are property of their respective owners. Product brand names mentioned are intended to show compatibility only. Uninet Imaging does not guarantee or warrant downloaded information.
- 4. UNINET IMAGING INC. • HP 2300 • DISASSEMBLING THE WASTE RESERVOIR SECTION
4. Slide open the drum shutter exposing the 5. With your left hand press the waste hopper
drum. Using needle nose pliers remove the and toner hopper together, while lifting the
drum axle pin from the small gear side of the small gear end of the drum out from the car-
drum. tridge.
6. Using needle nose pliers grasp the PCR by the metal shaft and remove.
NOTE: Clean the PCR using Uninet PCR Cream # 563 or mild soap and water.
Allow the PCR to dry perfectly before using.
USA EUROPE JAPAN BRAZIL ARGENTINA
Ph: +1-310-280-9620 +34-93-757-1335 +81-3-44-55-2789 +55-11-4822-3033 +54-11-4571-2388
www.u n i n e t imaging.com Fx: +1-310-838-7294 +34-93-741-4166 +1-310-838-7294 +55-11-4822-3353 +54-11-4574-3706
11124 Washington Blvd., Culver City, California U.S.A. 90232 Ph: 310 280-9620 • Fx: 310 838-7294 • sales@uninetimaging.com
© 2005 Uninet Imaging Inc. All Trademark names are property of their respective owners. Product brand names mentioned are intended to show compatibility only. Uninet Imaging does not guarantee or warrant downloaded information.
- 5. UNINET IMAGING INC. • HP 2300 • DISASSEMBLING THE WASTE RESERVOIR SECTION
E
S ID
O UT
H E
PUS
HT
OW D ST
ARD AR
S TH
EO TOW
UTS SH
IDE PU
7. Locate the cartridge pins on each side of the cartridge next to the metal stamping of the wiper
blade. Using a screwdriver press the in towards the outside of the cartridge.
8. Using diagonal cutters remove the cartridge pins from the both sides of the cartridge.
USA EUROPE JAPAN BRAZIL ARGENTINA
Ph: +1-310-280-9620 +34-93-757-1335 +81-3-44-55-2789 +55-11-4822-3033 +54-11-4571-2388
www.u n i n e t imaging.com Fx: +1-310-838-7294 +34-93-741-4166 +1-310-838-7294 +55-11-4822-3353 +54-11-4574-3706
11124 Washington Blvd., Culver City, California U.S.A. 90232 Ph: 310 280-9620 • Fx: 310 838-7294 • sales@uninetimaging.com
© 2005 Uninet Imaging Inc. All Trademark names are property of their respective owners. Product brand names mentioned are intended to show compatibility only. Uninet Imaging does not guarantee or warrant downloaded information.
- 6. UNINET IMAGING INC. • HP 2300 • DISASSEMBLING THE WASTE RESERVOIR SECTION
9. Separate the two sections of the cartridge. 10. Using a Phillips screwdriver remove the
two screws holding the wiper blade to the
waste hopper. Remove the wiper blade. Dump
the waste toner from the hopper. Clean the
waste hopper with a vacuum or compressed
air.
NOTES
USA EUROPE JAPAN BRAZIL ARGENTINA
Ph: +1-310-280-9620 +34-93-757-1335 +81-3-44-55-2789 +55-11-4822-3033 +54-11-4571-2388
www.u n i n e t imaging.com Fx: +1-310-838-7294 +34-93-741-4166 +1-310-838-7294 +55-11-4822-3353 +54-11-4574-3706
11124 Washington Blvd., Culver City, California U.S.A. 90232 Ph: 310 280-9620 • Fx: 310 838-7294 • sales@uninetimaging.com
© 2005 Uninet Imaging Inc. All Trademark names are property of their respective owners. Product brand names mentioned are intended to show compatibility only. Uninet Imaging does not guarantee or warrant downloaded information.
- 7. UNINET IMAGING INC. • HP 2300 • ASSEMBLING THE WASTE RESERVOIR SECTION
11. Apply padding powder to the wiper blade. 12. Clean the PCR saddles using a swab and
Place the wiper blade onto the waste hopper. alcohol, and apply new conductive grease to
Install the two screws that hold the wiper the black conductive saddle.
blade in place.
Install the cleaned PCR.
13. Apply padding powder to the drum. Install 14. Slide the drum axle pin into the small gear
the drive gear side of the drum into the bear- side of the drum.
ing hub.
Set the waste hopper section of the cartridge
aside and cover.
USA EUROPE JAPAN BRAZIL ARGENTINA
Ph: +1-310-280-9620 +34-93-757-1335 +81-3-44-55-2789 +55-11-4822-3033 +54-11-4571-2388
www.u n i n e t imaging.com Fx: +1-310-838-7294 +34-93-741-4166 +1-310-838-7294 +55-11-4822-3353 +54-11-4574-3706
11124 Washington Blvd., Culver City, California U.S.A. 90232 Ph: 310 280-9620 • Fx: 310 838-7294 • sales@uninetimaging.com
© 2005 Uninet Imaging Inc. All Trademark names are property of their respective owners. Product brand names mentioned are intended to show compatibility only. Uninet Imaging does not guarantee or warrant downloaded information.
- 8. UNINET IMAGING INC. • HP 2300 • DISASSEMBLING THE TONER HOPPER SECTION
15. Remove the drum shutter bar from each 16. Using a Phillips screwdriver remove the
side of the toner hopper and remove the shut- two screws that hold the toner hopper gear
ter. housing end cap to the hopper.
17. Pull the gear housing end cap from the 18. Carefully rotate the cartridge 180°,
end of toner hopper. remove the two Phillips screws from the con-
tact mag roller contact end cap.
USA EUROPE JAPAN BRAZIL ARGENTINA
Ph: +1-310-280-9620 +34-93-757-1335 +81-3-44-55-2789 +55-11-4822-3033 +54-11-4571-2388
www.u n i n e t imaging.com Fx: +1-310-838-7294 +34-93-741-4166 +1-310-838-7294 +55-11-4822-3353 +54-11-4574-3706
11124 Washington Blvd., Culver City, California U.S.A. 90232 Ph: 310 280-9620 • Fx: 310 838-7294 • sales@uninetimaging.com
© 2005 Uninet Imaging Inc. All Trademark names are property of their respective owners. Product brand names mentioned are intended to show compatibility only. Uninet Imaging does not guarantee or warrant downloaded information.
- 9. UNINET IMAGING INC. • HP 2300 • DISASSEMBLING THE TONER HOPPER SECTION
19. Using a small flat blade screwdriver press 20. Remove the end cap. NOTE: Do not lose
down on the locking clip that holds the con- the white bearing that sits inside the contact
tact end cap to the toner hopper. end cap.
21. Lift the mag roller out from the toner hopper.
Remove the black drive gear, the stabilizing bar 22. Remove the two screws holding the doctor
and the mag roller bushings from the ends of the blade to the toner hopper.
mag roller. Using dry compressed air or a vacuum, NOTE: The two screws used to hold the doctor
clean the toner off the mag roller. Clean the roller blade are longer than the normal cartridge
using a lint-free cloth and a mag roller cleaner. The screws. Make sure the correct screws are
mag roller bushings should be cleaned using a lint- used when reassembling the toner hopper.
free cloth and alcohol. NOTE: Do not lose the C-
bearing that sits inside the stabilizing bar.
USA EUROPE JAPAN BRAZIL ARGENTINA
Ph: +1-310-280-9620 +34-93-757-1335 +81-3-44-55-2789 +55-11-4822-3033 +54-11-4571-2388
www.u n i n e t imaging.com Fx: +1-310-838-7294 +34-93-741-4166 +1-310-838-7294 +55-11-4822-3353 +54-11-4574-3706
11124 Washington Blvd., Culver City, California U.S.A. 90232 Ph: 310 280-9620 • Fx: 310 838-7294 • sales@uninetimaging.com
© 2005 Uninet Imaging Inc. All Trademark names are property of their respective owners. Product brand names mentioned are intended to show compatibility only. Uninet Imaging does not guarantee or warrant downloaded information.
- 10. UNINET IMAGING INC. • HP 2300 • DISASSEMBLING THE TONER HOPPER SECTION
23. Remove both mag roller scrapers from 24. Lift out the doctor blade. Clean the doctor
each end of the mag roller. blade first using compressed air or a vacuum,
then using a lint free cloth and alcohol.
NOTES
25. Remove the mylar spacers that sit behind the
doctor blade on each end of the toner hopper.
Clean the toner hopper using a vacuum or dry
compressed air.
Fill the toner hopper using the correct gram fill.
USA EUROPE JAPAN BRAZIL ARGENTINA
Ph: +1-310-280-9620 +34-93-757-1335 +81-3-44-55-2789 +55-11-4822-3033 +54-11-4571-2388
www.u n i n e t imaging.com Fx: +1-310-838-7294 +34-93-741-4166 +1-310-838-7294 +55-11-4822-3353 +54-11-4574-3706
11124 Washington Blvd., Culver City, California U.S.A. 90232 Ph: 310 280-9620 • Fx: 310 838-7294 • sales@uninetimaging.com
© 2005 Uninet Imaging Inc. All Trademark names are property of their respective owners. Product brand names mentioned are intended to show compatibility only. Uninet Imaging does not guarantee or warrant downloaded information.
- 11. UNINET IMAGING INC. • HP 2300 • ASSEMBLING THE TONER HOPPER SECTION
26. Install the two mylar shims that sit under 27. Place the doctor blade onto the toner hop-
the doctor blade. per.
29. Slide the black mag roller bushing onto the
28. Set the mag roller scrapers onto each end contact side of the mag roller, and the green
of the doctor blade and install the two large bushing onto the drive gear side of the roller.
screws that hold the doctor blade in place. Install the stabilizing bar onto the mag roller
with the C-bear facing towards the mag roller
bushing. The mag roller drive gear will fit onto
the mag roller either way, however the flat side
of the drive gear needs to face the mag roller-
stabilizing bar and the side of the gear that has
the dimples faces outward.
USA EUROPE JAPAN BRAZIL ARGENTINA
Ph: +1-310-280-9620 +34-93-757-1335 +81-3-44-55-2789 +55-11-4822-3033 +54-11-4571-2388
www.u n i n e t imaging.com Fx: +1-310-838-7294 +34-93-741-4166 +1-310-838-7294 +55-11-4822-3353 +54-11-4574-3706
11124 Washington Blvd., Culver City, California U.S.A. 90232 Ph: 310 280-9620 • Fx: 310 838-7294 • sales@uninetimaging.com
© 2005 Uninet Imaging Inc. All Trademark names are property of their respective owners. Product brand names mentioned are intended to show compatibility only. Uninet Imaging does not guarantee or warrant downloaded information.
- 12. UNINET IMAGING INC. • HP 2300 • ASSEMBLING THE TONER HOPPER SECTION
30. Place the mag roller into the toner hopper. 31. Press the mag roller contact end cap onto
the toner hopper. Install the two screws that
hold the end cap.
32. Slide the gear housing end cap onto the 33. Install the drum shutter bar into the slots
toner hopper. Install the two screws that hold on each end of the toner hopper.
the end cap to the hopper.
USA EUROPE JAPAN BRAZIL ARGENTINA
Ph: +1-310-280-9620 +34-93-757-1335 +81-3-44-55-2789 +55-11-4822-3033 +54-11-4571-2388
www.u n i n e t imaging.com Fx: +1-310-838-7294 +34-93-741-4166 +1-310-838-7294 +55-11-4822-3353 +54-11-4574-3706
11124 Washington Blvd., Culver City, California U.S.A. 90232 Ph: 310 280-9620 • Fx: 310 838-7294 • sales@uninetimaging.com
© 2005 Uninet Imaging Inc. All Trademark names are property of their respective owners. Product brand names mentioned are intended to show compatibility only. Uninet Imaging does not guarantee or warrant downloaded information.
- 13. UNINET IMAGING INC. • HP 2300 • ASSEMBLING THE TONER HOPPER SECTION
34. Slide the drum shutter arm onto the alignment post
and install the shutter arm to the drum shutter.
35. Open the shutter to engage the tension 36. Holding the drum shutter open join the
spring. toner hopper and waste hopper together.
USA EUROPE JAPAN BRAZIL ARGENTINA
Ph: +1-310-280-9620 +34-93-757-1335 +81-3-44-55-2789 +55-11-4822-3033 +54-11-4571-2388
www.u n i n e t imaging.com Fx: +1-310-838-7294 +34-93-741-4166 +1-310-838-7294 +55-11-4822-3353 +54-11-4574-3706
11124 Washington Blvd., Culver City, California U.S.A. 90232 Ph: 310 280-9620 • Fx: 310 838-7294 • sales@uninetimaging.com
© 2005 Uninet Imaging Inc. All Trademark names are property of their respective owners. Product brand names mentioned are intended to show compatibility only. Uninet Imaging does not guarantee or warrant downloaded information.
- 14. UNINET IMAGING INC. • HP 2300 • ASSEMBLING THE TONER HOPPER SECTION
37. Install the long cartridge pin on the drive gear side, and the short cartridge pin on the small
gear side of the cartridge. Test the cartridge.
NOTES
USA EUROPE JAPAN BRAZIL ARGENTINA
Ph: +1-310-280-9620 +34-93-757-1335 +81-3-44-55-2789 +55-11-4822-3033 +54-11-4571-2388
www.u n i n e t imaging.com Fx: +1-310-838-7294 +34-93-741-4166 +1-310-838-7294 +55-11-4822-3353 +54-11-4574-3706
11124 Washington Blvd., Culver City, California U.S.A. 90232 Ph: 310 280-9620 • Fx: 310 838-7294 • sales@uninetimaging.com
© 2005 Uninet Imaging Inc. All Trademark names are property of their respective owners. Product brand names mentioned are intended to show compatibility only. Uninet Imaging does not guarantee or warrant downloaded information.