1. How to Make Glossy Postcards
If you want to make glossy postcards, then all you have to do is add a little creativity to it
for you to achieve the end result you had in mind when you started. Although the
difference between the conventional computer generated postcard and the glossy postcard
is not so much. You should know that most companies that produce stock paper make
them with a matte or a non-glossy surface which if you intend to use, won’t produce the
result you want.
Instructios:
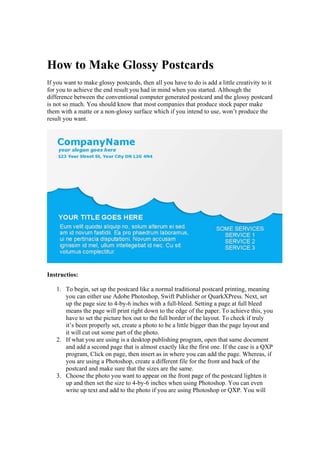
1. To begin, set up the postcard like a normal traditional postcard printing, meaning
you can either use Adobe Photoshop, Swift Publisher or QuarkXPress. Next, set
up the page size to 4-by-6 inches with a full-bleed. Setting a page at full bleed
means the page will print right down to the edge of the paper. To achieve this, you
have to set the picture box out to the full border of the layout. To check if truly
it’s been properly set, create a photo to be a little bigger than the page layout and
it will cut out some part of the photo.
2. If what you are using is a desktop publishing program, open that same document
and add a second page that is almost exactly like the first one. If the case is a QXP
program, Click on page, then insert as in where you can add the page. Whereas, if
you are using a Photoshop, create a different file for the front and back of the
postcard and make sure that the sizes are the same.
3. Choose the photo you want to appear on the front page of the postcard lighten it
up and then set the size to 4-by-6 inches when using Photoshop. You can even
write up text and add to the photo if you are using Photoshop or QXP. You will
2. need to create a normal postcard to design the back of the postcard where you can
manually write anything words appropriate and also a space for a stamp and
address.
4. At this point, you have to get a very thick glossy photo paper you can get that can
accept prints on both sides. The best so far that is available is called brochure
paper you can obtain them online or in any stationery shop. If you can find very
thick glossy photo paper that allows printing on both sides in a 4-by-6-inch size
good otherwise, you might have to cut the postcards with your hands. Now since
both sides of the postcard are glossy, to write on it you will need a Sharpie marker
or better still you can write it in the computer before you print the postcard.
5. You have to use a standard postcard stock paper and when done, laminate it. If
you intend to make a lot of postcard and will be laminating them, it will be better
if you got a laminating machine or if you won’t be producing a large quantity of
postcards, you can simply go to a store that does this task and laminate. One thing
you should be careful of is that you shouldn’t laminate the back of the postcard
where you have the write up; and also, the U.S post office will have to stamp on
the back of the card at the appropriate place.
Business Card Printing http://www.samedayprinting.com/business‐card‐printing.html
Flyer Printing http://www.samedayprinting.com/flyers.html
Postcard Printing http://www.samedayprinting.com/postcards.html
Poster Printing http://www.samedayprinting.com/posters.html
Banner Printing http://www.samedayprinting.com/banners.html
Brochure Printing http://www.samedayprinting.com/brochure‐printing.html
Sticker Printing http://www.samedayprinting.com/sticker‐printing.html
EDDM Printing
http://www.samedayprinting.com/direct‐mail‐printing‐
eddm.html