Forms and Reports Notes Readers Venue_compressed.pdf
1.
Forms And Reports
Bothare considered as objects of the database and are present in the
Database Pane of the LibreOffice Base User Interface.
Forms :
Labels :
Field value
text box :
A form is an object of the database that has a user friendly
interface where data can be entered and seen in an
attractive and easy-to-read format.
A label is a piece of text that specifies the data that should be
entered in the field value text box.
It stores the data and it is linked to the respective field in
the table.
2.
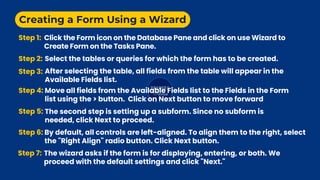
Creating a FormUsing a Wizard
Step 1: Click the Form icon on the Database Pane and click on use Wizard to
Create Form on the Tasks Pane.
Step 2: Select the tables or queries for which the form has to be created.
Step 3: After selecting the table, all fields from the table will appear in the
Available Fields list.
Step 4: Move all fields from the Available Fields list to the Fields in the Form
list using the > button. Click on Next button to move forward
Step 5: The second step is setting up a subform. Since no subform is
needed, click Next to proceed.
Step 6: By default, all controls are left-aligned. To align them to the right, select
the "Right Align" radio button. Click Next button.
Step 7: The wizard asks if the form is for displaying, entering, or both. We
proceed with the default settings and click "Next."
3.
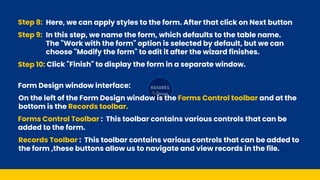
Step 8: Here,we can apply styles to the form. After that click on Next button
Step 9: In this step, we name the form, which defaults to the table name.
The "Work with the form" option is selected by default, but we can
choose "Modify the form" to edit it after the wizard finishes.
Step 10: Click "Finish" to display the form in a separate window.
On the left of the Form Design window is the Forms Control toolbar and at the
bottom is the Records toolbar.
Forms Control Toolbar : This toolbar contains various controls that can be
added to the form.
Records Toolbar : This toolbar contains various controls that can be added to
the form ,these buttons allow us to navigate and view records in the file.
Form Design window interface:
4.
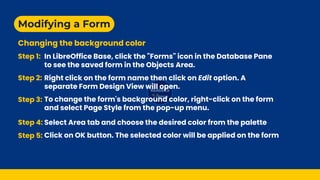
Modifying a Form
Changingthe background color
Step 1:
Step 2:
Step 3:
Step 4:
Step 5:
In LibreOffice Base, click the "Forms" icon in the Database Pane
to see the saved form in the Objects Area.
Right click on the form name then click on Edit option. A
separate Form Design View will open.
To change the form's background color, right-click on the form
and select Page Style from the pop-up menu.
Select Area tab and choose the desired color from the palette
Click on OK button. The selected color will be applied on the form
5.
Modifying a Form
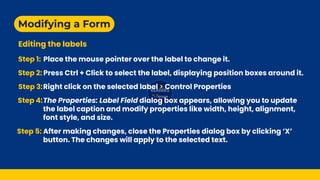
Editingthe labels
Step 1: Place the mouse pointer over the label to change it.
Step 2: Press Ctrl + Click to select the label, displaying position boxes around it.
Step 3:Right click on the selected label > Control Properties
Step 4:The Properties: Label Field dialog box appears, allowing you to update
the label caption and modify properties like width, height, alignment,
font style, and size.
Step 5: After making changes, close the Properties dialog box by clicking ‘X’
button. The changes will apply to the selected text.
6.
Modifying a Form
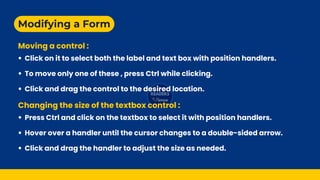
Movinga control :
Changing the size of the textbox control :
Click on it to select both the label and text box with position handlers.
To move only one of these , press Ctrl while clicking.
Click and drag the control to the desired location.
Press Ctrl and click on the textbox to select it with position handlers.
Hover over a handler until the cursor changes to a double-sided arrow.
Click and drag the handler to adjust the size as needed.
7.
Modifying a Form
Addinga Tool tip :
A tool-tip is a small text that appears when the mouse pointer hovers over a
control.
Press Ctrl button and click on text box.
Step 1:
Right click > Control Properties.
The Properties: Text Box dialog box will appear.
Step 2:
Scroll down till Help Text property appears.
Step 3:
Type desired tool tip text in the text box.
Step 4:
Close the dialog box by clicking on cross (X) button.
Step 5:
8.
Forms Controls Toolbar
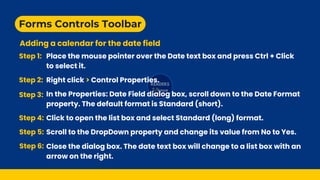
Addinga calendar for the date field
Step 1: Place the mouse pointer over the Date text box and press Ctrl + Click
to select it.
Step 2: Right click > Control Properties.
Step 3: In the Properties: Date Field dialog box, scroll down to the Date Format
property. The default format is Standard (short).
Step 4: Click to open the list box and select Standard (long) format.
Step 5: Scroll to the DropDown property and change its value from No to Yes.
Step 6: Close the dialog box. The date text box will change to a list box with an
arrow on the right.
9.
Forms Controls Toolbar
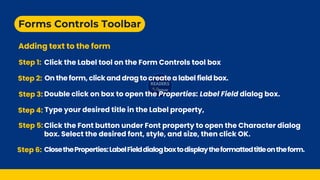
Addingtext to the form
Step 1: Click the Label tool on the Form Controls tool box
Step 3: Double click on box to open the Properties: Label Field dialog box.
Step 4: Type your desired title in the Label property,
Step 5: Click the Font button under Font property to open the Character dialog
box. Select the desired font, style, and size, then click OK.
Step 6: ClosetheProperties:LabelFielddialogboxtodisplaytheformattedtitleontheform.
Step 2: On the form, click and drag to create a label field box.
10.
Forms Controls Toolbar
Addinga new record using a form
The Form View window opens, showing the first record.
Click Design Mode on the Forms Controls toolbar to switch to Form View.
To add a new record, click New Record icon on the Records toolbar.
A blank form appears with the cursor in the first text box .
Enter data and click Save Record icon on the Records toolbar to store it.
Toggle between Design View and Form View using the Design Mode button.
To delete a record, navigate to it using the record number box or
navigation buttons, then click Delete on the Records toolbar.
11.
Reports
A report ina DBMS presents retrieved data in an organized and customized
format, enhancing visualization compared to a simple row-and-column
query display.
Creating a report
Step 1: In LibreOffice Base, click the Reports icon in the Database Pane.
Step 2: From the Tasks Pane, click Use Wizard to Create Report option.
Step 3: The Report Wizard opens along with the Report Builder window and the
Add Field dialog box.
Step 4: In the report wizard, select the table and then fields for the report.
Step 5: The Available Fields list displays all fields from the table. Click > button
to add them to the Fields in Report list.
12.
Step 6: ClickNext to label fields. Column headers are used as default labels,
but you can replace them with more descriptive names if needed.
Step 7: Click Next to proceed. This step allows grouping data by a field, but
since no grouping is needed, click Next again.
Step 8: Set Sort Options by selecting a field and choosing ascending or
descending order for data arrangement in the report.
Step 9: Click on the Next button to move on to the next step in which the layout
of the report will be selected.
Step 12: Click on Finish button to display the report.
Step 10: Select a layout and set the header & footer layout . Choose the orientation
as Landscape or Portrait, keeping Landscape selected by default.
Step 11: Click Next , Enter the report name . By default, the report is Dynamic,
updating automatically with table changes. To prevent updates,
select Static. Choose to modify or create the report, keeping the
default setting to create it.
13.
Inserting other controlsin the report
Inserting Titles and Headings
Step 1: Right-click on the Report name, and click on Edit option from
pop up menu. The Report builder window will appear.
Step 2: Click on the Label tool on the Report Controls toolbar.
Step 4: Double-click to open the Properties dialog box. Enter the title in the
Label property text box, and adjust the font style ,size under the Font
property.
Step 5: Close the Properties dialog box. Double-click the report in the Reports
of Database pane to view it with formatting applied.
Step 3: Bring the mouse pointer on the report. Click and drag to insert the
label textbox.
14.
Inserting other controlsin the report
Inserting Date and Time
Step 1:
Click in the Page Header area to make it active.
Step 3: From the main menu Click Insert > Date and Time.
Step 5:The date is inserted in the Page Header (top left). Click and drag to
reposition it as needed.
Step 4:TheDateandTimedialogboxappears.SelectthedesiredformatandclickOK.
Right click on the report name and then select edit option from
popup menu
Step 2: