Download to read offline
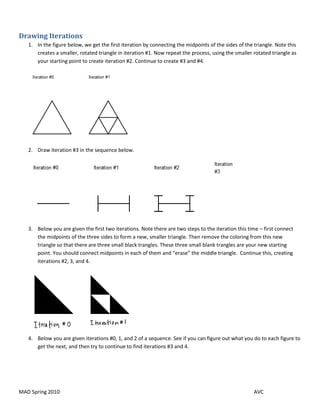
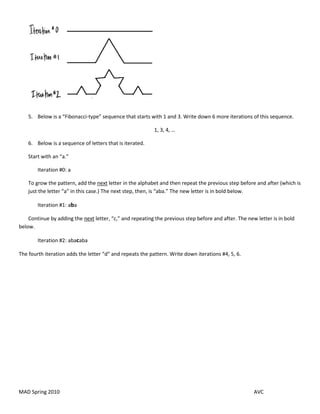

The document describes several examples of iterative sequences: 1. Connecting the midpoints of triangles to generate smaller nested triangles with each iteration. 2. Alternating between connecting midpoints and removing coloring in triangles to produce a pattern of blank and shaded triangles. 3. Continuing a sequence of nested figures by applying the same transformation at each step. 4. Extending a numeric sequence following a given rule to generate additional terms. 5. Building up a sequence of letters by appending the next letter and repeating the prior term.


![Arithmetic sequences and series[1]](https://cdn.slidesharecdn.com/ss_thumbnails/arithmeticsequencesandseries1-110831022502-phpapp01-thumbnail.jpg?width=640&height=640&fit=bounds)


