Kioti Daedong MECHRON 2200 UTV Service Repair Manualhjsnekmde
This is the Highly Detailed factory service repair manual for theKIOTI DAEDONG MECHRON 2200 UTV, this Service Manual has detailed illustrations as well as step by step instructions,It is 100 percents complete and intact. they are specifically written for the do-it-yourself-er as well as the experienced mechanic.KIOTI DAEDONG MECHRON 2200 UTV Service Repair Workshop Manual provides step-by-step instructions based on the complete dis-assembly of the machine. It is this level of detail, along with hundreds of photos and illustrations, that guide the reader through each service and repair procedure. Complete download comes in pdf format which can work under all PC based windows operating system and Mac also, All pages are printable. Using this repair manual is an inexpensive way to keep your vehicle working properly.
Service Repair Manual Covers:
Chapter 1 Safety First
Chapter 2 General
Chapter 3 Engine
Chapter 4 CVT
Chapter 5 Transmission
Chapter 6 Chassis
Chapter 7 Rear Axle
Chapter 8 Brake
Chapter 9 Front Axle
Chapter 10 Steering
Chapter 11 Hydraulic System
Chapter 12 Electric System
Chapter 13 Index
File Format: PDF
Compatible: All Versions of Windows & Mac
Language: English
Requirements: Adobe PDF Reader
NO waiting, Buy from responsible seller and get INSTANT DOWNLOAD, Without wasting your hard-owned money on uncertainty or surprise! All pages are is great to haveKIOTI DAEDONG MECHRON 2200 UTV Service Repair Workshop Manual.
Looking for some other Service Repair Manual,please check:
https://www.aservicemanualpdf.com/
Thanks for visiting!
8
In this presentation, we have discussed a very important feature of BMW X5 cars… the Comfort Access. Things that can significantly limit its functionality. And things that you can try to restore the functionality of such a convenient feature of your vehicle.
𝘼𝙣𝙩𝙞𝙦𝙪𝙚 𝙋𝙡𝙖𝙨𝙩𝙞𝙘 𝙏𝙧𝙖𝙙𝙚𝙧𝙨 𝙞𝙨 𝙫𝙚𝙧𝙮 𝙛𝙖𝙢𝙤𝙪𝙨 𝙛𝙤𝙧 𝙢𝙖𝙣𝙪𝙛𝙖𝙘𝙩𝙪𝙧𝙞𝙣𝙜 𝙩𝙝𝙚𝙞𝙧 𝙥𝙧𝙤𝙙𝙪𝙘𝙩𝙨. 𝙒𝙚 𝙝𝙖𝙫𝙚 𝙖𝙡𝙡 𝙩𝙝𝙚 𝙥𝙡𝙖𝙨𝙩𝙞𝙘 𝙜𝙧𝙖𝙣𝙪𝙡𝙚𝙨 𝙪𝙨𝙚𝙙 𝙞𝙣 𝙖𝙪𝙩𝙤𝙢𝙤𝙩𝙞𝙫𝙚 𝙖𝙣𝙙 𝙖𝙪𝙩𝙤 𝙥𝙖𝙧𝙩𝙨 𝙖𝙣𝙙 𝙖𝙡𝙡 𝙩𝙝𝙚 𝙛𝙖𝙢𝙤𝙪𝙨 𝙘𝙤𝙢𝙥𝙖𝙣𝙞𝙚𝙨 𝙗𝙪𝙮 𝙩𝙝𝙚 𝙜𝙧𝙖𝙣𝙪𝙡𝙚𝙨 𝙛𝙧𝙤𝙢 𝙪𝙨.
Over the 10 years, we have gained a strong foothold in the market due to our range's high quality, competitive prices, and time-lined delivery schedules.
5 Warning Signs Your BMW's Intelligent Battery Sensor Needs AttentionBertini's German Motors
IBS monitors and manages your BMW’s battery performance. If it malfunctions, you will have to deal with an array of electrical issues in your vehicle. Recognize warning signs like dimming headlights, frequent battery replacements, and electrical malfunctions to address potential IBS issues promptly.
Symptoms like intermittent starting and key recognition errors signal potential problems with your Mercedes’ EIS. Use diagnostic steps like error code checks and spare key tests. Professional diagnosis and solutions like EIS replacement ensure safe driving. Consult a qualified technician for accurate diagnosis and repair.
What Does the PARKTRONIC Inoperative, See Owner's Manual Message Mean for You...Autohaus Service and Sales
Learn what "PARKTRONIC Inoperative, See Owner's Manual" means for your Mercedes-Benz. This message indicates a malfunction in the parking assistance system, potentially due to sensor issues or electrical faults. Prompt attention is crucial to ensure safety and functionality. Follow steps outlined for diagnosis and repair in the owner's manual.
Comprehensive program for Agricultural Finance, the Automotive Sector, and Empowerment . We will define the full scope and provide a detailed two-week plan for identifying strategic partners in each area within Limpopo, including target areas.:
1. Agricultural : Supporting Primary and Secondary Agriculture
• Scope: Provide support solutions to enhance agricultural productivity and sustainability.
• Target Areas: Polokwane, Tzaneen, Thohoyandou, Makhado, and Giyani.
2. Automotive Sector: Partnerships with Mechanics and Panel Beater Shops
• Scope: Develop collaborations with automotive service providers to improve service quality and business operations.
• Target Areas: Polokwane, Lephalale, Mokopane, Phalaborwa, and Bela-Bela.
3. Empowerment : Focusing on Women Empowerment
• Scope: Provide business support support and training to women-owned businesses, promoting economic inclusion.
• Target Areas: Polokwane, Thohoyandou, Musina, Burgersfort, and Louis Trichardt.
We will also prioritize Industrial Economic Zone areas and their priorities.
Sign up on https://profilesmes.online/welcome/
To be eligible:
1. You must have a registered business and operate in Limpopo
2. Generate revenue
3. Sectors : Agriculture ( primary and secondary) and Automative
Women and Youth are encouraged to apply even if you don't fall in those sectors.
Core technology of Hyundai Motor Group's EV platform 'E-GMP'Hyundai Motor Group
What’s the force behind Hyundai Motor Group's EV performance and quality?
Maximized driving performance and quick charging time through high-density battery pack and fast charging technology and applicable to various vehicle types!
Discover more about Hyundai Motor Group’s EV platform ‘E-GMP’!
What Exactly Is The Common Rail Direct Injection System & How Does It WorkMotor Cars International
Learn about Common Rail Direct Injection (CRDi) - the revolutionary technology that has made diesel engines more efficient. Explore its workings, advantages like enhanced fuel efficiency and increased power output, along with drawbacks such as complexity and higher initial cost. Compare CRDi with traditional diesel engines and discover why it's the preferred choice for modern engines.
Fleet management these days is next to impossible without connected vehicle solutions. Why? Well, fleet trackers and accompanying connected vehicle management solutions tend to offer quite a few hard-to-ignore benefits to fleet managers and businesses alike. Let’s check them out!
Why Is Your BMW X3 Hood Not Responding To Release CommandsDart Auto
Experiencing difficulty opening your BMW X3's hood? This guide explores potential issues like mechanical obstruction, hood release mechanism failure, electrical problems, and emergency release malfunctions. Troubleshooting tips include basic checks, clearing obstructions, applying pressure, and using the emergency release.
"Trans Failsafe Prog" on your BMW X5 indicates potential transmission issues requiring immediate action. This safety feature activates in response to abnormalities like low fluid levels, leaks, faulty sensors, electrical or mechanical failures, and overheating.
Ever been troubled by the blinking sign and didn’t know what to do?
Here’s a handy guide to dashboard symbols so that you’ll never be confused again!
Save them for later and save the trouble!
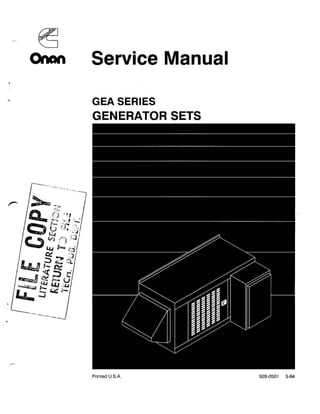
Cummins onan gea series generator sets service repair manual
1. -
E
m ~ m Service Manual
*
GEA SERIES
GENERATOR SETS
Printed U.S.A. 928-0501 5-94
2. Table of Contents
....................................................................
Safety Precautions ii
1.Introduction
ABOUT THIS MANUAL ..................................................................... 1-1
........................................................................
TESTEQUIPMENT 1-1
2.AC Control
AC CONTROL PANELCOMPONENTS ....................................................... 2-1
CONTROLBOX ........................................................................... 2-2
AC CONNECTIONS INSIDE MOUNTED AUTOMATIC TRANSFER SWITCH (ATS) ................ 2-3
AC CONNECTIONS WHEN AUTOMATIC TRANSFER swrrcH (ATS) NOT PROVIDED . . . . . . . . . . . . 2-4
VOLTAGEREGULATOR .................................................................... 2-5
PRINCIPLEOFGENERATOROPERATION ................................................... 2-8
3.DC Control
CONTROL PANEL COMPONENTS .......................................................... 3-1
............................
ENGINEACCESSORIES. SENSORSAND SHUTDOWN SWITCHES 3-4
ENGlNEMONlTOR(Al1) ................................................................... 3-6
AUXILIARY RELAY BOARD (A28) . . . . . . . . . . . . . . . . . . . . . . . . . . . . . . . . . . . . . . . . . . . . . . . . . . . . . . . 3-8
EMERGENCYO'!E!?R!DE MODULE (A29) ................................................... 3-10
ELECTRONICOVERSPEEDISTART DISCONNECTMODULE .................................. 3-11
COOLANT TEMPERATURE GAUGEASSEMBLY .............................................. 3-12
RELAYSKllANDK12 ..................................................................... 3-13
MANUAL FUEL SELECTOR SWITCH (S10) ................................................... 3-14
LOW GAS PRESSURESWITCH (E4) ........................................................ 3-14
...............................................................
SEQUENCEOFOPERATION 3-14
4.Troubleshooting
............................................
THE ENGINE DOES NOT CRANK IN RUN MODE 4-1
.........................................
THE ENGINE DOES NOT CRANK IN REMOTE MODE 4-3
..............................................
THE ENGINE CRANKS BUT DOES NOT START 4-4
THE ENGINE RUNS UNTIL FAULTSHUTDOWN ............................................. 4-6
............................................
THE ENGINE LACKS POWER OR IS UNSTABLE 4-7
ANAMBERWARNINGLAMP ISON ........................................................ 4-8
........................
THE GREEN RUN LAMP STAYS OFF BUT THE SET RUNS NORMALLY 4-9
NOOUTPUTVOLTAGE ................................................................. 4-10
OUTPUT VOLTAGE ISTOO HIGH OR TOO LOW ............................................ 4-13
.........................................................
OUTPUT VOLTAGE IS UNSTABLE 4-14
..........................................
THE FIELD CIRCUIT BREAKER KEEPSTRIPPING 4-15
THE PHASE CURRENTSARE UNBALANCED ............................................... 4-16
5.Generator
TESTINGTHEGENERATOR ................................................................ 5-1
............................................
GENERATOR DISASSEMBLYAND REASSEMBLY 5-8
6.Fuel System1 Governor
FUELSYSTEM ............................................................................ 6-1
......................................
GAS MIXTURE AND IDLE SPEED STOP ADJUSTMENTS 6-4
ELECTRONICGOVERNOR ................................................................. 6-6
GOVERNOR LINKAGE ..................................................................... 6-7
7.Wiring Diagrams
3. Safety Precautions
Before operating the generator set, readthe Operator's Manualand becomefamiliar with it andthe equip-
ment. Safe and efficient operatlon can be achieved only if the equlpment is properly operated and
maintained. Many accidents are caused by failure to follow fundamental rules and precautions.
The following symbols, foundthroughoutthis manual, alertyouto potentiallydangerousconditionsto the op-
erator, service personnel, or the equipment.
Thls symbol warns of lmmedlate hazards whlch wlll result In severe personal Injury or
death.
IAWARNING
I Thlssymbol refers to a hazaM or unsafepractice whlch can result In severepersonal In-
jury or death.
ACAUTION 1 Thls symbol refers to a hazard or unsafepractice which can result In personal injury or
product or property damage.
FUEL AND FUMESARE FLAMMABLE. Fire and explosion can result from improper practices.
DO NOT fill fuel tanks while engine is running, unless tanks are outside the engine compartment. Fuel
contact with hot engine or exhaust is a potential fire hazard.
DONOTpermitany flame, cigarette, pilotlight, spark, or other ignitionsource nearthegeneratorsetor fuel
tank.
Fuel lines must be adequately secured and free of leaks. Fuelconnection at the engine should be made
with an approved flexible line. Do not use copper pipingon flexible lines as copper will become brittle if
continuously vibrated or repeatedly bent.
Be sure all fuel supplies have a positive shutoff valve.
Donotsmokewhileservicingleadacidbatteries. Leadacidbatteriesemita highlyexplosivehydrogengas
that can be ignited by electrical arcing or by smoking.
EXHAUSTGASES ARE DEADLY
Provideanadequateexhaust systemto properlyexpeldischargedgases. Visuallyandaudibly inspectthe
exhaustdaily for leaksperthe maintenanceschedule. Ensurethat exhaust manifoldsaresecuredand not
warped. Do not use exhaust gases to heat a compartment.
Be sure the unit is well ventilated.
MOVINGPARTSCAN CAUSESEVERE PERSONALINJURY OR DEATH
Keep your hands, clothing, and jewelry away from moving parts.
Before startingwork on the generator set, disconnect starting batteries, negative (-) cable first. This will
prevent accidental starting.
Make sure that fasteners on the generator set are secure. Tighten supports and clamps, keep guards in
positionover fans, drive belts, etc.
Do not wear loose clothing or jewelry in the vicinity of movingparts, or while working on electricalequip-
ment. Loose clothing and jewelry can become caught in moving parts. Jewelry can short out electrical
contacts and cause shock or burning.
If adjustment must be made while the unit is running, use extremecaution around hot manifolds,moving
parts, etc.
ELECTRICALSHOCK CAN CAUSESEVERE PERSONALINJURY OR DEATH
o Remove electric power before removingprotective shields or touching electricalequipment. Use rubber
insulativematsplacedondrywoodplatformsoverfloorsthat are metalor concretewhen around electrical
equipment. Do not wear damp clothing (particularlywet shoes) or allow skin surface to be damp when
har~dlirsg
electrical equipment.
4. Useextremecautionwhenworkingonelectricalcomponents.Highvoltagescancauseinjuryordeath. DO
NOT tamper with interlocks.
Followallapplicable stateand localelectricalcodes. Haveallelectricalinstallationsperformedbyaquali-
fied licensedelectrician. Tag open switches to avoidaccidental closure.
DO NOT CONNECT GENERATOR SET DIRECTLY TO ANY BUILDING ELECTRICALSYSTEM. Haz-
ardous voltages canflow fromthe generator set intothe utility line. Thiscreatesa potentialfor electrocu-
tion or property damage. Connect only through an approved isolationswitch or an approved paralleling
device.
GENERAL SAFETY PRECAUTIONS
Coolants under pressure have a higher boiling point than water. DO NOT open a radiator or heat ex-
changer pressure capwhile the engine is running. Allow the generator set to cool and bleedthe system
pressure first.
Benzeneand lead, found in some gasoline, have been identifiedby some state and federal agencies as
causingcancer or reproductivetoxicity. When checking, drainingor addinggasoline,take care not to in-
gest, breathe the fumes, or contact gasoline.
Usedengineoilshavebeenidentifiedbysome stateorfederalagenciesascausingcanceror reproductive
toxicity. Whencheckingorchangingengineoil, takecarenotto ingest,breathethefumes, orcontactused
oil.
Provide appropriatefire extinguishers and installthem in convenient locations. Consult the localfire de-
partmentfor thecorrecttype of extinguisherto use. Do not usefoam onelectricalfires. Useextinguishers
ratedABC by NFPA.
Make sure that rags are not left on or near the engine.
Removeallunnecessarygreaseandoilfromthe unit. Accumulatedgreaseandoilcancauseoverheating
and engine damage which presenta potential fire hazard.
- Keep the generator set and the surrounding area clean and free from obstructions. Removeany debris
from the set and keepthe floor clean and dry.
Do not work on this equipment when mentally or physically fatigued, or after consumingany alcohol or
drug that makesthe operationof equipment unsafe.
iii
5. 1. Introduction
ABOUT THIS MANUAL
ThisservicemanualisfortheGEA Seriesgenerator
sets. Itincludesengineandgeneratortroubleshoot-
ing guides. Engine service instructions are in the
applicable engine service manual. Operating and
maintenanceinstructionsare inthe applicable Op-
erator's Manual.
This manualdoes not have instructionsfor servic-
ing printed circuit board assemblies. Always re-
place a faulty printed circuit board assembly. At-
tempts to repair a printedcircuit board can lead to
costly damage to the equipment.
ReadSafetyPrecautionsandcarefullyobserveall
instructionsand precautions in this manual.
TEST EQUIPMENT
Most of thetestsinthis manualcanbedonewith an
AC-DC multimeter, frequency meter, Wheatstone
bridge(0.001ohmprecisionis necessaryfor meas-
uringstatorwindingresistance)andloadtest panel.
~AWARNING]
Improper Servicecanlead to quip-
ment damage, severepersonal injury or death.
Service must be performed by qualified per-
sons who know about fuel, electrical and me-
chanical hazards. Read the safety precautions
page and carefully observeall instructions and
precautions in this manual.
~AWARNING
1 LPG and propane are heavier than
air. Explosive, leaking gas will settle in low
areas. If there is a possibility of leaking gas,
notify the operatorof theadjacentbelow-grade
vauit.
6. 2
.AC Control
AC CONTROL PANEL COMPONENTS
The generator set control box is mountedon top of
the generator enclosure, facing the rear or either
side. Figure 2-1 points out the components on the
controlpanelthat haveto dowith AC output control.
See Page 7-3 for the connection diagram.
Field Clrcult Breaker (CB21): The field circuit
breaker protects the generator from over-excita-
tion.
AC Voltmeter (M21): The voltmeter indicates out-
put voltage for the phase selected.
ACAmmeter(M22):The ammeterindicatesoutput
amperage for the phase selected. Input to the am-
meterisfromcurrenttransformers CT21, CT22and
CT23. (CT23 is providedfor 3-phase only.)
PhaseSelector Switch(521):The selector switch
is used to select the phase for voltage and amper-
age readings.
Scale Indicator Lamps (0521 and DS22): The
scale indicator lamps indicate whether to read the
upperor lowerscalesof thevoltmeter andammeter.
Frequency/RPMMeter (M23):The frequency me-
ter indicatesoutput frequency in Hertz (Hz) and en-
gine speed in RPM.
Output Voltage Trimmer (R21): The output volt-
age trimmer can be used to adjust output voltage
plus or minus five percent of nominal voltage.
FIGURE 2-1. TYPICAL AC CONTROL PANEL COMPONENTS
7. CONTROL BOX
Figure2-2 illustratesthe controlbox withthe control
panelhingedopen. Notethe lexan (redplastic)cov-
er secured over the metersto protect from electric
shock.
~AWARNING]
HAZARDOUS VOLTAGE! Touching
unlnsulatedllveparts insidethecontrolboxcan
result In severe personal Injury or death. Reln-
stall the protective cover to prevent contact
wlth bare, llve meter tennlnals.
TOP VIEW OF CONTROL BOX SIDE VIEW CONTROLBOX
LEXANCOVER SECURED BY INSU
THIS COVER MUST ALWAYS BE REINSTAUED FOLLOWINGSERVICE TO PROTECT FROMELECTRICSHOCK
FIGURE2-2. CONTROL BOX
2-2
8. CONTROL BOX
Figure2-2 illustratesthe controlbox withthe control
panelhingedopen. Notethe lexan (redplastic)cov-
er secured over the metersto protect from electric
shock.
[AWARNING
1 HAZARDOUS VOLTAGE! Touching
unlnsulatedllveparts Insidethecontrolboxcan
result In severe personal Injury or death. Reln-
stall the protective cover to prevent contact
with bare, llve meter temlnals.
TOP VIEW OF CONTROL BOX SIDE VIEW CONTROL BOX
LEXANCOVER SECURED BY INSU OVER THE AC METER TERMINALS
THIS COVER MUSTALWAYS BE REINSTALLEDFOLLOWING SERVICE TO PROTECT FROMELECTRICSHOCK
FIGURE2-2. CONTROL BOX
9. 2
.AC Control
AC CONTROL PANEL COMPONENTS
The generator set control box is mounted on top of
the generator enclosure, facing the rear or either
side. Figure 2-1 points out the components on the
controlpanelthat haveto dowith AC output control.
See Page 7-3 for the connection diagram.
Field Circuit Breaker (CB21): The field circuit
breaker protects the generator from over-excita-
tion.
AC Voltmeter (M21): The voltmeter indicates out-
put voltage for the phase selected.
ACAmmeter(M22):The ammeterindicatesoutput
amperage for the phase selected. Inputto the am-
meterisfrom currenttransformersCT21, CT22and
CT23. (CT23 is providedfor 3-phase only.)
PhaseSelector Switch(S21): The selector switch
is used to select the phase for voltage and amper-
age readings.
Scale indicator Lamps (DS21 and DS22): The
scale indicator lamps indicate whether to read the
upperor lowerscalesofthevoltmeter andammeter.
Frequency/RPM Meter(M23): The frequency me-
ter indicatesoutput frequency in Hertz (Hz) and en-
gine speed in RPM.
Output Voltage Trimmer (R21): The output volt-
age trimmer can be used to adjust output voltage
plus or minus five percent of nominalvoltage.
FIELD CIRCUIT BREAKER
(CB21)
AC VOLTMETER AC AMMETER
(M22)
FREQUENCYIRPM METER
(M23)
SCALE INDICATOR LAMPS
(DS21 AND DS22)
FIGURE 2-1. TYPICAL AC CONTROL PANELCOMPONENTS
10. Thank you very much for
your reading. Please Click
Here. Then Get COMPLETE
MANUAL. NO WAITING
NOTE:
If there is no response to
click on the link above,
please download the PDF
document first and then
click on it.
11. AC CONNECTIONSINSIDE MOUNTED -
1 HAZARDOUS VOLTAGE!Touching
AUTOMATICTRANSFER SWITCH (ATS) uninsuiated live parts inside the automatic
Figure2-3illustratesthe AC powerand controlcon- tmnsfer witchcan in severepersonaib-
nections inside the mounted automatic transfer juryordeath. Shutdown thesetanddisCOnnect
switch. See Pages 7-3, 7-6 and 7-7 for the control, ALL power sources to thegenerator set before
generator and ATS connection diagrams. opening the door.
ATS TERMINAL AUTOMATIC TRANSFER PHASE CONNECTIONS
BLOCKSTB2 AND TB3 SWITCH FOR NORMAL SUPPLY
0 0 0
0 0 0
0 0 0
0 0 0
GROUNDING LUGS CONTROL TRANSFORMERS HEATER CIRCUITS GENERATOR LINE
CT21, CT22 CIRCUIT BREAKER CIRCUIT BREAKER
FIGURE2-3. TYPICAL CONNECTIONS INSIDE MOUNTEDAUTOMATIC TRANSFER SWITCH
12. AC CONNECTIONSWHEN AUTOMATIC
TRANSFER SWITCH (ATS) NOT
PROVIDED
Figure2-4illustratesthe poweroutput box, which is
part of the right-hand side of the generator enclo-
sure (facing generator end). See Pages 7-3, 7-6
and 7-7 for the control, generatorand ATS connec-
tion diagrams.
(AWARNING
1 HAZARDOUS VOLTAGE! Touching
uninsulated liveparts inside theAC power out-
put box can result In severe personal Injury or
death. Shut down the set and disconnect ALL
power sources to the generator set before re-
movlng the cover of the AC power output box.
See Figure 2-4.
GENERATOR CURRENT TRANSFORMERS TERMINAL BLOCK BREAKER TERMINALS LINECIRCUIT
LEAD CT21, CT22AND CT23 FOR CONNECTING FOR CONNECTING BREAKER
ENTRANCE (3-PHONLY) M E POLARITY GENERATOR LEADS GENERATOR LEADS
DOTSMUST BE UP
HEATERS (CONNECTEDTO
NORMAL SOURCE)
THESETERMNALSARE
LIVEWHEN THE SET ISNOT
RUNNING-DISCONNECT LOAD WIRING CONTROL FOR CONTROLLEADS BREAKER TERMINALS
POWER BEFOREREMOVING STUB-UP WIRING FROMAUTOMATIC FOR LOAD
AC OUTPUT BOX COVER. SPACE HARNESS TRANSFER SWITCH CONNECTIONS
L
FIGURE2-4. POWER OUTPUT BOX
13. VOLTAGE REGULATOR
Figure 2-5 shows the terminals, the three selector
switches and the voltage adjusting potentiometer
on the voltage regulator board. Figure 2-6 shows
the connections.
The voltage regulatorisaccessibleby removingthe
top coverof the controlbox. Itis mountedon a plate
on the wall opposite the control panel. Note the
orientation of the voltage regulatoron its mounting
plate with terminal block VR21 at the bottom.
Setting Selector Switches
Check and, if necessary, reposition the selector
switches as follows when replacinga voltage regu-
lator:
1. Press S1-(1-4)and S1-(2-3)down on the
side marked OFF. (S1 is a rocker switch.)
2. Slide S2 to the left-hand position. (S2 is a
slide switch.)
3. For 60 Hertz operation: Press S3-(1-4)to 4
(OFF) and S3-(2-3)to 2 (ON). (S3 is a rocker
switch.)
4. For 50 Hertz operation: Press S3-(1-4)to 1
(ON) and S3-(2-3)to 2 (ON). (S3 is a rocker
switch.)
Adjusting Voltage
Use the control panel mounted voltage trimmer, if
provided, for small voltage adjustments. Measure
generator output voltage while the set is running
without loadatthe nominalfrequency. Ifthetrimmer
does not provide enough adjustment, lock it at its
midpoint. Then turn voltage adjusting pot R32 on
the regulatorboard until rated voltage is obtained.
If there is no output voltage, flash the field as fol-
lows:
1. Assemble a 6 volt battery, 10 ohm resistor,
18 volt voltage suppressor and 12 amp, 300
volt diode as shown in Figure 2-6.
2. While the set is running at nominalfrequency,
momentarily connect the positive (+) side of
the the circuit to voltage regulatorterminal
VR21-F1 and the negative side (-) to voltage
regulator terminal VR21-F2.
1ACAUTIONI The voltage regulator could be
damagedIf theflashingcircuitis connected
for more than 5 seconds.
3. Check output voltage, shut down the set and
restart it. See Troubleshootingif output volt-
age does not build up without field flashing.
. D .
p
.
HAZARDOUS VOLTAGE! Touching
uninsulated live parts inside the control and
power output boxes can result In severe per-
sonal Injury or death. Measurements and ad-
justments must be done with care to avoid
touching unlnsulated live parts.
Stand ona dry woodenplatform or rubber Insu-
lating mat, make sure your clothing and shoes
are dry, removejewelry and use toolswithInsu-
lated handles.
14. 6 8 L 9 S P
SELECTOR S
FIGURE2-5. VOLTAGE REGULATOR TERMINALS, SELECTOR SWITCHES AND VOLTAGE ADJUSTING POT