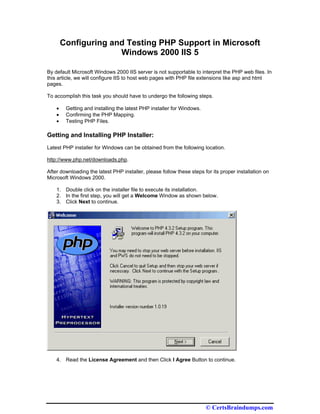
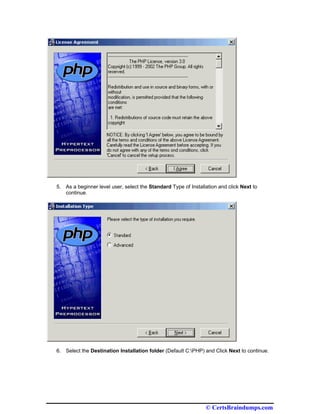
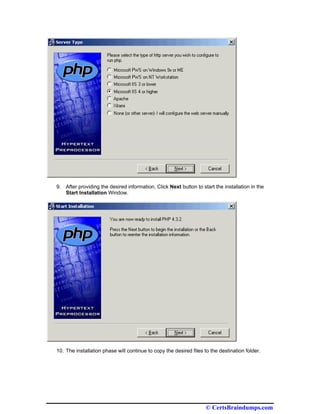
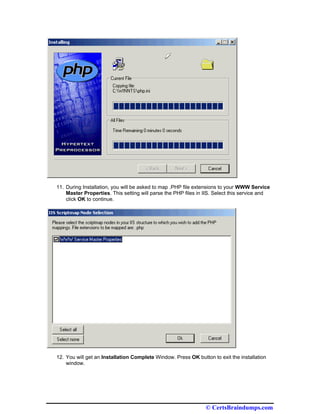
Configuring and Testing PHP Support in Microsoft
                      Windows 2000 IIS 5

By default Microsoft Windows 2000 IIS server is not supportable to interpret the PHP web files. In
this article, we will configure IIS to host web pages with PHP file extensions like asp and html
pages.

To accomplish this task you should have to undergo the following steps.

    •    Getting and installing the latest PHP installer for Windows.
    •    Confirming the PHP Mapping.
    •    Testing PHP Files.

Getting and Installing PHP Installer:
Latest PHP installer for Windows can be obtained from the following location.

http://www.php.net/downloads.php.

After downloading the latest PHP installer, please follow these steps for its proper installation on
Microsoft Windows 2000.

    1. Double click on the installer file to execute its installation.
    2. In the first step, you will get a Welcome Window as shown below.
    3. Click Next to continue.


    4. Read the License Agreement and then Click I Agree Button to continue.


                                                                        © CertsBraindumps.com
5. As a beginner level user, select the Standard Type of Installation and click Next to
   continue.


6. Select the Destination Installation folder (Default C:PHP) and Click Next to continue.


                                                                © CertsBraindumps.com
7. In the Mail Configuration Window, enter your desired mail configuration and click Next
   to continue.


8. You are installing PHP installer for Microsoft Windows 2000 IIS 5, Select this server type
   in the Server Type selection window and then click Next to continue.


                                                                 © CertsBraindumps.com
9. After providing the desired information, Click Next button to start the installation in the
   Start Installation Window.


10. The installation phase will continue to copy the desired files to the destination folder.


                                                                    © CertsBraindumps.com
11. During Installation, you will be asked to map .PHP file extensions to your WWW Service
    Master Properties. This setting will parse the PHP files in IIS. Select this service and
    click OK to continue.


12. You will get an Installation Complete Window. Press OK button to exit the installation
    window.


                                                                © CertsBraindumps.com
You have successfully installed the PHP 4.3.2 installer on Microsoft Windows 2000 IIS server to
support PHP files.

Confirming the PHP Mapping:
To check and confirm that successful mapping has been configured or not to parse PHP files,
follow these steps.

    13. Start Internet Services Manager from Start    Programs     Administrative Tools
        Internet Services Manager.
    14. In the Internet Services Manager, Highlight your web server, right click and open its
        Properties window.


                                                                     © CertsBraindumps.com
15. Select WWW Service in the Master Properties Section and click Edit Button Next to it.


16. Click the Home Directory Tab in the WWW Service Master Properties Window.


                                                              © CertsBraindumps.com
17. Click Configuration Button in the Application Settings section to confirm the PHP
    Application mapping to parse .PHP files.


                                                              © CertsBraindumps.com
18. You will notice that .PHP extension has been added and IIS 5 has been configured to
    support .PHP files.


                                                              © CertsBraindumps.com
Note: After successfully installing PHP installer, if the .PHP extension is missing in the above
mapping window, then you can manually add the mapping by clicking the Add button and then
providing the desired information as shown below.


    19. Close all the above opened windows.

Your web server is successfully configured to support PHP files.

Testing PHP Files:


                                                                     © CertsBraindumps.com
After successfully installing the PHP installer and configuring the PHP mapping in IIS, now we will
test the support of IIS for PHP files by creating and browsing a PHP web page.

Please follow these steps.

    20. Open Notepad and type the following in it


<?php
 phpinfo();
?>

Note: phpinfo() is a PHP function which outputs a large amount of information about the current
state of PHP.


    21. Save this file as test.php at C:INETPUBWWWROOT or your IIS Web Root Folder or
        any desired location (We saved in the WWWRoot directory).

if you are going to place this file under another folder, you should enable this folder web sharing
under your default website or any desired website to access it through browser.

Note: During saving the file, don’t forget to put inverted commas around your file name.
Otherwise it will be saved as a simple text file not a PHP file.


                                                                       © CertsBraindumps.com
22. Launch the respective URL (if placed in the WWWRoot folder then
    http://localhost/test.php). You will get the following output in your browser window.


                                                                  © CertsBraindumps.com
The following output shows the complete PHP parser configuration for your system and indicates
that PHP support has been successfully installed on your IIS Web Server.

Final Note:

Please provide your comments and feedback about this article in the forum.

We are a growing online community to provide you free IT resources to extend your knowledge. If
you like our work, then please donate some amount through PayPal to overcome our website
expenses.


                                                                   © CertsBraindumps.com

Configuring and Testing PHP Support in Microsoft Windows 2000 ...

  • 1.
    Configuring and TestingPHP Support in Microsoft Windows 2000 IIS 5 By default Microsoft Windows 2000 IIS server is not supportable to interpret the PHP web files. In this article, we will configure IIS to host web pages with PHP file extensions like asp and html pages. To accomplish this task you should have to undergo the following steps. • Getting and installing the latest PHP installer for Windows. • Confirming the PHP Mapping. • Testing PHP Files. Getting and Installing PHP Installer: Latest PHP installer for Windows can be obtained from the following location. http://www.php.net/downloads.php. After downloading the latest PHP installer, please follow these steps for its proper installation on Microsoft Windows 2000. 1. Double click on the installer file to execute its installation. 2. In the first step, you will get a Welcome Window as shown below. 3. Click Next to continue. 4. Read the License Agreement and then Click I Agree Button to continue. © CertsBraindumps.com
  • 2.
    5. As abeginner level user, select the Standard Type of Installation and click Next to continue. 6. Select the Destination Installation folder (Default C:PHP) and Click Next to continue. © CertsBraindumps.com
  • 3.
    7. In theMail Configuration Window, enter your desired mail configuration and click Next to continue. 8. You are installing PHP installer for Microsoft Windows 2000 IIS 5, Select this server type in the Server Type selection window and then click Next to continue. © CertsBraindumps.com
  • 4.
    9. After providingthe desired information, Click Next button to start the installation in the Start Installation Window. 10. The installation phase will continue to copy the desired files to the destination folder. © CertsBraindumps.com
  • 5.
    11. During Installation,you will be asked to map .PHP file extensions to your WWW Service Master Properties. This setting will parse the PHP files in IIS. Select this service and click OK to continue. 12. You will get an Installation Complete Window. Press OK button to exit the installation window. © CertsBraindumps.com
  • 6.
    You have successfullyinstalled the PHP 4.3.2 installer on Microsoft Windows 2000 IIS server to support PHP files. Confirming the PHP Mapping: To check and confirm that successful mapping has been configured or not to parse PHP files, follow these steps. 13. Start Internet Services Manager from Start Programs Administrative Tools Internet Services Manager. 14. In the Internet Services Manager, Highlight your web server, right click and open its Properties window. © CertsBraindumps.com
  • 7.
    15. Select WWWService in the Master Properties Section and click Edit Button Next to it. 16. Click the Home Directory Tab in the WWW Service Master Properties Window. © CertsBraindumps.com
  • 8.
    17. Click ConfigurationButton in the Application Settings section to confirm the PHP Application mapping to parse .PHP files. © CertsBraindumps.com
  • 9.
    18. You willnotice that .PHP extension has been added and IIS 5 has been configured to support .PHP files. © CertsBraindumps.com
  • 10.
    Note: After successfullyinstalling PHP installer, if the .PHP extension is missing in the above mapping window, then you can manually add the mapping by clicking the Add button and then providing the desired information as shown below. 19. Close all the above opened windows. Your web server is successfully configured to support PHP files. Testing PHP Files: © CertsBraindumps.com
  • 11.
    After successfully installingthe PHP installer and configuring the PHP mapping in IIS, now we will test the support of IIS for PHP files by creating and browsing a PHP web page. Please follow these steps. 20. Open Notepad and type the following in it <?php phpinfo(); ?> Note: phpinfo() is a PHP function which outputs a large amount of information about the current state of PHP. 21. Save this file as test.php at C:INETPUBWWWROOT or your IIS Web Root Folder or any desired location (We saved in the WWWRoot directory). if you are going to place this file under another folder, you should enable this folder web sharing under your default website or any desired website to access it through browser. Note: During saving the file, don’t forget to put inverted commas around your file name. Otherwise it will be saved as a simple text file not a PHP file. © CertsBraindumps.com
  • 12.
    22. Launch therespective URL (if placed in the WWWRoot folder then http://localhost/test.php). You will get the following output in your browser window. © CertsBraindumps.com
  • 13.
    The following outputshows the complete PHP parser configuration for your system and indicates that PHP support has been successfully installed on your IIS Web Server. Final Note: Please provide your comments and feedback about this article in the forum. We are a growing online community to provide you free IT resources to extend your knowledge. If you like our work, then please donate some amount through PayPal to overcome our website expenses. © CertsBraindumps.com