SlideShare a Scribd company logo
1 of 23
Download to read offline
Copyrighted Material
Intended for CLARK dealers only
Do not sell or distribute
SM-520R
GCS/GCS
Copyrighted Material
Intended for CLARK dealers only
Do not sell or distribute
Foreword
This service publication provides information covering normal service, maintenance and repair of the
Clark lift trucks noted on the cover. It has been specifically prepared to help owners and service
personnel maintain these lift trucks in efficient and safe operating condition.
Regular, correct maintenance and care of lift trucks is not only important for long and efficient truck life; it
is essential for safe operation. The importance of proper maintenance through planned service, inspection
and qualified repairs cannot be emphasized too strongly.
To assist in keeping lift trucks in good operating condition, this manual includes preventive maintenance
procedures to be performed at regular intervals. These are essential to the service life and safe operation
of all fork lift trucks. Instructions for safety inspections, operational checks, cleaning, and lubrication are
provided for reference in setting-up and conducting a recommended periodic Planned Maintenance (PM)
program.
Refer to the Operator’s Manual, located on the truck, for additional information on the operation, care and
maintenance of your truck.
Genuine Clark replacement parts should be used for all service and repair requirements. Substitute parts
from other sources may be different than original parts and may not meet OSHA or other safety
requirements.
Any reference to brand names other than Clark in this manual is made simply as an example of the type of
tools and materials recommended for use and, as such, should not be considered as an endorsement.
Equivalents, if available, may be used.
For more information on maintenance and repair of these trucks, contact your authorized Clark dealer.
NOTICE - The descriptions and specifications included in this manual were in effect at the time of
printing. C/ark Equipment Company reserves the right to discontinue models at any time, or make
improvements and changes in specifications or design without notice and without incurring
obligation. Specifications, torques, pressures, measurements, adjustments, illustrations and other
items may change at any time. Contact your authorized CLARK dealer for information on possible
updates or revisions.
0 1989 Clark Equipment Company
1211
I89 SM520
ii
Copyrighted Material
Intended for CLARK dealers only
Do not sell or distribute
Contents
Subject Part
General Information...........................................................................
1
Specifications........................................................................................
2
Planned Maintenance .......................................................................
3
Engine (Group 00) .................................................................................... 4
Fuel System (GROUPS 02,03) ................................................................. 5
Electrical System (Groups 11-15) ........................................................ 6
Transaxle (stops 06,07,20)................................................................. 7
Brakes and Inching System (GIOUPS 22,23) ................................... 8
Steering System (Groups 25,26) ......................................................... 9
Hydraulic System (Groups28-33)..................................................... IO
Wheels and Tires (Groups 22,23) .................................................... 11
Counterweight and Chassis (Group 38) ...................................... 12
Uprights (Group 34). ............................................................................. 1 3
Index.. ....................................................................................................
14
SM520 212719
1
...
III
Copyrighted Material
Intended for CLARK dealers only
Do not sell or distribute
About This Manual
This manual is intended for use by persons who are trained and authorized to do lift truck maintenance.
It is designed to provide essential information about the correct and safe service maintenance and repair of
the lift truck by trained mechanics of service technicians.
The information is organized into 14 major Parts of related components or topics as outlined by
the Table of Contents at the front of the manual:
. 1 General information including precautions and safe maintenance practices.
l 2 Service specifications and reference information including lubricants, capacities, pressures, etc.
l 3 Planned Maintenance (PM) service procedures.
l 4-13 Adjustment, service and repair procedures for truck components.
In Parts 4-13, the detailed service and repair procedures are arranged in Sections for each
procedure, component or subsystem. Some Sections include explanations that cover service procedures
common to several components or subsystems.
In general, each Section is written to show and describe the general arrangement, adjustment,
removal, disassembly, inspection, repair, and assembly steps that are normally required to service the
component. Component specifications (as applicable), information notes and safety messages are included
within those procedures. In most cases, specifications are shown in Section 2, Service Specifications, for
convenience of reference.
Each Section includes Parts GROUP number(s) at the bottom of each page for cross reference.
The Parts GROUP numbers are the same as the component group in the Master Parts Book and Service
Parts Book. They are parts system reference numbers; use only the appropriate Parts Manual for ordering
parts. Do not order parts from numbers shown in this manual.
The Table of Contents lists major headings of Parts of the manual. Additional content listings are
placed at the beginning of each Section of the manual, subsection or component heading to simplify
reference to multiple topics or procedures covering optional equipment, such as engines and transaxles.
If you cannot find a topic in the respective Table of Contents, check the Alphabetical Subject Index at
the back of the manual.
This manual has been made easier to use by providing only specific steps and instructions
necessary to explain the activity, component, assembly, or process being worked on. The technician is
expected to include obvious additional steps of standard procedure for removal, disassembly, cleaning,
inspection, reassembly, installation, etc., as needed.
To be better prepared to do the necessary service work, take time to completely read the entire
procedure, including any special instructions, before doing any work.
The technician is cautioned and expected to always work in a safe manner by using the correct
procedure. Do not take chances which may result in injuries.
12/l/89 SM520
-v
Copyrighted Material
Intended for CLARK dealers only
Do not sell or distribute
1 General Information
Safe Maintenance Practices.. ................................................ 1.O-2
Safety Signs and Messages.. ................................................. 1.O-4
General Precautions ............................................................. 1.o-5
Product identification.. .......................................................... 1.O-6
Model Nomenclature ......................................................... 1.O-6
Model Designations.. ......................................................... 1.O-7
Model Serial Number Code.. .............................................. 1.O-7
Vehicle and Upright Identification.. ..................................... .l .O-8
Product Visual Identification .............................................. .I .O-9
SM520 12/l/89
l.O- 1
Copyrighted Material
Intended for CLARK dealers only
Do not sell or distribute
1.OGeneral Information
Safe Maintenance Practices
The following instructions have been prepared from current industry and government safety standards
applicable to industrial truck operation and maintenance. These recommended procedures specify
conditions, methods, and accepted practices that aid in the safe maintenance of industrial trucks. They are
listed here for the reference and safety of all workers during maintenance operations. Carefully read and
understand these instructions and the specific maintenance procedures before attempting to do any repair
work. When in doubt of any maintenance procedure, please contact your local CLARK dealer.
1. Powered industrial trucks can become hazardous
if maintenance is neglected. Therefore, suitable
maintenance facilities, trained personnel, and
procedures must be provided.
2. Maintenance and inspection of all powered
industrial trucks shall be done in conformance with
the manufacturer’s recommendations.
3. A scheduled planned maintenance, lubrication,
and inspection program shall be followed.
4. Only trained and authorized personnel should be
permitted to maintain, repair, adjust, and inspect
industrial trucks, and in accordance with the
manufacturer’s specifications.
5. Properly ventilate work area, vent exhaust fumes,
and keep shop dean and floor dry.
6. Avoid fire hazards and have fire protection
equipment present in the work area. Do not use an
open flame to check for level, or leakage of fuel,
electrolyte, or coolant. Do not use open pans of fuel
or flammable cleaning fluids for cleaning parts.
7. Before Starting Work On Truck:
a) Raise drive wheels off of floor or disconnect
power source and use blocks or other positive truck-
positioning devices.
b) Put blocks under the upright rails and carriage,
innermast( or chassis before working on them.
c) Disconnect battery before working on the
electrical system.
8. Before working on engine fuel system of gasoline
powered trucks with gravity-feed fuel systems, be
sure fuel shutoff valve is closed.
9. Before working on engine fuel system of LP-gas
powered trucks, close LP-gas cylinder valve and run
engine until there is no more fuel in the system and
engine stops running. If engine will not run, close LP-
tank valve and vent fuel slowly in a safe area.
10. Operation of the truck to check performance
must be conducted in an authorized, safe, clear
area.
11. Before Starting To Drive Truck:
a) Be in operating position.
b) Disengage clutch on manual transmissions, or
apply brake on trucks with powershift transmission
and electric trucks.
c) Put directional control in neutral.
d) Start engine or turn on power.
e) Check functioning of lift and tilt systems,
directional and speed controls, steering, brakes,
warning devices, and any load handling
attachments.
12. Before Leaving The Truck:
a) Stop truck.
b) Fully lower the load engaging means: upright,
carriage, forks, or attachments.
c) Put directional control in neutral.
d) Apply the parking brake.
e) Stop the engine or turn off power.
f) Turn off the control or ignition circuit.
g) Put blocks at the wheels, if truck is on an
incline.
h) Remove the ignition key (OSHA regulation)
13. Handle LP-gas cylinders with care. Damage
such as dents, scrapes, or gouges may dangerously
weaken the tank and make it unsafe for use.
14. Brakes, steering mechanisms, control
mechanisms, warning devices, lights, governors, lift
overload devices, guards and safety devices, lift and
tilt mechanisms, articulating axle stops, and frame
members must be carefully and regularly inspected
and maintained in a safe operating condition.
12/l/89 SM520
1.0-2
Copyrighted Material
Intended for CLARK dealers only
Do not sell or distribute
1.O General Information
15. Special trucks or devices designed and
approved for hazardous-area operation must receive
special attention to ensure that maintenance
preserves the original, approved safe operating
features.
16. Fuel systems must be checked for leaks and
condition of parts. Extra special consideration must
be given in the case of a leak in the fuel system.
Action must be taken to prevent the use of the truck
until the leak has been corrected.
17. All hydraulic sytems must be regularly inspected
and maintained in conformance with good practice.
Tilt and lift cylinders, valves, and other similar parts
must be checked to assure that “drift” or leakage has
not developed to the extent that it would create a
hazard.
18. When working on hydraulic system, be sure the
engine is turned off or battery disconnected on
electric trucks, upright is in its fully-lowered position,
and hydraulic pressure relieved in hoses and tubing.
WARNING - Always put blocks under the carriage
and upright rails when necessary to work with upright
in an elevated position.
19. Batteries, motors, controllers, limit switches,
protective devices, electrical conductors and
connections must be inspected and maintained in
conformance with good practice. Special attention
must be paid to the condition of electrical insulation.
20. To avoid injury to personnel or damage to the
equipment, consult the manufacturer’s procedures in
replacing contacts on any battery connection.
21. Industrial trucks must he kept in a clean
condition to minimize fire hazards and help to detect
loose or defective parts.
22. The truck manufacturers capacity, operation
and maintenance instruction plates, tags, or decals
must be maintained in legible condition.
23. Modifications and additions that affect capacity
and safe truck operation must not be done without
the manufacturers prior written approval. Capacity,
operation and maintenance instruction plates, tags
or decals must be changed accordingly. Note -
Using other than Clark parts may nullify the truck
rating.
24. Care must be taken to assure that all replace-
ment parts, including tires, are interchangeable with
the original parts and of a quality at least equal to
that provided in the original equipment. Parts,
including tires, are to be installed per the
manufacturer’s procedures. Always use genuine
CLARK or CLARK-approved parts.
25. When removing tires, follow industry safety
practices. Most important, deflate pneumatic tires
completely prior to removal. Following assembly of
tires on multi-piece rims, use a safety cage or
restraining device while inflating.
26. Use special care when removing heavy
components from the truck, such as counterweight,
upright, engine, transaxle, etc. WARNlNG - If not
properly blocked, truck may become unstable. Be
sure that lifting and handling equipment is of the
correct capacity and in good condition.
27. Before any truck is returned to service it must be
safety checked to insure safe operation.
NOTICE - Additional operating and maintenance
safety instructions are contained in the following
publications:
ANSVASME B56.1 - 1983: Safety Standard for
Low Lift and High Lift Trucks (Safety Code For
Powered Industrial Trucks). Published by: Sociei
of Mechanical Engineers, United Engineering
Center, 345 E. 47th Street, New York, N.Y.
10017.
NFPA 5051982: Fire Safety Standard for
Powered Industrial Trucks: Type Designations,
Areas of Use, Maintenance and Operation.
Available from: National Fire Protection Assoc.,
Inc., Batterymarch Park, Quincy, MA 02269.
General Industry Standards, OSHA 2206: OSHA
Safety and Health Standards (29 CFR 1910),
Subpart N-Materials Handling and Storage,
Section 1910.178 Powered Industrial Trucks. For
sale by: Superintendent of Documents, U.S.
Government Printing Office, Washington, D.C
20402.
SM520 12/l/89
1.0 - 3
Copyrighted Material
Intended for CLARK dealers only
Do not sell or distribute
1.OGeneral Information
Safety Signs and Messages
SAFETY SIGNS and MESSAGES are placed in conspicuous places throughout this manual and also on
the lift truck to provide instructions and to call attention to specific areas where potential hazards exist and
special precautions should be taken. Be sure to know and understand the meaning of these instructions,
signs and messages. Each one is there for a specific purpose. Damage to the truck or death or serious
injury to personnel may result if these messages are not followed.
NOTICE This message is used when special information, instructions or identification
is required relating to procedures, equipment, tools, pressures, capacities and other
special data.
IMPORTANT This message is used when special precautions should be taken to
ensure a correct action or to avoid damage to or malfunction of the truck or a
component.
CAUTION This message is used as a reminder of safety hazards which can result in
personal injury if proper precautions are not taken.
WARNING This message is used when a hazard exists which can result in injury or
death if proper precautions are not taken.
DANGER This message is used when an extreme hazard exists which will result in
death or serious injury if proper precautions are not taken.
These labels identify hazards which may not otherwise be apparent to a trained mechanic. There are
many potential hazards for an untrained mechanic and there is no way to label the truck or service
manual against all such hazards. Clark Equipment Company cannot anticipate every possible
circumstance that might involve a potential hazard. The safety signs and warning messages in this
manual are therefore not all inclusive. If a procedure, tool, device or work method not specifically noted
or recommended by Clark is used, you must satisfy yourself that it is safe for you and others. You should
also ensure that the lift truck or its components will not be damaged or made unsafe by the procedures
you choose.
12/l I89 SM520
1.0 - 4
Copyrighted Material
Intended for CLARK dealers only
Do not sell or distribute
1.OGeneral Information
I IMPORTANT SAFETY NOTICE --1
Read and understand all safety precautions and
warnings before performingrepairson lifttrucks.
Appropriate service methods and proper repair procedures are essential to the safe, reliable operation
of industrial trucks as well as the personal safety of the individual doing the work. This Service Manual
provides general directions for accomplishing service and repair work with tested, effective techniques.
Following them will help assure successful repair and reliable truck operation.
There are numerous variations in procedures, techniques, tools, and parts for servicing industrial trucks,
as well as in the skill of the individual doing the work. This manual cannot possibly anticipate all such
variations and provide advice or precautions as to each. Accordingly, anyone departing from the
instructions provided in this manual through procedures used or choice of tools, materials, and parts
may jeopardize his or her personal safety and/or the safety of the vehicle user.
Improper or careless techniques cause accidents. Don’t take chances with incorrect or damaged
equipment. Read and understand the procedures for safe operation and maintenance outlined in
this manual.
STAY ALERT! Follow safety rules, regulations and procedures. Accidents can be avoided by
recognizing dangerous procedures or situations before they occur.
DRIVE AND WORK SAFELY and follow the safety signs and their messages displayed on the
truck and in this manual.
General Precautions
The following list contains general precautions that
should be followed when working on a lift truck:
. Always wear safety glasses for eye protection.
l Remove rings, watches, loose jewelry and open
clothing before working on a vehicle, to avoid serious
injury.
l Do not smoke while working on a vehicle.
l Put ignition switch in the OFF position, unless
otherwise required by the procedure.
l Set the parking brake. Place wheel chocks or wood
blocks of 4” x 4” size or larger to the front and rear
surfaces of the tires to provide further restraint from
inadvertent vehicle movement.
l Use safety stands whenever a procedure requires
you to be under the vehicle.
l Operate the engine only in a well-ventilated area to
avoid the danger of carbon monoxide.
l Keep hands and other objects clear of the fan belt
and fan blades if it is necessary to work in the engine
compartment.
l Keep yourself and your clothing away from all
moving parts, especially the fan and belts, when the
engine is running.
l Avoid contact with hot metal parts such as the
radiator, exhaust manifold, exhaust pipe and muffler
to prevent serious burns.
SM520 1211189
l.O- 5
Copyrighted Material
Intended for CLARK dealers only
Do not sell or distribute
1.OGeneral Information
Product Identification
Model Nomenclature
Cushion fire Models
GCX 20/22/25/27/30 -,C
GCS 20/22/25/27/30 MB
GCS 17/20/22/25/27/30 MC,WC,I
DCS 17/20/22/25/27/30 I
Pneumatic Tire Models
G PX 20/22/25/27/30 -, C
G PS 20/22/25/27/30 M B
GPS 20/22/25/27/30 MC,WC,I
DPS 20/22/25/27/30 I
Rated Load Capacity* @24 inch [500 mm] Load Center
Model 17
Basic Capacity
Ibs 3500
t&Is1 ww
20 22 25 27 30
4000 4500 5000 5500 6000
[2000] [2250] [2500] [27501 [3000]
*This is the basic capacity of the truck chassis. The actual capacity of the truck may be less due to the use of
high lift uprights and/or attachments.
2/27/g 1 SM520
1.0 - 6
Copyrighted Material
Intended for CLARK dealers only
Do not sell or distribute
1.OGeneral Information
Product Identification
Model Designation by Engine and Transaxle Application
Serial No. Prefix
GP138 I I I
010
I I I .
Notes: 1 - Lot 5521 thru 7157 6 - Lot 5536 thru 7169
2 - Lot 7158 and above 7 - Lot 7170 and above
3 - Lot 6200 and above 8 - Lot 5525 thru 6091
4 - Lot 6200 and above 9 - Lot 6205 and above
5 - Lot 5510 thru 6086 10 - Lot 6205 and above
l HR500 and TA18 transaxles incorporate full-floating straight drive axles with drum-and-shoe brakes.
l HR600 transaxles incorporate pre-reduction enclosed oil-cooled disc brakes & offset drive axles.
Model Serial Number Code
Cushion Tire Trucks
Model Designation Sequence No. Lot No.
GX 230 -xXxX -xXxX
GX 230C
G138 MB I= I=
G138 MC -xXxX -xXxX
G138 WC -xXxX -xXxX
G138 I -xXxX -xXxX
Pneumatic Tire Trucks
Model Designation Sequence No. Lot No.
GPX 230 -XXXX -xXxX
GPX 230C -XxXX -xXxX
GP138 MB -xXxX -xXxX
GP138 MC -xXxX -xXxX
GP138 WC -xXxX -xXxX
GP138 I -XXXX -xXxX
SM520 2127191
Plant of Mfr
-XX
1%
-XX
-XX
-XX
Plant of Mfr
-XX
-XX
-xx
-XX
-XX
-XX
Plant of Manufacture
None ........Battle Creek, Ml
FA...........Georgetown, KY
FB...........Lexington, KY
KOF.........Republic of Korea
Plant of Manufacture
See above
1.0 - 7
Copyrighted Material
Intended for CLARK dealers only
Do not sell or distribute
4 Engine
4.3 Engine Tune-Up
Gasoline/LPG & Diesel
Tune-Up Preparation.. ............................................................. .4.3-l
l-Preliminary Checks.. ............................................................. .4.3-2
2-Tune-Up Procedures.. .......................................................... .4.3-5
Engine Tune-Up consists of:
I)- preliminary checks to be sure that all engine
systems are functioning correct/y, and
2) tune-up procedures, which include performing
tests, making minor adjustments and replacing minor
components as necessary to bring an engine up to
its peak level of performance.
Also refer to Section 4.2, EngineTroubieshooting
Tune-Up Preparation
CAUTION
To perform this service procedure, it is
recommended that you:
l Put blocks under the upright rails.
. Raise the drive wheels off the floor.
l Return all controls to neutral, apply the parking
brake, and turn key switch OFF, except as noted.
WARNING
LPG Fuel
Park truck in a well-ventilated area. Do not smoke
or perform maintenance near open flame or other
sources of ignition. Do not disconnect any lines
when exhaust manifold is excessively hot. LP Gas
is highly flammable.
Open and remove both side doors, and raise the
seat deck. Be sure the seat deck support is securely
latched.
1
WARNING
Stop engine before checking battery terminals or
electrical connections. Do not hold ignition wires
with bare hands since shocks or other injuries can
result. LPG (propane), sparks or flames near a
battery could cause an explosion or fire. Battery
acid can cause corrosive burns. Always wear eye
protection. Use of jumper cables or battery
charging should be done only as directed by
manufacturer’s safety instructions.
Minimum Tools Required:
l Tachometer l Torque wrenches
l Voltmeter 9 Vacuum gauge
l Timing light l Jumper wire
-1
Note - The following pages describe general engine
tune-up procedures illustrated with typical views of
the subject activity. Please check your engine
model for specific component arrangement and
corresponding service requirement.
Lubricate threads on spark plugs used in
SM520 12/I 189
Parts GROUP 00,Ol 4.3 - 1
Copyrighted Material
Intended for CLARK dealers only
Do not sell or distribute
4.3 Engine Tune-Up
1-Preliminary Checks
Note - The following quick, simple checks should always
be made to make sure that basic and easy to find troubles
are not the cause of poor engine performance. Once you
have eliminated these items you can check into the other
possible causes of poor engine performance.
1. Check engine oil and coolant levels.
2. Check engine air filter. A clogged filter will cause
engine power loss. Replace, as needed. Note - On
engines equipped with Cyclopac air cleaner, do not service
filter until indicated by restriction indicator.
IMPORTANT - Be careful when inspecting or replacing the
air filter element to prevent dirt from entering the engine air
intake housing.
3. Check air intake tubes for signs of filter leakage.
4. Check crankcase breather system to be sure it is
functioning correctly. Check the following and, if
necessary, clean or replace faulty parts:
1) Breather hoses for damage, cracks, and clogging.
2) Rocker cover and intake manifold fitting holes for
clogging.
4654 [2.6L] Engine
There are 2 sections of engine ventilation system:
1) Breather (PCV) hose from rocker cover to intake
manifold (shown).
2) Breather hoses from oil separator to oil pan and
from oil separator to air horn on carburetor. Oil
separator is not serviceable.
NOTICE - The oil separator has been eliminated on later
model 4654 engines.
Carefully inspect rocker cover side nipple hole
(orifice) and intake manifold nipple hole for clogging.
TM(D)27 [2.7L] Engine
1
TMD27 diesel shown. TM27 gasoline/LPG similar.
Blow-by circulates into intake manifold maintaining
crankcase pressure within a narrow range regardless
of operating speed or load. Servicing of the PCV
system is usually confined to cleaning PCV orifice
and/or valve along with cleaning the air inlet, where
applicable. All connections must be air tight.
Check condition of the hoses and connections.
Repair or replace as required.
D176GA [2.9L] Engine
Check crankcase breather or PCV system to be sure
it is clean (opening or hoses not plugged with dirt or
grease).
4.3 - 2
12/l/89 SM520
Parts GROUP 00,Ol
Copyrighted Material
Intended for CLARK dealers only
Do not sell or distribute
4.3 Enaine Tune-Up
If crankcase breather opening or PCV valve is
plugged with dirt and oil accumulation, remove and
clean with an approved solvent or replace, as
required.
5. Gasoline engines only. Check choke control
linkage to carburetor to be sure it fully closes
opens the choke.
j-~- . ““ON
For safety when checking or removing battery
.
connectrons, always first drsconnect the negative
battery cable at the engine ground connection.
6. Check coil polarity to be sure that primary wire from
point-type distributors is connected to negative
terminal on coil (black wire to coil, white wire to 12
volts at bottom of ballast resistor). Note - On electronic
ignition systems there are two wires coming from the
distributor and both are connected to the coil. D176GA
engine coil does not have external ballast resistor.
and
and
7. Check battery for damage and cleanliness of
terminals. Remove the boot covers to expose
terminal connections. Clean battery terminals and
cable connections if they are dirty and corroded.
Check battery terminal cable connections for
tightness. Replace boots over terminals after
inspection. If necessary, wash battery with a mild solution
of baking soda and water. First, make sure that cell vent
caps are tight to ensure that soda solution does not
contaminate battery electrolyte.
NOTICE - For side-mounted terminals, each battery cable is
attached to terminal by a bolt which threads into the
terminal. When tightening the bolt, use recommended
torque value to prevent terminal damage, while assuring a
good connection. Do not overtighten.
.’
8. Be sure battery negative (ground) cable is
securely connected to engine block. Check engine
starter cable connections.
SM520 12/l/89
Parts GROUP 00,Ol 4.3 - 3
Copyrighted Material
Intended for CLARK dealers only
Do not sell or distribute
4.3 Engine Tune-Up
9. Start the engine.
10. With engine running, look at the battery charge
indicator. The light should not be illuminated,
indicating voltage output from the alternator.
11. Check fuel gauge to be sure fuel level is
adequate, to ensure that low fuel level will not affect
other tests of engine performance.
Spark Test
WARNING
Electrical Shock I
Do not hold ignition wireswith barehandssince
shocks or other injuries can result. High ignition
voltageor the reactionfromelectrical shock can cause
severe personal injury.
12. Perform a spark test with each spark plug wire, or
use a spark indicator, to check coil and spark plug
wires to be sure coil is producing adequate voltage
to all plugs. At the same time, check all spark plug
wire connections for tightness.
If there is indication of a problem in the ignition
refer to Section 6.3, Ignition System Maintenance.
system,
Cranking Test
13. If there is indication of a faulty battery, or if engine
cranking speed is slow, perform a cranking test, as
follows:
1) LPG fuel system. Shut off LPG service valve.
2) Ground the ignition system. Disconnect high tension
coil wire from the distributor cap, clip a jumper lead onto the
coil wire and ground it on engine block.
3) Then, connect a voltmeter across the battery
terminals. Now push accelerator pedal fully down (to open
the throttle and obtain higher compression) and crank the
engine for 15 seconds.
4) During cranking the battery voltage should exceed 9.6
volts. Battery voltage of less than 9.4-9.6 volts indicates
trouble in the battery, cables, or starter.
5) Immediately after cranking, battery no-load voltage
should be 12 volts, minimum. The voltmeter should show a
quick response. If the voltage is less than 12 volts or the
voltmeter has a sluggish response it is an indication of a
battery problem.
6) If battery no-load voltage returns to 12 volts
immediately after cranking but there is low cranking voltage
(e.g., 8 volts), the problem is in the cables or starter. First,
inspect the cables for loose and burned teminal
connections. Then, remove and check the starter.
Rebuild or replace, as required.
7) Remove the jumper lead, connect the coil wire to
distributor cap and start and accelerate engine to a steady
speed of 1800-2000 rpm.
8) Charging system output voltage should be between
12.5-13.5 volts.
4.3 - 4
12/l I89 SM520
Parts GROUP 00,07
Copyrighted Material
Intended for CLARK dealers only
Do not sell or distribute
4.3 Engine Tune-Up
14. If the battery has been “running down”
(discharging) or if engine cranking speed is low,
check the alternator circuit and battery. See cranking
test above.
Refer to Section 6.8, Alternator Maintenance.
NOTICE - The above preliminary tests show whether the
basic engine sytems are functioning and that charging and
cranking systems are okay or in need of repair. Remove the
voltmeter after these tests are made.
Fuel Supply System
Gasoline engines
1. Check if there is a fuel system problem by
accelerating engine with the choke knob in and the
tilt lever fully forward (or back) to put hydraulic system
in bypass to load engine.
2. If engine operation is erratic, pull choke knob out
and again accelerate under hydraulic by-pass load. If
engine smooths out there is a problem in the fuel
system due to insufficient fuel flow to engine.
1) Check in-line fuel filter. Replace, as necessary.
2) Check fuel pump flow and pressure. Repair or
replace fuel pump, as required.
3) Check carburetor. Repair, clean or replace.
LPG engines
For LPG trucks, refer to Section 5.2, LPG Fuel System.
Z-Tune-Up Procedures
1. Connect a tachometer, or combination test
instrument such as the Clark Dynamic Engine
Analyzer, Part No. 1802047, to the engine.
2. Install a vacuum gauge. The pick-up location to
install a vacuum gauge will vary between engines.
Find a location where the vacuum gauge may be
connected to measure intake manifold vacuum.
D176GA [2.9L] Engine. Install vacuum gauge at the
plug fitting in the intake manifold (shown).
4G64 [2.6L] Engine. Install the vacuum gauge at the
breather hose leading from the valve cover to the
intake manifold. Use a nipple or an adapter to
connect to the vacuum hose.
TM27 [2.7L] Engine. Attach vacuum gauge to PCV
fitting on intake manifold.
3. Start the engine, and let it warm up. While doing
this, look for excessive exhaust smoke and listen for
any unusual engine noise.
Note - Blue exhaust smoke indicates excessive oil
consumption caused by faulty seating of piston rings, dirt,
or worn engine components such as rings, cylinders,
pistons, or valve guides. Black smoke indicates excessive
fuel consumption caused by faulty carburetor or choke
problem (gasoline engines only).
1. Stall Test
1. First, perform a stall test to determine engine
condition and whether engine and other compo-
nents are functioning correctly. Check:
1) Idle speed and vacuum
2) No-load governed speed and vacuum
3) Speed and vacuum in hydraulic (tilt) bypass
4) Engine stall speed and vacuum
Refer to Section 4.7, RPM, Vacuum & Stall Tests, for
procedures and analysis of test results.
Also see Section 2.7, Service Specifications.
NOTICE - A stall test is perhaps the most important and
useful test for quickly determining engine condition. Stall
tests should be a part of all engine tune-ups and must be
carefully conducted and analyzed to pinpoint specific
problems.
Stall tests must include RPM, vacuum and hydraulic
pressure measurements to accurately diagnose specific
problem areas. For this reason, stall testing is described in
a separate, detailed section noted above.
Engine speed and vacuum checks with engine under load,
are made to also determine whether major components or
systems other than the engine are causing problems.
Note - lf stall speed is low, do not automatically blame the
torque converter. Carefully check engine condition.
Frequently an obstruction, e.g., carbon plugging, in the air
intake or exhaust system is the problem.
2. Idle Speed
1. Check engine idle speed and adjust carburetor
idle setting if idle speed is not correct.
Refer to Section 4.10 for Carburetor Idle Adjustment.
4654 Engine 650 rpm (600-700 rpm)
TM(D)27 Engine 650 rpm (600-700 rpm)
Reference Section 2. I, Service Specifications.
SM520 12/l/89
Parts GROUP 00,Ol 4.3 - 5
Copyrighted Material
Intended for CLARK dealers only
Do not sell or distribute
4.3 Engine Tune-Up
3. Ignition System
Refer to Section 6.3, Ignition System Maintenance, for
additional procedures.
1-Distributor, Coil and Wiring
1. First, check the distributor, coil and ignition wiring
(4G54 engine shown).
2. Remove the distributor cap and check its
condition for:
l cracks
l carbon tracking or flashover burn marks
l corrosion, rusting or damage of terminals
l burned center terminal or side inserts
l dirt inside and outside
l moisture
It is very important for the cap to be clean. Moisture and dirt
make a good path for flashover. Once a carbon track has
started, the cap must be replaced.
3. Clean the distributor cap and terminals, or replace,
as needed.
4. Remove the spark plug wires (cables) from the
distributor cap. Inspect the cable socket terminals in
the cap for corrosion and burn damage. Clean the
towers and terminals, as needed.
5. Remove the rotor and inspect it for:
l cracks
l carbon tracking or flashover burn marks
l burned, pitted , bent or worn terminal tip
. moisture, contamination and dirt buildup
Clean or replace the rotor, as needed.
6. Check centrifugal advance governor. Install the
rotor. Turn (rotate) the rotor in the direction of
rotation and release it to confirm that the rotor returns
to the original position smoothly.
Adjust or Replace Ignition Points
1. 4654 [2_6L] engine only.
1. Inspect the ignition points for wearcondition, etc.
2. Inspect condenser and condition of installation.
3. Replace ignition points and condenser, as needed.
4. Lubricate distributor cam and pivots (see below).
5. Check point gap setting (see Ignition Timing below).
6. Check electronic ignition unit, as appljcable.
Refer to Section 6.4, Ignition System - 4G54 Engine.
2. TM27 [2.7L] & D 176GA [2.9L] engines.
1. Inspect electronic ignition unit. Check air gap.
Refer to Section 6.5, Ignition System - TM27 Engine.
Refer to Section 6.6, Ignition System - D 176GA Engine.
Lubricatiotl
Refer to Section 6.4, ignition System-4G54 [2,6L] Engine.
Note - TM27 [2.7L] and D176GA {2.9L] engine distributors
do not require periodic lubrication.
coil
1. Ignition coils do not normally require any service
except keeping all terminals and connections clean
and tight. The coil should be kept reasonably clean;
however, it must not be subjected to steam cleaning
or similar cleaning methods that may cause moisture
to enter the coil.
2. Check the ignition coil tower for tracking and
obvious damage. Be sure the tower is clean and dry.
Check coil boot nipple for correct sealing and
insulating qualities. If flashover occurs here, the
engine probably won’t start.
3. Check primary circuit wires for tight connections
and correct polarity. When the ignition coil is wired
up incorrectly with the distributor, it can cause high
speed missing with loss of power and performance
under heavy loads.
4. Check the coil to distributor cap high-tension
(secondary) cable. Check the fit of the boot on the
coil and distributor cap towers. A high voltage leak at
this point will cause the engine not to start.
5. Test the Coil When Necessary. If the coil is
suspected of being faulty, remove and check its
operation on a coil tester and replace it if inoperative.
Spark Plug wires
1. Check spark plug cables and boots for cuts,
cracking, brittleness, burns or excessive corrosion of
the terminals on both ends, and general deteriora-
tion. If the cables are three years old or more,
replace them.
2. To install new cables, remove one old wire at a
time and match it to a new one. Use all looms and
separators and route the wires exactly as the old
ones.
NOTICE - Dielectric Grease. The use of a dielectric silicone
grease at high-voltage connecting points such as coil and
distributor cap towers and spark plugs is recommended to
ensure good electrical connection and prevent corrosion.
2-Spark Plugs
1. Use an air nozzle to blow dirt and contamination
out of the spark plug wells, before and after
loosening the plugs.
12/l/89 SM520
4.3 - 6 Parts GROUP 00,Ol
Copyrighted Material
Intended for CLARK dealers only
Do not sell or distribute
4.3 Engine Tune-Up
IMPORTANT
Do not allow dirt and contaminants to enter spark
plug openings when the plugs are removed.
2. Remove and check the spark plugs and clean,
adjust or replace, as necessary.
3. As each plug is removed, keep it in cylinder order
and examine it carefully. Check spark plugs for
burned electrodes, wear, carbon deposits and gap
setting. Inspect closely for cracked insulators.
4. If the edges of the plug’s inner and outer
electrodes are noticeably eroded, replace it.
Generally, spark plugs used with breaker-point
ignition should be replaced per recommended
schedule. With electronic ignition, check each plug
for excessive wear.
5. It may be necessary to periodically clean the plugs
with a plug cleaner and to reset the gaps to correct
specifications. Check the gap of the plugs with a
wire gauge, using the tool at the end of the gauge to
bend the outer electrode to change the gap.
6. Spark plugs must be correctly installed in order to
obtain good performance from them. Clean the
spark plug seat in the cylinder head. Use new seat
gaskets and screw plug in by hand. Tighten all plugs
to correct torque with socket wrench of correct size.
Wipe insulators clean before installing the boots and
cables.
Refer to Section 6.3, Ignition System Maintenance, for
additional spark plug maintenance procedures.
Mgnition Timing and Advance
IMPORTANT - Correct ignition timing is vital to the proper
and efficient operation of the engine. Incorrect timing can
result in engine overheating, with resultant reduced piston
and valve life, and lowered fuel economy.
It is important that the ignition point gap or air gap
(electronic ignition) is set correctly before checking and
adjusting the timing.
Checking timing is counter-productive if the point gap is not
set to specification. Timing is set using a timing light. The
light flashes when the “points” open. If the points open at
the wrong time, the timing marks are seen at the wrong
time. And therefore, based on this, the timing is set
incorrectly.
To insure accuracy, the points must be set using a dwell
meter. Using a feeler gauge to set points can be very
inaccurate due to variations in judgment of “feel” as well as
other mechanical variations. Use a dwell meter to set
points.
Refer to Section 4.4, Ignition Timing Procedures.
1. Using a dwell meter, check and adjust point gap or
air gap (electronic ignition) first and then check
ignition timing and advance.
See Section 2.7, Service Specifications, for your engine.
SM520 12/l I89
2. Adjust idle speed to 500 rpm.
3. Disconnect vacuum advance hose at distributor
(as applicable) and plug or clamp the open end.
4. Install a timing light.
CAUTION
Enaine Fan
Be careful of rotating fan blades when
using a timing light.
5. With engine running at 500 rpm idle speed and
vacuum advance disconnected, aim the timing light
at the crankshaft pulley and timing indicator.
6. Check the initial (basic) timing by alignment of
timing notch on crank pulley with mark on timing
indicator (4654 engine shown). Adjust timing, as
necessary.
Refer to Section 4.4, Ignition Timing Procedures.
See also Section 2.7, Service Specifications.
7. Check spark advance mechanism(s). Accelerate the
engine speed slowly to determine if there is a steady and
smooth spark advance. This will be indicated by the notch
on crankshaft pulley, which will appear to move away from
the initial timing point and, generally, upwards, as viewed in
truck.
8. Run engine at steady 1600-1800 rpm.
Temporarily connect the vacuum advance hose and
check for correct advance. Ifthere is no advance or if it is
erratic, the distributor advance mechanisms must be
inspected and repaired or replaced. Check for hose leaks,
etc., or replace advance diaphragm.
Refer to Part 6, Ignition System Maintenance procedures
for your engine.
9. Reconnect vacuum advance and set idle speed
to specification.
4. Readjust Idle Speed
1. After replacement or adjustment of ignition
components or other engine parts, recheck and
adjust the carburetor idle speed to specification and
adjust idle air-fuel ratio.
2. Adjust idle air-fuel ratio to obtain low carbon
monoxide (use CO meter).
falts GROUf OU,U7 4.3 - 7
Copyrighted Material
Intended for CLARK dealers only
Do not sell or distribute
4.3 Enaine Tune-M
5. Compression Check
1. If the stall speed reading is not in the correct range
or the engine runs erratically, perform an engine
compression check. This will check the condition of
the piston rings and engine valves.
Refer to Section 4.6, Engine Cylinder Compression Test.
See Section 2.1, Service Specifications.
6. Valve Clearance Settings
1. If the engine compression test indicates a valve
problem, or valve train is noisy, check and adjust
valve (tappet) clearances, as necessary.
Refer to Section 4.5, Valve Tappet Clearance Adjustment.
Valve Clearance Settings: See Section 2.1, Service
Specifications
7. Cooling System
Refer to Section 4.8, Cooling System for additional
information.
1. If there is an indication of engine overheating,
perform a complete check of the engine cooling
system.
2. Inspect the radiator for damage and clogging from
dirt contamination. Air clean the radiator, if it has not
already been cleaned as part of the PM procedure.
3. Check to be sure that the fan blades are not loose
or damaged and that the fan is installed correctly (fan
installed badwards is a wmmon problem.)
NOTfCE - The fan is designed as a “pusher-type” fan, i.e.,
to push air through the radiator. The fan blades should be
installed with their curve to push air into the radiator as they
turn in the direction of right-hand engine rotation.
IMPORTANT - Fan blades should engage l/3 of the depth
of the radiator shroud.
4. On optional models with viscous fan drive, check
the fan drive (speed control) assembly.
5. Check the fan drive belt for proper tension and
adjust, as necessary. If tension is low, the belt will
slip. If belt tension is too high the bearings and seals
in the water pump and alternator can be damaged.
6. Check the exhaust pipe to be sure that exhaust is
not blowing into the radiator (except GS, LPS, DS
construction with piccolo tube).
7. As a final step, if necessary:
1) pressure test the cooling system.
2) pressure test the radiator cap.
3) check the thermostat.
4) check the coolant for freeze protection level.
5) check overflow reservoir and hoses.
8. TMD27 [2.9L] Diesel Engine
J
1. Check glow plugs and inspect glow plug wiring.
Repair or replace, as needed.
2. Inspect fuel lines for leaks. Adjust fuel control
linkage, and accelerator pedal linkage to allow for full
travel of arm on fuel injection pump, as necessary.
Refer to Section 5.3. Diesel Fuel System for additional
information.
9. Recheck Engine Performance
1. Stall Test. Run a stall test to check engine
performance after tune-up.
Remove the tachometer, vacuum gauge and timing
light.
Tune-Up Completion
When you have systematically completed these tune-up
procedures you should have been successful in restoring
the engine to its peak level of performance, or otherwise
determined the need for additional maintenance or repair
of the engine.
1. Lower and latch the seat deck. Be sure seat deck
is correct/y latched. Install and close the side doors.
Lower the drive wheels to the floor and remove any
blocking, if used.
2. Test drive the truck.
3. Clean up any loose dirt and spills. Wipe off the
truck.
4.3 - 8
mfa9 SM520
Parts GROUP 00,Ol
Thank you very much for
your reading. Please Click
Here. Then Get COMPLETE
MANUAL. NO WAITING
NOTE:
If there is no response to
click on the link above,
please download the PDF
document first and then
click on it.
Copyrighted Material
Intended for CLARK dealers only
Do not sell or distribute
Engine Ignition 4 Engine
4.4 Ignition Timing Procedures
General Procedures.. ............................................................... 4.4-l
Checking Ignition Timing.. ....................................................... .4.4-3
Initial (Basic) Ignition Timing.. .................................................... .4.4-4
Ignition Timing Adjustment.. ..................................................... 4.4-4
Checking Spark Advance.. ....................................................... .4.4-5
Emergency Timing Method.. .................................................... .4.4-6
Engine Ignition Timing procedures include:
I) checking the point gap (air gap on electronic
ignition) and initial (basic) timing of the distributor to
the engine,
2) adjusting the timing when timing is found to be
incorrect, and
3) checking spark advance.
Normally Clark industrial engines with distributor-
ignition are timed to have the distributor points open
(or electronic breaker trigger) when the #1 cylinder is
on compression stroke and the crankshaft (or
crankshaft pulley) mark lines up with the pointer or
timing indicator on the engine.
The general timing procedures are the same for all
G(P)X, GCS/GPS 77-30 engine models, whether
equipped with contact breaker-point distributor or
electronic ignition distributor. Both types of ignition
utilize a typical distributor mounted and driven in the
conventional manner. Individual differences in
components and procedures are noted or shown
where applicable.
Note - The following pages d8SCfib8 general engine
ignition timing pfOC8dUf8S i/iustrated with typical views of
the subject activity. f/ease check your engine model for
specific component arrangement and corresponding
service requirement.
Refer to Part 6, Ignition System maintenance for your
engine model.
General Procedures
Be careful of rotating fan blades when
1. Open and remove either the right hand (4654 &
TM27 engine) or left hand side door (D176GA
engine), and raise the seat deck. Be sure the seat
deck support is securely latched.
NOTICE - 4654 [2.6L] Engine Air Filter
For best access to the distributor and timing
indicator, it is recommended to remove the air filter
housing from the truck. If you are unfamiliar with this
procedure, please refer to Section 4.9, Air Filter.
There are two methods of checking ignition timing:
with or without a timing light. Timing without a light is
an emergency method which is outlined at the end
of this section. The preferred method is to use a
timing light as described in the folio wing procedures.
SM520 12/l/89
Parts GROUP 11 4.4 - 1
Copyrighted Material
Intended for CLARK dealers only
Do not sell or distribute
4.4 Ignition Timing
General Procedures (Cont’d)
2. Install a tachometer, or a combination test instru-
ment, such as the Clark Dynamic Engine Analyzer,
Part No. 1802047. Note - Tachometer must be con-
nected directly to battery terminals (other ground not
suitable).
7. Disconnect vacuum hose from vacuum advance
on distributor (as applicable). Plug or clamp the open
end of vacuum hose to carburetor or manifold.
Note - D176GA [2.9L] engine does not have vacuum
advance.
8. Lower the engine speed by adjusting the
carburetor idle screw to obtain 500 tpm idle speed.
Refer to Section 4.10, Engine Adjustments, for additional
information on idle adjustment.
3. Install a timing light.
Note - An ignition timing light, Clark Part No. 1801971, or
equivalent, with inductive spark pickup is recommended.
Install per manufacturerrecommendations.
4. Clean the timing pointer or indicator and timing
mark or notch on the crank pulley to make the mark
more legible under the timing light.
5. Start the engine and warm it up until it runs
smoothly.
6. Check and adjust ignition point gap or air gap
(electronic ignition), as applicable, with a dwell meter.
IMPORTANT - To insure accuracy, always use a dwell meter
to check and adjust point gap setting. See NOTICEat right.
Refer to Part 6, Ignition System Maintenance for your
engine model for ignition point or air gap S8tkgS.
9. Run engine at 500 rpm idle speed (unless
otherwise noted), so the automatic advance of the
distributor is not operating.
Note - lt is standard practice to check engine initial (basic)
timing with engine running at 500 rpm idle speed setting,
so that the automatic advance of the distributor is
completely retarded and not affecting timing. THIS IS
VERY IMPORTANT TO OBTAIN CORRECT TIMING.
NOTICE - Correct ignition’timing is vital to the proper
and efficient operation of the engine. Incorrect
timing can result in engine overheating, with
resultant reduced piston and valve life, and lowered
fuel economy.
It is important that the ignition point gap (or air gap on
electronic ignition) is set correctly before checking
and adjusting the timing.
Checking timing is counter-productive if the point
gap is not set to specification. Timing is set using a
timing light. The light f/ashes when the “points”
open. If the points open at the wrong time, the
timing marks are seen at the wrong time. And
therefore, based on this, the timing is set incorrect/y.
To insure accuracy, the points must be set using a
dwell meter. Using a feeler gauge to set points can
be inaccurate due to variations in judgment of “fee/”
as well as other mechanical variations. Always use a
dwell meter to set points.
12/l/89 SM520
4.4 - 2 Parts GROUP 11
Copyrighted Material
Intended for CLARK dealers only
Do not sell or distribute
4.4 Ignition Timing
Checking Ignition Timing
IMPORTANT - Distributors with vacuum advance.
Before ignition timing can be checked or adjusted,
disconnect vacuum advance line from distributor and
plug or clamp the open end of line leading to the
manifold to prevent loss of vacuum.
4054 [2.6L] Engine
CAUTION
Enaine Fan
to hold the timing light in a position to
avoid being too close to the rotating fan blades.
Be careful to stay away from the fan when leaning over
to see the timing marks.
1. The 4654 engine timing indicator (1) is located
near the crankshaft pulley (2) and may be seen from
the right-hand side of the truck.
2. With engine running at the noted idle speed, aim
the timing light at the crankshaft pulley and timing
indicator. Note timing marks as light flashes. (4G54
[2.6L] engine shown.)
TM27 [2.7L] Engine
1. The timing indicator is located near crankshaft
pulley similar to the 4G54 [2.6L] engine and may be
seen from right-hand side of truck.
D176GA [2.9L] Engine
1. Stand at left side of truck and point timing light
down in a vertical direction between the fan and
alternator.
CAUTtON
Engine Fan
Be sure to hold the timing light in a position above
the top of the alternator (or radiator) to avoid being
too close to the rotating fan blades. Be careful to
stay away from the fan when leaning over to see the
timing marks.
I
SM520 12/l/89
Parts GROUP 11 4.4 - 3

More Related Content

What's hot

International Navistar Manual de Taller DT466.pdf
International Navistar Manual de Taller DT466.pdfInternational Navistar Manual de Taller DT466.pdf
International Navistar Manual de Taller DT466.pdfAdrianMartinez319
 
Catalogo chevrolet partes_de_motor
Catalogo chevrolet partes_de_motorCatalogo chevrolet partes_de_motor
Catalogo chevrolet partes_de_motorAtm Movil24/7
 
Ms.37. esquema electrico. version de idioma. edicion 1
Ms.37. esquema electrico. version de idioma. edicion 1Ms.37. esquema electrico. version de idioma. edicion 1
Ms.37. esquema electrico. version de idioma. edicion 1Maik700
 
40627672 diagrama-de-frenos
40627672 diagrama-de-frenos40627672 diagrama-de-frenos
40627672 diagrama-de-frenosMiguel Ticuna
 
Deutz fahr tcd 2012 2 v engine service repair manual
Deutz fahr tcd 2012 2 v engine service repair manualDeutz fahr tcd 2012 2 v engine service repair manual
Deutz fahr tcd 2012 2 v engine service repair manualjskefksmemwe
 
Manual de serviã§os super 100 80507-d03 a-001
Manual de serviã§os super 100   80507-d03 a-001Manual de serviã§os super 100   80507-d03 a-001
Manual de serviã§os super 100 80507-d03 a-001nielson araujo
 
Inyeccion_Diesel_-_Hdi_-_Bosch.pdf
Inyeccion_Diesel_-_Hdi_-_Bosch.pdfInyeccion_Diesel_-_Hdi_-_Bosch.pdf
Inyeccion_Diesel_-_Hdi_-_Bosch.pdffacundo807201
 
Manual-Renault-Megane-2 (1).pdf
Manual-Renault-Megane-2 (1).pdfManual-Renault-Megane-2 (1).pdf
Manual-Renault-Megane-2 (1).pdfANTONIOAMAYA18
 
Har 1014 Vortec DBW Wiring Harness Manual and Instructions
Har 1014 Vortec DBW Wiring Harness Manual and Instructions Har 1014 Vortec DBW Wiring Harness Manual and Instructions
Har 1014 Vortec DBW Wiring Harness Manual and Instructions PSI Conversion
 
Mitsubishi fuso fighter 6 m60 engine
Mitsubishi fuso fighter 6 m60 engineMitsubishi fuso fighter 6 m60 engine
Mitsubishi fuso fighter 6 m60 engineWilliam Valer
 
Tecnología acert EN MOTORES CATERPILLAR
Tecnología acert EN MOTORES CATERPILLARTecnología acert EN MOTORES CATERPILLAR
Tecnología acert EN MOTORES CATERPILLARRamiro Ticona Mamani
 
Eges 216 manual de diagnósticos y localización de fallas - familia de moto...
Eges 216   manual de diagnósticos y localización de fallas -  familia de moto...Eges 216   manual de diagnósticos y localización de fallas -  familia de moto...
Eges 216 manual de diagnósticos y localización de fallas - familia de moto...Otorongosabroso
 
Hyundai D4DD engine manual
Hyundai D4DD engine manualHyundai D4DD engine manual
Hyundai D4DD engine manualViktor
 
Cajas de cambios manuales vt2214 b vt2514b y vt2814b
Cajas de cambios manuales vt2214 b vt2514b y vt2814bCajas de cambios manuales vt2214 b vt2514b y vt2814b
Cajas de cambios manuales vt2214 b vt2514b y vt2814bjjhernandezch
 

What's hot (20)

Denso hp4 1
Denso hp4 1Denso hp4 1
Denso hp4 1
 
Caja de mandos
Caja de mandosCaja de mandos
Caja de mandos
 
Manual de Operacion y Mantenimiento Motores C4.4 ACERT (ingles)
Manual de Operacion y Mantenimiento Motores C4.4 ACERT (ingles)Manual de Operacion y Mantenimiento Motores C4.4 ACERT (ingles)
Manual de Operacion y Mantenimiento Motores C4.4 ACERT (ingles)
 
Bf4 l2011 manual de mantenimiento
Bf4 l2011 manual de mantenimientoBf4 l2011 manual de mantenimiento
Bf4 l2011 manual de mantenimiento
 
International Navistar Manual de Taller DT466.pdf
International Navistar Manual de Taller DT466.pdfInternational Navistar Manual de Taller DT466.pdf
International Navistar Manual de Taller DT466.pdf
 
Catalogo chevrolet partes_de_motor
Catalogo chevrolet partes_de_motorCatalogo chevrolet partes_de_motor
Catalogo chevrolet partes_de_motor
 
Ms.37. esquema electrico. version de idioma. edicion 1
Ms.37. esquema electrico. version de idioma. edicion 1Ms.37. esquema electrico. version de idioma. edicion 1
Ms.37. esquema electrico. version de idioma. edicion 1
 
40627672 diagrama-de-frenos
40627672 diagrama-de-frenos40627672 diagrama-de-frenos
40627672 diagrama-de-frenos
 
Deutz fahr tcd 2012 2 v engine service repair manual
Deutz fahr tcd 2012 2 v engine service repair manualDeutz fahr tcd 2012 2 v engine service repair manual
Deutz fahr tcd 2012 2 v engine service repair manual
 
Manual de serviã§os super 100 80507-d03 a-001
Manual de serviã§os super 100   80507-d03 a-001Manual de serviã§os super 100   80507-d03 a-001
Manual de serviã§os super 100 80507-d03 a-001
 
Inyeccion_Diesel_-_Hdi_-_Bosch.pdf
Inyeccion_Diesel_-_Hdi_-_Bosch.pdfInyeccion_Diesel_-_Hdi_-_Bosch.pdf
Inyeccion_Diesel_-_Hdi_-_Bosch.pdf
 
Manual-Renault-Megane-2 (1).pdf
Manual-Renault-Megane-2 (1).pdfManual-Renault-Megane-2 (1).pdf
Manual-Renault-Megane-2 (1).pdf
 
Har 1014 Vortec DBW Wiring Harness Manual and Instructions
Har 1014 Vortec DBW Wiring Harness Manual and Instructions Har 1014 Vortec DBW Wiring Harness Manual and Instructions
Har 1014 Vortec DBW Wiring Harness Manual and Instructions
 
Mitsubishi fuso fighter 6 m60 engine
Mitsubishi fuso fighter 6 m60 engineMitsubishi fuso fighter 6 m60 engine
Mitsubishi fuso fighter 6 m60 engine
 
Tecnología acert EN MOTORES CATERPILLAR
Tecnología acert EN MOTORES CATERPILLARTecnología acert EN MOTORES CATERPILLAR
Tecnología acert EN MOTORES CATERPILLAR
 
Manual motor om 611
Manual motor om 611Manual motor om 611
Manual motor om 611
 
Eges 216 manual de diagnósticos y localización de fallas - familia de moto...
Eges 216   manual de diagnósticos y localización de fallas -  familia de moto...Eges 216   manual de diagnósticos y localización de fallas -  familia de moto...
Eges 216 manual de diagnósticos y localización de fallas - familia de moto...
 
Hyundai D4DD engine manual
Hyundai D4DD engine manualHyundai D4DD engine manual
Hyundai D4DD engine manual
 
Cajas de cambios manuales vt2214 b vt2514b y vt2814b
Cajas de cambios manuales vt2214 b vt2514b y vt2814bCajas de cambios manuales vt2214 b vt2514b y vt2814b
Cajas de cambios manuales vt2214 b vt2514b y vt2814b
 
TABLA DE BUJIAS.pdf
TABLA DE BUJIAS.pdfTABLA DE BUJIAS.pdf
TABLA DE BUJIAS.pdf
 

Similar to Clark gcs standard forklift service repair manual

Clark hwd 30 forklift service repair manual
Clark hwd 30 forklift service repair manualClark hwd 30 forklift service repair manual
Clark hwd 30 forklift service repair manualfhjsjekdmme
 
Clark hwd 25 forklift service repair manual
Clark hwd 25 forklift service repair manualClark hwd 25 forklift service repair manual
Clark hwd 25 forklift service repair manualdikskedmdm
 
Clark hwd 30 forklift service repair manual
Clark hwd 30 forklift service repair manualClark hwd 30 forklift service repair manual
Clark hwd 30 forklift service repair manualfjjskedmme
 
Clark hwd 25 forklift service repair manual
Clark hwd 25 forklift service repair manualClark hwd 25 forklift service repair manual
Clark hwd 25 forklift service repair manualfhjsjekdmme
 
Clark hwd 25 forklift service repair manual
Clark hwd 25 forklift service repair manualClark hwd 25 forklift service repair manual
Clark hwd 25 forklift service repair manualfjjskedmme
 
Clark pwd 30 forklift service repair manual
Clark pwd 30 forklift service repair manualClark pwd 30 forklift service repair manual
Clark pwd 30 forklift service repair manualdidkkmmdm
 
Clark pwd 25 forklift service repair manual
Clark pwd 25 forklift service repair manualClark pwd 25 forklift service repair manual
Clark pwd 25 forklift service repair manualdidkkmmdm
 
Clark pwd 25 forklift service repair manual
Clark pwd 25 forklift service repair manualClark pwd 25 forklift service repair manual
Clark pwd 25 forklift service repair manualfhhjsjekmdme
 
Clark pwd 36 forklift service repair manual
Clark pwd 36 forklift service repair manualClark pwd 36 forklift service repair manual
Clark pwd 36 forklift service repair manualdidkkmmdm
 
Clark hwd 36 forklift service repair manual
Clark hwd 36 forklift service repair manualClark hwd 36 forklift service repair manual
Clark hwd 36 forklift service repair manualdikskedmdm
 
Clark hwd 36 forklift service repair manual
Clark hwd 36 forklift service repair manualClark hwd 36 forklift service repair manual
Clark hwd 36 forklift service repair manualfjjskedmme
 
Clark pwd 36 forklift service repair manual
Clark pwd 36 forklift service repair manualClark pwd 36 forklift service repair manual
Clark pwd 36 forklift service repair manualfhhjsjekmdme
 
Clark hwd 30 forklift service repair manual
Clark hwd 30 forklift service repair manualClark hwd 30 forklift service repair manual
Clark hwd 30 forklift service repair manualdikskedmdm
 
Clark pwd 30 forklift service repair manual
Clark pwd 30 forklift service repair manualClark pwd 30 forklift service repair manual
Clark pwd 30 forklift service repair manualfhhjsjekmdme
 
Clark hwd 36 forklift service repair manual
Clark hwd 36 forklift service repair manualClark hwd 36 forklift service repair manual
Clark hwd 36 forklift service repair manualfhjsjekdmme
 
Clark g127 e forklift service repair manual
Clark g127 e forklift service repair manualClark g127 e forklift service repair manual
Clark g127 e forklift service repair manualjfdjskmdmme
 
Clark gp127 e forklift service repair manual
Clark gp127 e forklift service repair manualClark gp127 e forklift service repair manual
Clark gp127 e forklift service repair manualjfdjskmdmme
 
Clark gp127 forklift service repair manual
Clark gp127 forklift service repair manualClark gp127 forklift service repair manual
Clark gp127 forklift service repair manualfhsjejkdm
 
Clark gp127 forklift service repair manual
Clark gp127 forklift service repair manualClark gp127 forklift service repair manual
Clark gp127 forklift service repair manualdikskekmdmdm
 
Clark g127 forklift service repair manual
Clark g127 forklift service repair manualClark g127 forklift service repair manual
Clark g127 forklift service repair manualjfdjskmdmme
 

Similar to Clark gcs standard forklift service repair manual (20)

Clark hwd 30 forklift service repair manual
Clark hwd 30 forklift service repair manualClark hwd 30 forklift service repair manual
Clark hwd 30 forklift service repair manual
 
Clark hwd 25 forklift service repair manual
Clark hwd 25 forklift service repair manualClark hwd 25 forklift service repair manual
Clark hwd 25 forklift service repair manual
 
Clark hwd 30 forklift service repair manual
Clark hwd 30 forklift service repair manualClark hwd 30 forklift service repair manual
Clark hwd 30 forklift service repair manual
 
Clark hwd 25 forklift service repair manual
Clark hwd 25 forklift service repair manualClark hwd 25 forklift service repair manual
Clark hwd 25 forklift service repair manual
 
Clark hwd 25 forklift service repair manual
Clark hwd 25 forklift service repair manualClark hwd 25 forklift service repair manual
Clark hwd 25 forklift service repair manual
 
Clark pwd 30 forklift service repair manual
Clark pwd 30 forklift service repair manualClark pwd 30 forklift service repair manual
Clark pwd 30 forklift service repair manual
 
Clark pwd 25 forklift service repair manual
Clark pwd 25 forklift service repair manualClark pwd 25 forklift service repair manual
Clark pwd 25 forklift service repair manual
 
Clark pwd 25 forklift service repair manual
Clark pwd 25 forklift service repair manualClark pwd 25 forklift service repair manual
Clark pwd 25 forklift service repair manual
 
Clark pwd 36 forklift service repair manual
Clark pwd 36 forklift service repair manualClark pwd 36 forklift service repair manual
Clark pwd 36 forklift service repair manual
 
Clark hwd 36 forklift service repair manual
Clark hwd 36 forklift service repair manualClark hwd 36 forklift service repair manual
Clark hwd 36 forklift service repair manual
 
Clark hwd 36 forklift service repair manual
Clark hwd 36 forklift service repair manualClark hwd 36 forklift service repair manual
Clark hwd 36 forklift service repair manual
 
Clark pwd 36 forklift service repair manual
Clark pwd 36 forklift service repair manualClark pwd 36 forklift service repair manual
Clark pwd 36 forklift service repair manual
 
Clark hwd 30 forklift service repair manual
Clark hwd 30 forklift service repair manualClark hwd 30 forklift service repair manual
Clark hwd 30 forklift service repair manual
 
Clark pwd 30 forklift service repair manual
Clark pwd 30 forklift service repair manualClark pwd 30 forklift service repair manual
Clark pwd 30 forklift service repair manual
 
Clark hwd 36 forklift service repair manual
Clark hwd 36 forklift service repair manualClark hwd 36 forklift service repair manual
Clark hwd 36 forklift service repair manual
 
Clark g127 e forklift service repair manual
Clark g127 e forklift service repair manualClark g127 e forklift service repair manual
Clark g127 e forklift service repair manual
 
Clark gp127 e forklift service repair manual
Clark gp127 e forklift service repair manualClark gp127 e forklift service repair manual
Clark gp127 e forklift service repair manual
 
Clark gp127 forklift service repair manual
Clark gp127 forklift service repair manualClark gp127 forklift service repair manual
Clark gp127 forklift service repair manual
 
Clark gp127 forklift service repair manual
Clark gp127 forklift service repair manualClark gp127 forklift service repair manual
Clark gp127 forklift service repair manual
 
Clark g127 forklift service repair manual
Clark g127 forklift service repair manualClark g127 forklift service repair manual
Clark g127 forklift service repair manual
 

More from fhsjejkdm

John deere 280 skid steer loader service repair manual
John deere 280 skid steer loader service repair manualJohn deere 280 skid steer loader service repair manual
John deere 280 skid steer loader service repair manualfhsjejkdm
 
John deere 270 skid steer loader service repair manual
John deere 270 skid steer loader service repair manualJohn deere 270 skid steer loader service repair manual
John deere 270 skid steer loader service repair manualfhsjejkdm
 
John deere 260 skid steer loader service repair manual
John deere 260 skid steer loader service repair manualJohn deere 260 skid steer loader service repair manual
John deere 260 skid steer loader service repair manualfhsjejkdm
 
John deere 230 cs chainsaws service repair manual
John deere 230 cs chainsaws service repair manualJohn deere 230 cs chainsaws service repair manual
John deere 230 cs chainsaws service repair manualfhsjejkdm
 
John deere 200 cs chainsaws service repair manual
John deere 200 cs chainsaws service repair manualJohn deere 200 cs chainsaws service repair manual
John deere 200 cs chainsaws service repair manualfhsjejkdm
 
John deere 200 sprayer attachment service repair manual
John deere 200 sprayer attachment service repair manualJohn deere 200 sprayer attachment service repair manual
John deere 200 sprayer attachment service repair manualfhsjejkdm
 
John deere 113 172 clipper service repair manual
John deere 113  172 clipper service repair manualJohn deere 113  172 clipper service repair manual
John deere 113 172 clipper service repair manualfhsjejkdm
 
John deere 110 g, 210g, 240g 260g trimmer clutters service repair manual
John deere 110 g, 210g, 240g  260g trimmer  clutters service repair manualJohn deere 110 g, 210g, 240g  260g trimmer  clutters service repair manual
John deere 110 g, 210g, 240g 260g trimmer clutters service repair manualfhsjejkdm
 
John deere 54 inch commercial walk behind mower service repair manual
John deere 54 inch commercial walk behind mower service repair manualJohn deere 54 inch commercial walk behind mower service repair manual
John deere 54 inch commercial walk behind mower service repair manualfhsjejkdm
 
John deere 51 & 246 rotary brooms service repair manual
John deere 51 & 246 rotary brooms service repair manualJohn deere 51 & 246 rotary brooms service repair manual
John deere 51 & 246 rotary brooms service repair manualfhsjejkdm
 
John deere 48, 450, 550 & 660 rotary tillers service repair manual
John deere 48, 450, 550 & 660 rotary tillers service repair manualJohn deere 48, 450, 550 & 660 rotary tillers service repair manual
John deere 48, 450, 550 & 660 rotary tillers service repair manualfhsjejkdm
 
John deere 48, 50, 54, 60, 72, 76, 160, 172, 261 & 272 rotary mowers serv...
John deere 48, 50, 54, 60, 72, 76, 160, 172, 261 & 272 rotary mowers serv...John deere 48, 50, 54, 60, 72, 76, 160, 172, 261 & 272 rotary mowers serv...
John deere 48, 50, 54, 60, 72, 76, 160, 172, 261 & 272 rotary mowers serv...fhsjejkdm
 
John deere 48 inch commercial walk behind mower service repair manual
John deere 48 inch commercial walk behind mower service repair manualJohn deere 48 inch commercial walk behind mower service repair manual
John deere 48 inch commercial walk behind mower service repair manualfhsjejkdm
 
John deere 47, 59 & 359 snowblowers service repair manual
John deere 47, 59 & 359 snowblowers service repair manualJohn deere 47, 59 & 359 snowblowers service repair manual
John deere 47, 59 & 359 snowblowers service repair manualfhsjejkdm
 
John deere 46, 49 & 50 snowthrowers service repair manual
John deere 46, 49 & 50 snowthrowers service repair manualJohn deere 46, 49 & 50 snowthrowers service repair manual
John deere 46, 49 & 50 snowthrowers service repair manualfhsjejkdm
 
Clark gph 50 forklift service repair manual
Clark gph 50 forklift service repair manualClark gph 50 forklift service repair manual
Clark gph 50 forklift service repair manualfhsjejkdm
 
Clark gp127 e forklift service repair manual
Clark gp127 e forklift service repair manualClark gp127 e forklift service repair manual
Clark gp127 e forklift service repair manualfhsjejkdm
 
Clark gex20 30 forklift service repair manual
Clark gex20 30 forklift service repair manualClark gex20 30 forklift service repair manual
Clark gex20 30 forklift service repair manualfhsjejkdm
 
Clark g127 e forklift service repair manual
Clark g127 e forklift service repair manualClark g127 e forklift service repair manual
Clark g127 e forklift service repair manualfhsjejkdm
 
Clark g127 forklift service repair manual
Clark g127 forklift service repair manualClark g127 forklift service repair manual
Clark g127 forklift service repair manualfhsjejkdm
 

More from fhsjejkdm (20)

John deere 280 skid steer loader service repair manual
John deere 280 skid steer loader service repair manualJohn deere 280 skid steer loader service repair manual
John deere 280 skid steer loader service repair manual
 
John deere 270 skid steer loader service repair manual
John deere 270 skid steer loader service repair manualJohn deere 270 skid steer loader service repair manual
John deere 270 skid steer loader service repair manual
 
John deere 260 skid steer loader service repair manual
John deere 260 skid steer loader service repair manualJohn deere 260 skid steer loader service repair manual
John deere 260 skid steer loader service repair manual
 
John deere 230 cs chainsaws service repair manual
John deere 230 cs chainsaws service repair manualJohn deere 230 cs chainsaws service repair manual
John deere 230 cs chainsaws service repair manual
 
John deere 200 cs chainsaws service repair manual
John deere 200 cs chainsaws service repair manualJohn deere 200 cs chainsaws service repair manual
John deere 200 cs chainsaws service repair manual
 
John deere 200 sprayer attachment service repair manual
John deere 200 sprayer attachment service repair manualJohn deere 200 sprayer attachment service repair manual
John deere 200 sprayer attachment service repair manual
 
John deere 113 172 clipper service repair manual
John deere 113  172 clipper service repair manualJohn deere 113  172 clipper service repair manual
John deere 113 172 clipper service repair manual
 
John deere 110 g, 210g, 240g 260g trimmer clutters service repair manual
John deere 110 g, 210g, 240g  260g trimmer  clutters service repair manualJohn deere 110 g, 210g, 240g  260g trimmer  clutters service repair manual
John deere 110 g, 210g, 240g 260g trimmer clutters service repair manual
 
John deere 54 inch commercial walk behind mower service repair manual
John deere 54 inch commercial walk behind mower service repair manualJohn deere 54 inch commercial walk behind mower service repair manual
John deere 54 inch commercial walk behind mower service repair manual
 
John deere 51 & 246 rotary brooms service repair manual
John deere 51 & 246 rotary brooms service repair manualJohn deere 51 & 246 rotary brooms service repair manual
John deere 51 & 246 rotary brooms service repair manual
 
John deere 48, 450, 550 & 660 rotary tillers service repair manual
John deere 48, 450, 550 & 660 rotary tillers service repair manualJohn deere 48, 450, 550 & 660 rotary tillers service repair manual
John deere 48, 450, 550 & 660 rotary tillers service repair manual
 
John deere 48, 50, 54, 60, 72, 76, 160, 172, 261 & 272 rotary mowers serv...
John deere 48, 50, 54, 60, 72, 76, 160, 172, 261 & 272 rotary mowers serv...John deere 48, 50, 54, 60, 72, 76, 160, 172, 261 & 272 rotary mowers serv...
John deere 48, 50, 54, 60, 72, 76, 160, 172, 261 & 272 rotary mowers serv...
 
John deere 48 inch commercial walk behind mower service repair manual
John deere 48 inch commercial walk behind mower service repair manualJohn deere 48 inch commercial walk behind mower service repair manual
John deere 48 inch commercial walk behind mower service repair manual
 
John deere 47, 59 & 359 snowblowers service repair manual
John deere 47, 59 & 359 snowblowers service repair manualJohn deere 47, 59 & 359 snowblowers service repair manual
John deere 47, 59 & 359 snowblowers service repair manual
 
John deere 46, 49 & 50 snowthrowers service repair manual
John deere 46, 49 & 50 snowthrowers service repair manualJohn deere 46, 49 & 50 snowthrowers service repair manual
John deere 46, 49 & 50 snowthrowers service repair manual
 
Clark gph 50 forklift service repair manual
Clark gph 50 forklift service repair manualClark gph 50 forklift service repair manual
Clark gph 50 forklift service repair manual
 
Clark gp127 e forklift service repair manual
Clark gp127 e forklift service repair manualClark gp127 e forklift service repair manual
Clark gp127 e forklift service repair manual
 
Clark gex20 30 forklift service repair manual
Clark gex20 30 forklift service repair manualClark gex20 30 forklift service repair manual
Clark gex20 30 forklift service repair manual
 
Clark g127 e forklift service repair manual
Clark g127 e forklift service repair manualClark g127 e forklift service repair manual
Clark g127 e forklift service repair manual
 
Clark g127 forklift service repair manual
Clark g127 forklift service repair manualClark g127 forklift service repair manual
Clark g127 forklift service repair manual
 

Recently uploaded

Hyundai World Rally Team in action at 2024 WRC
Hyundai World Rally Team in action at 2024 WRCHyundai World Rally Team in action at 2024 WRC
Hyundai World Rally Team in action at 2024 WRCHyundai Motor Group
 
Delhi Call Girls Vikaspuri 9711199171 ☎✔👌✔ Whatsapp Hard And Sexy Vip Call
Delhi Call Girls Vikaspuri 9711199171 ☎✔👌✔ Whatsapp Hard And Sexy Vip CallDelhi Call Girls Vikaspuri 9711199171 ☎✔👌✔ Whatsapp Hard And Sexy Vip Call
Delhi Call Girls Vikaspuri 9711199171 ☎✔👌✔ Whatsapp Hard And Sexy Vip Callshivangimorya083
 
Delhi Call Girls Mayur Vihar 9711199171 ☎✔👌✔ Whatsapp Hard And Sexy Vip Call
Delhi Call Girls Mayur Vihar 9711199171 ☎✔👌✔ Whatsapp Hard And Sexy Vip CallDelhi Call Girls Mayur Vihar 9711199171 ☎✔👌✔ Whatsapp Hard And Sexy Vip Call
Delhi Call Girls Mayur Vihar 9711199171 ☎✔👌✔ Whatsapp Hard And Sexy Vip Callshivangimorya083
 
定制(Cantab毕业证书)剑桥大学毕业证成绩单原版一比一
定制(Cantab毕业证书)剑桥大学毕业证成绩单原版一比一定制(Cantab毕业证书)剑桥大学毕业证成绩单原版一比一
定制(Cantab毕业证书)剑桥大学毕业证成绩单原版一比一mjyguplun
 
Alina 7042364481 Call Girls Service Pochanpur Colony - independent Pochanpur ...
Alina 7042364481 Call Girls Service Pochanpur Colony - independent Pochanpur ...Alina 7042364481 Call Girls Service Pochanpur Colony - independent Pochanpur ...
Alina 7042364481 Call Girls Service Pochanpur Colony - independent Pochanpur ...Hot Call Girls In Sector 58 (Noida)
 
꧁༒☬ 7042364481 (Call Girl) In Dwarka Delhi Escort Service In Delhi Ncr☬༒꧂
꧁༒☬ 7042364481 (Call Girl) In Dwarka Delhi Escort Service In Delhi Ncr☬༒꧂꧁༒☬ 7042364481 (Call Girl) In Dwarka Delhi Escort Service In Delhi Ncr☬༒꧂
꧁༒☬ 7042364481 (Call Girl) In Dwarka Delhi Escort Service In Delhi Ncr☬༒꧂Hot Call Girls In Sector 58 (Noida)
 
Hauz Khas Call Girls ☎ 7042364481 independent Escorts Service in delhi
Hauz Khas Call Girls ☎ 7042364481 independent Escorts Service in delhiHauz Khas Call Girls ☎ 7042364481 independent Escorts Service in delhi
Hauz Khas Call Girls ☎ 7042364481 independent Escorts Service in delhiHot Call Girls In Sector 58 (Noida)
 
加拿大温尼伯大学毕业证(UBC毕业证书)成绩单原版一比一
加拿大温尼伯大学毕业证(UBC毕业证书)成绩单原版一比一加拿大温尼伯大学毕业证(UBC毕业证书)成绩单原版一比一
加拿大温尼伯大学毕业证(UBC毕业证书)成绩单原版一比一nsrmw5ykn
 
Call Girls in Malviya Nagar Delhi 💯 Call Us 🔝9205541914 🔝( Delhi) Escorts Ser...
Call Girls in Malviya Nagar Delhi 💯 Call Us 🔝9205541914 🔝( Delhi) Escorts Ser...Call Girls in Malviya Nagar Delhi 💯 Call Us 🔝9205541914 🔝( Delhi) Escorts Ser...
Call Girls in Malviya Nagar Delhi 💯 Call Us 🔝9205541914 🔝( Delhi) Escorts Ser...Delhi Call girls
 
Call me @ 9892124323 Call Girl in Andheri East With Free Home Delivery
Call me @ 9892124323 Call Girl in Andheri East With Free Home DeliveryCall me @ 9892124323 Call Girl in Andheri East With Free Home Delivery
Call me @ 9892124323 Call Girl in Andheri East With Free Home DeliveryPooja Nehwal
 
Sales & Marketing Alignment_ How to Synergize for Success.pptx.pdf
Sales & Marketing Alignment_ How to Synergize for Success.pptx.pdfSales & Marketing Alignment_ How to Synergize for Success.pptx.pdf
Sales & Marketing Alignment_ How to Synergize for Success.pptx.pdfAggregage
 
How To Troubleshoot Mercedes Blind Spot Assist Inoperative Error
How To Troubleshoot Mercedes Blind Spot Assist Inoperative ErrorHow To Troubleshoot Mercedes Blind Spot Assist Inoperative Error
How To Troubleshoot Mercedes Blind Spot Assist Inoperative ErrorAndres Auto Service
 
꧁ ୨ Call Girls In Radisson Blu Plaza Delhi Airport, New Delhi ❀7042364481❀ Es...
꧁ ୨ Call Girls In Radisson Blu Plaza Delhi Airport, New Delhi ❀7042364481❀ Es...꧁ ୨ Call Girls In Radisson Blu Plaza Delhi Airport, New Delhi ❀7042364481❀ Es...
꧁ ୨ Call Girls In Radisson Blu Plaza Delhi Airport, New Delhi ❀7042364481❀ Es...Hot Call Girls In Sector 58 (Noida)
 
Russian Call Girls Delhi Indirapuram {9711199171} Aarvi Gupta ✌️Independent ...
Russian  Call Girls Delhi Indirapuram {9711199171} Aarvi Gupta ✌️Independent ...Russian  Call Girls Delhi Indirapuram {9711199171} Aarvi Gupta ✌️Independent ...
Russian Call Girls Delhi Indirapuram {9711199171} Aarvi Gupta ✌️Independent ...shivangimorya083
 
Electronic Vehicle (EV) Industry Challenges
Electronic Vehicle (EV) Industry ChallengesElectronic Vehicle (EV) Industry Challenges
Electronic Vehicle (EV) Industry Challengesmarketingmangosemi
 
Vip Hot Call Girls 🫤 Mahipalpur ➡️ 9711199171 ➡️ Delhi 🫦 Whatsapp Number
Vip Hot Call Girls 🫤 Mahipalpur ➡️ 9711199171 ➡️ Delhi 🫦 Whatsapp NumberVip Hot Call Girls 🫤 Mahipalpur ➡️ 9711199171 ➡️ Delhi 🫦 Whatsapp Number
Vip Hot Call Girls 🫤 Mahipalpur ➡️ 9711199171 ➡️ Delhi 🫦 Whatsapp Numberkumarajju5765
 
ENJOY Call Girls In Okhla Vihar Delhi Call 9654467111
ENJOY Call Girls In Okhla Vihar Delhi Call 9654467111ENJOY Call Girls In Okhla Vihar Delhi Call 9654467111
ENJOY Call Girls In Okhla Vihar Delhi Call 9654467111Sapana Sha
 
VIP Kolkata Call Girl Kasba 👉 8250192130 Available With Room
VIP Kolkata Call Girl Kasba 👉 8250192130  Available With RoomVIP Kolkata Call Girl Kasba 👉 8250192130  Available With Room
VIP Kolkata Call Girl Kasba 👉 8250192130 Available With Roomdivyansh0kumar0
 

Recently uploaded (20)

Hyundai World Rally Team in action at 2024 WRC
Hyundai World Rally Team in action at 2024 WRCHyundai World Rally Team in action at 2024 WRC
Hyundai World Rally Team in action at 2024 WRC
 
Delhi Call Girls Vikaspuri 9711199171 ☎✔👌✔ Whatsapp Hard And Sexy Vip Call
Delhi Call Girls Vikaspuri 9711199171 ☎✔👌✔ Whatsapp Hard And Sexy Vip CallDelhi Call Girls Vikaspuri 9711199171 ☎✔👌✔ Whatsapp Hard And Sexy Vip Call
Delhi Call Girls Vikaspuri 9711199171 ☎✔👌✔ Whatsapp Hard And Sexy Vip Call
 
Delhi Call Girls Mayur Vihar 9711199171 ☎✔👌✔ Whatsapp Hard And Sexy Vip Call
Delhi Call Girls Mayur Vihar 9711199171 ☎✔👌✔ Whatsapp Hard And Sexy Vip CallDelhi Call Girls Mayur Vihar 9711199171 ☎✔👌✔ Whatsapp Hard And Sexy Vip Call
Delhi Call Girls Mayur Vihar 9711199171 ☎✔👌✔ Whatsapp Hard And Sexy Vip Call
 
定制(Cantab毕业证书)剑桥大学毕业证成绩单原版一比一
定制(Cantab毕业证书)剑桥大学毕业证成绩单原版一比一定制(Cantab毕业证书)剑桥大学毕业证成绩单原版一比一
定制(Cantab毕业证书)剑桥大学毕业证成绩单原版一比一
 
Alina 7042364481 Call Girls Service Pochanpur Colony - independent Pochanpur ...
Alina 7042364481 Call Girls Service Pochanpur Colony - independent Pochanpur ...Alina 7042364481 Call Girls Service Pochanpur Colony - independent Pochanpur ...
Alina 7042364481 Call Girls Service Pochanpur Colony - independent Pochanpur ...
 
꧁༒☬ 7042364481 (Call Girl) In Dwarka Delhi Escort Service In Delhi Ncr☬༒꧂
꧁༒☬ 7042364481 (Call Girl) In Dwarka Delhi Escort Service In Delhi Ncr☬༒꧂꧁༒☬ 7042364481 (Call Girl) In Dwarka Delhi Escort Service In Delhi Ncr☬༒꧂
꧁༒☬ 7042364481 (Call Girl) In Dwarka Delhi Escort Service In Delhi Ncr☬༒꧂
 
Hauz Khas Call Girls ☎ 7042364481 independent Escorts Service in delhi
Hauz Khas Call Girls ☎ 7042364481 independent Escorts Service in delhiHauz Khas Call Girls ☎ 7042364481 independent Escorts Service in delhi
Hauz Khas Call Girls ☎ 7042364481 independent Escorts Service in delhi
 
加拿大温尼伯大学毕业证(UBC毕业证书)成绩单原版一比一
加拿大温尼伯大学毕业证(UBC毕业证书)成绩单原版一比一加拿大温尼伯大学毕业证(UBC毕业证书)成绩单原版一比一
加拿大温尼伯大学毕业证(UBC毕业证书)成绩单原版一比一
 
Call Girls in Malviya Nagar Delhi 💯 Call Us 🔝9205541914 🔝( Delhi) Escorts Ser...
Call Girls in Malviya Nagar Delhi 💯 Call Us 🔝9205541914 🔝( Delhi) Escorts Ser...Call Girls in Malviya Nagar Delhi 💯 Call Us 🔝9205541914 🔝( Delhi) Escorts Ser...
Call Girls in Malviya Nagar Delhi 💯 Call Us 🔝9205541914 🔝( Delhi) Escorts Ser...
 
Call me @ 9892124323 Call Girl in Andheri East With Free Home Delivery
Call me @ 9892124323 Call Girl in Andheri East With Free Home DeliveryCall me @ 9892124323 Call Girl in Andheri East With Free Home Delivery
Call me @ 9892124323 Call Girl in Andheri East With Free Home Delivery
 
Sales & Marketing Alignment_ How to Synergize for Success.pptx.pdf
Sales & Marketing Alignment_ How to Synergize for Success.pptx.pdfSales & Marketing Alignment_ How to Synergize for Success.pptx.pdf
Sales & Marketing Alignment_ How to Synergize for Success.pptx.pdf
 
How To Troubleshoot Mercedes Blind Spot Assist Inoperative Error
How To Troubleshoot Mercedes Blind Spot Assist Inoperative ErrorHow To Troubleshoot Mercedes Blind Spot Assist Inoperative Error
How To Troubleshoot Mercedes Blind Spot Assist Inoperative Error
 
꧁ ୨ Call Girls In Radisson Blu Plaza Delhi Airport, New Delhi ❀7042364481❀ Es...
꧁ ୨ Call Girls In Radisson Blu Plaza Delhi Airport, New Delhi ❀7042364481❀ Es...꧁ ୨ Call Girls In Radisson Blu Plaza Delhi Airport, New Delhi ❀7042364481❀ Es...
꧁ ୨ Call Girls In Radisson Blu Plaza Delhi Airport, New Delhi ❀7042364481❀ Es...
 
Call Girls In Kirti Nagar 7042364481 Escort Service 24x7 Delhi
Call Girls In Kirti Nagar 7042364481 Escort Service 24x7 DelhiCall Girls In Kirti Nagar 7042364481 Escort Service 24x7 Delhi
Call Girls In Kirti Nagar 7042364481 Escort Service 24x7 Delhi
 
Russian Call Girls Delhi Indirapuram {9711199171} Aarvi Gupta ✌️Independent ...
Russian  Call Girls Delhi Indirapuram {9711199171} Aarvi Gupta ✌️Independent ...Russian  Call Girls Delhi Indirapuram {9711199171} Aarvi Gupta ✌️Independent ...
Russian Call Girls Delhi Indirapuram {9711199171} Aarvi Gupta ✌️Independent ...
 
Electronic Vehicle (EV) Industry Challenges
Electronic Vehicle (EV) Industry ChallengesElectronic Vehicle (EV) Industry Challenges
Electronic Vehicle (EV) Industry Challenges
 
Call Girls in Shri Niwas Puri Delhi 💯Call Us 🔝9953056974🔝
Call Girls in  Shri Niwas Puri  Delhi 💯Call Us 🔝9953056974🔝Call Girls in  Shri Niwas Puri  Delhi 💯Call Us 🔝9953056974🔝
Call Girls in Shri Niwas Puri Delhi 💯Call Us 🔝9953056974🔝
 
Vip Hot Call Girls 🫤 Mahipalpur ➡️ 9711199171 ➡️ Delhi 🫦 Whatsapp Number
Vip Hot Call Girls 🫤 Mahipalpur ➡️ 9711199171 ➡️ Delhi 🫦 Whatsapp NumberVip Hot Call Girls 🫤 Mahipalpur ➡️ 9711199171 ➡️ Delhi 🫦 Whatsapp Number
Vip Hot Call Girls 🫤 Mahipalpur ➡️ 9711199171 ➡️ Delhi 🫦 Whatsapp Number
 
ENJOY Call Girls In Okhla Vihar Delhi Call 9654467111
ENJOY Call Girls In Okhla Vihar Delhi Call 9654467111ENJOY Call Girls In Okhla Vihar Delhi Call 9654467111
ENJOY Call Girls In Okhla Vihar Delhi Call 9654467111
 
VIP Kolkata Call Girl Kasba 👉 8250192130 Available With Room
VIP Kolkata Call Girl Kasba 👉 8250192130  Available With RoomVIP Kolkata Call Girl Kasba 👉 8250192130  Available With Room
VIP Kolkata Call Girl Kasba 👉 8250192130 Available With Room
 

Clark gcs standard forklift service repair manual

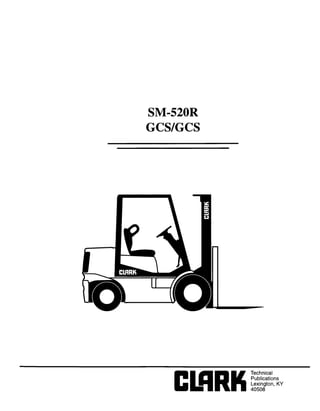
  • 1. Copyrighted Material Intended for CLARK dealers only Do not sell or distribute SM-520R GCS/GCS
  • 2. Copyrighted Material Intended for CLARK dealers only Do not sell or distribute Foreword This service publication provides information covering normal service, maintenance and repair of the Clark lift trucks noted on the cover. It has been specifically prepared to help owners and service personnel maintain these lift trucks in efficient and safe operating condition. Regular, correct maintenance and care of lift trucks is not only important for long and efficient truck life; it is essential for safe operation. The importance of proper maintenance through planned service, inspection and qualified repairs cannot be emphasized too strongly. To assist in keeping lift trucks in good operating condition, this manual includes preventive maintenance procedures to be performed at regular intervals. These are essential to the service life and safe operation of all fork lift trucks. Instructions for safety inspections, operational checks, cleaning, and lubrication are provided for reference in setting-up and conducting a recommended periodic Planned Maintenance (PM) program. Refer to the Operator’s Manual, located on the truck, for additional information on the operation, care and maintenance of your truck. Genuine Clark replacement parts should be used for all service and repair requirements. Substitute parts from other sources may be different than original parts and may not meet OSHA or other safety requirements. Any reference to brand names other than Clark in this manual is made simply as an example of the type of tools and materials recommended for use and, as such, should not be considered as an endorsement. Equivalents, if available, may be used. For more information on maintenance and repair of these trucks, contact your authorized Clark dealer. NOTICE - The descriptions and specifications included in this manual were in effect at the time of printing. C/ark Equipment Company reserves the right to discontinue models at any time, or make improvements and changes in specifications or design without notice and without incurring obligation. Specifications, torques, pressures, measurements, adjustments, illustrations and other items may change at any time. Contact your authorized CLARK dealer for information on possible updates or revisions. 0 1989 Clark Equipment Company 1211 I89 SM520 ii
  • 3. Copyrighted Material Intended for CLARK dealers only Do not sell or distribute Contents Subject Part General Information........................................................................... 1 Specifications........................................................................................ 2 Planned Maintenance ....................................................................... 3 Engine (Group 00) .................................................................................... 4 Fuel System (GROUPS 02,03) ................................................................. 5 Electrical System (Groups 11-15) ........................................................ 6 Transaxle (stops 06,07,20)................................................................. 7 Brakes and Inching System (GIOUPS 22,23) ................................... 8 Steering System (Groups 25,26) ......................................................... 9 Hydraulic System (Groups28-33)..................................................... IO Wheels and Tires (Groups 22,23) .................................................... 11 Counterweight and Chassis (Group 38) ...................................... 12 Uprights (Group 34). ............................................................................. 1 3 Index.. .................................................................................................... 14 SM520 212719 1 ... III
  • 4. Copyrighted Material Intended for CLARK dealers only Do not sell or distribute About This Manual This manual is intended for use by persons who are trained and authorized to do lift truck maintenance. It is designed to provide essential information about the correct and safe service maintenance and repair of the lift truck by trained mechanics of service technicians. The information is organized into 14 major Parts of related components or topics as outlined by the Table of Contents at the front of the manual: . 1 General information including precautions and safe maintenance practices. l 2 Service specifications and reference information including lubricants, capacities, pressures, etc. l 3 Planned Maintenance (PM) service procedures. l 4-13 Adjustment, service and repair procedures for truck components. In Parts 4-13, the detailed service and repair procedures are arranged in Sections for each procedure, component or subsystem. Some Sections include explanations that cover service procedures common to several components or subsystems. In general, each Section is written to show and describe the general arrangement, adjustment, removal, disassembly, inspection, repair, and assembly steps that are normally required to service the component. Component specifications (as applicable), information notes and safety messages are included within those procedures. In most cases, specifications are shown in Section 2, Service Specifications, for convenience of reference. Each Section includes Parts GROUP number(s) at the bottom of each page for cross reference. The Parts GROUP numbers are the same as the component group in the Master Parts Book and Service Parts Book. They are parts system reference numbers; use only the appropriate Parts Manual for ordering parts. Do not order parts from numbers shown in this manual. The Table of Contents lists major headings of Parts of the manual. Additional content listings are placed at the beginning of each Section of the manual, subsection or component heading to simplify reference to multiple topics or procedures covering optional equipment, such as engines and transaxles. If you cannot find a topic in the respective Table of Contents, check the Alphabetical Subject Index at the back of the manual. This manual has been made easier to use by providing only specific steps and instructions necessary to explain the activity, component, assembly, or process being worked on. The technician is expected to include obvious additional steps of standard procedure for removal, disassembly, cleaning, inspection, reassembly, installation, etc., as needed. To be better prepared to do the necessary service work, take time to completely read the entire procedure, including any special instructions, before doing any work. The technician is cautioned and expected to always work in a safe manner by using the correct procedure. Do not take chances which may result in injuries. 12/l/89 SM520 -v
  • 5. Copyrighted Material Intended for CLARK dealers only Do not sell or distribute 1 General Information Safe Maintenance Practices.. ................................................ 1.O-2 Safety Signs and Messages.. ................................................. 1.O-4 General Precautions ............................................................. 1.o-5 Product identification.. .......................................................... 1.O-6 Model Nomenclature ......................................................... 1.O-6 Model Designations.. ......................................................... 1.O-7 Model Serial Number Code.. .............................................. 1.O-7 Vehicle and Upright Identification.. ..................................... .l .O-8 Product Visual Identification .............................................. .I .O-9 SM520 12/l/89 l.O- 1
  • 6. Copyrighted Material Intended for CLARK dealers only Do not sell or distribute 1.OGeneral Information Safe Maintenance Practices The following instructions have been prepared from current industry and government safety standards applicable to industrial truck operation and maintenance. These recommended procedures specify conditions, methods, and accepted practices that aid in the safe maintenance of industrial trucks. They are listed here for the reference and safety of all workers during maintenance operations. Carefully read and understand these instructions and the specific maintenance procedures before attempting to do any repair work. When in doubt of any maintenance procedure, please contact your local CLARK dealer. 1. Powered industrial trucks can become hazardous if maintenance is neglected. Therefore, suitable maintenance facilities, trained personnel, and procedures must be provided. 2. Maintenance and inspection of all powered industrial trucks shall be done in conformance with the manufacturer’s recommendations. 3. A scheduled planned maintenance, lubrication, and inspection program shall be followed. 4. Only trained and authorized personnel should be permitted to maintain, repair, adjust, and inspect industrial trucks, and in accordance with the manufacturer’s specifications. 5. Properly ventilate work area, vent exhaust fumes, and keep shop dean and floor dry. 6. Avoid fire hazards and have fire protection equipment present in the work area. Do not use an open flame to check for level, or leakage of fuel, electrolyte, or coolant. Do not use open pans of fuel or flammable cleaning fluids for cleaning parts. 7. Before Starting Work On Truck: a) Raise drive wheels off of floor or disconnect power source and use blocks or other positive truck- positioning devices. b) Put blocks under the upright rails and carriage, innermast( or chassis before working on them. c) Disconnect battery before working on the electrical system. 8. Before working on engine fuel system of gasoline powered trucks with gravity-feed fuel systems, be sure fuel shutoff valve is closed. 9. Before working on engine fuel system of LP-gas powered trucks, close LP-gas cylinder valve and run engine until there is no more fuel in the system and engine stops running. If engine will not run, close LP- tank valve and vent fuel slowly in a safe area. 10. Operation of the truck to check performance must be conducted in an authorized, safe, clear area. 11. Before Starting To Drive Truck: a) Be in operating position. b) Disengage clutch on manual transmissions, or apply brake on trucks with powershift transmission and electric trucks. c) Put directional control in neutral. d) Start engine or turn on power. e) Check functioning of lift and tilt systems, directional and speed controls, steering, brakes, warning devices, and any load handling attachments. 12. Before Leaving The Truck: a) Stop truck. b) Fully lower the load engaging means: upright, carriage, forks, or attachments. c) Put directional control in neutral. d) Apply the parking brake. e) Stop the engine or turn off power. f) Turn off the control or ignition circuit. g) Put blocks at the wheels, if truck is on an incline. h) Remove the ignition key (OSHA regulation) 13. Handle LP-gas cylinders with care. Damage such as dents, scrapes, or gouges may dangerously weaken the tank and make it unsafe for use. 14. Brakes, steering mechanisms, control mechanisms, warning devices, lights, governors, lift overload devices, guards and safety devices, lift and tilt mechanisms, articulating axle stops, and frame members must be carefully and regularly inspected and maintained in a safe operating condition. 12/l/89 SM520 1.0-2
  • 7. Copyrighted Material Intended for CLARK dealers only Do not sell or distribute 1.O General Information 15. Special trucks or devices designed and approved for hazardous-area operation must receive special attention to ensure that maintenance preserves the original, approved safe operating features. 16. Fuel systems must be checked for leaks and condition of parts. Extra special consideration must be given in the case of a leak in the fuel system. Action must be taken to prevent the use of the truck until the leak has been corrected. 17. All hydraulic sytems must be regularly inspected and maintained in conformance with good practice. Tilt and lift cylinders, valves, and other similar parts must be checked to assure that “drift” or leakage has not developed to the extent that it would create a hazard. 18. When working on hydraulic system, be sure the engine is turned off or battery disconnected on electric trucks, upright is in its fully-lowered position, and hydraulic pressure relieved in hoses and tubing. WARNING - Always put blocks under the carriage and upright rails when necessary to work with upright in an elevated position. 19. Batteries, motors, controllers, limit switches, protective devices, electrical conductors and connections must be inspected and maintained in conformance with good practice. Special attention must be paid to the condition of electrical insulation. 20. To avoid injury to personnel or damage to the equipment, consult the manufacturer’s procedures in replacing contacts on any battery connection. 21. Industrial trucks must he kept in a clean condition to minimize fire hazards and help to detect loose or defective parts. 22. The truck manufacturers capacity, operation and maintenance instruction plates, tags, or decals must be maintained in legible condition. 23. Modifications and additions that affect capacity and safe truck operation must not be done without the manufacturers prior written approval. Capacity, operation and maintenance instruction plates, tags or decals must be changed accordingly. Note - Using other than Clark parts may nullify the truck rating. 24. Care must be taken to assure that all replace- ment parts, including tires, are interchangeable with the original parts and of a quality at least equal to that provided in the original equipment. Parts, including tires, are to be installed per the manufacturer’s procedures. Always use genuine CLARK or CLARK-approved parts. 25. When removing tires, follow industry safety practices. Most important, deflate pneumatic tires completely prior to removal. Following assembly of tires on multi-piece rims, use a safety cage or restraining device while inflating. 26. Use special care when removing heavy components from the truck, such as counterweight, upright, engine, transaxle, etc. WARNlNG - If not properly blocked, truck may become unstable. Be sure that lifting and handling equipment is of the correct capacity and in good condition. 27. Before any truck is returned to service it must be safety checked to insure safe operation. NOTICE - Additional operating and maintenance safety instructions are contained in the following publications: ANSVASME B56.1 - 1983: Safety Standard for Low Lift and High Lift Trucks (Safety Code For Powered Industrial Trucks). Published by: Sociei of Mechanical Engineers, United Engineering Center, 345 E. 47th Street, New York, N.Y. 10017. NFPA 5051982: Fire Safety Standard for Powered Industrial Trucks: Type Designations, Areas of Use, Maintenance and Operation. Available from: National Fire Protection Assoc., Inc., Batterymarch Park, Quincy, MA 02269. General Industry Standards, OSHA 2206: OSHA Safety and Health Standards (29 CFR 1910), Subpart N-Materials Handling and Storage, Section 1910.178 Powered Industrial Trucks. For sale by: Superintendent of Documents, U.S. Government Printing Office, Washington, D.C 20402. SM520 12/l/89 1.0 - 3
  • 8. Copyrighted Material Intended for CLARK dealers only Do not sell or distribute 1.OGeneral Information Safety Signs and Messages SAFETY SIGNS and MESSAGES are placed in conspicuous places throughout this manual and also on the lift truck to provide instructions and to call attention to specific areas where potential hazards exist and special precautions should be taken. Be sure to know and understand the meaning of these instructions, signs and messages. Each one is there for a specific purpose. Damage to the truck or death or serious injury to personnel may result if these messages are not followed. NOTICE This message is used when special information, instructions or identification is required relating to procedures, equipment, tools, pressures, capacities and other special data. IMPORTANT This message is used when special precautions should be taken to ensure a correct action or to avoid damage to or malfunction of the truck or a component. CAUTION This message is used as a reminder of safety hazards which can result in personal injury if proper precautions are not taken. WARNING This message is used when a hazard exists which can result in injury or death if proper precautions are not taken. DANGER This message is used when an extreme hazard exists which will result in death or serious injury if proper precautions are not taken. These labels identify hazards which may not otherwise be apparent to a trained mechanic. There are many potential hazards for an untrained mechanic and there is no way to label the truck or service manual against all such hazards. Clark Equipment Company cannot anticipate every possible circumstance that might involve a potential hazard. The safety signs and warning messages in this manual are therefore not all inclusive. If a procedure, tool, device or work method not specifically noted or recommended by Clark is used, you must satisfy yourself that it is safe for you and others. You should also ensure that the lift truck or its components will not be damaged or made unsafe by the procedures you choose. 12/l I89 SM520 1.0 - 4
  • 9. Copyrighted Material Intended for CLARK dealers only Do not sell or distribute 1.OGeneral Information I IMPORTANT SAFETY NOTICE --1 Read and understand all safety precautions and warnings before performingrepairson lifttrucks. Appropriate service methods and proper repair procedures are essential to the safe, reliable operation of industrial trucks as well as the personal safety of the individual doing the work. This Service Manual provides general directions for accomplishing service and repair work with tested, effective techniques. Following them will help assure successful repair and reliable truck operation. There are numerous variations in procedures, techniques, tools, and parts for servicing industrial trucks, as well as in the skill of the individual doing the work. This manual cannot possibly anticipate all such variations and provide advice or precautions as to each. Accordingly, anyone departing from the instructions provided in this manual through procedures used or choice of tools, materials, and parts may jeopardize his or her personal safety and/or the safety of the vehicle user. Improper or careless techniques cause accidents. Don’t take chances with incorrect or damaged equipment. Read and understand the procedures for safe operation and maintenance outlined in this manual. STAY ALERT! Follow safety rules, regulations and procedures. Accidents can be avoided by recognizing dangerous procedures or situations before they occur. DRIVE AND WORK SAFELY and follow the safety signs and their messages displayed on the truck and in this manual. General Precautions The following list contains general precautions that should be followed when working on a lift truck: . Always wear safety glasses for eye protection. l Remove rings, watches, loose jewelry and open clothing before working on a vehicle, to avoid serious injury. l Do not smoke while working on a vehicle. l Put ignition switch in the OFF position, unless otherwise required by the procedure. l Set the parking brake. Place wheel chocks or wood blocks of 4” x 4” size or larger to the front and rear surfaces of the tires to provide further restraint from inadvertent vehicle movement. l Use safety stands whenever a procedure requires you to be under the vehicle. l Operate the engine only in a well-ventilated area to avoid the danger of carbon monoxide. l Keep hands and other objects clear of the fan belt and fan blades if it is necessary to work in the engine compartment. l Keep yourself and your clothing away from all moving parts, especially the fan and belts, when the engine is running. l Avoid contact with hot metal parts such as the radiator, exhaust manifold, exhaust pipe and muffler to prevent serious burns. SM520 1211189 l.O- 5
  • 10. Copyrighted Material Intended for CLARK dealers only Do not sell or distribute 1.OGeneral Information Product Identification Model Nomenclature Cushion fire Models GCX 20/22/25/27/30 -,C GCS 20/22/25/27/30 MB GCS 17/20/22/25/27/30 MC,WC,I DCS 17/20/22/25/27/30 I Pneumatic Tire Models G PX 20/22/25/27/30 -, C G PS 20/22/25/27/30 M B GPS 20/22/25/27/30 MC,WC,I DPS 20/22/25/27/30 I Rated Load Capacity* @24 inch [500 mm] Load Center Model 17 Basic Capacity Ibs 3500 t&Is1 ww 20 22 25 27 30 4000 4500 5000 5500 6000 [2000] [2250] [2500] [27501 [3000] *This is the basic capacity of the truck chassis. The actual capacity of the truck may be less due to the use of high lift uprights and/or attachments. 2/27/g 1 SM520 1.0 - 6
  • 11. Copyrighted Material Intended for CLARK dealers only Do not sell or distribute 1.OGeneral Information Product Identification Model Designation by Engine and Transaxle Application Serial No. Prefix GP138 I I I 010 I I I . Notes: 1 - Lot 5521 thru 7157 6 - Lot 5536 thru 7169 2 - Lot 7158 and above 7 - Lot 7170 and above 3 - Lot 6200 and above 8 - Lot 5525 thru 6091 4 - Lot 6200 and above 9 - Lot 6205 and above 5 - Lot 5510 thru 6086 10 - Lot 6205 and above l HR500 and TA18 transaxles incorporate full-floating straight drive axles with drum-and-shoe brakes. l HR600 transaxles incorporate pre-reduction enclosed oil-cooled disc brakes & offset drive axles. Model Serial Number Code Cushion Tire Trucks Model Designation Sequence No. Lot No. GX 230 -xXxX -xXxX GX 230C G138 MB I= I= G138 MC -xXxX -xXxX G138 WC -xXxX -xXxX G138 I -xXxX -xXxX Pneumatic Tire Trucks Model Designation Sequence No. Lot No. GPX 230 -XXXX -xXxX GPX 230C -XxXX -xXxX GP138 MB -xXxX -xXxX GP138 MC -xXxX -xXxX GP138 WC -xXxX -xXxX GP138 I -XXXX -xXxX SM520 2127191 Plant of Mfr -XX 1% -XX -XX -XX Plant of Mfr -XX -XX -xx -XX -XX -XX Plant of Manufacture None ........Battle Creek, Ml FA...........Georgetown, KY FB...........Lexington, KY KOF.........Republic of Korea Plant of Manufacture See above 1.0 - 7
  • 12. Copyrighted Material Intended for CLARK dealers only Do not sell or distribute 4 Engine 4.3 Engine Tune-Up Gasoline/LPG & Diesel Tune-Up Preparation.. ............................................................. .4.3-l l-Preliminary Checks.. ............................................................. .4.3-2 2-Tune-Up Procedures.. .......................................................... .4.3-5 Engine Tune-Up consists of: I)- preliminary checks to be sure that all engine systems are functioning correct/y, and 2) tune-up procedures, which include performing tests, making minor adjustments and replacing minor components as necessary to bring an engine up to its peak level of performance. Also refer to Section 4.2, EngineTroubieshooting Tune-Up Preparation CAUTION To perform this service procedure, it is recommended that you: l Put blocks under the upright rails. . Raise the drive wheels off the floor. l Return all controls to neutral, apply the parking brake, and turn key switch OFF, except as noted. WARNING LPG Fuel Park truck in a well-ventilated area. Do not smoke or perform maintenance near open flame or other sources of ignition. Do not disconnect any lines when exhaust manifold is excessively hot. LP Gas is highly flammable. Open and remove both side doors, and raise the seat deck. Be sure the seat deck support is securely latched. 1 WARNING Stop engine before checking battery terminals or electrical connections. Do not hold ignition wires with bare hands since shocks or other injuries can result. LPG (propane), sparks or flames near a battery could cause an explosion or fire. Battery acid can cause corrosive burns. Always wear eye protection. Use of jumper cables or battery charging should be done only as directed by manufacturer’s safety instructions. Minimum Tools Required: l Tachometer l Torque wrenches l Voltmeter 9 Vacuum gauge l Timing light l Jumper wire -1 Note - The following pages describe general engine tune-up procedures illustrated with typical views of the subject activity. Please check your engine model for specific component arrangement and corresponding service requirement. Lubricate threads on spark plugs used in SM520 12/I 189 Parts GROUP 00,Ol 4.3 - 1
  • 13. Copyrighted Material Intended for CLARK dealers only Do not sell or distribute 4.3 Engine Tune-Up 1-Preliminary Checks Note - The following quick, simple checks should always be made to make sure that basic and easy to find troubles are not the cause of poor engine performance. Once you have eliminated these items you can check into the other possible causes of poor engine performance. 1. Check engine oil and coolant levels. 2. Check engine air filter. A clogged filter will cause engine power loss. Replace, as needed. Note - On engines equipped with Cyclopac air cleaner, do not service filter until indicated by restriction indicator. IMPORTANT - Be careful when inspecting or replacing the air filter element to prevent dirt from entering the engine air intake housing. 3. Check air intake tubes for signs of filter leakage. 4. Check crankcase breather system to be sure it is functioning correctly. Check the following and, if necessary, clean or replace faulty parts: 1) Breather hoses for damage, cracks, and clogging. 2) Rocker cover and intake manifold fitting holes for clogging. 4654 [2.6L] Engine There are 2 sections of engine ventilation system: 1) Breather (PCV) hose from rocker cover to intake manifold (shown). 2) Breather hoses from oil separator to oil pan and from oil separator to air horn on carburetor. Oil separator is not serviceable. NOTICE - The oil separator has been eliminated on later model 4654 engines. Carefully inspect rocker cover side nipple hole (orifice) and intake manifold nipple hole for clogging. TM(D)27 [2.7L] Engine 1 TMD27 diesel shown. TM27 gasoline/LPG similar. Blow-by circulates into intake manifold maintaining crankcase pressure within a narrow range regardless of operating speed or load. Servicing of the PCV system is usually confined to cleaning PCV orifice and/or valve along with cleaning the air inlet, where applicable. All connections must be air tight. Check condition of the hoses and connections. Repair or replace as required. D176GA [2.9L] Engine Check crankcase breather or PCV system to be sure it is clean (opening or hoses not plugged with dirt or grease). 4.3 - 2 12/l/89 SM520 Parts GROUP 00,Ol
  • 14. Copyrighted Material Intended for CLARK dealers only Do not sell or distribute 4.3 Enaine Tune-Up If crankcase breather opening or PCV valve is plugged with dirt and oil accumulation, remove and clean with an approved solvent or replace, as required. 5. Gasoline engines only. Check choke control linkage to carburetor to be sure it fully closes opens the choke. j-~- . ““ON For safety when checking or removing battery . connectrons, always first drsconnect the negative battery cable at the engine ground connection. 6. Check coil polarity to be sure that primary wire from point-type distributors is connected to negative terminal on coil (black wire to coil, white wire to 12 volts at bottom of ballast resistor). Note - On electronic ignition systems there are two wires coming from the distributor and both are connected to the coil. D176GA engine coil does not have external ballast resistor. and and 7. Check battery for damage and cleanliness of terminals. Remove the boot covers to expose terminal connections. Clean battery terminals and cable connections if they are dirty and corroded. Check battery terminal cable connections for tightness. Replace boots over terminals after inspection. If necessary, wash battery with a mild solution of baking soda and water. First, make sure that cell vent caps are tight to ensure that soda solution does not contaminate battery electrolyte. NOTICE - For side-mounted terminals, each battery cable is attached to terminal by a bolt which threads into the terminal. When tightening the bolt, use recommended torque value to prevent terminal damage, while assuring a good connection. Do not overtighten. .’ 8. Be sure battery negative (ground) cable is securely connected to engine block. Check engine starter cable connections. SM520 12/l/89 Parts GROUP 00,Ol 4.3 - 3
  • 15. Copyrighted Material Intended for CLARK dealers only Do not sell or distribute 4.3 Engine Tune-Up 9. Start the engine. 10. With engine running, look at the battery charge indicator. The light should not be illuminated, indicating voltage output from the alternator. 11. Check fuel gauge to be sure fuel level is adequate, to ensure that low fuel level will not affect other tests of engine performance. Spark Test WARNING Electrical Shock I Do not hold ignition wireswith barehandssince shocks or other injuries can result. High ignition voltageor the reactionfromelectrical shock can cause severe personal injury. 12. Perform a spark test with each spark plug wire, or use a spark indicator, to check coil and spark plug wires to be sure coil is producing adequate voltage to all plugs. At the same time, check all spark plug wire connections for tightness. If there is indication of a problem in the ignition refer to Section 6.3, Ignition System Maintenance. system, Cranking Test 13. If there is indication of a faulty battery, or if engine cranking speed is slow, perform a cranking test, as follows: 1) LPG fuel system. Shut off LPG service valve. 2) Ground the ignition system. Disconnect high tension coil wire from the distributor cap, clip a jumper lead onto the coil wire and ground it on engine block. 3) Then, connect a voltmeter across the battery terminals. Now push accelerator pedal fully down (to open the throttle and obtain higher compression) and crank the engine for 15 seconds. 4) During cranking the battery voltage should exceed 9.6 volts. Battery voltage of less than 9.4-9.6 volts indicates trouble in the battery, cables, or starter. 5) Immediately after cranking, battery no-load voltage should be 12 volts, minimum. The voltmeter should show a quick response. If the voltage is less than 12 volts or the voltmeter has a sluggish response it is an indication of a battery problem. 6) If battery no-load voltage returns to 12 volts immediately after cranking but there is low cranking voltage (e.g., 8 volts), the problem is in the cables or starter. First, inspect the cables for loose and burned teminal connections. Then, remove and check the starter. Rebuild or replace, as required. 7) Remove the jumper lead, connect the coil wire to distributor cap and start and accelerate engine to a steady speed of 1800-2000 rpm. 8) Charging system output voltage should be between 12.5-13.5 volts. 4.3 - 4 12/l I89 SM520 Parts GROUP 00,07
  • 16. Copyrighted Material Intended for CLARK dealers only Do not sell or distribute 4.3 Engine Tune-Up 14. If the battery has been “running down” (discharging) or if engine cranking speed is low, check the alternator circuit and battery. See cranking test above. Refer to Section 6.8, Alternator Maintenance. NOTICE - The above preliminary tests show whether the basic engine sytems are functioning and that charging and cranking systems are okay or in need of repair. Remove the voltmeter after these tests are made. Fuel Supply System Gasoline engines 1. Check if there is a fuel system problem by accelerating engine with the choke knob in and the tilt lever fully forward (or back) to put hydraulic system in bypass to load engine. 2. If engine operation is erratic, pull choke knob out and again accelerate under hydraulic by-pass load. If engine smooths out there is a problem in the fuel system due to insufficient fuel flow to engine. 1) Check in-line fuel filter. Replace, as necessary. 2) Check fuel pump flow and pressure. Repair or replace fuel pump, as required. 3) Check carburetor. Repair, clean or replace. LPG engines For LPG trucks, refer to Section 5.2, LPG Fuel System. Z-Tune-Up Procedures 1. Connect a tachometer, or combination test instrument such as the Clark Dynamic Engine Analyzer, Part No. 1802047, to the engine. 2. Install a vacuum gauge. The pick-up location to install a vacuum gauge will vary between engines. Find a location where the vacuum gauge may be connected to measure intake manifold vacuum. D176GA [2.9L] Engine. Install vacuum gauge at the plug fitting in the intake manifold (shown). 4G64 [2.6L] Engine. Install the vacuum gauge at the breather hose leading from the valve cover to the intake manifold. Use a nipple or an adapter to connect to the vacuum hose. TM27 [2.7L] Engine. Attach vacuum gauge to PCV fitting on intake manifold. 3. Start the engine, and let it warm up. While doing this, look for excessive exhaust smoke and listen for any unusual engine noise. Note - Blue exhaust smoke indicates excessive oil consumption caused by faulty seating of piston rings, dirt, or worn engine components such as rings, cylinders, pistons, or valve guides. Black smoke indicates excessive fuel consumption caused by faulty carburetor or choke problem (gasoline engines only). 1. Stall Test 1. First, perform a stall test to determine engine condition and whether engine and other compo- nents are functioning correctly. Check: 1) Idle speed and vacuum 2) No-load governed speed and vacuum 3) Speed and vacuum in hydraulic (tilt) bypass 4) Engine stall speed and vacuum Refer to Section 4.7, RPM, Vacuum & Stall Tests, for procedures and analysis of test results. Also see Section 2.7, Service Specifications. NOTICE - A stall test is perhaps the most important and useful test for quickly determining engine condition. Stall tests should be a part of all engine tune-ups and must be carefully conducted and analyzed to pinpoint specific problems. Stall tests must include RPM, vacuum and hydraulic pressure measurements to accurately diagnose specific problem areas. For this reason, stall testing is described in a separate, detailed section noted above. Engine speed and vacuum checks with engine under load, are made to also determine whether major components or systems other than the engine are causing problems. Note - lf stall speed is low, do not automatically blame the torque converter. Carefully check engine condition. Frequently an obstruction, e.g., carbon plugging, in the air intake or exhaust system is the problem. 2. Idle Speed 1. Check engine idle speed and adjust carburetor idle setting if idle speed is not correct. Refer to Section 4.10 for Carburetor Idle Adjustment. 4654 Engine 650 rpm (600-700 rpm) TM(D)27 Engine 650 rpm (600-700 rpm) Reference Section 2. I, Service Specifications. SM520 12/l/89 Parts GROUP 00,Ol 4.3 - 5
  • 17. Copyrighted Material Intended for CLARK dealers only Do not sell or distribute 4.3 Engine Tune-Up 3. Ignition System Refer to Section 6.3, Ignition System Maintenance, for additional procedures. 1-Distributor, Coil and Wiring 1. First, check the distributor, coil and ignition wiring (4G54 engine shown). 2. Remove the distributor cap and check its condition for: l cracks l carbon tracking or flashover burn marks l corrosion, rusting or damage of terminals l burned center terminal or side inserts l dirt inside and outside l moisture It is very important for the cap to be clean. Moisture and dirt make a good path for flashover. Once a carbon track has started, the cap must be replaced. 3. Clean the distributor cap and terminals, or replace, as needed. 4. Remove the spark plug wires (cables) from the distributor cap. Inspect the cable socket terminals in the cap for corrosion and burn damage. Clean the towers and terminals, as needed. 5. Remove the rotor and inspect it for: l cracks l carbon tracking or flashover burn marks l burned, pitted , bent or worn terminal tip . moisture, contamination and dirt buildup Clean or replace the rotor, as needed. 6. Check centrifugal advance governor. Install the rotor. Turn (rotate) the rotor in the direction of rotation and release it to confirm that the rotor returns to the original position smoothly. Adjust or Replace Ignition Points 1. 4654 [2_6L] engine only. 1. Inspect the ignition points for wearcondition, etc. 2. Inspect condenser and condition of installation. 3. Replace ignition points and condenser, as needed. 4. Lubricate distributor cam and pivots (see below). 5. Check point gap setting (see Ignition Timing below). 6. Check electronic ignition unit, as appljcable. Refer to Section 6.4, Ignition System - 4G54 Engine. 2. TM27 [2.7L] & D 176GA [2.9L] engines. 1. Inspect electronic ignition unit. Check air gap. Refer to Section 6.5, Ignition System - TM27 Engine. Refer to Section 6.6, Ignition System - D 176GA Engine. Lubricatiotl Refer to Section 6.4, ignition System-4G54 [2,6L] Engine. Note - TM27 [2.7L] and D176GA {2.9L] engine distributors do not require periodic lubrication. coil 1. Ignition coils do not normally require any service except keeping all terminals and connections clean and tight. The coil should be kept reasonably clean; however, it must not be subjected to steam cleaning or similar cleaning methods that may cause moisture to enter the coil. 2. Check the ignition coil tower for tracking and obvious damage. Be sure the tower is clean and dry. Check coil boot nipple for correct sealing and insulating qualities. If flashover occurs here, the engine probably won’t start. 3. Check primary circuit wires for tight connections and correct polarity. When the ignition coil is wired up incorrectly with the distributor, it can cause high speed missing with loss of power and performance under heavy loads. 4. Check the coil to distributor cap high-tension (secondary) cable. Check the fit of the boot on the coil and distributor cap towers. A high voltage leak at this point will cause the engine not to start. 5. Test the Coil When Necessary. If the coil is suspected of being faulty, remove and check its operation on a coil tester and replace it if inoperative. Spark Plug wires 1. Check spark plug cables and boots for cuts, cracking, brittleness, burns or excessive corrosion of the terminals on both ends, and general deteriora- tion. If the cables are three years old or more, replace them. 2. To install new cables, remove one old wire at a time and match it to a new one. Use all looms and separators and route the wires exactly as the old ones. NOTICE - Dielectric Grease. The use of a dielectric silicone grease at high-voltage connecting points such as coil and distributor cap towers and spark plugs is recommended to ensure good electrical connection and prevent corrosion. 2-Spark Plugs 1. Use an air nozzle to blow dirt and contamination out of the spark plug wells, before and after loosening the plugs. 12/l/89 SM520 4.3 - 6 Parts GROUP 00,Ol
  • 18. Copyrighted Material Intended for CLARK dealers only Do not sell or distribute 4.3 Engine Tune-Up IMPORTANT Do not allow dirt and contaminants to enter spark plug openings when the plugs are removed. 2. Remove and check the spark plugs and clean, adjust or replace, as necessary. 3. As each plug is removed, keep it in cylinder order and examine it carefully. Check spark plugs for burned electrodes, wear, carbon deposits and gap setting. Inspect closely for cracked insulators. 4. If the edges of the plug’s inner and outer electrodes are noticeably eroded, replace it. Generally, spark plugs used with breaker-point ignition should be replaced per recommended schedule. With electronic ignition, check each plug for excessive wear. 5. It may be necessary to periodically clean the plugs with a plug cleaner and to reset the gaps to correct specifications. Check the gap of the plugs with a wire gauge, using the tool at the end of the gauge to bend the outer electrode to change the gap. 6. Spark plugs must be correctly installed in order to obtain good performance from them. Clean the spark plug seat in the cylinder head. Use new seat gaskets and screw plug in by hand. Tighten all plugs to correct torque with socket wrench of correct size. Wipe insulators clean before installing the boots and cables. Refer to Section 6.3, Ignition System Maintenance, for additional spark plug maintenance procedures. Mgnition Timing and Advance IMPORTANT - Correct ignition timing is vital to the proper and efficient operation of the engine. Incorrect timing can result in engine overheating, with resultant reduced piston and valve life, and lowered fuel economy. It is important that the ignition point gap or air gap (electronic ignition) is set correctly before checking and adjusting the timing. Checking timing is counter-productive if the point gap is not set to specification. Timing is set using a timing light. The light flashes when the “points” open. If the points open at the wrong time, the timing marks are seen at the wrong time. And therefore, based on this, the timing is set incorrectly. To insure accuracy, the points must be set using a dwell meter. Using a feeler gauge to set points can be very inaccurate due to variations in judgment of “feel” as well as other mechanical variations. Use a dwell meter to set points. Refer to Section 4.4, Ignition Timing Procedures. 1. Using a dwell meter, check and adjust point gap or air gap (electronic ignition) first and then check ignition timing and advance. See Section 2.7, Service Specifications, for your engine. SM520 12/l I89 2. Adjust idle speed to 500 rpm. 3. Disconnect vacuum advance hose at distributor (as applicable) and plug or clamp the open end. 4. Install a timing light. CAUTION Enaine Fan Be careful of rotating fan blades when using a timing light. 5. With engine running at 500 rpm idle speed and vacuum advance disconnected, aim the timing light at the crankshaft pulley and timing indicator. 6. Check the initial (basic) timing by alignment of timing notch on crank pulley with mark on timing indicator (4654 engine shown). Adjust timing, as necessary. Refer to Section 4.4, Ignition Timing Procedures. See also Section 2.7, Service Specifications. 7. Check spark advance mechanism(s). Accelerate the engine speed slowly to determine if there is a steady and smooth spark advance. This will be indicated by the notch on crankshaft pulley, which will appear to move away from the initial timing point and, generally, upwards, as viewed in truck. 8. Run engine at steady 1600-1800 rpm. Temporarily connect the vacuum advance hose and check for correct advance. Ifthere is no advance or if it is erratic, the distributor advance mechanisms must be inspected and repaired or replaced. Check for hose leaks, etc., or replace advance diaphragm. Refer to Part 6, Ignition System Maintenance procedures for your engine. 9. Reconnect vacuum advance and set idle speed to specification. 4. Readjust Idle Speed 1. After replacement or adjustment of ignition components or other engine parts, recheck and adjust the carburetor idle speed to specification and adjust idle air-fuel ratio. 2. Adjust idle air-fuel ratio to obtain low carbon monoxide (use CO meter). falts GROUf OU,U7 4.3 - 7
  • 19. Copyrighted Material Intended for CLARK dealers only Do not sell or distribute 4.3 Enaine Tune-M 5. Compression Check 1. If the stall speed reading is not in the correct range or the engine runs erratically, perform an engine compression check. This will check the condition of the piston rings and engine valves. Refer to Section 4.6, Engine Cylinder Compression Test. See Section 2.1, Service Specifications. 6. Valve Clearance Settings 1. If the engine compression test indicates a valve problem, or valve train is noisy, check and adjust valve (tappet) clearances, as necessary. Refer to Section 4.5, Valve Tappet Clearance Adjustment. Valve Clearance Settings: See Section 2.1, Service Specifications 7. Cooling System Refer to Section 4.8, Cooling System for additional information. 1. If there is an indication of engine overheating, perform a complete check of the engine cooling system. 2. Inspect the radiator for damage and clogging from dirt contamination. Air clean the radiator, if it has not already been cleaned as part of the PM procedure. 3. Check to be sure that the fan blades are not loose or damaged and that the fan is installed correctly (fan installed badwards is a wmmon problem.) NOTfCE - The fan is designed as a “pusher-type” fan, i.e., to push air through the radiator. The fan blades should be installed with their curve to push air into the radiator as they turn in the direction of right-hand engine rotation. IMPORTANT - Fan blades should engage l/3 of the depth of the radiator shroud. 4. On optional models with viscous fan drive, check the fan drive (speed control) assembly. 5. Check the fan drive belt for proper tension and adjust, as necessary. If tension is low, the belt will slip. If belt tension is too high the bearings and seals in the water pump and alternator can be damaged. 6. Check the exhaust pipe to be sure that exhaust is not blowing into the radiator (except GS, LPS, DS construction with piccolo tube). 7. As a final step, if necessary: 1) pressure test the cooling system. 2) pressure test the radiator cap. 3) check the thermostat. 4) check the coolant for freeze protection level. 5) check overflow reservoir and hoses. 8. TMD27 [2.9L] Diesel Engine J 1. Check glow plugs and inspect glow plug wiring. Repair or replace, as needed. 2. Inspect fuel lines for leaks. Adjust fuel control linkage, and accelerator pedal linkage to allow for full travel of arm on fuel injection pump, as necessary. Refer to Section 5.3. Diesel Fuel System for additional information. 9. Recheck Engine Performance 1. Stall Test. Run a stall test to check engine performance after tune-up. Remove the tachometer, vacuum gauge and timing light. Tune-Up Completion When you have systematically completed these tune-up procedures you should have been successful in restoring the engine to its peak level of performance, or otherwise determined the need for additional maintenance or repair of the engine. 1. Lower and latch the seat deck. Be sure seat deck is correct/y latched. Install and close the side doors. Lower the drive wheels to the floor and remove any blocking, if used. 2. Test drive the truck. 3. Clean up any loose dirt and spills. Wipe off the truck. 4.3 - 8 mfa9 SM520 Parts GROUP 00,Ol
  • 20. Thank you very much for your reading. Please Click Here. Then Get COMPLETE MANUAL. NO WAITING NOTE: If there is no response to click on the link above, please download the PDF document first and then click on it.
  • 21. Copyrighted Material Intended for CLARK dealers only Do not sell or distribute Engine Ignition 4 Engine 4.4 Ignition Timing Procedures General Procedures.. ............................................................... 4.4-l Checking Ignition Timing.. ....................................................... .4.4-3 Initial (Basic) Ignition Timing.. .................................................... .4.4-4 Ignition Timing Adjustment.. ..................................................... 4.4-4 Checking Spark Advance.. ....................................................... .4.4-5 Emergency Timing Method.. .................................................... .4.4-6 Engine Ignition Timing procedures include: I) checking the point gap (air gap on electronic ignition) and initial (basic) timing of the distributor to the engine, 2) adjusting the timing when timing is found to be incorrect, and 3) checking spark advance. Normally Clark industrial engines with distributor- ignition are timed to have the distributor points open (or electronic breaker trigger) when the #1 cylinder is on compression stroke and the crankshaft (or crankshaft pulley) mark lines up with the pointer or timing indicator on the engine. The general timing procedures are the same for all G(P)X, GCS/GPS 77-30 engine models, whether equipped with contact breaker-point distributor or electronic ignition distributor. Both types of ignition utilize a typical distributor mounted and driven in the conventional manner. Individual differences in components and procedures are noted or shown where applicable. Note - The following pages d8SCfib8 general engine ignition timing pfOC8dUf8S i/iustrated with typical views of the subject activity. f/ease check your engine model for specific component arrangement and corresponding service requirement. Refer to Part 6, Ignition System maintenance for your engine model. General Procedures Be careful of rotating fan blades when 1. Open and remove either the right hand (4654 & TM27 engine) or left hand side door (D176GA engine), and raise the seat deck. Be sure the seat deck support is securely latched. NOTICE - 4654 [2.6L] Engine Air Filter For best access to the distributor and timing indicator, it is recommended to remove the air filter housing from the truck. If you are unfamiliar with this procedure, please refer to Section 4.9, Air Filter. There are two methods of checking ignition timing: with or without a timing light. Timing without a light is an emergency method which is outlined at the end of this section. The preferred method is to use a timing light as described in the folio wing procedures. SM520 12/l/89 Parts GROUP 11 4.4 - 1
  • 22. Copyrighted Material Intended for CLARK dealers only Do not sell or distribute 4.4 Ignition Timing General Procedures (Cont’d) 2. Install a tachometer, or a combination test instru- ment, such as the Clark Dynamic Engine Analyzer, Part No. 1802047. Note - Tachometer must be con- nected directly to battery terminals (other ground not suitable). 7. Disconnect vacuum hose from vacuum advance on distributor (as applicable). Plug or clamp the open end of vacuum hose to carburetor or manifold. Note - D176GA [2.9L] engine does not have vacuum advance. 8. Lower the engine speed by adjusting the carburetor idle screw to obtain 500 tpm idle speed. Refer to Section 4.10, Engine Adjustments, for additional information on idle adjustment. 3. Install a timing light. Note - An ignition timing light, Clark Part No. 1801971, or equivalent, with inductive spark pickup is recommended. Install per manufacturerrecommendations. 4. Clean the timing pointer or indicator and timing mark or notch on the crank pulley to make the mark more legible under the timing light. 5. Start the engine and warm it up until it runs smoothly. 6. Check and adjust ignition point gap or air gap (electronic ignition), as applicable, with a dwell meter. IMPORTANT - To insure accuracy, always use a dwell meter to check and adjust point gap setting. See NOTICEat right. Refer to Part 6, Ignition System Maintenance for your engine model for ignition point or air gap S8tkgS. 9. Run engine at 500 rpm idle speed (unless otherwise noted), so the automatic advance of the distributor is not operating. Note - lt is standard practice to check engine initial (basic) timing with engine running at 500 rpm idle speed setting, so that the automatic advance of the distributor is completely retarded and not affecting timing. THIS IS VERY IMPORTANT TO OBTAIN CORRECT TIMING. NOTICE - Correct ignition’timing is vital to the proper and efficient operation of the engine. Incorrect timing can result in engine overheating, with resultant reduced piston and valve life, and lowered fuel economy. It is important that the ignition point gap (or air gap on electronic ignition) is set correctly before checking and adjusting the timing. Checking timing is counter-productive if the point gap is not set to specification. Timing is set using a timing light. The light f/ashes when the “points” open. If the points open at the wrong time, the timing marks are seen at the wrong time. And therefore, based on this, the timing is set incorrect/y. To insure accuracy, the points must be set using a dwell meter. Using a feeler gauge to set points can be inaccurate due to variations in judgment of “fee/” as well as other mechanical variations. Always use a dwell meter to set points. 12/l/89 SM520 4.4 - 2 Parts GROUP 11
  • 23. Copyrighted Material Intended for CLARK dealers only Do not sell or distribute 4.4 Ignition Timing Checking Ignition Timing IMPORTANT - Distributors with vacuum advance. Before ignition timing can be checked or adjusted, disconnect vacuum advance line from distributor and plug or clamp the open end of line leading to the manifold to prevent loss of vacuum. 4054 [2.6L] Engine CAUTION Enaine Fan to hold the timing light in a position to avoid being too close to the rotating fan blades. Be careful to stay away from the fan when leaning over to see the timing marks. 1. The 4654 engine timing indicator (1) is located near the crankshaft pulley (2) and may be seen from the right-hand side of the truck. 2. With engine running at the noted idle speed, aim the timing light at the crankshaft pulley and timing indicator. Note timing marks as light flashes. (4G54 [2.6L] engine shown.) TM27 [2.7L] Engine 1. The timing indicator is located near crankshaft pulley similar to the 4G54 [2.6L] engine and may be seen from right-hand side of truck. D176GA [2.9L] Engine 1. Stand at left side of truck and point timing light down in a vertical direction between the fan and alternator. CAUTtON Engine Fan Be sure to hold the timing light in a position above the top of the alternator (or radiator) to avoid being too close to the rotating fan blades. Be careful to stay away from the fan when leaning over to see the timing marks. I SM520 12/l/89 Parts GROUP 11 4.4 - 3