SlideShare a Scribd company logo
CLCLCLCLCLAAAAAAS TAS TAS TAS TAS TARGO C SeriesARGO C SeriesARGO C SeriesARGO C SeriesARGO C Series
REPREPREPREPREPAIR MANUALAIR MANUALAIR MANUALAIR MANUALAIR MANUAL
AXLES AND STEERING
ENGINE
TRANSMISSION
BOOM
CHASSIS
TECHNICAL DATA
08/2003 349859.0
The machines in this handbook are designed essentially for agricultural and associated applications. This is
their intended use.
Any modifications made to the machine without prior written approval from CLAAS or if the machine is used in
any way contrary to the intended use or if the machine is not properly driven or maintained then the Company
will not accept any liability whatsoever for any damage or injury (whether direct or consequential).
The method of operation and maintenance specified in this handbook should be strictly adhered to.
For your parts requirements, it is essential that only genuine CLAAS parts are fitted. Any resultant damage
from non-genuine parts will invalidate your machine warranty.
CLAAS operates a policy of continuous improvement to its products and reserve the right to change specifica-
tions and equipment without notice. Therefore some information within this handbook may differ from your
machine.
This manual is designed to service machines:
from Serial No. 50600011
up to Serial No. 50600251.
CONTENTS
INTRODUCTION
General
Machine identification
Health and Safety
SAFETY WARNINGS
SECTION 1
AXLES AND STEERING
AXLES 1.1
Description 1.1
Front Axle 1.1
Removal 1.1
Installation 1.2
Rear Axle 1.3
Removal 1.3
Installation 1.4
Dismantling and Assembly 1.5
Dismantling 1.6
Transmission box 1.6
Trunnions (rear axle only) 1.8
Steering cylinder (front and rear axle) 1.9
Epicyclic reduction gear (front and rear axle) 1.10
Wheel hub (front and rear axle) 1.11
Axle beam trumpet (front and rear axle) 1.13
Axle beam removal 1.14
Brake group (front axle only) 1.14
Differential support group (rear axle) 1.17
Differential group (front and rear axle) 1.18
Assembly 1.20
Pinion group (front axle) 1.20
Pinion group (rear axle) 1.24
Differential group (front and rear axle) 1.26
Brake and differential housing (front axle only) 1.27
Differential carrier group assembly 1.32
Brake control group assembly (front axle) 1.36
Generic information 1.37
Brake and axle beam assembly (front axle) 1.38
Wheel hub (front and rear axles) 1.41
Epicyclic reduction gear (front and rear axles) 1.43
Steering cylinder (front and rear axles) 1.44
Toe-in adjustment 1.45
Steering angle adjustment 1.46
Transmission box assembly 1.47
Trunnion assemblies 1.49
Testing after installation 1.50
Trouble shooting 1.51
Operating problems 1.51
Axle problems 1.52
Axle noise problems and diagnosis 1.53
Special tools 1.54
Steering 1.63
Description 1.63
Operation 1.63
Checking the steering system 1.66
Steering cylinder 1.66
Steering unit (OSPF) 1.66
Servicing 1.66
Steering valve assembly 1.67
Removal 1.67
Installation 1.67
Dismantling 1.68
Assembly 1.68
CONTENTS
SECTION 1 (continued)
AXLES AND STEERING
AXLES (continued)
Brake system bleeding 1.69
Dumping (disipation) of hydraulic pressure 1.70
Hydraulic level 1.71
SECTION 2
ENGINE
Description 2.1
Engine Data 2.1
Removal and Installation 2.2
General 2.2
Removal 2.2
Installation 2.4
Testing 2.4
SECTION 3
TRANSMISSION
Description 3.1
Hydrostatic system (up to Machines S/No.50600162 only) 3.1
Hydrostatic system (from Machines S/No.50600163 only) 3.2
Operation 3.5
Hydrostatic pump 3.5
Pressure relief valve 3.7
Proportional pressure reducing valve 3.7
Multi function valves 3.7
Pressure relief valve 3.7
Over pressure valve 3.8
Bypass valve function 3.9
Setting the bypass function 3.9
Hydrostatic motor 3.10
Removal and installation 3.12
Hydrostatic pump 3.12
Removal 3.12
Installation 3.13
Hydrostatic motor 3.14
Removal 3.14
Installation 3.15
Drive shaft 3.16
Removal 3.16
Installation 3.16
Testing 3.18
Trouble shooting guide 3.22
SECTION 4
BOOM
Description and operation 4.1
Description 4.1
Operation 4.2
Maintenance 4.3
Boom 4.3
Removal 4.3
Installation 4.4
Hydraulic cylinder 4.6
Crowd cylinder 4.6
Compensator cylinder 4.6
Lift cylinder 4.6
Extension cylinder 4.6
Boom tray cassette 4.7
Removal 4.7
Installation 4.9
CONTENTS
SECTION 4
BOOM
Maintenance (continued)
Boom tray hoses 4.9
Dismantling 4.9
Assembly 4.9
Inner boom 4.10
Removal 4.10
Installation 4.11
Boom wear pads 4.12
General 4.12
Replacement of outer boom wear pads (front) 4.12
Replacement of outer boom wear pads (rear) 4.14
Quattro control handle 4.15
Removal 4.15
Installation 4.15
SECTION 5
CHASSIS
Description 5.1
Operators cab 5.2
Removal 5.2
Installation 5.3
Fuel tank 5.5
Removal 5.5
Installation 5.5
Heater and Air Conditioning 5.7
Description 5.7
Blower motor 5.7
Removal 5.7
Installation 5.8
Heater coil 5.9
Removal 5.9
Installation 5.9
Air conditioning evaporator coil 5.10
Removal 5.10
Installation 5.11
Receiver - Drier assembly 5.12
Removal 5.12
Installation 5.13
Air conditioning condensor coil 5.13
Removal 5.13
Installation 5.13
Axial fan 5.15
Removal 5.15
Installation 5.15
Compressor 5.17
Removal 5.17
Installation 5.17
CONTENTS
SECTION 6
TECHNICAL DATA
Dimensions 6.1
Weight 6.1
Machine speed 6.2
Carriage 6.2
Cycle time 6.2
Engine 6.3
Cooling 6.3
Transmission 6.3
Tyres 6.3
Hydraulics 6.4
Electrics 6.4
Capacities 6.4
Brakes 6.4
INTRODUCTION
General
The contents of this Repair Manual, although correct at the time of publication, may be subject to alteration by
the manufacturer without notice.
This manual assumes that maintenance personnel have a sound knowledge of workshop practices and
safety procedures associated with the repairs of this type of machine. This manual is designed to assist with
the more specialised information required for removal and strip-down of major components.
It is recommended that the relevant part of this Repair Manual is studied carefully before proceeding with any
maintenance.
Machine identification
To make sure that the correct parts are obtained, always quote the machine Serial Number when ordering
parts.
Health and Safety
To prevent injury to personnel and damage to equipment and machinery, care must be taken to operate in a
safe manner. Read the Safety Warnings that follow and always work in a safe manner and obey the relevant
Warnings.
Throughout this manual and on the machine there are safety notes. Each note starts with a single word. The
meaning of these single words is as follows:
Identifies a hazard exists. If proper precautions are not taken, it is highly probable that the
operator (or others) could be killed or seriously injured.
Identifies a reminder of safety practices. Failure to observe these safety practices could result
in injury to the operator (or others) or damage to the machine.
In general these notes are used to indicate that the procedures being described in the manual must be
followed to avoid serious injury or death to yourself or others. The notes are also used to protect the machine
from unsafe maintenance practices.
SAFETY WARNINGS
Always wear correct fitting protective clothing. Loose or baggy clothing can be extremely
dangerous when operating or maintaining a machine.
Where possible, only work on or close to engines or machinery when they are stopped. If this
is not practical, remember to keep tools, test equipment and all parts of your body well away
from moving parts.
Avoid contact with exhaust pipes and exhaust manifolds when the engine is running; these
can be very hot.
Many liquids used on this machine are harmful if taken internally or splashed into the eyes. In
the event of accidentally swallowing oil, diesel fuel, anti-freeze, battery acid etc., DO NOT
induce vomiting, but OBTAIN QUALIFIED MEDICAL ASSISTANCE IMMEDIATELY.
Always obtain advice before mixing oils; some are incompatible.
Never run an engine in an enclosed space unless an exhaust extraction system is used.
Always disconnect battery cables before working on the electrical system to prevent injury
caused by electric shock.
When it is necessary to work on the electrical system with power on, for fault diagnosis,
always have a safety man in attendance
Any dust found on the machine or produced during work on the machine should be removed
by extraction, not by blowing. Dust waste should be dampened, placed in a sealed container
and marked for safe disposal.
Always dump pressure from the hydraulic system before carrying out any maintenance or
adjustment (refer to Hydraulic Repair Manual).
Never leave the machine unattended with pressure in the system.
Fine jets of hydraulic fluid at high pressure can penetrate the skin. Do not use your fingers to
check for hydraulic fluid leaks. Do not put your face close to suspected leaks. If hydraulic fluid
penetrates your skin OBTAIN QUALIFIED MEDICAL ASSISTANCE IMMEDIATELY.
Never allow unqualified personnel to attempt to remove or replace any part of the machine.
Always use the correct lifting equipment to remove large or heavy components.
Never attempt to lift or hold up the machine using the lash-down points.
SECTION 1
AXLES AND STEERING
AXLES & STEERING 1.1
Support the hydrostatic motor clear
of the axle to make sure it is not
damaged during axle removal.
AXLES
DESCRIPTION
The front axle has a transmission/reduction box
fitted, with both front and rear axles having epicyclic
reduction gears contained in the wheel hubs. The
front axle is fitted with a limited slip differential whilst
the rear axle has a standard type differential. The
front axle housing incorporates the brakes.
Steering is available to both axles, depending on the
steering mode selected. The axle hubs are steered
by the operation of a double acting hydraulic cylinder
attached to the axle.
FRONT AXLE
Removal
1. Park the machine on firm level ground.
2. Raise the boom and fit the boom safety stop.
3. Set the wheels straight ahead, in line with the
chassis and fit chocks to the front and rear of the
rear wheels.
4. Stop the engine and apply the parking brake.
5. Refer to page 1.70 and dump hydraulic pressure
from the brake systems and steering system, then
disconnect the battery.
Support the drive shaft clear of the
axle to make sure it is not damaged
during axle removal.
6. Disconnect the drive shaft from the axle flange
and support clear of axle.
7. Disconnect the inductive magnetic steering sensor
electrical lead.
8. Disconnect the hydrostatic motor from the
transmission box flange and support clear of axle.
9. Slacken front axle wheel nuts.
10. Support the chassis at a sufficient height to allow
the wheels to be removed.
AXLES & STEERING1.2
16. Remove the eight attachment bolts/nuts securing
axle to chassis (four each side) and remove support
plates.
17. Lower axle on fork lift/trolley jacks.
18. Move axle clear of machine and place on a
suitable support.
Installation
1. Installation is the reverse of the removal
procedure.
2. Torque load components as follows:
Axle to chassis nuts 640 Nm (472 lbf ft.)
Drive shaft bolts 61-81 Nm 45-60 lbf ft.)
Wheel nuts 300 Nm (221 lbf ft.)
Hydrostatic motor to Axle bolts 150 Nm (110 lbf ft.)
3. Check axle and wheel hub oil levels are correct.
4. When the axle has been dismantled and
reassembled, refer to the Axle Assembly section and
test the differential operation.
5. Connect the parking brake linkage (1). Refer to
testing and adjusting section to set up parking brake
control cable.
6. Refer to Page 1.69 and bleed the brakes then test
brake function and parking brake operation.
7. Start engine, make sure front wheel steering is
selected and operate steering through full range
several times to bleed air from steering system.
8. Test machine operation.
1. Parking brake linkage and adjuster
2. Steering hoses
3. LH Brake pipe (RH similar)
11. Support axle with a forklift or trolley jacks.
12. Remove front wheels.
13. Disconnect the parking brake linkage (1) and
position cable and attachments clear of the axle.
14. Disconnect brake pipes from left (3) and right
(not shown) brake units, fit blanks to open pipes and
brake unit connections.
15. Disconnect steering hoses (2) from steering
cylinder, fit blanks to open pipes and steering
cylinder connections.
Secure the axle to the fork lift/
trolley jacks to prevent axle tipping
on removal.
The axle weighs 391 kg, take care
when removing and transporting.
AXLES & STEERING 1.3
5. Disconnect the drive shaft from the axle flange
and support clear of axle.
6. Disconnect the load sensor electrical lead.
7. Disconnect the inductive magnetic steering sensor
electrical lead.
8. Disconnect steering hoses from steering cylinder,
fit blanks to open pipes and steering cylinder
connections.
9. Slacken rear axle wheel nuts.
10. Support the chassis at a sufficient height to allow
the wheels to be removed.
11. Remove rear wheels.
12. Support axle with a forklift or trolley jacks.
13. Remove the bolts attaching the axle front
support to the chassis.
14. Remove the bolts attaching the axle rear support
to the chassis.
Secure the axle to the fork-lift/trolley
jacks to prevent axle tipping on
removal. The axle weighs 298 kg dry
weight, take care when removing and
transporting.
15. Lower axle on fork-lift/trolley jacks.
16. Move axle clear of machine and place on a
suitable support.
Support the drive shaft clear of the
axle to make sure it is not damaged
during axle removal.
REAR AXLE
Removal
1. Park the machine on firm level ground.
2. Set the wheels straight ahead, in line with the
chassis and fit chocks to the front wheels.
3.Stop the engine and apply the parking brake.
4. Refer to page 1.70 and dump hydraulic pressure
from the steering system, then disconnect the
battery.
AXLES & STEERING1.4
Installation
1. Installation it the reverse of the removal
procedure.
2. Torque load components as follows:
Axle to chassis nuts 640 Nm (472 lbf ft.)
Drive shaft bolts 70-85 Nm (52-63 lbf ft.)
Wheel nuts 300 Nm (221 lbf ft.)
Axle support bolts 370 Nm (273 lbf ft.).
3. Check axle and wheel hub oil levels are correct.
4. When the axle has been dismantled and
reassembled, refer to the Axle Assembly section and
test the differential operation.
5. Start engine, make sure rear wheel steering is
selected and operate steering through full range
several times to bleed air from steering system.
6. Test machine operation.
AXLES & STEERING 1.5
NOTES:
(1) Sealing Compound. Ensure both surfaces to
be sealed are clean, dry and free from grease.
(2) O-ring seals. Lubricate seals before fitting to
prevent twisting when inserting the shaft.
(3) Bearings. It is recommended that bearings
are heated to 80°C - 90°C before fitting to shaft, or
cooling with dry ice before inserting them into an
outer housing.
(4) Shims. Measure shims before use, do not
rely on measurement marked on shim.
(5) Torque loading. Torque load all components
to the recommended figure.
(6) Oil seals. To assist with the correct
installation of oil seals carry out the following:
• Ensure the shaft is clean and not damaged
• Assemble with lip side towards the oil side
• Lubricate seal with oil and fill ¾ of seal cavity
with grease
• Use special tools to install seals, where
available. Do not hammer directly on the seal
• Do not damage seals while assembling the
shaft.
(7) Special tools. Use the special tools to
dismantle and assemble the axle.
DISMANTLING AND ASSEMBLY
Dispose of used axle oil in
accordance with local regulations.
Thank you very much for
your reading. Please Click
Here. Then Get COMPLETE
MANUAL. NO WAITING
NOTE:
If there is no response to
click on the link above,
please download the PDF
document first and then
click on it.
AXLES & STEERING1.6
DISMANTLING
TRANSMISSION BOX
(Front Axle only)
1.Removethedrainplug(1)anddrainoilintoasuitable
container.
2. Remove the bolts (2) and the engine flange (3)
from the half box. Remove the O-ring (5) from the
engine flange.
NOTE: The mounting screws for the engine flange
are of two different lengths. The positions of which
should be noted for fitment purposes.
3. Remove the half box mounting bolts (4) and
remove the half box using a rubber hammer.
4. Remove the gear wheel (6) and separate the
bearings (7) using a suitable extractor.
5. Remove the circlip (8) and withdraw the gear
wheel (9) and bearing (10) from the flanged shaft
(11) using a suitable extractor.
6. Remove the shaft (11) from the half box using a
hammer and drift and remove the lower bearing (12).
7. Remove the lower shaft oil seal (13) from the half
box with a hammer and drift.
NOTE: This will damage the oil seal, use a new oil
seal on assembly.
8. Remove the half box fixed to the axle body by
removing the mounting bolts (14).
1. Drain Plug
2. Bolt
3. Engine Flange
4. Bolt
5. O-Ring
6. Gear Wheel
7. Bearing
8. Circlip
9. Gear Wheel
10. Bearing
11. Flanged Shaft
12. Bearing
13. Oil Seal
14. Bolts
The half box is heavy and must be
supported with suitable equipment
during removal.
AXLES & STEERING 1.7
AXLES & STEERING1.8
TRUNNIONS
(Rear Axle only)
1. Remove the circlip (1) and withdraw the input
flange (2), the O-ring (3) and the washer (4).
2. Remove the front trunnion (5) and rear trunnion
(6).
3. Loosen the bolt (7) and withdraw the bush (8)
from the rear trunnion (6).
4. Inspect and replace as necessary the “A”
centering bushes (9) from the front trunnion (5) and
rear trunnion (6).
5. Loosen the grease nipple (10) and remove the
bush (11) and O-ring (12) from the front trunnion (5).
1. Circlip
2. Input flange
3. O-ring
4. Washer
5. Front trunnion
6. Rear trunnion
7. Bolt
8. Bush
9. Centering bush
10. Grease nipple
11. Bush
12. O-ring

More Related Content

Similar to Claas targo c50 40 (type 506) telehandlers service repair manual

Claas targo k50 telehandlers service repair manual
Claas targo k50 telehandlers service repair manualClaas targo k50 telehandlers service repair manual
Claas targo k50 telehandlers service repair manual
fjjskejdmdn
 
Claas targo k60 telehandlers service repair manual
Claas targo k60 telehandlers service repair manualClaas targo k60 telehandlers service repair manual
Claas targo k60 telehandlers service repair manual
fjjskejdmdn
 
Claas targo k70 telehandlers service repair manual
Claas targo k70 telehandlers service repair manualClaas targo k70 telehandlers service repair manual
Claas targo k70 telehandlers service repair manual
fjjskejdmdn
 
Claas targo k50 telehandlers service repair manual
Claas targo k50 telehandlers service repair manualClaas targo k50 telehandlers service repair manual
Claas targo k50 telehandlers service repair manual
ikdkkdmdmdm
 
Claas targo k70 telehandlers service repair manual
Claas targo k70 telehandlers service repair manualClaas targo k70 telehandlers service repair manual
Claas targo k70 telehandlers service repair manual
ikdkkdmdmdm
 
Claas targo k50 telehandlers service repair manual
Claas targo k50 telehandlers service repair manualClaas targo k50 telehandlers service repair manual
Claas targo k50 telehandlers service repair manual
fjskekdmjekm
 
Claas targo k70 telehandlers service repair manual
Claas targo k70 telehandlers service repair manualClaas targo k70 telehandlers service repair manual
Claas targo k70 telehandlers service repair manual
ifosodkmsme
 
Claas targo k60 telehandlers service repair manual
Claas targo k60 telehandlers service repair manualClaas targo k60 telehandlers service repair manual
Claas targo k60 telehandlers service repair manual
ifosodkmsme
 
Claas targo k50 telehandlers service repair manual
Claas targo k50 telehandlers service repair manualClaas targo k50 telehandlers service repair manual
Claas targo k50 telehandlers service repair manual
ifosodkmsme
 
Claas targo k70 telehandlers service repair manual
Claas targo k70 telehandlers service repair manualClaas targo k70 telehandlers service repair manual
Claas targo k70 telehandlers service repair manual
fjskekdmjekm
 

Similar to Claas targo c50 40 (type 506) telehandlers service repair manual (10)

Claas targo k50 telehandlers service repair manual
Claas targo k50 telehandlers service repair manualClaas targo k50 telehandlers service repair manual
Claas targo k50 telehandlers service repair manual
 
Claas targo k60 telehandlers service repair manual
Claas targo k60 telehandlers service repair manualClaas targo k60 telehandlers service repair manual
Claas targo k60 telehandlers service repair manual
 
Claas targo k70 telehandlers service repair manual
Claas targo k70 telehandlers service repair manualClaas targo k70 telehandlers service repair manual
Claas targo k70 telehandlers service repair manual
 
Claas targo k50 telehandlers service repair manual
Claas targo k50 telehandlers service repair manualClaas targo k50 telehandlers service repair manual
Claas targo k50 telehandlers service repair manual
 
Claas targo k70 telehandlers service repair manual
Claas targo k70 telehandlers service repair manualClaas targo k70 telehandlers service repair manual
Claas targo k70 telehandlers service repair manual
 
Claas targo k60 telehandlers service repair manual
Claas targo k60 telehandlers service repair manualClaas targo k60 telehandlers service repair manual
Claas targo k60 telehandlers service repair manual
 
Claas targo k50 telehandlers service repair manual
Claas targo k50 telehandlers service repair manualClaas targo k50 telehandlers service repair manual
Claas targo k50 telehandlers service repair manual
 
Claas targo k70 telehandlers service repair manual
Claas targo k70 telehandlers service repair manualClaas targo k70 telehandlers service repair manual
Claas targo k70 telehandlers service repair manual
 

More from fjskekdmjekm

Kawasaki 85 z7 wheel loader service repair manual (serial no. 85j1 8001 and up)
Kawasaki 85 z7 wheel loader service repair manual (serial no. 85j1 8001 and up)Kawasaki 85 z7 wheel loader service repair manual (serial no. 85j1 8001 and up)
Kawasaki 85 z7 wheel loader service repair manual (serial no. 85j1 8001 and up)
fjskekdmjekm
 
Kawasaki 85 z7 wheel loader operation and maintenance manual (serial no. 85j1...
Kawasaki 85 z7 wheel loader operation and maintenance manual (serial no. 85j1...Kawasaki 85 z7 wheel loader operation and maintenance manual (serial no. 85j1...
Kawasaki 85 z7 wheel loader operation and maintenance manual (serial no. 85j1...
fjskekdmjekm
 
Kawasaki 85 z7 wheel loader equipment components parts catalogue manual
Kawasaki 85 z7 wheel loader equipment components parts catalogue manualKawasaki 85 z7 wheel loader equipment components parts catalogue manual
Kawasaki 85 z7 wheel loader equipment components parts catalogue manual
fjskekdmjekm
 
Kawasaki 80 z7b wheel loader parts catalogue manual (serial no. 80c8 5001 and...
Kawasaki 80 z7b wheel loader parts catalogue manual (serial no. 80c8 5001 and...Kawasaki 80 z7b wheel loader parts catalogue manual (serial no. 80c8 5001 and...
Kawasaki 80 z7b wheel loader parts catalogue manual (serial no. 80c8 5001 and...
fjskekdmjekm
 
Kawasaki 80 z7 wheel loader parts catalogue manual (serial no. 80c6 5001 and up)
Kawasaki 80 z7 wheel loader parts catalogue manual (serial no. 80c6 5001 and up)Kawasaki 80 z7 wheel loader parts catalogue manual (serial no. 80c6 5001 and up)
Kawasaki 80 z7 wheel loader parts catalogue manual (serial no. 80c6 5001 and up)
fjskekdmjekm
 
Kawasaki 80 z7 wheel loader equipment components parts catalogue manual (seri...
Kawasaki 80 z7 wheel loader equipment components parts catalogue manual (seri...Kawasaki 80 z7 wheel loader equipment components parts catalogue manual (seri...
Kawasaki 80 z7 wheel loader equipment components parts catalogue manual (seri...
fjskekdmjekm
 
Kawasaki 70 z7 wheel loader operation and maintenance manual (serial no. 70c6...
Kawasaki 70 z7 wheel loader operation and maintenance manual (serial no. 70c6...Kawasaki 70 z7 wheel loader operation and maintenance manual (serial no. 70c6...
Kawasaki 70 z7 wheel loader operation and maintenance manual (serial no. 70c6...
fjskekdmjekm
 
Kawasaki 62 z7 wheel loader parts catalogue manual (serial no. 62j1 0101 and up)
Kawasaki 62 z7 wheel loader parts catalogue manual (serial no. 62j1 0101 and up)Kawasaki 62 z7 wheel loader parts catalogue manual (serial no. 62j1 0101 and up)
Kawasaki 62 z7 wheel loader parts catalogue manual (serial no. 62j1 0101 and up)
fjskekdmjekm
 
Kawasaki 62 z7 wheel loader equipment components parts catalogue manual (seri...
Kawasaki 62 z7 wheel loader equipment components parts catalogue manual (seri...Kawasaki 62 z7 wheel loader equipment components parts catalogue manual (seri...
Kawasaki 62 z7 wheel loader equipment components parts catalogue manual (seri...
fjskekdmjekm
 
John deere ch3500 harvester service repair manual
John deere ch3500 harvester service repair manualJohn deere ch3500 harvester service repair manual
John deere ch3500 harvester service repair manual
fjskekdmjekm
 
Cummins qsl9 engine parts catalogue manual
Cummins qsl9 engine parts catalogue manualCummins qsl9 engine parts catalogue manual
Cummins qsl9 engine parts catalogue manual
fjskekdmjekm
 
Caterpillar cat 318 e l excavator (prefix dzf) service repair manual (dzf0000...
Caterpillar cat 318 e l excavator (prefix dzf) service repair manual (dzf0000...Caterpillar cat 318 e l excavator (prefix dzf) service repair manual (dzf0000...
Caterpillar cat 318 e l excavator (prefix dzf) service repair manual (dzf0000...
fjskekdmjekm
 
Caterpillar cat 318 d2 l excavator (prefix xgs) service repair manual (xgs000...
Caterpillar cat 318 d2 l excavator (prefix xgs) service repair manual (xgs000...Caterpillar cat 318 d2 l excavator (prefix xgs) service repair manual (xgs000...
Caterpillar cat 318 d2 l excavator (prefix xgs) service repair manual (xgs000...
fjskekdmjekm
 
Caterpillar cat 318 d2 l excavator (prefix xah) service repair manual (xah000...
Caterpillar cat 318 d2 l excavator (prefix xah) service repair manual (xah000...Caterpillar cat 318 d2 l excavator (prefix xah) service repair manual (xah000...
Caterpillar cat 318 d2 l excavator (prefix xah) service repair manual (xah000...
fjskekdmjekm
 
Caterpillar cat 318 d2 l excavator (prefix wgr) service repair manual (wgr000...
Caterpillar cat 318 d2 l excavator (prefix wgr) service repair manual (wgr000...Caterpillar cat 318 d2 l excavator (prefix wgr) service repair manual (wgr000...
Caterpillar cat 318 d2 l excavator (prefix wgr) service repair manual (wgr000...
fjskekdmjekm
 
Caterpillar cat 318 d2 l excavator (prefix sgb) service repair manual (sgb000...
Caterpillar cat 318 d2 l excavator (prefix sgb) service repair manual (sgb000...Caterpillar cat 318 d2 l excavator (prefix sgb) service repair manual (sgb000...
Caterpillar cat 318 d2 l excavator (prefix sgb) service repair manual (sgb000...
fjskekdmjekm
 
Caterpillar cat 318 d2 l excavator (prefix dpj) service repair manual (dpj000...
Caterpillar cat 318 d2 l excavator (prefix dpj) service repair manual (dpj000...Caterpillar cat 318 d2 l excavator (prefix dpj) service repair manual (dpj000...
Caterpillar cat 318 d2 l excavator (prefix dpj) service repair manual (dpj000...
fjskekdmjekm
 
Caterpillar cat 318 d2 excavator (prefix sgb) service repair manual (sgb00001...
Caterpillar cat 318 d2 excavator (prefix sgb) service repair manual (sgb00001...Caterpillar cat 318 d2 excavator (prefix sgb) service repair manual (sgb00001...
Caterpillar cat 318 d2 excavator (prefix sgb) service repair manual (sgb00001...
fjskekdmjekm
 
Caterpillar cat 318 d l excavator (prefix zkj) service repair manual (zkj0000...
Caterpillar cat 318 d l excavator (prefix zkj) service repair manual (zkj0000...Caterpillar cat 318 d l excavator (prefix zkj) service repair manual (zkj0000...
Caterpillar cat 318 d l excavator (prefix zkj) service repair manual (zkj0000...
fjskekdmjekm
 
Caterpillar cat 318 c ln excavator (prefix mdy) service repair manual (mdy000...
Caterpillar cat 318 c ln excavator (prefix mdy) service repair manual (mdy000...Caterpillar cat 318 c ln excavator (prefix mdy) service repair manual (mdy000...
Caterpillar cat 318 c ln excavator (prefix mdy) service repair manual (mdy000...
fjskekdmjekm
 

More from fjskekdmjekm (20)

Kawasaki 85 z7 wheel loader service repair manual (serial no. 85j1 8001 and up)
Kawasaki 85 z7 wheel loader service repair manual (serial no. 85j1 8001 and up)Kawasaki 85 z7 wheel loader service repair manual (serial no. 85j1 8001 and up)
Kawasaki 85 z7 wheel loader service repair manual (serial no. 85j1 8001 and up)
 
Kawasaki 85 z7 wheel loader operation and maintenance manual (serial no. 85j1...
Kawasaki 85 z7 wheel loader operation and maintenance manual (serial no. 85j1...Kawasaki 85 z7 wheel loader operation and maintenance manual (serial no. 85j1...
Kawasaki 85 z7 wheel loader operation and maintenance manual (serial no. 85j1...
 
Kawasaki 85 z7 wheel loader equipment components parts catalogue manual
Kawasaki 85 z7 wheel loader equipment components parts catalogue manualKawasaki 85 z7 wheel loader equipment components parts catalogue manual
Kawasaki 85 z7 wheel loader equipment components parts catalogue manual
 
Kawasaki 80 z7b wheel loader parts catalogue manual (serial no. 80c8 5001 and...
Kawasaki 80 z7b wheel loader parts catalogue manual (serial no. 80c8 5001 and...Kawasaki 80 z7b wheel loader parts catalogue manual (serial no. 80c8 5001 and...
Kawasaki 80 z7b wheel loader parts catalogue manual (serial no. 80c8 5001 and...
 
Kawasaki 80 z7 wheel loader parts catalogue manual (serial no. 80c6 5001 and up)
Kawasaki 80 z7 wheel loader parts catalogue manual (serial no. 80c6 5001 and up)Kawasaki 80 z7 wheel loader parts catalogue manual (serial no. 80c6 5001 and up)
Kawasaki 80 z7 wheel loader parts catalogue manual (serial no. 80c6 5001 and up)
 
Kawasaki 80 z7 wheel loader equipment components parts catalogue manual (seri...
Kawasaki 80 z7 wheel loader equipment components parts catalogue manual (seri...Kawasaki 80 z7 wheel loader equipment components parts catalogue manual (seri...
Kawasaki 80 z7 wheel loader equipment components parts catalogue manual (seri...
 
Kawasaki 70 z7 wheel loader operation and maintenance manual (serial no. 70c6...
Kawasaki 70 z7 wheel loader operation and maintenance manual (serial no. 70c6...Kawasaki 70 z7 wheel loader operation and maintenance manual (serial no. 70c6...
Kawasaki 70 z7 wheel loader operation and maintenance manual (serial no. 70c6...
 
Kawasaki 62 z7 wheel loader parts catalogue manual (serial no. 62j1 0101 and up)
Kawasaki 62 z7 wheel loader parts catalogue manual (serial no. 62j1 0101 and up)Kawasaki 62 z7 wheel loader parts catalogue manual (serial no. 62j1 0101 and up)
Kawasaki 62 z7 wheel loader parts catalogue manual (serial no. 62j1 0101 and up)
 
Kawasaki 62 z7 wheel loader equipment components parts catalogue manual (seri...
Kawasaki 62 z7 wheel loader equipment components parts catalogue manual (seri...Kawasaki 62 z7 wheel loader equipment components parts catalogue manual (seri...
Kawasaki 62 z7 wheel loader equipment components parts catalogue manual (seri...
 
John deere ch3500 harvester service repair manual
John deere ch3500 harvester service repair manualJohn deere ch3500 harvester service repair manual
John deere ch3500 harvester service repair manual
 
Cummins qsl9 engine parts catalogue manual
Cummins qsl9 engine parts catalogue manualCummins qsl9 engine parts catalogue manual
Cummins qsl9 engine parts catalogue manual
 
Caterpillar cat 318 e l excavator (prefix dzf) service repair manual (dzf0000...
Caterpillar cat 318 e l excavator (prefix dzf) service repair manual (dzf0000...Caterpillar cat 318 e l excavator (prefix dzf) service repair manual (dzf0000...
Caterpillar cat 318 e l excavator (prefix dzf) service repair manual (dzf0000...
 
Caterpillar cat 318 d2 l excavator (prefix xgs) service repair manual (xgs000...
Caterpillar cat 318 d2 l excavator (prefix xgs) service repair manual (xgs000...Caterpillar cat 318 d2 l excavator (prefix xgs) service repair manual (xgs000...
Caterpillar cat 318 d2 l excavator (prefix xgs) service repair manual (xgs000...
 
Caterpillar cat 318 d2 l excavator (prefix xah) service repair manual (xah000...
Caterpillar cat 318 d2 l excavator (prefix xah) service repair manual (xah000...Caterpillar cat 318 d2 l excavator (prefix xah) service repair manual (xah000...
Caterpillar cat 318 d2 l excavator (prefix xah) service repair manual (xah000...
 
Caterpillar cat 318 d2 l excavator (prefix wgr) service repair manual (wgr000...
Caterpillar cat 318 d2 l excavator (prefix wgr) service repair manual (wgr000...Caterpillar cat 318 d2 l excavator (prefix wgr) service repair manual (wgr000...
Caterpillar cat 318 d2 l excavator (prefix wgr) service repair manual (wgr000...
 
Caterpillar cat 318 d2 l excavator (prefix sgb) service repair manual (sgb000...
Caterpillar cat 318 d2 l excavator (prefix sgb) service repair manual (sgb000...Caterpillar cat 318 d2 l excavator (prefix sgb) service repair manual (sgb000...
Caterpillar cat 318 d2 l excavator (prefix sgb) service repair manual (sgb000...
 
Caterpillar cat 318 d2 l excavator (prefix dpj) service repair manual (dpj000...
Caterpillar cat 318 d2 l excavator (prefix dpj) service repair manual (dpj000...Caterpillar cat 318 d2 l excavator (prefix dpj) service repair manual (dpj000...
Caterpillar cat 318 d2 l excavator (prefix dpj) service repair manual (dpj000...
 
Caterpillar cat 318 d2 excavator (prefix sgb) service repair manual (sgb00001...
Caterpillar cat 318 d2 excavator (prefix sgb) service repair manual (sgb00001...Caterpillar cat 318 d2 excavator (prefix sgb) service repair manual (sgb00001...
Caterpillar cat 318 d2 excavator (prefix sgb) service repair manual (sgb00001...
 
Caterpillar cat 318 d l excavator (prefix zkj) service repair manual (zkj0000...
Caterpillar cat 318 d l excavator (prefix zkj) service repair manual (zkj0000...Caterpillar cat 318 d l excavator (prefix zkj) service repair manual (zkj0000...
Caterpillar cat 318 d l excavator (prefix zkj) service repair manual (zkj0000...
 
Caterpillar cat 318 c ln excavator (prefix mdy) service repair manual (mdy000...
Caterpillar cat 318 c ln excavator (prefix mdy) service repair manual (mdy000...Caterpillar cat 318 c ln excavator (prefix mdy) service repair manual (mdy000...
Caterpillar cat 318 c ln excavator (prefix mdy) service repair manual (mdy000...
 

Recently uploaded

一比一原版(UNITEC毕业证)UNITEC理工学院毕业证成绩单如何办理
一比一原版(UNITEC毕业证)UNITEC理工学院毕业证成绩单如何办理一比一原版(UNITEC毕业证)UNITEC理工学院毕业证成绩单如何办理
一比一原版(UNITEC毕业证)UNITEC理工学院毕业证成绩单如何办理
bouvoy
 
What Are The Immediate Steps To Take When The VW Temperature Light Starts Fla...
What Are The Immediate Steps To Take When The VW Temperature Light Starts Fla...What Are The Immediate Steps To Take When The VW Temperature Light Starts Fla...
What Are The Immediate Steps To Take When The VW Temperature Light Starts Fla...
Import Motorworks
 
Bài tập - Tiếng anh 11 Global Success UNIT 1 - Bản HS.doc
Bài tập - Tiếng anh 11 Global Success UNIT 1 - Bản HS.docBài tập - Tiếng anh 11 Global Success UNIT 1 - Bản HS.doc
Bài tập - Tiếng anh 11 Global Success UNIT 1 - Bản HS.doc
daothibichhang1
 
What do the symbols on vehicle dashboard mean?
What do the symbols on vehicle dashboard mean?What do the symbols on vehicle dashboard mean?
What do the symbols on vehicle dashboard mean?
Hyundai Motor Group
 
Things to remember while upgrading the brakes of your car
Things to remember while upgrading the brakes of your carThings to remember while upgrading the brakes of your car
Things to remember while upgrading the brakes of your car
jennifermiller8137
 
What Does the PARKTRONIC Inoperative, See Owner's Manual Message Mean for You...
What Does the PARKTRONIC Inoperative, See Owner's Manual Message Mean for You...What Does the PARKTRONIC Inoperative, See Owner's Manual Message Mean for You...
What Does the PARKTRONIC Inoperative, See Owner's Manual Message Mean for You...
Autohaus Service and Sales
 
5 Red Flags Your VW Camshaft Position Sensor Might Be Failing
5 Red Flags Your VW Camshaft Position Sensor Might Be Failing5 Red Flags Your VW Camshaft Position Sensor Might Be Failing
5 Red Flags Your VW Camshaft Position Sensor Might Be Failing
Fifth Gear Automotive Cross Roads
 
Hero Glamour Xtec Brochure | Hero MotoCorp
Hero Glamour Xtec Brochure | Hero MotoCorpHero Glamour Xtec Brochure | Hero MotoCorp
Hero Glamour Xtec Brochure | Hero MotoCorp
Hero MotoCorp
 
What Could Cause The Headlights On Your Porsche 911 To Stop Working
What Could Cause The Headlights On Your Porsche 911 To Stop WorkingWhat Could Cause The Headlights On Your Porsche 911 To Stop Working
What Could Cause The Headlights On Your Porsche 911 To Stop Working
Lancer Service
 
欧洲杯比赛投注官网-欧洲杯比赛投注官网网站-欧洲杯比赛投注官网|【​网址​🎉ac123.net🎉​】
欧洲杯比赛投注官网-欧洲杯比赛投注官网网站-欧洲杯比赛投注官网|【​网址​🎉ac123.net🎉​】欧洲杯比赛投注官网-欧洲杯比赛投注官网网站-欧洲杯比赛投注官网|【​网址​🎉ac123.net🎉​】
欧洲杯比赛投注官网-欧洲杯比赛投注官网网站-欧洲杯比赛投注官网|【​网址​🎉ac123.net🎉​】
ahmedendrise81
 
Wondering if Your Mercedes EIS is at Fault Here’s How to Tell
Wondering if Your Mercedes EIS is at Fault Here’s How to TellWondering if Your Mercedes EIS is at Fault Here’s How to Tell
Wondering if Your Mercedes EIS is at Fault Here’s How to Tell
Vic Auto Collision & Repair
 
AadiShakti Projects ( Asp Cranes ) Raipur
AadiShakti Projects ( Asp Cranes ) RaipurAadiShakti Projects ( Asp Cranes ) Raipur
AadiShakti Projects ( Asp Cranes ) Raipur
AadiShakti Projects
 
What Causes 'Trans Failsafe Prog' to Trigger in BMW X5
What Causes 'Trans Failsafe Prog' to Trigger in BMW X5What Causes 'Trans Failsafe Prog' to Trigger in BMW X5
What Causes 'Trans Failsafe Prog' to Trigger in BMW X5
European Service Center
 
One compartment Model Deliverdddddded.pdf
One compartment Model Deliverdddddded.pdfOne compartment Model Deliverdddddded.pdf
One compartment Model Deliverdddddded.pdf
RehanRustam2
 
5 Warning Signs Your Mercedes Exhaust Back Pressure Sensor Is Failing
5 Warning Signs Your Mercedes Exhaust Back Pressure Sensor Is Failing5 Warning Signs Your Mercedes Exhaust Back Pressure Sensor Is Failing
5 Warning Signs Your Mercedes Exhaust Back Pressure Sensor Is Failing
Fifth Gear Automotive Argyle
 
一比一原版(AUT毕业证)奥克兰理工大学毕业证成绩单如何办理
一比一原版(AUT毕业证)奥克兰理工大学毕业证成绩单如何办理一比一原版(AUT毕业证)奥克兰理工大学毕业证成绩单如何办理
一比一原版(AUT毕业证)奥克兰理工大学毕业证成绩单如何办理
mymwpc
 
Antique Plastic Traders Company Profile
Antique Plastic Traders Company ProfileAntique Plastic Traders Company Profile
Antique Plastic Traders Company Profile
Antique Plastic Traders
 
Statistics5,c.xz,c.;c.;d.c;d;ssssss.pptx
Statistics5,c.xz,c.;c.;d.c;d;ssssss.pptxStatistics5,c.xz,c.;c.;d.c;d;ssssss.pptx
Statistics5,c.xz,c.;c.;d.c;d;ssssss.pptx
coc7987515756
 
Why Is Your BMW X3 Hood Not Responding To Release Commands
Why Is Your BMW X3 Hood Not Responding To Release CommandsWhy Is Your BMW X3 Hood Not Responding To Release Commands
Why Is Your BMW X3 Hood Not Responding To Release Commands
Dart Auto
 
TRAINEES-RECORD-BOOK- electronics and electrical
TRAINEES-RECORD-BOOK- electronics and electricalTRAINEES-RECORD-BOOK- electronics and electrical
TRAINEES-RECORD-BOOK- electronics and electrical
JohnCarloPajarilloKa
 

Recently uploaded (20)

一比一原版(UNITEC毕业证)UNITEC理工学院毕业证成绩单如何办理
一比一原版(UNITEC毕业证)UNITEC理工学院毕业证成绩单如何办理一比一原版(UNITEC毕业证)UNITEC理工学院毕业证成绩单如何办理
一比一原版(UNITEC毕业证)UNITEC理工学院毕业证成绩单如何办理
 
What Are The Immediate Steps To Take When The VW Temperature Light Starts Fla...
What Are The Immediate Steps To Take When The VW Temperature Light Starts Fla...What Are The Immediate Steps To Take When The VW Temperature Light Starts Fla...
What Are The Immediate Steps To Take When The VW Temperature Light Starts Fla...
 
Bài tập - Tiếng anh 11 Global Success UNIT 1 - Bản HS.doc
Bài tập - Tiếng anh 11 Global Success UNIT 1 - Bản HS.docBài tập - Tiếng anh 11 Global Success UNIT 1 - Bản HS.doc
Bài tập - Tiếng anh 11 Global Success UNIT 1 - Bản HS.doc
 
What do the symbols on vehicle dashboard mean?
What do the symbols on vehicle dashboard mean?What do the symbols on vehicle dashboard mean?
What do the symbols on vehicle dashboard mean?
 
Things to remember while upgrading the brakes of your car
Things to remember while upgrading the brakes of your carThings to remember while upgrading the brakes of your car
Things to remember while upgrading the brakes of your car
 
What Does the PARKTRONIC Inoperative, See Owner's Manual Message Mean for You...
What Does the PARKTRONIC Inoperative, See Owner's Manual Message Mean for You...What Does the PARKTRONIC Inoperative, See Owner's Manual Message Mean for You...
What Does the PARKTRONIC Inoperative, See Owner's Manual Message Mean for You...
 
5 Red Flags Your VW Camshaft Position Sensor Might Be Failing
5 Red Flags Your VW Camshaft Position Sensor Might Be Failing5 Red Flags Your VW Camshaft Position Sensor Might Be Failing
5 Red Flags Your VW Camshaft Position Sensor Might Be Failing
 
Hero Glamour Xtec Brochure | Hero MotoCorp
Hero Glamour Xtec Brochure | Hero MotoCorpHero Glamour Xtec Brochure | Hero MotoCorp
Hero Glamour Xtec Brochure | Hero MotoCorp
 
What Could Cause The Headlights On Your Porsche 911 To Stop Working
What Could Cause The Headlights On Your Porsche 911 To Stop WorkingWhat Could Cause The Headlights On Your Porsche 911 To Stop Working
What Could Cause The Headlights On Your Porsche 911 To Stop Working
 
欧洲杯比赛投注官网-欧洲杯比赛投注官网网站-欧洲杯比赛投注官网|【​网址​🎉ac123.net🎉​】
欧洲杯比赛投注官网-欧洲杯比赛投注官网网站-欧洲杯比赛投注官网|【​网址​🎉ac123.net🎉​】欧洲杯比赛投注官网-欧洲杯比赛投注官网网站-欧洲杯比赛投注官网|【​网址​🎉ac123.net🎉​】
欧洲杯比赛投注官网-欧洲杯比赛投注官网网站-欧洲杯比赛投注官网|【​网址​🎉ac123.net🎉​】
 
Wondering if Your Mercedes EIS is at Fault Here’s How to Tell
Wondering if Your Mercedes EIS is at Fault Here’s How to TellWondering if Your Mercedes EIS is at Fault Here’s How to Tell
Wondering if Your Mercedes EIS is at Fault Here’s How to Tell
 
AadiShakti Projects ( Asp Cranes ) Raipur
AadiShakti Projects ( Asp Cranes ) RaipurAadiShakti Projects ( Asp Cranes ) Raipur
AadiShakti Projects ( Asp Cranes ) Raipur
 
What Causes 'Trans Failsafe Prog' to Trigger in BMW X5
What Causes 'Trans Failsafe Prog' to Trigger in BMW X5What Causes 'Trans Failsafe Prog' to Trigger in BMW X5
What Causes 'Trans Failsafe Prog' to Trigger in BMW X5
 
One compartment Model Deliverdddddded.pdf
One compartment Model Deliverdddddded.pdfOne compartment Model Deliverdddddded.pdf
One compartment Model Deliverdddddded.pdf
 
5 Warning Signs Your Mercedes Exhaust Back Pressure Sensor Is Failing
5 Warning Signs Your Mercedes Exhaust Back Pressure Sensor Is Failing5 Warning Signs Your Mercedes Exhaust Back Pressure Sensor Is Failing
5 Warning Signs Your Mercedes Exhaust Back Pressure Sensor Is Failing
 
一比一原版(AUT毕业证)奥克兰理工大学毕业证成绩单如何办理
一比一原版(AUT毕业证)奥克兰理工大学毕业证成绩单如何办理一比一原版(AUT毕业证)奥克兰理工大学毕业证成绩单如何办理
一比一原版(AUT毕业证)奥克兰理工大学毕业证成绩单如何办理
 
Antique Plastic Traders Company Profile
Antique Plastic Traders Company ProfileAntique Plastic Traders Company Profile
Antique Plastic Traders Company Profile
 
Statistics5,c.xz,c.;c.;d.c;d;ssssss.pptx
Statistics5,c.xz,c.;c.;d.c;d;ssssss.pptxStatistics5,c.xz,c.;c.;d.c;d;ssssss.pptx
Statistics5,c.xz,c.;c.;d.c;d;ssssss.pptx
 
Why Is Your BMW X3 Hood Not Responding To Release Commands
Why Is Your BMW X3 Hood Not Responding To Release CommandsWhy Is Your BMW X3 Hood Not Responding To Release Commands
Why Is Your BMW X3 Hood Not Responding To Release Commands
 
TRAINEES-RECORD-BOOK- electronics and electrical
TRAINEES-RECORD-BOOK- electronics and electricalTRAINEES-RECORD-BOOK- electronics and electrical
TRAINEES-RECORD-BOOK- electronics and electrical
 

Claas targo c50 40 (type 506) telehandlers service repair manual

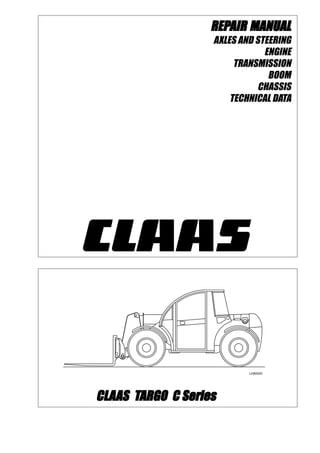
  • 1. CLCLCLCLCLAAAAAAS TAS TAS TAS TAS TARGO C SeriesARGO C SeriesARGO C SeriesARGO C SeriesARGO C Series REPREPREPREPREPAIR MANUALAIR MANUALAIR MANUALAIR MANUALAIR MANUAL AXLES AND STEERING ENGINE TRANSMISSION BOOM CHASSIS TECHNICAL DATA
  • 3. The machines in this handbook are designed essentially for agricultural and associated applications. This is their intended use. Any modifications made to the machine without prior written approval from CLAAS or if the machine is used in any way contrary to the intended use or if the machine is not properly driven or maintained then the Company will not accept any liability whatsoever for any damage or injury (whether direct or consequential). The method of operation and maintenance specified in this handbook should be strictly adhered to. For your parts requirements, it is essential that only genuine CLAAS parts are fitted. Any resultant damage from non-genuine parts will invalidate your machine warranty. CLAAS operates a policy of continuous improvement to its products and reserve the right to change specifica- tions and equipment without notice. Therefore some information within this handbook may differ from your machine. This manual is designed to service machines: from Serial No. 50600011 up to Serial No. 50600251.
  • 4. CONTENTS INTRODUCTION General Machine identification Health and Safety SAFETY WARNINGS SECTION 1 AXLES AND STEERING AXLES 1.1 Description 1.1 Front Axle 1.1 Removal 1.1 Installation 1.2 Rear Axle 1.3 Removal 1.3 Installation 1.4 Dismantling and Assembly 1.5 Dismantling 1.6 Transmission box 1.6 Trunnions (rear axle only) 1.8 Steering cylinder (front and rear axle) 1.9 Epicyclic reduction gear (front and rear axle) 1.10 Wheel hub (front and rear axle) 1.11 Axle beam trumpet (front and rear axle) 1.13 Axle beam removal 1.14 Brake group (front axle only) 1.14 Differential support group (rear axle) 1.17 Differential group (front and rear axle) 1.18 Assembly 1.20 Pinion group (front axle) 1.20 Pinion group (rear axle) 1.24 Differential group (front and rear axle) 1.26 Brake and differential housing (front axle only) 1.27 Differential carrier group assembly 1.32 Brake control group assembly (front axle) 1.36 Generic information 1.37 Brake and axle beam assembly (front axle) 1.38 Wheel hub (front and rear axles) 1.41 Epicyclic reduction gear (front and rear axles) 1.43 Steering cylinder (front and rear axles) 1.44 Toe-in adjustment 1.45 Steering angle adjustment 1.46 Transmission box assembly 1.47 Trunnion assemblies 1.49 Testing after installation 1.50 Trouble shooting 1.51 Operating problems 1.51 Axle problems 1.52 Axle noise problems and diagnosis 1.53 Special tools 1.54 Steering 1.63 Description 1.63 Operation 1.63 Checking the steering system 1.66 Steering cylinder 1.66 Steering unit (OSPF) 1.66 Servicing 1.66 Steering valve assembly 1.67 Removal 1.67 Installation 1.67 Dismantling 1.68 Assembly 1.68
  • 5. CONTENTS SECTION 1 (continued) AXLES AND STEERING AXLES (continued) Brake system bleeding 1.69 Dumping (disipation) of hydraulic pressure 1.70 Hydraulic level 1.71 SECTION 2 ENGINE Description 2.1 Engine Data 2.1 Removal and Installation 2.2 General 2.2 Removal 2.2 Installation 2.4 Testing 2.4 SECTION 3 TRANSMISSION Description 3.1 Hydrostatic system (up to Machines S/No.50600162 only) 3.1 Hydrostatic system (from Machines S/No.50600163 only) 3.2 Operation 3.5 Hydrostatic pump 3.5 Pressure relief valve 3.7 Proportional pressure reducing valve 3.7 Multi function valves 3.7 Pressure relief valve 3.7 Over pressure valve 3.8 Bypass valve function 3.9 Setting the bypass function 3.9 Hydrostatic motor 3.10 Removal and installation 3.12 Hydrostatic pump 3.12 Removal 3.12 Installation 3.13 Hydrostatic motor 3.14 Removal 3.14 Installation 3.15 Drive shaft 3.16 Removal 3.16 Installation 3.16 Testing 3.18 Trouble shooting guide 3.22 SECTION 4 BOOM Description and operation 4.1 Description 4.1 Operation 4.2 Maintenance 4.3 Boom 4.3 Removal 4.3 Installation 4.4 Hydraulic cylinder 4.6 Crowd cylinder 4.6 Compensator cylinder 4.6 Lift cylinder 4.6 Extension cylinder 4.6 Boom tray cassette 4.7 Removal 4.7 Installation 4.9
  • 6. CONTENTS SECTION 4 BOOM Maintenance (continued) Boom tray hoses 4.9 Dismantling 4.9 Assembly 4.9 Inner boom 4.10 Removal 4.10 Installation 4.11 Boom wear pads 4.12 General 4.12 Replacement of outer boom wear pads (front) 4.12 Replacement of outer boom wear pads (rear) 4.14 Quattro control handle 4.15 Removal 4.15 Installation 4.15 SECTION 5 CHASSIS Description 5.1 Operators cab 5.2 Removal 5.2 Installation 5.3 Fuel tank 5.5 Removal 5.5 Installation 5.5 Heater and Air Conditioning 5.7 Description 5.7 Blower motor 5.7 Removal 5.7 Installation 5.8 Heater coil 5.9 Removal 5.9 Installation 5.9 Air conditioning evaporator coil 5.10 Removal 5.10 Installation 5.11 Receiver - Drier assembly 5.12 Removal 5.12 Installation 5.13 Air conditioning condensor coil 5.13 Removal 5.13 Installation 5.13 Axial fan 5.15 Removal 5.15 Installation 5.15 Compressor 5.17 Removal 5.17 Installation 5.17
  • 7. CONTENTS SECTION 6 TECHNICAL DATA Dimensions 6.1 Weight 6.1 Machine speed 6.2 Carriage 6.2 Cycle time 6.2 Engine 6.3 Cooling 6.3 Transmission 6.3 Tyres 6.3 Hydraulics 6.4 Electrics 6.4 Capacities 6.4 Brakes 6.4
  • 8. INTRODUCTION General The contents of this Repair Manual, although correct at the time of publication, may be subject to alteration by the manufacturer without notice. This manual assumes that maintenance personnel have a sound knowledge of workshop practices and safety procedures associated with the repairs of this type of machine. This manual is designed to assist with the more specialised information required for removal and strip-down of major components. It is recommended that the relevant part of this Repair Manual is studied carefully before proceeding with any maintenance. Machine identification To make sure that the correct parts are obtained, always quote the machine Serial Number when ordering parts. Health and Safety To prevent injury to personnel and damage to equipment and machinery, care must be taken to operate in a safe manner. Read the Safety Warnings that follow and always work in a safe manner and obey the relevant Warnings. Throughout this manual and on the machine there are safety notes. Each note starts with a single word. The meaning of these single words is as follows: Identifies a hazard exists. If proper precautions are not taken, it is highly probable that the operator (or others) could be killed or seriously injured. Identifies a reminder of safety practices. Failure to observe these safety practices could result in injury to the operator (or others) or damage to the machine. In general these notes are used to indicate that the procedures being described in the manual must be followed to avoid serious injury or death to yourself or others. The notes are also used to protect the machine from unsafe maintenance practices.
  • 9. SAFETY WARNINGS Always wear correct fitting protective clothing. Loose or baggy clothing can be extremely dangerous when operating or maintaining a machine. Where possible, only work on or close to engines or machinery when they are stopped. If this is not practical, remember to keep tools, test equipment and all parts of your body well away from moving parts. Avoid contact with exhaust pipes and exhaust manifolds when the engine is running; these can be very hot. Many liquids used on this machine are harmful if taken internally or splashed into the eyes. In the event of accidentally swallowing oil, diesel fuel, anti-freeze, battery acid etc., DO NOT induce vomiting, but OBTAIN QUALIFIED MEDICAL ASSISTANCE IMMEDIATELY. Always obtain advice before mixing oils; some are incompatible. Never run an engine in an enclosed space unless an exhaust extraction system is used. Always disconnect battery cables before working on the electrical system to prevent injury caused by electric shock. When it is necessary to work on the electrical system with power on, for fault diagnosis, always have a safety man in attendance Any dust found on the machine or produced during work on the machine should be removed by extraction, not by blowing. Dust waste should be dampened, placed in a sealed container and marked for safe disposal. Always dump pressure from the hydraulic system before carrying out any maintenance or adjustment (refer to Hydraulic Repair Manual). Never leave the machine unattended with pressure in the system. Fine jets of hydraulic fluid at high pressure can penetrate the skin. Do not use your fingers to check for hydraulic fluid leaks. Do not put your face close to suspected leaks. If hydraulic fluid penetrates your skin OBTAIN QUALIFIED MEDICAL ASSISTANCE IMMEDIATELY. Never allow unqualified personnel to attempt to remove or replace any part of the machine. Always use the correct lifting equipment to remove large or heavy components. Never attempt to lift or hold up the machine using the lash-down points.
  • 11. AXLES & STEERING 1.1 Support the hydrostatic motor clear of the axle to make sure it is not damaged during axle removal. AXLES DESCRIPTION The front axle has a transmission/reduction box fitted, with both front and rear axles having epicyclic reduction gears contained in the wheel hubs. The front axle is fitted with a limited slip differential whilst the rear axle has a standard type differential. The front axle housing incorporates the brakes. Steering is available to both axles, depending on the steering mode selected. The axle hubs are steered by the operation of a double acting hydraulic cylinder attached to the axle. FRONT AXLE Removal 1. Park the machine on firm level ground. 2. Raise the boom and fit the boom safety stop. 3. Set the wheels straight ahead, in line with the chassis and fit chocks to the front and rear of the rear wheels. 4. Stop the engine and apply the parking brake. 5. Refer to page 1.70 and dump hydraulic pressure from the brake systems and steering system, then disconnect the battery. Support the drive shaft clear of the axle to make sure it is not damaged during axle removal. 6. Disconnect the drive shaft from the axle flange and support clear of axle. 7. Disconnect the inductive magnetic steering sensor electrical lead. 8. Disconnect the hydrostatic motor from the transmission box flange and support clear of axle. 9. Slacken front axle wheel nuts. 10. Support the chassis at a sufficient height to allow the wheels to be removed.
  • 12. AXLES & STEERING1.2 16. Remove the eight attachment bolts/nuts securing axle to chassis (four each side) and remove support plates. 17. Lower axle on fork lift/trolley jacks. 18. Move axle clear of machine and place on a suitable support. Installation 1. Installation is the reverse of the removal procedure. 2. Torque load components as follows: Axle to chassis nuts 640 Nm (472 lbf ft.) Drive shaft bolts 61-81 Nm 45-60 lbf ft.) Wheel nuts 300 Nm (221 lbf ft.) Hydrostatic motor to Axle bolts 150 Nm (110 lbf ft.) 3. Check axle and wheel hub oil levels are correct. 4. When the axle has been dismantled and reassembled, refer to the Axle Assembly section and test the differential operation. 5. Connect the parking brake linkage (1). Refer to testing and adjusting section to set up parking brake control cable. 6. Refer to Page 1.69 and bleed the brakes then test brake function and parking brake operation. 7. Start engine, make sure front wheel steering is selected and operate steering through full range several times to bleed air from steering system. 8. Test machine operation. 1. Parking brake linkage and adjuster 2. Steering hoses 3. LH Brake pipe (RH similar) 11. Support axle with a forklift or trolley jacks. 12. Remove front wheels. 13. Disconnect the parking brake linkage (1) and position cable and attachments clear of the axle. 14. Disconnect brake pipes from left (3) and right (not shown) brake units, fit blanks to open pipes and brake unit connections. 15. Disconnect steering hoses (2) from steering cylinder, fit blanks to open pipes and steering cylinder connections. Secure the axle to the fork lift/ trolley jacks to prevent axle tipping on removal. The axle weighs 391 kg, take care when removing and transporting.
  • 13. AXLES & STEERING 1.3 5. Disconnect the drive shaft from the axle flange and support clear of axle. 6. Disconnect the load sensor electrical lead. 7. Disconnect the inductive magnetic steering sensor electrical lead. 8. Disconnect steering hoses from steering cylinder, fit blanks to open pipes and steering cylinder connections. 9. Slacken rear axle wheel nuts. 10. Support the chassis at a sufficient height to allow the wheels to be removed. 11. Remove rear wheels. 12. Support axle with a forklift or trolley jacks. 13. Remove the bolts attaching the axle front support to the chassis. 14. Remove the bolts attaching the axle rear support to the chassis. Secure the axle to the fork-lift/trolley jacks to prevent axle tipping on removal. The axle weighs 298 kg dry weight, take care when removing and transporting. 15. Lower axle on fork-lift/trolley jacks. 16. Move axle clear of machine and place on a suitable support. Support the drive shaft clear of the axle to make sure it is not damaged during axle removal. REAR AXLE Removal 1. Park the machine on firm level ground. 2. Set the wheels straight ahead, in line with the chassis and fit chocks to the front wheels. 3.Stop the engine and apply the parking brake. 4. Refer to page 1.70 and dump hydraulic pressure from the steering system, then disconnect the battery.
  • 14. AXLES & STEERING1.4 Installation 1. Installation it the reverse of the removal procedure. 2. Torque load components as follows: Axle to chassis nuts 640 Nm (472 lbf ft.) Drive shaft bolts 70-85 Nm (52-63 lbf ft.) Wheel nuts 300 Nm (221 lbf ft.) Axle support bolts 370 Nm (273 lbf ft.). 3. Check axle and wheel hub oil levels are correct. 4. When the axle has been dismantled and reassembled, refer to the Axle Assembly section and test the differential operation. 5. Start engine, make sure rear wheel steering is selected and operate steering through full range several times to bleed air from steering system. 6. Test machine operation.
  • 15. AXLES & STEERING 1.5 NOTES: (1) Sealing Compound. Ensure both surfaces to be sealed are clean, dry and free from grease. (2) O-ring seals. Lubricate seals before fitting to prevent twisting when inserting the shaft. (3) Bearings. It is recommended that bearings are heated to 80°C - 90°C before fitting to shaft, or cooling with dry ice before inserting them into an outer housing. (4) Shims. Measure shims before use, do not rely on measurement marked on shim. (5) Torque loading. Torque load all components to the recommended figure. (6) Oil seals. To assist with the correct installation of oil seals carry out the following: • Ensure the shaft is clean and not damaged • Assemble with lip side towards the oil side • Lubricate seal with oil and fill ¾ of seal cavity with grease • Use special tools to install seals, where available. Do not hammer directly on the seal • Do not damage seals while assembling the shaft. (7) Special tools. Use the special tools to dismantle and assemble the axle. DISMANTLING AND ASSEMBLY Dispose of used axle oil in accordance with local regulations.
  • 16. Thank you very much for your reading. Please Click Here. Then Get COMPLETE MANUAL. NO WAITING NOTE: If there is no response to click on the link above, please download the PDF document first and then click on it.
  • 17. AXLES & STEERING1.6 DISMANTLING TRANSMISSION BOX (Front Axle only) 1.Removethedrainplug(1)anddrainoilintoasuitable container. 2. Remove the bolts (2) and the engine flange (3) from the half box. Remove the O-ring (5) from the engine flange. NOTE: The mounting screws for the engine flange are of two different lengths. The positions of which should be noted for fitment purposes. 3. Remove the half box mounting bolts (4) and remove the half box using a rubber hammer. 4. Remove the gear wheel (6) and separate the bearings (7) using a suitable extractor. 5. Remove the circlip (8) and withdraw the gear wheel (9) and bearing (10) from the flanged shaft (11) using a suitable extractor. 6. Remove the shaft (11) from the half box using a hammer and drift and remove the lower bearing (12). 7. Remove the lower shaft oil seal (13) from the half box with a hammer and drift. NOTE: This will damage the oil seal, use a new oil seal on assembly. 8. Remove the half box fixed to the axle body by removing the mounting bolts (14). 1. Drain Plug 2. Bolt 3. Engine Flange 4. Bolt 5. O-Ring 6. Gear Wheel 7. Bearing 8. Circlip 9. Gear Wheel 10. Bearing 11. Flanged Shaft 12. Bearing 13. Oil Seal 14. Bolts The half box is heavy and must be supported with suitable equipment during removal.
  • 19. AXLES & STEERING1.8 TRUNNIONS (Rear Axle only) 1. Remove the circlip (1) and withdraw the input flange (2), the O-ring (3) and the washer (4). 2. Remove the front trunnion (5) and rear trunnion (6). 3. Loosen the bolt (7) and withdraw the bush (8) from the rear trunnion (6). 4. Inspect and replace as necessary the “A” centering bushes (9) from the front trunnion (5) and rear trunnion (6). 5. Loosen the grease nipple (10) and remove the bush (11) and O-ring (12) from the front trunnion (5). 1. Circlip 2. Input flange 3. O-ring 4. Washer 5. Front trunnion 6. Rear trunnion 7. Bolt 8. Bush 9. Centering bush 10. Grease nipple 11. Bush 12. O-ring