1. The document provides identification information for injector pumps and injectors used in various tractor models. It identifies the manufacturer, models, and specifications of the injector pumps and injectors.
2. The fuel injection system is described including the fuel tank, lines, filters, pump, and injectors. The operating principle and components of the injector pump are explained along with diagrams.
3. Torque settings and adjustment procedures are provided for the accelerator control and injector pump internal settings.
CLAAS NECTIS VE 217 2+4WD (Type T14) Tractor Service Repair Manual.pdfpingdun24363384
This document provides identification and descriptions of components for fuel injection systems used on various tractor models. It identifies the injector pumps, injectors, fuel filters and other components. It also provides diagrams of the fuel system and descriptions of how each component functions within the overall system. Torque specifications are provided for certain components.
CLAAS NECTIS VE 237 2+4WD (Type T14) Tractor Service Repair Manual.pdfpingdun24363384
This document provides identification and descriptions of components for fuel injection systems used on various tractor models. It identifies the injector pumps, injectors, fuel filters and other components. It also provides diagrams of the fuel system and descriptions of how each component functions within the overall system. Torque specifications are provided for certain components.
CLAAS NECTIS VE 227 2+4WD (Type T14) Tractor Service Repair Manual.pdfpingdun24363384
This document provides identification and descriptions of components for fuel injection systems used on various tractor models. It identifies the injector pumps, injectors, fuel filters and other components. It also provides diagrams of the fuel system and descriptions of how each component functions within the overall system. Torque specifications are provided for certain components.
CLAAS NECTIS VE 227 2+4WD (Type T14) Tractor Service Repair Manual.pdfcangci7058
1) The document provides identification information for various tractor models including the engine, air intake, injection type, number of cylinders, injector pump model, and injector type.
2) It describes the components and operation of the fuel injection system including the fuel tank, lines, pump, filter, injector pump, injectors, and return lines. Diagrams show the components and labeling.
3) It provides information on checks and adjustments that can be performed on components like the accelerator control, injector pump timing and pressure settings, and injectors. Diagrams illustrate the procedures.
CLAAS NECTIS VE 237 2+4WD (Type T14) Tractor Service Repair Manual.pdfcangci7058
1) The document provides identification information for various tractor models including the engine, air intake, injection system, number of cylinders, injector pump model, and injector type.
2) It describes the components and operation of the fuel injection system including the fuel tank, lines, pump, filter, injector pump, injectors, and return lines. Diagrams show the components and labeling.
3) It provides information on checking and adjusting various components like the accelerator control, injector pump timing, injectors, and supply pressure. Diagrams illustrate the procedures.
CLAAS NECTIS VE 217 2+4WD (Type T14) Tractor Service Repair Manual.pdfcangci7058
This document provides identification and descriptions of components for fuel injection systems used on various tractor models. It identifies the injector pumps, injectors, fuel filters and other components. It also provides diagrams of the fuel system and descriptions of how each component functions within the overall system. Torque specifications are provided for certain components.
CLAAS NECTIS VE 217 2+4WD (Type T14) Tractor Service Repair Manual.pdflsk60670862
1) The document provides identification information for various tractor models including the engine, air intake, injection type, number of cylinders, injector pump model, and injector type.
2) It describes the components and operation of the fuel injection system including the fuel tank, lines, pump, filter, injector pump, injectors, and return lines. Diagrams show the components and labeling.
3) It provides information on checks and adjustments that can be performed on components like the accelerator control, injector pump timing and pressure settings, and injectors. Diagrams illustrate the procedures.
CLAAS NECTIS VE 227 2+4WD (Type T14) Tractor Service Repair Manual.pdflsk60670862
1) The document provides identification information for various tractor models including the engine, air intake, injection system, number of cylinders, injector pump model, and injector type.
2) It describes the components and operation of the fuel injection system including the fuel tank, lines, pump, filter, injector pump, injectors, and return lines. Diagrams show the components and labeling.
3) It provides information on checking, adjusting, and removing various components like the accelerator control, injector pump timing and internal settings, injectors, supply pressure, and removing the fuel filter. Diagrams illustrate the procedures.
Caterpillar Cat EL300B EXCAVATOR (Prefix 3FJ) Service Repair Manual (3FJ00001...fujeikdmdmd5
The document provides instructions for assembling a fuel injection pump housing. It includes:
1) Installing bearings in both ends of the housing and ensuring proper positioning and clearance.
2) Installing the camshaft and securing it with a washer and snap ring.
3) Installing lifters and a fuel rack after assembling the governor.
The document provides instructions for removing and installing the fuel priming pump, fuel filter base, and fuel transfer pump on a Caterpillar EL300 excavator powered by a 3306 engine. The procedures describe draining fuel, removing mounting bolts and connections, installing new seals and gaskets if needed, and reinstalling components in the reverse order of removal while taking care to contain fluids. The fuel transfer pump section also includes instructions for disassembling and assembling the pump components.
Caterpillar Cat EL240C EXCAVATOR (Prefix 9PK) Service Repair Manual (9PK00001...fujeikdmdmd5
This service repair manual provides instructions for removing and installing various engine components on a Caterpillar 3116 engine, including:
- Removing the inlet manifold by disconnecting air lines, removing bolts, and removing the manifold and gasket.
- Installing the inlet manifold by installing a new gasket, positioning the manifold, installing bolts, and reconnecting air lines.
- Removing inlet and exhaust valves by using a tool to compress springs, removing locks and springs, and removing seals and valves.
- Installing inlet and exhaust valves by lubricating valves, installing seals, springs, retainers and locks while compressing springs.
- Removing inlet and exhaust valve guides using a driver tool.
Caterpillar Cat 322C L 322CL Excavator (Prefix FED) Service Repair Manual (FE...fujeikdmdmd5
The document provides instructions for installing a control manifold on a 322C excavator. It describes:
1) Connecting various harnesses, hoses, and assemblies to the control manifold.
2) Installing high efficiency filters to replace standard filters for 250 hours.
3) Closing an access door to complete the installation.
Caterpillar Cat 322C FM EXCAVATOR (Prefix C3R) Service Repair Manual (C3R0000...fujeikdmdmd5
1. The document provides instructions for removing and installing a unit injector hydraulic pump on a 322C FM EXCAVATOR C3R powered by a 3126B engine.
2. The removal instructions include disconnecting hoses and lines, removing bolts, and extracting the pump. Installation is the reverse, and involves cleaning seals, torquing bolts, and reconnecting hoses and lines.
3. Separate sections provide instructions for removing, disassembling, and assembling a turbocharger on the same engine model. Removal requires removing bolts and nuts holding the turbocharger in place. Disassembly separates the compressor housing, turbine housing, and cartridge assembly. Assembly is
Caterpillar Cat 322C L 322CL Excavator (Prefix BKM) Service Repair Manual (BK...fujeikdmdmd5
This document provides instructions for removing and installing fuel system components on a Caterpillar 322C excavator engine. The components include the fuel priming pump, primary fuel filter, fuel transfer pump, and fuel shutoff solenoid. The procedures describe disconnecting fuel lines and electrical connections, removing mounting hardware, and installing replacement parts in the reverse order while maintaining cleanliness to prevent contamination. Special tools are required for some steps, and safety precautions are provided to contain fluids and compressed springs.
Caterpillar Cat 322C FM EXCAVATOR (Prefix BPH) Service Repair Manual (BPH0000...fujeikdmdmd5
This document provides instructions for removing and installing a governor from a 322C FM EXCAVATOR engine. It describes disconnecting linkages, removing mounting bolts and clips, and using special tools. Proper cleaning and lubrication of seals is emphasized. References are provided for additional information on governor inspection and fuel linkage components.
The document provides instructions for installing a control manifold on a 322C excavator. It describes:
1) Connecting various harnesses, hoses, and assemblies to the control manifold.
2) Installing high efficiency filters to replace standard filters for 250 hours.
3) Closing an access door to complete the installation.
Caterpillar Cat 322C FM EXCAVATOR (Prefix CAM) Service Repair Manual (CAM0000...fujeikdmdmd5
This document provides instructions for removing and installing inlet and exhaust valve seats in a 322C FM excavator engine. It outlines the required tools and gives step-by-step procedures for removal and installation. Removal involves using a valve seat extractor tool to pull each seat from the cylinder head. Installation requires tapping new seats into place and ensuring they are flush with the head. Proper cleaning and inspection of parts is emphasized to prevent premature wear.
The document provides instructions for disassembling and assembling the pilot valve of a 322C excavator. It describes:
1) Removing 20 individual parts of the pilot valve including plates, seals, springs, and spools.
2) Cleaning each part thoroughly before assembly to prevent dirt from entering.
3) Reassembling the 20 parts in the reverse order, replacing all O-rings and seals with new ones, and adjusting dimensions and torques to specifications.
This document provides instructions for disassembling a Type IV governor used on 3114, 3116, and 3126 MUI engines. It describes 29 steps to disassemble the governor into its main components, including removing housing covers, springs, flyweights, shutoff assemblies, and other internal parts. Technicians are advised to inspect all parts for wear and replace as needed according to specifications. Safety precautions are provided to contain fluids and release spring forces carefully during disassembly.
This document provides instructions for removing and installing fuel system components on a Caterpillar 322C excavator engine. The procedures describe removing and installing the fuel priming pump, primary fuel filter, fuel transfer pump, and fuel shutoff solenoid. Detailed illustrations and cautions are provided to complete each step correctly and safely.
Crown GPC2000 Series Lift Truck Parts Catalogue Manual.pdffujeikdmdmd5
This document is a parts manual for a GPC 2000 series lift truck. It contains a table of contents listing the various sections and parts included in the manual. Safety information is provided at the beginning, including symbols used and general maintenance safety notes. The manual is organized into sections covering various systems of the lift truck such as covers, hydraulics, electrical, brakes, steering, mast/lift structure, cylinders, and more. Each section lists the relevant parts diagrams and specifications.
Clark TMX12-25 Forklift Service Repair Manual.pdffujeikdmdmd5
This document is the service manual for Clark forklift models TMX12-25 and ECX16-18. It provides instructions on using and arranging the manual, as well as safety practices for maintaining the forklifts. The manual is intended for trained service personnel and instructs them to read the safety section and follow all warnings and cautions when working on the forklifts. It outlines specific safety procedures for raising and blocking the forklifts, working on electrical and fuel systems, inspecting and replacing parts, and making any modifications.
Clark GPX 50E Forklift Service Repair Manual.pdffujeikdmdmd5
The document is a service manual for Clark GPX 35/40/50E trucks. It includes new overhaul information for GM Vortec V-6 engines and new truck specifications. The manual contains sections covering engines, cooling systems, fuel systems, transmissions, electrical systems, drive axles, wheels and tires, braking systems, steering systems, hydraulic systems, uprights, and specifications.
Clark EPX 16-20S Forklift Service Repair Manual.pdffujeikdmdmd5
This document provides instructions for safely maintaining electric forklifts. It discusses:
1. Identifying safety signs and messages and outlining safe maintenance practices such as blocking the wheels before working under the truck.
2. Procedures for lifting parts of the truck, including raising the drive wheels, chaining the upright, and jacking the rear or entire truck.
3. Instructions for securely tying down the truck for shipping.
Ever been troubled by the blinking sign and didn’t know what to do?
Here’s a handy guide to dashboard symbols so that you’ll never be confused again!
Save them for later and save the trouble!
What Could Be Behind Your Mercedes Sprinter's Power Loss on Uphill RoadsSprinter Gurus
Unlock the secrets behind your Mercedes Sprinter's uphill power loss with our comprehensive presentation. From fuel filter blockages to turbocharger troubles, we uncover the culprits and empower you to reclaim your vehicle's peak performance. Conquer every ascent with confidence and ensure a thrilling journey every time.
Understanding Catalytic Converter Theft:
What is a Catalytic Converter?: Learn about the function of catalytic converters in vehicles and why they are targeted by thieves.
Why are They Stolen?: Discover the valuable metals inside catalytic converters (such as platinum, palladium, and rhodium) that make them attractive to criminals.
Steps to Prevent Catalytic Converter Theft:
Parking Strategies: Tips on where and how to park your vehicle to reduce the risk of theft, such as parking in well-lit areas or secure garages.
Protective Devices: Overview of various anti-theft devices available, including catalytic converter locks, shields, and alarms.
Etching and Marking: The benefits of etching your vehicle’s VIN on the catalytic converter or using a catalytic converter marking kit to make it traceable and less appealing to thieves.
Surveillance and Monitoring: Recommendations for using security cameras and motion-sensor lights to deter thieves.
Statistics and Insights:
Theft Rates by Borough: Analysis of data to determine which borough in NYC experiences the highest rate of catalytic converter thefts.
Recent Trends: Current trends and patterns in catalytic converter thefts to help you stay aware of emerging hotspots and tactics used by thieves.
Benefits of This Presentation:
Awareness: Increase your awareness about catalytic converter theft and its impact on vehicle owners.
Practical Tips: Gain actionable insights and tips to effectively prevent catalytic converter theft.
Local Insights: Understand the specific risks in different NYC boroughs, helping you take targeted preventive measures.
This presentation aims to equip you with the knowledge and tools needed to protect your vehicle from catalytic converter theft, ensuring you are prepared and proactive in safeguarding your property.
Expanding Access to Affordable At-Home EV Charging by Vanessa WarheitForth
Vanessa Warheit, Co-Founder of EV Charging for All, gave this presentation at the Forth Addressing The Challenges of Charging at Multi-Family Housing webinar on June 11, 2024.
Welcome to ASP Cranes, your trusted partner for crane solutions in Raipur, Chhattisgarh! With years of experience and a commitment to excellence, we offer a comprehensive range of crane services tailored to meet your lifting and material handling needs.
At ASP Cranes, we understand the importance of reliable and efficient crane operations in various industries, from construction and manufacturing to logistics and infrastructure development. That's why we strive to deliver top-notch solutions that enhance productivity, safety, and cost-effectiveness for our clients.
Our services include:
Crane Rental: Whether you need a crawler crane for heavy lifting or a hydraulic crane for versatile operations, we have a diverse fleet of well-maintained cranes available for rent. Our rental options are flexible and can be customized to suit your project requirements.
Crane Sales: Looking to invest in a crane for your business? We offer a wide selection of new and used cranes from leading manufacturers, ensuring you find the perfect equipment to match your needs and budget.
Crane Maintenance and Repair: To ensure optimal performance and safety, regular maintenance and timely repairs are essential for cranes. Our team of skilled technicians provides comprehensive maintenance and repair services to keep your equipment running smoothly and minimize downtime.
Crane Operator Training: Proper training is crucial for safe and efficient crane operation. We offer specialized training programs conducted by certified instructors to equip operators with the skills and knowledge they need to handle cranes effectively.
Custom Solutions: We understand that every project is unique, which is why we offer custom crane solutions tailored to your specific requirements. Whether you need modifications, attachments, or specialized equipment, we can design and implement solutions that meet your needs.
At ASP Cranes, customer satisfaction is our top priority. We are dedicated to delivering reliable, cost-effective, and innovative crane solutions that exceed expectations. Contact us today to learn more about our services and how we can support your project in Raipur, Chhattisgarh, and beyond. Let ASP Cranes be your trusted partner for all your crane needs!
EV Charging at MFH Properties by Whitaker JamiesonForth
Whitaker Jamieson, Senior Specialist at Forth, gave this presentation at the Forth Addressing The Challenges of Charging at Multi-Family Housing webinar on June 11, 2024.
Implementing ELDs or Electronic Logging Devices is slowly but surely becoming the norm in fleet management. Why? Well, integrating ELDs and associated connected vehicle solutions like fleet tracking devices lets businesses and their in-house fleet managers reap several benefits. Check out the post below to learn more.
CLAAS NECTIS VE 217 2+4WD (Type T14) Tractor Service Repair Manual.pdf
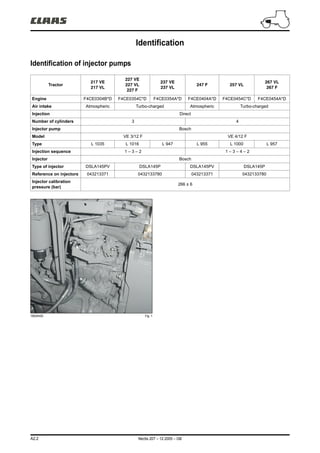
1. A2.2 Nectis 207 – 12.2005 – GB
Identification
Identification of injector pumps
160vfm00 Fig. 1
Tractor
217 VE
217 VL
227 VE
227 VL
227 F
237 VE
237 VL
247 F 257 VL
267 VL
267 F
Engine F4CE0304B*D F4CE0354C*D F4CE0354A*D F4CE0404A*D F4CE0454C*D F4CE0454A*D
Air intake Atmospheric Turbo-charged Atmospheric Turbo-charged
Injection Direct
Number of cylinders 3 4
Injector pump Bosch
Model VE 3/12 F VE 4/12 F
Type L 1035 L 1016 L 947 L 955 L 1000 L 957
Injection sequence 1 – 3 – 2 1 – 3 – 4 – 2
Injector Bosch
Type of injector DSLA145PV DSLA145P DSLA145PV DSLA145P
Reference on injectors 043213371 0432133780 043213371 0432133780
Injector calibration
pressure (bar)
266 ± 6
5. A2.6 Nectis 207 – 12.2005 – GB
Description
161vfm05 Fig. 4
Operating principle
Fuel is drawn from the fuel tank by the camshaft-driven
fuel pump located on the engine block . The fuel then
passes through the filter (19) to the transfer pump suction
chamber inlet. The transfer pump (vane type) is located
inside the injector pump and its role is to raise fuel
pressure as a function of increases of engine rpm. The
fuel then arrives at the valve that regulates the pressure
within the injector pump. The distributor piston later raises
this pressure and sends the fuel to the injectors via the
outlet connector. Excess fuel is recovered and returned to
the tank.
Nomenclature
5 Injector pump.
19 Fuel filter.
20 Line between feed pump and filter.
21 Line between fuel filter and injector pump.
22 Fuel pump.
21
22
5
20
19
6. Nectis 207 – 12.2005 – GB A2.7
Description
Injector pump
The pinion of the rotary injector pump is driven by the
camshaft pinion.
Identification plate
The identification plate is located on the pump body.
Typical identification: VE4/12F1150L955.
V = Rotary distributor piston.
E = Pump size.
4 = 4 cylinder engines (3 = 3 cylinder engines).
12 = Diameter of distributor piston (in mm).
F = Mechanical regulator.
1 150 = Pump rpm.
L = Direction of rotation.
955 = Pump model variant.
161vfm04 Fig. 5
Nomenclature (injector pump longitudinal section)
23 Membrane.
24 Adjustment collar.
25 Pushrod.
26 Operating lever.
27 Speed regulator.
28 Transfer pump.
29 Drive shaft.
30 Cam plate.
31 Advance mechanism.
32 Distributor piston.
33 Return connector.
34 Hydraulic head.
35 Control platen.
36 Floating shaft.
37 Return spring.
37
36
35
34
33
31
30
28
27
26
25
24
23
29
32
7. A2.8 Nectis 207 – 12.2005 – GB
Description
Fuel pump
The role of the pump is to deliver the fuel from the tank to
the injector pump inlet. It is located on the engine block
and is driven from the camshaft.
Nomenclature
22 Pump.
38 Fuel outlet (towards the filter).
39 Operating lever.
40 Fuel inlet (from the tank).
41 Camshaft.
161vfm03 Fig. 6
161vfm02 Fig. 7
Line filter
Filters: 300 microns.
Refer to chapter "L" of the operator's manual for
instructions on changing the line filter (57).
160vfm04 Fig. 8
OUT
IN
39
38
40
22
41
39
57
8. Nectis 207 – 12.2005 – GB A2.9
Description
Fuel filter
The filter is located near the injector/supply pump and its
role is to collect impurities and to separate any water
present in the fuel. At the base of the filter cartridge a
water drain screw or a water detector is provided.
Filters: 5 microns.
Nomenclature
19 Fuel filter.
42 Fuel filter bracket.
43 Water drain screw.
44 Water detector.
161vfm01 Fig. 9
161vfm06 Fig. 10
43
19
42
42
19
44
10. Nectis 207 – 12.2005 – GB A2.11
Description
Engine temperature sensor
The engine temperature sensor is mounted on the
cylinder head, close to the thermostat housing, and
records coolant temperature.
Characteristics:
System voltage: .............................................. 6 V to 12 V
Resistances:
at 80 °C........................................ 0,304 to 0,342 K.ohms
at 20 °C........................................ 2,262 to 2,760 K.ohms
at –10 °C.................................... 8,244 to 10,661 K.ohms
161vfm09 Fig. 12
Water temperature sensor for the cold start
advance mechanism
This sensor is fitted to the cylinder head on the left side of
the engine.
Characteristics
System voltage: 12 V.
Operating threshold
– 63 ± 3°C
Contacts open with increasing temperature.
– 53 ± 3°C
Closure of contacts with decreasing temperature.
161vfm10 Fig. 13
C
A
B
46
B
C
A
48
11. A2.12 Nectis 207 – 12.2005 – GB
Description
Solenoid valves on the injector pump
Nomenclature
4 Engine shutdown solenoid valve.
6 Solenoid valve for cold start advance mechanism.
161vfm12 Fig. 14
Water detector
A water detector (44) is fitted to the base of the fuel filter.
For further information see chapter "Instrument panel,
Characteristics".
161vfm13 Fig. 15
Oil pressure sensor
This sensor (53) is fitted to the block on the left side of the
engine.
Characteristics
System voltage: 12 V.
Operating threshold
– Contact closes.
With decreasing pressure: 0,6 bar.
– Contact opens.
With rising pressure: 0,9 bar.
161vfm14 Fig. 16
6
4
12 V
44
B
D
B
A
C
A
C
0,6
0,9
b
12. Nectis 207 – 12.2005 – GB A2.13
Description
Preheating element
This is an electric element (50) located in the inlet
manifold that is used to heat the air during pre-heating
operations. The element is supplied from a remote
controlled switch usually located near the engine.
Characteristics
System voltage: 12 V.
Maximum possible air flow: 2 cm³/min (at a pressure of
138 kPa).
161vfm17 Fig. 17
50
13. A2.14 Nectis 207 – 12.2005 – GB
Description
Electrical diagram (output)
This controller uses the remote switch to control the
element as a function of engine coolant temperature.
Characteristics
System voltage: 12 V.
Operating voltage: 7 V to 12 V.
Operating temperature: – 40 °C to 85 °C.
Maximum current in line "GH": 0,3 A.
Pre-heating controller
Description
F = Fuse.
R = Preheating element.
T = Relay.
GHC = Pre-heating controller.
161vfm18 Fig. 18
Pin N° Description
1 Output to "cold start" warning light.
2 Not used.
3 "feedback" signal input from the pre-heating element (FB).
4 Engine start signal input (D).
5 Start signal input (50).
6 Output to remote switch supplying preheating element (GH).
7 Supply positive (15).
8 Supply negative (31).
9 Not used.
10 Analogue temperature signal input (NTC).
30
N31
15
50
NTC
31
7
5
10
8
4
1 3
6 GH
FB
F
R
F
T
1,2 W
+0 30
GHC
14. Nectis 207 – 12.2005 – GB A2.15
Checks/Adjustments
Accelerator control adjustment
152vfm00 Fig. 19
105
104
100
103
105
101
102
106
104
100
101
102
106
A
B
15. A2.16 Nectis 207 – 12.2005 – GB
Checks/Adjustments
– Attach the control cable to the accelerator lever on the
injector pump (100).
– Connect the control cable to the accelerator pedal
(101).
– Check in the cab that the manual control lever is set to
minimum "A" (Fig. 19).
– Adjust the cable at the pedal end to achieve a light
tension then tighten the nuts (102). Ensure that the pump
lever is tight against the idle speed adjustment
screw (103).
– Adjust the manual control cable (105) then tighten the
nuts (106).
– Correct adjustment should enable the engine throttle
control (104) to return to the mechanical stop (103)
when the lever or the pedal is at its minimum setting and
enable an extension of the accelerator cable spring on
the pump when the manual lever or the pedal is at its
maximum setting.
Injector pump
Internal setting
The pump must be removed and cylinder n° 1 must be at
TDC on the compression stroke (refer to chapter
"Removal/refitting", "Injector pump").
– Remove the central screw (101) on the distributor
head.
– Align the keyway slot in the shaft with the outlet for
cylinder n° 1 item (B) for the 4 cylinder pump (5b) and
item (A) for the 3 cylinder pump (5a).
– Mount the pump shaft in a soft-faced vice.
– Attach tool (89) reference n° 60 05 005 560 with the
dial gauge (88) placing the shaft in contact with the head
of the distributor piston.
– Install the dial gauge at mid travel.
– Turn the pump so that the shaft turns clockwise until
the needle stops moving.
– Set the dial gauge to zero.
– Turn the pump so that the shaft turns anti-clockwise
until the dial gauge reads 1 for turbo-charged engines
and 1,15 for normally aspirated engines.
160vfm13 Fig. 20
160vfm14 Fig. 21
89
88
86
5a
A
101
101
86
5b
B
16. Nectis 207 – 12.2005 – GB A2.17
Checks/Adjustments
– Lock the shaft by tightening screw (86) then refit the
pump (refer to chapter "Removal/refitting", "Injector
pump").
– Check the pump installation (refer to paragraph
"Checking the timing of the injector pump").
Checking the timing of the injector pump
N° 1 cylinder must be at TDC on the compression stroke
(refer to chapter "Removal/refitting", "Injector pump").
The pump must be attached to the engine block with the
pump shaft free and the operating lever attachment nut
tightened.
– Remove the central screw on the distributor head.
– Attach tool (89) reference n° 60 05 005 560 with the
dial gauge (88) placing the shaft in contact with the head
of the distributor piston (Fig. 22).
– Install the dial gauge at mid travel.
– Turn the engine flywheel against the normal operating
direction until the dial gauge needle stops moving.
– Set the dial gauge to zero.
– Turn the engine flywheel in the normal operating
direction to return to TDC (replace the flywheel locking
pin). The dial gauge should show a reading of 1 for
turbo-charged engines and 1,15 for normally aspirated
engines.
– If these values are not obtained, slacken the 3 pump
attachment nuts and rotate it clockwise or anti-clockwise
to obtain the desired reading.
– Re-tighten the 3 pump attachment nuts.
160vfm07 Fig. 22
88
89
17. A2.18 Nectis 207 – 12.2005 – GB
Checks/Adjustments
Injector
Instructions for the removal of the injectors will be found in
the chapter "Removal/refitting of injectors".
Check the injector's pressure setting (see chapter
"identification" for pressure values).
Note: It is recommended to aim for the maximum
value in the adjustment because after operating for
some time the pressure drops slightly before
stabilising. Repeat the adjustment in order to obtain a
reliable result.
Note: The injector nozzle must never be pointing
towards the person performing the adjustment. The
jet escaping from a port can pierce clothing and skin,
and cause serious infections. The jet should be
recovered in a transparent container.
160vfm05 Fig. 23
18. Nectis 207 – 12.2005 – GB A2.19
Checks/Adjustments
Supply pressure
– Create a test installation as shown in figure n° 22 to
check the fuel supply pressure.
– Connect the ends of the lines (100a) to the filter
outlet (19), (100b), to the injector pump inlet (5), (100c)
and to the reference pressure gauge n° 60 05 005 521.
– Start the engine.
– Check the pressure (refer to chapter A1
"measurement and test points" for pressure values).
– If the pressure is low, check the supply system (filter,
strainer, hoses) and re-test.
Nomenclature
5 Injector pump.
19 Fuel filter.
97 Pressure gauge.
98 2 elbow connectors reference n° 00 11 306 150.
99 6 hose clamps.
100 Fuel pipe (internal diameter 9,5 mm).
101 "T" piece reference n° 77 00 067 854.
160vfm08 Fig. 24
100b
100a
100c
97
98
98 5
99
19
101
19. A2.20 Nectis 207 – 12.2005 – GB
Removal/refitting
Fuel filter
Removal of the fuel filter bracket
– Place a container under the fuel filter and unscrew the
condensation drain covers under the filter. Drain out all
the fuel present.
– Unscrew fully the valve and remove the fuel filter (19).
– Disconnect the fuel lines (20), (21) from the feed pump
to the filter bracket and from the latter to the injector
pump.
– Remove the fuel filter bracket (42).
To disconnect the fuel lines (20), (21) (Fig. 25), press
down on the fastener (54) as shown in figure (B). After
disconncting the lines, withdraw the fastener (54) to its
locked position (Fig. A).
Refitting the fuel filter
Proceed in reverse order to the removal operations.
N.B.: Before refitting the fuel filter (19), it must be
refilled with fuel to facilitate the bleeding of the fuel
feed system.
161vfm19 Fig. 25
161vfm20 Fig. 26
Injection system
Injection system bleeding
Refer to the user manual.
42
19
21
20
54
54
A B
20. Thank you very much for
your reading. Please Click
Here. Then Get COMPLETE
MANUAL. NO WAITING
NOTE:
If there is no response to
click on the link above,
please download the PDF
document first and then
click on it.
21. Nectis 207 – 12.2005 – GB A2.21
Removal/refitting
Injector pump
Finding top dead centre (TDC)
– Remove the starter motor.
– Fit the flywheel rotation tool (90) reference
n° 77 01 388 169 (Fig. 27).
160vfm09 Fig. 27
1st method (Fig. 27)
– Turn the flywheel carefully in the normal rotational
sense to take up the play in the gear train.
– Turn the flywheel until the 8mm pin ø8 (91) engages in
the socket on the flywheel provided for this purpose.
– Check that cylinder n° 1 is at TDC on the compression
stroke, in other words the inlet and exhaust valves are
both fully closed and not partially lifted.
2nd method (Fig. 28)
– Remove the first injector, fit tool n° 00 11 308 920 (81)
with a dial gauge (82) and remove the rocker cover (83).
– Use the flywheel rotation tool (90) n° 77 01 388 169 to
turn the crankshaft until n° 1 cylinder is at TDC.
TDC on the compression stroke for n° 1 cylinder is
obtained when the dial gauge needle is at its maximum
value and the inlet and exhaust valves are both closed
and not partially lifted.
161vfm34 Fig. 28
91
90
83
81
82
22. A2.22 Nectis 207 – 12.2005 – GB
Removal/refitting
Removal of injector pump on 3-cylinder
engines
– Disconnect the elecrical harness (58) from the engine
shut down and cold start solenoid valves.
– Release the clamp from the fuel scavenge pipe (18)
return to the injector pump.
– Release the clamp from the fuel supply (10) and
scavenge (59) pipes.
– Remove the turbo pressure line (55).
– Remove the roll bar (depending on equipment fit).
– Remove the feed pump and if necessary the oil
pressure sensor.
160vfm06 Fig. 29
55
58
6
18
10
59
23. Nectis 207 – 12.2005 – GB A2.23
Removal/refitting
161vfm25 Fig. 30
– Unscrew the injector connectors (60).
– Unscrew the screws that retain the tube attachment
brackets (63), (64), (61), (62) then remove the tubes (1a).
– Fit blanks to the ends of the tubes.
Nomenclature
1a Injection pipes.
2a Injector.
5a Injector pump.
18a Fuel return line to the injector pump.
60 Injector pump outlet connector.
61 Attachment screw for small rear bracket
(on the inlet manifold plate).
62 Bracket attachment screw.
63 Attachment screw for small front
bracket (on the inlet manifold plate).
64 Attachment screw for the small bracket
near the injector pump.
A Cylinder n° 1 outlet.
61
18a
5a
A
60
64
2a
63
62 1a