
Recommended
Recommended
More Related Content
What's hot
What's hot (20)
Similar to Claas dominator 108 vx combine service repair manual
Similar to Claas dominator 108 vx combine service repair manual (16)
More from fjjskefkksemqwe
More from fjjskefkksemqwe (20)
Recently uploaded
Recently uploaded (20)
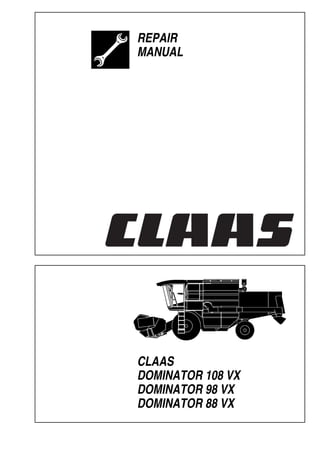
Claas dominator 108 vx combine service repair manual
- 1. REPAIR MANUAL CLAAS DOMINATOR 108 VX DOMINATOR 98 VX DOMINATOR 88 VX
- 2. 297 977.0 - RHB DOMINATOER 108 VX – 88 VX 0.1.1 Contents CONTENTS Contents ................................................................................ 0.1.1 1. General information General information ............................................................... 1.1.1 Introduction ...................................................................... 1.1.1 Introduction to the CLAAS-REPAIR MANUAL .............................................. 1.1.2 Key to symbols ................................................................ 1.1.3 Safety rules ............................................................................ 1.2.1 Important ......................................................................... 1.2.1 Identification of warning and danger signs ...................... 1.2.2 Correct use of the machine ............................................. 1.2.2 General safety and accident prevention regulations ....................................................................... 1.2.2 Leaving the machine ....................................................... 1.2.3 Compressor-type air conditioner ...................................... 1.2.3 Service ............................................................................. 1.2.3 Basic rule ......................................................................... 1.2.3 Hydraulic accumulators ................................................... 1.2.3 General information for repair ................................................ 1.3.1 Cause of trouble .............................................................. 1.3.1 Spare parts ...................................................................... 1.3.1 Engine ............................................................................. 1.3.1 Transmission ................................................................... 1.3.1 Three-phase alternator .................................................... 1.3.1 Correct tension of steel roller chains ............................... 1.3.1 Taper ring fasteners (locking cones) ............................... 1.3.1 Self-locking bolts (with adhesive-filled micro capsules) ............................... 1.3.2 Liquid locking compound ................................................. 1.3.2 Correct installation of lock collar bearings ....................... 1.3.2 Correct installation of adapter sleeve bearings ........................................................................... 1.3.2 Olive (ferrule) fittings on hydraulic lines ........................... 1.3.3 Progressive tube fittings on hydraulic lines ...................... 1.3.3 Taper fitting connections for hydraulic lines ..................... 1.3.4 Welding ............................................................................ 1.3.4 Some advice for speedy and correct repair ..................... 1.3.4 Torque settings ...................................................................... 1.4.1 Bolts ................................................................................. 1.4.1 Hydraulic fittings .............................................................. 1.4.2 Specifications ......................................................................... 1.5.1 Lubricants chart ............................................................... 1.5.1 2. Operator’s platform Hand brake ............................................................................ 2.1.1 Removing the hand brake rope ....................................... 2.1.1 Hand brake, exploded view ............................................. 2.1.4 Installing the hand brake rope ......................................... 2.1.5 Foot brake .............................................................................. 2.2.1 Bleeding the brake system .............................................. 2.2.1 Removing the main brake cylinder .................................. 2.2.3 Installing the main brake cylinder .................................... 2.2.3 Air conditioner ........................................................................ 2.3.1 Important information on compressor-type air conditioner ...................................... 2.3.1 Important information on installing parts in the compressor-type air conditioner ............................ 2.3.2 Air conditioner – filling up refrigerant ............................... 2.3.3 Checking / filling up refrigerant oil at the air conditioning compressor .................................. 2.3.4 Topping up refrigerant oil ................................................ 2.3.5 Removing the condenser ................................................ 2.3.5 Installing the condenser .................................................. 2.3.6 Removing the air conditioning compressor ..................... 2.3.7 Installing the air conditioning compressor ....................... 2.3.9 Removing the electro-magnetic clutch of the air conditioning compressor ................................ 2.3.10 Air conditioning compressor Sanden Sd 5h 14, exploded view ............................................................... 2.3.14 Installing the electro-magnetic clutch of the air conditioning compressor ................................ 2.3.15 Air conditioning compressor – removing the cylinder head / cylinder head gasket ....................... 2.3.17 Air conditioning compressor – installing the cylinder head / cylinder head gasket ....................... 2.3.18 Air conditioning compressor – removing the shaft seal ................................................................. 2.3.19 Air conditioning compressor – installing the shaft seal ................................................................. 2.3.21 Removing the expansion valve ..................................... 2.3.22 Air conditioner (cab side), exploded view ...................... 2.3.24 Installing the expansion valve ....................................... 2.3.25 Removing the thermostat .............................................. 2.3.25 Installing the thermostat ................................................ 2.3.27 Removing the evaporator .............................................. 2.3.28 Installing the evaporator ................................................ 2.3.31 Removing the filter drier ................................................ 2.3.34 Filter drier, exploded view ............................................. 2.3.35 Installing the filter drier .................................................. 2.3.35 Engine – electric system ....................................................... 2.4.1 Removing the electric starting motor DOMINATOR 98 VX – PERKINS 1006-60TW, DOMINATOR 88 VX ....................................................... 2.4.1 Installing the electric starting motor DOMINATOR 98 VX – PERKINS 1006-60TW, DOMINATOR 88 VX ....................................................... 2.4.2 Removing the electric starting motor DOMINATOR 98 VX – MERCEDES OM 366 LA, DOMINATOR 108 VX ..................................................... 2.4.2 Installing the electric starting motor DOMINATOR 98 VX – MERCEDES OM 366 LA, DOMINATOR 108 VX ..................................................... 2.4.4 Alternator ......................................................................... 2.4.5 Removing the alternator .................................................. 2.4.6 Installing the alternator .................................................... 2.4.7 Steering ................................................................................. 2.5.1 Visible damage on the Orbitrol steering unit ................... 2.5.1 External leaks .................................................................. 2.5.1 Internal leaks ................................................................... 2.5.1 Contents
- 3. 0.1.2 RHB DOMINATOER 108 VX – 88 VX - 297 977.0 Contents Removing the steering column ........................................ 2.5.2 Dismantling the steering column ...................................... 2.5.6 Steering, exploded view ................................................... 2.5.7 Assembling the steering column ...................................... 2.5.8 Installing the steering column .......................................... 2.5.9 Bleeding the steering hydraulic system ......................... 2.5.12 Checking the pressure control valve at the steering valve block ................................................. 2.5.13 Removing the steering unit valve block ......................... 2.5.15 Dismantling the steering unit valve block ....................... 2.5.15 Assembling the steering unit valve block ....................... 2.5.18 Installing the steering unit valve block ........................... 2.5.20 Removing the steering unit ............................................ 2.5.20 Installing the steering unit .............................................. 2.5.22 3. Threshing mechanism Feeder housing ...................................................................... 3.1.1 Removing the feeder housing .......................................... 3.1.1 Installing the feeder housing ............................................ 3.1.4 Removing the upper feed rake shaft ................................ 3.1.5 Upper feed rake shaft, exploded view DOMINATOR 108 VX .................................................... 3.1.10 Upper feed rake shaft, exploded view DOMINATOR 98 VX / 88 VX ......................................... 3.1.11 Installing the upper feed rake shaft ................................ 3.1.12 Removing the lower feed rake roller .............................. 3.1.14 Dismantling the lower feed rake roller ........................... 3.1.17 Lower feed rake roller, exploded view ........................... 3.1.19 Assembling the lower feed rake roller ............................ 3.1.19 Installing the lower feed rake roller ................................ 3.1.20 Replacing the feeder chains .......................................... 3.1.22 Removing the wooden ledges ....................................... 3.1.24 Installing the wooden ledges ......................................... 3.1.26 Removing the intermediate floor .................................... 3.1.27 Installing the intermediate floor ...................................... 3.1.31 Replacing the slide rails ................................................. 3.1.32 Removing the intermediate drive shaft .......................... 3.1.33 Installing the intermediate drive shaft ............................ 3.1.36 Concave ................................................................................. 3.2.1 Removing the stone trap .................................................. 3.2.1 Installing the stone trap .................................................... 3.2.2 Removing the concave .................................................... 3.2.3 Installing the concave ...................................................... 3.2.7 Basic setting of concave .................................................. 3.2.9 Threshing drum ...................................................................... 3.3.1 Removing the left-hand threshing drum bearing .................................................................... 3.3.1 Dismantling the left-hand threshing drum bearing .................................................................... 3.3.5 Left-hand threshing drum bearing, exploded view .................................................................. 3.3.6 Assembling the left-hand threshing drum bearing .................................................................... 3.3.6 Installing the left-hand threshing drum bearing .................................................................... 3.3.7 Removing the right-hand threshing drum bearing ................................................................. 3.3.11 Dismantling the right-hand threshing drum bearing ................................................................. 3.3.15 Right-hand threshing drum bearing, exploded view ................................................................ 3.3.15 Assembling the right-hand threshing drum bearing ................................................................. 3.3.16 Installing the right-hand threshing drum bearing ................................................................. 3.3.17 Removing the threshing drum ....................................... 3.3.19 Replacing the threshing drum rasp bars ....................... 3.3.24 Replacing the threshing drum shaft ............................... 3.3.26 Threshing drum, exploded view .................................... 3.3.27 Installing the threshing drum ......................................... 3.3.28 Impeller .................................................................................. 3.4.1 Removing the left-hand impeller bearing ......................... 3.4.1 Installing the left-hand impeller bearing ........................... 3.4.2 Removing the right-hand impeller bearing ...................... 3.4.3 Installing the right-hand impeller bearing ........................ 3.4.4 Removing the impeller ..................................................... 3.4.5 Dismantling the impeller .................................................. 3.4.5 Impeller, exploded view ................................................... 3.4.7 Assembling the impeller .................................................. 3.4.8 Installing the impeller ....................................................... 3.4.9 4. Cleaning Under-walker return floor ....................................................... 4.1.1 Removing the under-walker return floor DOMINATOR 88 VX ........................................................ 4.1.1 Front rocker arm, exploded view ..................................... 4.1.2 Rear rocker arm, exploded view ...................................... 4.1.2 Installing the under-walker return floor ............................ 4.1.3 Straw walker .......................................................................... 4.2.1 Removing the straw walker racks .................................... 4.2.1 Installing the straw walker racks ...................................... 4.2.3 Removing the front straw walker shaft ............................ 4.2.5 Installing the front straw walker shaft .............................. 4.2.7 Removing the rear straw walker shaft ............................. 4.2.8 Installing the rear straw walker shaft ............................. 4.2.11 Dismantling the straw walker shafts (for straw walker shafts with ball bearings) ................... 4.2.14 Straw walker bearing, exploded view ............................ 4.2.15 Assembling the straw walker shafts (for straw walker shafts with ball bearings) ................... 4.2.15 Intensive separation system .................................................. 4.3.1 Removing the front intensive separation system shaft .................................................. 4.3.1 Installing the front intensive separation system shaft .................................................. 4.3.4 Removing the rear intensive separation system shaft .................................................. 4.3.6 Installing the rear intensive separation system shaft .................................................. 4.3.8 Dismantling the intensive separation system shaft ................................................ 4.3.10 Assembling the intensive separation system shaft ................................................ 4.3.11
- 4. 297 977.0 - RHB DOMINATOER 108 VX – 88 VX 0.1.3 Contents Removing the intensive separation system control shaft ....................................................... 4.3.11 Installing the intensive separation system control shaft ....................................................... 4.3.12 Replacing the agitator tines ........................................... 4.3.12 Sieve pan ............................................................................... 4.4.1 Removing the upper sieves With 3-D cleaning system ................................................ 4.4.1 Installing the upper sieves With 3-D cleaning system ................................................ 4.4.1 Removing the upper sieves Without 3-D cleaning system ........................................... 4.4.1 Installing the upper sieves Without 3-D cleaning system ........................................... 4.4.1 Removing the lower sieves With 3-D cleaning system ................................................ 4.4.2 Installing the lower sieves With 3-D cleaning system ................................................ 4.4.2 Removing the lower sieves Without 3-D cleaning system ........................................... 4.4.3 Installing the lower sieves Without 3-D cleaning system ........................................... 4.4.3 Removing the 3-D cleaning system frame ....................... 4.4.4 Cleaning system frame, exploded view ........................... 4.4.7 Installing the 3-D cleaning system frame ......................... 4.4.8 Removing the sieve pan ................................................ 4.4.13 Installing the sieve pan .................................................. 4.4.17 Preparation floor .................................................................... 4.5.1 Removing the preparation floor ....................................... 4.5.1 Preparation floor, exploded view ..................................... 4.5.5 Installing the preparation floor ......................................... 4.5.6 3-D cleaning system .............................................................. 4.6.1 Removing the 3-D cleaning system ................................. 4.6.1 Installing the 3-D cleaning system ................................... 4.6.1 3-D sieve pan suspension and cleaning system, exploded view .................................................................. 4.6.2 Adjusting the 3-D cleaning system .................................. 4.6.4 Adjusting the pivot arm using the «3-D gauge» .................................................... 4.6.5 Rocker arm drive .................................................................... 4.7.1 Removing the rocker arm drive ........................................ 4.7.1 Rocker arm drive, exploded view ..................................... 4.7.5 Installing the rocker arm drive ......................................... 4.7.7 Cleaning fan ........................................................................... 4.8.1 Removing the bearings to the right-hand and left-hand side of cleaning fan ........................................... 4.8.1 Self-aligning ball bearing, exploded view ........................ 4.8.4 Installing the bearings to the right-hand and left-hand side of cleaning fan ........................................... 4.8.4 Removing the fan blast reduction DOMINATOR 108 VX ...................................................... 4.8.6 Fan blast reduction, exploded view DOMINATOR 108 VX ...................................................... 4.8.8 Installing the fan blast reduction DOMINATOR 108 VX ...................................................... 4.8.9 Removing the fan shaft DOMINATOR 108 VX .................................................... 4.8.11 Installing the fan shaft DOMINATOR 108 VX ................................................... 4.8.13 Removing the centre cleaning fan bearing DOMINATOR 108 VX ................................................... 4.8.15 Centre cleaning fan bearing, exploded view ............................................................... 4.8.16 Installing the centre cleaning fan bearing DOMINATOR 108 VX ................................................... 4.8.16 Removing the fan rotors DOMINATOR 108 VX ................................................... 4.8.16 Installing the fan rotors DOMINATOR 108 VX ................................................... 4.8.17 Removing the fan housing DOMINATOR 108 VX ................................................... 4.8.17 Installing the fan housing DOMINATOR 108 VX ................................................... 4.8.18 Removing the wind boards DOMINATOR 108 VX ................................................... 4.8.19 Installing the wind boards DOMINATOR 108 VX ................................................... 4.8.19 Removing the fan shaft DOMINATOR 98 – 88 VX ............................................. 4.8.20 Installing the fan shaft DOMINATOR 98 – 88 VX ............................................. 4.8.20 Removing the fan spiders DOMINATOR 98 – 88 VX ............................................. 4.8.21 Installing the fan spiders DOMINATOR 98 – 88 VX ............................................. 4.8.21 Removing the fan rotor DOMINATOR 98 – 88 VX ............................................. 4.8.22 Installing the fan rotor DOMINATOR 98 – 88 VX ............................................. 4.8.23 Fan blades DOMINATOR 98 – 88 VX ............................................. 4.8.23 Removing the fan housing DOMINATOR 98 – 88 VX ............................................. 4.8.24 Installing the fan housing DOMINATOR 98 – 88 VX ............................................. 4.8.25 Removing the wind boards DOMINATOR 98 – 88 VX ............................................. 4.8.26 Installing the wind boards DOMINATOR 98 – 88 VX ............................................. 4.8.26 5. Grain delivery Returns elevator .................................................................... 5.1.1 Removing the returns elevator chain .............................. 5.1.1 Installing the returns elevator chain ................................ 5.1.3 Removing the upper returns auger ................................. 5.1.3 Installing the upper returns auger ................................... 5.1.6 Removing the returns elevator ........................................ 5.1.7 Dismantling the returns elevator ................................... 5.1.10 Assembling the returns elevator .................................... 5.1.12 Installing the returns elevator ........................................ 5.1.13 Removing the lower returns auger ................................ 5.1.15 Installing the lower returns auger .................................. 5.1.19 Grain elevator ........................................................................ 5.2.1 Removing the grain elevator chain DOMINATOR 98 VX – 88 VX .......................................... 5.2.1
- 5. 0.1.4 RHB DOMINATOER 108 VX – 88 VX - 297 977.0 Contents Installing the grain elevator chain DOMINATOR 98 VX – 88 VX .......................................... 5.2.3 Removing the grain elevator chain DOMINATOR 108 VX ...................................................... 5.2.3 Installing the grain elevator chain DOMINATOR 108 VX ...................................................... 5.2.5 Removing the grain elevator top DOMINATOR 98 VX – 88 VX .......................................... 5.2.6 Removing the grain elevator top DOMINATOR 108 VX ...................................................... 5.2.7 Dismantling the grain elevator top ................................... 5.2.7 Grain elevator top, exploded view ................................. 5.2.11 Assembling the grain elevator top ................................. 5.2.12 Installing the grain elevator top DOMINATOR 98 VX – 88 VX ........................................ 5.2.15 Installing the grain elevator top DOMINATOR 108 VX .................................................... 5.2.15 Removing the grain elevator shaft DOMINATOR 108 VX .................................................... 5.2.16 Installing the grain elevator shaft DOMINATOR 108 VX .................................................... 5.2.19 Removing the grain elevator boot DOMINATOR 98 VX – 88 VX ........................................ 5.2.20 Installing the grain elevator boot DOMINATOR 98 VX – 88 VX ........................................ 5.2.23 Removing the grain elevator boot DOMINATOR 108 VX .................................................... 5.2.23 Installing the grain elevator boot DOMINATOR 108 VX .................................................... 5.2.25 Removing the grain auger ............................................. 5.2.26 Installing the grain auger ............................................... 5.2.29 Removing the grain tank filler auger DOMINATOR 98 VX – 88 VX ........................................ 5.2.31 Removing the grain tank filler auger DOMINATOR 108 VX .................................................... 5.2.32 Dismantling the angle drive for grain tank filler auger DOMINATOR 108 VX – 88 VX .................... 5.2.34 Grain tank filler auger, exploded view ............................ 5.2.36 Assembling the angle drive for grain tank filler auger DOMINATOR 108 VX – 88 VX .................... 5.2.37 Installing the grain tank filler auger DOMINATOR 98 VX – 88 VX ........................................ 5.2.39 Installing the grain tank filler auger DOMINATOR 108 VX .................................................... 5.2.40 Grain tank unloading .............................................................. 5.3.1 Removing the grain tank unloading auger ....................... 5.3.1 Installing the grain tank unloading auger ......................... 5.3.4 Removing the grain tank unloading tube auger ............... 5.3.5 Installing the grain tank unloading tube auger ................. 5.3.7 Removing the grain tank unloading tube ......................... 5.3.7 Installing the grain tank unloading tube ........................... 5.3.9 Removing the lateral augers DOMINATOR 108 VX .................................................... 5.3.10 Installing the lateral augers DOMINATOR 108 VX .................................................... 5.3.12 Chaff spreader ....................................................................... 5.4.1 Removing the chaff spreader flange housing ................................................................. 5.4.1 Dismantling the chaff spreader flange housing ................................................................. 5.4.2 Assembling the chaff spreader flange housing ................................................................. 5.4.3 Installing the chaff spreader flange housing ................................................................. 5.4.5 Removing the chaff spreader drive shaft ......................... 5.4.6 Dismantling the chaff spreader drive shaft ...................... 5.4.7 Chaff spreader, exploded view ........................................ 5.4.8 Assembling the chaff spreader drive shaft .................... 5.4.10 Installing the chaff spreader drive shaft ......................... 5.4.10 6. Grain delivery Straw spreader ...................................................................... 6.1.1 Removing the straw spreader ......................................... 6.1.1 Dismantling the straw spreader ....................................... 6.1.2 Straw spreader, exploded view ....................................... 6.1.5 Assembling the straw spreader ....................................... 6.1.7 Installing the straw spreader ........................................... 6.1.9 Straw chopper ....................................................................... 6.2.1 Removing the right-hand straw chopper bearing ..................................................... 6.2.1 Removing the left-hand straw chopper bearing ..................................................... 6.2.3 Dismantling the left-hand / right-hand straw chopper bearing ..................................................... 6.2.5 Assembling the left-hand / right-hand straw chopper bearing ..................................................... 6.2.5 Installing the right-hand straw chopper bearing ..................................................... 6.2.6 Installing the left-hand straw chopper bearing ..................................................... 6.2.8 Removing the cutting cylinder ....................................... 6.2.10 Cutting cylinder, exploded view ..................................... 6.2.12 Pre-assembling the cutting cylinder .............................. 6.2.13 Installing the cutting cylinder ......................................... 6.2.14 7. Drives Drive belts .............................................................................. 7.1.1 General instructions ........................................................ 7.1.1 Drive diagram, left-hand side .......................................... 7.1.2 Drive diagram, right-hand side ........................................ 7.1.3 Drive belts on left-hand side .................................................. 7.2.1 Removing the cutterbar drive belt (1) .............................. 7.2.1 Installing and adjusting the cutterbar drive belt (1) ..................................................... 7.2.3 Removing the compressor drive belt (2) ......................... 7.2.4 Installing and adjusting the compressor drive belt (2) ................................................. 7.2.4 Removing the hydrostatic ground drive belt (3) ........................................................ 7.2.5 Installing and adjusting the hydrostatic ground drive belt (3) ...................................... 7.2.7 Removing the drive belt (4) for the working hydraulics pump.................................................. 7.2.9
- 6. 297 977.0 - RHB DOMINATOER 108 VX – 88 VX 0.1.5 Contents Installing and adjusting the drive belt (4) for the working hydraulics pump.................................................. 7.2.9 Removing the threshing mechanism drive belt (5) ........ 7.2.10 Installing and adjusting the threshing mechanism drive belt (5) ................................................................... 7.2.12 Removing the grain tank discharge drive belt (6) .......... 7.2.13 Installing and adjusting the grain tank discharge drive belt (6) ................................................................... 7.2.15 Removing the sieve pan / fan intermediate drive belt (7) ................................................................... 7.2.16 Installing and adjusting the sieve pan / fan intermediate drive belt (7) .............................................. 7.2.16 Removing the fan drive belt (8) ..................................... 7.2.17 Installing the fan drive belt (8) ....................................... 7.2.18 Removing the sieve pan intermediate drive belt (9) .............................................. 7.2.19 Installing and adjusting the sieve pan intermediate drive belt (9) .............................................. 7.2.19 Removing the sieve pan drive belt (10) ......................... 7.2.20 Installing and adjusting the sieve pan drive belt (10) ................................................................. 7.2.21 Removing the straw walker drive belt (11) ..................... 7.2.21 Installing and adjusting the straw walker drive belt (11) ................................................................. 7.2.22 Removing the intensive separation system drive belt (12) ................................................................. 7.2.23 Installing and adjusting intensive separation drive belt (12) ................................................................. 7.2.24 Removing the lateral auger drive belt (13) DOMINATOR 88 VX....................................................... 7.2.25 Removing the straw spreader drive belt (14) ................. 7.2.25 Installing and adjusting the straw spreader drive belt (14) ................................................................. 7.2.26 Removing the chaff spreader drive belt (15) .................. 7.2.26 Installing and adjusting the chaff spreader drive belt (15) ................................................................. 7.2.27 Removing the chaff spreader drive belt (16) .................. 7.2.27 Installing and adjusting the chaff spreader drive belt (16) ................................................................. 7.2.27 Drive belts on right-hand side ................................................ 7.3.1 Removing the straw chopper drive belt (20) .................... 7.3.1 Installing and adjusting the straw chopper drive belt (20) ................................................................... 7.3.2 Removing the straw chopper intermediate drive belt (21) ................................................................... 7.3.3 Installing and adjusting the straw chopper intermediate drive belt (21) .............................................. 7.3.3 Removing the suction blower drive belt (22) .................... 7.3.4 Installing and adjusting suction blower drive belt (22) ....................................................... 7.3.5 Removing the threshing drum speed control belt (23) ..................................................... 7.3.6 Installing and adjusting the threshing drum speed control belt (23) .................................................... 7.3.8 Removing the threshing drum drive belt (24) ................................................................. 7.3.10 Installing and adjusting the threshing drum drive belt (24) ................................................................. 7.3.12 Removing the threshing drum speed control belt (25) (excluding intermediate drive) ....................................... 7.3.13 Installing and tensioning the threshing drum speed control belt (25) (excluding intermediate drive) ....................................... 7.3.14 Removing the radiator chaff screen drive belt (26) ................................................................ 7.3.15 Installing the radiator chaff screen drive belt (26) ................................................................ 7.3.15 Removing the radiator chaff screen intermediate drive belt (27) ........................................... 7.3.16 Installing and adjusting the radiator chaff screen intermediate drive belt (27) ........................................... 7.3.16 Removing the grain elevator top drive chain (30) DOMINATOR 108 VX ................................................... 7.3.17 Installing the grain elevator top drive chain (30) DOMINATOR 108 VX ................................................... 7.3.17 Removing the grain elevator top drive chain (30) DOMINATOR 98 VX / 88 VX ......................................... 7.3.18 Installing the grain elevator top drive chain (30) DOMINATOR 98 VX / 88 VX ......................................... 7.3.19 Removing the grain tank unloading intermediate drive chain (31) ......................................... 7.3.19 Installing and adjusting the grain tank unloading intermediate drive chain (31) ......................................... 7.3.19 Removing the grain tank unloading intermediate drive chain (32) DOMINATOR 108 VX ................................................... 7.3.20 Installing and adjusting the grain tank unloading intermediate drive chain (32) DOMINATOR 108 VX ................................................... 7.3.20 Removing the returns drive chain (33) .......................... 7.3.21 Installing and adjusting the returns drive chain (33) ............................................................. 7.3.21 Cutterbar drive ....................................................................... 7.4.1 Removing the cutterbar clutch ........................................ 7.4.1 Cutterbar clutch, exploded view ...................................... 7.4.6 Installing the cutterbar clutch .......................................... 7.4.9 Removing the front cutterbar drive pulley (DOMINATOR 108 VX) ................................................. 7.4.15 Installing the front cutterbar drive pulley (DOMINATOR 108 VX) ................................................. 7.4.15 Removing the front cutterbar drive pulley (DOMINATOR 98 VX / 88 VX) ...................................... 7.4.15 Installing the front cutterbar drive pulley (DOMINATOR 98 VX / 88 VX) ...................................... 7.4.16 Removing the cutterbar drive deflection pulley ............. 7.4.16 Cutterbar drive deflection pulley, exploded view ........... 7.4.16 Installing the cutterbar drive deflection pulley ............... 7.4.17 Removing the cutterbar drive slip clutch ....................... 7.4.17 Dismantling the cutterbar drive slip clutch ..................... 7.4.17 Cutterbar drive slip clutch, exploded view ..................... 7.4.19 Assembling the cutterbar drive slip clutch ..................... 7.4.19 Installing the cutterbar drive slip clutch ......................... 7.4.21 Removing the cutterbar drive jockey pulley .................. 7.4.22 Cutterbar drive jockey pulley, exploded view ................ 7.4.22 Installing the cutterbar drive jockey pulley .................... 7.4.22
- 7. 0.1.6 RHB DOMINATOER 108 VX – 88 VX - 297 977.0 Contents Left-hand threshing mechanism drive .................................... 7.5.1 Removing the threshing mechanism drive pulley ............ 7.5.1 Installing the threshing mechanism drive pulley .............. 7.5.1 Removing the threshing mechanism drive jockey pulley .................................................................... 7.5.1 Threshing mechanism drive jockey pulley, exploded view .................................................................. 7.5.2 Installing the threshing mechanism drive jockey pulley .................................................................... 7.5.3 Right-hand threshing mechanism drive ................................. 7.6.1 Removing the threshing drum variable-speed drive (spring-loaded) ............................... 7.6.1 Dismantling the threshing drum variable-speed drive (spring-loaded) ............................... 7.6.3 Threshing drum variable-speed drive (spring-loaded), exploded view ........................................ 7.6.6 Assembling the threshing drum variable-speed drive (spring-loaded) ............................... 7.6.7 Installing the threshing drum variable-speed drive (spring-loaded) ............................. 7.6.11 Removing the threshing drum variable-speed drive (hydraulic) ..................................... 7.6.14 Dismantling the threshing drum variable-speed drive (hydraulic) ..................................... 7.6.16 Threshing drum variable-speed drive (hydraulic), exploded view ............................................. 7.6.18 Assembling the threshing drum variable-speed drive (hydraulic) ..................................... 7.6.20 Installing the threshing drum variable-speed drive (hydraulic) ..................................... 7.6.22 Removing the threshing drum drive jockey pulley without threshing drum speed reduction kit (DOMINATOR 108 VX), with threshing drum speed reduction kit (DOMINATOR 108 VX – 88 VX) .................................... 7.6.24 Threshing drum drive jockey pulley, exploded view ................................................................ 7.6.24 Installing the threshing drum drive jockey pulley without threshing drum speed reduction kit (DOMINATOR 108 VX), with threshing drum speed reduction kit (DOMINATOR 108 VX – 88 VX) .................................... 7.6.24 Threshing drum speed reduction kit ....................................... 7.7.1 Removing the threshing drum speed reduction kit .......... 7.7.1 Dismantling the threshing drum speed reduction kit ........ 7.7.2 Threshing drum speed reduction kit, exploded view ........ 7.7.7 Assembling the threshing drum speed reduction kit ........ 7.7.8 Installing the threshing drum speed reduction kit .......... 7.7.14 Sieve pan intermediate drive ................................................. 7.8.1 Removing the sieve pan / fan intermediate drive jockey pulley ........................................................... 7.8.1 Sieve pan / fan intermediate drive jockey pulley, exploded view .................................................................. 7.8.1 Installing the sieve pan / fan intermediate drive jockey pulley ........................................................... 7.8.1 Straw walker drive .................................................................. 7.9.1 Removing the straw walker drive jockey pulley ............... 7.9.1 Installing the straw walker drive jockey pulley ................. 7.9.1 Removing the intensive separation system drive deflection pulley ...................................................... 7.9.1 Installing the intensive separation system drive deflection pulley ...................................................... 7.9.2 Removing the intensive separation system drive jockey pulley ........................................................... 7.9.2 Installing the intensive separation system drive jockey pulley ........................................................... 7.9.2 Straw walker drive, exploded view .................................. 7.9.3 Sieve pan drive .................................................................... 7.10.1 Removing the straw walker / sieve pan intermediate drive jockey pulley .................................... 7.10.1 Dismantling the straw walker / sieve pan intermediate drive jockey pulley .................................... 7.10.1 Assembling the straw walker / sieve pan intermediate drive jockey pulley .................................... 7.10.2 Installing the straw walker / sieve pan intermediate drive jockey pulley .................................... 7.10.2 Removing the straw walker / sieve pan intermediate drive V-belt pulley package ...................... 7.10.3 Dismantling the straw walker / sieve pan intermediate drive V-belt pulley package ...................... 7.10.3 Assembling the straw walker / sieve pan intermediate drive V-belt pulley package ...................... 7.10.4 Installing the straw walker / sieve pan intermediate drive V-belt pulley package ...................... 7.10.5 Removing the sieve pan drive deflection pulley ............ 7.10.5 Straw walker / sieve pan intermediate drive, exploded view ................................................................ 7.10.6 Installing the sieve pan drive deflection pulley .............. 7.10.7 Removing the sieve pan drive jockey pulley ................. 7.10.7 Sieve pan drive jockey pulley, exploded view ............... 7.10.8 Installing the sieve pan drive jockey pulley ................... 7.10.8 Fan drive .............................................................................. 7.11.1 Removing the fan adjustment (electrical) (Version A) .................................................................... 7.11.1 Dismantling the fan adjustment (electrical) (Version A) .................................................................... 7.11.2 Fan adjustment (electrical), exploded view (Version A) .................................................................... 7.11.3 Assembling the fan adjustment (electrical) (Version A) .................................................................... 7.11.4 Installing the fan adjustment (electrical) (Version A) .................................................................... 7.11.7 Removing the fan adjustment (electrical) (Version B) .................................................................... 7.11.8 Dismantling the fan adjustment (electrical) (Version B) .................................................................... 7.11.9 Fan adjustment (electrical), exploded view (Version B) .................................................................. 7.11.11 Assembling the fan adjustment (electrical) (Version B) .................................................................. 7.11.12 Installing the fan adjustment (electrical) (Version B) .................................................................. 7.11.14
- 8. 297 977.0 - RHB DOMINATOER 108 VX – 88 VX 0.1.7 Contents Removing the variable-speed fan drive (electrical) .................................................................... 7.11.15 Dismantling the variable-speed fan drive (electrical) .................................................................... 7.11.16 Variable speed fan drive (electrical), exploded view .............................................................. 7.11.18 Assembling the variable-speed fan drive (electrical) .................................................................... 7.11.19 Installing the variable-speed fan drive (electrical) .................................................................... 7.11.21 Aligning the variable speed fan pulleys ....................... 7.11.25 Removing the variable-speed fan drive (spring-loaded) ............................................................ 7.11.26 Dismantling the variable-speed fan drive (spring-loaded) ............................................................ 7.11.27 Variable-speed fan drive (spring-loaded), exploded view .............................................................. 7.11.29 Assembling the variable-speed fan drive (spring-loaded) ............................................................ 7.11.30 Installing the variable-speed fan drive (spring-loaded) ............................................................ 7.11.32 Chaff spreader drive ............................................................ 7.12.1 Removing the chaff spreader drive bracket ................... 7.12.1 Dismantling the chaff spreader drive bracket ................ 7.12.2 Assembling the chaff spreader drive bracket ................. 7.12.3 Installing the chaff spreader drive bracket ..................... 7.12.3 Removing the chaff spreader drive jockey pulley .......... 7.12.4 Dismantling the chaff spreader drive jockey pulley ........ 7.12.4 Chaff spreader drive, exploded view ............................. 7.12.6 Assembling the chaff spreader drive jockey pulley ........ 7.12.7 Installing the chaff spreader drive jockey pulley ............ 7.12.7 Grain tank unloading drive ................................................... 7.13.1 Removing the upper angle drive of grain tank unloading ...................................................... 7.13.1 Dismantling the upper angle drive of grain tank unloading ...................................................... 7.13.2 Upper angle drive of grain tank unloading, assembled ..................................................................... 7.13.3 Assembling the upper angle drive of grain tank unloading ...................................................... 7.13.4 Installing the upper angle drive of grain tank unloading ...................................................... 7.13.6 Removing the lower angle drive of grain tank unloading ...................................................... 7.13.7 Dismantling the lower angle drive of grain tank unloading ...................................................... 7.13.8 Lower angle drive of grain tank unloading, assembled ................................................................... 7.13.12 Assembling the lower angle drive of grain tank unloading .................................................... 7.13.13 Installing the lower angle drive of grain tank unloading .................................................... 7.13.15 Removing the grain tank intermediate drive shaft ....... 7.13.16 Installing the grain tank intermediate drive shaft ......... 7.13.18 Removing the grain tank unloading drive jockey pulley (DOMINATOR 108 VX) ............................................... 7.13.20 Grain tank unloading drive jockey pulley, exploded view (DOMINATOR 108 VX) ............................................... 7.13.20 Installing the grain tank unloading drive jockey pulley (DOMINATOR 108 VX) ............................................... 7.13.20 Removing the grain tank unloading drive jockey pulley (DOMINATOR 98 VX / 88 VX) .................................... 7.13.21 Grain tank unloading drive jockey pulley, exploded view (DOMINATOR 98 VX / 88 VX) .................................... 7.13.21 Installing the grain tank unloading drive jockey pulley (DOMINATOR 98 VX / 88 VX) .................................... 7.13.21 Removing the grain tank unloading auger safety clutch ................................................................ 7.13.22 Dismantling the grain tank unloading auger safety clutch ................................................................ 7.13.23 Grain tank unloading auger safety clutch, exploded view ............................................................. 7.13.23 Assembling the grain tank unloading auger safety clutch ................................................................ 7.13.24 Installing the grain tank unloading auger safety clutch ................................................................ 7.13.24 Removing the lateral auger drive (DOMINATOR 108 VX) ............................................... 7.13.25 Installing the lateral auger drive (DOMINATOR 108 VX) ............................................... 7.13.25 Straw chopper drive ............................................................ 7.14.1 Removing the straw chopper intermediate drive jockey pulley .................................................................. 7.14.1 Straw chopper intermediate drive jockey pulley, exploded view ............................................................... 7.14.1 Installing the straw chopper intermediate drive jockey pulley .................................................................. 7.14.1 Removing the straw chopper intermediate drive ........... 7.14.2 Dismantling the straw chopper intermediate drive ........ 7.14.3 Assembling the straw chopper intermediate drive ........ 7.14.5 Installing the straw chopper intermediate drive ............. 7.14.7 Removing the straw chopper drive jockey pulley .......... 7.14.7 Straw chopper intermediate drive, exploded view ......... 7.14.8 Installing the straw chopper drive jockey pulley ............ 7.14.9 Straw spreader drive ........................................................... 7.15.1 Removing the straw spreader tensioning device .......... 7.15.1 Dismantling the straw spreader tensioning device ........ 7.15.1 Straw spreader tensioning device, exploded view ........ 7.15.2 Assembling the straw spreader tensioning device ........ 7.15.3 Installing the straw spreader tensioning device ............ 7.15.3 Rotary radiator screen drive ................................................ 7.16.1 Removing the rotary radiator screen drive shaft ........... 7.16.1 Dismantling the rotary radiator screen drive shaft ......... 7.16.2 Rotary radiator screen drive, exploded view ................. 7.16.6 Assembling the rotary radiator screen drive shaft ......... 7.16.7 Installing the rotary radiator screen drive shaft ............. 7.16.9
- 9. 0.1.8 RHB DOMINATOER 108 VX – 88 VX - 297 977.0 Contents Rotary radiator screen suction blower ................................. 7.17.1 Removing the rotary radiator screen suction blower ................................................................ 7.17.1 Dismantling the rotary radiator screen suction blower ................................................................ 7.17.1 Rotary radiator screen suction blower, exploded view ................................................................ 7.17.4 Assembling the rotary radiator screen suction blower ................................................................ 7.17.5 Installing the rotary radiator screen suction blower ................................................................ 7.17.7 Hydraulic pump drive ........................................................... 7.18.1 Removing the hydrostatic ground drive jockey pulley (DOMINATOR 108 VX) .................................................. 7.18.1 Hydrostatic ground drive jockey pulley, exploded view (DOMINATOR 108 VX) .................................................. 7.18.1 Installing the hydrostatic ground drive jockey pulley (DOMINATOR 108 VX) .................................................. 7.18.2 Removing the hydrostatic ground drive jockey pulley (DOMINATOR 98 VX / 88 VX) ....................................... 7.18.3 Hydrostatic ground drive jockey pulley, exploded view (DOMINATOR 98 VX / 88 VX) ....................................... 7.18.4 Installing the hydrostatic ground drive jockey pulley (DOMINATOR 98 / 88 VX) ............................................. 7.18.5 Final drives ........................................................................... 7.19.1 Removing the final drives .............................................. 7.19.1 Dismantling the final drives DOMINATOR 108 VX .................................................... 7.19.2 Final drive, exploded view DOMINATOR 108 VX .................................................. 7.19.11 Assembling the final drives DOMINATOR 108 VX .................................................. 7.19.13 Dismantling the final drives DOMINATOR 98 VX / 88 VX ....................................... 7.19.22 Assembling the final drives DOMINATOR 98 VX / 88 VX ....................................... 7.19.29 Installing the final drives .............................................. 7.19.37 Transmission gearbox .......................................................... 7.20.1 Lowering the transmission gearbox with drum brakes (DOMINATOR 108 VX / 88 VX) ..................................... 7.20.1 Raising the transmission gearbox with drum brakes (DOMINATOR 108 VX / 88 VX) ..................................... 7.20.7 Lowering the transmission gearbox with disc brakes (DOMINATOR 98 VX) .................................................. 7.20.12 Raising the transmission gearbox with disc brakes (DOMINATOR 98 VX) .................................................. 7.20.16 Removing the transmission gearbox ........................... 7.20.20 Dismantling the gearbox (DOMINATOR 108 VX) ............................................... 7.20.26 Assembling the gearbox DOMINATOR 108 VX .................................................. 7.20.37 Dismantling the gearbox (DOMINATOR 98 / 88 VX) .......................................... 7.20.44 Assembling the gearbox (DOMINATOR 98 VX / 88 VX) .................................... 7.20.57 Dismantling the differential (DOMINATOR 108 VX – 88 VX) ................................. 7.20.67 Differential, exploded view .......................................... 7.20.69 Assembling the differential (DOMINATOR 108 VX – 88 VX) ................................. 7.20.70 Installing the gearbox .................................................. 7.20.73 Parking brake ...................................................................... 7.21.1 Removing the brake units for the parking brake with drum brakes (DOMINATOR 108 VX / 88 VX) .................................... 7.21.1 Installing the brake units for the parking brake with drum brakes (DOMINATOR 108 VX / 88 VX) .................................... 7.21.3 Removing the brake units for the parking brake with disc brakes (DOMINATOR 98 VX) ................................................... 7.21.5 Installing the brake units for the parking brake with disc brakes (DOMINATOR 98 VX) ................................................... 7.21.6 Foot brake ........................................................................... 7.22.1 Bleeding the brake units ................................................ 7.22.1 Removing the brake shoes from the foot brake with drum brakes (DOMINATOR 108 VX / 88 VX) .................................... 7.22.2 Installing the brake shoes from the foot brake with drum brakes (DOMINATOR 108 VX / 88 VX) .................................... 7.22.4 Removing the wheel brake ram with drum brakes (DOMINATOR 108 VX / 88 VX) .................................... 7.22.5 Installing the wheel brake ram with drum brakes (DOMINATOR 108 VX / 88 VX) .................................... 7.22.6 Removing the brake cradle with disc brakes (DOMINATOR 98 VX) ......................... 7.22.6 Installing the brake cradle with disc brakes (DOMINATOR 98 VX) ......................... 7.22.8 Removing the brake pads with disc brakes (DOMINATOR 98 VX) ......................... 7.22.9 Installing the brake pads with disc brakes (DOMINATOR 98 VX) ....................... 7.22.10 Drive axle ............................................................................. 7.23.1 Removing the drive axle ................................................ 7.23.1 Installing the drive axle .................................................. 7.23.5 Steering axle ........................................................................ 7.24.1 Removing the wheel bearings (2.05 m steering axle) .................................................... 7.24.1 Installing the wheel bearings (2.05 m steering axle) .................................................... 7.24.3
- 10. 297 977.0 - RHB DOMINATOER 108 VX – 88 VX 0.1.9 Contents Removing the stub axle (2.05 m steering axle) .................................................... 7.24.6 Installing the stub axle (2.05 m steering axle) .................................................... 7.24.8 Removing the wheel bearings (adjustable axle) .......................................................... 7.24.10 Installing the wheel bearings (adjustable steering axle) ............................................ 7.24.12 Removing the stub axle (adjustable steering axle) ............................................ 7.24.14 Installing the stub axle (adjustable steering axle) ............................................ 7.24.16 Adjusting the steering axle end stops (2.05 m steering axle, adjustable steering axle) .............................................. 7.24.18 Adjusting the steering axle end stops (CLAAS 4-trac axle) ..................................................... 7.24.19 Wheel track adjustment ............................................... 7.24.20 Removing the steering axle ......................................... 7.24.22 Installing the steering axle ........................................... 7.24.25 Removing the CLAAS 4-trac axle ................................ 7.24.27 Installing the CLAAS 4-trac axle .................................. 7.24.30 Bleeding the hydraulic motors (CLAAS 4-trac axle) ..................................................... 7.24.33 Removing the planetary gearbox / hydraulic motor (CLAAS 4-trac axle) ..................................................... 7.24.35 Removing the stub axle housing (CLAAS 4-trac axle) ..................................................... 7.24.37 CLAAS 4-trac system, exploded view .......................... 7.24.39 Installing the stub axle housing (CLAAS 4-trac axle) ..................................................... 7.24.40 Installing planetary gearbox / hydraulic motor (CLAAS 4-trac axle) ..................................................... 7.24.41 8. 9. Hydraulics Maintenance .......................................................................... 9.1.1 Hydraulic system ............................................................. 9.1.1 Checking the hydraulic oil level ....................................... 9.1.2 Changing the hydraulic oil ............................................... 9.1.2 Hydraulic pump ...................................................................... 9.2.1 Removing the double pump with the hydraulic tank ........ 9.2.1 Dismantling the double pump and the hydraulic tank ...... 9.2.3 Double pump and hydraulic tank, exploded view ............ 9.2.5 Assembling the double pump and hydraulic tank ............ 9.2.6 Installing the double pump and hydraulic tank ................ 9.2.8 Check the double pump ................................................... 9.2.9 Hydraulic ram – steering hydraulics ....................................... 9.3.1 Removing the steering ram (with 2.05 m steering axle) .............................................. 9.3.1 Dismantling the steering ram (with 2.05 m steering axle) .............................................. 9.3.2 Steering ram, exploded view (with 2.05 m steering axle) .............................................. 9.3.3 Assembling the steering ram (with 2.05 m steering axle) .............................................. 9.3.4 Installing the steering axle (with 2.05 m steering axle) .............................................. 9.3.5 Removing the steering ram (with adjustable steering axle and CLAAS 4-trac axle) .................................................. 9.3.6 Dismantling the steering ram (with adjustable steering axle and CLAAS 4-trac axle) .................................................. 9.3.7 Steering ram, exploded view (with adjustable steering axle and CLAAS 4-trac axle) .................................................. 9.3.8 Assembling the steering ram (with adjustable steering axle and CLAAS 4-trac axle) .................................................. 9.3.9 Installing the steering ram (with adjustable steering axle and CLAAS 4-trac axle) ................................................ 9.3.10 Bleed the steering ram .................................................. 9.3.11 Removing the 3-D sieve box hydraulic ram .................. 9.3.12 Dismantling the 3-D sieve box hydraulic ram ................ 9.3.13 3-D sieve box hydraulic ram, exploded view ................. 9.3.14 Assembling the 3-D sieve box hydraulic ram ................ 9.3.15 Installing the 3-D sieve box hydraulic ram .................... 9.3.16 Removing the 3-D sieve box pendulum ........................ 9.3.16 Dismantling the 3-D sieve box pendulum ...................... 9.3.17 3-D pendulum unit, exploded view ................................ 9.3.19 Assembling the 3-D pendulum ...................................... 9.3.20 Installing the 3-D sieve box pendulum .......................... 9.3.20 Hydraulic ram – low-pressure hydraulics .............................. 9.4.1 Removing the threshing drum engagement ram ............. 9.4.1 Dismantling the threshing drum engagement ram .......... 9.4.2 Threshing engagement ram, exploded view ................... 9.4.3 Assembling the threshing engagement ram .................... 9.4.4 Installing the threshing engagement ram ........................ 9.4.5 Removing the grain tank engagement ram (DOMINATOR 108 VX) ................................................... 9.4.6 Installing the grain tank engagement ram (DOMINATOR 108 VX) ................................................... 9.4.7 Removing the grain tank engagement ram (DOMINATOR 98 VX / 88 VX) ........................................ 9.4.8 Installing the grain tank engagement ram (DOMINATOR 98 VX / 88 VX) ........................................ 9.4.9 Dismantling the grain tank engagement ram ................ 9.4.10 Grain tank engagement ram, exploded view ................. 9.4.11 Assembling the grain tank engagement ram ................. 9.4.12 Removing the rotary coupling for the cutterbar engagement ................................................... 9.4.13 Dismantling the rotary coupling for the cutterbar engagement ................................................... 9.4.13 Assembling the rotary coupling for the cutterbar engagement ................................................... 9.4.16 Installing the rotary coupling for the cutterbar engagement ................................................... 9.4.18 Removing the cutterbar engagement ram ..................... 9.4.19 Dismantling the cutterbar engagement ram .................. 9.4.20 Rotary coupling and hydraulic ram for the cutterbar engagement, exploded view .......................... 9.4.21 Assembling the cutterbar engagement ram .................. 9.4.22 Installing the cutterbar engagement ram ....................... 9.4.23
- 11. 0.1.10 RHB DOMINATOER 108 VX – 88 VX - 297 977.0 Contents Working hydraulics rams ........................................................ 9.5.1 Removing the cutterbar rams .......................................... 9.5.1 Dismantling the cutterbar rams ........................................ 9.5.2 Cutterbar ram, exploded view .......................................... 9.5.4 Assembling the cutterbar rams ........................................ 9.5.5 Installing the cutterbar rams ............................................ 9.5.6 Removing the grain tank unloading tube ram .................. 9.5.7 Dismantling the grain tank unloading tube ram ............... 9.5.7 Grain tank unloading tube ram, exploded view ................ 9.5.9 Assembling the grain tank unloading tube ram .............. 9.5.10 Installing the grain tank unloading tube ram .................. 9.5.12 Removing the CLAAS Auto-Contour hydraulic ram ................................................................. 9.5.13 Dismantling the CLAAS Auto-Contour hydraulic ram ................................................................. 9.5.13 Hydraulic ram for the CLAAS Auto-Contour, exploded view ................................................................ 9.5.15 Assembling the CLAAS Auto-Contour hydraulic ram ................................................................. 9.5.16 Installing the CLAAS Auto-Contour hydraulic ram ................................................................. 9.5.18 Bleeding the CLAAS Auto-Contour hydraulic ram ................................................................. 9.5.18 Removing the rotary coupling for the drum variable-speed drive ...................................................... 9.5.20 Dismantling the rotary coupling for the drum variable-speed drive ...................................................... 9.5.20 Assembling the rotary coupling for the drum variable-speed drive ...................................................... 9.5.23 Installing the rotary coupling for the drum variable-speed drive ...................................................... 9.5.25 Removing the hydraulic ram for the drum variable-speed drive ...................................................... 9.5.26 Dismantling the hydraulic ram for the drum variable-speed drive ...................................................... 9.5.26 Hydraulic ram / rotary coupling for the drum variable-speed drive, exploded view .............................. 9.5.27 Assembling the hydraulic ram for the drum variable-speed drive ...................................................... 9.5.28 Installing the hydraulic ram for the drum variable-speed drive ...................................................... 9.5.28 Valve combinations – low-pressure hydraulics ...................... 9.6.1 Removing the 3/2 way low-pressure solenoid valve ........ 9.6.1 Solenoid valve and pressure relief valve for the low-pressure hydraulics, exploded view .......................... 9.6.4 Installing the 3/2 way low-pressure solenoid valve .......... 9.6.5 Removing the pressure relief valve for the low-pressure hydraulics ................................................... 9.6.6 Installing the pressure relief valve for the low-pressure hydraulics ................................................... 9.6.7 Checking and adjusting the pressure relief valve for the low-pressure hydraulics .............................. 9.6.8 Valve combinations – working hydraulics .............................. 9.7.1 Removing the grain tank unloading tube lock valve ........ 9.7.1 Grain tank unloading tube lock valve, exploded view ...... 9.7.1 Installing the grain tank unloading tube lock valve .......... 9.7.1 Removing the CLAAS Auto-Contour lock valve ............... 9.7.2 CLAAS Auto-Contour lock valve, exploded view ............. 9.7.2 Installing the CLAAS Auto-Contour lock valve ................ 9.7.3 Removing the working hydraulics pressure relief valve ....................................................................... 9.7.3 Dismantling the working hydraulics pressure relief valve ........................................................ 9.7.4 Working hydraulics pressure relief valve, exploded view .................................................................. 9.7.5 Assembling the working hydraulics pressure relief valve ........................................................ 9.7.6 Installing the working hydraulics pressure relief valve ........................................................ 9.7.6 Testing and adjusting the working hydraulics pressure relief valve ........................................................ 9.7.7 Removing the working hydraulics valve block ....................................................................... 9.7.8 Installing the working hydraulics valve block ....................................................................... 9.7.9 Removing the 3/3 way control valve for the drum speed adjustment ................................................. 9.7.10 Dismantling the 3/3 way control valve for the drum speed adjustment ................................................. 9.7.10 3/3 way control valve for the drum speed adjustment, exploded view ............................................ 9.7.13 Assembling the 3/3 way control valve for the drum speed adjustment ................................................. 9.7.14 Installing the 3/3 way control valve for the drum speed adjustment ................................................. 9.7.15 Removing the 4/3 way solenoid valve for the reel fore and aft adjustment and the CLAAS Auto-Contour .................................................... 9.7.15 4/3 way solenoid valve for the reel fore and aft adjustment and CLAAS Auto-Contour, exploded view ................................................................ 9.7.16 Installing the 4/3 way solenoid valve for the reel fore and aft adjustment and CLAAS Auto-Contour .................................................... 9.7.17 Removing the rear working hydraulics valve block ..................................................................... 9.7.17 Installing the rear working hydraulics valve block ..................................................................... 9.7.19 Removing the 3/3 way solenoid valve for the reel raise / lower and cutterbar raise / lower ................. 9.7.20 Dismantling the 3/3 way solenoid valve for the reel raise / lower and cutterbar raise / lower ................. 9.7.20 3/3 way solenoid valve for the reel raise / lower and cutterbar raise / lower, exploded view .................... 9.7.24 Assembling the 3/3 way solenoid valve for the reel raise / lower and cutterbar raise / lower ................. 9.7.25 Installing the 3/3 way solenoid valve for the reel raise / lower and cutterbar raise / lower ................. 9.7.26 Removing the 4/3 way solenoid valve for swinging the grain tank unloading tube in and out ........ 9.7.26 4/3 way solenoid valve for swinging the grain tank unloading tube in and out, exploded view ............. 9.7.27 Installing the 4/3 way solenoid valve for swinging the grain tank unloading tube in and out ....................... 9.7.28
- 12. 297 977.0 - RHB DOMINATOER 108 VX – 88 VX 0.1.11 Contents Removing the flow control valve for the CLAAS Auto-Contour .................................................... 9.7.28 Flow control valve for the CLAAS Auto-Contour, exploded view ............................ 9.7.29 Installing the flow control valve for the CLAAS Auto-Contour .................................................... 9.7.29 Ground hydraulics .................................................................. 9.8.1 Removing the hydrostatic pump ...................................... 9.8.1 Installing the hydrostatic pump ........................................ 9.8.4 Adjusting the hydrostatic pump ....................................... 9.8.7 Removing the hydrostatic motor ...................................... 9.8.9 Installing the hydrostatic motor ...................................... 9.8.11 Bleeding the hydrostatic system .................................... 9.8.13 Bleeding the CLAAS 4-trac system ............................... 9.8.14 Measuring the high pressure / charge pressure / purge pressure .............................................................. 9.8.15 Hydraulic oil cooler ................................................................. 9.9.1 Removing the hydraulic oil cooler for the hydrostatic ground drive .................................................. 9.9.1 Installing the hydraulic oil cooler for the hydrostatic ground drive .................................................. 9.9.2 10. Engine Engine P.T.O. ...................................................................... 10.1.1 Removing the engine output shaft ................................. 10.1.1 Engine output, exploded view DOMINATOR 108 VX MERCEDES OM 366 LA ............................................... 10.1.9 Installing the engine output shaft DOMINATOR 108 VX MERCEDES OM 366 LA ............................................. 10.1.10 Engine output, exploded view DOMINATOR 98 VX MERCEDES OM 366 LA.............................................. 10.1.12 Installing the engine output shaft DOMINATOR 98 VX MERCEDES OM 366 LA ............................................. 10.1.13 Engine output, exploded view DOMINATOR 88 VX PERKINS 1006.6 T ...................................................... 10.1.15 Installing the engine output shaft DOMINATOR 88 VX PERKINS 1006.6 T ...................................................... 10.1.16 Installing the engine output pulley DOMINATOR 108 VX / 98 VX / 88 VX ........................ 10.1.18 Engine DOMINATOR 108 VX .............................................. 10.2.1 Removing the engine DOMINATOR 108 VX MERCEDES OM 366 LA ............................................... 10.2.1 Installing the engine DOMINATOR 108 VX MERCEDES OM 366 LA ............................................... 10.2.5 Engine DOMINATOR 98 VX ................................................ 10.3.1 Removing the engine DOMINATOR 98 VX MERCEDES OM 366 LA ............................................... 10.3.1 Installing the engine DOMINATOR 98 VX MERCEDES OM 366 LA ............................................... 10.3.5 Engine DOMINATOR 88 VX ............................................... 10.4.1 Removing the engine DOMINATOR 88 VX PERKINS 1006-60 TW .................................................. 10.4.1 Installing the engine DOMINATOR 88 VX PERKINS 1006-60 TW .................................................. 10.4.5 Engine accessories ............................................................. 10.5.1 Removing the rotary screen .......................................... 10.5.1 Rotary screen, exploded view ....................................... 10.5.2 Installing the rotary screen ............................................ 10.5.3 Removing the water cooler ........................................... 10.5.4 Cooling system, exploded view ................................... 10.5.11 Installing the water cooler ........................................... 10.5.12 Removing the fuel tank ............................................... 10.5.16 Fuel tank, exploded view ............................................. 10.5.18 Installing the fuel tank ................................................. 10.5.19 Bleeding the fuel system ............................................. 10.5.20 11. Index Index .................................................................................... 11.1.1
- 13. 297 977.0 - RHB DOMINATOER 108 VX – 88 VX 2.1.1 Hand brake HAND BRAKE Removing the hand brake rope Secure the machine so it will not roll away. With the hand brake released, remove cotter pin of pin (E) and remove it. Unscrew Bowden cable retarder (F). (Fig. 1) Remove the cab door. To do this, proceed as follows: – Pull the driver's seat fully to the front. – Unscrew the cover (A) on the left-hand side. – Unscrew the panels (B and C). – Remove passenger seat. To do this, unscrew cover (D). – Unscrew cover (L) and remove it. (Fig. 2, 3) – Loosen the two locks (V) and rotate by 90°. – Slightly swing the door (K) to the front and remove. (Fig. 4) 1 2 3 4 Hand brake
- 14. 2.1.2 RHB DOMINATOER 108 VX – 88 VX - 297 977.0 Hand brake Take out floor tray (M). Unscrew lid (N). (Fig. 5) Remove insulation (O). (Fig. 6) Set concave adjusting lever (P) fully to the bottom. Unscrew hexagon bolt (23). Watch out for washers (12) and the Belleville spring (13) which may fall out. (Fig. 7, 12) Unscrew yoke (4) together with the stop (3). Take out wear strip (11). Unscrew bracket (7). (Fig. 8, 12) 5 6 7 8
- 15. 297 977.0 - RHB DOMINATOER 108 VX – 88 VX 2.1.3 Hand brake Rear side of cab: Push bracket (R) off of rope. Pull end of rope (S) out of cab rear wall. (Fig. 9) Jack up machine at the front right-hand side. Remove front right-hand drive wheel. Unscrew clamps (T). (Fig. 10) Unscrew clamps (U). Remove rope. (Fig. 11) 9 10 11
- 16. 2.1.4 RHB DOMINATOER 108 VX – 88 VX - 297 977.0 Hand brake Hand brake, exploded view 1 Brake light switch 2 Hexagon nut M 12 x 1.5 DIN 936 3 Stop 4 Yoke 5 Rope 6 Seal 7 Bracket 8 Hexagon bolt M 6 x 12 DIN 933-8.8 9 Contact washer A 6 10 Hexagon nut M 10 DIN 934 11 Wear strip 12 Washer 13 Belleville spring B 28 DIN 2093 14 Lock nut VM 12 15 Hand lever 16 Button 17 O-ring 12 x 2 18 Compression spring 19 Rod 20 Locking pawl 21 Ratchet 22 Expansion pin 5 x 12a DIN 8752 23 Pin (Fig. 12) 12
- 17. 297 977.0 - RHB DOMINATOER 108 VX – 88 VX 2.1.5 Hand brake Installing the hand brake rope Screw the rope loosely to the machine frame using the clamps (U and T). (Fig. 13, 14) Guide end of rope (S) through the cab rear wall and clamp down with bracket (R). Tighten clamps (U and T). Install front right-hand drive wheel. (Fig. 13, 14, 15) Bolt the yoke (4) to the end of the rope together with the stop (3). Fasten yoke (4) along with the wear strip (11) to the hand lever (15). (Fig. 12, 16) 13 14 15 16
- 18. 2.1.6 RHB DOMINATOER 108 VX – 88 VX - 297 977.0 Hand brake Bolt down hand lever (15) to the support (25) using the hexagon bolt (23), washers (12) and Belleville spring (13). CAUTION! Only slight pressure is allowed on the Belleville spring (13) to allow easy movement of the hand lever (15). Bolt down the end of rope to the support (25) using the bracket (7). (Fig. 12, 17) Functional check: The indicator light (17) in the vehicle information unit must light up after the hand lever has been moved by one or two notches. This setting can be corrected at the stop (3) if required. (Fig. 12, 16, 17, 18) Bolt down the lid (N) with the insulation (O) located behind it. Insert floor tray (M). (Fig. 6, 19) 17 18 19
- 19. 297 977.0 - RHB DOMINATOER 108 VX – 88 VX 2.1.7 Hand brake Install cab door. – Insert door (K) and fasten using the locks (V). (Fig. 20) – Insert cover (L) and screw down. – Install passenger seat (if provided). – Screw down cover (D). – Screw down panels (B and C). – Screw down cover (A) at the left-hand side. (Fig. 21, 22) Bolt down the hand brake rope at the Bowden cable retarder (F). With the hand brake released, insert and secure the pin (E). Adjust the hand brake rope so at the yoke (G) that the hand brake becomes effective after the first 3 to 4 teeth. (Fig. 23) 20 21 22 23
- 20. 297 977.0 - RHB DOMINATOER 108 VX – 88 VX 2.2.1 Foot brake FOOT BRAKE Bleeding the brake system 1. Fill up the brake fluid container (A) on the operator's platform to maximum level. (Fig. 1) 2. Connect bleeding hose (B) with collecting container to the bleed valve (C). For drum brake (wheel brake cylinder) (Fig. 2) For disk brake (brake calliper) (Fig. 3) 1 2 3 Foot brake
- 21. 2.2.2 RHB DOMINATOER 108 VX – 88 VX - 297 977.0 Foot brake 3. Loosen bleed valve (C) and push the corres- ponding foot brake lever downwards. 4. Keep foot brake lever in the bottom position and close bleed valve (C). Release foot brake lever. Repeat this procedure as often as required to make brake liquid leave the bleed hose without any bubbles. CAUTION! Make sure there is enough brake liquid in the brake liquid container (A) on the operator's platform and in the collecting container. Use only ATE brake fluid according to SAE specification J 1703. 5. Perform a brake test. (Fig. 1, 2, 3)
- 22. 297 977.0 - RHB DOMINATOER 108 VX – 88 VX 2.2.3 Foot brake Removing the main brake cylinder Drain the brake liquid and collect it in a collecting container. Unscrew brake lines (A) from the main brake cylinder and plug them at both ends using plugs. Remove the safety of pin (B) and pull out pin. Unscrew hexagon bolts (C) and remove main brake cylinder. (Fig. 4) Installing the main brake cylinder Insert main brake cylinder and bolt down using two hexagon bolts (C). Adjust yoke (D) so that pin (B) can be easily pushed in with the brake pedals at rest. Maximum play = 0.5 mm Secure pin (B). Bleed brake system. (Fig. 4, 5) 4 5
- 23. 297 977.0 - RHB DOMINATOER 108 VX – 88 VX 2.3.1 Air conditioner AIR CONDITIONER Important information on compressor-type air conditioner DANGER! 1. Avoid any contact with refrigerants. Refrigerants may cause serious frostbites or injuries. 2. Always wear safety glasses when working on the air conditioner. 3. In case of eye or skin contact rinse with plenty of sterilized or drinking water immediately and consult a doctor. 4. Have maintenance and repair work be carried out by specialised refrigerating equipment workshops only. 5. Before dismantling the refrigerant circuit for main- tenance and repair purposes, the refrigerant must be sucked off using an approved and suitable recovery unit. 6. Never drain refrigerants to the atmosphere. 7. Refrigerant forms toxic or corrosive substances when reacting in direct contact with open flames or hot metal surfaces. 8. Never use compressed air or oxygen to perform a leak test of the air conditioner – danger of explosion! 9. Never clean the air conditioner with a hot water jet when filled – danger of explosion! Air conditioner
- 24. Thank you very much for your reading. Please Click Here. Then Get COMPLETE MANUAL. NO WAITING NOTE: If there is no response to click on the link above, please download the PDF document first and then click on it.
- 25. 2.3.2 RHB DOMINATOER 108 VX – 88 VX - 297 977.0 Air conditioner Important information on installing parts in the compressor-type air conditioner ATTENTION! 1. Keep refrigerant circuit absolutely free of dust and moisture. To this end, plug all removed connectors with suitable plugs. 2. Plugs of new parts should be removed only immediately before their installation. 3. O-rings shall always be replaced. 4. Before connecting a refrigerant line, apply some drops of refrigerant oil to the thread and the O-ring seat. 5. Always use two wrenches when tightening and / or loosening the refrigerant lines in order to avoid twisting of the lines.
- 26. 297 977.0 - RHB DOMINATOER 108 VX – 88 VX 2.3.3 Air conditioner Air conditioner – filling up refrigerant (Air conditioning compressor Sanden Sd 5 h 14) 1. Before evacuating, check if the filter drier must be replaced. Checking the filter drier: An indicator bead is provided at the control orifice (E). Blue colour = Filter drier ok Pink colour = Replace filter drier In addition to this, the filter drier must be replaced after a major leak, e.g. a broken line, has occurred in the refrigerant circuit. 2. Before filling up, the air conditioner must be evacuated and a leak test must be carried out. 3. Filling up refrigerant: Fill up refrigerant at the air conditioning compres- sor connections (D, delivery side and S, suction side). ATTENTION! Liquid must absolutely not be filled in at connection (S)! Use only refrigerant R134a. The required quantity is approx. 1550 g (comply with the manufacturer's instructions). 4. Check the refrigerant level at the control orifice (E) of the filter drier, using the white float ball: When the white float is at the bottom = lack of refrigerant When the white float is at the top = refrigerant level ok CAUTION! The correct refrigerant level should be checked immediately after the functional test of the system. During extended periods of standstill of the system, the liquid level may fall below the control orifice despite the correct refrigerant quantity being filled in. (Fig. 1, 2) 1 2
- 27. 2.3.4 RHB DOMINATOER 108 VX – 88 VX - 297 977.0 Air conditioner Checking / filling up refrigerant oil at the air conditioning compressor (Air conditioning compressor Sanden Sd 5 h 14) NOTE: The oil level at the compressor must be checked when a new air conditioning compressor or a newly sealed air conditioning compressor is installed. 1. Start diesel engine and let it run at lower idle speed. 2. Start air conditioning compressor and let run for 10 minutes. Shut down diesel engine. 3. Suck off refrigerant at the connections (D, delivery side and S, suction side) of the air conditioning compressor. Proceed very slowly in order to avoid any refrigerant oil being sucked off as well (comply with the manufacturer's instructions). 4. Unscrew dust cap (A) and screw out oil filler plug (B). 5. Remove air conditioning compressor if necessary. 6. Rotate air conditioning compressor to a horizontal position. 7. Rotate the counterweight (C) to the position shown and insert oil level dipstick, Part No. 181 788.0 (or self-manufactured). While doing so, the 30° angle of the oil level dipstick must make contact with the compressor body. X = 105 mm W = 30° Y = 3 mm (distance between marks) 8. The oil level must reach notch 15 (from the bottom) of the oil level dipstick. Refill refrigerant oil (SANDEN SP 20) if necessary. 9. Screw in oil filler plug (B) with a new O-ring and tighten with a tightening torque of 20 Nm. Put on dust cap (A) and screw in hexagon bolts using liquid screw fastener, e.g. DELO-ML-5349. 10. Fill up air conditioner refrigerant. (Fig. 3, 4, 5) 3 4 5