This document is a repair manual that provides instructions and specifications for repairing CX75SR and CX80 equipment. It includes sections on distribution systems, power production, travelling, body and structure, frame positioning, working arm, tools and couplers. The introduction provides general instructions on cleaning, inspection, bearings, gears, gaskets, shafts and lubrication. It also provides specific torque specifications for tightening nuts and bolts on both the CX75SR and CX80 models.
PERKINS 1106C-E70TA AND 1106D-E70TA INDUSTRIAL ENGINE (Model PV)Service Repai...jknmms ekdms
This is the Highly Detailed factory service repair manual for thePERKINS 1106C-E70TA AND 1106D-E70TA INDUSTRIAL ENGINE (MODEL PV), this Service Manual has detailed illustrations as well as step by step instructions,It is 100 percents complete and intact. they are specifically written for the do-it-yourself-er as well as the experienced mechanic.PERKINS 1106C-E70TA AND 1106D-E70TA INDUSTRIAL ENGINE (MODEL PV) Service Repair Workshop Manual provides step-by-step instructions based on the complete dis-assembly of the machine. It is this level of detail, along with hundreds of photos and illustrations, that guide the reader through each service and repair procedure. Complete download comes in pdf format which can work under all PC based windows operating system and Mac also, All pages are printable. Using this repair manual is an inexpensive way to keep your vehicle working properly.
Service Repair Manual Covers:
File Format: PDF
Compatible: All Versions of Windows & Mac
Language: English
Requirements: Adobe PDF Reader
NO waiting, Buy from responsible seller and get INSTANT DOWNLOAD, Without wasting your hard-owned money on uncertainty or surprise! All pages are is great to havePERKINS 1106C-E70TA AND 1106D-E70TA INDUSTRIAL ENGINE (MODEL PV) Service Repair Workshop Manual.
Looking for some other Service Repair Manual,please check:
https://www.aservicemanualpdf.com/
Thanks for visiting!
8
Liebherr A 934 C Litronic Hydraulic Excavator Service Repair Manual SN:31793 ...jksemd jksemm
This is the Highly Detailed factory service repair manual for theLIEBHERR A 934 C LITRONIC HYDRAULIC EXCAVATOR, this Service Manual has detailed illustrations as well as step by step instructions,It is 100 percents complete and intact. they are specifically written for the do-it-yourself-er as well as the experienced mechanic.LIEBHERR A 934 C LITRONIC HYDRAULIC EXCAVATOR Service Repair Workshop Manual provides step-by-step instructions based on the complete dis-assembly of the machine. It is this level of detail, along with hundreds of photos and illustrations, that guide the reader through each service and repair procedure. Complete download comes in pdf format which can work under all PC based windows operating system and Mac also, All pages are printable. Using this repair manual is an inexpensive way to keep your vehicle working properly.
Service Repair Manual Covers:
General Information
Tools
Technical Data / Maintenance Guidelines
Engine
Clutch / Splitterbox
Hydraulic System
Hydraulic Components
Electrical System
Swing Gear
Swing Ring
Two Speed Gear Box
Axles / Gear Box
Steering
Oscillating Axle Stabilizer
Brake System
Special Attachments / Accessory Kits
Cab Heater / Air Conditioning System
Undercarriage / Uppercarriage / Attachments
File Format: PDF
Compatible: All Versions of Windows & Mac
Language: English
Requirements: Adobe PDF Reader
NO waiting, Buy from responsible seller and get INSTANT DOWNLOAD, Without wasting your hard-owned money on uncertainty or surprise! All pages are is great to haveLIEBHERR A 934 C LITRONIC HYDRAULIC EXCAVATOR Service Repair Workshop Manual.
Looking for some other Service Repair Manual,please check:
https://www.aservicemanualpdf.com/
Thanks for visiting!
PERKINS 2200 SERIES 2206D-E13TA INDUSTRIAL ENGINE Service Repair Manualjsnekmse
This is the Highly Detailed factory service repair manual for thePERKINS 2200 SERIES 2206D-E13TA INDUSTRIAL ENGINE , this Service Manual has detailed illustrations as well as step by step instructions,It is 100 percents complete and intact. they are specifically written for the do-it-yourself-er as well as the experienced mechanic.PERKINS 2200 SERIES 2206D-E13TA INDUSTRIAL ENGINE Service Repair Workshop Manual provides step-by-step instructions based on the complete dis-assembly of the machine. It is this level of detail, along with hundreds of photos and illustrations, that guide the reader through each service and repair procedure. Complete download comes in pdf format which can work under all PC based windows operating system and Mac also, All pages are printable. Using this repair manual is an inexpensive way to keep your vehicle working properly.
Operation and Maintenance Manual Cover:
Safety Section
Product Information Section
Operation Section
Maintenance Section
Warranty Section
Index Section
Engine Schematic
Systems Operation Testing and Adjusting Cover:
Systems Operation Section
Testing and Adjusting Section
Fuel System
Air Inlet and Exhaust System
Lubrication System
Cooling System
Basic Engine
Electrical System
Index Section
Troubleshooting Manual Cover:
Introduction
Electronic System Overview
Configuration Parameters
Diagnostic Trouble Codes
Event Codes
Symptom Troubleshooting
Circuit Tests
Service
Index Section
File Format: PDF
Compatible: All Versions of Windows & Mac
Language: English
Requirements: Adobe PDF Reader
NO waiting, Buy from responsible seller and get INSTANT DOWNLOAD, Without wasting your hard-owned money on uncertainty or surprise! All pages are is great to havePERKINS 2200 SERIES 2206D-E13TA INDUSTRIAL ENGINE Service Repair Workshop Manual.
Looking for some other Service Repair Manual,please check:
https://www.aservicemanualpdf.com/
Thanks for visiting!
8
This is the user manual of Autel AL619.
>> READ MORE: https://www.obdadvisor.com/autel-al619/
Here is a detailed review of the scan tool based on my own experience, including:
- Compatibility
- Features and Functions
- Pros and Cons
Check it out to get the REVIEW and some NOTES about using the scanner.
CASE CX225SR CRAWLER EXCAVATOR Service Repair Manualhksemd yjekmd
This is the Highly Detailed factory service repair manual for theCASE CX225SR CRAWLER EXCAVATOR, this Service Manual has detailed illustrations as well as step by step instructions,It is 100 percents complete and intact. they are specifically written for the do-it-yourself-er as well as the experienced mechanic.CASE CX225SR CRAWLER EXCAVATOR Service Repair Workshop Manual provides step-by-step instructions based on the complete dis-assembly of the machine. It is this level of detail, along with hundreds of photos and illustrations, that guide the reader through each service and repair procedure. Complete download comes in pdf format which can work under all PC based windows operating system and Mac also, All pages are printable. Using this repair manual is an inexpensive way to keep your vehicle working properly.
Service Repair Manual Covers:
Introduction
Distribution Systems
Power Production
Travelling
Body and Structure
Frame Positioning
Working Arm
Tools and Couplers
Hydraulic Electrical Schematic
File Format: PDF
Compatible: All Versions of Windows & Mac
Language: English
Requirements: Adobe PDF Reader
NO waiting, Buy from responsible seller and get INSTANT DOWNLOAD, Without wasting your hard-owned money on uncertainty or surprise! All pages are is great to haveCASE CX225SR CRAWLER EXCAVATOR Service Repair Workshop Manual.
Looking for some other Service Repair Manual,please check:
https://www.aservicemanualpdf.com/
Thanks for visiting!
CASE CX225SR CRAWLER EXCAVATOR Service Repair Manualkmsekmd eukdm
This is the Highly Detailed factory service repair manual for theCASE CX225SR CRAWLER EXCAVATOR, this Service Manual has detailed illustrations as well as step by step instructions,It is 100 percents complete and intact. they are specifically written for the do-it-yourself-er as well as the experienced mechanic.CASE CX225SR CRAWLER EXCAVATOR Service Repair Workshop Manual provides step-by-step instructions based on the complete dis-assembly of the machine. It is this level of detail, along with hundreds of photos and illustrations, that guide the reader through each service and repair procedure. Complete download comes in pdf format which can work under all PC based windows operating system and Mac also, All pages are printable. Using this repair manual is an inexpensive way to keep your vehicle working properly.
Service Repair Manual Covers:
Introduction
Distribution Systems
Power Production
Travelling
Body and Structure
Frame Positioning
Working Arm
Tools and Couplers
Hydraulic Electrical Schematic
File Format: PDF
Compatible: All Versions of Windows & Mac
Language: English
Requirements: Adobe PDF Reader
NO waiting, Buy from responsible seller and get INSTANT DOWNLOAD, Without wasting your hard-owned money on uncertainty or surprise! All pages are is great to haveCASE CX225SR CRAWLER EXCAVATOR Service Repair Workshop Manual.
Looking for some other Service Repair Manual,please check:
https://www.aservicemanualpdf.com/
Thanks for visiting!
8
CASE CX135SR CRAWLER EXCAVATOR Service Repair Manualhjskekdmm
This is the Highly Detailed factory service repair manual for theCASE CX135SR CRAWLER EXCAVATOR, this Service Manual has detailed illustrations as well as step by step instructions,It is 100 percents complete and intact. they are specifically written for the do-it-yourself-er as well as the experienced mechanic.CASE CX135SR CRAWLER EXCAVATOR Service Repair Workshop Manual provides step-by-step instructions based on the complete dis-assembly of the machine. It is this level of detail, along with hundreds of photos and illustrations, that guide the reader through each service and repair procedure. Complete download comes in pdf format which can work under all PC based windows operating system and Mac also, All pages are printable. Using this repair manual is an inexpensive way to keep your vehicle working properly.
Service Repair Manual Covers:
Introduction
Distribution Systems
Power Production
Travelling
Body and Structure
Frame Positioning
Working Arm
Tools and Couplers
Hydraulic Electrical Schematic
File Format: PDF
Compatible: All Versions of Windows & Mac
Language: English
Requirements: Adobe PDF Reader
NO waiting, Buy from responsible seller and get INSTANT DOWNLOAD, Without wasting your hard-owned money on uncertainty or surprise! All pages are is great to haveCASE CX135SR CRAWLER EXCAVATOR Service Repair Workshop Manual.
Looking for some other Service Repair Manual,please check:
https://www.aservicemanualpdf.com/
Thanks for visiting!
8
Toyota 42-6FGCU20 Forklift Service Repair Manualjksemd jksemm
This is the Highly Detailed factory service repair manual for theTOYOTA 42-6FGCU20 FORKLIFT, this Service Manual has detailed illustrations as well as step by step instructions,It is 100 percents complete and intact. they are specifically written for the do-it-yourself-er as well as the experienced mechanic.TOYOTA 42-6FGCU20 FORKLIFT Service Repair Workshop Manual provides step-by-step instructions based on the complete dis-assembly of the machine. It is this level of detail, along with hundreds of photos and illustrations, that guide the reader through each service and repair procedure. Complete download comes in pdf format which can work under all PC based windows operating system and Mac also, All pages are printable. Using this repair manual is an inexpensive way to keep your vehicle working properly.
Service Repair Manual Covers:
Foreword
Section Index
General
Engine
Torque Converter
Differential
Front Axle
Rear Axle
Steering
Brake
Body
Material Handling System
Mast
Cylinder
Oil Pump
Oil Control Valve
Appendix
Wire Diagrams
File Format: PDF
Compatible: All Versions of Windows & Mac
Language: English
Requirements: Adobe PDF Reader
NO waiting, Buy from responsible seller and get INSTANT DOWNLOAD, Without wasting your hard-owned money on uncertainty or surprise! All pages are is great to haveTOYOTA 42-6FGCU20 FORKLIFT Service Repair Workshop Manual.
Looking for some other Service Repair Manual,please check:
https://www.aservicemanualpdf.com/
Thanks for visiting!
Toyota 7BNCU20 Forklift Service Repair Manual SN:50001 and upjksemd jksemm
This is the Highly Detailed factory service repair manual for theTOYOTA 7BNCU20 FORKLIFT, this Service Manual has detailed illustrations as well as step by step instructions,It is 100 percents complete and intact. they are specifically written for the do-it-yourself-er as well as the experienced mechanic.TOYOTA 7BNCU20 FORKLIFT Service Repair Workshop Manual provides step-by-step instructions based on the complete dis-assembly of the machine. It is this level of detail, along with hundreds of photos and illustrations, that guide the reader through each service and repair procedure. Complete download comes in pdf format which can work under all PC based windows operating system and Mac also, All pages are printable. Using this repair manual is an inexpensive way to keep your vehicle working properly.
Service Repair Manual Covers:
How to use this manual
Safety
Systems Overview
Planned Maintenance
Troubleshooting
Message, Codes, and Tests
Component Procedures
Theory of Operation
Appendix
Index
Wire Diagram
File Format: PDF
Compatible: All Versions of Windows & Mac
Language: English
Requirements: Adobe PDF Reader
NO waiting, Buy from responsible seller and get INSTANT DOWNLOAD, Without wasting your hard-owned money on uncertainty or surprise! All pages are is great to haveTOYOTA 7BNCU20 FORKLIFT Service Repair Workshop Manual.
Looking for some other Service Repair Manual,please check:
https://www.aservicemanualpdf.com/
Thanks for visiting!
MITSUBISHI FG50CN FORKLIFT TRUCKS Service Repair Manual SN: EF25D-80001-UPjksemd jksemm
This is the Highly Detailed factory service repair manual for theMITSUBISHI FG50CN FORKLIFT TRUCKS, this Service Manual has detailed illustrations as well as step by step instructions,It is 100 percents complete and intact. they are specifically written for the do-it-yourself-er as well as the experienced mechanic.MITSUBISHI FG50CN FORKLIFT TRUCKS Service Repair Workshop Manual provides step-by-step instructions based on the complete dis-assembly of the machine. It is this level of detail, along with hundreds of photos and illustrations, that guide the reader through each service and repair procedure. Complete download comes in pdf format which can work under all PC based windows operating system and Mac also, All pages are printable. Using this repair manual is an inexpensive way to keep your vehicle working properly.
Service Repair Manual Covers:
Chassis and Mast: Foreword
Chassis and Mast: General Information
Chassis and Mast: Cooling System
Chassis and Mast: Electrical System
Chassis and Mast: Electrical Schematics
Chassis and Mast: Controllers
Chassis and Mast: Power Train
Chassis and Mast: Power shift Transmission
Chassis and Mast: Front Axle and Reduction Differential
Chassis and Mast: Rear Axle
Chassis and Mast: Brake System
Chassis and Mast: Steering System
Chassis and Mast: Hydraulic System
Chassis and Mast: Mast and Forks
Chassis and Mast: Service Data
Engine: TB45 Gasoline: Foreword
Engine: TB45 Gasoline: General Information
Engine: TB45 Gasoline: Tune Up
Engine: TB45 Gasoline: Mechanical
Engine: TB45 Gasoline: Lubrication
Engine: TB45 Gasoline: Cooling System
Engine: TB45 Gasoline: Control
Engine: TB45 Gasoline: Fuel System
Engine: TB45 Gasoline: Electrical System
File Format: PDF
Compatible: All Versions of Windows & Mac
Language: English
Requirements: Adobe PDF Reader
NO waiting, Buy from responsible seller and get INSTANT DOWNLOAD, Without wasting your hard-owned money on uncertainty or surprise! All pages are is great to haveMITSUBISHI FG50CN FORKLIFT TRUCKS Service Repair Workshop Manual.
Looking for some other Service Repair Manual,please check:
https://www.aservicemanualpdf.com/
Thanks for visiting!
MITSUBISHI FG15ZN FORKLIFT TRUCKS Service Repair Manual SN:F34-50011-UPjksemd jksemm
This is the Highly Detailed factory service repair manual for theMITSUBISHI FG15ZN FORKLIFT TRUCKS, this Service Manual has detailed illustrations as well as step by step instructions,It is 100 percents complete and intact. they are specifically written for the do-it-yourself-er as well as the experienced mechanic.MITSUBISHI FG15ZN FORKLIFT TRUCKS Service Repair Workshop Manual provides step-by-step instructions based on the complete dis-assembly of the machine. It is this level of detail, along with hundreds of photos and illustrations, that guide the reader through each service and repair procedure. Complete download comes in pdf format which can work under all PC based windows operating system and Mac also, All pages are printable. Using this repair manual is an inexpensive way to keep your vehicle working properly.
Service Repair Manual Covers:
Chassis and Mast: Foreword
Chassis and Mast: General Information
Chassis and Mast: Cooling System
Chassis and Mast: Electrical System
Chassis and Mast: Electrical Schematics
Chassis and Mast: Controllers
Chassis and Mast: Power Train
Chassis and Mast: Clutches
Chassis and Mast: Manual Transmission
Chassis and Mast: Power shift Transmission
Chassis and Mast: Front Axle and Reduction Differential
Chassis and Mast: Rear Axle
Chassis and Mast: Brake System
Chassis and Mast: Steering System
Chassis and Mast: Hydraulic System
Chassis and Mast: Mast and Forks
Chassis and Mast: Service Data
Engine: K15, K21, K25 Gasoline: Foreword
Engine: K15, K21, K25 Gasoline: General Information
Engine: K15, K21, K25 Gasoline: Maintenance
Engine: K15, K21, K25 Gasoline: Tune Up
Engine: K15, K21, K25 Gasoline: Mechanical
Engine: K15, K21, K25 Gasoline: Control
Engine: K15, K21, K25 Gasoline: Lubrication and Cooling
Engine: K15, K21, K25 Gasoline: Fuel
Engine: K15, K21, K25 Gasoline: Electrical
File Format: PDF
Compatible: All Versions of Windows & Mac
Language: English
Requirements: Adobe PDF Reader
NO waiting, Buy from responsible seller and get INSTANT DOWNLOAD, Without wasting your hard-owned money on uncertainty or surprise! All pages are is great to haveMITSUBISHI FG15ZN FORKLIFT TRUCKS Service Repair Workshop Manual.
Looking for some other Service Repair Manual,please check:
https://www.aservicemanualpdf.com/
Thanks for visiting!
Liebherr R914 Litronic Crawler Excavator Service Repair Manualjksemd jksemm
This is the Highly Detailed factory service repair manual for theLIEBHERR R914 LITRONIC CRAWLER EXCAVATOR, this Service Manual has detailed illustrations as well as step by step instructions,It is 100 percents complete and intact. they are specifically written for the do-it-yourself-er as well as the experienced mechanic.LIEBHERR R914 LITRONIC CRAWLER EXCAVATOR Service Repair Workshop Manual provides step-by-step instructions based on the complete dis-assembly of the machine. It is this level of detail, along with hundreds of photos and illustrations, that guide the reader through each service and repair procedure. Complete download comes in pdf format which can work under all PC based windows operating system and Mac also, All pages are printable. Using this repair manual is an inexpensive way to keep your vehicle working properly.
Service Repair Manual Covers:
General Information
Tools
Technical Data / Maintenance Guidelines
Engine
Coupling / Splitterbox
Hydraulic Sytem
Hydraulic Components
Electrical System
Swing Gear
Swing Ring
Travel Gear / Two Speed Gear Box
Track Components / Axles
Special Attachments / Additional Hydraulic Installations
Cab Heater / Air Conditioning System
Undercarriage / Uppercarriage Attachments
File Format: PDF
Compatible: All Versions of Windows & Mac
Language: English
Requirements: Adobe PDF Reader
NO waiting, Buy from responsible seller and get INSTANT DOWNLOAD, Without wasting your hard-owned money on uncertainty or surprise! All pages are is great to haveLIEBHERR R914 LITRONIC CRAWLER EXCAVATOR Service Repair Workshop Manual.
Looking for some other Service Repair Manual,please check:
https://www.aservicemanualpdf.com/
Thanks for visiting!
Liebherr A312 Litronic Wheel Excavator Service Repair Manual SN:12363 and upjksemd jksemm
This is the Highly Detailed factory service repair manual for theLIEBHERR A312 LITRONIC WHEEL EXCAVATOR, this Service Manual has detailed illustrations as well as step by step instructions,It is 100 percents complete and intact. they are specifically written for the do-it-yourself-er as well as the experienced mechanic.LIEBHERR A312 LITRONIC WHEEL EXCAVATOR Service Repair Workshop Manual provides step-by-step instructions based on the complete dis-assembly of the machine. It is this level of detail, along with hundreds of photos and illustrations, that guide the reader through each service and repair procedure. Complete download comes in pdf format which can work under all PC based windows operating system and Mac also, All pages are printable. Using this repair manual is an inexpensive way to keep your vehicle working properly.
Service Repair Manual Covers:
General
Tools
Technical Data / Maintenance Instructions
Drive Motor
Coupling / Pump Distribution Gear
Hydraulic System
Hydraulic Components
Electrical System
Slewing Gear Mechanism
Slewing Ring
Transmission
Axles
Steering
Oscillating Axle Support
Brake System
Special Equipment / Accessory Kits
Operator’s Cab / Heating and Air-Conditioning
Undercarriage / Uppercarriage / Attachments
Tank Arrangement
File Format: PDF
Compatible: All Versions of Windows & Mac
Language: English
Requirements: Adobe PDF Reader
NO waiting, Buy from responsible seller and get INSTANT DOWNLOAD, Without wasting your hard-owned money on uncertainty or surprise! All pages are is great to haveLIEBHERR A312 LITRONIC WHEEL EXCAVATOR Service Repair Workshop Manual.
Looking for some other Service Repair Manual,please check:
https://www.aservicemanualpdf.com/
Thanks for visiting!
JOHN DEERE 4520 TRACTOR Service Repair Manualjksemd jksemm
This is the Highly Detailed factory service repair manual for theJOHN DEERE 4520 TRACTOR, this Service Manual has detailed illustrations as well as step by step instructions,It is 100 percents complete and intact. they are specifically written for the do-it-yourself-er as well as the experienced mechanic.JOHN DEERE 4520 TRACTOR Service Repair Workshop Manual provides step-by-step instructions based on the complete dis-assembly of the machine. It is this level of detail, along with hundreds of photos and illustrations, that guide the reader through each service and repair procedure. Complete download comes in pdf format which can work under all PC based windows operating system and Mac also, All pages are printable. Using this repair manual is an inexpensive way to keep your vehicle working properly.
Service Repair Manual Covers:
General
Engine
Fuel System
Electrical System
Power Train
Steering and Brakes
Hydraulic System
Miscellaneous
File Format: PDF
Compatible: All Versions of Windows & Mac
Language: English
Requirements: Adobe PDF Reader
NO waiting, Buy from responsible seller and get INSTANT DOWNLOAD, Without wasting your hard-owned money on uncertainty or surprise! All pages are is great to haveJOHN DEERE 4520 TRACTOR Service Repair Workshop Manual.
Looking for some other Service Repair Manual,please check:
https://www.aservicemanualpdf.com/
Thanks for visiting!
This is the Highly Detailed factory service repair manual for theCATERPILLAR CAT EC55N FORKLIFT LIFT TRUCKS, this Service Manual has detailed illustrations as well as step by step instructions,It is 100 percents complete and intact. they are specifically written for the do-it-yourself-er as well as the experienced mechanic.CATERPILLAR CAT EC55N FORKLIFT LIFT TRUCKS Service Repair Workshop Manual provides step-by-step instructions based on the complete dis-assembly of the machine. It is this level of detail, along with hundreds of photos and illustrations, that guide the reader through each service and repair procedure. Complete download comes in pdf format which can work under all PC based windows operating system and Mac also, All pages are printable. Using this repair manual is an inexpensive way to keep your vehicle working properly.
Service Repair Manual Covers:
Chassis and Mast: General Information
Chassis and Mast: Front Axle and Reduction Differential
Chassis and Mast: Transfer Assembly
Chassis and Mast: Brake System
Chassis and Mast: Steering System
Chassis and Mast: Hydraulic System
Chassis and Mast: Mast and Forks
Chassis and Mast: Service Data
GE SX Controls: Foreword
GE SX Controls: General Information and Features
GE SX Controls: Programming
GE SX Controls: Checks and Repairs
GE SX Controls: SX Control Connections and Troubleshooting by Symptom
GE SX Controls: Electrical
GE SX Controls: SX Diagnostic Status Codes
GE SX Controls: Schematics
File Format: PDF
Compatible: All Versions of Windows & Mac
Language: English
Requirements: Adobe PDF Reader
NO waiting, Buy from responsible seller and get INSTANT DOWNLOAD, Without wasting your hard-owned money on uncertainty or surprise! All pages are is great to haveCATERPILLAR CAT EC55N FORKLIFT LIFT TRUCKS Service Repair Workshop Manual.
Looking for some other Service Repair Manual,please check:
https://www.aservicemanualpdf.com/
Thanks for visiting!
2011 INFINITI QX56 Service Repair Manualjksemd jksemm
This is the Highly Detailed factory service repair manual for the2011 INFINITI QX56, this Service Manual has detailed illustrations as well as step by step instructions,It is 100 percents complete and intact. they are specifically written for the do-it-yourself-er as well as the experienced mechanic.2011 INFINITI QX56 Service Repair Workshop Manual provides step-by-step instructions based on the complete dis-assembly of the machine. It is this level of detail, along with hundreds of photos and illustrations, that guide the reader through each service and repair procedure. Complete download comes in pdf format which can work under all PC based windows operating system and Mac also, All pages are printable. Using this repair manual is an inexpensive way to keep your vehicle working properly.
Service Repair Manual Covers:
General Information
Engine Mechanical
Engine Lubrication System
Engine Cooling System
Engine Control System
Fuel System
Exhaust System
Starting System
Accelerator Control System
Transaxle & Transmission
Driveline
Front Axle
Rear Axle
Front Suspension
Rear Suspension
Suspension Control System
Road Wheels & Tires
Brake System
Parking Brake System
Brake Control System
Steering System
Steering Control System
Seat Belt
Seat Belt Control System
SRS Airbag
SRS Airbag Control System
Ventilation System
Heater & Air Conditioning System
Heater & Air Conditioning Control System
Interior
Instrument Panel
Seat
Automatic Drive Positioner
Door & Lock
Security Control System
Glass & Window System
Power Window Control System
Roof
Exterior
Body Repair
Mirrors
Exterior Lighting System
Interior Lighting System
Wiper & Washer
Defogger
Horn
Power Outlet
Body Control System
LAN System
Power Control System
Charging System
Power Supply, Ground & Circuit Elements
Meter, Warning Lamp & Indicator
Warning Chime System
Audio, Visual & Navigation System
Cruise Control System
Driver Assistance System
Maintenance
File Format: PDF
Compatible: All Versions of Windows & Mac
Language: English
Requirements: Adobe PDF Reader
NO waiting, Buy from responsible seller and get INSTANT DOWNLOAD, Without wasting your hard-owned money on uncertainty or surprise! All pages are is great to have2011 INFINITI QX56 Service Repair Workshop Manual.
Looking for some other Service Repair Manual,please check:
https://www.aservicemanualpdf.com/
Thanks for visiting!
2010 YAMAHA F300CA 4-STROKE OUTBOARD Service Repair Manual SN:1000001 and upjksemd jksemm
This is the Highly Detailed factory service repair manual for the2010 YAMAHA F300CA 4-STROKE OUTBOARD, this Service Manual has detailed illustrations as well as step by step instructions,It is 100 percents complete and intact. they are specifically written for the do-it-yourself-er as well as the experienced mechanic.2010 YAMAHA F300CA 4-STROKE OUTBOARD Service Repair Workshop Manual provides step-by-step instructions based on the complete dis-assembly of the machine. It is this level of detail, along with hundreds of photos and illustrations, that guide the reader through each service and repair procedure. Complete download comes in pdf format which can work under all PC based windows operating system and Mac also, All pages are printable. Using this repair manual is an inexpensive way to keep your vehicle working properly.
Service Repair Manual Covers:
General Information
Specification
Technical Feature and Description
Rigging Information
Troubleshooting
Electrical System
Fuel System
Power Unit
Lower Unit
Bracket Unit
Maintenance
Index
Appendix
File Format: PDF
Compatible: All Versions of Windows & Mac
Language: English
Requirements: Adobe PDF Reader
NO waiting, Buy from responsible seller and get INSTANT DOWNLOAD, Without wasting your hard-owned money on uncertainty or surprise! All pages are is great to have2010 YAMAHA F300CA 4-STROKE OUTBOARD Service Repair Workshop Manual.
Looking for some other Service Repair Manual,please check:
https://www.aservicemanualpdf.com/
Thanks for visiting!
2009 SATURN OUTLOOK Service Repair Manualjksemd jksemm
This is the Highly Detailed factory service repair manual for the2009 SATURN OUTLOOK, this Service Manual has detailed illustrations as well as step by step instructions,It is 100 percents complete and intact. they are specifically written for the do-it-yourself-er as well as the experienced mechanic.2009 SATURN OUTLOOK Service Repair Workshop Manual provides step-by-step instructions based on the complete dis-assembly of the machine. It is this level of detail, along with hundreds of photos and illustrations, that guide the reader through each service and repair procedure. Complete download comes in pdf format which can work under all PC based windows operating system and Mac also, All pages are printable. Using this repair manual is an inexpensive way to keep your vehicle working properly.
Service Repair Manual Covers:
Maintenance
Engine
Control System
Mechanical
Fuel Service Specifications
Emission Control
Intake Exhaust Cooling
Lube
Ignition Starting Charging
Auto Transmission Clutch
Manual Transmission
Transfer Propeller Shaft
Drive Shaft
Differential
Axle Suspension
Tire & Wheel
Brake Control
Brake
Parking Brake
Steering Column
Power Steering
Air Condition
Suppl Restraint System
Seat Belt
Engine Immobilizer
Cruise Control
Wiper & Washer
Door Lock
Meter Audio/Visual
Horn
Windshield/Glass Mirror
Instrument Panel
Seat
Engine Hood/ Door
Exterior & Interior
Electrical
Multiplex/ Can Communication
And much more
File Format: PDF
Compatible: All Versions of Windows & Mac
Language: English
Requirements: Adobe PDF Reader
NO waiting, Buy from responsible seller and get INSTANT DOWNLOAD, Without wasting your hard-owned money on uncertainty or surprise! All pages are is great to have2009 SATURN OUTLOOK Service Repair Workshop Manual.
Looking for some other Service Repair Manual,please check:
https://www.aservicemanualpdf.com/
Thanks for visiting!
2009 POLARIS RANGER 4X4 500 EFI Service Repair Manualjksemd jksemm
This is the Highly Detailed factory service repair manual for the2009 POLARIS RANGER 4X4 500 EFI, this Service Manual has detailed illustrations as well as step by step instructions,It is 100 percents complete and intact. they are specifically written for the do-it-yourself-er as well as the experienced mechanic.2009 POLARIS RANGER 4X4 500 EFI Service Repair Workshop Manual provides step-by-step instructions based on the complete dis-assembly of the machine. It is this level of detail, along with hundreds of photos and illustrations, that guide the reader through each service and repair procedure. Complete download comes in pdf format which can work under all PC based windows operating system and Mac also, All pages are printable. Using this repair manual is an inexpensive way to keep your vehicle working properly.
Service Repair Manual Covers:
General Information
Maintenance
Engine
Electronic Fuel Injection
Body / Steering / Suspension
Clutching
Final Drive
Transmission
Brakes
Electrical
Wire Diagram
File Format: PDF
Compatible: All Versions of Windows & Mac
Language: English
Requirements: Adobe PDF Reader
NO waiting, Buy from responsible seller and get INSTANT DOWNLOAD, Without wasting your hard-owned money on uncertainty or surprise! All pages are is great to have2009 POLARIS RANGER 4X4 500 EFI Service Repair Workshop Manual.
Looking for some other Service Repair Manual,please check:
https://www.aservicemanualpdf.com/
Thanks for visiting!
1986 HARLEY DAVIDSON SOFTAIL Service Repair Manualjksemd jksemm
This is the Highly Detailed factory service repair manual for the1986 HARLEY DAVIDSON SOFTAIL, this Service Manual has detailed illustrations as well as step by step instructions,It is 100 percents complete and intact. they are specifically written for the do-it-yourself-er as well as the experienced mechanic.1986 HARLEY DAVIDSON SOFTAIL Service Repair Workshop Manual provides step-by-step instructions based on the complete dis-assembly of the machine. It is this level of detail, along with hundreds of photos and illustrations, that guide the reader through each service and repair procedure. Complete download comes in pdf format which can work under all PC based windows operating system and Mac also, All pages are printable. Using this repair manual is an inexpensive way to keep your vehicle working properly.
Service Repair Manual Covers:
General Information
Troubleshooting
Periodic Lubrication, Maintenance & Tune-up
Engine
Clutch, Primary Drive & Starter Drive
4-Speed Transmission
5-Speed Transmission
Fuel, Exhaust & Emission Control Systems
Electrical System
Wheels, Hubs & Tires
Front Suspension & Steering(Models with Telescopic Front Forks)
Springer Front Fork
Rear Suspension
Brakes
Frame, Body & Frame Repainting
Supplement
Index
File Format: PDF
Compatible: All Versions of Windows & Mac
Language: English
Requirements: Adobe PDF Reader
NO waiting, Buy from responsible seller and get INSTANT DOWNLOAD, Without wasting your hard-owned money on uncertainty or surprise! All pages are is great to have1986 HARLEY DAVIDSON SOFTAIL Service Repair Workshop Manual.
Looking for some other Service Repair Manual,please check:
https://www.aservicemanualpdf.com/
Thanks for visiting!
1974 JOHNSON EVINRUDE OUTBOARD 25 Hp Service Repair Manualjksemd jksemm
This is the Highly Detailed factory service repair manual for the1974 JOHNSON EVINRUDE OUTBOARD 25 HP, this Service Manual has detailed illustrations as well as step by step instructions,It is 100 percents complete and intact. they are specifically written for the do-it-yourself-er as well as the experienced mechanic.1974 JOHNSON EVINRUDE OUTBOARD 25 HP Service Repair Workshop Manual provides step-by-step instructions based on the complete dis-assembly of the machine. It is this level of detail, along with hundreds of photos and illustrations, that guide the reader through each service and repair procedure. Complete download comes in pdf format which can work under all PC based windows operating system and Mac also, All pages are printable. Using this repair manual is an inexpensive way to keep your vehicle working properly.
Service Repair Manual Covers:
General Information
Lubrication, Maintenance & Tune Up
Troubleshooting
Fuel System
Electrical System
Engine Repair & Overhaul
Lower Unit
Manual Starter
Electric Motors
Supplement: 1976-1978 Service Information
Index
File Format: PDF
Compatible: All Versions of Windows & Mac
Language: English
Requirements: Adobe PDF Reader
NO waiting, Buy from responsible seller and get INSTANT DOWNLOAD, Without wasting your hard-owned money on uncertainty or surprise! All pages are is great to have1974 JOHNSON EVINRUDE OUTBOARD 25 HP Service Repair Workshop Manual.
Looking for some other Service Repair Manual,please check:
https://www.aservicemanualpdf.com/
Thanks for visiting!
What Does the Active Steering Malfunction Warning Mean for Your BMWTanner Motors
Discover the reasons why your BMW’s Active Steering malfunction warning might come on. From electrical glitches to mechanical failures and software anomalies, addressing these promptly with professional inspection and maintenance ensures continued safety and performance on the road, maintaining the integrity of your driving experience.
𝘼𝙣𝙩𝙞𝙦𝙪𝙚 𝙋𝙡𝙖𝙨𝙩𝙞𝙘 𝙏𝙧𝙖𝙙𝙚𝙧𝙨 𝙞𝙨 𝙫𝙚𝙧𝙮 𝙛𝙖𝙢𝙤𝙪𝙨 𝙛𝙤𝙧 𝙢𝙖𝙣𝙪𝙛𝙖𝙘𝙩𝙪𝙧𝙞𝙣𝙜 𝙩𝙝𝙚𝙞𝙧 𝙥𝙧𝙤𝙙𝙪𝙘𝙩𝙨. 𝙒𝙚 𝙝𝙖𝙫𝙚 𝙖𝙡𝙡 𝙩𝙝𝙚 𝙥𝙡𝙖𝙨𝙩𝙞𝙘 𝙜𝙧𝙖𝙣𝙪𝙡𝙚𝙨 𝙪𝙨𝙚𝙙 𝙞𝙣 𝙖𝙪𝙩𝙤𝙢𝙤𝙩𝙞𝙫𝙚 𝙖𝙣𝙙 𝙖𝙪𝙩𝙤 𝙥𝙖𝙧𝙩𝙨 𝙖𝙣𝙙 𝙖𝙡𝙡 𝙩𝙝𝙚 𝙛𝙖𝙢𝙤𝙪𝙨 𝙘𝙤𝙢𝙥𝙖𝙣𝙞𝙚𝙨 𝙗𝙪𝙮 𝙩𝙝𝙚 𝙜𝙧𝙖𝙣𝙪𝙡𝙚𝙨 𝙛𝙧𝙤𝙢 𝙪𝙨.
Over the 10 years, we have gained a strong foothold in the market due to our range's high quality, competitive prices, and time-lined delivery schedules.
What Exactly Is The Common Rail Direct Injection System & How Does It WorkMotor Cars International
Learn about Common Rail Direct Injection (CRDi) - the revolutionary technology that has made diesel engines more efficient. Explore its workings, advantages like enhanced fuel efficiency and increased power output, along with drawbacks such as complexity and higher initial cost. Compare CRDi with traditional diesel engines and discover why it's the preferred choice for modern engines.
"Trans Failsafe Prog" on your BMW X5 indicates potential transmission issues requiring immediate action. This safety feature activates in response to abnormalities like low fluid levels, leaks, faulty sensors, electrical or mechanical failures, and overheating.
Core technology of Hyundai Motor Group's EV platform 'E-GMP'Hyundai Motor Group
What’s the force behind Hyundai Motor Group's EV performance and quality?
Maximized driving performance and quick charging time through high-density battery pack and fast charging technology and applicable to various vehicle types!
Discover more about Hyundai Motor Group’s EV platform ‘E-GMP’!
In this presentation, we have discussed a very important feature of BMW X5 cars… the Comfort Access. Things that can significantly limit its functionality. And things that you can try to restore the functionality of such a convenient feature of your vehicle.
What Does the PARKTRONIC Inoperative, See Owner's Manual Message Mean for You...Autohaus Service and Sales
Learn what "PARKTRONIC Inoperative, See Owner's Manual" means for your Mercedes-Benz. This message indicates a malfunction in the parking assistance system, potentially due to sensor issues or electrical faults. Prompt attention is crucial to ensure safety and functionality. Follow steps outlined for diagnosis and repair in the owner's manual.
Symptoms like intermittent starting and key recognition errors signal potential problems with your Mercedes’ EIS. Use diagnostic steps like error code checks and spare key tests. Professional diagnosis and solutions like EIS replacement ensure safe driving. Consult a qualified technician for accurate diagnosis and repair.
Why Is Your BMW X3 Hood Not Responding To Release CommandsDart Auto
Experiencing difficulty opening your BMW X3's hood? This guide explores potential issues like mechanical obstruction, hood release mechanism failure, electrical problems, and emergency release malfunctions. Troubleshooting tips include basic checks, clearing obstructions, applying pressure, and using the emergency release.
Things to remember while upgrading the brakes of your carjennifermiller8137
Upgrading the brakes of your car? Keep these things in mind before doing so. Additionally, start using an OBD 2 GPS tracker so that you never miss a vehicle maintenance appointment. On top of this, a car GPS tracker will also let you master good driving habits that will let you increase the operational life of your car’s brakes.
5 Warning Signs Your BMW's Intelligent Battery Sensor Needs AttentionBertini's German Motors
IBS monitors and manages your BMW’s battery performance. If it malfunctions, you will have to deal with an array of electrical issues in your vehicle. Recognize warning signs like dimming headlights, frequent battery replacements, and electrical malfunctions to address potential IBS issues promptly.
Comprehensive program for Agricultural Finance, the Automotive Sector, and Empowerment . We will define the full scope and provide a detailed two-week plan for identifying strategic partners in each area within Limpopo, including target areas.:
1. Agricultural : Supporting Primary and Secondary Agriculture
• Scope: Provide support solutions to enhance agricultural productivity and sustainability.
• Target Areas: Polokwane, Tzaneen, Thohoyandou, Makhado, and Giyani.
2. Automotive Sector: Partnerships with Mechanics and Panel Beater Shops
• Scope: Develop collaborations with automotive service providers to improve service quality and business operations.
• Target Areas: Polokwane, Lephalale, Mokopane, Phalaborwa, and Bela-Bela.
3. Empowerment : Focusing on Women Empowerment
• Scope: Provide business support support and training to women-owned businesses, promoting economic inclusion.
• Target Areas: Polokwane, Thohoyandou, Musina, Burgersfort, and Louis Trichardt.
We will also prioritize Industrial Economic Zone areas and their priorities.
Sign up on https://profilesmes.online/welcome/
To be eligible:
1. You must have a registered business and operate in Limpopo
2. Generate revenue
3. Sectors : Agriculture ( primary and secondary) and Automative
Women and Youth are encouraged to apply even if you don't fall in those sectors.
5. INTRODUCTION
Foreword ( - A.10.A.40)
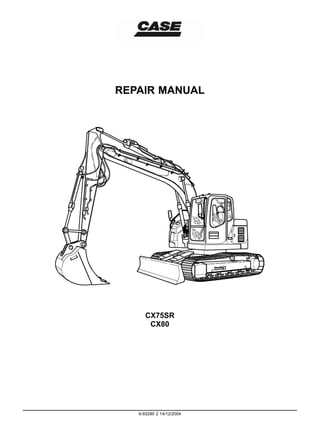
CX75SR, CX80
INTRODUCTION TO THE REPAIR MANUAL
This manual has been designed so that in the near future it can be made available on CD and in a database
via a computer network.
This will allow fast and targeted search and navigation between the various information modules.
Information search
CRIL03J033E01 1
This manual is organised according to types of function and information.
• The function and information types are codied and appear in parentheses after the title and separated by a dash:
(1) Function
(2) Information type.
• Only the rst letter (A) and the rst number (B) of the function need to be used for the information search.
The rst letter (A) corresponds to the sections of the repair manual.
The rst number (B) corresponds to the chapters of the repair manual.
The rst part of the (A.B) code is reected in the page numbering.
THE REST OF THE CODING IS NOT LISTED IN ALPHA-NUMERIC ORDER IN THIS MANUAL.
• You will nd a table of contents at the beginning and end of each section and chapter.
You will nd an alphabetical index at the end of each chapter.
• Therefore it is the rst part of the (A.B) coding, then the tables of contents and index (page numbers) which will allow you to
quickly nd the information you are looking for.
9-93290 2 14/12/2004
3
6. INTRODUCTION
Safety rules ( - A.50.A.10)
CX75SR, CX80
CAUTION
M171C - THIS SAFETY ALERT SYMBOL INDICATES IMPORTANT SAFETY MESSAGES IN THIS MANUAL.
WHEN YOU SEE THIS SYMBOL, CAREFULLY READ THE MESSAGE THAT FOLLOWS AND BE ALERT TO
THE POSSIBILITY OF DEATH OR SERIOUS INJURY.
ATTENTION: To avoid injury, always observe the Safety Notices, CAUTION and ATTENTION, contained in this
section and throughout the manual.
Place a “Do not start the machine” warning notice on the starter switch key before all maintenance or repair
operations.
CAUTION
M489 - Read the operators manual to familiarize yourself with the correct control functions.
CAUTION
M490 - Operate the machine and equipment controls from the seat position only. Any other method could
result in serious injury.
CAUTION
M265A - A frequent cause of personal injury or death is persons falling off and being run over. Do not
permit anyone to ride on the machine.
CAUTION
SB055 - Before starting engine, study operators manual safety messages. Read all safety signs on machine.
Clear the area of other persons. Learn and practice safe use of controls before operation. It is your
responsibility to understand and follow manufacturers instructions on machine operation, service, and to
observe pertinent laws and regulation. Operators and service manuals can be obtained from your dealer.
ATTENTION: You risk injury if you wear loose clothing or if you do not use safety equipment for your work. Always
wear clothes which are unlikely to become caught in the machinery. Other safety equipment may be required, in
particular: hard hat, safety boots, ear protectors, safety goggles or mask, thick gloves and reective clothing.
CAUTION
M124A - Rotating machine parts, stay clear, keep shields installed to help protect from clothing
entanglement and injury. Wear close-tted clothing.
CAUTION
SB071 - Rotating fan and belts: Contact will cause injury. Keep clear.
ATTENTION: Follow the procedures exactly when carrying out checks or inspections on the vehicle’s hydraulic
systems. DO NOT CHANGE the procedures.
ATTENTION: Before running the hydraulic cylinders in this vehicle through the cycles necessary for checking their
functioning or for draining a circuit, warn people nearby to move away.
9-93290 2 14/12/2004
4
7. INTRODUCTION
CAUTION
SM121A - Always wear heat protective gloves to prevent burning your hands when handling heated parts.
CAUTION
M132B - Lower or block elevated implements and other attachments before servicing or when leaving the
equipment.
CAUTION
R149C - Hydraulic oil or diesel fuel leaking under pressure can penetrate the skin and cause infection
or other injury. To Prevent Personal Injury: Relieve all pressure, before disconnecting uid lines or
performing work on the hydraulic system. Before applying pressure, make sure all connections are tight
and components are in good condition. Never use your hand to check for suspected leaks under pressure.
Use a piece of cardboard or wood for this purpose. If injured by leaking uid, see your doctor immediately.
ATTENTION: To remove a hardened pin, such as a pivot pin, or a hardened shaft, use a soft-headed hammer
(brass or bronze) or a brass or bronze peg and a steel-headed hammer.
CAUTION
M428 - Always wear safety glasses when using a drill, hammer, saw, or other tools that may cause chips
to y.
ATTENTION: Use suitable servicing jacks or a chain hoist for raising the wheels or tracks. Always chock the
vehicle in place with suitable safety supports.
ATTENTION: When carrying out maintenance or repair operations on the vehicle, keep the workshop oor, the
driving position and the steps free from oil, water, grease, tools, etc... Use an oil absorbent material and/or workshop
cloths as necessary. Always use sound methods.
ATTENTION: Some parts of this vehicle are very heavy. Use lifting devices or additional assistance recommended
in the Operator’s Manual.
CAUTION
M532 - Do not operate the engine in a closed building. Proper ventilation is required under all circumstances.
CAUTION
M503 - When the battery electrolyte is frozen, the battery can explode if (1), you try to charge the battery, or
(2), you try to jump start and run the engine. To prevent the battery electrolyte from freezing, try to keep the
battery at full charge. If you do not follow these instructions, you or others in the area can be injured.
CAUTION
M244A - BATTERIES CONTAIN ACID AND EXPLOSIVE GAS. EXPLOSION CAN RESULT FROM SPARKS,
FLAMES, OR WRONG CABLE CONNECTIONS. TO CONNECT JUMPER CABLES OR CHARGER, SEE
MANUAL(S) FOR THE CORRECT PROCEDURE. FAILURE TO FOLLOW THE ABOVE INSTRUCTIONS CAN
CAUSE SERIOUS PERSONAL INJURY OR DEATH.
9-93290 2 14/12/2004
5
8. INTRODUCTION
Basic instructions ( - A.90.A.05)
CX75SR, CX80
GENERAL
Cleaning
Clean all metal parts except the bearings with white spirit or steam. Do not use caustic soda for steam cleaning.
After each cleaning, dry and oil all parts. Clean the oil ducts with compressed air. Clean the bearings with parafn,
then dry them completely and lubricate them.
Inspection
Check all the parts when they are disassembled. Replace all parts that show signs of wear or damage. Supercial
scratches and grooves can be removed with an oil stone or with a cloth dipped in red oxide. A complete visual
inspection is necessary to detect wear and pitting, and replacing parts as soon as it becomes necessary will help to
avoid premature breakdowns.
Bearings
Check that the bearings turn freely. Replace them if their adjustment is too free or if their functioning is irregular.
Wash the bearings with a good solvent or parafn and allow them to air dry.
DO NOT DRY THE BEARINGS WITH COMPRESSED AIR.
Needle bearings
Before pushing needle bearings into a cylinder bore, always remove all metallic projections from the bore and its
edges. Before pushing in bearings with a press, coat the inside and edges of the bearings with Vaseline.
Gears
Check all the gears and ensure that they do not show any signs of wear or damage. Replace the worn out
or damaged gears.
Gaskets, O-rings and at seals
Always install new gaskets, O-rings, and at seals. Coat the gaskets and O-rings with Vaseline.
Shaft
Check all shafts showing wear or damage. Enusre that the surface of a shaft carrying a bearing or gasket is
not damaged.
Spare parts
Always use CASE spare parts. To order these, refer to the Spare Parts Catalogue and indicate the correct reference
number of the CASE spare parts.
Breakdowns caused by the use of parts other than CASE spare parts are not covered by the warranty.
Lubrication
Use only the oils and lubricants specied in the Operator’s Manual or the Service Manual.
Breakdowns caused by the use of oils and lubricants not specically listed are not covered by the warranty.
9-93290 2 14/12/2004
6
9. INTRODUCTION
Torque ( - A.90.A.10)
CX75SR
Order of tightening nuts and cap screws.
Tighten alternately so that torque setting remains even.
Cap screws which are tted with Loctite (look for traces of a white residue on the thread after removal), must be
cleaned with a thin oil or a suitable solvent, then dried.
Add two or three drops of Loctite to the cap screw thread, then t the screw.
CRIL03H012E01 1
The numbers in the diagrams represent the order of tightening.
Tightening torque
Where there are no special instructions, tighten cap nuts screws to the torques given in the table below.
Standard torque setting table.
Designation of cap screws
(dimensions)
M6 M8 M10 M12 M14 M16 M18 M20
Wrench in mm 10 13 17 19 22 24 27 30Cap screw
Torque setting in
Nm
6,9 19,6 39,2 58,8 98,1 157,2 196 274
Wrench in mm 5 6 8 10 12 14 14 17Socket head
screw Torque setting in
Nm
8,8 21,6 42,1 78,4 117,6 176,4 245 343
SPECIAL TORQUE SETTINGS
No. Component Screw
diameter
Wrench
in mm
Tightening torque
(1)* Travel moto-reduction gear M16 24 267 - 312 Nm
(2)* Sprocket M14 22 173 - 202 Nm
(3)* Idler wheel M10 17 63 - 73 Nm
(4)* Upper roller M16 24 267 - 312 Nm
(5)* Lower roller M20 30 521 - 608 Nm
(6) Track pad M14 22 220 - 270 Nm
(7) Counterweight M24 36 850 - 992 Nm
(8) Turntable bearing (chassis and upperstructure) M16 24 252 - 283 Nm
(9)* Swing moto-reduction gear M16 24 267 - 312 Nm
(10)* Engine M16 24 265 - 313 Nm
(11)* Engine mounts M10 17 64 - 74 Nm
(12) Radiator M12 19 36 - 44 Nm
(13)* Hydraulic pump M10 17 64 - 74 Nm
(14)* Hydraulic pump support M12 Hex 109 - 126 Nm
(15)* Hydraulic reservoir M12 19 69 - 78 Nm
(16)* Fuel tank M10 17 36 - 44 Nm
9-93290 2 14/12/2004
7
10. INTRODUCTION
No. Component Screw
diameter
Wrench
in mm
Tightening torque
(17)* Control valve M12 19 53 - 64 Nm
(18)* Hydraulic swivel M10 17 63 - 73 Nm
(19) Cab M16 24 78 - 80 Nm
Use Loctite 262 or an equivalent on mounting screws marked with an asterisk (*).
CRIL03H14G01 2
9-93290 2 14/12/2004
8
12. INTRODUCTION
Torque ( - A.90.A.10)
CX80
Order of tightening nuts and cap screws.
Tighten alternately so that torque setting remains even.
Cap screws which are tted with Loctite (look for traces of a white residue on the thread after removal), must be
cleaned with a thin oil or a suitable solvent, then dried.
Add two or three drops of Loctite to the cap screw thread, then t the screw.
CRIL03H012E01 1
The numbers in the diagrams represent the order of tightening.
Tightening torque
Where there are no special instructions, tighten cap nuts screws to the torques given in the table below.
Standard torque setting table.
Designation of cap screws
(dimensions)
M6 M8 M10 M12 M14 M16 M18 M20
Wrench in mm 10 13 17 19 22 24 27 30Cap screw
Torque setting in
Nm
6,9 19,6 39,2 58,8 98,1 157,2 196 274
Wrench in mm 5 6 8 10 12 14 14 17Socket head
screw Torque setting in
Nm
8,8 21,6 42,1 78,4 117,6 176,4 245 343
SPECIAL TORQUE SETTINGS
No. Component Screw
diameter
Wrench
in mm
Tightening torque
(1)* Travel moto-reduction gear M16 24 267 - 312 Nm
(2)* Sprocket M14 22 173 - 202 Nm
(3)* Idler wheel M10 17 63 - 73 Nm
(4)* Upper roller M16 24 267 - 312 Nm
(5)* Lower roller M20 30 521 - 608 Nm
(6) Track pad M14 22 220 - 270 Nm
(7) Counterweight M24 36 850 - 992 Nm
(8) Turntable bearing (chassis and upperstructure) M16 24 252 - 283 Nm
(9)* Swing moto-reduction gear M16 24 267 - 312 Nm
(10)* Engine M16 24 265 - 313 Nm
(11)* Engine mounts M10 17 64 - 74 Nm
(12) Radiator M12 19 36 - 44 Nm
(13)* Hydraulic pump M10 17 64 - 74 Nm
(14)* Hydraulic pump support M12 Hex 109 - 126 Nm
(15)* Hydraulic reservoir M12 19 107.9 Nm
(16)* Fuel tank M12 19 107.9 Nm
9-93290 2 14/12/2004
10
13. INTRODUCTION
No. Component Screw
diameter
Wrench
in mm
Tightening torque
(17)* Control valve M12 19 53 - 64 Nm
(18)* Hydraulic swivel M10 17 63 - 73 Nm
(19) Cab M16 24 78 - 80 Nm
Use Loctite 262 or an equivalent on mounting screws marked with an asterisk (*).
CRIL04F009G01c 2
9-93290 2 14/12/2004
11
15. INTRODUCTION
Dimension ( - A.92.A.30)
CX75SR
Machine tted with monoblock boom + dozer blade
CRIL03G042G01 1
Monobloc boom + dozer blade
1,71m dipper
(A) 2.69 m (G) 1.21 m (M) 0.36 m
(B) 2.70 m (H) 2.84 m (N) 4.49 m
(C) 5.915 m (I) 2.21 m (P) 1.16 m
(D) 1.42 m (J) 1.87 m (Q) 1.06 m
(E) 2.22 m (K) 0.45 m (R) 2.32 m
(F) 0.74 m (L) 2.32 m (S) 0.45 m
2.12 m dipper
(A) 2.95 m (G) 1.21 m (M) 0.36 m
(B) 2.70 m (H) 2.84 m (N) 4.485 m
(C) 5.910 m (I) 2.21 m (P) 1.16 m
9-93290 2 14/12/2004
13
16. INTRODUCTION
(D) 1.42 m (J) 1.87 m (Q) 1.06 m
(E) 2.22 m (K) 0.45 m (R) 2.32 m
(F) 0.74 m (L) 2.32 m (S) 0.45 m
Machine tted with offset backhoe boom + dozer blade
CRIL03G043G01 2
Offset backhoe boom + dozer blade
1.75 m dipper
(A) 2.97 m (H) 2.84 m (P) 1.16 m
(B) 2.70 m (I) 2.21 m (Q) 1.06 m
(C) 5.97 m (J) 1.87 m (R) 2.32 m
(D) 1.42 m (K) 0.45 m (S) 0.45 m
(E) 2.22 m (L) 2.32 m (T) 1 m
(F) 0.74 m (M) 0.36 m (U) 1.1 m
(G) 1.21 m (N) 4.54 m (V) 0.18 m
9-93290 2 14/12/2004
14
17. INTRODUCTION
Dimension ( - A.92.A.30)
CX80
Machine tted with monobloc boom 3,50 m + dozer blade
CRIL04E060G01 1
Monobloc boom + dozer blade
1.70 m dipper
(A) 2.33 m (G) 1.63 m (M) 0.36 m
(B) 2.70 m (H) 2.85 m (N) 5 m
(C) 6.425 m (I) 2.21 m (P) 1.16 m
(D) 1.425 m (J) 1.87 m (Q) 1.065 m
(E) 2.225 m (K) 0.45 m (R) 2.32 m
(F) 0.745 m (L) 2.32 m (S) 0 m
2.10 m dipper
(A) 2.65 m (G) 1.63 m (M) 0.36 m
(B) 2.70 m (H) 2.85 m (N) 5.09 m
(C) 6.510 m (I) 2.21 m (P) 1.16 m
9-93290 2 14/12/2004
15
18. INTRODUCTION
(D) 1.425 m (J) 1.87 m (Q) 1.065 m
(E) 2.225 m (K) 0.45 m (R) 2.32 m
(F) 0.745 m (L) 2.32 m (S) 0.45 m
1.75 m dipper
(A) 2.97 m (H) 2.84 m (P) 1.16 m
(B) 2.70 m (I) 2.21 m (Q) 1.06 m
(C) 5.97 m (J) 1.87 m (R) 2.32 m
(D) 1.42 m (K) 0.45 m (S) 0.45 m
(E) 2.22 m (L) 2.32 m (T) 1 m
(F) 0.74 m (M) 0.36 m (U) 1.1 m
(G) 1.21 m (N) 4.54 m (V) 0.18 m
9-93290 2 14/12/2004
16
19. INTRODUCTION
Weight ( - A.92.A.40)
CX75SR
Weight of components
Mono boom
dozer blade
Offset
backhoe boom
dozer blade
Engine 260 kg
Hydraulic pump 54 kg
Attachment control valve 88 kg
Swing motor and reduction gear assembly 80 kg
Travel motor and reduction gear assembly 81 kg
Boom cylinder 103 kg
Dipper cylinder 78 kg
Bucket cylinder 51 kg
Dozer blade cylinder 34 kg
Offset backhoe dipper cylinder 81 kg
Offset backhoe boom cylinder 41 kg
Counterweight 1210 kg
Cab kg
Turntable 92 kg
Upperstructure assembly 4780 kg 5190 kg
Hydraulic swivel 40 kg
Undercarriage assembly 2790 kg
Machine without attachment 6500 kg
Attachment 1090 kg 1490 kg
Boom assembly 620 kg 1020 kg
Dipper assembly 260 kg
Dozer blade 330 kg
Radiator and oil-cooler assembly 25,5 kg
Fuel tank 11 kg
Hydraulic reservoir 54 kg
Idler wheel 44 kg
Upper roller 4 kg
Lower roller 14 kg
Tension shock absorber 37 kg
Track 450 mm 425 kg
Track 600 mm 502 kg
9-93290 2 14/12/2004
17
20. INTRODUCTION
Weight ( - A.92.A.40)
CX80
Weight of components
Mono boom dozer blade
Engine 260 kg
Hydraulic pump 51 kg
Attachment control valve 88 kg
Swing moto-reduction gear 80 kg
Travel moto-reduction gear 81 kg
Boom cylinder 103 kg
Dipper cylinder 78 kg
Bucket cylinder 51 kg
Dozer blade cylinder 34 kg
Offset cylinder 56 kg
Counterweight 1220 kg
Cab XXX kg
Turntable 92 kg
Upperstructure assembly 4430 kg
Hydraulic swivel 40 kg
Undercarriage assembly 2790 kg
Machine without equipment 6900 kg
Attachment 1390 kg
Boom assembly 1060 kg
Dipper assembly 260 kg
Dozer blade 330 kg
Radiator and oil-cooler assembly 35 kg
Fuel tank 47.3 kg
Hydraulic reservoir 54.2 kg
Idler wheel 45 kg
Upper roller 4 kg
Lower roller 14 kg
Tension shock absorber 37 kg
Track 450 mm 425 kg
Track 600 mm 502 kg
9-93290 2 14/12/2004
18
21. INTRODUCTION
Consumables ( - A.92.A.55)
CX75SR, CX80
FLUIDS AND LUBRICANTS
Lubricants must have the correct properties for each application.
ATTENTION: You must respect the operating conditions for the different ingredients.
Hydraulic uid
CASE AKCELA hydraulic uid is specially designed for high pressure applications and for the CASE hydraulic
system.
The type of uid to be used depends on the ambient temperature.
• TEMPERATE COUNTRIES - 20 °C to + 40 °C
CASE AKCELA HYDRAULIC EXCAVATOR FLUID
(MS 1230. ISO VG 46. DIN 51524 PART 2 HV)
• HOT COUNTRIES 0 °C to + 60 °C
CASE AKCELA HYDRAULIC EXCAVATOR FLUID "HOT CLIMATE"
(MS 1230. ISO VG 100. DIN 51524 PART 2 HV)
• COLD COUNTRIES - 40 °C to + 20 °C
CASE AKCELA HYDRAULIC EXCAVATOR FLUID "COLD CLIMATE"
(MS 1230. ISO VG 22. DIN 51524 PART 2 HV)
• BIODEGRADABLE FLUID - 30 - +40 °C
This yellow uid can be mixed with standard uid.
If this liquid is used, it is advisable to completely drain the hydraulic circuit .
CASE AKCELA HYDRAULIC EXCAVATORS FLUID BIO
(MS 1230. ISO VG 46. DIN 51524 PART 2 HV)
Transmission component oil
Extreme pressure oil used in transmission components inside sealed housings.
CASE AKCELA 135H EP GEAR LUBE SAE 80W-90
(SAE 80W-90. API GL 5. MIL-L-2105 D. MS 1316. ZF TE-ML 05A)
Grease
"Extreme Pressure" multi-purpose grease
• CASE AKCELA MOLY GREASE 241H EP-M (251H EP-M NLGI2)
with lithium and molybdenum bisulphide soap.
• CASE AKCELA 251H EP MULTI-PURPOSE GREASE (251H EP. NLGI 2)
with lithium and calcium soap.
• CASE AKCELA PREMIUM GREASE EP-2 (NLGI 2)
with lithium soap.
HYDRAULIC HAMMERS
Use only CASE AKCELA PREMIUM GREASE EP-2 (NLGI 2) grease with lithium soap.
Engine oil
CASE AKCELA NO. 1 ENGINE OIL is recommended for the engine.
This oil provides correct lubrication for your engine in all working conditions.
If CASE AKCELA NO. 1 ENGINE OIL Multigrade cannot be obtained, use oil corresponding to one of the following
categories: ACEA E5. MS 1121. API CH-4.
9-93290 2 14/12/2004
19
22. INTRODUCTION
CRIL03H015F01 1
OIL USE RANGE
1. Mineral-based
2. Semi-synthetic based
3. Synthetic based
Fuel
Use fuel that is compliant with ASTM (American Society for Testing and Materials) standard D975.
• Use Grade No 2 fuel. The use of other types of fuel can result in a loss of power and may cause high fuel
consumption.
• When the temperature is very cold, the use of a mixture of No 1 and No 2 fuel is permitted. See your fuel
vendor for winter fuel requirements in your area.
• If the temperature falls below the fuel cloud point (point at which wax begins to form) the wax crystals will
cause power loss or will prevent the engine from starting.
IMPORTANT: In cold weather, ll the fuel tank at the end of the day’s work to prevent condensation from forming.
FUEL STORAGE
Long storage can lead to the accumulation of impurities and condensation in the fuel tank. Engine trouble can
often be traced to the presence of water in the fuel.
The storage tank must be placed outside and the temperature of the fuel should be kept as low as possible.
Drain off water and impurities regularly.
Anti-freeze/Anti-corrosion
Use anti-freeze in all seasons to protect the cooling system from corrosion and all risk of freezing.
CASE AKCELA PREMIUM ANTI-FREEZE LRD -25°C
For environments with temperatures falling to - 25 °C, do not mix with water.
CASE AKCELA PREMIUM ANTI-FREEZE (MS 1710)
For environments with temperatures falling to - 38 °C, use with water in a proportion of 50/50.
IMPORTANT: Do not mix products of a different origin or a different make.
The system must be topped up with the same product.
9-93290 2 14/12/2004
20
23. INTRODUCTION
Environment
Before carrying out any servicing operation on this machine and before disposing of used uids or lubricants, always
think of the environment. Never throw uid or oil on the ground and never keep them in leaking receptacles.
Contact your local ecological recycling centre for information on appropriate ways to dispose of these substances.
Components made from plastic or resin
When cleaning plastic parts, (the console, the instrument panel, the indicators etc...) avoid using petrol, parafn,
paint solvents etc.
Use only water, soap and a soft cloth. The use of petrol, parafn, paint solvents, etc, will cause discoloration,
cracking or deformation of these components.
9-93290 2 14/12/2004
21
24. INTRODUCTION
Hydraulic contamination ( - A.92.A.60)
CX75SR, CX80
CLEANING THE HYDRAULIC SYSTEM
General
Contamination of the hydraulic system is a major cause of incorrect operation of hydraulic components.
Contamination is indicated by the presence of foreign particles in the hydraulic uid.
Contamination of the hydraulic system can occur in any of the following situations:
1. When draining the uid or disconnecting a hydraulic line.
2. When disassembling a component.
3. Due to normal component wear.
4. Due to damaged or worn seals.
5. Due to a damaged component in the hydraulic system.
All hydraulic systems can function even if they are slightly contaminated. The components of the hydraulic system
are designed to support slight contamination. Any increase in the degree of contamination can cause serious
problems in the hydraulic system.
The following is an incomplete list of these problems:
1. The cylinder rod seals leak.
2. Control valve spools do not return to the neutral position.
3. Control valve spools do not move easily.
4. Hydraulic uid is too hot.
5. Hydraulic components wear quickly.
6. Safety valves or check valves do not close due to contamination.
7. Repaired components break down soon.
8. Cycles are slow; the machine does not have enough power.
If any of the above situations occurs, it is an indication of excessive contamination of the hydraulic system.
To eliminate contamination, effectively, refer to PRIMARY HYDRAULIC POWER SYSTEM - Decontaminating
(A.10.A - F.30.A.60).
Types of contamination
Contamination exists basically in two forms: microscopic or visible.
We speak of microscopic contamination when very small particles of foreign bodies are in suspension in the
hydraulic uid. These particles are too small to be seen or felt. Microscopic contamination can be detected by
identifying the problems relating to microscopic contamination or by laboratory tests.
The following are a few examples of problems caused by microscopic contamination:
• The cylinder rod seals leak.
• Control valve spools do not return to the neutral position.
• The operating temperature of the hydraulic system is too high.
• Components wear quickly.
We speak of visible contamination when the presence of foreign bodies can be detected visually, by touch or by
smell. Visible contamination can cause the sudden failure of a component.
The following are a few examples of problems caused by visible contamination:
9-93290 2 14/12/2004
22
25. INTRODUCTION
• The uid contains metal or other fragments.
• The uid contains air. The uid is dark and thick.
• There is a smell of burning in the uid. The uid contains water.
9-93290 2 14/12/2004
23
26. INTRODUCTION
Product identication ( - A.80.A.10)
CX75SR WE, CX80 WE
NOTE: For all parts orders, requests for information or assistance, always specify the type and the serial number of
the machine to your CASE dealer.
Fill out the following lines with the required information: type, year of manufacture, serial number of the machine
(manufacturer’s plate), make, type and serial number of the engine and serial numbers of hydraulic components.
Manufacturer’s plate
CRIL04F001E01 1
(1)TYPE (2)YEAR OF MANUFACTURE (3)SERIAL NUMBER
Engine
MAKE TYPE SERIAL NUMBER
Serial numbers of hydraulic components
COMPONENTS SERIAL NUMBER
Hydraulic pump
Swing reduction gear
Travel reduction gear
Travel control valve
Attachment control valve
Swing control valve
9-93290 2 14/12/2004
24
27. INTRODUCTION
Product identication ( - A.80.A.10)
CX75SR NA, CX80 NA
NOTE: For all parts orders, requests for information or assistance, always specify the type and the serial number of
the machine to your CASE dealer.
Fill out the following lines with the required information: type, year of manufacture, serial number of the machine
(manufacturer’s plate), make, type and serial number of the engine and serial numbers of hydraulic components.
Manufacturer’s plate
CRIL03I175E01 1
(1)TYPE (2)YEAR OF MANUFACTURE (3)SERIAL NUMBER
Engine
MAKE TYPE SERIAL NUMBER
Serial numbers of hydraulic components
COMPONENTS SERIAL NUMBER
Hydraulic pump
Swing reduction gear
Travel reduction gear
Travel control valve
Attachment control valve
Swing control valve
9-93290 2 14/12/2004
25
30. Contents
DISTRIBUTION SYSTEMS - A
PRIMARY HYDRAULIC POWER SYSTEM
CX75SR, CX80
A.10.A
SECONDARY HYDRAULIC POWER SYSTEM
CX75SR, CX80
A.12.A
HYDRAULIC COMMAND SYSTEM
CX75SR, CX80
A.14.A
ELECTRICAL POWER SYSTEM
CX75SR, CX80
A.30.A
LIGHTING SYSTEM
CX75SR, CX80
A.40.A
27084 2 14/12/2004
A
31. DISTRIBUTION SYSTEMS - A
PRIMARY HYDRAULIC POWER SYSTEM - 10.A
CX75SR
CX80
27085 2 14/12/2004
A.10.A / 1
32. Contents
DISTRIBUTION SYSTEMS - A
PRIMARY HYDRAULIC POWER SYSTEM - 10.A
TECHNICAL DATA
PRIMARY HYDRAULIC POWER SYSTEM - General specication (A.10.A - D.40.A.10)
CX75SR
5
PRIMARY HYDRAULIC POWER SYSTEM - General specication (A.10.A - D.40.A.10)
CX80
7
PRIMARY HYDRAULIC POWER SYSTEM - Special tools (A.10.A - D.20.A.40)
CX75SR WE, CX80 WE
9
PRIMARY HYDRAULIC POWER SYSTEM - Special tools (A.10.A - D.20.A.40)
CX75SR NA, CX80 NA
11
Hydraulic pump
Hydraulic pump - Torque (A.10.A.20 - D.20.A.10)
CX75SR, CX80
12
Hydraulic pump - Special tools (A.10.A.20 - D.20.A.40)
CX75SR, CX80
13
Stack valve
Stack valve Inlet section - Torque (A.10.A.18.10 - D.20.A.10)
CX75SR, CX80
13
Stack valve Outlet section - Torque (A.10.A.18.20 - D.20.A.10)
CX75SR, CX80
14
FUNCTIONAL DATA
PRIMARY HYDRAULIC POWER SYSTEM - Static description (A.10.A - C.30.A.20)
CX75SR, CX80
15
PRIMARY HYDRAULIC POWER SYSTEM - Dynamic description (A.10.A - C.30.A.10)
CX75SR, CX80
16
Hydraulic pump
Hydraulic pump - External view (A.10.A.20 - C.10.A.40)
CX75SR, CX80
17
Hydraulic pump - Sectional view (A.10.A.20 - C.10.A.30)
CX75SR, CX80
18
Stack valve
Stack valve - External view (A.10.A.18 - C.10.A.40)
CX75SR
19
Stack valve - External view (A.10.A.18 - C.10.A.40)
CX80
20
Stack valve - Sectional view (A.10.A.18 - C.10.A.30)
CX75SR
21
Stack valve - Sectional view (A.10.A.18 - C.10.A.30)
CX80
23
Stack valve Inlet section - Sectional view (A.10.A.18.10 - C.10.A.30)
CX75SR, CX80
25
27085 2 14/12/2004
A.10.A / 2
35. DISTRIBUTION SYSTEMS - PRIMARY HYDRAULIC POWER SYSTEM
PRIMARY HYDRAULIC POWER SYSTEM - General specication
(A.10.A - D.40.A.10)
CX75SR
Capacities
Total hydraulic circuit 95 L
Hydraulic uid reservoir 50 L
Coolant only 3.5 L
Main hydraulic pump
Variable ow twin pump, with axial pistons.
Maximum ow 2 x 71.4 L/min
Displacement 2 x 34 cm³
Hydraulic control pump
Fixed ow pump
Maximum ow 22,5 L/min
Displacement 10.7 cm³
Secondary hydraulic pump
Fixed ow pump
Maximum ow 25.4 L/min
Displacement 12.1 cm³
Calibration pressure
Pilot circuit main relief valve (± 1 bar) 42 bar
Main relief valve (standard) (± 3 bar) 294 bar
Main relief valve (option) (± 3 bar) 226 bar
Secondary relief valve (boom, dipper and bucket) ( ± 5 bar) 319 bar
Secondary relief valve (swing) (± 4 bar) 226 bar
Secondary relief valve (travel) (± 5 bar) 294 bar
Secondary relief valve (dozer blade) (± 5 bar) 255 bar
Secondary relief valve (backhoe offset) (± 5 bar) 333 bar
Secondary relief valve (boom and dipper) (± 5 bar) 314 bar
Boom cylinder
Barrel diameter 110 mm
Rod diameter 70 mm
Stroke 911 mm
Dipper cylinder
Barrel diameter 95 mm
Rod diameter 60 mm
Stroke 797 mm
Bucket cylinder
Barrel diameter 85 mm
Rod diameter 110 mm
Stroke 665 mm
27085 2 14/12/2004
A.10.A / 5
36. DISTRIBUTION SYSTEMS - PRIMARY HYDRAULIC POWER SYSTEM
Dozer blade cylinder
Barrel diameter 100 mm
Rod diameter 60 mm
Stroke 180 mm
Backhoe-offset dipper cylinder
Barrel diameter 95 mm
Rod diameter 60 mm
Stroke 685 mm
Backhoe-offset cylinder
Barrel diameter 95 mm
Rod diameter 55 mm
Stroke 315 mm
Cylinder leakage - attachment lowering (without load)
Boom cylinders (rod retraction) 3 mm/ 5 mn
Dipper cylinder (rod extension) 5 mm/ 5 mn
Bucket cylinder (rod extension) 7 mm/ 5 mn
Full (at the end of the attachment) 200 mm/ 5 mn
Control valve
Five-section control valve for dipper, boom acceleration, swing, option and left-side travel.
Four-section control valve for dipper acceleration, bucket, boom and right-side travel.
Two-section control valve for dozer blade and backhoe-offset boom.
Load holding relief valve for boom and dipper.
Swing motor
Fixed ow motor with axial pistons.
Automatic disk brake.
Chassis upperstructure swing speed 13.4 RPM
Displacement 44.1 cm³
Working ow xxx L/min
Reduction ratio 20.6
Braking torque 158.3 Nm
Minimum brake release pressure 15 bar
Acceptable motor leakage xx L/min
Travel motor
Two-speed motor with axial pistons.
Automatic disk brakes.
Slow speed 3.4 km/h
High speed 4.9 km/h
Gradeability 70 % (35°)
Tractive effort 6200 daN
Displacement 32.6/21.3 cm³
Working ow 68 L/min
Reduction ratio 66.5
Braking torque (excluding reduction gear) 64.5 Nm
Acceptable motor leakage xx L/min
27085 2 14/12/2004
A.10.A / 6
37. DISTRIBUTION SYSTEMS - PRIMARY HYDRAULIC POWER SYSTEM
Attachment
Breakout force 5690 daN
Breakout force (dipper 1,71 m) 3830 daN
Breakout force (dipper 1,75 m - backhoe-offset) 3940 daN
PRIMARY HYDRAULIC POWER SYSTEM - General specication
(A.10.A - D.40.A.10)
CX80
Capacities
Total hydraulic circuit 95 L
Hydraulic uid reservoir 50 L
Coolant only 3.5 L
Main hydraulic pump
Variable ow twin pump, with axial pistons.
Maximum ow 2 x 71.4 L/min
Displacement 2 x 34 cm³
Hydraulic control pump
Fixed ow pump
Maximum ow 22.5 L/min
Displacement 10.7 cm³
Secondary hydraulic pump
Fixed ow pump
Maximum ow 25.4 L/min
Displacement 12.1 cm³
Calibration pressure
Pilot circuit main relief valve (± 1 bar) 42 bar
Main relief valve (standard) 294 bar
Main relief valve blade option / option 2 (± 5 bar) 226 bar
Secondary relief valve (option 1) (± 5 bar) 319 bar
Secondary relief valve (option 2) 255 bar
Boom lowering secondary relief valve 319 bar
Dipper out port secondary relief 319 bar
Bucket open port secondary relief 319 bar
Bucket close port secondary relief 319 bar
Secondary relief valve (swing) (± 5 bar) 226 bar
Secondary relief valve (travel) (± 5 bar) 294 bar
Secondary relief valve (raising dozer blade) (± 5 bar) 255 bar
Secondary relief valve (dozer blade lowering) (± 5 bar) 255 bar
Secondary relief valve (RH boom offset) (± 5 bar) 333 bar
Secondary relief valve (LH boom offset) (± 5 bar) 319 bar
Safety valve (boom raising and dipper return) (± 5 bar) 319 bar
Boom cylinder
Barrel diameter 110 mm
Rod diameter 70 mm
Stroke 911 mm
27085 2 14/12/2004
A.10.A / 7
38. DISTRIBUTION SYSTEMS - PRIMARY HYDRAULIC POWER SYSTEM
Dipper cylinder
Barrel diameter 95 mm
Rod diameter 60 mm
Stroke 797 mm
Bucket cylinder
Barrel diameter 85 mm
Rod diameter 55 mm
Stroke 665 mm
Dozer blade cylinder
Barrel diameter 100 mm
Rod diameter 60 mm
Stroke 180 mm
Dipper foot offset cylinder
Barrel diameter 95 mm
Rod diameter 55 mm
Stroke 640 mm
Cylinder leakage - attachment lowering (without load)
Boom cylinders (rod retraction) 3 mm/ 5 mn
Dipper cylinder (rod extension) 5 mm/ 5 mn
Bucket cylinder (rod extension) 7 mm/ 5 mn
Full (at the end of the attachment) 200 mm/ 5 mn
Control valve
Five-function control valve for dipper, boom acceleration, swing (1), option and left-side travel.
Four-function control valve for dipper acceleration, boom, bucket and right-side travel.
Dual function control valve for dozer blade, offset and option (2).
Load holding relief valve for boom and dipper.
Swing motor
Fixed ow motor with axial pistons.
Automatic disk brakes.
Chassis upperstructure swing speed 13.4 RPM
Displacement 44.1 cm³
Working ow xxx L/min
Reduction ratio 20.6
Braking torque 158.3 Nm
Minimum brake release pressure 15 bar
Acceptable motor leakage xx L/min
Travel motor
Two-speed motor with axial pistons.
Automatic disk brakes.
Slow speed 3.4 km/h
High speed 4.9 km/h
Gradeability 70 % (35°)
Tractive effort 6200 daN
Displacement 32.6/21.3 cm³
Working ow 68 L/min
Reduction ratio 66.5
Braking torque (excluding reduction gear) 64.5 Nm
Acceptable motor leakage xx L/min
27085 2 14/12/2004
A.10.A / 8
39. DISTRIBUTION SYSTEMS - PRIMARY HYDRAULIC POWER SYSTEM
Attachment
Breakout force 5690 daN
Breakout force (dipper 1.71 m) 3830 daN
Breakout force (dipper 2.10 m) XXXX daN
PRIMARY HYDRAULIC POWER SYSTEM - Special tools (A.10.A -
D.20.A.40)
CX75SR WE, CX80 WE
Digital tester assembly
CRIL03G253E00 1
DESCRIPTION QUANTITY CODE
Tester assembly for Multi-Handy 2051 - E54444449
Multi-Handy 2051 tester 1 D5444448
Pressure sensor (0 bar to 600 bar) 2 V5344460
Straight union for sensor 2 W5344461
Elbow union for sensor 1 X5344462
Engine speed sensor 1 Z5344463
Cable (length 5 m) 3 E3144472
Electric plug 220 volts 50 Hz 1 D5344467
Cigarette lighter cable 1 E5344468
Instruction Sheet 1 -
Carrying case 1 N5344476
The Multi-Handy tester is used to:
Check pressure (two pressure scales)
Check differential pressure (delta P)
Check temperature
Check engine rpm
Check the ow
27085 2 14/12/2004
A.10.A / 9
40. DISTRIBUTION SYSTEMS - PRIMARY HYDRAULIC POWER SYSTEM
600 litre turbine
CRIL03G254E00 2
DESCRIPTION QUANTITY CODE
Turbine 1 RE3 Z5344486
Plates M45x2 2 D4323359
Flange diameter 24 mm 2 B8230183
Semi-ange 4 D4024267
Screw M12 length 75 mm 8 Z1232983
Union assembly for testing pressure and ow
CRIL03G258E00 3
DESCRIPTION CODE
Union assembly for testing pressure and ow CAS30038
Set of high pressure hoses
CRIL03G259E00 4
DESCRIPTION CODE
Set of high pressure hoses CAS30036
27085 2 14/12/2004
A.10.A / 10
41. DISTRIBUTION SYSTEMS - PRIMARY HYDRAULIC POWER SYSTEM
PRIMARY HYDRAULIC POWER SYSTEM - Special tools (A.10.A -
D.20.A.40)
CX75SR NA, CX80 NA
Digital tester assembly for pressure measurement
CRIL03G255E00 1
DESCRIPTION CODE
Digital tester assembly for pressure measurement OEM1652
Digital tester assembly for pressure and temperature measurement
CRIL03G256E00 2
DESCRIPTION CODE
Digital tester assembly for pressure and temperature measurement OEM1653
Flowmeter
CRIL03G257E00 3
DESCRIPTION CODE
Flowmeter for a ow of < 75 GPM CAS10280
Flowmeter for a ow of > 75 GPM OEM1240
27085 2 14/12/2004
A.10.A / 11
42. DISTRIBUTION SYSTEMS - PRIMARY HYDRAULIC POWER SYSTEM
Union assembly for testing pressure and ow
CRIL03G258E00 4
DESCRIPTION CODE
Union assembly for testing pressure and ow CAS40023A + CAS40035
Set of high pressure hoses
CRIL03G259E00 5
DESCRIPTION CODE
Set of high pressure hoses CAS30036
Hydraulic pump - Torque (A.10.A.20 - D.20.A.10)
CX75SR, CX80
CRIL03G048E01 1
(1) Screw 150 - 180 Nm
(2) Screw 55 - 69 Nm
(3) Safety valve 9.8 Nm
(4) Cylinder 126 - 157 Nm
27085 2 14/12/2004
A.10.A / 12
43. DISTRIBUTION SYSTEMS - PRIMARY HYDRAULIC POWER SYSTEM
Hydraulic pump - Special tools (A.10.A.20 - D.20.A.40)
CX75SR, CX80
CRIL03G165E01a 1
Pump bracket (shaft side)
Used to secure the pump in the upright position during pump removal and assembly. To be made locally.
(A) Diameter 150 mm
(B) Diameter 50 - 80 mm
(C) 65 mm
Stack valve Inlet section - Torque (A.10.A.18.10 - D.20.A.10)
CX75SR, CX80
CRIL03F160F02 1
(19) Plug 106-141 Nm
(28) Plug 106-141 Nm
(62) Main relief valve 59-59 Nm
(67) Plug 5.8-9.8 Nm
(69) Plug 62-82 Nm
27085 2 14/12/2004
A.10.A / 13
44. DISTRIBUTION SYSTEMS - PRIMARY HYDRAULIC POWER SYSTEM
Stack valve Outlet section - Torque (A.10.A.18.20 - D.20.A.10)
CX75SR, CX80
CRIL03F190F01 1
(21) Plug 61-82 Nm
(32) Plug 106-141 Nm
(63) Safety valve 59-59 Nm
27085 2 14/12/2004
A.10.A / 14
45. DISTRIBUTION SYSTEMS - PRIMARY HYDRAULIC POWER SYSTEM
PRIMARY HYDRAULIC POWER SYSTEM - Static description (A.10.A
- C.30.A.20)
CX75SR, CX80
The hydraulic diagram is available as a poster at the end of this manual.
For easier understanding, the same legend is used for components appearing in the hydraulic sections and on
the poster.
27085 2 14/12/2004
A.10.A / 15
46. DISTRIBUTION SYSTEMS - PRIMARY HYDRAULIC POWER SYSTEM
PRIMARY HYDRAULIC POWER SYSTEM - Dynamic description
(A.10.A - C.30.A.10)
CX75SR, CX80
CRIL03I020G01 1
Controls in neutral position
In neutral with the engine running, some of the ow from the low pressure pump (1) is fed to (PP) and is divided by a calibrated
restrictor bridge. One fraction passes through the two travel spools, and the other passes through all the other spools before
rejoining the general return circuit. When the spools are moved, these circuits will be locked, which will close the upper pilot
(B26) and travel pilot (B27) pressure switches.
(1) Low pressure pump
(2) Calibrated restrictor bridge
(B26) Upper pilot pressure switch
(B27) Travel pilot pressure switch
27085 2 14/12/2004
A.10.A / 16
47. DISTRIBUTION SYSTEMS - PRIMARY HYDRAULIC POWER SYSTEM
Hydraulic pump - External view (A.10.A.20 - C.10.A.40)
CX75SR, CX80
CRIL03F245G01 1
1. Hydraulic pump
2. Secondary pump
3. Control pump
4. Cover
5. Main pump outlet port (A1)
6. Main pump outlet port (A2)
7. Secondary pump outlet port (A3)
8. Control pump outlet port (PP)
9. Main pump inlet port (S)
27085 2 14/12/2004
A.10.A / 17
49. DISTRIBUTION SYSTEMS - PRIMARY HYDRAULIC POWER SYSTEM
Stack valve - External view (A.10.A.18 - C.10.A.40)
CX75SR
CRIL03F152G01 1
Description
(62) Main relief valve (72) Nut
(63) Safety valve (73) Tie rod
(64) Safety valve (option) (74) Nut
(65) Screw (75) Manufacturer’s plate
(67) Screw (78) Inlet plate (option)
(69) Plug assembly (79) Main relief valve (option)
(71) Tie rod (90) Plug assembly
27085 2 14/12/2004
A.10.A / 19
50. DISTRIBUTION SYSTEMS - PRIMARY HYDRAULIC POWER SYSTEM
Stack valve - External view (A.10.A.18 - C.10.A.40)
CX80
CRIL04F023G01 1
Description
(62) Main relief valve (72) Nut
(63) Safety valve (73) Tie rod
(64) Safety valve (option) (74) Nut
(65) Screw (75) Manufacturer’s plate
(67) Screw (78) Inlet plate (option)
(69) Plug assembly (79) Main relief valve (option)
(71) Tie rod (90) Plug assembly
27085 2 14/12/2004
A.10.A / 20
51. DISTRIBUTION SYSTEMS - PRIMARY HYDRAULIC POWER SYSTEM
Stack valve - Sectional view (A.10.A.18 - C.10.A.30)
CX75SR
NOTE: Refer to the functions concerned for sections of the control valve block not described in this chapter.
CRIL03F163F01 1
Cross-section A-A
(1) Control valve housing
(2) LH travel spool assembly
(3) Optional spool assembly
(4) Swing spool assembly
(5) Boom spool assembly (2)
(6) Dipper spool assembly (1)
(11) Large cap
(12) Seal
(13) Small cap
(32) Plug assembly
27085 2 14/12/2004
A.10.A / 21
52. DISTRIBUTION SYSTEMS - PRIMARY HYDRAULIC POWER SYSTEM
CRIL03F164G01 2
Cross-section B-B
(7) Dipper spool assembly (2) (8) Boom spool assembly (1)
(9) Bucket spool assembly (10) Straight-line travel spool assembly
(11) Large cap (12) Seal
(13) Small cap (40) Spool
(42) Seal (44) Spring
(47) Cap (48) Spool
(61) Outlet plate (62) Main relief valve
(78) Optional inlet plate (79) Main relief valve (option)
(83) Backhoe-offset spool assembly (84) Dozer blade spool assembly
27085 2 14/12/2004
A.10.A / 22
53. DISTRIBUTION SYSTEMS - PRIMARY HYDRAULIC POWER SYSTEM
Stack valve - Sectional view (A.10.A.18 - C.10.A.30)
CX80
NOTE: Refer to the functions concerned for sections of the control valve block not described in this chapter.
CRIL03F163F01 1
Cross-section A-A
(1) Timing gear case
(2) LH travel spool assembly
(3) Spool assembly - option
(4) Spool assembly - swing
(5) Spool assembly - boom (2)
(6) Spool assembly - dipper (1)
(11) Large cap
(12) Seal
(13) Small cap
(32) Plug assembly
27085 2 14/12/2004
A.10.A / 23
54. DISTRIBUTION SYSTEMS - PRIMARY HYDRAULIC POWER SYSTEM
CRIL04F022G01 2
Cross-section B-B
(7) Dipper spool assembly (2) (8) Boom spool assembly (1)
(9) Bucket spool assembly (10) Straight-line travel spool assembly
(11) Large cap (12) Seal
(13) Small cap (40) Spool
(42) Seal (44) Spring
(47) Cap (48) Spool
(61) Outlet plate (62) Main relief valve
(78) Inlet plate (option) (79) Main relief valve (option)
(83) Boom offset spool assembly (84) Dozer blade spool assembly
(85) Optional component assembly
27085 2 14/12/2004
A.10.A / 24
55. DISTRIBUTION SYSTEMS - PRIMARY HYDRAULIC POWER SYSTEM
Stack valve Inlet section - Sectional view (A.10.A.18.10 - C.10.A.30)
CX75SR, CX80
CRIL03F160F01 1
Inlet section
(16) Valve
(17) Spring
(18) Seal
(19) Plug
(62) Main relief valve
(69) Plug
27085 2 14/12/2004
A.10.A / 25
56. DISTRIBUTION SYSTEMS - PRIMARY HYDRAULIC POWER SYSTEM
Stack valve Outlet section - Sectional view (A.10.A.18.20 - C.10.A.30)
CX75SR, CX80
CRIL03F190F01 1
Outlet section
(21) Plug assembly
(32) Plug assembly
(63) Safety valve
27085 2 14/12/2004
A.10.A / 26
57. DISTRIBUTION SYSTEMS - PRIMARY HYDRAULIC POWER SYSTEM
Sensing system Temperature sensor - Electronic schema
(A.10.A.95.90 - C.20.A.50)
CX75SR, CX80
HYDRAULIC OIL TEMPERATURE
1. CIRCUIT CONFIGURATION
CRIL03G095E01 1
(1) Coolant and hydraulic oil overheating indicator lamp
(2) Audible alarm device
(B10) Hydraulic oil temperature thermo- switch
(P1) Instrument panel
2. TIMING DIAGRAM
CRIL03G094E02 2
27085 2 14/12/2004
A.10.A / 27
58. DISTRIBUTION SYSTEMS - PRIMARY HYDRAULIC POWER SYSTEM
PRIMARY HYDRAULIC POWER SYSTEM - Warm up (A.10.A -
F.35.A.40)
CX75SR, CX80
1. Start the engine. The engine takes 10 to 15 minutes
to warm up.
2. With the engine running at full speed, operate the
bucket and dipper controls in one direction (against
the cylinder stops) for 30 seconds.
3. Actuate the bucket and dipper control in the other
direction (against the cylinder stops) for 30 seconds.
4. Repeat steps 2 and 3 until the hydraulic temperature
reaches 44 - 55 °C.
5. Operate the boom, swing and travel controls in both
directions to warm up all the circuits to 44 - 55 °C.
27085 2 14/12/2004
A.10.A / 28
59. DISTRIBUTION SYSTEMS - PRIMARY HYDRAULIC POWER SYSTEM
PRIMARY HYDRAULIC POWER SYSTEM - Depressurising (A.10.A -
F.35.A.51)
CX75SR, CX80
IMPORTANT: This operation must be carried out before any work is done on the hydraulic circuit.
1. Park the machine on hard, at ground.
2. Open the bucket until the cylinder rod is completely
retracted.
3. Extend the dipper until the cylinder rod is completely
retracted.
Lower the boom so that the end of the dipper is
resting on the ground.
Lower the tool to the ground.
Lower the dozer blade to the ground
4. Reduce the engine speed to idle for 30 secondes,
then shut down the engine.
5. Turn the starter switch key to "ON" without starting
the engine.
6. Lower the pilot control cancellation lever.
7. Operate each control more than 10 times in both
directions to release all pressure in the circuits.
8. Press the button (1) located on the hydraulic
reservoir breather to release all pressure in the
reservoir.
CRIL03I122A01 1
27085 2 14/12/2004
A.10.A / 29
60. DISTRIBUTION SYSTEMS - PRIMARY HYDRAULIC POWER SYSTEM
PRIMARY HYDRAULIC POWER SYSTEM - Drain uid (A.10.A -
F.35.A.20)
CX75SR, CX80
Prior operation: PRIMARY HYDRAULIC POWER SYSTEM - Depressurising (A.10.A - F.35.A.51)
NOTE: It is recommended to install the vacuum pump before carrying out any work on the hydraulic circuit that
requires opening the circuit.
Installing this pump prevents uid loss when the circuit is opened.
This chapter describes the procedure for installing the vacuum pump CAS-10193.
1. Remove plate (A) from the top of the hydraulic
reservoir.
Do not remove the reservoir seal.
CRIL03I122A02 1
2. Install the adapter plate with the elbow union, refer
to PRIMARY HYDRAULIC POWER SYSTEM -
Special tools (A.10.A - D.20.A.40).
3. Connect the vacuum pump to the adapter plate
elbow union.
Connect the vacuum pump harness to the batteries.
4. Start the pump before carrying out any work on the
circuit.
27085 2 14/12/2004
A.10.A / 30
61. DISTRIBUTION SYSTEMS - PRIMARY HYDRAULIC POWER SYSTEM
PRIMARY HYDRAULIC POWER SYSTEM - Bleed (A.10.A - F.35.A.25)
CX75SR, CX80
IMPORTANT: A hydraulic component and the circuit must be bled after the component has been replaced.
It is essential to ll the pump and motor housings and hydraulic components with oil before starting the machine.
Failure to comply with these two recommendations may damage the component (overheating and seizing).
IMPORTANT: Having bled the components, stop the engine for ve minutes and check for air bubbles in the
hydraulic uid in the reservoir.
1. To ll the housing and drain the hydraulic pump,
refer to Hydraulic pump - Bleed (A.10.A.20 -
F.35.A.25)
2. To bleed the attachment cylinders, extend and
retract each cylinder rod four or ve times without
bringing them up against the stops.
Repeat the operation three or four times, this time
bringing all the cylinder rods up against the stops.
3. To ll the housing and bleed the hydraulic swing
motor, refer to Hydraulic motor - Bleed (F.40.C.28
- F.35.A.25)
27085 2 14/12/2004
A.10.A / 31
62. DISTRIBUTION SYSTEMS - PRIMARY HYDRAULIC POWER SYSTEM
PRIMARY HYDRAULIC POWER SYSTEM - Decontaminating (A.10.A
- F.30.A.60)
CX75SR, CX80
Prior operation: PRIMARY HYDRAULIC POWER SYSTEM - Depressurising (A.10.A - F.35.A.51)
Prior operation: To remove the electric pump for lling with fuel, refer to Fuel ller aid - Remove (B.20.A.20
- F.10.A.10)
Prior operation: To remove the protective panel from the hydraulic reservoir, refer to Upper shield - Remove
(E.20.A.71 - F.10.A.10)
Prior operation: To remove the lower access panel to the hydraulic reservoir, refer to Protective shield - Remove
(E.20.A.73 - F.10.A.10)
1. Prepare portable lter CAS10162A as follows:
Expel all hydraulic uid from the portable lter inlet
and outlet hoses.
Remove the portable lter cartridge.
Expel all hydraulic uid from the portable lter.
Clean the interior of the cartridge housing.
Install a new lter cartridge.
CRIL03I082A 1
2. Drain the hydraulic uid from the reservoir and clean
the reservoir, see the Operator’s Manual.
NOTE: Do not re-install the drain plug on the hydraulic
reservoir.
3. Replace the breather element and the return lter
and clean the intake lter, see the Operator’s
Manual.
NOTE: Do not install the plate and the breather.
4. Replace the pilot circuit lter, see the Operator’s
Manual.
5. Replace the Ultra Clean lter, see the Operator’s
Manual.
6. Install the valve from union kit (CAS 10508) on the
reservoir drain port.
Make sure that the valve is closed.
CAS10508-3 2
7. Fill the hydraulic reservoir with clean hydraulic uid,
see the Operator’s Manual.
27085 2 14/12/2004
A.10.A / 32
63. DISTRIBUTION SYSTEMS - PRIMARY HYDRAULIC POWER SYSTEM
8. Install the inlet hose from the portable lter on the
valve under the hydraulic reservoir.
9. Install the long pipe from union kit (CAS 10508) on
the portable lter return hose.
10. Pass the long pipe into the hydraulic reservoir via
the breather port.
Move the intake lter long pipe as far away as
possible.
11. Open the valve under the hydraulic reservoir.
12. Install the portable lter on the upperstructure so
that the machine can be operated.
Attach the portable lter securely to the machine.
13. Connect the portable lter electric cable to the
battery.
Make sure that the electric cable is away from all
moving parts.
14. Start the portable lter.
15. Start the engine, run it at half speed for 10 minutes.
During those ten minutes, stir the hydraulic uid in
the hydraulic reservoir with the long pipe.
16. Bring the hydraulic uid to its operating temperature,
refer to PRIMARY HYDRAULIC POWER SYSTEM
- Warm up (A.10.A - F.35.A.40)
17. With the engine idling, stir the hydraulic uid in the
hydraulic reservoir for 10 minutes with the long pipe.
18. Shut down the portable lter and the engine.
19. Close the valve under the hydraulic reservoir.
20. Remove the inlet pipe from the valve under the
hydraulic reservoir.
21. Remove the long pipe from the hydraulic reservoir.
22. Disconnect the portable lter’s electric cable from
the battery.
Remove the portable lter from the machine.
23. Install a vacuum pump on the hydraulic reservoir,
refer to PRIMARY HYDRAULIC POWER SYSTEM
- Drain uid (A.10.A - F.35.A.20)
Start the vacuum pump.
24. Remove the valve from underneath the reservoir
and install the drain plug.
25. Stop and remove the vacuum pump.
26. Replace the return lter and clean the intake lter,
see the Operator’s Manual.
27. Replace the pilot circuit lter, see the Operator’s
Manual.
28. Replace the Ultra-Clean lter, see the Operator’s
Manual.
29. Check the hydraulic uid level.
Top up as necessary, see the Operator’s Manual.
27085 2 14/12/2004
A.10.A / 33
64. DISTRIBUTION SYSTEMS - PRIMARY HYDRAULIC POWER SYSTEM
Hydraulic pump - Remove (A.10.A.20 - F.10.A.10)
CX75SR, CX80
Prior operation: PRIMARY HYDRAULIC POWER SYSTEM - Drain uid (A.10.A - F.35.A.20)
Prior operation: Rear ballasting - Remove (F.20.B.61 - F.10.A.10)
Prior operation: Silencer - Remove (B.40.A.36 - F.10.A.10)
1. Remove the xing screws (1) and washers (2) from
the silencer bracket (3), then remove the silencer
bracket (3).
CRIL03J005A01 1
2. Mark all the hoses connected to the main pump and
the control pump.
3. Remove and plug the inlet pipe (1) on the main
pump (2).
Disconnect and plug the hoses (3) and (4) on the
main pump (2).
Disconnect and plug the pilot hose (5) from the
main pump (2).
Disconnect and plug the hose (6) from the control
pump (7).
CRIL03J005A02 2
4. Install a suitable lifting device with sling to support
the ange and pump assembly (1).
Do not allow any slack in the sling so that the lifting
device supports the ange and pump assembly (1)
immediately it is removed.
CRIL03J006A01 3
5. Remove the screws (2) and washers (3) which
secure the ange and pump assembly (1) to the
engine.
6. Gently pull the ange and pump assembly (1)
horizontally away from the exible coupling secured
to the engine ywheel. Set the ange and pump
assembly (1) down on a clean workbench.
27085 2 14/12/2004
A.10.A / 34
65. DISTRIBUTION SYSTEMS - PRIMARY HYDRAULIC POWER SYSTEM
7. Remove the splined sleeve (1) from the main
pump shaft (2), refer to Drive system - Remove
(B.90.A.42 - F.10.A.10).
CRIL03J012A01 4
8. Remove the xing screws and washers (1), then
remove the main pump, secondary pump and
control pump assembly (3) and the ange (2).
CRIL03J011A01 5
9. Remove the secondary hydraulic pump, refer to
Hydraulic pump - Remove (A.12.A.20 - F.10.A.10)
10. Remove the splined sleeve (1) and the ring (2)
connecting the main pump and the secondary pump.
CRIL03J013A01a 6
27085 2 14/12/2004
A.10.A / 35
66. DISTRIBUTION SYSTEMS - PRIMARY HYDRAULIC POWER SYSTEM
Hydraulic pump - Disassemble (A.10.A.20 - F.10.A.25)
CX75SR, CX80
1. Remove the screws fastening the cover.
CRIL03F089A00 1
2. Remove the cover, taking care not to drop the valve
plate.
CRIL03F090A00 2
3. Remove the outer spring, the inner spring, the guide
and the spring seat.
CRIL03F091A00 3
4. Remove the cylinder block assembly.
CRIL03F092A00 4
27085 2 14/12/2004
A.10.A / 36
67. DISTRIBUTION SYSTEMS - PRIMARY HYDRAULIC POWER SYSTEM
5. Check that the three pins have been removed from
the cylinder block.
Mark the position of the pistons in the cylinder block.
Remove the pistons with the retaining plate.
CRIL03F093A00 5
6. Remove the snap ring.
CRIL03F094A00 6
7. Remove the seal holder and the seal.
CRIL03F095A00 7
8. Remove the shaft.
CRIL03F096A00 8
27085 2 14/12/2004
A.10.A / 37
68. DISTRIBUTION SYSTEMS - PRIMARY HYDRAULIC POWER SYSTEM
9. Mark and remove the swash plate.
CRIL03F097A00 9
10. Mark and remove the guide, discharge side.
Mark and remove the guide, intake side.
CRIL03F098A00 10
11. Mark and remove the valve plate from the cover.
CRIL03F099A00 11
12. Remove the piston.
Loosen and remove the cylinder.
CRIL03F100A00 12
27085 2 14/12/2004
A.10.A / 38
69. DISTRIBUTION SYSTEMS - PRIMARY HYDRAULIC POWER SYSTEM
13. Remove the piston, washers and shim.
CRIL03F101A00 13
14. Remove the screws and the ow regulator cover.
IMPORTANT: Do not remove the ow regulator unless
absolutely necessary. Do not loosen the ow regulator
adjustment nut, failure to comply with this instruction will
alter the pressure and ow.
CRIL03F102A00 14
15. Remove the spring seat taking care not to drop the
shims (if tted).
CRIL03F103A00 15
16. Mark and loosen the lock nut and adjustment screw,
remove the spring and the spool.
IMPORTANT: Do not remove and disassemble the pilot
safety valve unless absolutely necessary, failure to comply
with this instruction will alter the pilot pressure.
CRIL03F104A00 16
27085 2 14/12/2004
A.10.A / 39
70. DISTRIBUTION SYSTEMS - PRIMARY HYDRAULIC POWER SYSTEM
Hydraulic pump - Assemble (A.10.A.20 - F.10.A.20)
CX75SR, CX80
1. Fit the spool and spring.
Adjust the screw and tighten the nut following the
marks made during removal.
Tighten the pilot safety valve to the required torque.
CRIL03F105A00 1
2. Fit the spring seat (with the shim if tted).
CRIL03F103A00 2
3. Engage and tighten the ow regulator screws to the
required torque.
CRIL03F102A00 3
4. Grease all the components lightly to keep them
together.
Fit the piston (1), washers (2) and shim (3) inside
the cylinder (4), apply thread lock uid to the
cylinder thread.
CRIL03F106A01 4
27085 2 14/12/2004
A.10.A / 40
71. DISTRIBUTION SYSTEMS - PRIMARY HYDRAULIC POWER SYSTEM
5. Engage and tighten the cylinder to the required
torque.
Install the piston.
CRIL03F107A00 5
6. Grease the contact surfaces lightly to prevent the
valve plate from falling.
Install the valve plate.
CRIL03F099A00 6
7. Grease the contact surfaces lightly and t the guide
on the discharge side and the guide on the intake
side.
CRIL03F108A00 7
8. Apply a thin coat of grease to the spherical parts in
contact with the guides.
Install the swash plate.
CRIL03F109A00 8
27085 2 14/12/2004
A.10.A / 41
72. DISTRIBUTION SYSTEMS - PRIMARY HYDRAULIC POWER SYSTEM
9. Install the drive shaft.
CRIL03F096A00 9
10. Install the seal.
CRIL03F110A00 10
11. Install the seal holder with its seal tted.
CRIL03F111A00 11
12. Install the snap ring.
CRIL03F094A00 12
27085 2 14/12/2004
A.10.A / 42
73. Thank you very much
for your reading.
Please Click Here
Then Get More
Information.