Downloaded 240 times


![72
Shopping List
Quantities needed for listed items will depend
on your specific selections. Review your choices
and adjust the shopping list accordingly. It may be
helpful for you to photocopy this list each week
before doing your shopping.
Staples
Orange juice, skim milk, whole-wheat bread,
Promise Ultra® Vegetable Oil Spread, Italian
fat-free dressing, Dijon mustard, safflower oil,
noncaloric beverages
(tea, decaffeinated coffee, diet soft drinks, water).
Grains
Bagels, Sarah Lee (frozen)
Cereals — 1.5 oz. (42 g) serving equals
approximately 165 calories; Kellogg’s® Low-Fat
Granola (without raisins), General Mills® Honey
Nut Clusters, General Mills® Basic 4.
Wheat germ, malted milk powder, popcorn
(microwave light).
Fruits
Bananas, large (8 3/4 inches [22 cm] long), apples
(3-inch [7.6 cm] diameter), cantaloupes (5-inch
[12.7 cm] diameter), dried prunes, raisins.
Vegetables
Lettuce, tomatoes, whole kernel corn (canned no
salt added), sweet peas, (canned no salt added),
sliced white potatoes (canned), cut beets (canned).
Dairy
Yogurt (light nonfat), cream cheese (light), cheese
(fat-free), low-fat frozen yogurt, Carnation® Instant
Breakfast packets, Champion UltraMet® Packets.
Meat, Poultry, Fish and Entrees
Chicken (thin sliced), turkey (thin sliced), tuna
(canned in water), sirloin steak (lean).
Canned soup:
Healthy Choice® Hearty Chicken, Campbell’s®
Healthy Request Hearty Vegetable Beef.
Frozen microwave dinners or entrees:
Lean Cuisine® Glazed Chicken Dinner, Lean
Cuisine® Lasagna with Meat Sauce, Lean Cuisine®
Lunch Express Broccoli & Cheddar Cheese over
Potato, Weight Watchers® Macaroni and Cheese,
Healthy Choice® Grilled Turkey Breast.](https://image.slidesharecdn.com/bowflex-blaze-workouts-manual-150413031210-conversion-gate01/85/Bowflex-Blaze-Workouts-and-Manual-72-320.jpg)


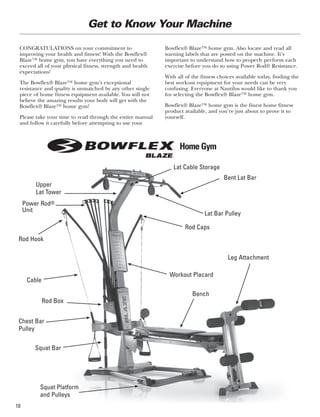
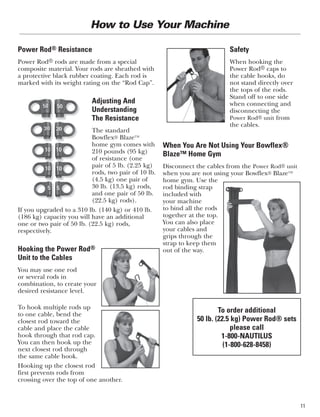
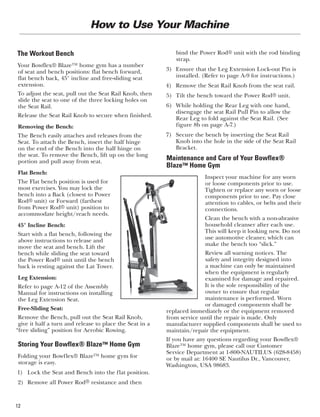
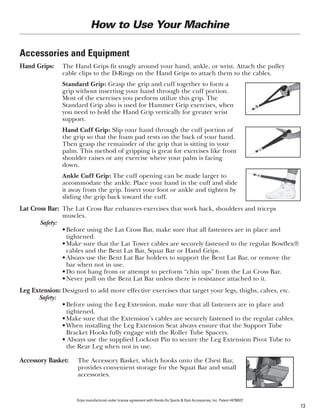
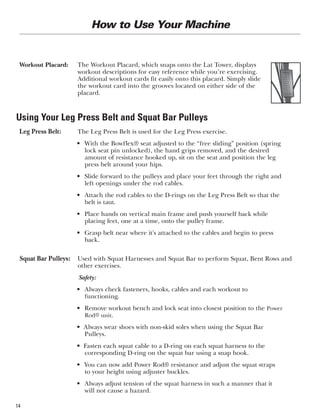
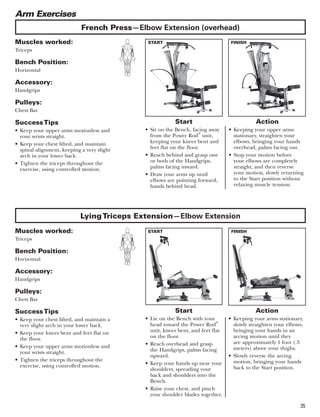
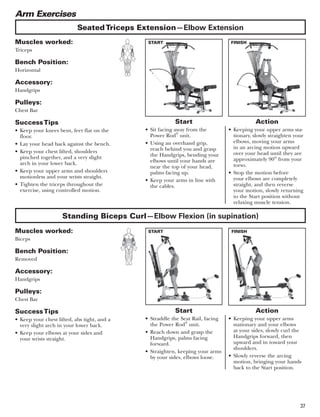
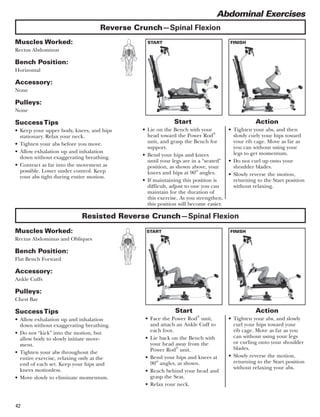
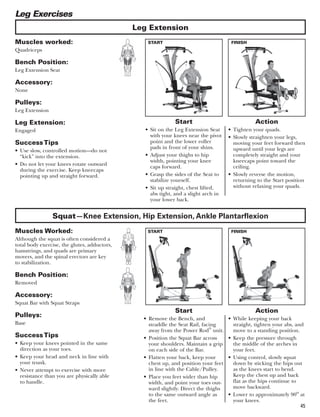
The document provides an owner's manual for the Bowflex Blaze Home Gym, including: - Safety requirements and warning labels locations - An overview of machine components like the Power Rod resistance unit and bench - Instructions for adjusting resistance levels and connecting rods to cables - Guidance on using the flat, incline, and leg extension benches - Steps for storing the folded machine - Maintenance tips and a customer service contact The manual outlines safe and proper use of the home gym through written instructions and diagrams.


