Downloaded 26 times


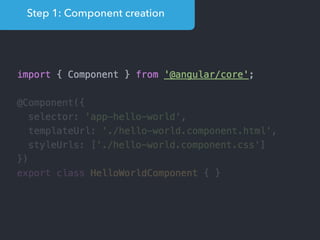
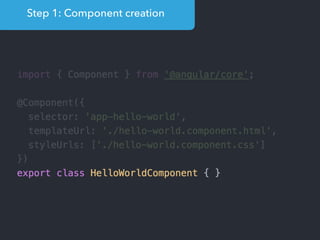
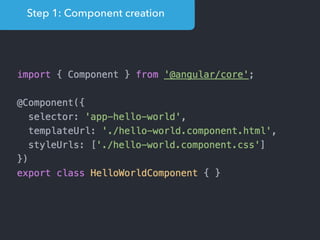
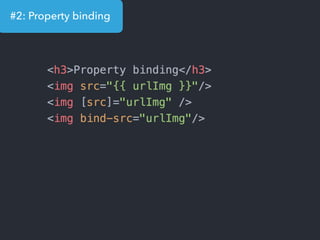
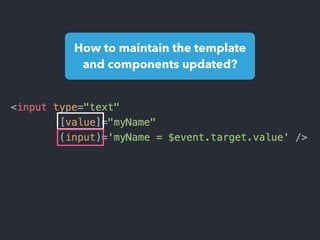
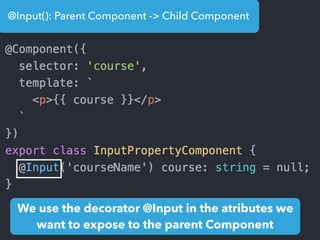
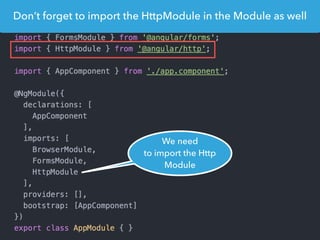
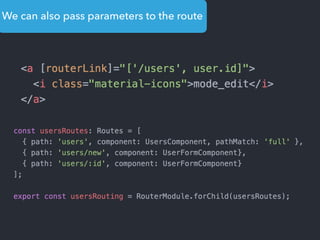
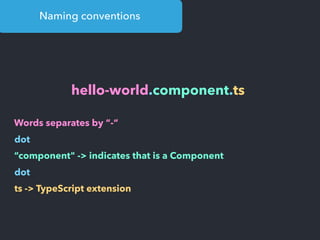
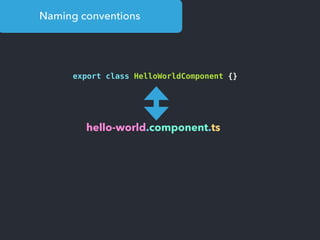
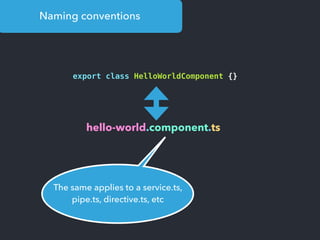
![Step 1: Component creation
[Web Components]
Name of the HTML tag for
this Component](https://image.slidesharecdn.com/angular2-60minutes-en-161214234046/85/Angular-2-overview-in-60-minutes-35-320.jpg)


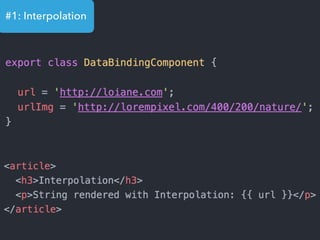
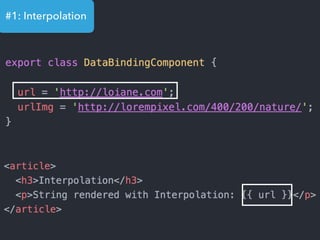
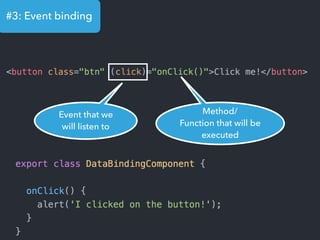
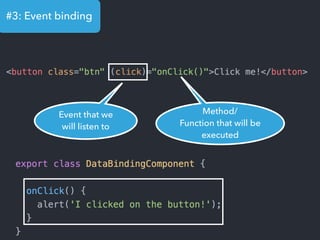
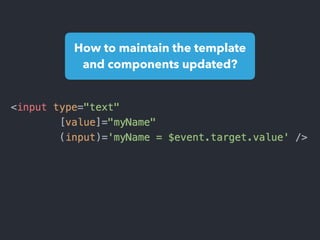
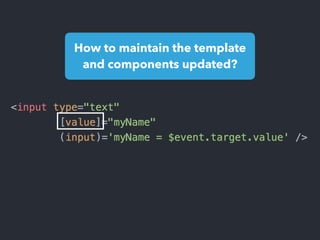

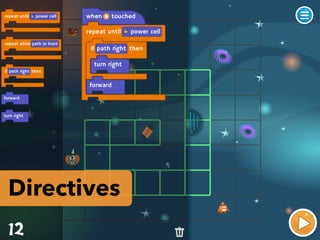
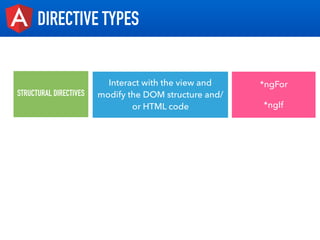
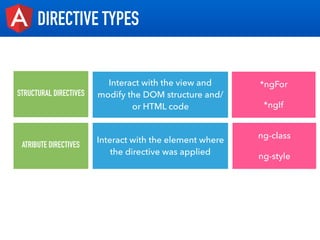
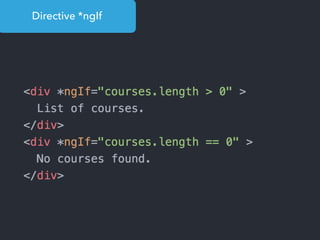
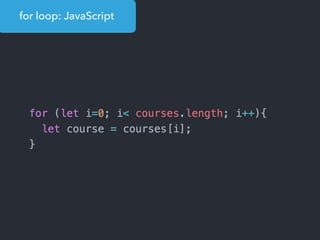
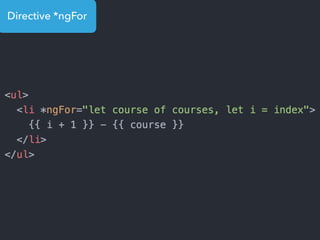
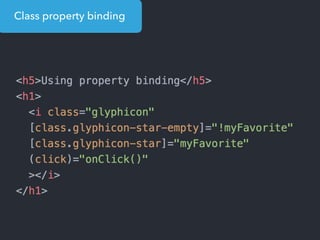
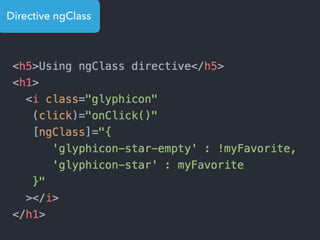
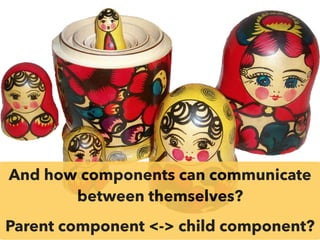
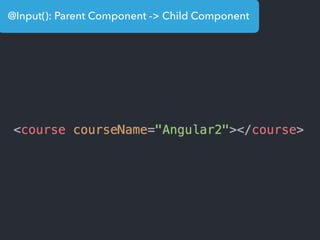
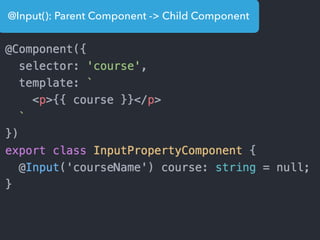


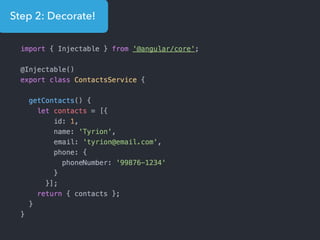

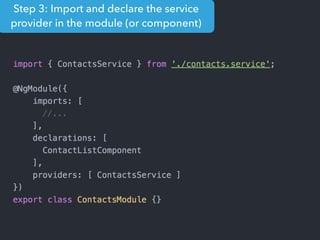
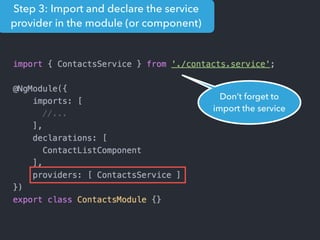
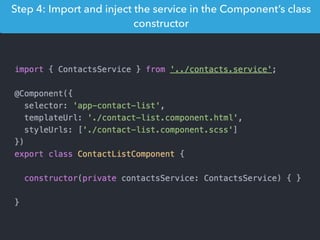

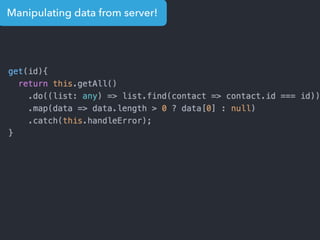
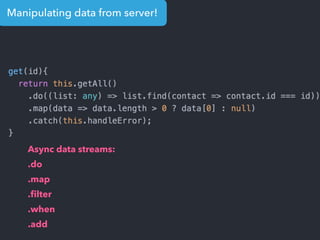
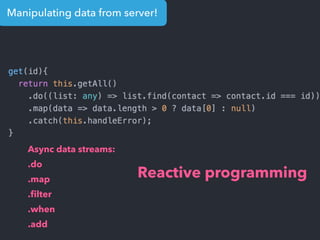
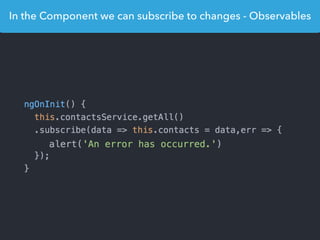

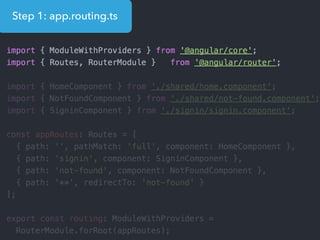
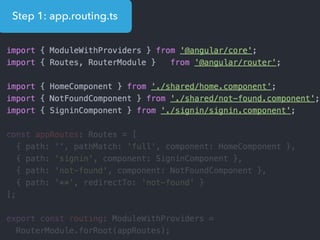
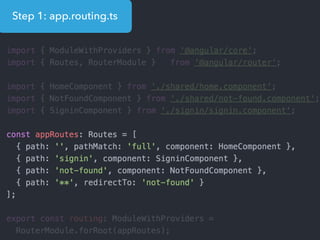
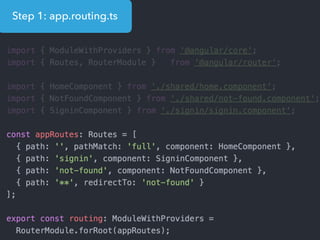
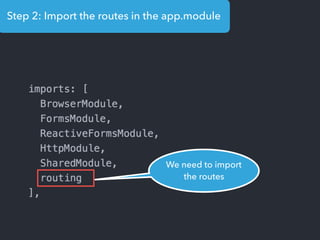
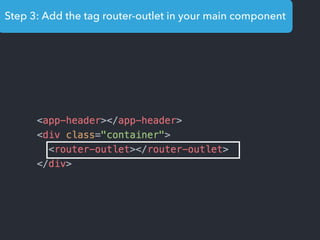
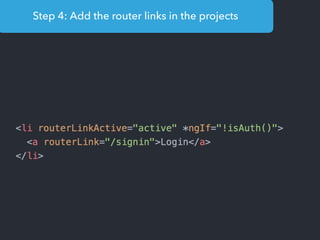

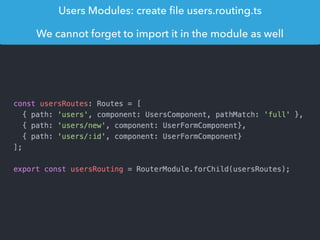

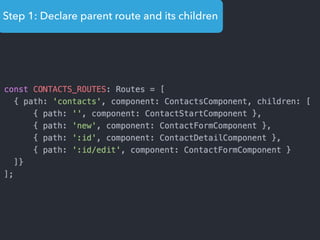
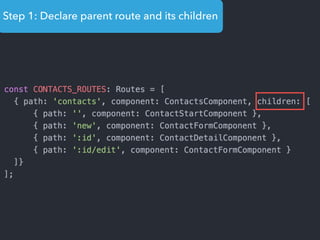
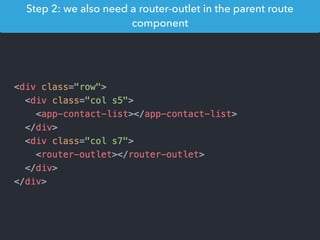
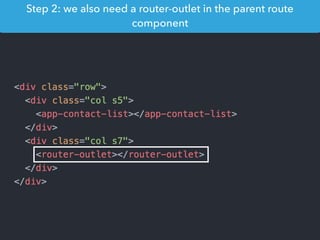


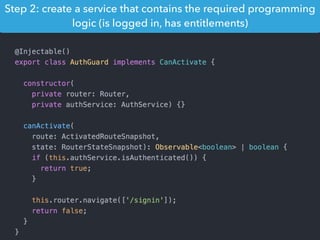
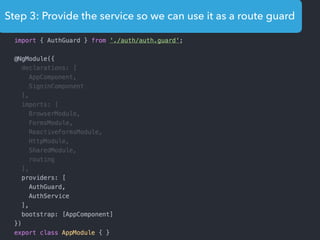
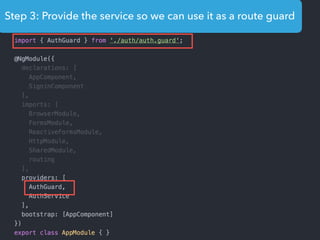


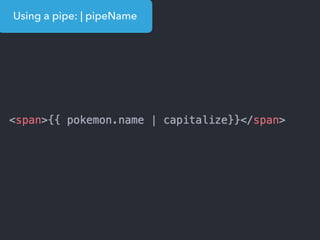

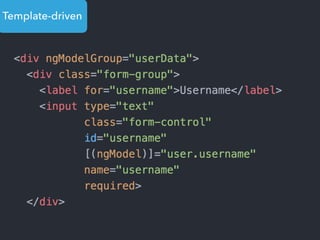

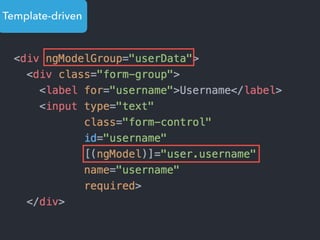
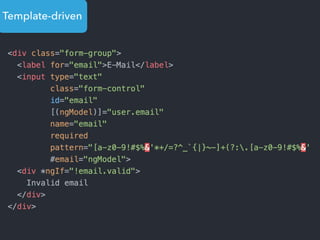
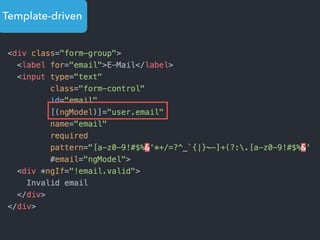
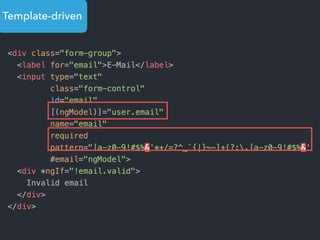

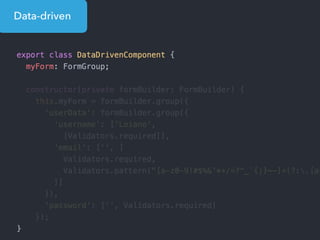
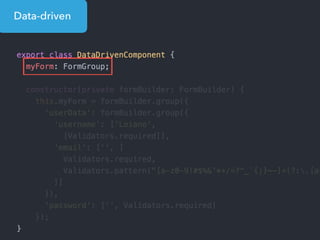
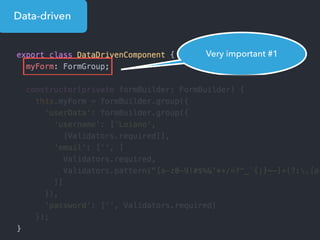
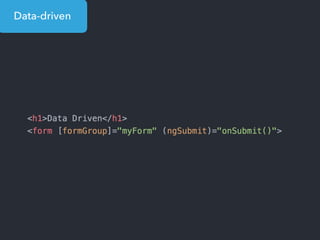
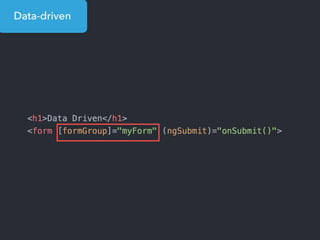
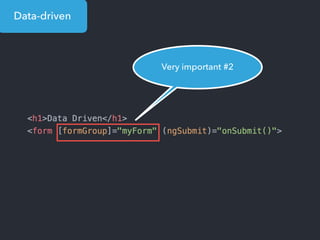
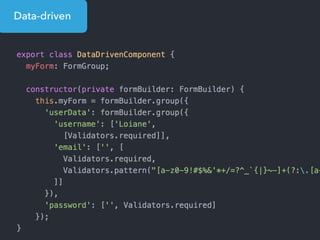
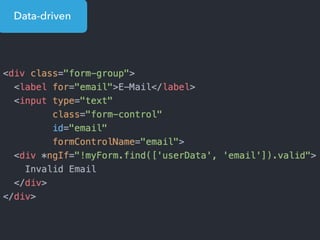
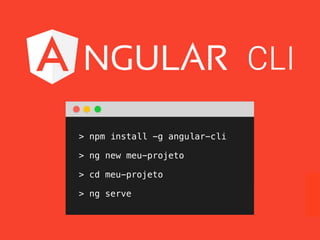

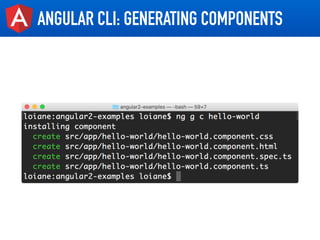


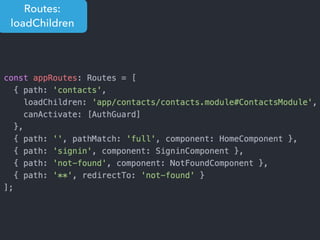
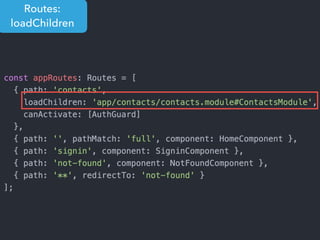
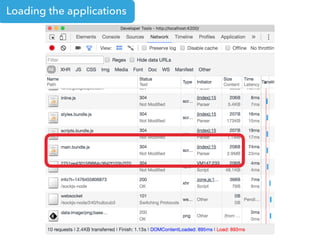
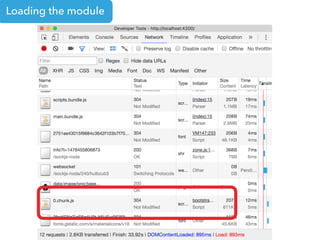

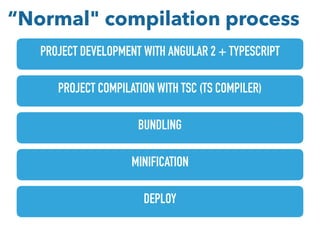
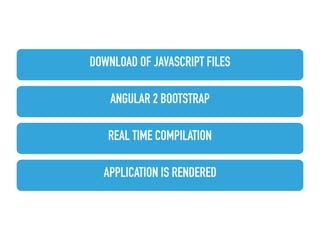
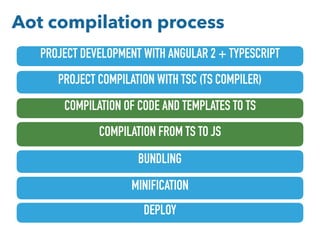
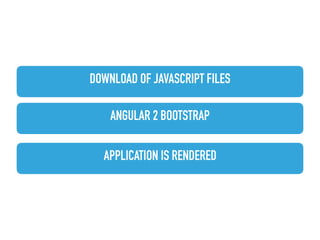


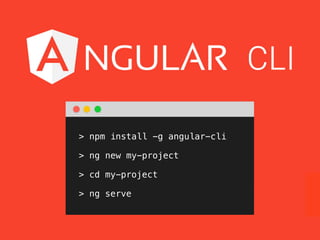
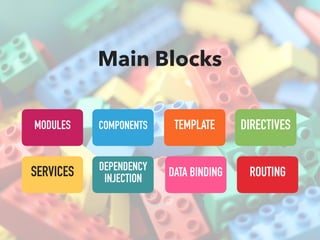
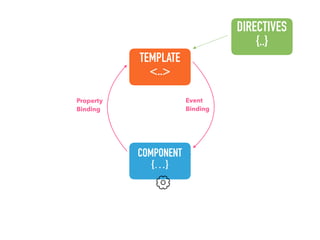
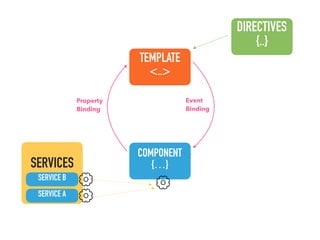
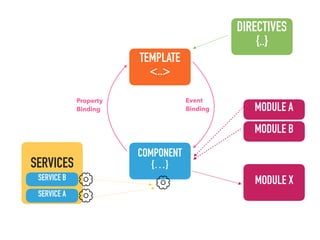
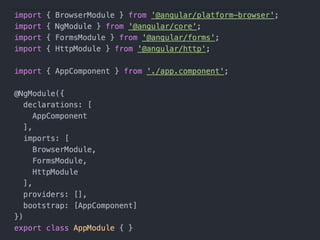
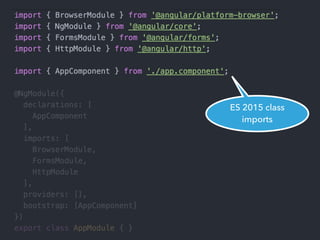
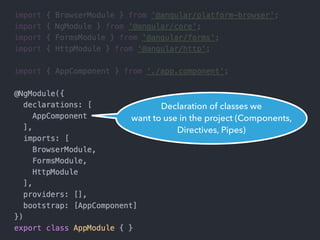
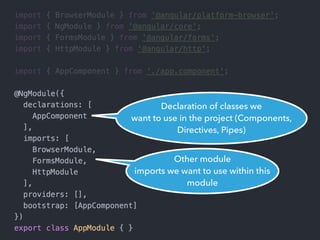
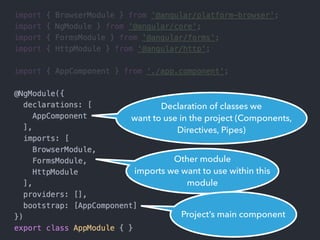
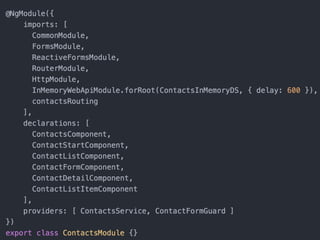
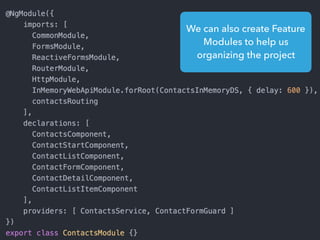
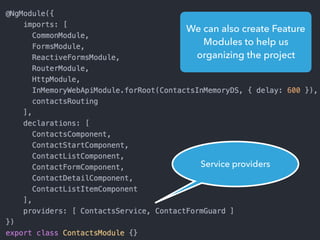
This document provides an overview of Angular 2 including: - Main blocks like components, directives, services, routing etc. - How to set up a development environment with Node.js and TypeScript - Examples of core features like data binding, communication between components, dependency injection, and HTTP requests - Tips for organizing projects, lazy loading modules, ahead of time compilation, and using the Angular CLI


![[Curso Java Basico] Exercicios Aula 24](https://cdn.slidesharecdn.com/ss_thumbnails/curso-javase-labs-aula24-150424130946-conversion-gate01-thumbnail.jpg?width=640&height=640&fit=bounds)