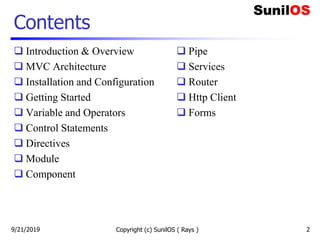


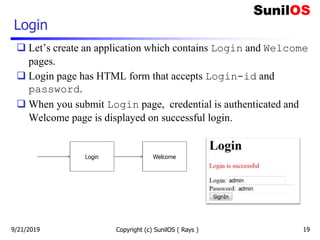
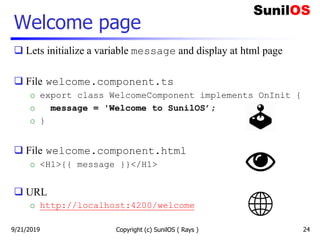
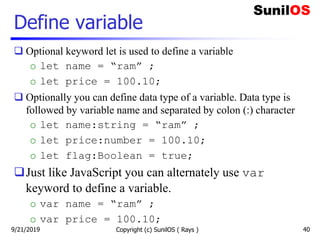
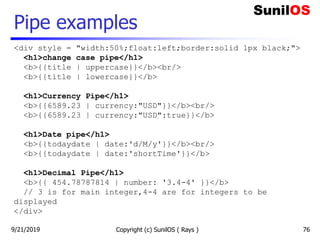
![Define routes
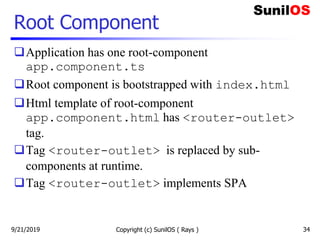
In order to access pages, define routes in app-routing.module.ts
const routes: Routes = [
{ path: 'login', component: LoginComponent},
{ path: 'welcome', component: WelcomeComponent}
];
#app.module.ts file
@NgModule({
imports: [RouterModule.forRoot(routes)],
exports: [RouterModule]
})
Access pages using following URLs
o http://localhost:4200/login
o http://localhost:4200/welcome
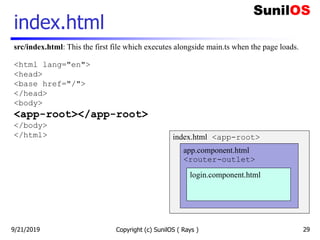
Copyright (c) SunilOS ( Rays ) 239/21/2019](https://image.slidesharecdn.com/angular8v1-190921085027/85/Angular-8-23-320.jpg)
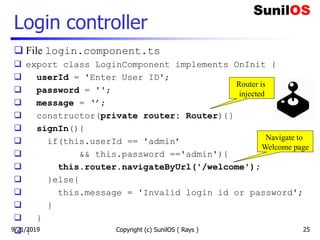
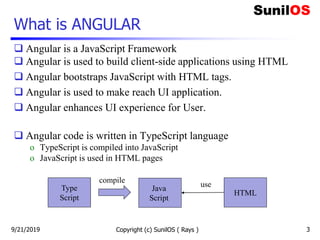
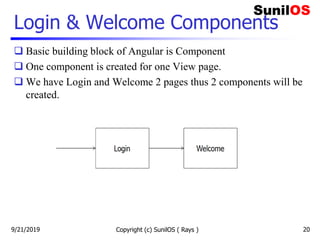
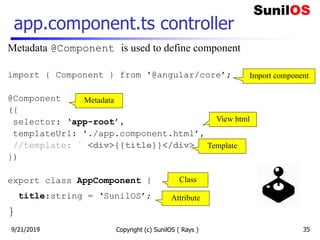
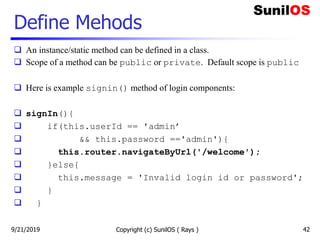
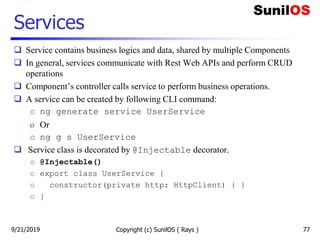
![Login View
<H1>Login</H1>
<p style="color:red" >{{message}}</p>
<form >
User ID: <input [(ngModel)]="userId" name="userId" type="text">
Password: <input [(ngModel)]="password" name="password" type="password">
<button (click)="signIn()">Sign In</button>
</form>
Directive [(ngModel)] is used for two-way data binding with attributes userId and password
of class LoginComponent.
Directive (click) is used to bind on-click event. Method signIn() is called when
Sign-In button is clicked.
Directive ngModel is provided by inbuild FormsModule module. This module will be
imported in app.module.ts.
URL :http://localhost:4200/login Copyright (c) SunilOS (
Rays ) 269/21/2019](https://image.slidesharecdn.com/angular8v1-190921085027/85/Angular-8-26-320.jpg)
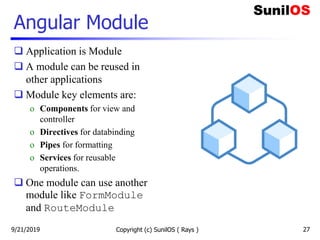
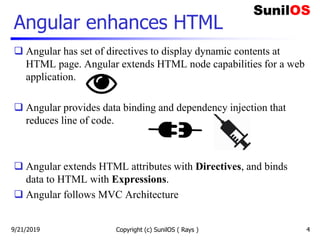
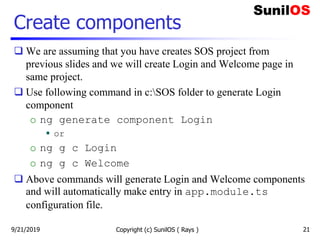
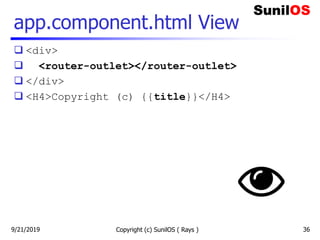
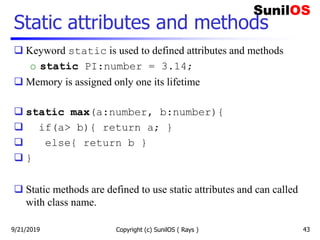
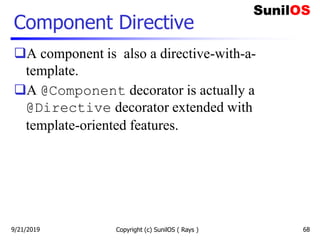
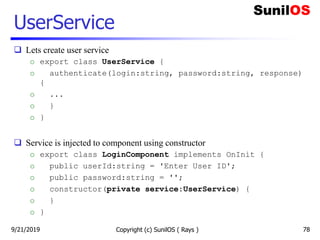
![app.module.ts
Copyright (c) SunilOS ( Rays ) 31
import { FormsModule } from '@angular/forms';
import { AppRoutingModule } from './app-routing.module';
@NgModule({
declarations: [
AppComponent,
LoginComponent,
WelcomeComponent
],
imports: [
AppRoutingModule,
FormsModule,
],
providers: [
UserService,
MarksheetServce,
],
bootstrap: [AppComponent]
})
export class AppModule { }
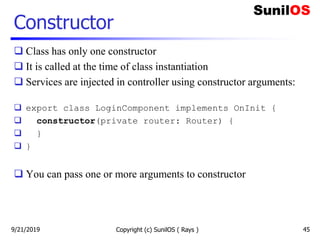
Component
Modules
Services
Root Component
Module Class
9/21/2019](https://image.slidesharecdn.com/angular8v1-190921085027/85/Angular-8-31-320.jpg)
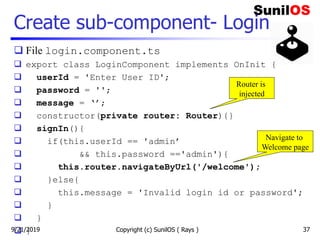
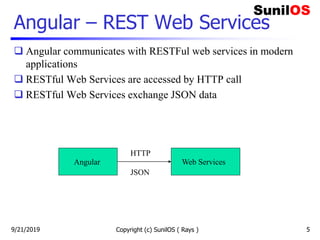
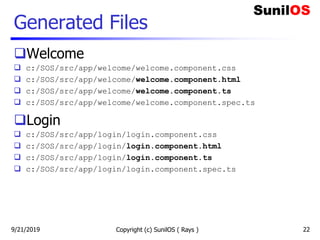
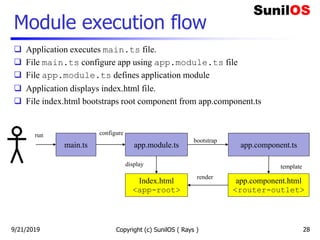
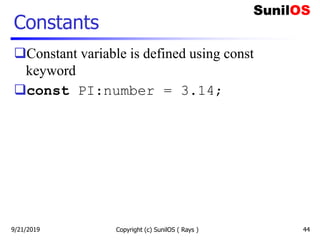
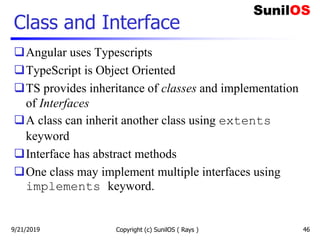
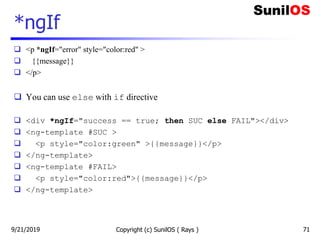
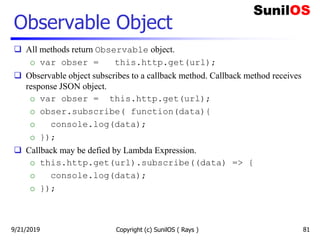
![Login View
<H1>Login</H1>
<p style="color:red" >{{message}}</p>
<form >
User ID: <input [(ngModel)]="userId" name="userId" type="text">
Password: <input [(ngModel)]="password" name="password" type="password">
<button (click)="signIn()">Sign In</button>
</form>
Directive [(ngModel)] is used for two-way data binding with attributes userId and password
of class LoginComponent.
Directive (click) is used to bind on-click event. Method signIn() is called when
Sign-In button is clicked.
Directive ngModel is provided by inbuild FormsModule module. This module will be
imported in app.module.ts.
URL :http://localhost:4200/login Copyright (c) SunilOS (
Rays ) 389/21/2019](https://image.slidesharecdn.com/angular8v1-190921085027/85/Angular-8-38-320.jpg)
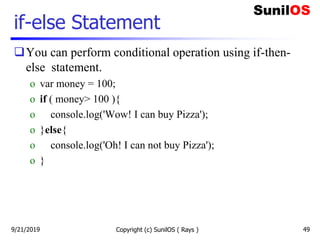
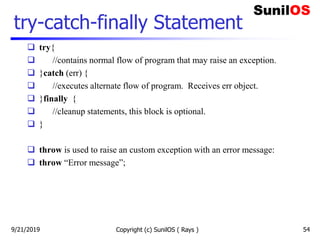
![Define Login-route
In order to access pages, define routes in app-routing.module.ts
const routes: Routes = [
{ path: 'login', component: LoginComponent},
{ path: 'welcome', component: WelcomeComponent}
];
@NgModule({
imports: [RouterModule.forRoot(routes)],
exports: [RouterModule]
})
Access pages using following URLs
o http://localhost:4200/login
Copyright (c) SunilOS ( Rays ) 399/21/2019](https://image.slidesharecdn.com/angular8v1-190921085027/85/Angular-8-39-320.jpg)


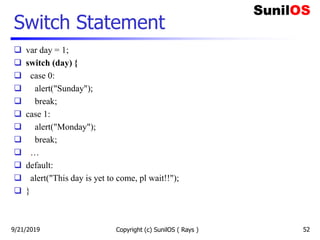
![For loop
var table = [2,4,6,8,10];
for (i=0; i<table.length; i++ ){
console.log('table['+i+']: ' + table[i]);
}
For in loop
for (i in table){
console.log('table['+i+']: ' + table[i]);
}
9/21/2019 Copyright (c) SunilOS ( Rays ) 50](https://image.slidesharecdn.com/angular8v1-190921085027/85/Angular-8-50-320.jpg)
![While Loop
var table = [2,4,6,8,10], var i=0;
while(i<table.length){
console.log('table['+i+']: ' + table[i]);
i++;
}
do{
console.log('table['+i+']: ' + table[i]);
i++;
}while(i<table.length)
9/21/2019 Copyright (c) SunilOS ( Rays ) 51](https://image.slidesharecdn.com/angular8v1-190921085027/85/Angular-8-51-320.jpg)

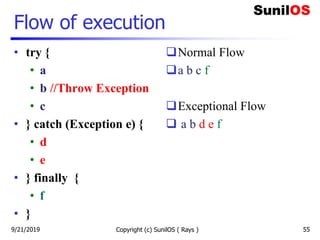
![Data Binding (Contd.)
Data Binding can be One-way, where data change in controller is
reflected at view, or Two-way, where data changes are reflected
in both directions; controller and view.
The following types of bindings are supported by Angular:
o One-way binding
Interpolation - {{attribute-name}}
Property Binding - [attribute-name]
o Event Binding - (event)
o Two-way binding - [(attribute-name)]
Copyright (c) SunilOS ( Rays ) 579/21/2019](https://image.slidesharecdn.com/angular8v1-190921085027/85/Angular-8-57-320.jpg)
![Property Binding
Property binding is used for one-way data binding
It binds controller attribute with DOM property of HTML
elements
For example
o <input type=“text” [value]=“message” >
o <img [src]='imageUrl’>
o export class LoginComponent implements OnInit {
o message = 'Invalid id or password’;
o imageUrl = ‘login.gif’;
o }
Copyright (c) SunilOS ( Rays ) 599/21/2019](https://image.slidesharecdn.com/angular8v1-190921085027/85/Angular-8-59-320.jpg)
![Event Binding
For example, signIn()method in LoginComponent is
bound with click event of submit button in login form.
export class LoginComponent implements OnInit {
signIn(){ .. }
}
<form >
User ID:<input [(ngModel)]="userId" >
Password: <input [(ngModel)]="password" >
<button (click)="signIn()">Sign In</button>
</form>
Copyright (c) SunilOS ( Rays ) 619/21/2019](https://image.slidesharecdn.com/angular8v1-190921085027/85/Angular-8-61-320.jpg)
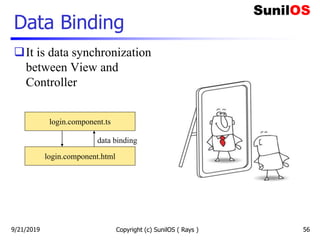
![Two-way data binding
In two-way data binding, data will be changed in both directions;
controller and view.
If you change data at view then controller will be changed. If you
change data at controller then view will be changed.
Two-way data binding is done by directive [(ngModel)].
It is used to bind html form input elements with controller class
attributes.
For example login form elements are bound with [()]:
o User ID:<input [(ngModel)]="userId" >
o Password: <input [(ngModel)]="password" >
Copyright (c) SunilOS ( Rays ) 629/21/2019](https://image.slidesharecdn.com/angular8v1-190921085027/85/Angular-8-62-320.jpg)
![Define routes
In order to access pages, define routes in app-routing.module.ts
const routes: Routes = [
{ path: 'login', component: LoginComponent},
{ path: 'welcome', component: WelcomeComponent}
];
@NgModule({
imports: [RouterModule.forRoot(routes)],
exports: [RouterModule]
})
Access pages using following URLs
o http://localhost:4200/login
o http://localhost:4200/welcome
Copyright (c) SunilOS ( Rays ) 649/21/2019](https://image.slidesharecdn.com/angular8v1-190921085027/85/Angular-8-64-320.jpg)
![Read Route Parameters
Path variables are read by ActivatedRoute service.
Service is injected into component constructor
Parameters read buy registering callback with
route.params.subscribe method
o import {ActivatedRoute} from "@angular/router";
o constructor(private route: ActivatedRoute) {
o this.route.params.subscribe( params =>{
o console.log(params["id"])
o });
o }
Copyright (c) SunilOS ( Rays ) 669/21/2019](https://image.slidesharecdn.com/angular8v1-190921085027/85/Angular-8-66-320.jpg)

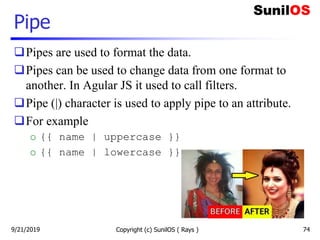
![*ngFor
export class MarksheetlistComponent implements OnInit {
list = [
{"id":1,"rollNo":"A1","name":"Rajesh Verma”},
{"id":2,"rollNo":"A2","name":"Ashish Nehra"},
{"id":3,"rollNo":"A3","name":"Manish”}
];
}
<table border="1">
<tr *ngFor = "let e of list" >
<td>{{e.id}}</td>
<td>{{e.rollNo}}</td>
<td>{{e.name}}</td>
</tr>
</table>
Copyright (c) SunilOS ( Rays ) 709/21/2019](https://image.slidesharecdn.com/angular8v1-190921085027/85/Angular-8-70-320.jpg)
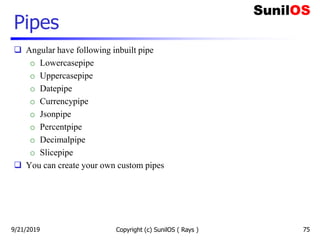
![Attribute Directive
Attribute directive alter the appearance or behavior of an existing
HTML element.
Attribute directive look like regular HTML attributes.
The ngModel directive, which implements two-way data
binding, is an example of an attribute directive.
ngModel modifies the behavior of an existing element by
setting its display property and responding to the changing
events.
o <input [(ngModel)]="movie.name">
Copyright (c) SunilOS ( Rays ) 729/21/2019](https://image.slidesharecdn.com/angular8v1-190921085027/85/Angular-8-72-320.jpg)
![Custom Directive
You can define your own custom directive using @Directive
decorator.
Custom directive can be generated by CLI command:
o ng generate directive myDir
Above command will generate
o @Directive({
o selector: '[appMyDir]'
o })
o export class MyDirDirective {..}
Copyright (c) SunilOS ( Rays ) 739/21/2019](https://image.slidesharecdn.com/angular8v1-190921085027/85/Angular-8-73-320.jpg)
![HttpClient Service
HttpClient service is used to communicate with http server.
It is contained by HttpClientModule module.
Module HttpClientModule is imported in app.module.ts.
Http Client is introduced in Angular 6.
//app.module.ts
o import { HttpClientModule } from '@angular/common/http’;
o @NgModule({
o imports: [
o BrowserModule,
o HttpClientModule
o ]
o })
Copyright (c) SunilOS ( Rays ) 799/21/2019](https://image.slidesharecdn.com/angular8v1-190921085027/85/Angular-8-79-320.jpg)
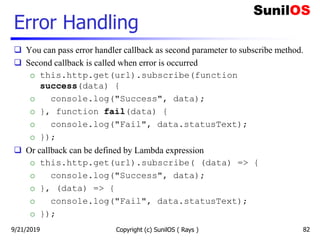
![HTTP Methods
HttpClient contains get(), post(), put(),patch(), delete()
methods to make http calls to the server.
Methods get(url) and delete(url) receive one parameter; url (endpoint) whereas
put(url,data), post(url,data) and patch(url,data) receive two parameters; url and
data.
Data is added to the request body. Usually data is a JSON object.
All methods receive “httpOptions” as last optional parameter.
get(url [,httpOptions])
delete(url[,httpOptions])
put(url,data[,httpOptions])
post(url,data[,httpOptions])
patch(url,data[,httpOptions])
Object HttpOptions contains request header information, query parameters and
other configurable values.
Copyright (c) SunilOS ( Rays ) 809/21/2019](https://image.slidesharecdn.com/angular8v1-190921085027/85/Angular-8-80-320.jpg)
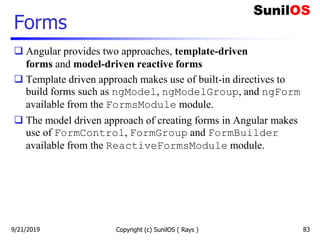
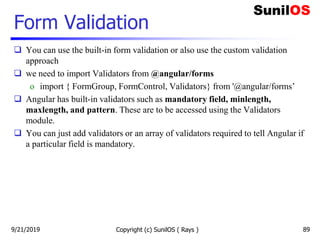
![Template Driven Form
With a template driven form, most of the work is done in the template
We need to import to FormsModule in app.module.ts
import { FormsModule } from '@angular/forms’;
o @NgModule({
o imports: [
o BrowserModule,
o FormsModule
o ],
Copyright (c) SunilOS ( Rays ) 849/21/2019](https://image.slidesharecdn.com/angular8v1-190921085027/85/Angular-8-84-320.jpg)
![Model Driven Form
In the model driven form, we need to import the ReactiveFormsModule from
@angular/forms and use the same in the imports array.
import { FormsModule } from '@angular/forms’;
o @NgModule({
o imports: [
o BrowserModule,
o ReactiveFormsModule
o ],
Copyright (c) SunilOS ( Rays ) 869/21/2019](https://image.slidesharecdn.com/angular8v1-190921085027/85/Angular-8-86-320.jpg)
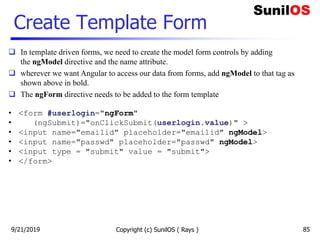
![login.component.html
Copyright (c) SunilOS ( Rays ) 88
<form [formGroup] = "formdata"
(ngSubmit)="onClickSubmit(formdata.value)" >
<input name="emailid" placeholder="emailid"
formControlName="emailid">
<input name="passwd" placeholder="passwd"
formControlName="passwd">
<input type = "submit" value="Log In">
</form>
9/21/2019](https://image.slidesharecdn.com/angular8v1-190921085027/85/Angular-8-88-320.jpg)
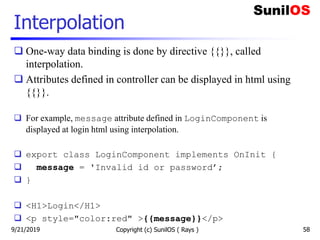
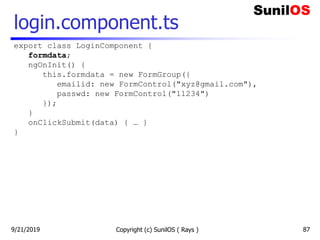
![login.component.ts
Copyright (c) SunilOS ( Rays ) 90
export class AppComponent {
formdata;
ngOnInit() {
this.formdata = new FormGroup({
emailid: new FormControl("", Validators.compose([
Validators.required,
Validators.pattern("[^ @]*@[^ @]*")
])),
passwd: new FormControl("")
});
}
onClickSubmit(data) {this.emailid = data.emailid;}
}
9/21/2019](https://image.slidesharecdn.com/angular8v1-190921085027/85/Angular-8-90-320.jpg)
![login.component.html
Copyright (c) SunilOS ( Rays ) 91
<form [formGroup] = "formdata"
(ngSubmit)="onClickSubmit(formdata.value)" >
<input type = "submit"
[disabled] = "!formdata.valid" value = "Log In">
</form>
9/21/2019](https://image.slidesharecdn.com/angular8v1-190921085027/85/Angular-8-91-320.jpg)


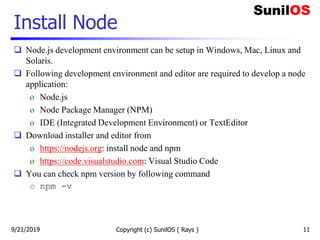
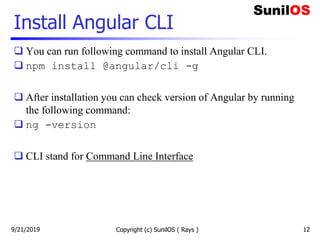
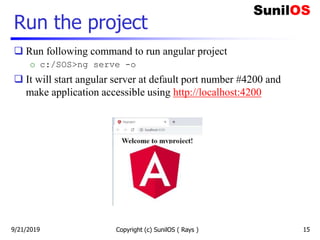
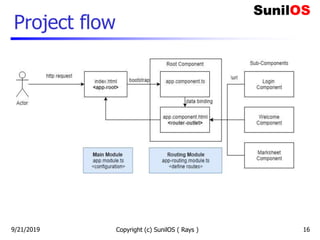
This document provides an overview of Angular, including: - Angular is a JavaScript framework used to build client-side applications with HTML. Code is written in TypeScript which compiles to JavaScript. - Angular enhances HTML with directives, data binding, and dependency injection. It follows an MVC architecture internally. - Components are the basic building blocks of Angular applications. Modules contain components and services. Services contain reusable business logic. - The document discusses Angular concepts like modules, components, data binding, services, routing and forms. It provides examples of creating a sample login/welcome application in Angular.