SlideShare a Scribd company logo
Inspiration strikes.
VM-110
LED MACRO RING LIGHT
User’s Manual
2 | Introduction
Introduction | 3
Introduction
Thank you for choosing the Bolt VM-110 LED Macro Ring Light. This LED light combines a compact design with
versatile features to give you both ease of use and creative lighting control. It’s great for shooting close-ups
and even portraits at close range. Among the benefits you’ll enjoy:
• Six levels of brightness adjustment
• Left- and right-only illumination modes
• Flash mode
• Automatic power-saving function
4 | Contents
Copyright © 2012 Gradus Group.
Bolt and other names of Bolt products are trademarks of Gradus Group. Other product and corporate names mentioned herein are trademarks of their respective holders.
Contents | 5
Contents
Introduction.....................................................................................................................................................3
Overview.....................................................................................................................................................6–9
Installing Batteries...................................................................................................................................10–11
Mounting the VM-110..............................................................................................................................12–14
Using the Diffusers..................................................................................................................................14–15
Turning on the VM-110 and Firing a Test..................................................................................................16–17
Light Mode....................................................................................................................................................17
Flash Mode....................................................................................................................................................18
Left and Right Mode......................................................................................................................................18
Brightness Adjustment...................................................................................................................................18
Troubleshooting.......................................................................................................................................19–20
Specifications................................................................................................................................................21
Notes.............................................................................................................................................................22
Warranty........................................................................................................................................................23
6 | Overview
3
6
1
2
4
9
13
11
12
14
15
10
8
7
5
Overview | 7
Overview
LED Ring Light
1. LED array
2. Adapter ring locks
3. Diffuser mounting indicators
4. Cable
Power Control Unit
5. LCD
6. Battery compartment cover
7. Locking wheel
8. Mounting foot
9. Pilot button
10. Mode button
11. Light button
12. Power button
13. Left navigation button
14. Set button
15. Right navigation button
8 | Overview
17 18 19 20
21
23
16
22
Overview | 9
LCD
16. Battery level indicator
17. Light mode
18. Flash mode
19. Left mode
20. Right mode
21. Dot indicator
22. Power output level indicator
23. Power output value
Included Accessories
• Four diffusers (clear, frosted
white, blue, and amber)
• Eight adapter rings (49, 52,
55, 58, 62, 67, 72, and 77mm)
• Stand / Tripod mount
10 | Installing Batteries
Installing Batteries
The VM-110 can be powered by four AA batteries of several types:
• Lithium (1.5 V)
• Nickel-metal hydride (Ni-MH) (1.2 V)
• Alkaline (1.5 V)
Note: For the longest battery life, lithium or Ni-MH batteries are recommended.
To install batteries, make sure the VM-110 is turned off and follow these steps:
1. Press on the battery compartment cover and slide it in the direction of the arrow to open it.
2. Insert batteries in the orientations indicated by the illustrations inside the compartment.
3. Close the battery compartment cover by pressing and sliding it into place, in the opposite direction of the
arrow on the cover.
Installing Batteries | 11
Important!
When battery power is low, the battery level indicator will blink on the LCD. Replace all four batteries at the
same time. Do not mix battery types or brands, or use old and new batteries together.
1 2 3
12 | Mounting the VM-110
Mounting the VM-110
The VM-110 has two main components, the power control unit and the LED ring light. The power control unit
mounts onto your camera’s hot shoe mount, and the LED ring light mounts onto your camera’s lens via one of
the included adapter rings. There are eight adapter rings included: 49, 52, 55, 58, 62, 67, 72, and 77mm.
To mount the power control unit on your camera,
make sure the VM-110 is turned off
and follow these steps:
1. Rotate the locking wheel counterclockwise to loosen it.
1
Mounting the VM-110 | 13
2. Slide the mounting
foot all the way into
your camera’s hot
shoe.
3. Rotate the locking
wheel clockwise until
secure.
To mount the LED ring light on your camera, follow these steps:
1. Determine what size adapter ring will fit your camera lens; the
engraving on the ring should match your lens’ filter thread.
2. Align the adapter ring with the thread on the inside of the lens,
and screw it on until secure. Do not overtighten.
3. Press and hold the adapter ring locks while mounting the ring
light onto the adapter. Make sure that the Bolt logo is on the
bottom of the ring light and facing away from the camera.
2
2
3
3
14 | Using the Diffusers
To dismount the VM-110 from your camera, make sure that it is turned off and follow these steps:
1. Press and hold the adapter ring locks to release the LED ring.
2. Rotate the locking wheel counterclockwise to release the power control.
3. Slide the mounting foot out of your camera’s hot shoe.
4. If desired, remove the adapter ring from your lens.
Mounting the VM-110 power control on the included stand:
You can mount the VM-110 power control unit on the included stand in the same way you would mount it on
your camera. This allows you to set it on a flat surface or to attach it to a tripod head, light stand, or clamp
that has a compatible 1/4″-20 screw mount. Using your VM-110 in this manner will free up your camera’s hot
shoe.
Using the Diffusers
The VM-110 comes with four diffusers that modify the light output: clear, frosted white, blue, and amber. The
frosted white diffuser will produce a more diffused light than the clear one. The blue and amber diffusers will
cool and warm the light, respectively. Note that you will lose a bit of light with the blue and amber diffusers.
Using the Diffusers | 15
To mount the diffuser on your LED ring:
1. Match up the red alignment line on the diffuser with the OFF
alignment line on the LED ring.
2. Fit the diffuser onto the LED ring and rotate it so the red
alignment line on the diffuser matches up with the ON
alignment line on the LED ring.
To remove the diffuser, rotate it so that the indicator matches up
with the OFF alignment line. The diffuser can then be removed.
Tip: Using the VM-110 without any diffuser in place will result in the
maximum brightness, but the light will also be the least soft.
1
2
16 | Turning on the VM-110
Turning on the VM-110 and Firing a Test
To turn the VM-110 on, press and hold the power button until the LCD on the power control unit turns on.
To fire a test, press the PILOT button.
Important!
Some lenses have front elements that rotate during autofocusing. In such a case, we recommend using
manual focus to prevent any possible damage to your lens or camera.
Automatic power-saving function: After thirty minutes of inactivity, the VM-110 will automatically enter
power-saving mode to conserve battery life. To reactivate the VM-110, press the SET button. During long
periods of inactivity, it is recommended that you use the power button to turn the LED off completely.
LCD illumination: When you turn on the VM-110 or press any button, the LCD will be illuminated for about
twenty seconds.
Light Mode | 17
Battery level indicator: The battery level indicator on the LCD shows the remaining battery power.
LCD Display Status Battery Level
70%–100%
40%–69%
10%–39%
0%–9%
Light Mode
During Light mode, the light will be on continuously. This is ideal for seeing exactly where the light will fall, as
well as for shooting video. Press the LIGHT button to turn on the LEDs for constant lighting. The dot indicator
on the LCD will switch to Light mode.
18 | Modes
Flash Mode
To save battery power, you can engage the flash mode so the LED turns on for approximately half a second
when the camera’s shutter is released. To engage the Flash mode, press the MODE button repeatedly until the
dot indicator on the LCD switches to Flash mode.
When switching to Flash mode from Light mode, the power level indicator may rise to a higher level. This
happens when the battery power is very low and indicates that the batteries will have a longer ‘effective life’ in
Flash mode. Note that the flash mode will only work if the control unit is mounted on the camera’s hot shoe.
Left and Right Mode
For more dramatic lighting, you can set your VM-110 to illuminate only from the left or right half of the LED
array. To set your VM-110 to Left or Right mode, press the MODE button repeatedly until the dot indicator on
the LCD switches to Left mode or Right mode.
Brightness Adjustment
You can adjust the brightness output of your VM-110 from -1.5 to +1.5. To adjust the brightness output, press
the right or left navigation buttons to increase or decrease the brightness. The onscreen power output level
indicator indicates the current brightness output.
Troubleshooting | 19
Troubleshooting
Problem Solution
The VM-110 is stuck in the
camera hot shoe.
• Make sure that the mounting foot lock is released. (Page 14)
The VM-110 is turned on and is
in Light mode but won’t light up.
• Make sure that fresh batteries are installed and are in the proper
orientation. (Page 10)
The VM-110 is turned on and is
in Flash mode but won’t fire.
• Make sure that fresh batteries are installed and are in the proper
orientation. (Page 10)
• Make sure the control unit is securely attached to the camera. (Page
12)
• Make sure that the electrical contact on the foot of the control unit is
not dirty. Clean it and try again.
The VM-110 is rotating right
or left while the camera is
focusing.
• Your lens has a rotating front element. Use manual focus.
20 | Troubleshooting
Problem Solution
The battery indicator fluctuates
between full and empty when
reinstalling the same batteries
repeatedly.
• This is normal and may happen when the batteries are nearly
exhausted. Replace the batteries.
Specifications | 21
Specifications
Type: On-camera LED macro ring light
Compatible cameras: All cameras with a standard hot shoe and a lens filter thread of 49, 52, 55, 58, 62, 67,
72, or 77mm
Guider number: (at 50mm focal length, ISO 100): GN 15
Effective distance: up to 4.9 ft. (1.5 m)
Color temperature: 3,000–15,000 K (Using diffusers)
Power Source: 4 AA lithium, Ni-MH, or alkaline batteries
Dimensions:
Power control unit: Approx. 4.5 x 2.75 x 1.4 inches / 114 x 70 x 35 mm
LED ring: Approx. 4.5 x 4.3 x .75 inches / 114 x 109 x 19 mm
Weight: 7.1 oz. (200 g) without batteries
22 | Notes
Notes
Warranty | 23
Warranty
LIMITED ONE-YEAR WARRANTY
Bolt provides a limited warranty that this product is free from defects in materials and workmanship to the
original purchaser under normal use for a period of one (1) year from the original purchase date or thirty (30)
days after replacement whichever occurs later. Our responsibility with respect to this limited warranty shall be
limited solely to repair or replacement, at its option, of any product which fails during normal consumer use.
To obtain warranty coverage during the Warranty Period, contact your place of purchase (“Seller”) to obtain a
return merchandise authorization (“RMA”) number, and return to Seller the defective product along with proof
of purchase and the RMA number.
This warranty does not extend to damage or failure which results from misuse, neglect, accident, alteration,
abuse, improper installation or maintenance. EXCEPT AS PROVIDED HEREIN, BOLT MAKES NEITHER ANY
EXPRESS WARRANTIES NOR ANY IMPLIED WARRANTIES, INCLUDING BUT NOT LIMITED TO ANY IMPLIED
WARRANTY OF MERCHANTABILITY OR FITNESS FOR A PARTICULAR PURPOSE. This warranty provides you with
specific legal rights, and you may also have additional rights which vary from state to state.
© Copyright 2012 Gradus Group, LLC
www.BoltFlashes.com
Copyright © 2012 Gradus Group.
www.boltflashes.com

More Related Content

Similar to 75914.pdf

Datavideo RMC-190 PTZ camara control unit
Datavideo RMC-190 PTZ camara control unitDatavideo RMC-190 PTZ camara control unit
Datavideo RMC-190 PTZ camara control unit
AV ProfShop
 
Instruction Manual | Sig Sauer Romeo5X/XDR 1x20 | Optics Trade
Instruction Manual | Sig Sauer Romeo5X/XDR 1x20 | Optics TradeInstruction Manual | Sig Sauer Romeo5X/XDR 1x20 | Optics Trade
Instruction Manual | Sig Sauer Romeo5X/XDR 1x20 | Optics Trade
Optics-Trade
 
Instructions | Holosun HS407CO-RD-X2 | Optics Trade
Instructions | Holosun HS407CO-RD-X2 | Optics TradeInstructions | Holosun HS407CO-RD-X2 | Optics Trade
Instructions | Holosun HS407CO-RD-X2 | Optics Trade
Optics-Trade
 
Holosun 508T X2 Instruction Manual - Optics Trade
Holosun 508T X2 Instruction Manual - Optics TradeHolosun 508T X2 Instruction Manual - Optics Trade
Holosun 508T X2 Instruction Manual - Optics Trade
Optics-Trade
 
Actron CP7527 Inductive Timing Light User Manual
Actron CP7527 Inductive Timing Light User ManualActron CP7527 Inductive Timing Light User Manual
Actron CP7527 Inductive Timing Light User Manual
Tim Miller
 
Actron CP7528 Advance Timing Light User Manual
Actron CP7528 Advance Timing Light User ManualActron CP7528 Advance Timing Light User Manual
Actron CP7528 Advance Timing Light User Manual
Tim Miller
 
Actron CP7529 Digital Timing Light User Manual
Actron CP7529 Digital Timing Light User ManualActron CP7529 Digital Timing Light User Manual
Actron CP7529 Digital Timing Light User Manual
Tim Miller
 
Instruction manual | Leupold Freedom RDS Red Dots | Optics Trade
Instruction manual | Leupold Freedom RDS Red Dots | Optics TradeInstruction manual | Leupold Freedom RDS Red Dots | Optics Trade
Instruction manual | Leupold Freedom RDS Red Dots | Optics Trade
Optics-Trade
 
Instructions | Vortex Razor AMG UH-1 Red Dot
Instructions | Vortex Razor AMG UH-1 Red DotInstructions | Vortex Razor AMG UH-1 Red Dot
Instructions | Vortex Razor AMG UH-1 Red Dot
Optics-Trade
 
Ph pan04-zipato-micro-module-switch-double-user-manual-v1.4
Ph pan04-zipato-micro-module-switch-double-user-manual-v1.4Ph pan04-zipato-micro-module-switch-double-user-manual-v1.4
Ph pan04-zipato-micro-module-switch-double-user-manual-v1.4
Domotica daVinci
 
ZIP Pan03 - Zipato micromodule single switch max.load 11 a user manual v1.0
ZIP Pan03 - Zipato micromodule single switch max.load 11 a user manual v1.0ZIP Pan03 - Zipato micromodule single switch max.load 11 a user manual v1.0
ZIP Pan03 - Zipato micromodule single switch max.load 11 a user manual v1.0
Domotica daVinci
 
Holosun 509T X2 Instruction Manual - Optics Trade
Holosun 509T X2 Instruction Manual - Optics TradeHolosun 509T X2 Instruction Manual - Optics Trade
Holosun 509T X2 Instruction Manual - Optics Trade
Optics-Trade
 
Instruction Manual | Pard FD1 Digital NV Front Attachment | Optics Trade
Instruction Manual | Pard FD1 Digital NV Front Attachment | Optics TradeInstruction Manual | Pard FD1 Digital NV Front Attachment | Optics Trade
Instruction Manual | Pard FD1 Digital NV Front Attachment | Optics Trade
Optics-Trade
 
Hướng dẫn sử dụng máy nội soi công nghiệp Extech BR100
Hướng dẫn sử dụng  máy nội soi công nghiệp Extech BR100Hướng dẫn sử dụng  máy nội soi công nghiệp Extech BR100
Hướng dẫn sử dụng máy nội soi công nghiệp Extech BR100
Tenmars Việt Nam
 
Multimedia camara
Multimedia camaraMultimedia camara
Multimedia camara
Natalia Ornitorrinco
 
Instruction Manual ATN NVB5X Series NV Bi-ocular | Optics Trade
Instruction Manual ATN NVB5X Series NV Bi-ocular | Optics TradeInstruction Manual ATN NVB5X Series NV Bi-ocular | Optics Trade
Instruction Manual ATN NVB5X Series NV Bi-ocular | Optics Trade
Optics-Trade
 
Micro remote system_doc (2)
Micro remote system_doc (2)Micro remote system_doc (2)
Micro remote system_doc (2)
Sang-Dae Jung
 
Instructions NightForce BEAST Riflescopes | Optics Trade
Instructions NightForce BEAST Riflescopes | Optics TradeInstructions NightForce BEAST Riflescopes | Optics Trade
Instructions NightForce BEAST Riflescopes | Optics Trade
Optics-Trade
 
Instruction Manual | EO Tech 2.5-10x FFP | Optics Trade
Instruction Manual | EO Tech 2.5-10x FFP | Optics TradeInstruction Manual | EO Tech 2.5-10x FFP | Optics Trade
Instruction Manual | EO Tech 2.5-10x FFP | Optics Trade
Optics-Trade
 
Samsung 193T User Manual.pdf
Samsung 193T User Manual.pdfSamsung 193T User Manual.pdf
Samsung 193T User Manual.pdf
ssuser942942
 

Similar to 75914.pdf (20)

Datavideo RMC-190 PTZ camara control unit
Datavideo RMC-190 PTZ camara control unitDatavideo RMC-190 PTZ camara control unit
Datavideo RMC-190 PTZ camara control unit
 
Instruction Manual | Sig Sauer Romeo5X/XDR 1x20 | Optics Trade
Instruction Manual | Sig Sauer Romeo5X/XDR 1x20 | Optics TradeInstruction Manual | Sig Sauer Romeo5X/XDR 1x20 | Optics Trade
Instruction Manual | Sig Sauer Romeo5X/XDR 1x20 | Optics Trade
 
Instructions | Holosun HS407CO-RD-X2 | Optics Trade
Instructions | Holosun HS407CO-RD-X2 | Optics TradeInstructions | Holosun HS407CO-RD-X2 | Optics Trade
Instructions | Holosun HS407CO-RD-X2 | Optics Trade
 
Holosun 508T X2 Instruction Manual - Optics Trade
Holosun 508T X2 Instruction Manual - Optics TradeHolosun 508T X2 Instruction Manual - Optics Trade
Holosun 508T X2 Instruction Manual - Optics Trade
 
Actron CP7527 Inductive Timing Light User Manual
Actron CP7527 Inductive Timing Light User ManualActron CP7527 Inductive Timing Light User Manual
Actron CP7527 Inductive Timing Light User Manual
 
Actron CP7528 Advance Timing Light User Manual
Actron CP7528 Advance Timing Light User ManualActron CP7528 Advance Timing Light User Manual
Actron CP7528 Advance Timing Light User Manual
 
Actron CP7529 Digital Timing Light User Manual
Actron CP7529 Digital Timing Light User ManualActron CP7529 Digital Timing Light User Manual
Actron CP7529 Digital Timing Light User Manual
 
Instruction manual | Leupold Freedom RDS Red Dots | Optics Trade
Instruction manual | Leupold Freedom RDS Red Dots | Optics TradeInstruction manual | Leupold Freedom RDS Red Dots | Optics Trade
Instruction manual | Leupold Freedom RDS Red Dots | Optics Trade
 
Instructions | Vortex Razor AMG UH-1 Red Dot
Instructions | Vortex Razor AMG UH-1 Red DotInstructions | Vortex Razor AMG UH-1 Red Dot
Instructions | Vortex Razor AMG UH-1 Red Dot
 
Ph pan04-zipato-micro-module-switch-double-user-manual-v1.4
Ph pan04-zipato-micro-module-switch-double-user-manual-v1.4Ph pan04-zipato-micro-module-switch-double-user-manual-v1.4
Ph pan04-zipato-micro-module-switch-double-user-manual-v1.4
 
ZIP Pan03 - Zipato micromodule single switch max.load 11 a user manual v1.0
ZIP Pan03 - Zipato micromodule single switch max.load 11 a user manual v1.0ZIP Pan03 - Zipato micromodule single switch max.load 11 a user manual v1.0
ZIP Pan03 - Zipato micromodule single switch max.load 11 a user manual v1.0
 
Holosun 509T X2 Instruction Manual - Optics Trade
Holosun 509T X2 Instruction Manual - Optics TradeHolosun 509T X2 Instruction Manual - Optics Trade
Holosun 509T X2 Instruction Manual - Optics Trade
 
Instruction Manual | Pard FD1 Digital NV Front Attachment | Optics Trade
Instruction Manual | Pard FD1 Digital NV Front Attachment | Optics TradeInstruction Manual | Pard FD1 Digital NV Front Attachment | Optics Trade
Instruction Manual | Pard FD1 Digital NV Front Attachment | Optics Trade
 
Hướng dẫn sử dụng máy nội soi công nghiệp Extech BR100
Hướng dẫn sử dụng  máy nội soi công nghiệp Extech BR100Hướng dẫn sử dụng  máy nội soi công nghiệp Extech BR100
Hướng dẫn sử dụng máy nội soi công nghiệp Extech BR100
 
Multimedia camara
Multimedia camaraMultimedia camara
Multimedia camara
 
Instruction Manual ATN NVB5X Series NV Bi-ocular | Optics Trade
Instruction Manual ATN NVB5X Series NV Bi-ocular | Optics TradeInstruction Manual ATN NVB5X Series NV Bi-ocular | Optics Trade
Instruction Manual ATN NVB5X Series NV Bi-ocular | Optics Trade
 
Micro remote system_doc (2)
Micro remote system_doc (2)Micro remote system_doc (2)
Micro remote system_doc (2)
 
Instructions NightForce BEAST Riflescopes | Optics Trade
Instructions NightForce BEAST Riflescopes | Optics TradeInstructions NightForce BEAST Riflescopes | Optics Trade
Instructions NightForce BEAST Riflescopes | Optics Trade
 
Instruction Manual | EO Tech 2.5-10x FFP | Optics Trade
Instruction Manual | EO Tech 2.5-10x FFP | Optics TradeInstruction Manual | EO Tech 2.5-10x FFP | Optics Trade
Instruction Manual | EO Tech 2.5-10x FFP | Optics Trade
 
Samsung 193T User Manual.pdf
Samsung 193T User Manual.pdfSamsung 193T User Manual.pdf
Samsung 193T User Manual.pdf
 

Recently uploaded

Dpboss Matka Guessing Satta Matta Matka Kalyan panel Chart Indian Matka Dpbos...
Dpboss Matka Guessing Satta Matta Matka Kalyan panel Chart Indian Matka Dpbos...Dpboss Matka Guessing Satta Matta Matka Kalyan panel Chart Indian Matka Dpbos...
Dpboss Matka Guessing Satta Matta Matka Kalyan panel Chart Indian Matka Dpbos...
➒➌➎➏➑➐➋➑➐➐Dpboss Matka Guessing Satta Matka Kalyan Chart Indian Matka
 
Full CAD Project Cardiovascuwhore Debut PDF CAD Meena Pittman
Full CAD Project Cardiovascuwhore Debut PDF CAD Meena PittmanFull CAD Project Cardiovascuwhore Debut PDF CAD Meena Pittman
Full CAD Project Cardiovascuwhore Debut PDF CAD Meena Pittman
meenap32
 
Cherries 32 collection of colorful paintings
Cherries 32 collection of colorful paintingsCherries 32 collection of colorful paintings
Cherries 32 collection of colorful paintings
sandamichaela *
 
Heart Touching Romantic Love Shayari In English with Images
Heart Touching Romantic Love Shayari In English with ImagesHeart Touching Romantic Love Shayari In English with Images
Heart Touching Romantic Love Shayari In English with Images
Short Good Quotes
 
Portfolio of my work as my passion and skills
Portfolio of my work as my passion and skillsPortfolio of my work as my passion and skills
Portfolio of my work as my passion and skills
waljorylypil626
 
一比一原版加拿大多伦多大学毕业证(uoft毕业证书)如何办理
一比一原版加拿大多伦多大学毕业证(uoft毕业证书)如何办理一比一原版加拿大多伦多大学毕业证(uoft毕业证书)如何办理
一比一原版加拿大多伦多大学毕业证(uoft毕业证书)如何办理
taqyea
 
Barbie Made To Move Skin Tones Matches.pptx
Barbie Made To Move Skin Tones Matches.pptxBarbie Made To Move Skin Tones Matches.pptx
Barbie Made To Move Skin Tones Matches.pptx
LinaCosta15
 
❼❷⓿❺❻❷❽❷❼❽ Dpboss Kalyan Satta Matka Guessing Matka Result Main Bazar chart
❼❷⓿❺❻❷❽❷❼❽ Dpboss Kalyan Satta Matka Guessing Matka Result Main Bazar chart❼❷⓿❺❻❷❽❷❼❽ Dpboss Kalyan Satta Matka Guessing Matka Result Main Bazar chart
❼❷⓿❺❻❷❽❷❼❽ Dpboss Kalyan Satta Matka Guessing Matka Result Main Bazar chart
 
哪里购买美国乔治城大学毕业证硕士学位证书原版一模一样
哪里购买美国乔治城大学毕业证硕士学位证书原版一模一样哪里购买美国乔治城大学毕业证硕士学位证书原版一模一样
哪里购买美国乔治城大学毕业证硕士学位证书原版一模一样
tc73868
 
This is a test powerpoint!!!!!!!!!!!!!!!
This is a test powerpoint!!!!!!!!!!!!!!!This is a test powerpoint!!!!!!!!!!!!!!!
This is a test powerpoint!!!!!!!!!!!!!!!
briannedpegg
 
❼❷⓿❺❻❷❽❷❼❽ Dpboss Matka ! Fix Satta Matka ! Matka Result ! Matka Guessing ! ...
❼❷⓿❺❻❷❽❷❼❽  Dpboss Matka ! Fix Satta Matka ! Matka Result ! Matka Guessing ! ...❼❷⓿❺❻❷❽❷❼❽  Dpboss Matka ! Fix Satta Matka ! Matka Result ! Matka Guessing ! ...
❼❷⓿❺❻❷❽❷❼❽ Dpboss Matka ! Fix Satta Matka ! Matka Result ! Matka Guessing ! ...
❼❷⓿❺❻❷❽❷❼❽ Dpboss Kalyan Satta Matka Guessing Matka Result Main Bazar chart
 
哪里购买(ucr毕业证书)美国加州大学河滨分校毕业证研究生文凭证书原版一模一样
哪里购买(ucr毕业证书)美国加州大学河滨分校毕业证研究生文凭证书原版一模一样哪里购买(ucr毕业证书)美国加州大学河滨分校毕业证研究生文凭证书原版一模一样
哪里购买(ucr毕业证书)美国加州大学河滨分校毕业证研究生文凭证书原版一模一样
a0pr7yf1
 
➒➌➎➏➑➐➋➑➐➐ Kalyan Matka Satta Matka Dpboss Matka Guessing Indian Matka
➒➌➎➏➑➐➋➑➐➐ Kalyan Matka Satta Matka Dpboss Matka Guessing Indian Matka➒➌➎➏➑➐➋➑➐➐ Kalyan Matka Satta Matka Dpboss Matka Guessing Indian Matka
➒➌➎➏➑➐➋➑➐➐ Kalyan Matka Satta Matka Dpboss Matka Guessing Indian Matka
➒➌➎➏➑➐➋➑➐➐Dpboss Matka Guessing Satta Matka Kalyan Chart Indian Matka
 
ARNAUVALERY RECORD STORE SCAVENGER HUNT.
ARNAUVALERY RECORD STORE SCAVENGER HUNT.ARNAUVALERY RECORD STORE SCAVENGER HUNT.
ARNAUVALERY RECORD STORE SCAVENGER HUNT.
ValeryArnau
 
Minor_Michael_PowerPoint-Presentation.pptx
Minor_Michael_PowerPoint-Presentation.pptxMinor_Michael_PowerPoint-Presentation.pptx
Minor_Michael_PowerPoint-Presentation.pptx
MichaelMinor19
 
FinalFinalSelf-PortraiturePowerPoint.pptx
FinalFinalSelf-PortraiturePowerPoint.pptxFinalFinalSelf-PortraiturePowerPoint.pptx
FinalFinalSelf-PortraiturePowerPoint.pptx
abbieharman
 
Codes n Conventions Website Media studies.pptx
Codes n Conventions Website Media studies.pptxCodes n Conventions Website Media studies.pptx
Codes n Conventions Website Media studies.pptx
ZackSpencer3
 
一比一原版(BC毕业证)波士顿学院毕业证如何办理
一比一原版(BC毕业证)波士顿学院毕业证如何办理一比一原版(BC毕业证)波士顿学院毕业证如何办理
一比一原版(BC毕业证)波士顿学院毕业证如何办理
40fortunate
 
storyboard: Victor and Verlin discussing about top hat
storyboard: Victor and Verlin discussing about top hatstoryboard: Victor and Verlin discussing about top hat
storyboard: Victor and Verlin discussing about top hat
LyneSun
 
FinalLessonPlanResponding.docxnknknknknknk
FinalLessonPlanResponding.docxnknknknknknkFinalLessonPlanResponding.docxnknknknknknk
FinalLessonPlanResponding.docxnknknknknknk
abbieharman
 

Recently uploaded (20)

Dpboss Matka Guessing Satta Matta Matka Kalyan panel Chart Indian Matka Dpbos...
Dpboss Matka Guessing Satta Matta Matka Kalyan panel Chart Indian Matka Dpbos...Dpboss Matka Guessing Satta Matta Matka Kalyan panel Chart Indian Matka Dpbos...
Dpboss Matka Guessing Satta Matta Matka Kalyan panel Chart Indian Matka Dpbos...
 
Full CAD Project Cardiovascuwhore Debut PDF CAD Meena Pittman
Full CAD Project Cardiovascuwhore Debut PDF CAD Meena PittmanFull CAD Project Cardiovascuwhore Debut PDF CAD Meena Pittman
Full CAD Project Cardiovascuwhore Debut PDF CAD Meena Pittman
 
Cherries 32 collection of colorful paintings
Cherries 32 collection of colorful paintingsCherries 32 collection of colorful paintings
Cherries 32 collection of colorful paintings
 
Heart Touching Romantic Love Shayari In English with Images
Heart Touching Romantic Love Shayari In English with ImagesHeart Touching Romantic Love Shayari In English with Images
Heart Touching Romantic Love Shayari In English with Images
 
Portfolio of my work as my passion and skills
Portfolio of my work as my passion and skillsPortfolio of my work as my passion and skills
Portfolio of my work as my passion and skills
 
一比一原版加拿大多伦多大学毕业证(uoft毕业证书)如何办理
一比一原版加拿大多伦多大学毕业证(uoft毕业证书)如何办理一比一原版加拿大多伦多大学毕业证(uoft毕业证书)如何办理
一比一原版加拿大多伦多大学毕业证(uoft毕业证书)如何办理
 
Barbie Made To Move Skin Tones Matches.pptx
Barbie Made To Move Skin Tones Matches.pptxBarbie Made To Move Skin Tones Matches.pptx
Barbie Made To Move Skin Tones Matches.pptx
 
❼❷⓿❺❻❷❽❷❼❽ Dpboss Kalyan Satta Matka Guessing Matka Result Main Bazar chart
❼❷⓿❺❻❷❽❷❼❽ Dpboss Kalyan Satta Matka Guessing Matka Result Main Bazar chart❼❷⓿❺❻❷❽❷❼❽ Dpboss Kalyan Satta Matka Guessing Matka Result Main Bazar chart
❼❷⓿❺❻❷❽❷❼❽ Dpboss Kalyan Satta Matka Guessing Matka Result Main Bazar chart
 
哪里购买美国乔治城大学毕业证硕士学位证书原版一模一样
哪里购买美国乔治城大学毕业证硕士学位证书原版一模一样哪里购买美国乔治城大学毕业证硕士学位证书原版一模一样
哪里购买美国乔治城大学毕业证硕士学位证书原版一模一样
 
This is a test powerpoint!!!!!!!!!!!!!!!
This is a test powerpoint!!!!!!!!!!!!!!!This is a test powerpoint!!!!!!!!!!!!!!!
This is a test powerpoint!!!!!!!!!!!!!!!
 
❼❷⓿❺❻❷❽❷❼❽ Dpboss Matka ! Fix Satta Matka ! Matka Result ! Matka Guessing ! ...
❼❷⓿❺❻❷❽❷❼❽  Dpboss Matka ! Fix Satta Matka ! Matka Result ! Matka Guessing ! ...❼❷⓿❺❻❷❽❷❼❽  Dpboss Matka ! Fix Satta Matka ! Matka Result ! Matka Guessing ! ...
❼❷⓿❺❻❷❽❷❼❽ Dpboss Matka ! Fix Satta Matka ! Matka Result ! Matka Guessing ! ...
 
哪里购买(ucr毕业证书)美国加州大学河滨分校毕业证研究生文凭证书原版一模一样
哪里购买(ucr毕业证书)美国加州大学河滨分校毕业证研究生文凭证书原版一模一样哪里购买(ucr毕业证书)美国加州大学河滨分校毕业证研究生文凭证书原版一模一样
哪里购买(ucr毕业证书)美国加州大学河滨分校毕业证研究生文凭证书原版一模一样
 
➒➌➎➏➑➐➋➑➐➐ Kalyan Matka Satta Matka Dpboss Matka Guessing Indian Matka
➒➌➎➏➑➐➋➑➐➐ Kalyan Matka Satta Matka Dpboss Matka Guessing Indian Matka➒➌➎➏➑➐➋➑➐➐ Kalyan Matka Satta Matka Dpboss Matka Guessing Indian Matka
➒➌➎➏➑➐➋➑➐➐ Kalyan Matka Satta Matka Dpboss Matka Guessing Indian Matka
 
ARNAUVALERY RECORD STORE SCAVENGER HUNT.
ARNAUVALERY RECORD STORE SCAVENGER HUNT.ARNAUVALERY RECORD STORE SCAVENGER HUNT.
ARNAUVALERY RECORD STORE SCAVENGER HUNT.
 
Minor_Michael_PowerPoint-Presentation.pptx
Minor_Michael_PowerPoint-Presentation.pptxMinor_Michael_PowerPoint-Presentation.pptx
Minor_Michael_PowerPoint-Presentation.pptx
 
FinalFinalSelf-PortraiturePowerPoint.pptx
FinalFinalSelf-PortraiturePowerPoint.pptxFinalFinalSelf-PortraiturePowerPoint.pptx
FinalFinalSelf-PortraiturePowerPoint.pptx
 
Codes n Conventions Website Media studies.pptx
Codes n Conventions Website Media studies.pptxCodes n Conventions Website Media studies.pptx
Codes n Conventions Website Media studies.pptx
 
一比一原版(BC毕业证)波士顿学院毕业证如何办理
一比一原版(BC毕业证)波士顿学院毕业证如何办理一比一原版(BC毕业证)波士顿学院毕业证如何办理
一比一原版(BC毕业证)波士顿学院毕业证如何办理
 
storyboard: Victor and Verlin discussing about top hat
storyboard: Victor and Verlin discussing about top hatstoryboard: Victor and Verlin discussing about top hat
storyboard: Victor and Verlin discussing about top hat
 
FinalLessonPlanResponding.docxnknknknknknk
FinalLessonPlanResponding.docxnknknknknknkFinalLessonPlanResponding.docxnknknknknknk
FinalLessonPlanResponding.docxnknknknknknk
 

75914.pdf

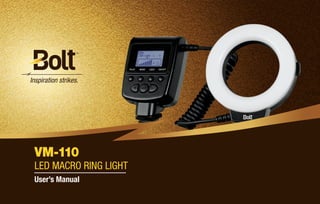
  • 1. Inspiration strikes. Inspiration strikes. VM-110 LED MACRO RING LIGHT User’s Manual
  • 3. Introduction | 3 Introduction Thank you for choosing the Bolt VM-110 LED Macro Ring Light. This LED light combines a compact design with versatile features to give you both ease of use and creative lighting control. It’s great for shooting close-ups and even portraits at close range. Among the benefits you’ll enjoy: • Six levels of brightness adjustment • Left- and right-only illumination modes • Flash mode • Automatic power-saving function
  • 4. 4 | Contents Copyright © 2012 Gradus Group. Bolt and other names of Bolt products are trademarks of Gradus Group. Other product and corporate names mentioned herein are trademarks of their respective holders.
  • 5. Contents | 5 Contents Introduction.....................................................................................................................................................3 Overview.....................................................................................................................................................6–9 Installing Batteries...................................................................................................................................10–11 Mounting the VM-110..............................................................................................................................12–14 Using the Diffusers..................................................................................................................................14–15 Turning on the VM-110 and Firing a Test..................................................................................................16–17 Light Mode....................................................................................................................................................17 Flash Mode....................................................................................................................................................18 Left and Right Mode......................................................................................................................................18 Brightness Adjustment...................................................................................................................................18 Troubleshooting.......................................................................................................................................19–20 Specifications................................................................................................................................................21 Notes.............................................................................................................................................................22 Warranty........................................................................................................................................................23
  • 7. Overview | 7 Overview LED Ring Light 1. LED array 2. Adapter ring locks 3. Diffuser mounting indicators 4. Cable Power Control Unit 5. LCD 6. Battery compartment cover 7. Locking wheel 8. Mounting foot 9. Pilot button 10. Mode button 11. Light button 12. Power button 13. Left navigation button 14. Set button 15. Right navigation button
  • 8. 8 | Overview 17 18 19 20 21 23 16 22
  • 9. Overview | 9 LCD 16. Battery level indicator 17. Light mode 18. Flash mode 19. Left mode 20. Right mode 21. Dot indicator 22. Power output level indicator 23. Power output value Included Accessories • Four diffusers (clear, frosted white, blue, and amber) • Eight adapter rings (49, 52, 55, 58, 62, 67, 72, and 77mm) • Stand / Tripod mount
  • 10. 10 | Installing Batteries Installing Batteries The VM-110 can be powered by four AA batteries of several types: • Lithium (1.5 V) • Nickel-metal hydride (Ni-MH) (1.2 V) • Alkaline (1.5 V) Note: For the longest battery life, lithium or Ni-MH batteries are recommended. To install batteries, make sure the VM-110 is turned off and follow these steps: 1. Press on the battery compartment cover and slide it in the direction of the arrow to open it. 2. Insert batteries in the orientations indicated by the illustrations inside the compartment. 3. Close the battery compartment cover by pressing and sliding it into place, in the opposite direction of the arrow on the cover.
  • 11. Installing Batteries | 11 Important! When battery power is low, the battery level indicator will blink on the LCD. Replace all four batteries at the same time. Do not mix battery types or brands, or use old and new batteries together. 1 2 3
  • 12. 12 | Mounting the VM-110 Mounting the VM-110 The VM-110 has two main components, the power control unit and the LED ring light. The power control unit mounts onto your camera’s hot shoe mount, and the LED ring light mounts onto your camera’s lens via one of the included adapter rings. There are eight adapter rings included: 49, 52, 55, 58, 62, 67, 72, and 77mm. To mount the power control unit on your camera, make sure the VM-110 is turned off and follow these steps: 1. Rotate the locking wheel counterclockwise to loosen it. 1
  • 13. Mounting the VM-110 | 13 2. Slide the mounting foot all the way into your camera’s hot shoe. 3. Rotate the locking wheel clockwise until secure. To mount the LED ring light on your camera, follow these steps: 1. Determine what size adapter ring will fit your camera lens; the engraving on the ring should match your lens’ filter thread. 2. Align the adapter ring with the thread on the inside of the lens, and screw it on until secure. Do not overtighten. 3. Press and hold the adapter ring locks while mounting the ring light onto the adapter. Make sure that the Bolt logo is on the bottom of the ring light and facing away from the camera. 2 2 3 3
  • 14. 14 | Using the Diffusers To dismount the VM-110 from your camera, make sure that it is turned off and follow these steps: 1. Press and hold the adapter ring locks to release the LED ring. 2. Rotate the locking wheel counterclockwise to release the power control. 3. Slide the mounting foot out of your camera’s hot shoe. 4. If desired, remove the adapter ring from your lens. Mounting the VM-110 power control on the included stand: You can mount the VM-110 power control unit on the included stand in the same way you would mount it on your camera. This allows you to set it on a flat surface or to attach it to a tripod head, light stand, or clamp that has a compatible 1/4″-20 screw mount. Using your VM-110 in this manner will free up your camera’s hot shoe. Using the Diffusers The VM-110 comes with four diffusers that modify the light output: clear, frosted white, blue, and amber. The frosted white diffuser will produce a more diffused light than the clear one. The blue and amber diffusers will cool and warm the light, respectively. Note that you will lose a bit of light with the blue and amber diffusers.
  • 15. Using the Diffusers | 15 To mount the diffuser on your LED ring: 1. Match up the red alignment line on the diffuser with the OFF alignment line on the LED ring. 2. Fit the diffuser onto the LED ring and rotate it so the red alignment line on the diffuser matches up with the ON alignment line on the LED ring. To remove the diffuser, rotate it so that the indicator matches up with the OFF alignment line. The diffuser can then be removed. Tip: Using the VM-110 without any diffuser in place will result in the maximum brightness, but the light will also be the least soft. 1 2
  • 16. 16 | Turning on the VM-110 Turning on the VM-110 and Firing a Test To turn the VM-110 on, press and hold the power button until the LCD on the power control unit turns on. To fire a test, press the PILOT button. Important! Some lenses have front elements that rotate during autofocusing. In such a case, we recommend using manual focus to prevent any possible damage to your lens or camera. Automatic power-saving function: After thirty minutes of inactivity, the VM-110 will automatically enter power-saving mode to conserve battery life. To reactivate the VM-110, press the SET button. During long periods of inactivity, it is recommended that you use the power button to turn the LED off completely. LCD illumination: When you turn on the VM-110 or press any button, the LCD will be illuminated for about twenty seconds.
  • 17. Light Mode | 17 Battery level indicator: The battery level indicator on the LCD shows the remaining battery power. LCD Display Status Battery Level 70%–100% 40%–69% 10%–39% 0%–9% Light Mode During Light mode, the light will be on continuously. This is ideal for seeing exactly where the light will fall, as well as for shooting video. Press the LIGHT button to turn on the LEDs for constant lighting. The dot indicator on the LCD will switch to Light mode.
  • 18. 18 | Modes Flash Mode To save battery power, you can engage the flash mode so the LED turns on for approximately half a second when the camera’s shutter is released. To engage the Flash mode, press the MODE button repeatedly until the dot indicator on the LCD switches to Flash mode. When switching to Flash mode from Light mode, the power level indicator may rise to a higher level. This happens when the battery power is very low and indicates that the batteries will have a longer ‘effective life’ in Flash mode. Note that the flash mode will only work if the control unit is mounted on the camera’s hot shoe. Left and Right Mode For more dramatic lighting, you can set your VM-110 to illuminate only from the left or right half of the LED array. To set your VM-110 to Left or Right mode, press the MODE button repeatedly until the dot indicator on the LCD switches to Left mode or Right mode. Brightness Adjustment You can adjust the brightness output of your VM-110 from -1.5 to +1.5. To adjust the brightness output, press the right or left navigation buttons to increase or decrease the brightness. The onscreen power output level indicator indicates the current brightness output.
  • 19. Troubleshooting | 19 Troubleshooting Problem Solution The VM-110 is stuck in the camera hot shoe. • Make sure that the mounting foot lock is released. (Page 14) The VM-110 is turned on and is in Light mode but won’t light up. • Make sure that fresh batteries are installed and are in the proper orientation. (Page 10) The VM-110 is turned on and is in Flash mode but won’t fire. • Make sure that fresh batteries are installed and are in the proper orientation. (Page 10) • Make sure the control unit is securely attached to the camera. (Page 12) • Make sure that the electrical contact on the foot of the control unit is not dirty. Clean it and try again. The VM-110 is rotating right or left while the camera is focusing. • Your lens has a rotating front element. Use manual focus.
  • 20. 20 | Troubleshooting Problem Solution The battery indicator fluctuates between full and empty when reinstalling the same batteries repeatedly. • This is normal and may happen when the batteries are nearly exhausted. Replace the batteries.
  • 21. Specifications | 21 Specifications Type: On-camera LED macro ring light Compatible cameras: All cameras with a standard hot shoe and a lens filter thread of 49, 52, 55, 58, 62, 67, 72, or 77mm Guider number: (at 50mm focal length, ISO 100): GN 15 Effective distance: up to 4.9 ft. (1.5 m) Color temperature: 3,000–15,000 K (Using diffusers) Power Source: 4 AA lithium, Ni-MH, or alkaline batteries Dimensions: Power control unit: Approx. 4.5 x 2.75 x 1.4 inches / 114 x 70 x 35 mm LED ring: Approx. 4.5 x 4.3 x .75 inches / 114 x 109 x 19 mm Weight: 7.1 oz. (200 g) without batteries
  • 23. Warranty | 23 Warranty LIMITED ONE-YEAR WARRANTY Bolt provides a limited warranty that this product is free from defects in materials and workmanship to the original purchaser under normal use for a period of one (1) year from the original purchase date or thirty (30) days after replacement whichever occurs later. Our responsibility with respect to this limited warranty shall be limited solely to repair or replacement, at its option, of any product which fails during normal consumer use. To obtain warranty coverage during the Warranty Period, contact your place of purchase (“Seller”) to obtain a return merchandise authorization (“RMA”) number, and return to Seller the defective product along with proof of purchase and the RMA number. This warranty does not extend to damage or failure which results from misuse, neglect, accident, alteration, abuse, improper installation or maintenance. EXCEPT AS PROVIDED HEREIN, BOLT MAKES NEITHER ANY EXPRESS WARRANTIES NOR ANY IMPLIED WARRANTIES, INCLUDING BUT NOT LIMITED TO ANY IMPLIED WARRANTY OF MERCHANTABILITY OR FITNESS FOR A PARTICULAR PURPOSE. This warranty provides you with specific legal rights, and you may also have additional rights which vary from state to state. © Copyright 2012 Gradus Group, LLC www.BoltFlashes.com
  • 24. Copyright © 2012 Gradus Group. www.boltflashes.com