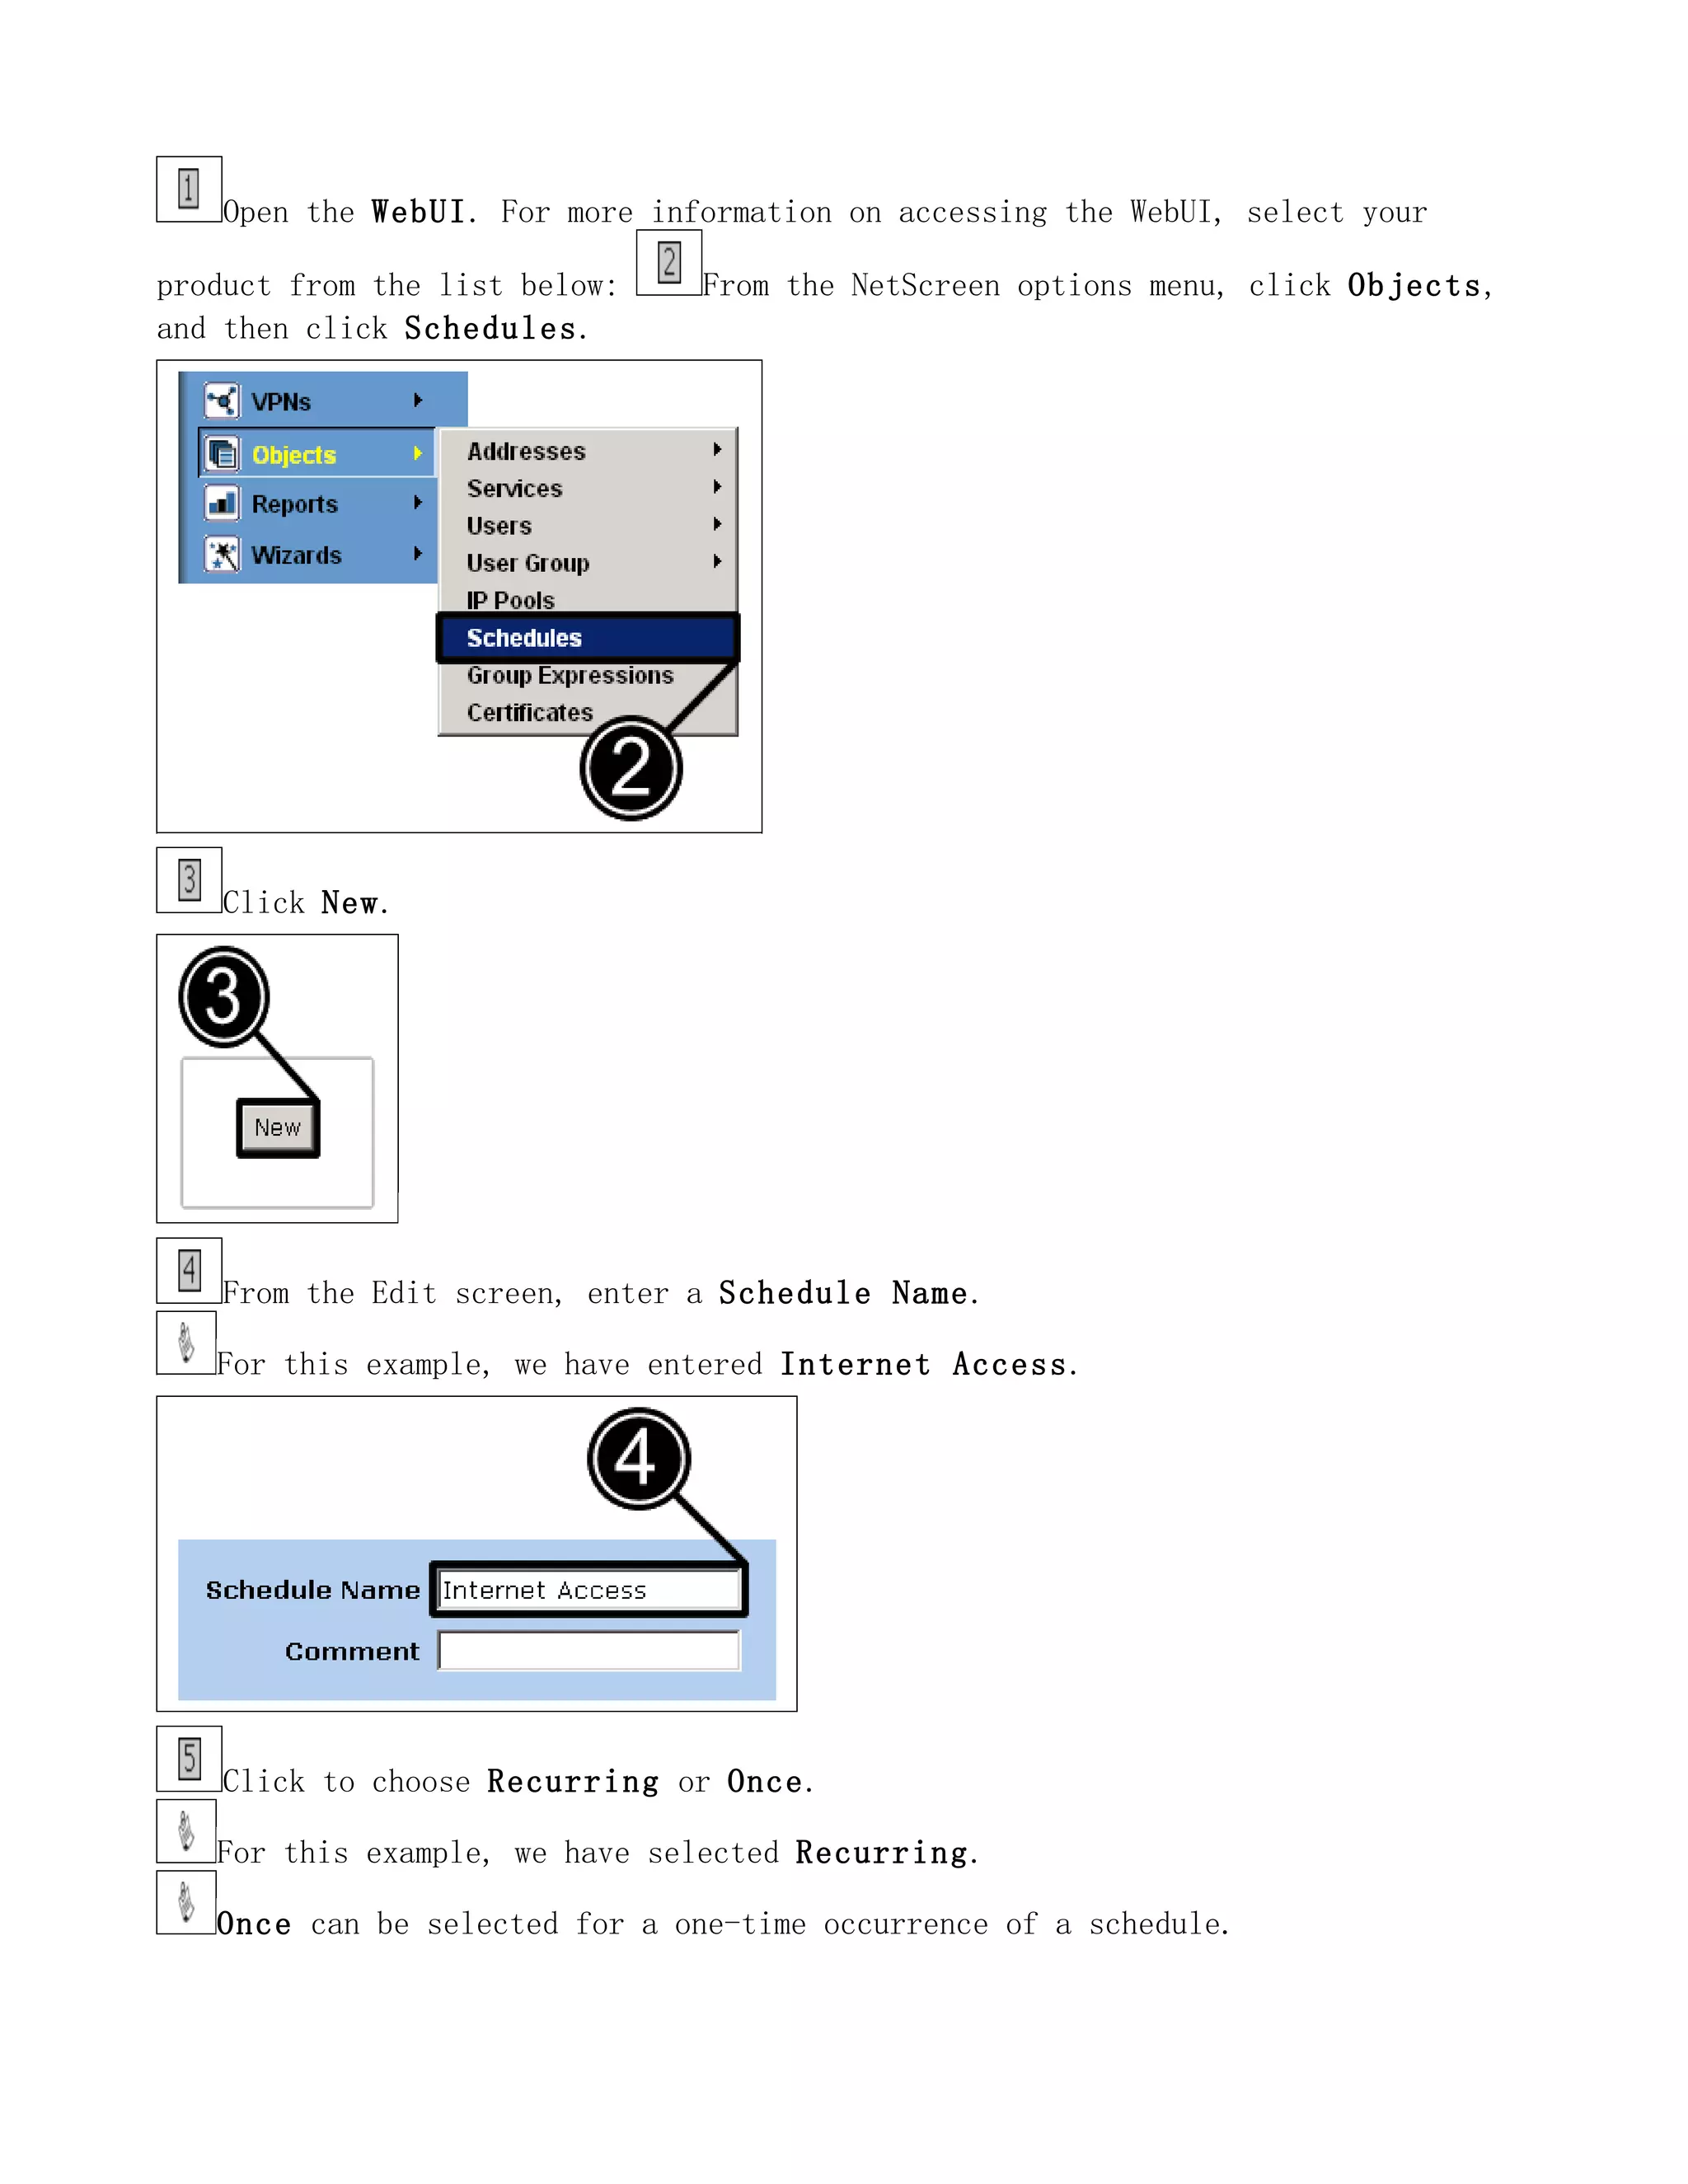
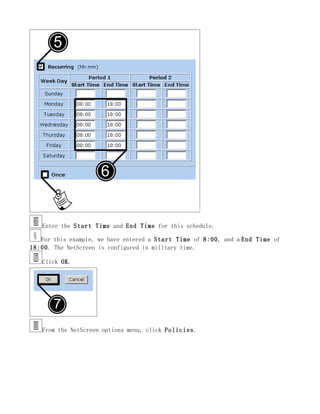
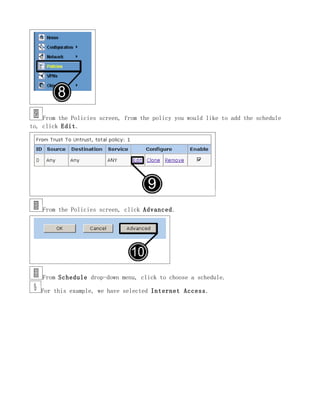
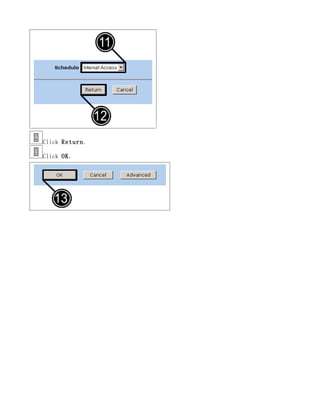
Open the WebUI. For more information on accessing the WebUI, select your

product from the list below:    From the NetScreen options menu, click Objects,
and then click Schedules.


    Click New.


    From the Edit screen, enter a Schedule Name.

   For this example, we have entered Internet Access.


    Click to choose Recurring or Once.

   For this example, we have selected Recurring.

   Once can be selected for a one-time occurrence of a schedule.
Enter the Start Time and End Time for this schedule.

   For this example, we have entered a Start Time of 8:00, and a End Time of
18:00. The NetScreen is configured in military time.

   Click OK.


   From the NetScreen options menu, click Policies.
From the Policies screen, from the policy you would like to add the schedule
to, click Edit.


    From the Policies screen, click Advanced.


    From Schedule drop-down menu, click to choose a schedule.

   For this example, we have selected Internet Access.
Click Return.

Click OK.

5gt 时间控制

  • 1.
    Open the WebUI.For more information on accessing the WebUI, select your product from the list below: From the NetScreen options menu, click Objects, and then click Schedules. Click New. From the Edit screen, enter a Schedule Name. For this example, we have entered Internet Access. Click to choose Recurring or Once. For this example, we have selected Recurring. Once can be selected for a one-time occurrence of a schedule.
  • 2.
    Enter the StartTime and End Time for this schedule. For this example, we have entered a Start Time of 8:00, and a End Time of 18:00. The NetScreen is configured in military time. Click OK. From the NetScreen options menu, click Policies.
  • 3.
    From the Policiesscreen, from the policy you would like to add the schedule to, click Edit. From the Policies screen, click Advanced. From Schedule drop-down menu, click to choose a schedule. For this example, we have selected Internet Access.
  • 4.