Download to read offline


![Feet & Legs
Using dark blue and light blue
We crochet the feet beginning with dark blue to give the effect of the shoes, then, we
change to light blue.
We work the two feet and legs and then they are joined as the trousers’ legs.
1st
Foot and leg
Using dark blue.
Round 1: magic ring, 6 sc (alternatively, 2 ch and 6 sc in 2nd ch from hook).
Round 2: [sc, 2sc, 2sc] repeat 2 times (10 sts)
Round 3: [sc sc sc 3sc 3sc] repeat 2 times (18 sts)
Round 4: change to light blue, work in BLO sc in next 9sts, change to dark blue and
work in both loops: sc, hdc, hdc4tog, hdc, change to light blue and work in
BLO in next 2 sts.
Round 5: work in both loops and in light blue. Sc in next 10 sts, sc2tog, sc in next
2sts. (13 sts)
Round 6, 7: two increases at the sides. (15, 17 sts)
Round 8-13: sc in every st across (17sts)
Round 14-18: one increase at each round placed randomly (18, 19, 20, 21 sts)
Round 19-20: sc in every st across (21sts)
Round 21: sc until you reach , then fasten off.
2nd
Foot and leg
Work as 1st
foot. Finish round 21 at the opposite side of 1st
foot and do not fasten off.](https://image.slidesharecdn.com/2016sadnessdoll-160511225744/85/2016-sadness-doll-7-320.jpg)
![Joining legs
We work this part as for the trousers, but instead of working 2ch we work 4 ch.
Round 1: 4ch, sc in all the sts of the other leg, work 4sc on the 4 ch, work 21 sc and
finally 4sc on the other side of the 4ch (21+21+4+4=50sts)
Round 2: 4 increases and sc in remaining sts (54sts)
Round 3: [2sc, sc in 4sts] repeat 9 times (63sts)
Round 4: [2sc, sc in 6sts] repeat 9 times (72sts)
Round 5-12: sc in every st across (72 sts)
Fasten off.
Stuff.](https://image.slidesharecdn.com/2016sadnessdoll-160511225744/85/2016-sadness-doll-8-320.jpg)

![HANDS and ARMS (make 2)
HANDS
Using light blue
Round 1: magic ring, 6 sc (alternatively, 2 ch and 6 sc in 2nd ch from hook).
Round 2: [2sc, sc] repeat 3 times (9sts)
Round 3: [2sc, sc, sc] repeat 3 times (12sts)
Round 4: sc in every st across (12 sts)
Round 5, 6: one increase (13, 14 sts)
Round 7: bobble (5dc together), sc in 13 sts (14sts)
Round 8-10: sc in every st (14sts)
ARMS
Using white
Working in BLO
I wanted the arms to be movable, so I placed one doll joint inside each of them, and
then connect them with the body. Another option is to sew them to the body
directly.
Approximately, the joint is placed at round 5 of the arm and 4th
-5th
round of body.
Round 1: magic ring, 6 sc (alternatively, 2 ch and 6 sc in 2nd ch from hook).
Round 2: 2sc in every st (12 sts)
Round 3: [2sc, sc] repeat 6 times (18 sts)
Round 4-17: sc (18 sts)](https://image.slidesharecdn.com/2016sadnessdoll-160511225744/85/2016-sadness-doll-10-320.jpg)


![HEAD
Using light blue
Round 1: magic ring, 6 sc (alternatively, 2 ch and 6 sc in 2nd ch from hook).
Round 2: 2sc in next 6 st, (12 sts)
Round 3: [2sc in next st, sc in next 1st] repeat 6 times (18st)
Round 4: [2sc in next st, sc in next 2st] repeat 6 times (24st)
Round 5: [2sc in next st, sc in next 3st] repeat 6 times (30st)
Round 6: [2sc in next st, sc in next 4st] repeat 6 times (36st)
Round 7: [2sc in next st, sc in next 5st] repeat 6 times (42st)
Round 8: [2sc in next st, sc in next 6st] repeat 6 times (48st)
Round 9: [2sc in next st, sc in next 7st] repeat 6 times (54st)
Round 10: [2sc in next st, sc in next 8st] repeat 6 times (60st)
Round 11: [2sc in next st, sc in next 9st] repeat 6 times (66st)
Round 12: [2sc in next st, sc in next 10st] repeat 6 times (72st)
Round 13: [2sc in next st, sc in next 11st] repeat 6 times (78st)
Round 14-27: sc (78sts)
Round 28: nose: bobble (6trebble together), sc in 77sts (78sts)
Round 29-32: sc (78 sts) (14 rounds)
Round 33: [sc2tog, sc in next 11st] repeat 6 times (72st)
Round 34: [sc2tog, sc in next 10st] repeat 6 times (66st)](https://image.slidesharecdn.com/2016sadnessdoll-160511225744/85/2016-sadness-doll-14-320.jpg)
![Round 35: [sc2tog, sc in next 9st] repeat 6 times (60st)
Round 36: [sc2tog, sc in next 8st] repeat 6 times (54st)
Round 37: [sc2tog, sc in next 7st] repeat 6 times (48st)
Do not fasten off, just change to white: pullover and follow to next section.
PULLOVER:
BODY
Change to white:
And work in BLO
Round 1: [2sc in next st, sc in next 7st] repeat 6 times (54st)
Round 2: [2sc in next st, sc in next 8st] repeat 6 times (60st)
Round 3: [2sc in next st, sc in next 9st] repeat 6 times (66st)
Round 4: [2sc in next st, sc in next 10st] repeat 6 times (72st)
Round 5-25 (21 rounds): sc (72sts)
Fasten off
Join arms to body as explained in the arms section.
Pullover’s collar
I wanted to imitate, to mimic the knit effect of collars and cuffs. For the sleeves’ cuff I
opted for the classic sc worked on the back loop only. But the collar and the bottom
part of the pullover are bigger and I was looking for a ribbing effect in a different way.
I found that there is a ribbed half dc stitch, very easy and with spectacular results.
There is a tutorial here:
http://littlemonkeyscrochet.com/tutorial-ribbed-half-double-crochet-stitch-ribhdc/
chain 10 and Follow the tutorial for 48 rounds.
Sew the collar to the neck’s hemline. See photos:](https://image.slidesharecdn.com/2016sadnessdoll-160511225744/85/2016-sadness-doll-15-320.jpg)

![Sew it to the pullover.
COMMENT: at this point I recommend to place eyes and embroider the mouth and
eyelashes. This way when you are attaching the hair you can go for the final
look. If you are not too sure about the eyes location, do not place the
fasteners.
Hair’s base/cap
Using dark blue
I find easier to attach the hairs if I work the base in BLO.
So, working in BLO.
Round 1: magic ring, 6 sc (alternatively, 2 ch and 6 sc in 2nd ch from hook).
Round 2: 2sc in next 6 st, (12 sts)
Round 3: [2sc in next st, sc in next 1st] repeat 6 times (18st)
Round 4: [2sc in next st, sc in next 2st] repeat 6 times (24st)
Round 5: [2sc in next st, sc in next 3st] repeat 6 times (30st)
Round 6: [2sc in next st, sc in next 4st] repeat 6 times (36st)
Round 7: [2sc in next st, sc in next 5st] repeat 6 times (42st)
Round 8: [2sc in next st, sc in next 6st] repeat 6 times (48st)
Round 9: [2sc in next st, sc in next 7st] repeat 6 times (54st)
Round 10: [2sc in next st, sc in next 8st] repeat 6 times (60st)
Round 11: [2sc in next st, sc in next 9st] repeat 6 times (66st)
Round 12: [2sc in next st, sc in next 10st] repeat 6 times (72st)
Round 13,14: sc (72sts)
We shape the cap slightly to copy the real one … The parts with hdc will go to the
back of the head.
Round 15: 20 sc, 52 hdc
Round 16: 24 sc, 48 hdc
Round 17: 28 sc, 44 hdc
Round 18: 32 sc, 40 hdc
Round 19: 36 sc, 36 hdc
Fasten off and sew it to head. I took as reference the 1st
head’s round with 78 sts. Be
careful, place the hdc to the back: nose is a good reference to center the cap.](https://image.slidesharecdn.com/2016sadnessdoll-160511225744/85/2016-sadness-doll-17-320.jpg)


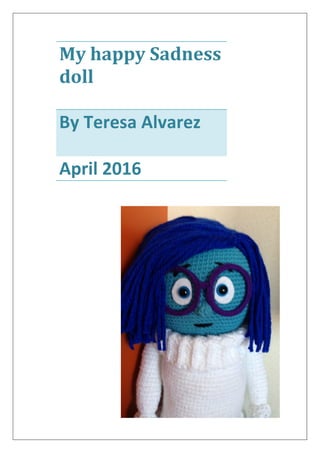
This document provides instructions for crocheting a Sadness doll from the movie Inside Out. It includes materials needed, instructions for making the body parts like legs, arms, head and hair. The doll is made using blue, white and black yarn to resemble Sadness. Instructions are written in US terminology and include photos to illustrate the process. The goal is to create a plush doll that a child who identified with Sadness can enjoy.


